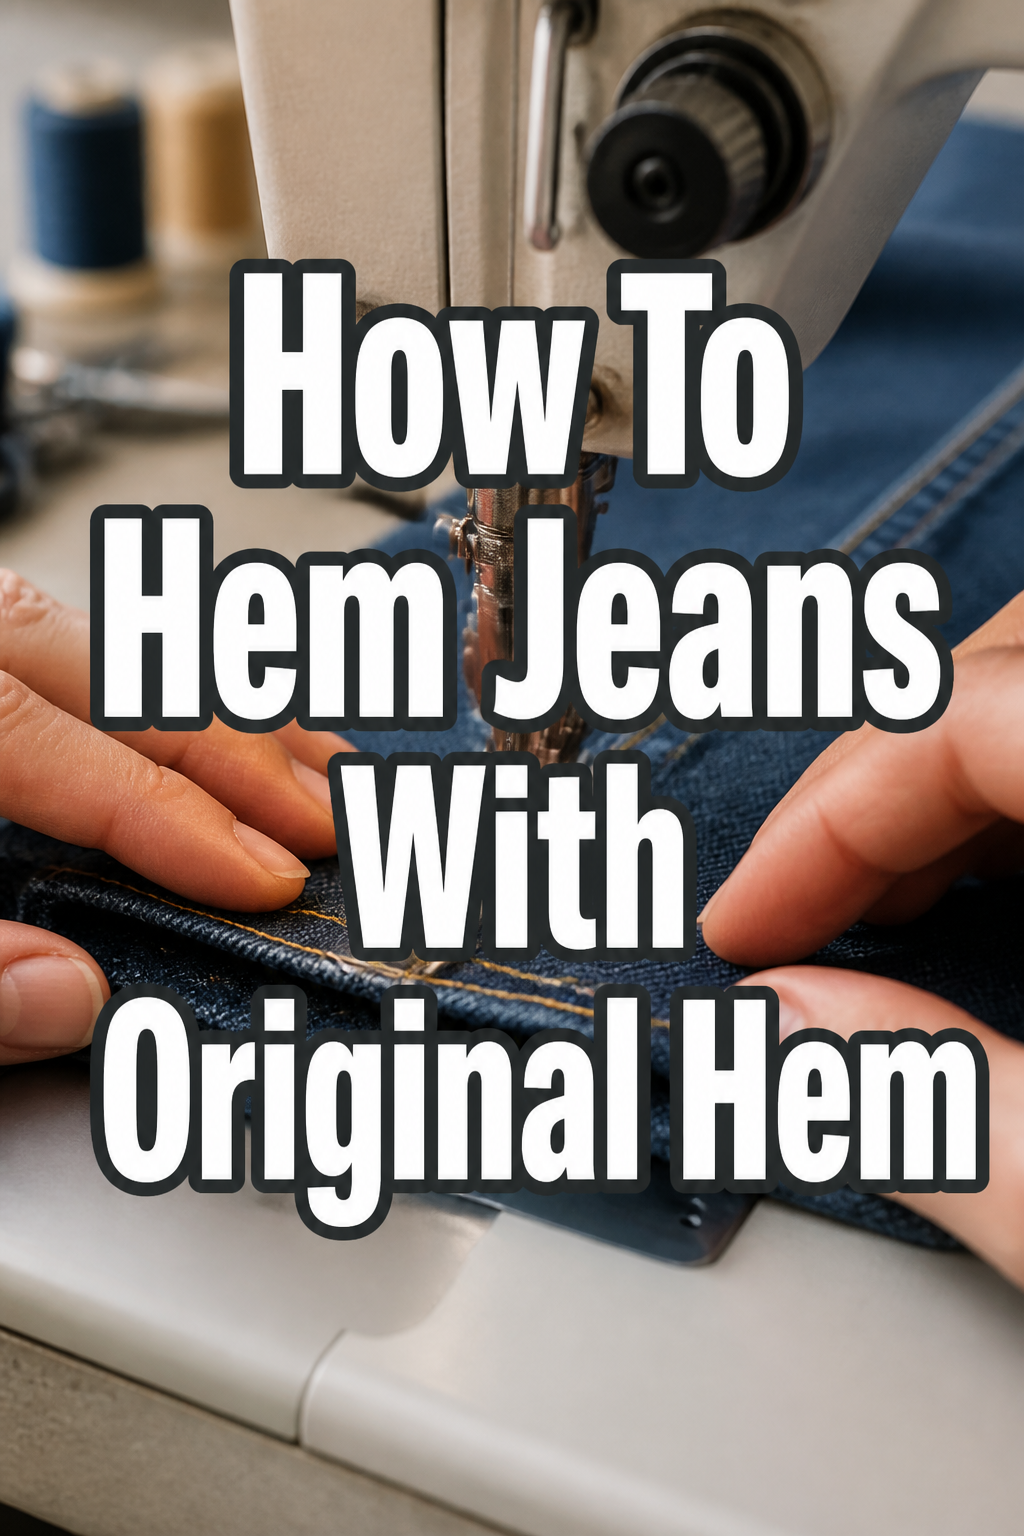
👖 How To Hem Jeans With Original Hem

Beginner-friendly templates, step-by-step guides,
and weekly project ideas in your inbox.
Transforming the length of your favorite jeans while keeping that iconic factory hem might seem like a daunting task. Many people shy away from altering denim, fearing they’ll ruin the look.
I’ve personally hemmed dozens of jeans, both for myself and friends, perfecting this technique over time. With the right approach, you can achieve a professional, custom fit that looks like it came straight from the designer.
This guide will walk you through every step, ensuring your jeans look exactly as they should—perfectly tailored for you.
Quick Overview
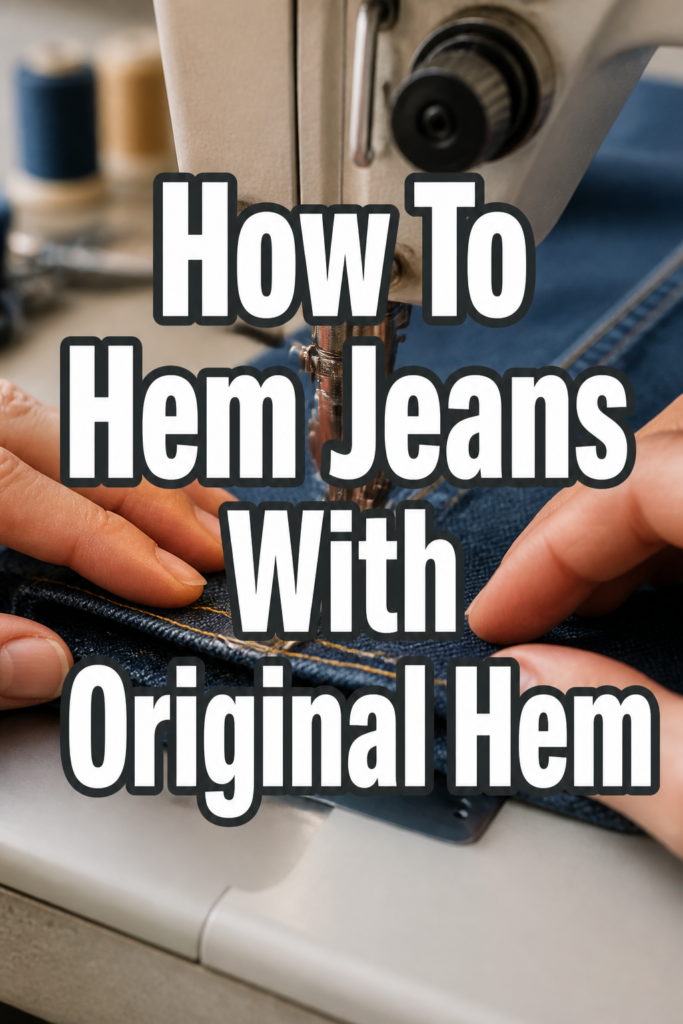
This guide will empower you to confidently shorten your jeans, preserving their original, worn-in hemline. You’ll gain a valuable skill that saves money and ensures a perfect fit every time.
- Time needed: 1.5 – 2.5 hours
- Difficulty: Intermediate (Beginner with patience)
- What you’ll need: Sewing machine, heavy-duty denim needle, sturdy thread (matching), sharp fabric scissors, pins, seam ripper, tailor’s chalk or fabric marker, measuring tape or ruler, iron, ironing board.
Step-by-Step Instructions
Step 1: Prepare Your Jeans
Before you begin any alteration, it’s crucial to prepare your denim properly. This ensures accurate measurements and prevents future surprises.
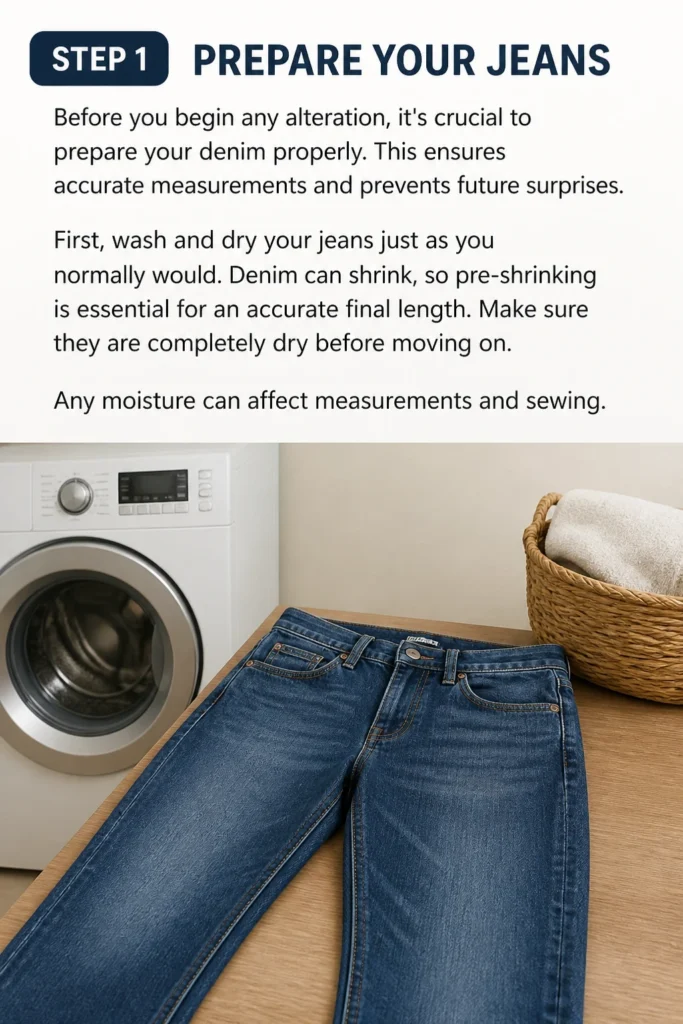
First, wash and dry your jeans just as you normally would. Denim can shrink, so pre-shrinking is essential for an accurate final length.
Make sure they are completely dry before moving on. Any moisture can affect measurements and sewing.
Step 2: Determine Your New Length
This is perhaps the most critical step for achieving the perfect fit. Precision here prevents regret later.
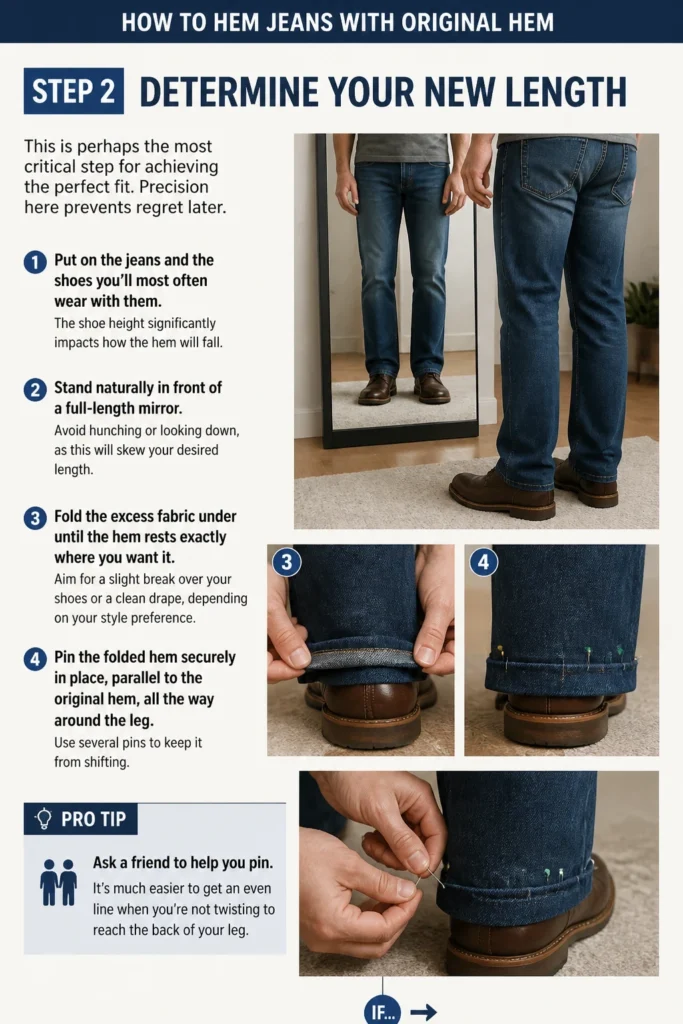
Put on the jeans and the shoes you’ll most often wear with them. The shoe height significantly impacts how the hem will fall.
Stand naturally in front of a full-length mirror. Avoid hunching or looking down, as this will skew your desired length.
Fold the excess fabric under until the hem rests exactly where you want it. Aim for a slight “break” over your shoes or a clean drape, depending on your style preference.
Pin the folded hem securely in place, parallel to the original hem, all the way around the leg. Use several pins to keep it from shifting.
Pro Tip: Ask a friend to help you pin. It’s much easier to get an even line when you’re not twisting to reach the back of your leg. If alone, take your time and check from multiple angles.
Step 3: Mark the Cut Line
With your desired length pinned, it’s time to mark where the original hem will be reattached. This requires careful measurement.
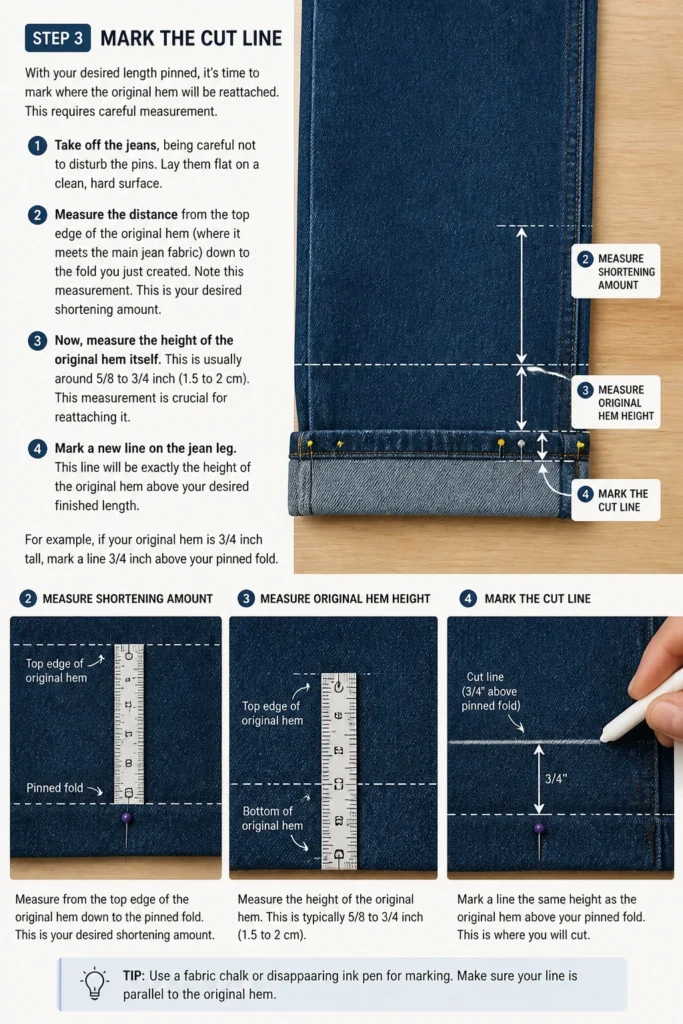
Take off the jeans, being careful not to disturb the pins. Lay them flat on a clean, hard surface.
Measure the distance from the top edge of the original hem (where it meets the main jean fabric) down to the fold you just created. Note this measurement. This is your desired shortening amount.
Now, measure the height of the original hem itself. This is usually around 5/8 to 3/4 inch (1.5 to 2 cm). This measurement is crucial for reattaching it.
Mark a new line on the jean leg. This line will be exactly the height of the original hem above your desired finished length. For example, if your original hem is 3/4 inch tall, mark a line 3/4 inch above your pinned fold. This is your “sewing line.”
Draw another line 1/2 inch (1.25 cm) below your sewing line. This second line is your “cut line.” This extra fabric provides a seam allowance for the reattached hem.
Repeat this process for the other leg, ensuring both are marked identically. Double-check all measurements to ensure symmetry.
Step 4: Cut the Excess Fabric
Now, it’s time to make the first significant cut. Work slowly and use sharp tools for a clean edge.
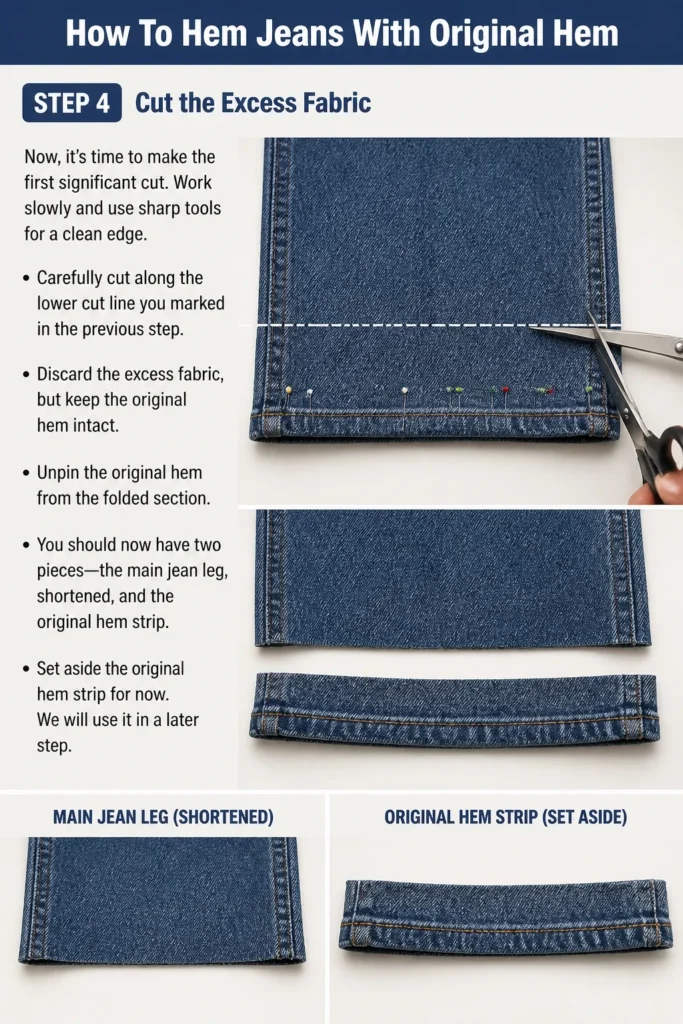
Carefully cut along the lower “cut line” you marked in the previous step. Discard the excess fabric, but keep the original hem intact.
Unpin the original hem from the folded section. You should now have two pieces: the main jean leg, shortened, and the original hem strip.
Set aside the original hem strip for now. We will use it in a later step.
Step 5: Open the Original Hem
To reattach the original hem seamlessly, you need to flatten it out. This involves using a seam ripper.
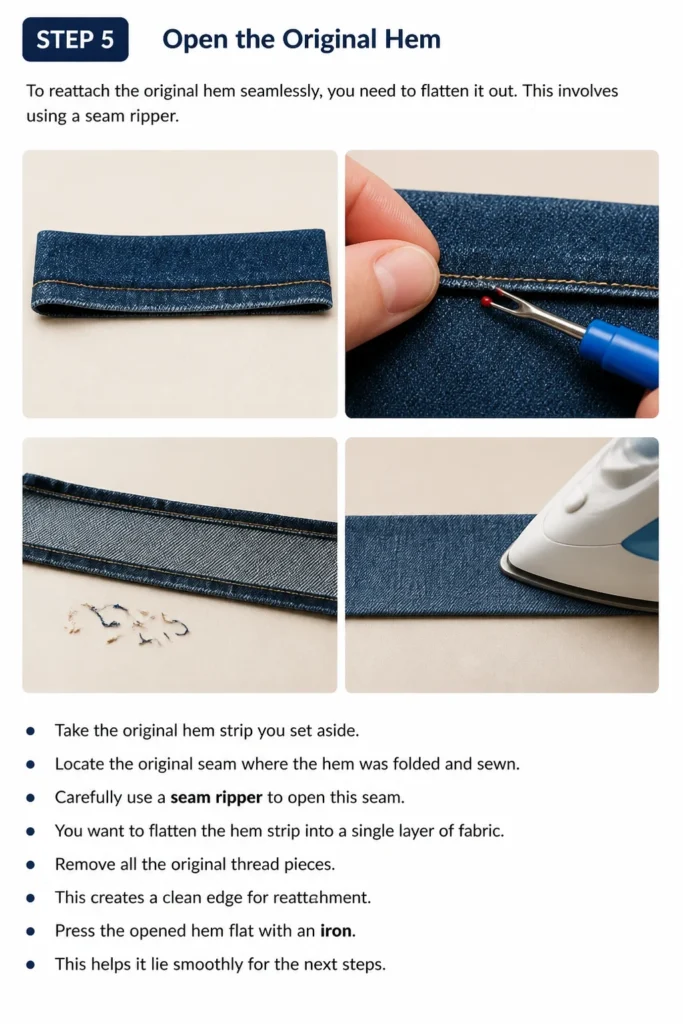
Take the original hem strip you set aside. Locate the original seam where the hem was folded and sewn.
Carefully use a seam ripper to open this seam. You want to flatten the hem strip into a single layer of fabric.
Remove all the original thread pieces. This creates a clean edge for reattachment.
Press the opened hem flat with an iron. This helps it lie smoothly for the next steps.
Step 6: Attach the Original Hem
This step involves pinning the original hem strip to the newly cut edge of your jeans. Precision is key for an even result.
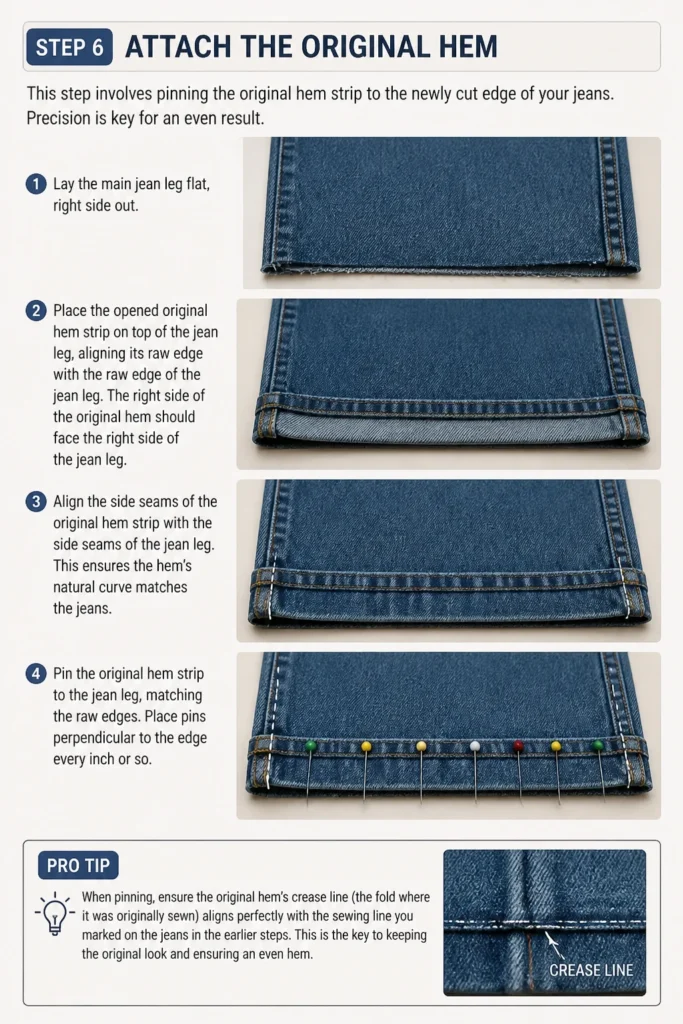
Lay the main jean leg flat, right side out.
Place the opened original hem strip on top of the jean leg, aligning its raw edge with the raw edge of the jean leg. The “right side” of the original hem should face the “right side” of the jean leg.
Align the side seams of the original hem strip with the side seams of the jean leg. This ensures the hem’s natural curve matches the jeans.
Pin the original hem strip to the jean leg, matching the raw edges. Place pins perpendicular to the edge every inch or so.
Pro Tip: When pinning, ensure the original hem’s “crease line” (the fold where it was originally sewn) aligns perfectly with the “sewing line” you marked on the jeans in Step 3. This is where your new stitch line will go.
Step 7: Sew the New Hem
Now, it’s time to bring out the sewing machine. Using the right needle and settings is crucial for denim.
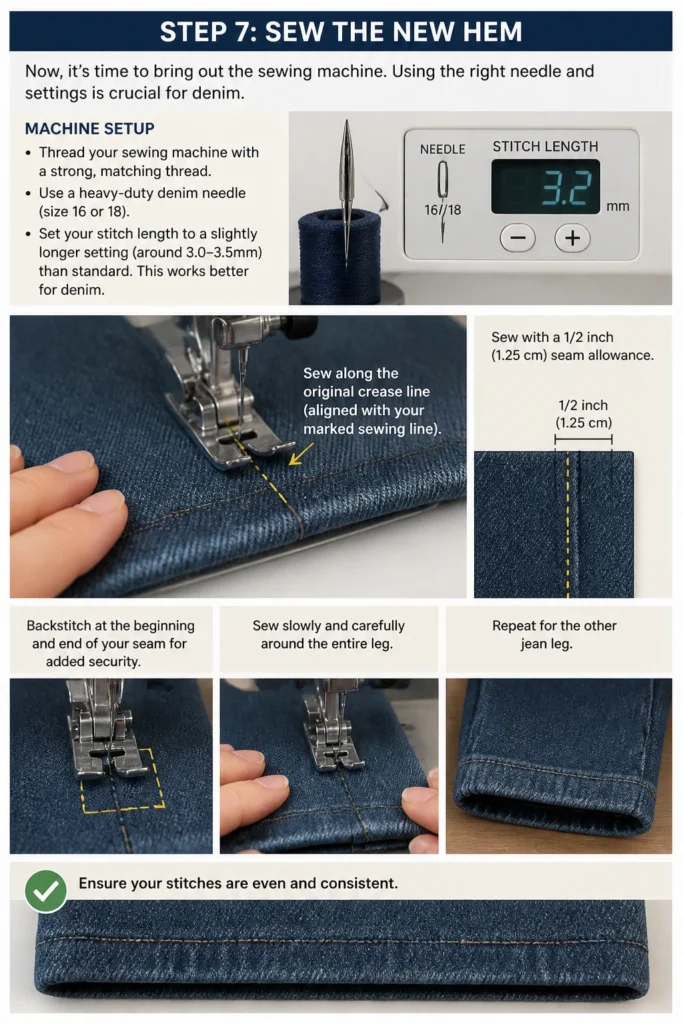
Thread your sewing machine with a strong, matching thread. Use a heavy-duty denim needle (size 16 or 18).
Set your stitch length to a slightly longer setting (around 3.0-3.5mm) than standard. This works better for denim.
Start sewing along the original crease line of the hem strip (which should align with your marked “sewing line” on the jeans). Sew with a 1/2 inch (1.25 cm) seam allowance.
Backstitch at the beginning and end of your seam for added security. Sew slowly and carefully around the entire leg.
Repeat for the other jean leg. Ensure your stitches are even and consistent.
Step 8: Trim and Finish
After sewing, a few finishing touches will make your new hem look professional and durable.
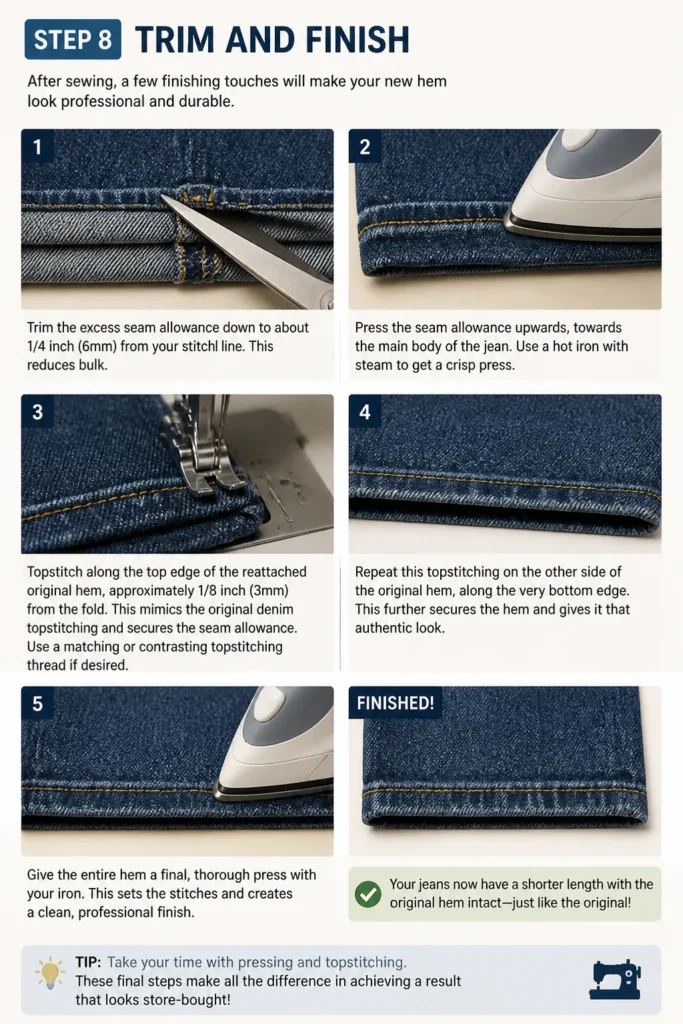
Trim the excess seam allowance down to about 1/4 inch (6mm) from your stitch line. This reduces bulk.
Press the seam allowance upwards, towards the main body of the jean. Use a hot iron with steam to get a crisp press.
Topstitch along the top edge of the reattached original hem, approximately 1/8 inch (3mm) from the fold. This mimics the original denim topstitching and secures the seam allowance. Use a matching or contrasting topstitching thread if desired.
Repeat this topstitching on the other side of the original hem, along the very bottom edge. This further secures the hem and gives it that authentic look.
Give the entire hem a final, thorough press with your iron. This sets the stitches and creates a professional finish.
Common Mistakes to Avoid
Not Pre-Washing Your Jeans
Skipping the wash and dry cycle before measuring is a common pitfall. Denim, especially raw or untreated denim, can shrink significantly after its first wash. If you hem before washing, your perfectly measured jeans might end up too short after their first trip through the laundry. Always wash and dry your jeans as you normally would to account for any shrinkage upfront, ensuring your final length is accurate.
Inaccurate Measuring
Measuring inconsistently can lead to an uneven hem or one that’s too short or long. Don’t rush this step. Measure both legs carefully, from the same point, and double-check your marks. Wearing the shoes you intend to wear with the jeans during the initial pinning is crucial for a realistic length assessment. Take your time, re-measure, and even try the jeans on again before making any cuts.
Cutting Too Much Fabric
This is an irreversible mistake. Always remember the adage: “measure twice, cut once.” It’s better to cut a little less than you think you need, as you can always trim more. Ensure you factor in the seam allowance for reattaching the original hem above your final desired length. If in doubt, err on the side of leaving a little extra fabric; you can always adjust it later.
Using the Wrong Needle or Thread
Denim is a thick, sturdy fabric, and standard sewing needles and threads often aren’t up to the task. Using a regular needle can lead to skipped stitches, broken needles, or damage to your machine. Always opt for a heavy-duty denim needle (size 16 or 18) and a strong, all-purpose polyester or denim thread. This will ensure your stitches are secure and your machine operates smoothly.
Troubleshooting
Uneven Hem
An uneven hem is usually caused by inaccurate initial marking or shifting fabric during sewing. If your hem looks wavy or one side is higher than the other, carefully inspect where the inconsistency lies. You might need to unpick a section of the seam, re-pin more precisely, and re-sew. Ensure your initial marking was level around the entire leg, and use plenty of pins to secure the hem before sewing.
Bulky Seam
Denim is thick, and sometimes the reattached hem can feel bulky. This often happens if the seam allowance wasn’t trimmed enough or wasn’t pressed properly. To fix this, carefully trim the seam allowance closer to your stitch line (down to about 1/4 inch or 6mm). Then, use a hot iron with plenty of steam to press the seam allowance flat against the jean leg. You can also “grade” the seam by trimming one layer of fabric slightly shorter than the other before pressing, which helps reduce bulk.
Puckering Along the Stitch Line
Puckering can occur if your stitch length is too short for denim, or if the fabric is being stretched while sewing. To prevent this, always use a slightly longer stitch length (3.0-3.5mm) when sewing denim. If puckering has already occurred, you might need to unpick the section, adjust your stitch length, and re-sew. Ensure you’re not pulling or stretching the fabric as it feeds through the machine; let the feed dogs do the work.
Key Takeaways
- Always pre-wash and dry your jeans to account for shrinkage before measuring.
- Measure precisely while wearing your preferred shoes to achieve the perfect length.
- Carefully mark your sewing and cut lines, remembering to include seam allowance.
- Use a heavy-duty denim needle and strong thread for durable, professional results.
- Press seams thoroughly at each stage for a crisp, finished appearance.
- Take your time with pinning and sewing; precision is rewarded with a perfect hem.
Frequently Asked Questions
Can I do this by hand if I don’t have a sewing machine?
While technically possible, it is highly discouraged for denim. Denim is very thick, and hand sewing would be incredibly challenging, time-consuming, and unlikely to produce a durable or professional-looking result. A sewing machine with a heavy-duty needle is essential for this project.
What if my jeans are tapered? Does this method still work?
Yes, this method works for tapered jeans. The key is to align the original hem strip’s side seams with the jeans’ side seams when reattaching. The original hem will naturally follow the taper of the jean leg, maintaining its original shape. Just be extra careful with pinning to ensure smooth alignment.
What type of needle should I use for denim?
You should always use a “denim” or “jeans” needle. These needles are specifically designed with a stronger shank and a sharper, more penetrating point to handle thick, dense fabrics like denim without breaking or skipping stitches. Sizes 16 (100) or 18 (110) are typically recommended.
How do I prevent the raw edge from fraying inside the hem?
The raw edge of the jean leg, once sewn to the original hem, will be encased within the seam allowance. After trimming the seam allowance to 1/4 inch, you can finish this raw edge to prevent fraying. An easy way is to use a zigzag stitch along the raw edge of the seam allowance. If you have a serger, serging the raw edge is the most professional finish.
Our Top Recommended Finds
- Schmetz Denim Needles: These needles are specifically engineered for heavy fabrics, ensuring smooth penetration and preventing skipped stitches when working with denim.
- Gingher Fabric Shears: Investing in a sharp pair of fabric scissors makes a huge difference. Clean cuts prevent fraying and make the entire process easier and more precise.
- Gutermann All-Purpose Thread: A high-quality polyester thread is strong and durable, perfect for denim. Choose a color that closely matches your jeans’ existing topstitching for an invisible finish.
Craft Your Perfect Denim Look
You now possess the knowledge and detailed steps to confidently hem your jeans, preserving that beloved original finish. No more settling for ill-fitting pants or paying for costly alterations.
Imagine slipping into jeans that are perfectly tailored to your height, with every detail just right. This project is a fantastic way to personalize your wardrobe and extend the life of your favorite denim pieces. Grab your tools, pick out a pair of jeans, and start creating your ideal fit today.
Beginner-friendly templates, step-by-step guides,
and weekly project ideas in your inbox.