🛠️ How To Cover Tile Walls In Bathroom

Beginner-friendly templates, step-by-step guides,
and weekly project ideas in your inbox.
Outdated bathroom tile can make your space feel tired and uninviting. I’ve personally tackled several tile transformation projects, and the results are always incredibly rewarding. This guide shares the practical, hands-on knowledge you need to achieve a fresh look without the mess and expense of full tile removal.
You’ll discover how to effectively cover your existing bathroom tiles, giving your walls a completely new aesthetic. Get ready to revitalize your bathroom with confidence and skill.
Quick Overview
Transforming your bathroom by covering old tiles is a rewarding project. This guide will walk you through the process of selecting a method, preparing your surfaces, and applying your chosen finish. You’ll achieve a modern, refreshed look without extensive demolition.
- Time needed: 2-5 days (depending on method and drying times)
- Difficulty: Intermediate
- What you’ll need: Cleaning supplies, sandpaper, primer, chosen covering material (e.g., tile paint, wall panels, peel-and-stick tiles), measuring tools, cutting tools, adhesive/applicators, caulk, safety gear.
Step-by-Step Instructions
Step 1: Plan Your Approach and Gather Materials
Before beginning any physical work, decide on the best covering method for your bathroom. Consider the level of moisture, your budget, and the desired aesthetic. Common options include specialized tile paint, waterproof wall panels, or peel-and-stick tiles.
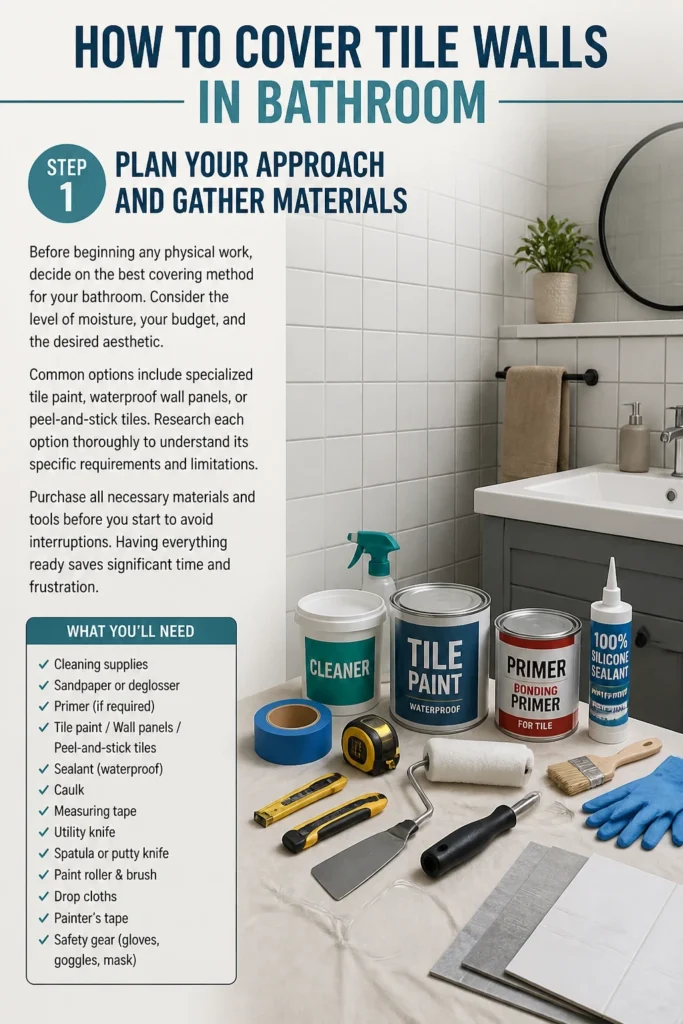
Research each option thoroughly to understand its specific requirements and limitations. Purchase all necessary materials and tools before you start to avoid interruptions. Having everything ready saves significant time and frustration.
Step 2: Thoroughly Clean the Tile Walls
Proper cleaning is the most critical preparatory step for any covering method. Grime, soap scum, and mildew will prevent new materials from adhering correctly. Use a strong degreasing bathroom cleaner and a stiff brush to scrub every inch of the tiled surface.
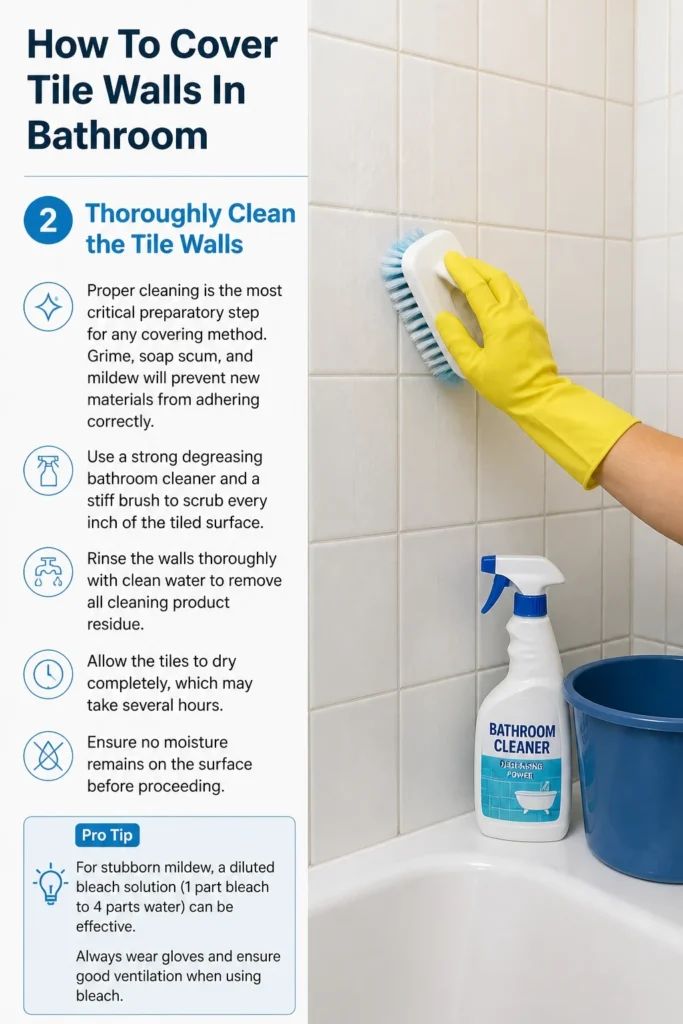
Rinse the walls thoroughly with clean water to remove all cleaning product residue. Allow the tiles to dry completely, which may take several hours. Ensure no moisture remains on the surface before proceeding.
Pro Tip: For stubborn mildew, a diluted bleach solution (1 part bleach to 4 parts water) can be effective. Always wear gloves and ensure good ventilation when using bleach.
Step 3: Repair and Prepare the Tile Surface
Inspect your tiles and grout for any damage. Fill any cracks, chips, or missing grout with a waterproof epoxy filler or grout repair compound. Smooth these repairs flush with the existing surface.
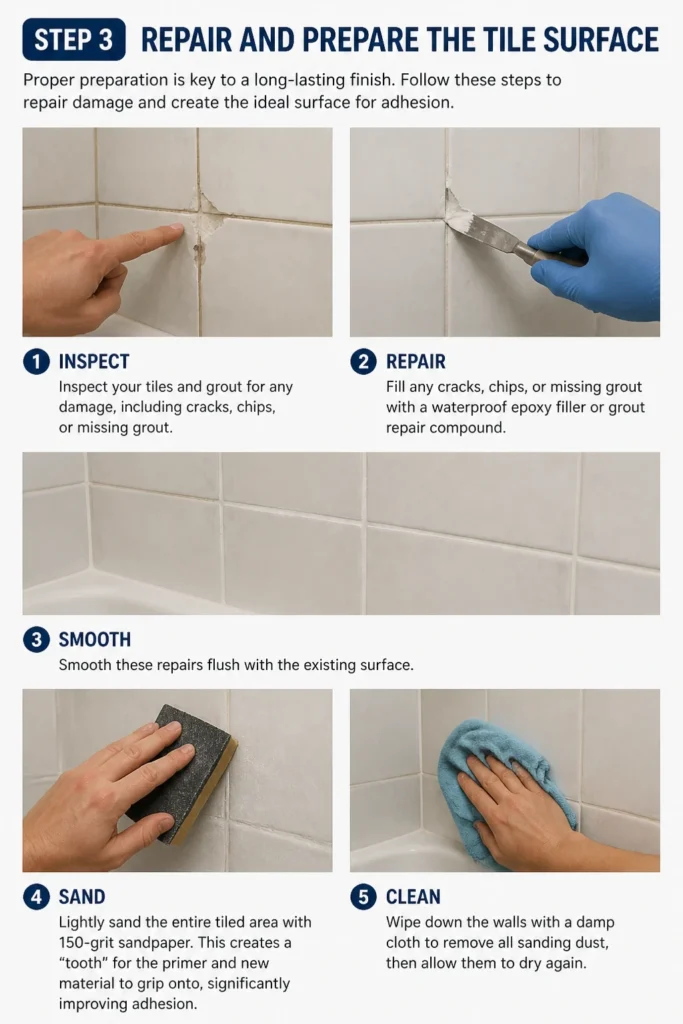
Lightly sand the entire tiled area with 150-grit sandpaper. This creates a “tooth” for the primer and new material to grip onto, significantly improving adhesion. Wipe down the walls with a damp cloth to remove all sanding dust, then allow them to dry again.
Step 4: Apply a High-Quality Primer
A specialized bonding primer is essential for most tile covering projects. This primer creates an adhesive layer that allows your chosen finish to stick to the slick tile surface. Choose a primer specifically designed for glossy, non-porous surfaces or one that explicitly states it’s for tile.
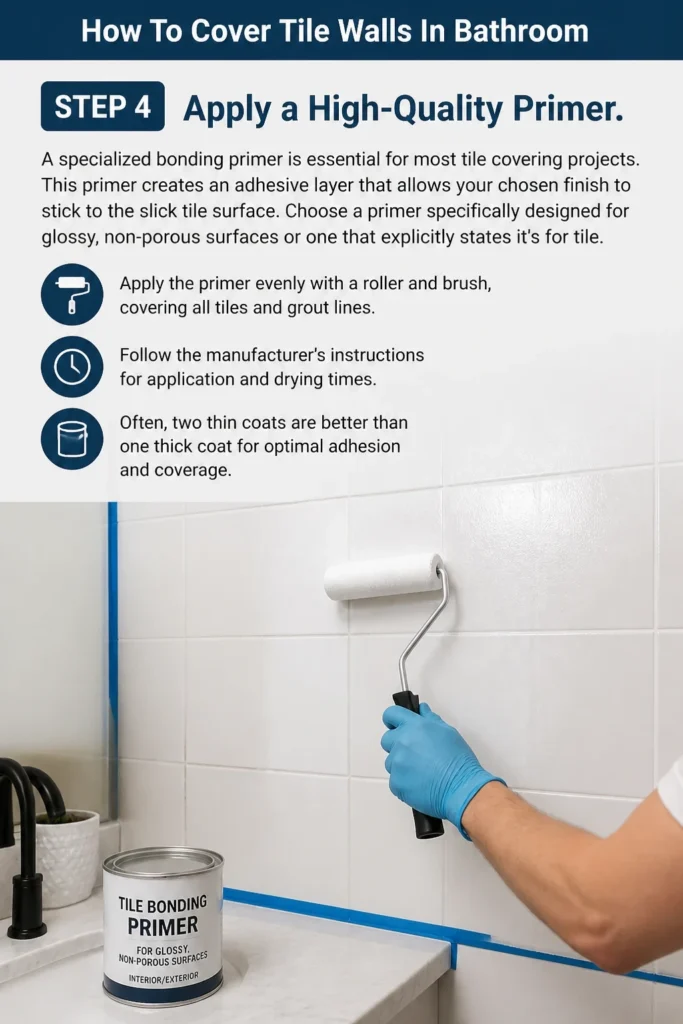
Apply the primer evenly with a roller and brush, covering all tiles and grout lines. Follow the manufacturer’s instructions for application and drying times. Often, two thin coats are better than one thick coat for optimal adhesion and coverage.
Step 5: Install Your Chosen Covering Method
This step varies significantly based on your chosen material.
Option A: Painting Over Tiles
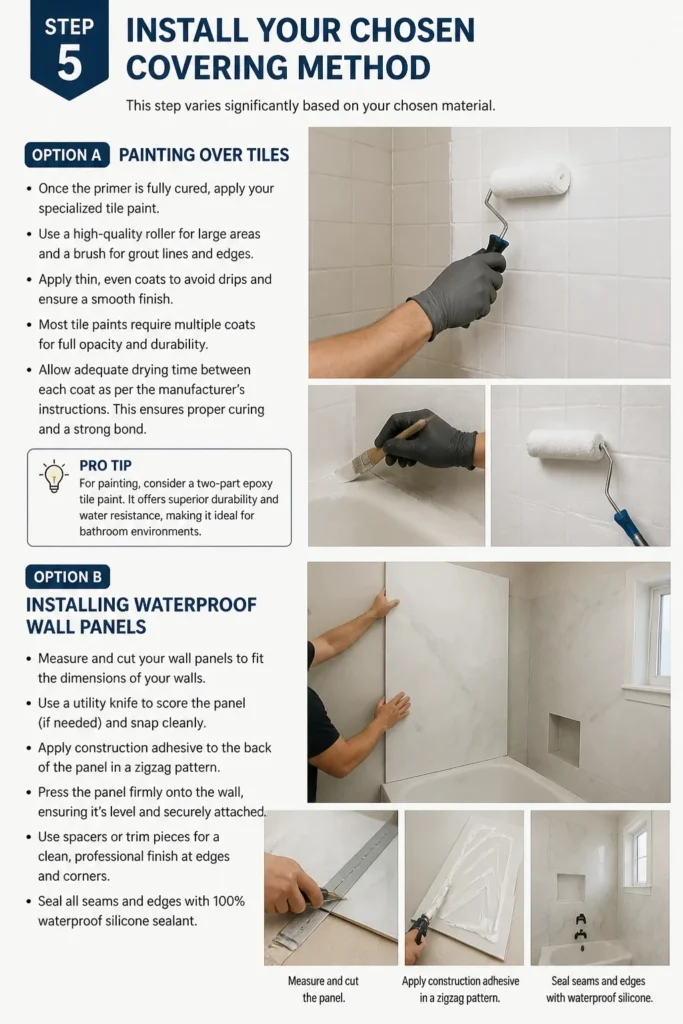
Once the primer is fully cured, apply your specialized tile paint. Use a high-quality roller for large areas and a brush for grout lines and edges. Apply thin, even coats to avoid drips and ensure a smooth finish.
Most tile paints require multiple coats for full opacity and durability. Allow adequate drying time between each coat as per the manufacturer’s instructions. This ensures proper curing and a strong bond.
Pro Tip: For painting, consider a two-part epoxy tile paint. It offers superior durability and water resistance, making it ideal for bathroom environments.
Option B: Installing Waterproof Wall Panels
Measure and cut your wall panels to fit the dimensions of your walls. Use a utility knife or saw appropriate for the panel material (e.g., PVC, laminate). Many panels are designed to interlock or be glued directly over existing surfaces.
Apply a strong, waterproof construction adhesive to the back of each panel, following the manufacturer’s pattern. Press the panels firmly onto the primed tile walls, ensuring a tight, flush fit. Use spacers or temporary supports if needed to hold them in place while the adhesive cures.
Option C: Applying Peel-and-Stick Tiles or Panels
Begin from a central, prominent point or a corner, ensuring your first piece is perfectly level. Carefully peel off the backing of the self-adhesive tile or panel. Align it precisely before pressing it firmly onto the primed tile wall.
Work slowly and methodically, pressing out any air bubbles as you go. Use a utility knife and a straightedge to cut pieces to fit around obstacles or at edges. Overlap seams slightly if recommended by the product instructions for a watertight seal.
Step 6: Seal and Finish Edges
Once your chosen covering is fully installed and cured, address all edges and seams. Apply a high-quality, mold-resistant silicone caulk where the new covering meets other surfaces, such as the ceiling, floor, shower surround, or vanity. This creates a watertight seal, preventing moisture penetration.
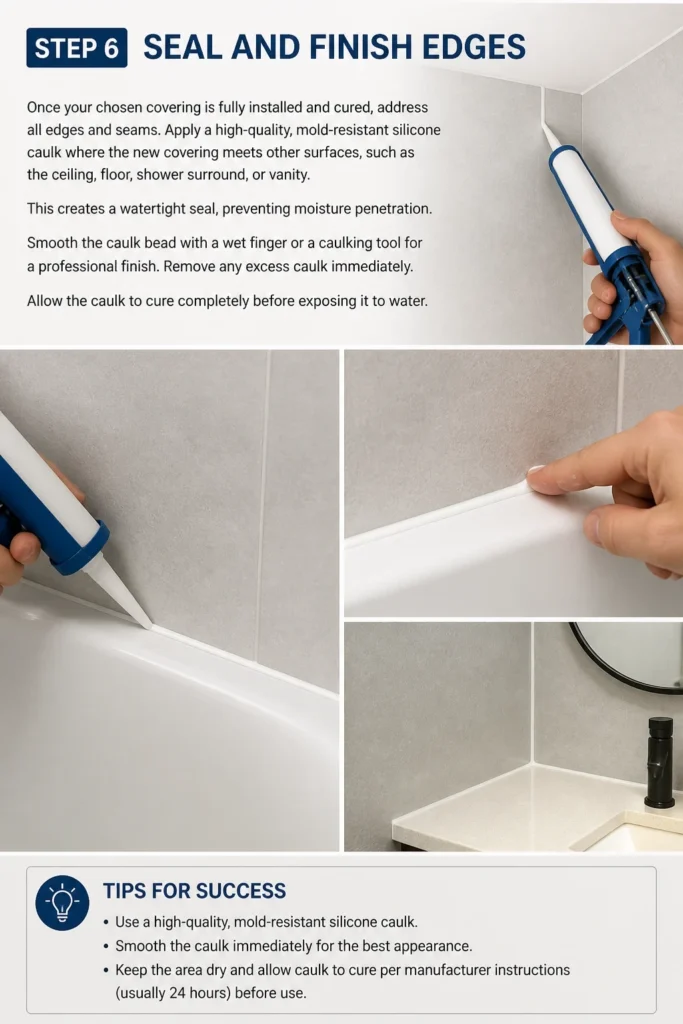
Smooth the caulk bead with a wet finger or a caulking tool for a professional finish. Remove any excess caulk immediately. Allow the caulk to cure completely before exposing it to water.
Step 7: Reinstall Fixtures and Accessorize
Carefully reinstall any removed fixtures, such as light switches, electrical outlets, or towel bars. Take care not to damage your newly covered walls during this process. Ensure all electrical connections are secure and safe.
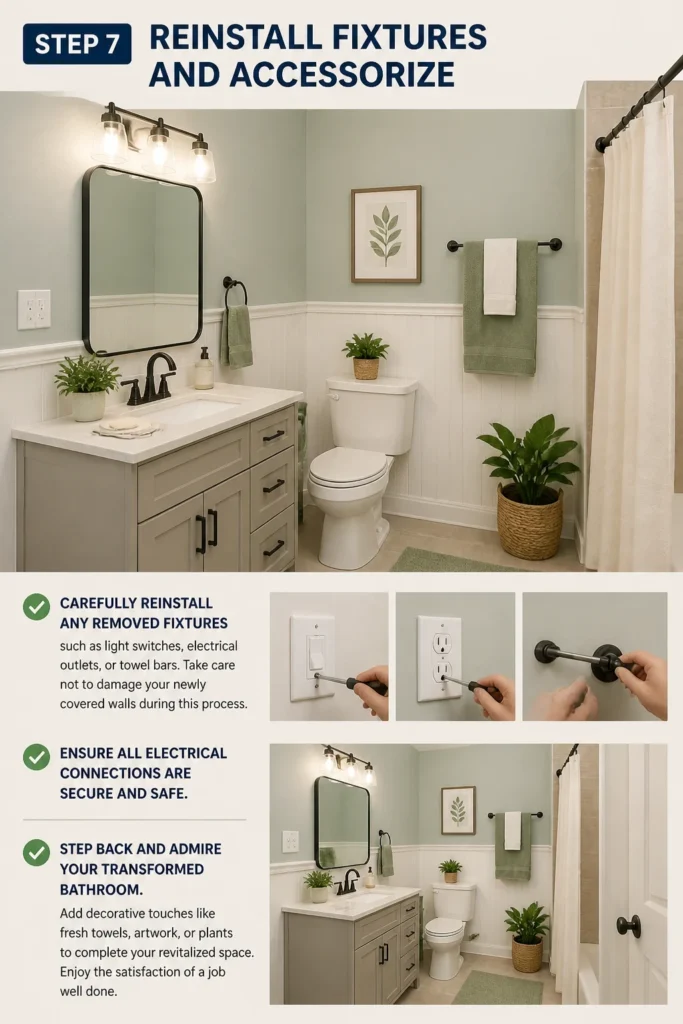
Step back and admire your transformed bathroom. Add decorative touches like fresh towels, artwork, or plants to complete your revitalized space. Enjoy the satisfaction of a job well done.
Common Mistakes to Avoid
Skipping Proper Surface Preparation
Many homeowners underestimate the importance of cleaning and sanding. Failing to thoroughly clean and degrease tiles, or skipping the sanding step, severely compromises adhesion. This often leads to peeling paint, loose panels, or bubbling surfaces shortly after the project is complete. Always invest ample time in preparation for lasting results.
Using the Wrong Primer or Adhesive
Not all primers are created equal, especially for slick, non-porous surfaces like glazed tile. Using a standard wall primer or a weak adhesive will not provide the necessary bond. This can result in poor coverage, premature wear, and the material detaching from the wall. Always choose products specifically formulated for tile or high-moisture environments.
Ignoring Moisture Management
Bathrooms are inherently wet environments. Failing to use mold-resistant caulk, waterproof adhesives, or to properly seal all seams and edges invites moisture penetration. This can lead to mold growth behind your new covering, damage to the underlying structure, and peeling or warping of the new surface. Prioritize watertight seals in all areas.
Rushing Drying and Curing Times
Patience is crucial when covering tile. Each product, from primer to paint to adhesive, has specific drying and curing times. Rushing to the next step before a previous layer is fully dry can lead to soft spots, smudges, poor adhesion, and an overall weaker finish. Always adhere strictly to manufacturer guidelines for drying and curing.
Troubleshooting
Peeling or Bubbling Paint/Panels
If your new covering starts to peel or bubble, it’s almost always an adhesion issue. This usually stems from inadequate surface preparation, such as not cleaning thoroughly or skipping primer. It could also be due to not allowing proper drying times between coats.
To fix this, you’ll need to carefully remove the peeling section. Clean, sand, and re-prime the exposed area meticulously. Then, reapply your chosen covering, ensuring you follow all preparation and drying instructions precisely.
Mold or Mildew Reappearing
Mold or mildew growth indicates moisture penetration, often due to inadequate sealing. Check all caulked seams around the shower, tub, and corners. Look for cracks or gaps where water might be seeping behind the covering.
Remove any old, compromised caulk. Clean the area thoroughly with a mold-killing cleaner. Then, reapply a fresh bead of high-quality, mold-resistant silicone caulk, ensuring a complete and watertight seal. Address any ventilation issues in the bathroom as well.
Uneven or Streaky Finish
An uneven finish, especially with paint, can result from applying coats too thickly, using a low-quality roller, or not mixing the paint properly. Streaks often occur if the paint dries too quickly or if you’re not maintaining a wet edge during application.
For painted surfaces, lightly sand the affected area with fine-grit sandpaper (e.g., 220-grit). Clean off the dust. Then, apply another thin, even coat of paint using a high-quality roller, maintaining consistent pressure and avoiding overworking the paint.
Key Takeaways
- Thorough preparation, including deep cleaning and proper priming, is non-negotiable for lasting results.
- Select a covering method that suits your bathroom’s moisture levels and your skill set.
- Always use products specifically designed for tile or high-moisture environments, such as bonding primers and waterproof adhesives.
- Pay close attention to manufacturer instructions for drying and curing times; patience prevents many common failures.
- Seal all edges and seams with mold-resistant silicone caulk to prevent moisture penetration and future issues.
- Small repairs to grout and tile chips before covering contribute significantly to a smooth, professional finish.
Frequently Asked Questions
Can I cover tile in a shower or high-moisture area?
Yes, but you must choose your materials very carefully. Specialized waterproof wall panels (like PVC or composite panels) are excellent for shower surrounds. If painting, use a two-part epoxy tile paint designed for wet areas. Always ensure all seams are meticulously sealed with mold-resistant silicone caulk.
Will covering the tiles make my bathroom feel smaller?
Not necessarily. Lighter colors and reflective surfaces can actually make a space feel larger and brighter. If you choose dark colors or heavily textured panels, it might visually reduce the space. Consider your overall design to achieve the desired effect.
How long does a tile covering typically last?
The lifespan depends heavily on the method and quality of application. Well-applied tile paint can last 5-10 years or more with proper care. High-quality waterproof wall panels can last 10-20 years. Peel-and-stick options may have a shorter lifespan, often 3-7 years, depending on brand and exposure to moisture.
Do I need to remove the toilet or vanity to cover the tiles behind them?
For the most professional and seamless finish, it is highly recommended to temporarily remove the toilet and any pedestal sinks or vanities. This allows you to cover the wall completely behind them, avoiding awkward cuts and visible seams. If removal isn’t feasible, you’ll need to be very precise with your cuts and caulking around these fixtures.
Our Top Recommended Finds
- High-Bonding Epoxy Primer: Essential for creating a strong adhesive base on glossy tile surfaces. Look for brands specifically mentioning tile or non-porous materials.
- Mold-Resistant Silicone Caulk: Crucial for sealing all edges and gaps in a bathroom environment, preventing water damage and mildew growth. Choose a flexible, durable formula.
- Quality Utility Knife with Snap-Off Blades: Indispensable for precise cutting of wall panels, peel-and-stick tiles, and for trimming caulk. Sharp blades make all the difference.
Your Bathroom’s Fresh Start Awaits
Transforming your bathroom by covering old tiles is an achievable project that yields impressive results. You now have the practical steps and insights needed to tackle this renovation with confidence. Say goodbye to outdated aesthetics and hello to a modern, refreshed space.
Don’t let the thought of a major renovation hold you back. Start planning your project today, gather your tools, and embark on the journey to a beautifully updated bathroom. Your revitalized space is just a few dedicated steps away.
Beginner-friendly templates, step-by-step guides,
and weekly project ideas in your inbox.