🧵 How To Make A Quilt For Beginners

Beginner-friendly templates, step-by-step guides,
and weekly project ideas in your inbox.
Embarking on your first quilting project can feel a little daunting, but it’s an incredibly rewarding journey.
I remember the thrill of piecing together my very first quilt, a simple throw, and the immense satisfaction of seeing it come to life.
This guide is designed to walk you through each step, ensuring you build confidence and create something beautiful from scratch.
Quick Overview
You’ll learn the fundamental techniques to construct a cozy and personal quilt, perfect for snuggling or gifting.
We’ll cover everything from selecting your fabric to the final binding stitch.
- Time needed: 20-40 hours (can be spread over several days or weeks)
- Difficulty: Beginner
- What you’ll need: Fabric (top, backing), batting, sewing machine, thread, rotary cutter, cutting mat, quilting ruler, pins, iron, ironing board.
Step-by-Step Instructions
Step 1: Gather Your Supplies
Collect all the necessary tools and materials before you begin. Having everything at hand makes the process smoother and more enjoyable.
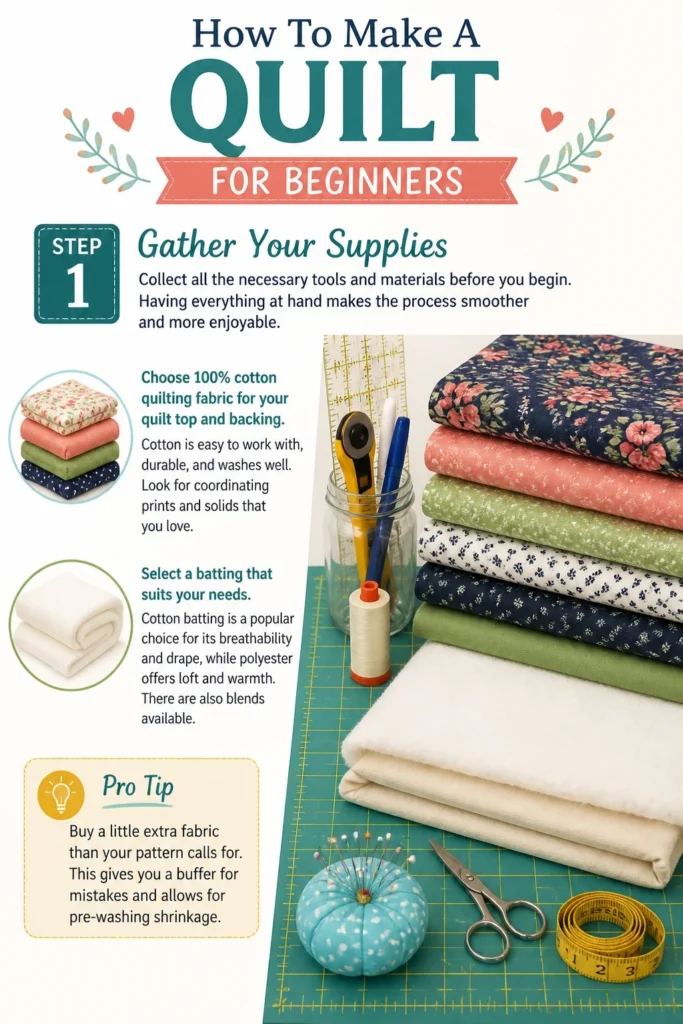
Choose 100% cotton quilting fabric for your quilt top and backing. Cotton is easy to work with, durable, and washes well. Look for coordinating prints and solids that you love.
Select a batting that suits your needs. Cotton batting is a popular choice for its breathability and drape, while polyester offers loft and warmth. There are also blends available.
Pro Tip: Buy a little extra fabric than your pattern calls for. This gives you a buffer for mistakes and allows for pre-washing shrinkage.
Step 2: Plan Your Quilt Design
Decide on a simple pattern for your first quilt. Basic squares or strips are perfect for beginners as they teach foundational skills without overwhelming complexity.
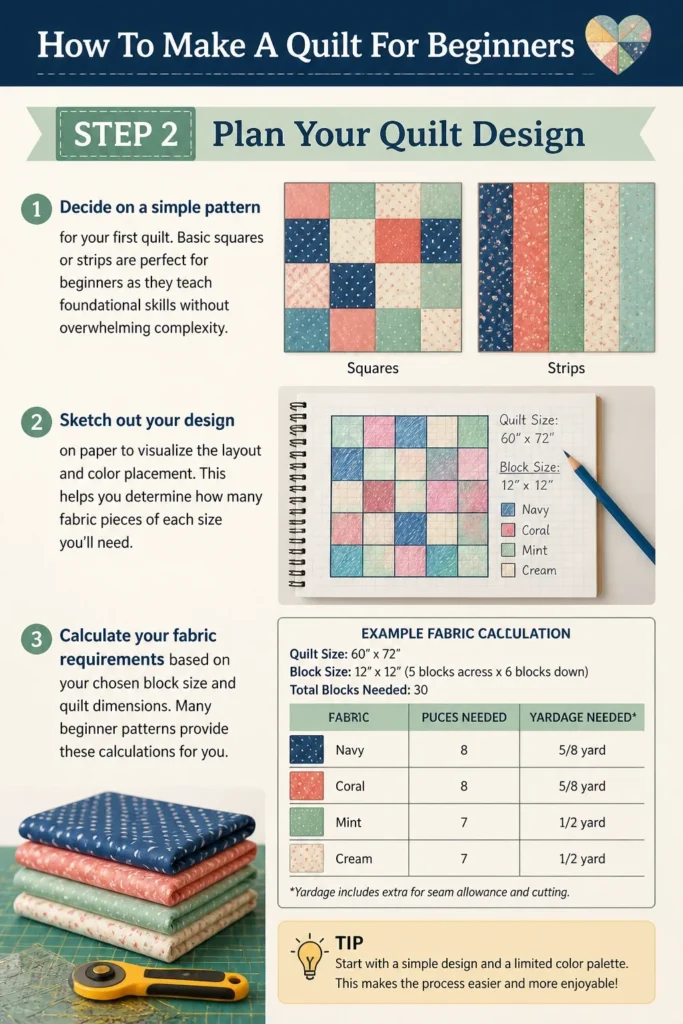
Sketch out your design on paper to visualize the layout and color placement. This helps you determine how many fabric pieces of each size you’ll need.
Calculate your fabric requirements based on your chosen block size and quilt dimensions. Many beginner patterns provide these calculations for you.
Step 3: Prepare Your Fabric
Wash all your cotton fabrics before cutting. This pre-shrinks the fabric and removes any excess dye, preventing potential issues after the quilt is finished.
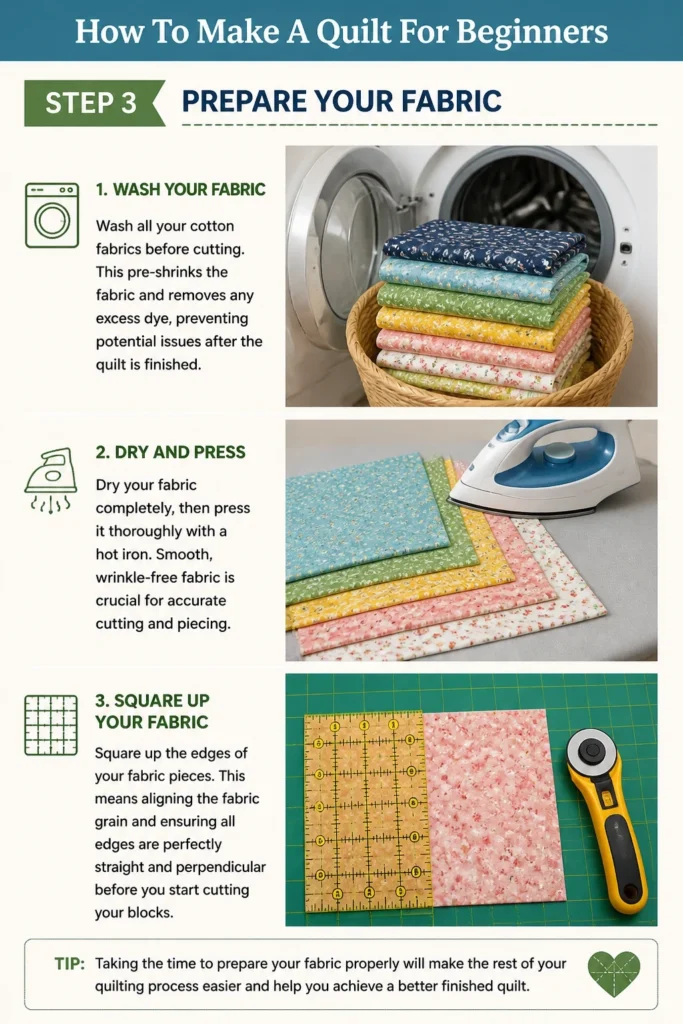
Dry your fabric completely, then press it thoroughly with a hot iron. Smooth, wrinkle-free fabric is crucial for accurate cutting and piecing.
Square up the edges of your fabric pieces. This means aligning the fabric grain and ensuring all edges are perfectly straight and perpendicular before you start cutting your blocks.
Step 4: Cut Your Fabric Pieces
Lay your prepared fabric flat on your cutting mat. Use your quilting ruler to measure and guide your cuts.
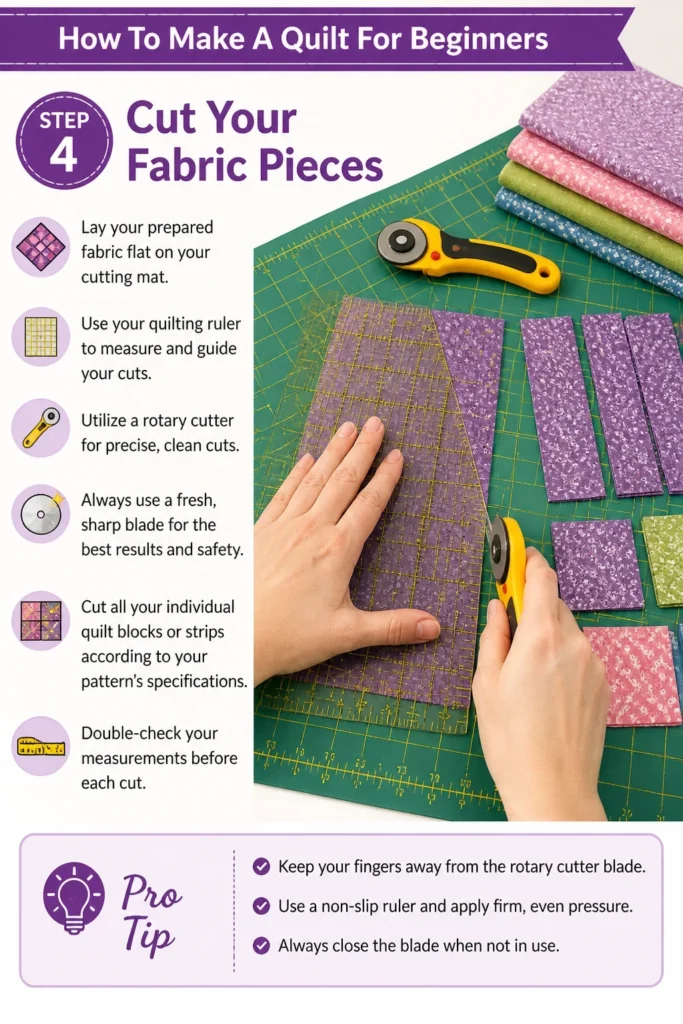
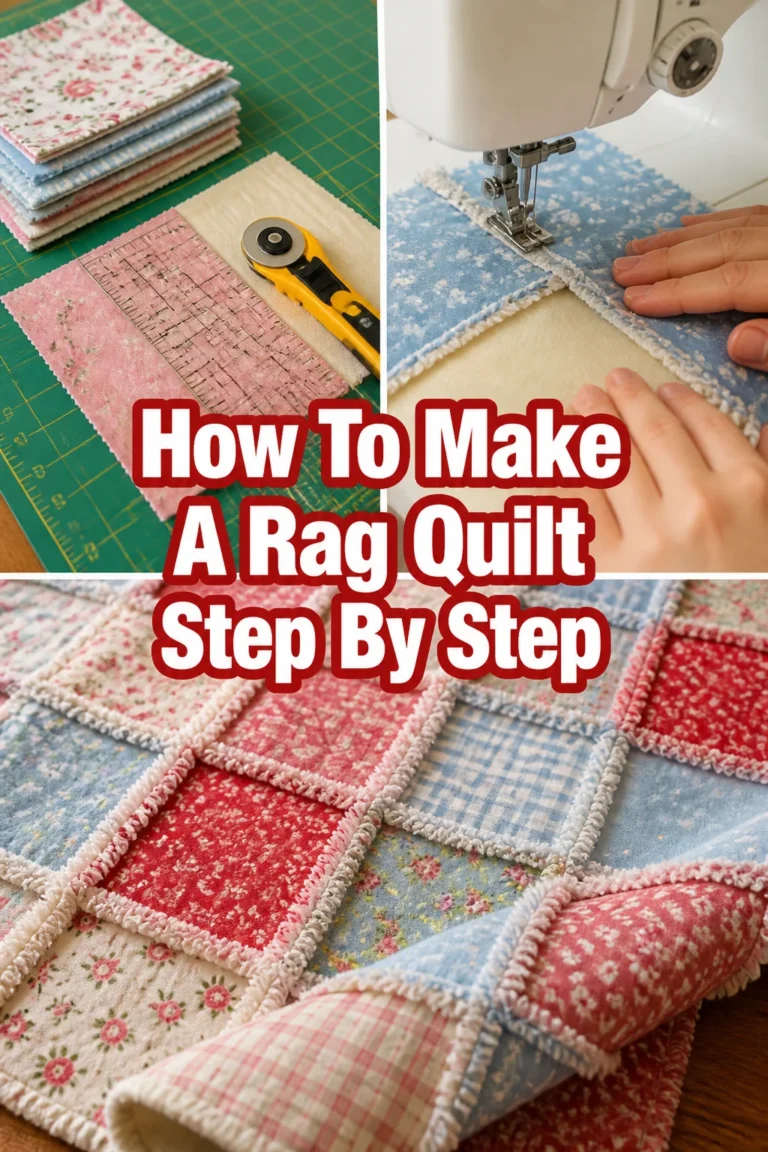
Utilize a rotary cutter for precise, clean cuts. Always use a fresh, sharp blade for the best results and safety.
Cut all your individual quilt blocks or strips according to your pattern’s specifications. Double-check your measurements before each cut.
Pro Tip: Keep your fingers away from the rotary cutter blade. Use a non-slip ruler and apply firm, even pressure. Always close the blade when not in use.
Step 5: Assemble the Quilt Top
Arrange your cut fabric pieces on a flat surface or design wall in the order you want them to appear in your quilt. This helps you visualize the finished top.
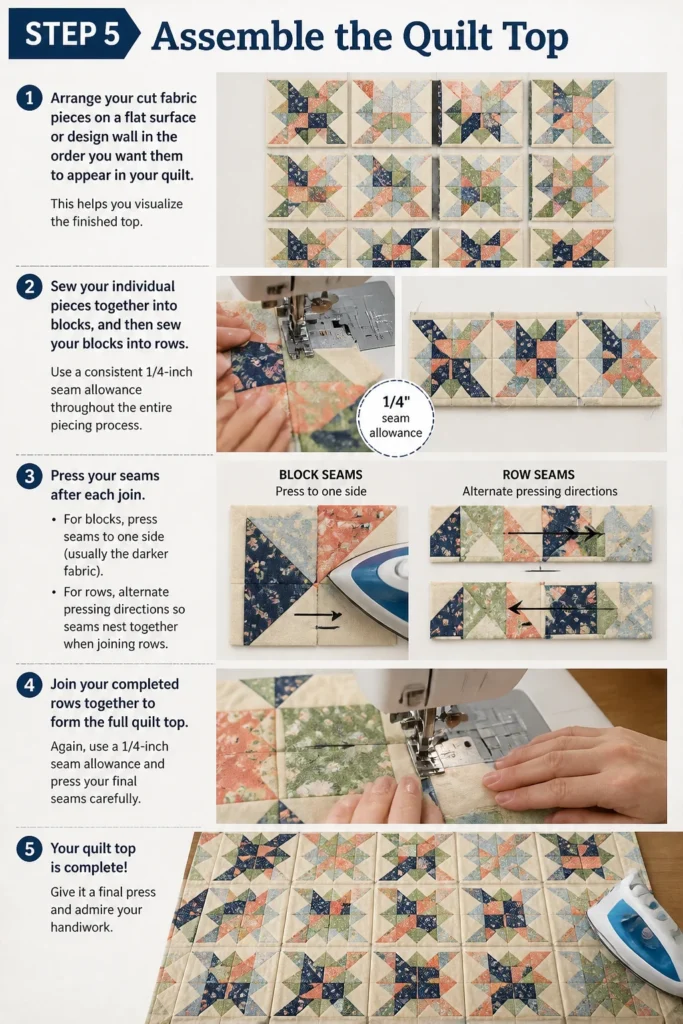
Sew your individual pieces together into blocks, and then sew your blocks into rows. Use a consistent 1/4-inch seam allowance throughout the entire piecing process.
Press your seams after each join. For blocks, press seams to one side (usually the darker fabric). For rows, alternate pressing directions so seams nest together when joining rows.
Join your completed rows together to form the full quilt top. Again, use a 1/4-inch seam allowance and press your final seams carefully.
Step 6: Layer the Quilt Sandwich
Prepare your backing fabric. It should be at least 4-6 inches larger on all sides than your quilt top. Press it smooth.
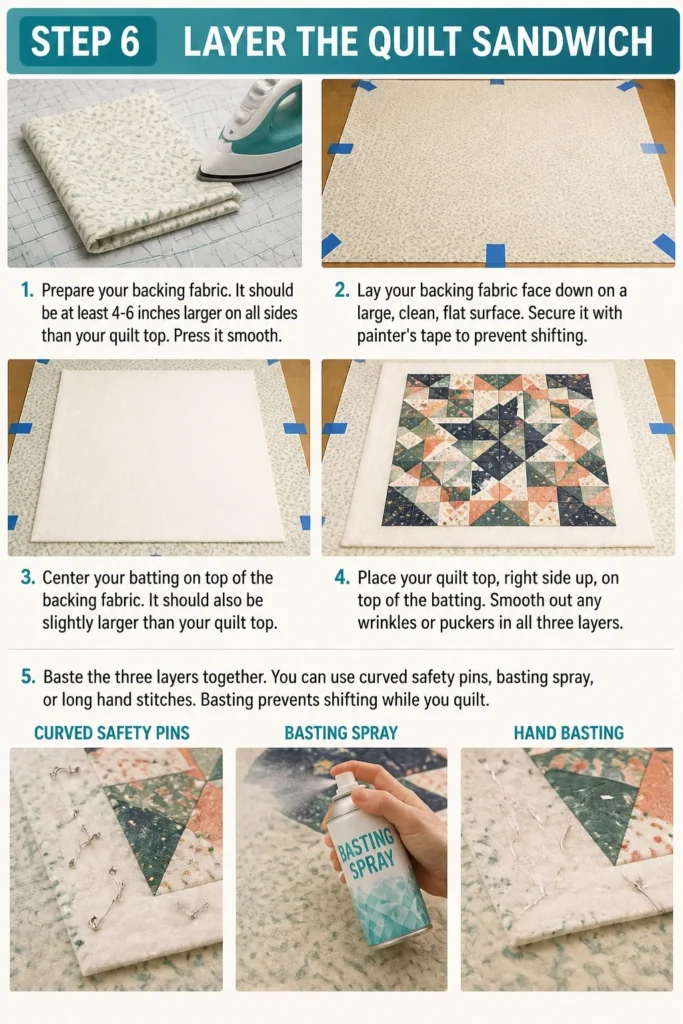
Lay your backing fabric face down on a large, clean, flat surface. Secure it with painter’s tape to prevent shifting.
Center your batting on top of the backing fabric. It should also be slightly larger than your quilt top.
Place your quilt top, right side up, on top of the batting. Smooth out any wrinkles or puckers in all three layers.
Baste the three layers together. You can use curved safety pins, basting spray, or long hand stitches. Basting prevents shifting while you quilt.
Step 7: Quilt the Layers Together
Choose a simple quilting design. Straight lines, grid patterns, or “stitch-in-the-ditch” (quilting along the seam lines) are excellent for beginners.
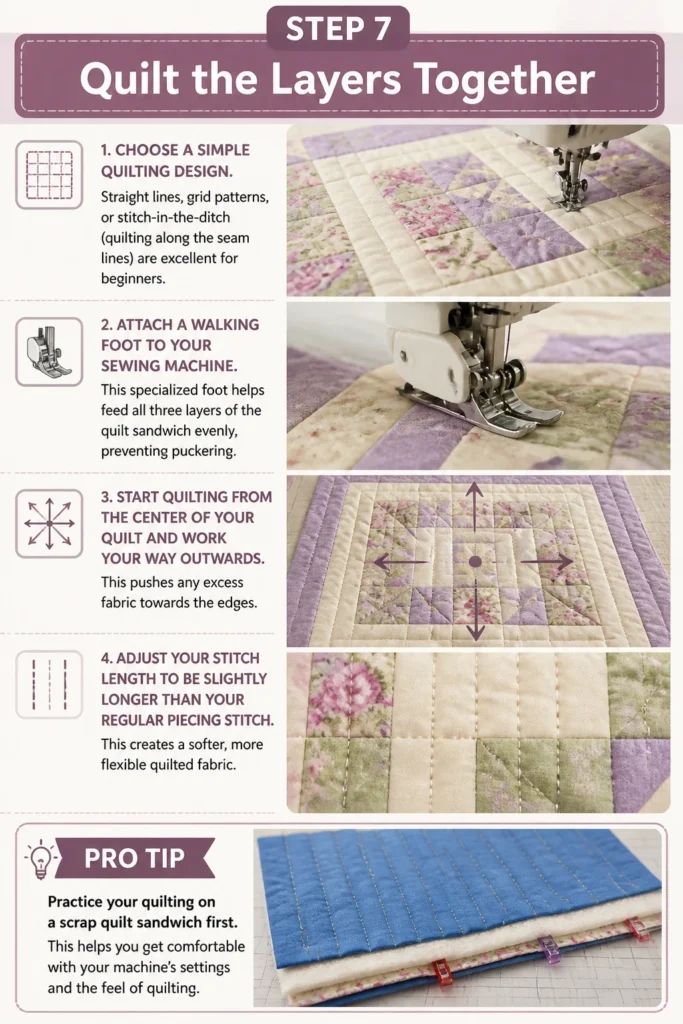
Attach a walking foot to your sewing machine. This specialized foot helps feed all three layers of the quilt sandwich evenly, preventing puckering.
Start quilting from the center of your quilt and work your way outwards. This pushes any excess fabric towards the edges.
Adjust your stitch length to be slightly longer than your regular piecing stitch. This creates a softer, more flexible quilted fabric.
Pro Tip: Practice your quilting on a scrap quilt sandwich first. This helps you get comfortable with your machine’s settings and the feel of quilting.
Step 8: Bind the Quilt
Trim the excess backing and batting even with the edges of your quilt top. Use your rotary cutter and ruler for a clean finish.
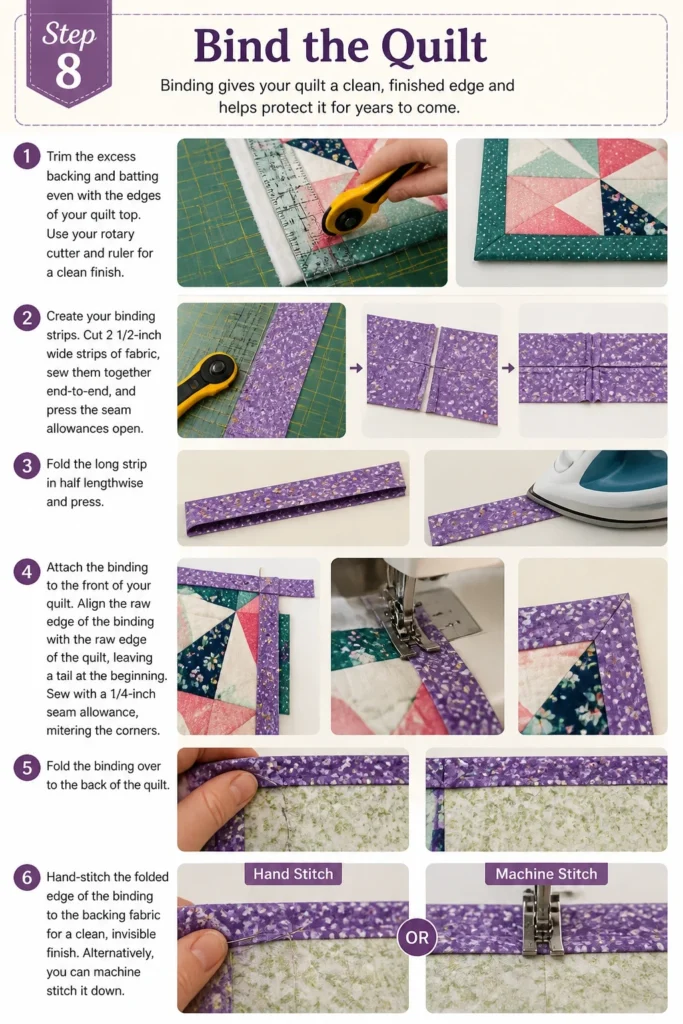
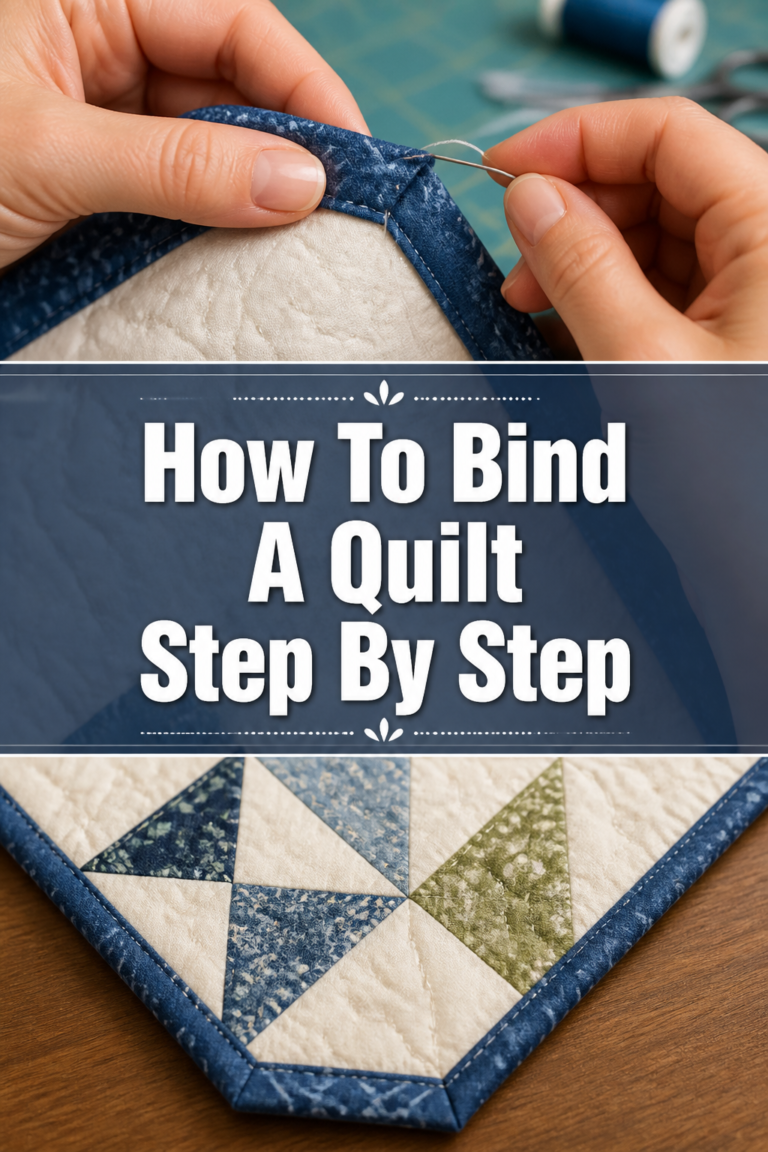
Create your binding strips. Cut 2 1/2-inch wide strips of fabric, sew them together end-to-end, and press the seam allowances open. Fold the long strip in half lengthwise and press.
Attach the binding to the front of your quilt. Align the raw edge of the binding with the raw edge of the quilt, leaving a tail at the beginning. Sew with a 1/4-inch seam allowance, mitering the corners.
Fold the binding over to the back of the quilt. Hand-stitch the folded edge of the binding to the backing fabric for a clean, invisible finish. Alternatively, you can machine stitch it down.
Common Mistakes to Avoid
Inaccurate Cutting
Many beginners rush the cutting phase, leading to slightly off-kilter pieces. Even a tiny inaccuracy, multiplied across many blocks, can result in a wonky quilt top that’s difficult to square up.
Always take your time when cutting. Use a sharp rotary blade, a non-slip ruler, and ensure your fabric is perfectly flat and aligned on the mat before each cut. Measure twice, cut once.
Skipping Pressing
It’s tempting to iron over seams quickly or skip pressing altogether between steps. However, this creates bulky, uneven seams that can make your blocks distort and prevent them from lying flat.
Pressing is crucial for a flat, professional-looking quilt. Always press your seams after each seam is sewn, and press, don’t iron. Pressing lifts and places the iron, while ironing slides it, which can stretch fabric.
Not Squaring Up Blocks/Quilt Top
If your individual blocks aren’t perfectly square, or if your quilt top isn’t squared up before layering, your quilt will likely have wavy borders or be difficult to bind evenly.
Invest in a square ruler and trim your blocks to their finished size after piecing. Before basting, ensure your entire quilt top is square and flat. This makes all subsequent steps much easier.
Poor Fabric Choice
Using fabrics that aren’t 100% cotton, or mixing different fabric types (e.g., cotton with flannel), can lead to issues with shrinking, stretching, and overall durability and washability of your quilt.
Stick to good quality 100% cotton quilting fabric for your first project. These fabrics are designed to work well together, are stable, and will give your quilt a long, happy life.
Troubleshooting
Wavy Borders/Edges
This often happens when borders are stretched as they are sewn onto the quilt top. It can also occur if the quilt top itself wasn’t squared up before adding borders.
To fix this, measure the exact length of your quilt top’s sides through the center. Cut your border strips to that precise measurement. Pin them generously, matching centers and ends, before sewing to distribute fullness evenly.
Puckering During Quilting
Puckering can be caused by uneven tension on your sewing machine, insufficient basting, or the fabric not being smoothed out properly before quilting.
First, check your machine’s tension settings; a test on a scrap sandwich can help. Ensure your quilt is well-basted with pins every 3-4 inches or thorough spray basting. Smooth the fabric constantly as you quilt, working from the center out.
Fabric Slipping While Cutting
If your fabric slides around while you’re trying to cut, it often leads to inaccurate cuts and frustration. This can be due to a dull rotary blade or insufficient pressure on your ruler.
Always use a sharp rotary blade; change it frequently. Use a non-slip ruler or add non-slip grips to the back of your ruler. Apply firm, even pressure directly onto the ruler to hold the fabric securely in place.
Key Takeaways
- Start with a simple pattern to build your skills and confidence.
- Precision in cutting and a consistent 1/4-inch seam allowance are fundamental.
- Always press your seams after each step to ensure a flat, professional finish.
- Baste your quilt layers thoroughly to prevent shifting during quilting.
- Don’t be afraid to make mistakes; they are part of the learning process.
- Enjoy the creative journey and the unique charm of a handmade quilt.
Frequently Asked Questions
What’s the best fabric for beginners?
100% quilting cotton is highly recommended for beginners. It’s stable, easy to cut and sew, comes in a vast array of colors and patterns, and holds up well to washing.
Do I need a special sewing machine?
No, a basic sewing machine that can perform a straight stitch is perfectly adequate for your first quilt. A walking foot attachment is highly beneficial for the quilting stage, but not strictly essential for starting.
How do I wash my finished quilt?
Wash your quilt on a gentle cycle with cold water and a mild, dye-free detergent. Tumble dry on low heat or air dry flat to prevent excessive shrinking or damage. The first wash often creates a lovely crinkled texture.
Can I hand sew a quilt?
Absolutely! Quilting originated as a handcraft. You can hand piece your quilt blocks and hand quilt the layers together. It will take considerably more time and patience, but the result is a unique, soft drape often preferred by traditional quilters.
Our Top Recommended Finds
- Rotary Cutter & Mat Set: Essential for accurate and efficient fabric cutting, a good quality set will last for years.
- Quilting Ruler (6″x24″ or similar): A clear acrylic ruler with clear markings is invaluable for precise measuring and squaring up.
- Walking Foot for your Sewing Machine: This attachment makes quilting the layers together much smoother, preventing fabric shifting and puckering.
Your Quilting Journey Begins Now!
You now have the knowledge and steps to create your very first quilt. Imagine the satisfaction of wrapping yourself in something you made with your own hands.
Don’t wait! Gather your supplies, choose a simple pattern, and take that exciting first step. Once you’ve completed this beginner project, you might feel ready to tackle a baby quilt, a wall hanging, or even a larger bed quilt.
Embrace the process, enjoy the creativity, and cherish the beautiful, functional art you’re about to bring into the world.
Beginner-friendly templates, step-by-step guides,
and weekly project ideas in your inbox.