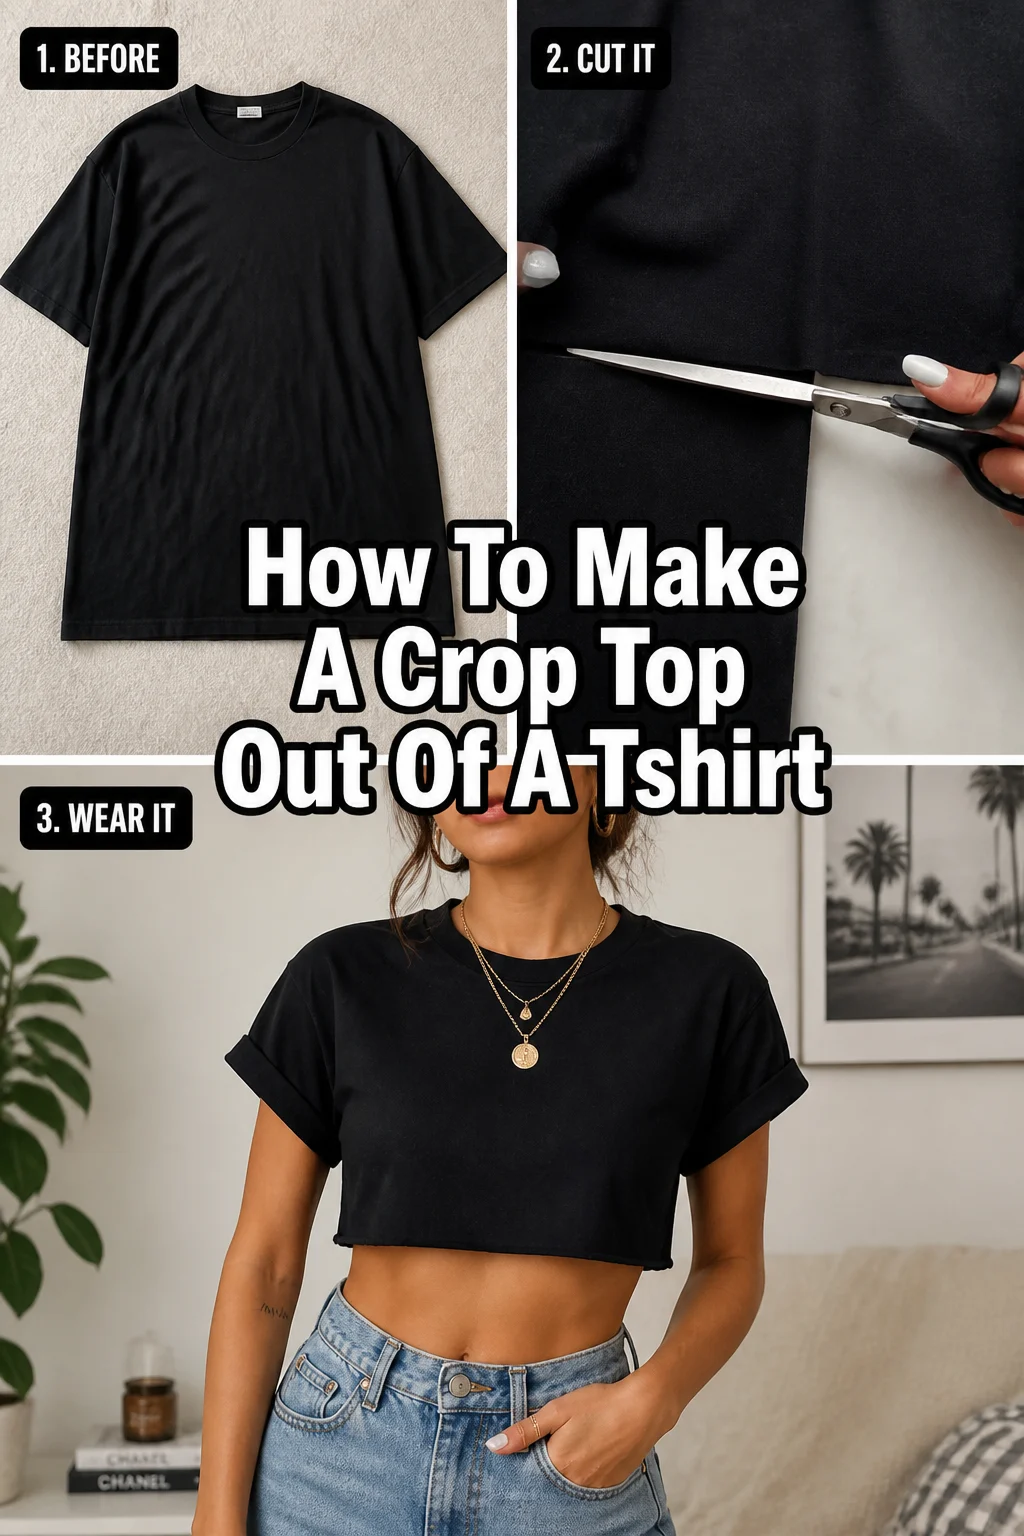
✂️ How To Make A Crop Top Out Of A Tshirt

Beginner-friendly templates, step-by-step guides,
and weekly project ideas in your inbox.
I remember the first time I wanted a crop top but didn’t want to buy a new one. I looked at an old band tee, grabbed some scissors, and just went for it. That initial attempt wasn’t perfect, but it sparked a love for transforming forgotten clothes into fresh, wearable pieces.
This guide comes from countless hours of trial and error, learning the best techniques to get a professional-looking finish right from your own home. You don’t need fancy skills, just a desire to create something unique.

Quick Overview
Transforming an old t-shirt into a stylish crop top is a fantastic way to refresh your wardrobe and embrace sustainable fashion. This guide will walk you through the entire process, ensuring a great result even if you’ve never sewn a stitch before.
- Time needed: 30 minutes to 1 hour (depending on finishing method)
- Difficulty: Beginner
- What you’ll need: An old t-shirt, sharp fabric scissors, fabric chalk or marker, ruler or measuring tape, pins, sewing machine (optional), needle and thread (optional)
Step-by-Step Instructions
Step 1: Choose Your T-Shirt Wisely
The foundation of a great crop top is the right t-shirt. Select a t-shirt that fits well around your shoulders and chest, as these areas won’t be altered much. Consider the fabric type; cotton or cotton blends are usually easiest to work with.
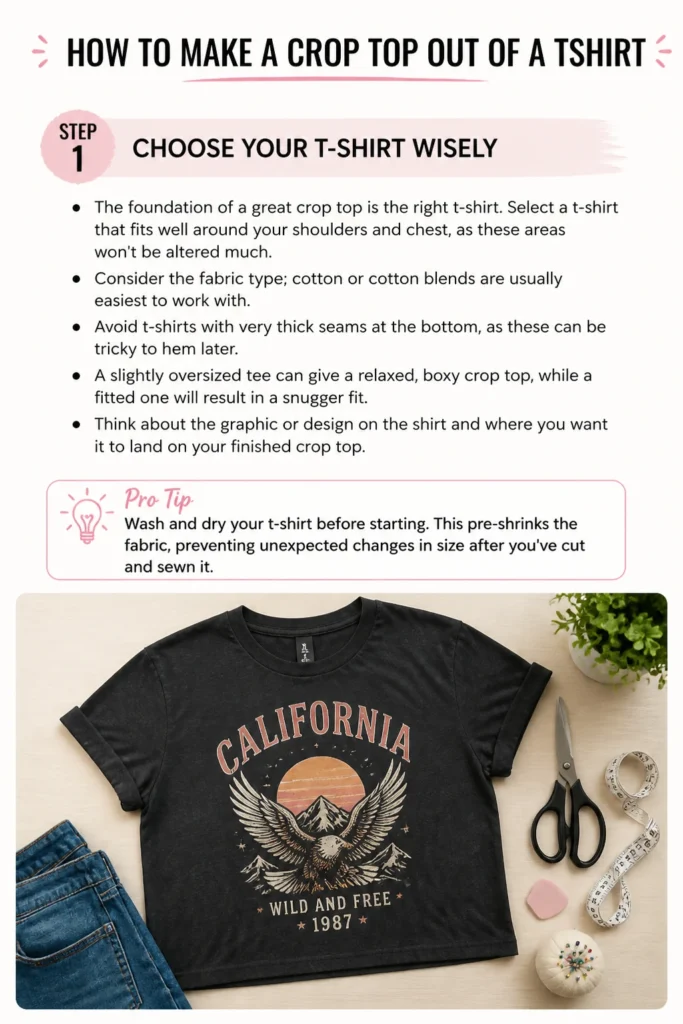
Avoid t-shirts with very thick seams at the bottom, as these can be tricky to hem later. A slightly oversized tee can give a relaxed, boxy crop top, while a fitted one will result in a snugger fit. Think about the graphic or design on the shirt and where you want it to land on your finished crop top.
Pro Tip: Wash and dry your t-shirt before starting. This pre-shrinks the fabric, preventing unexpected changes in size after you’ve cut and sewn it.
Step 2: Try On and Mark Your Desired Length
This is the most crucial step for getting the length just right. Put on the t-shirt you plan to transform. Stand in front of a mirror and decide exactly where you want the crop top to hit.
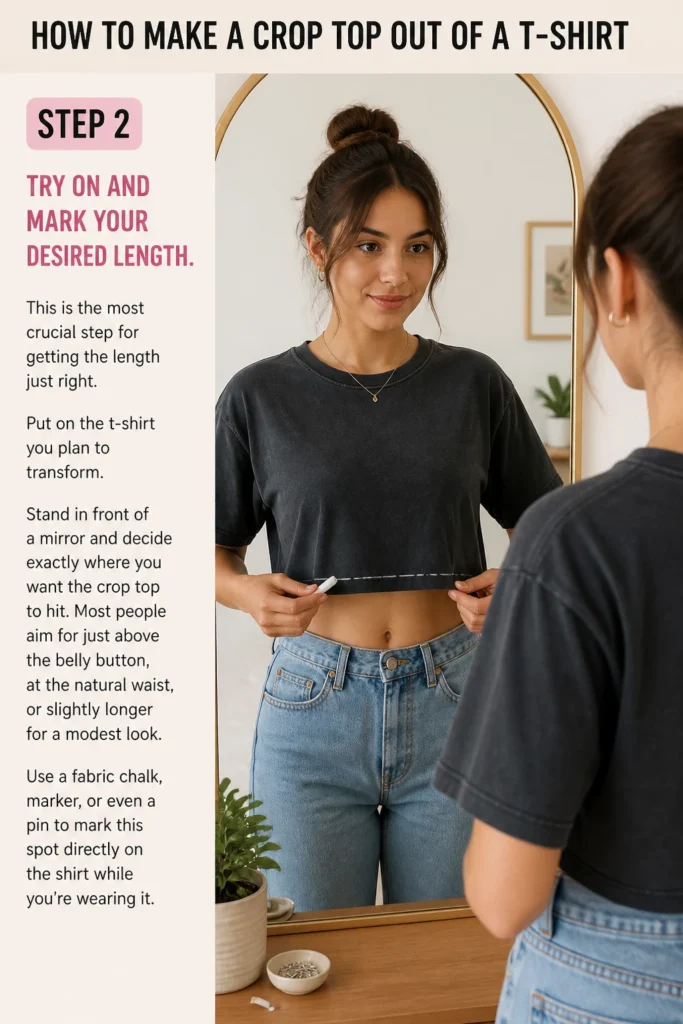
Most people aim for just above the belly button, at the natural waist, or slightly longer for a modest look. Use a fabric chalk, marker, or even a pin to mark this spot directly on the shirt while you’re wearing it. This ensures a personalized fit that flatters your body.
Step 3: Measure and Add Seam Allowance
Carefully take off the t-shirt. Lay it flat on a clean, hard surface, smoothing out any wrinkles. Using your ruler or measuring tape, measure from the bottom hem of the shirt up to the mark you just made.
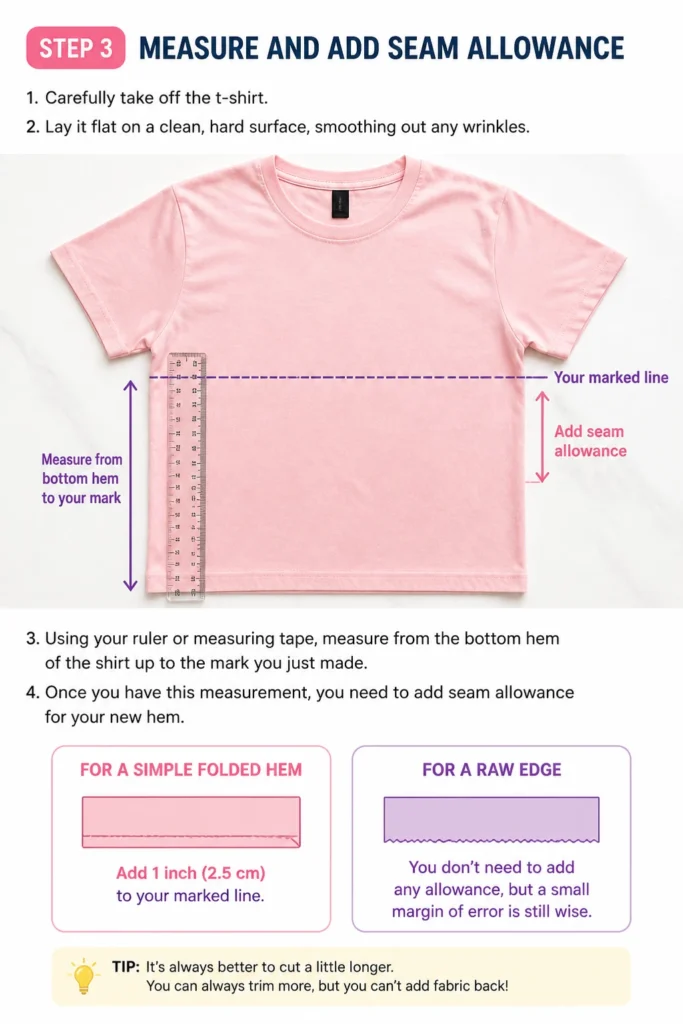
Once you have this measurement, you need to add seam allowance for your new hem. For a simple folded hem, add 1 inch (2.5 cm) to your marked line. If you’re going for a raw edge, you don’t need to add any allowance, but a small margin of error is still wise.
Step 4: Draw Your Cutting Line
Using your ruler and fabric chalk or marker, draw a straight, even line across the entire width of the t-shirt at your new measurement. Make sure the line is perpendicular to the side seams. This line is where you will make your cut.
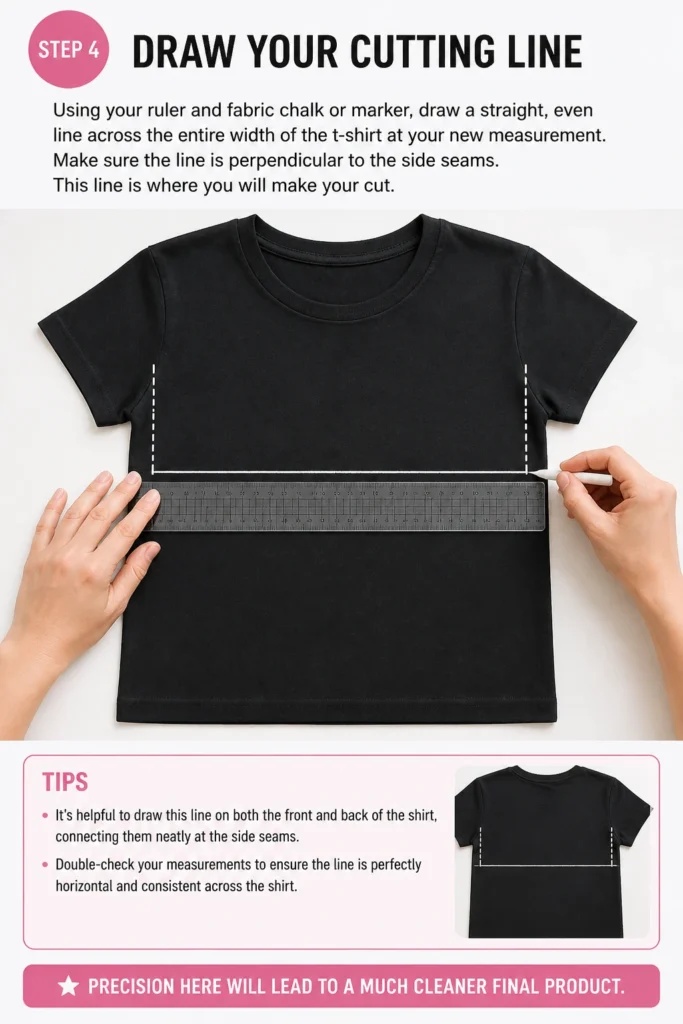
It’s helpful to draw this line on both the front and back of the shirt, connecting them neatly at the side seams. Double-check your measurements to ensure the line is perfectly horizontal and consistent across the shirt. Precision here will lead to a much cleaner final product.
Step 5: Cut the T-Shirt
Now it’s time to cut! Using very sharp fabric scissors, carefully cut along the line you just drew. Take your time and make long, smooth cuts rather than short, choppy ones. This helps create a clean, even edge.
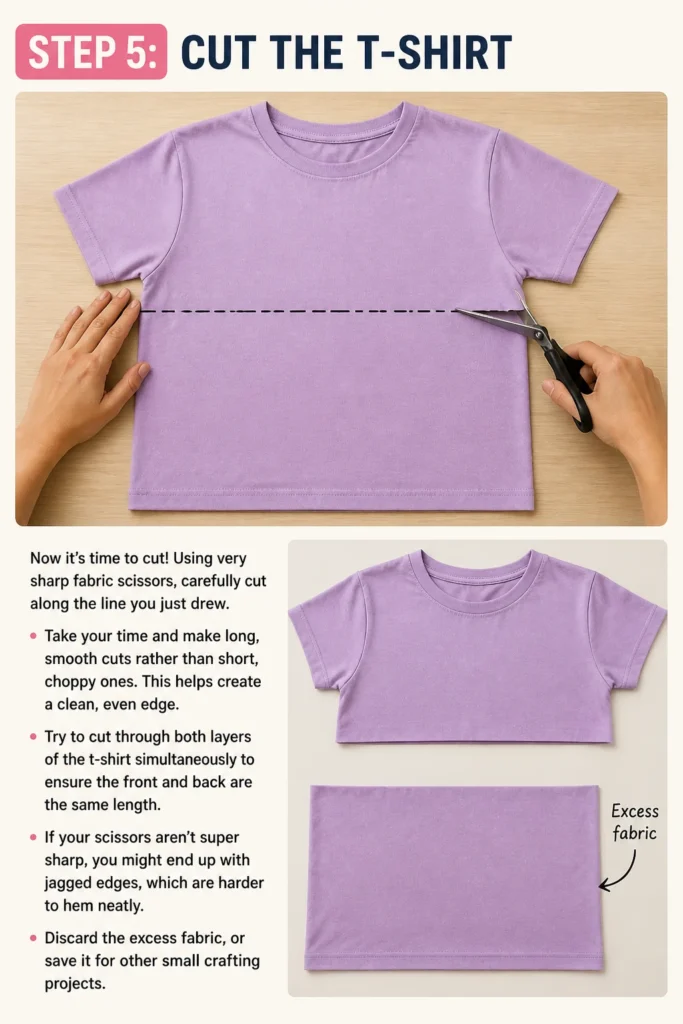
Try to cut through both layers of the t-shirt simultaneously to ensure the front and back are the same length. If your scissors aren’t super sharp, you might end up with jagged edges, which are harder to hem neatly. Discard the excess fabric, or save it for other small crafting projects.
Step 6: Decide on Your Hem Style (No-Sew, Folded, or Sewn)
At this point, you have a cut t-shirt, but the edge is raw. You have a few options for finishing it. Choose between a no-sew raw edge, a simple folded hem, or a more durable sewn hem.
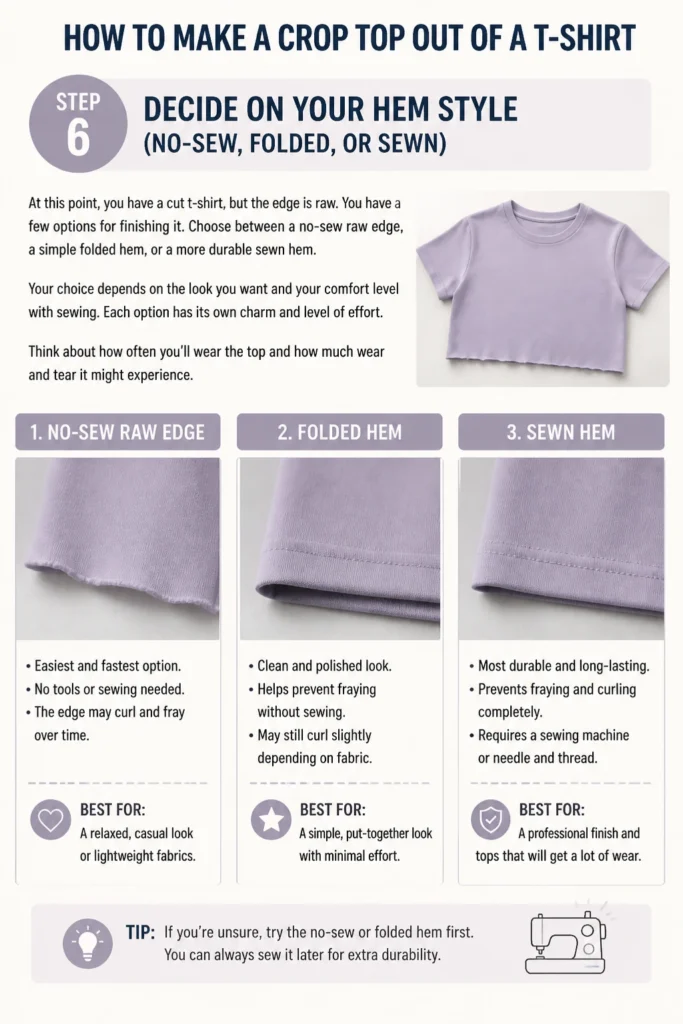
Your choice depends on the look you want and your comfort level with sewing. Each option has its own charm and level of effort. Think about how often you’ll wear the top and how much wear and tear it might experience.
Step 7: Option 1: The No-Sew Raw Edge
If you prefer a quick, effortless look, you can leave the edge raw. Simply stretch the cut edge gently to encourage the fabric to roll slightly. T-shirt knits often curl naturally when cut, creating a soft, unfinished look that prevents excessive fraying.
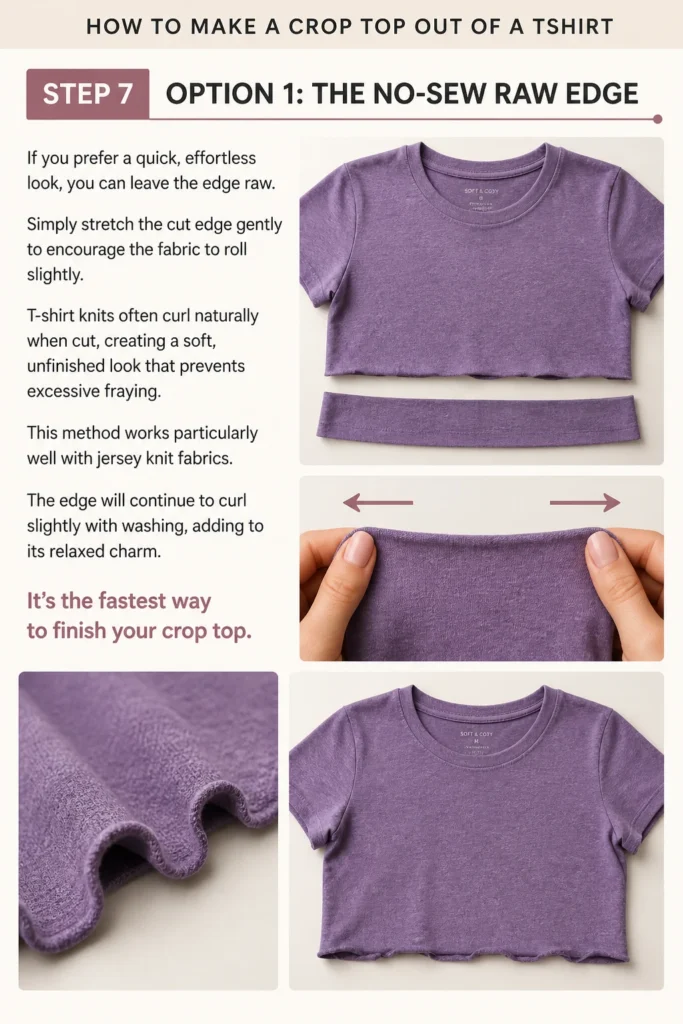
This method works particularly well with jersey knit fabrics. The edge will continue to curl slightly with washing, adding to its relaxed charm. It’s the fastest way to finish your crop top.
Step 8: Option 2: The Folded Hem (No-Sew with Fabric Glue)
For a slightly neater no-sew finish, you can use fabric glue. Fold the raw edge up by about 0.5 inches (1.25 cm) towards the inside of the shirt. Press it firmly with your fingers or an iron to create a crisp fold.
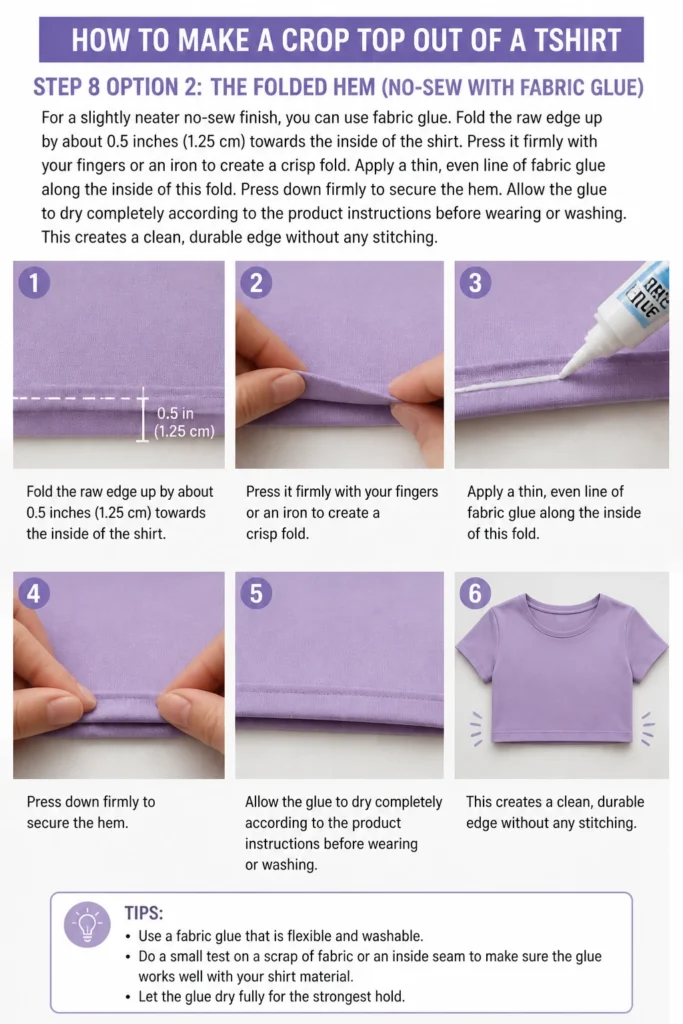
Apply a thin, even line of fabric glue along the inside of this fold. Press down firmly to secure the hem. Allow the glue to dry completely according to the product instructions before wearing or washing. This creates a clean, durable edge without any stitching.
Step 9: Option 3: The Sewn Hem (Hand or Machine)
For the most professional and durable finish, a sewn hem is ideal. Fold the raw edge up by about 0.5 inches (1.25 cm) towards the inside of the shirt. Press this fold flat with an iron.
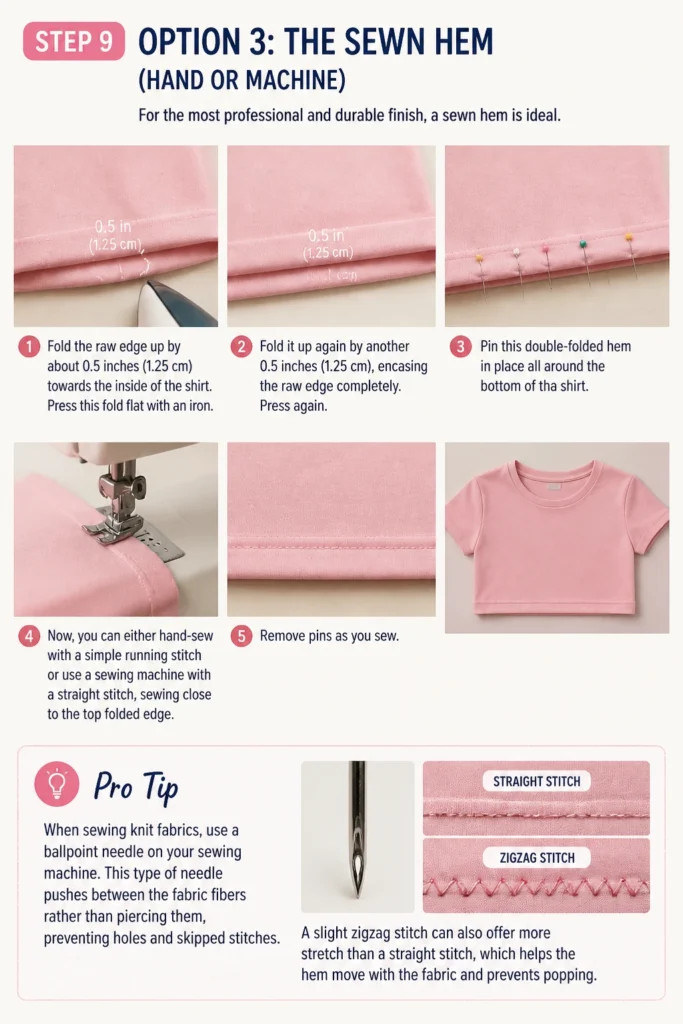
Then, fold it up again by another 0.5 inches (1.25 cm), encasing the raw edge completely. Press again. Pin this double-folded hem in place all around the bottom of the shirt. Now, you can either hand-sew with a simple running stitch or use a sewing machine with a straight stitch, sewing close to the top folded edge. Remove pins as you sew.
Pro Tip: When sewing knit fabrics, use a ballpoint needle on your sewing machine. This type of needle pushes between the fabric fibers rather than piercing them, preventing holes and skipped stitches. A slight zigzag stitch can also offer more stretch than a straight stitch, which is great for t-shirt fabric.
Step 10: Final Touches and Enjoy!
Once your hem is finished and dry, give your new crop top a final press with an iron to set the hem and smooth out any wrinkles. Try it on and admire your handiwork! You’ve successfully transformed an old t-shirt into a stylish, custom-fit crop top.
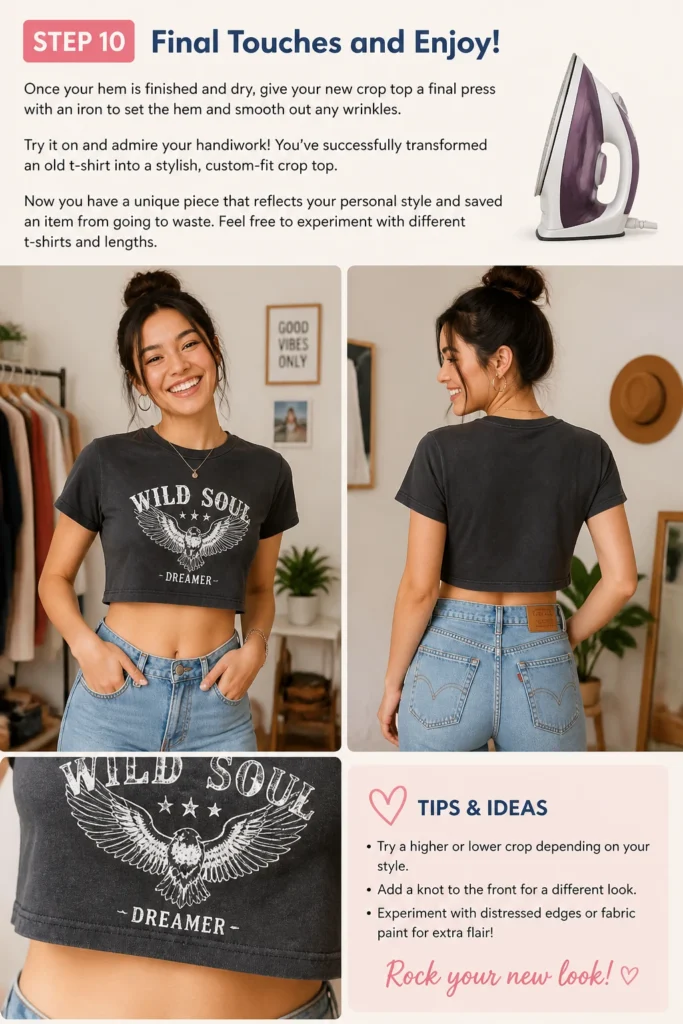
Now you have a unique piece that reflects your personal style and saved an item from going to waste. Feel free to experiment with different t-shirts and lengths.
Common Mistakes to Avoid
Cutting Too Short Initially
Many people get excited and cut their t-shirt much shorter than intended. It’s impossible to add fabric back once it’s cut. Always mark your desired length, then add a generous seam allowance, even if you plan a raw edge. You can always trim more later, but you can’t add back.
Using Dull Scissors
Dull scissors will tear and chew through fabric, leaving a jagged, uneven edge. This makes hemming difficult and gives your crop top an unprofessional look. Always use sharp fabric scissors specifically designed for textiles. If yours are dull, sharpen them or invest in a new pair.
Skipping the Pre-Wash
Forgetting to wash and dry your t-shirt before cutting can lead to disappointment. Most cotton garments will shrink slightly on their first wash. If you cut and hem before washing, your perfectly sized crop top might end up too short or tight after its first trip through the laundry.
Not Measuring Accurately
Eyeballing the cutting line is a recipe for a crooked hem. Use a ruler or measuring tape and fabric chalk to draw a precise, straight line all the way around the shirt. Even a slight inaccuracy can become very noticeable on a finished garment. Take your time with the measurements.
Troubleshooting
My Hem is Wavy or Stretched Out
This often happens when sewing knit fabrics with a straight stitch that doesn’t allow for stretch, or if you’re pulling the fabric while sewing. To fix this, try unpicking the wavy section and re-sewing with a slight zigzag stitch (width 0.5-1, length 2.5-3). A walking foot on your machine can also help feed the fabric more evenly, preventing stretching.
The Raw Edge is Fraying Too Much
Some knit fabrics, especially loosely woven ones, might fray more than just curling. If this happens, you can still create a small, rolled hem using fabric glue or a quick hand stitch. Alternatively, you could try a small line of fray check liquid along the very edge after cutting to stabilize it.
The Crop Top Feels Too Boxy After Cutting
If your crop top feels too wide or boxy around the bottom after cutting, you can take in the side seams slightly. Put the top on inside out and use pins to mark where you’d like it to be more fitted. Draw a new seam line from the armpit down to the new hem, tapering it in. Stitch along this new line and trim the excess fabric, leaving a small seam allowance.
Key Takeaways
- Choose the right t-shirt: Opt for cotton or blends that fit well in the shoulders and chest.
- Personalize the length: Always try on the shirt and mark your desired length while wearing it.
- Add seam allowance: Account for your chosen hem style when marking your cutting line.
- Cut with precision: Use sharp fabric scissors and a ruler for a clean, straight edge.
- Finish the hem: Select a no-sew raw edge, fabric glue, or a sewn hem for durability and style.
- Pre-wash your fabric: Prevent unexpected shrinking by washing and drying your t-shirt beforehand.
Frequently Asked Questions
Can I make a crop top from any type of t-shirt?
While you can technically cut any t-shirt, knits (like jersey cotton) are ideal because they don’t fray as much as woven fabrics and often curl nicely when left raw. Thick or very stretchy performance fabrics can be more challenging to cut and hem smoothly.
How do I make sure the cut is perfectly straight?
Lay the t-shirt flat and smooth, ensuring side seams are aligned. Use a ruler or measuring tape to measure from a consistent point (like the armpit seam or original bottom hem) up to your desired cutting line at multiple points across the shirt. Connect these points with fabric chalk for a straight guide.
Do I have to hem the crop top, or can I leave the edge raw?
No, you don’t have to hem it! Leaving a raw edge is a popular, casual style, especially with knit fabrics that naturally curl and don’t fray excessively. Just be aware that some fabrics might fray more than others, and a hem will always provide a more finished and durable look.
What if I don’t have a sewing machine?
No problem at all! You can opt for a no-sew raw edge, or use fabric glue for a neat folded hem. If you want a sewn hem, it can be easily done by hand with a simple running stitch or whipstitch. It will take a little longer but is completely achievable.
Our Top Recommended Finds
- Sharp Fabric Scissors: A good pair makes all the difference for clean cuts and less frustration.
- Fabric Chalk or Marker: Essential for precise marking that washes out easily.
- Fabric Glue: Great for no-sew hems that still look neat and hold up well.
Your Next Fashion Project Awaits
You’ve just learned how to transform a simple t-shirt into a stylish crop top, adding a personalized touch to your wardrobe. This skill opens up a world of possibilities for customizing your clothes and expressing your unique style. Don’t let those old tees gather dust in your closet any longer.
Why not try experimenting with different lengths, adding embellishments, or even cutting fringes next? The satisfaction of wearing something you made yourself is truly rewarding. Grab an old t-shirt today and start creating!
Beginner-friendly templates, step-by-step guides,
and weekly project ideas in your inbox.