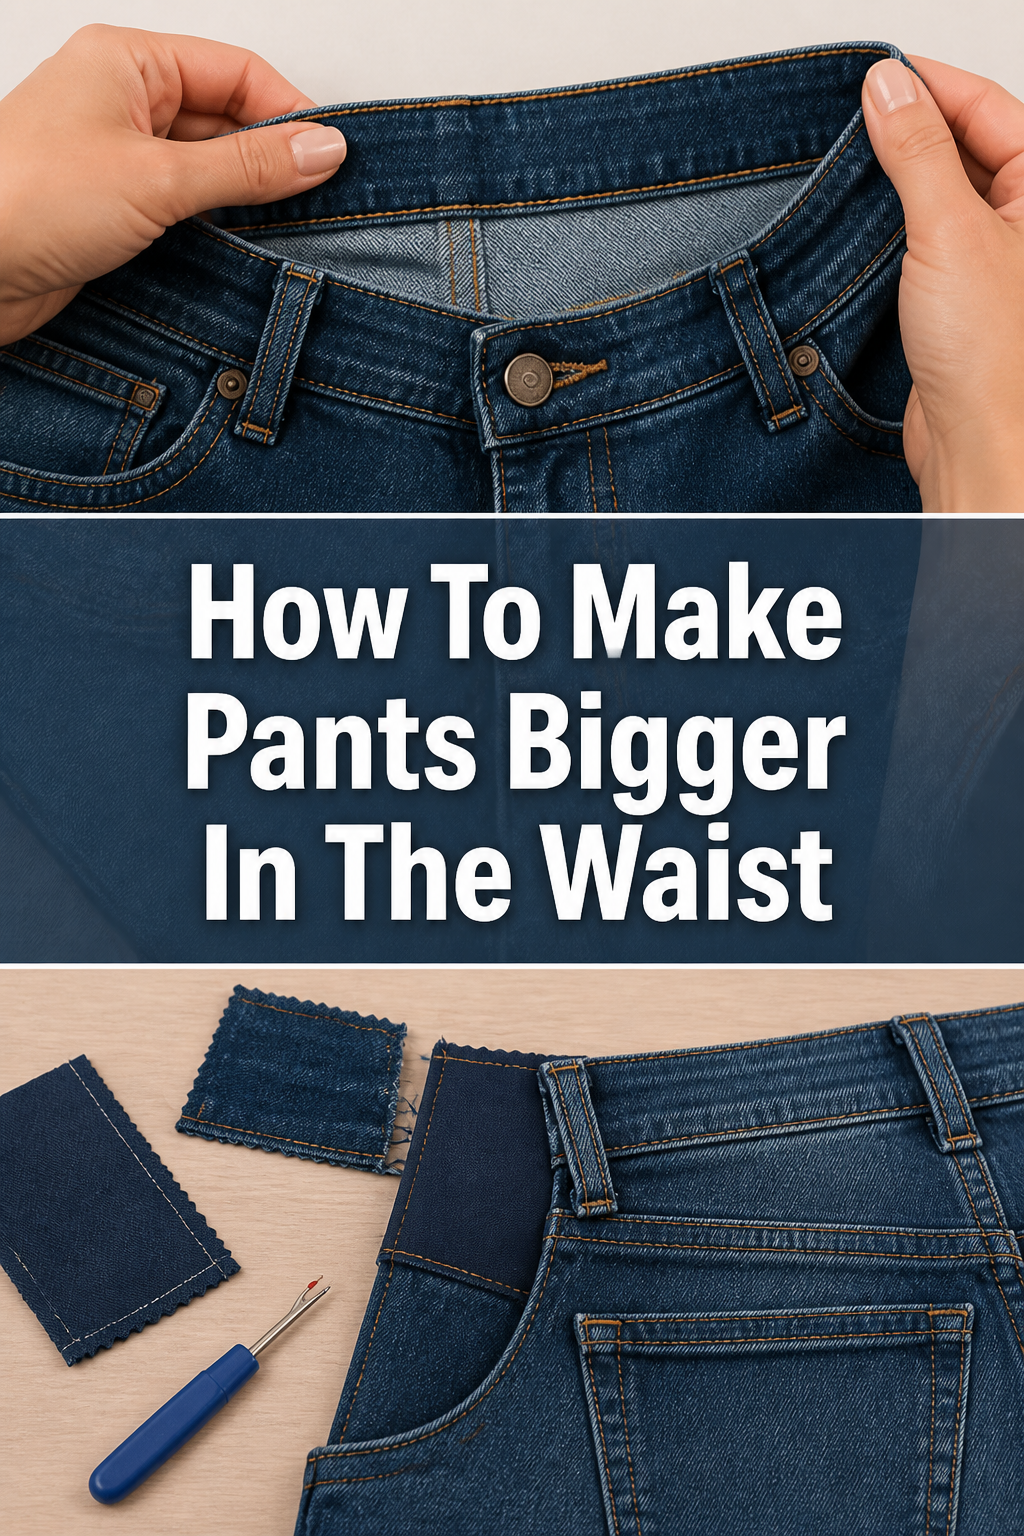
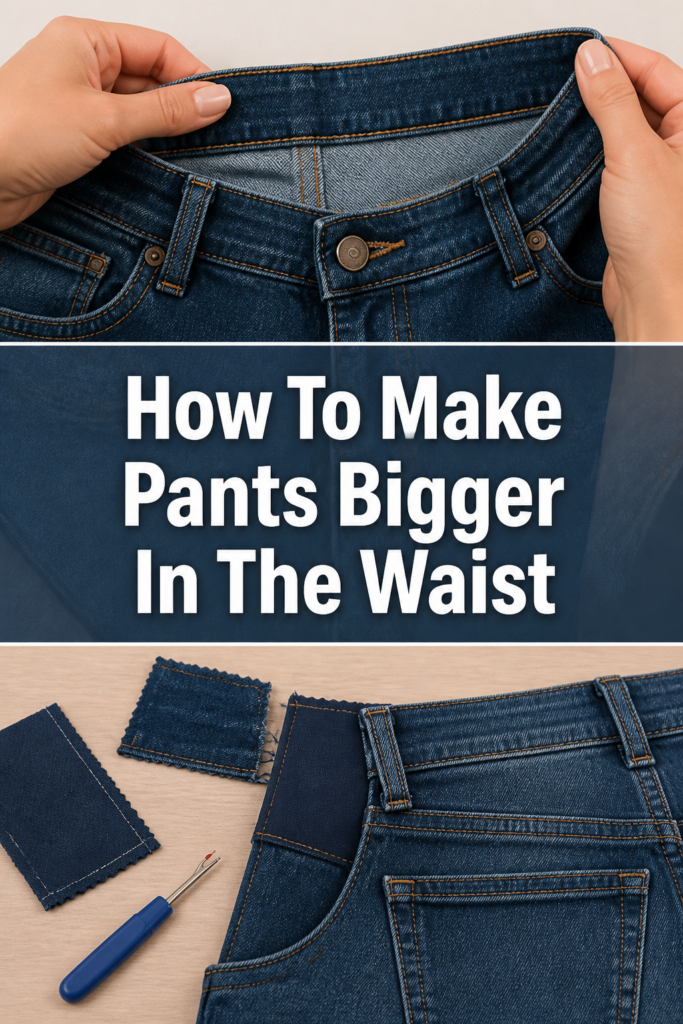
👖 How To Make Pants Bigger In The Waist

Beginner-friendly templates, step-by-step guides,
and weekly project ideas in your inbox.
We have all experienced that frustrating moment when a favorite pair of jeans or trousers feels a little too snug around the middle.
Instead of donating them or letting them gather dust, you can easily modify them to fit your body perfectly.
I have spent years hacking my own wardrobe and repairing vintage finds, so I know exactly how to give your clothes a second life without spending a fortune at a tailor.
Quick Overview
This guide covers several methods to expand a waistband, ranging from simple no-sew hacks to permanent fabric insertions.
- Time needed: 15 to 60 minutes depending on the method chosen
- Difficulty: Beginner to Intermediate
- What you’ll need: Seam ripper, fabric scraps, elastic, needle and thread or sewing machine, and a spray bottle
Step-by-Step Instructions
Step 1: Identify the fabric and construction
Examine the material of your pants to determine which expansion method will work best for that specific pair.
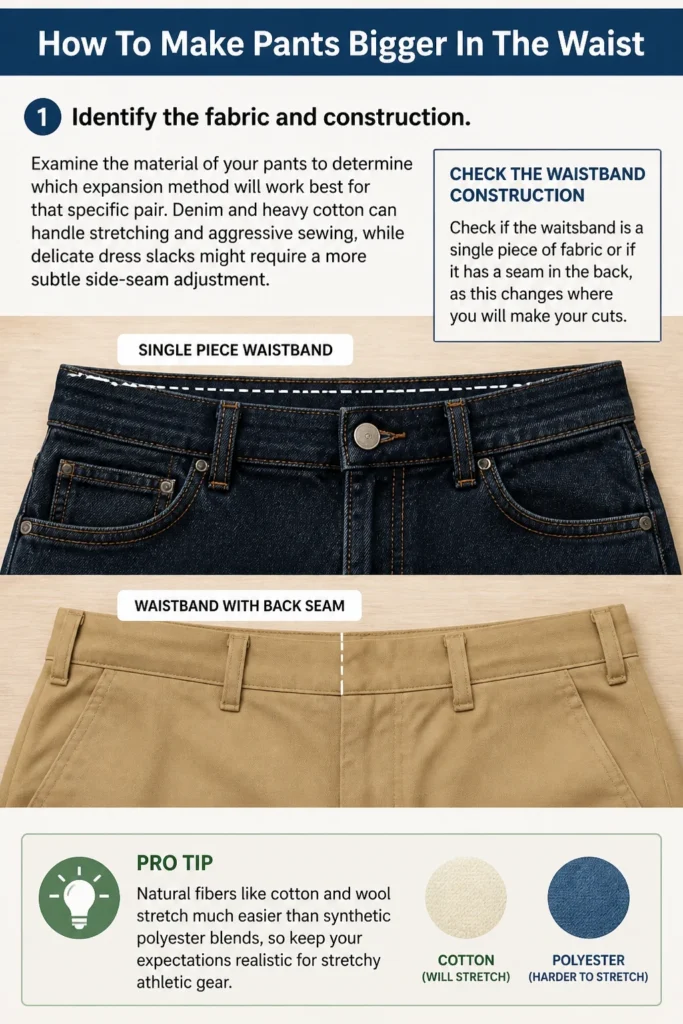
Denim and heavy cotton can handle stretching and aggressive sewing, while delicate dress slacks might require a more subtle side-seam adjustment.
Check if the waistband is a single piece of fabric or if it has a seam in the back, as this changes where you will make your cuts.
Pro Tip: Natural fibers like cotton and wool stretch much easier than synthetic polyester blends, so keep your expectations realistic for stretchy athletic gear.
Step 2: Try the water and tension method
Spray the waistband of your pants with lukewarm water until the fabric is damp but not dripping wet.
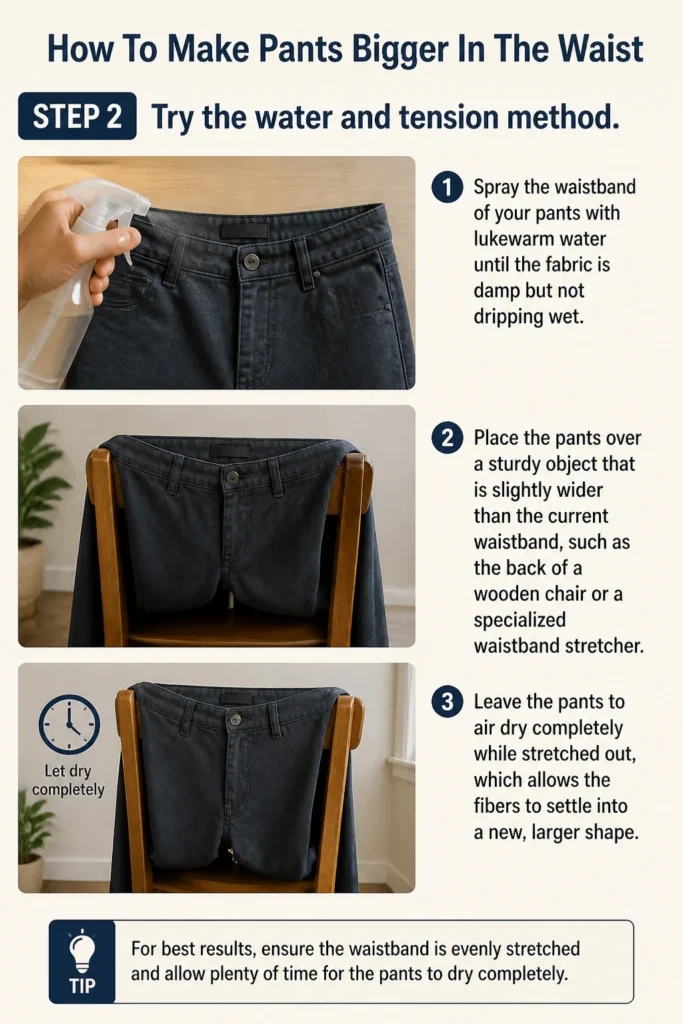
Place the pants over a sturdy object that is slightly wider than the current waistband, such as the back of a wooden chair or a specialized waistband stretcher.
Leave the pants to air dry completely while stretched out, which allows the fibers to settle into a new, larger shape.
Step 3: Use a button extender for a quick fix
Slide a rubber or metal button extender over the existing button of your pants to gain an extra inch of breathing room instantly.
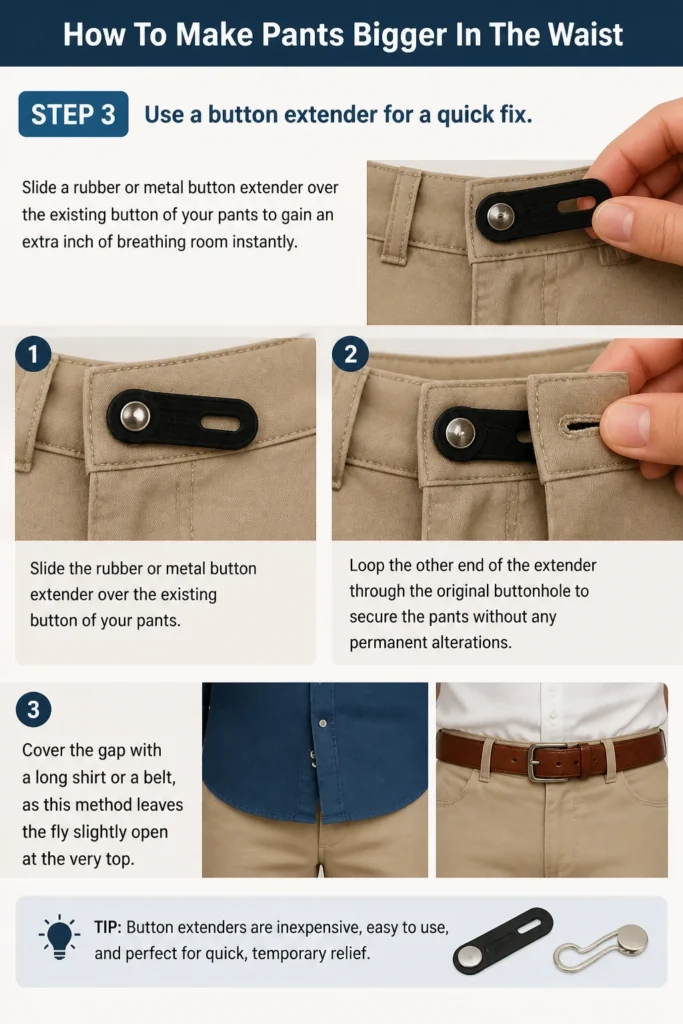
Loop the other end of the extender through the original buttonhole to secure the pants without any permanent alterations.
Cover the gap with a long shirt or a belt, as this method leaves the fly slightly open at the very top.
Step 4: Prepare the waistband for a V-insert
Locate the side seams of the pants where the waistband meets the hips, as this is the most discreet place to add extra fabric.
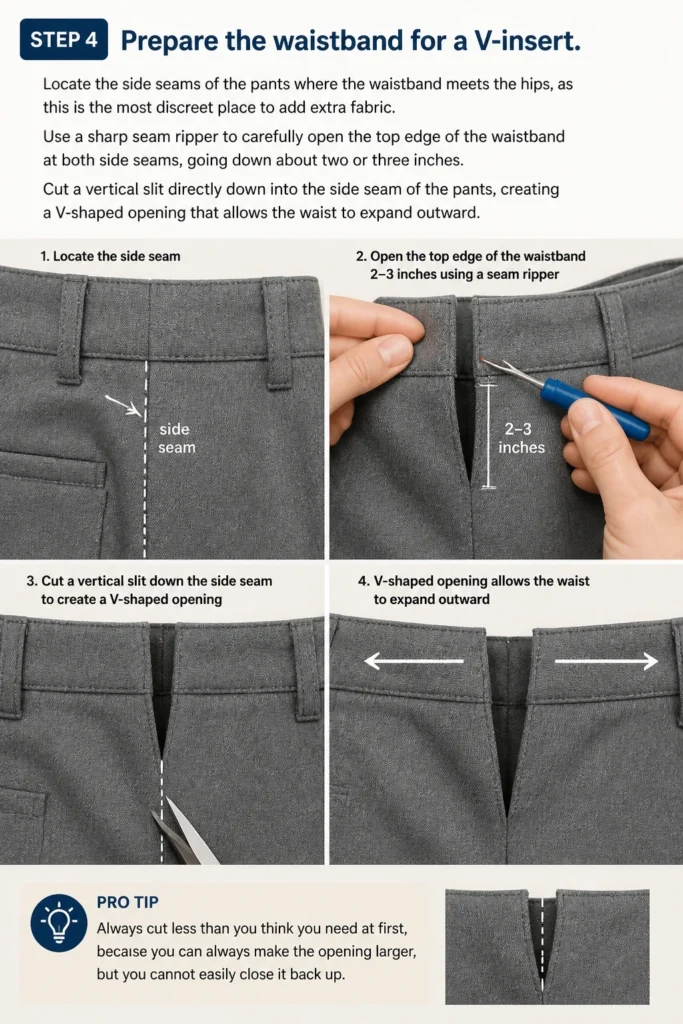
Use a sharp seam ripper to carefully open the top edge of the waistband at both side seams, going down about two or three inches.
Cut a vertical slit directly down into the side seam of the pants, creating a V-shaped opening that allows the waist to expand outward.
Pro Tip: Always cut less than you think you need at first, because you can always make the opening larger, but you cannot easily close it back up.
Step 5: Select and cut your insert fabric
Find a scrap piece of fabric that closely matches the color and weight of your pants, or choose a fun contrasting pattern for a custom look.
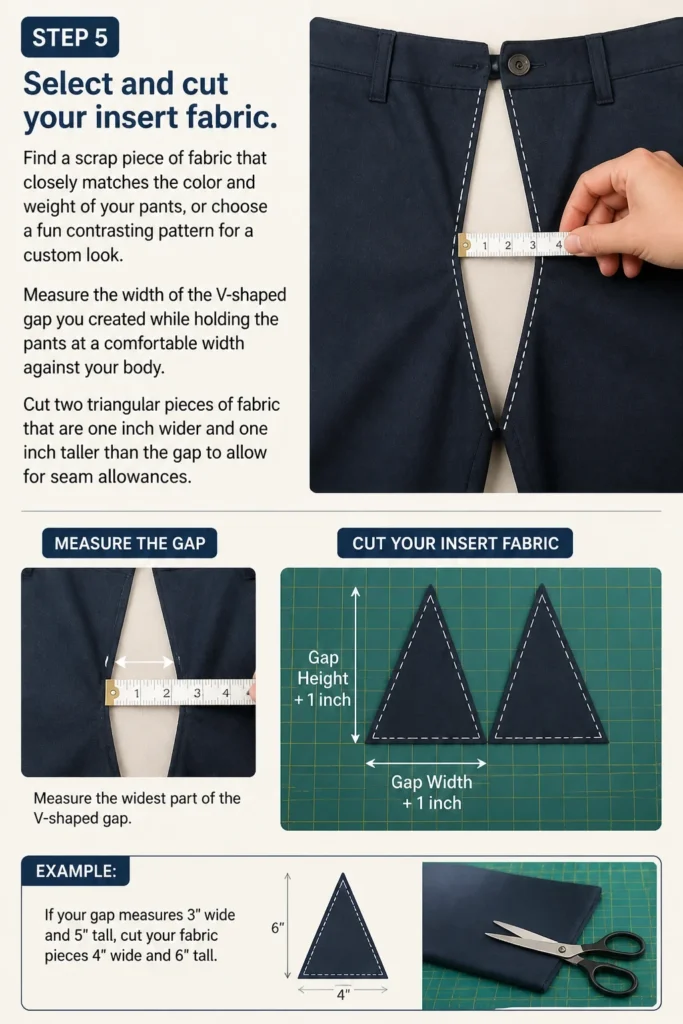
Measure the width of the V-shaped gap you created while holding the pants at a comfortable width against your body.
Cut two triangular pieces of fabric that are one inch wider and one inch taller than the gap to allow for seam allowances.
Step 6: Pin the inserts into place
Turn your pants inside out so you can work directly on the raw edges of the fabric and the new insert.
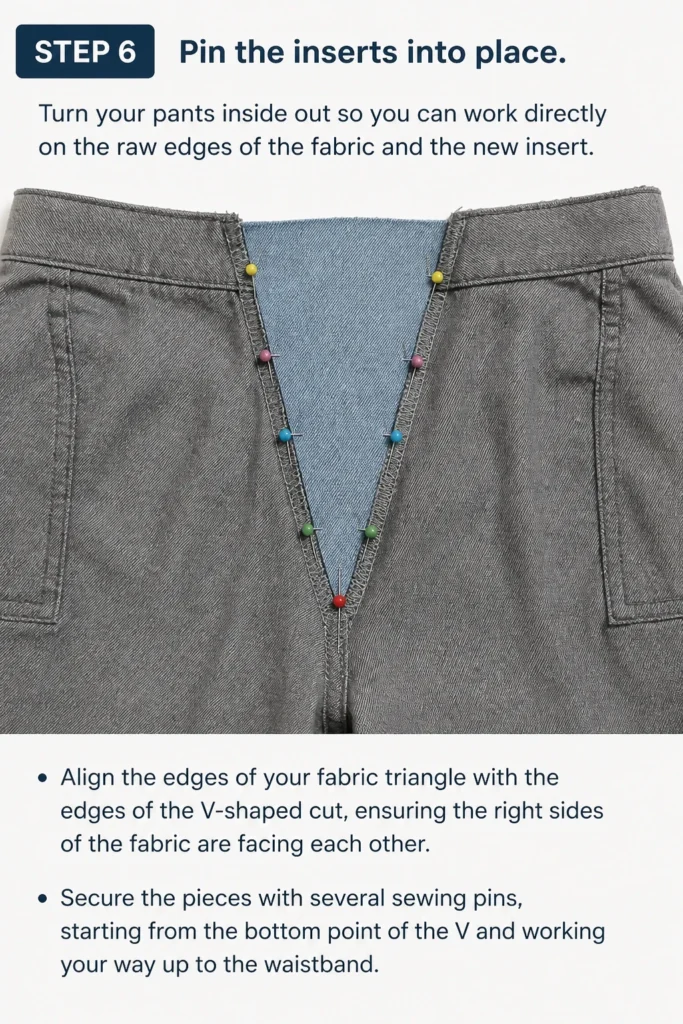
Align the edges of your fabric triangle with the edges of the V-shaped cut, ensuring the “right” sides of the fabric are facing each other.
Secure the pieces with several sewing pins, starting from the bottom point of the V and working your way up to the waistband.
Step 7: Sew the new side panels
Stitch along the pinned edges using a sturdy straight stitch or a zigzag stitch if your fabric has any stretch to it.
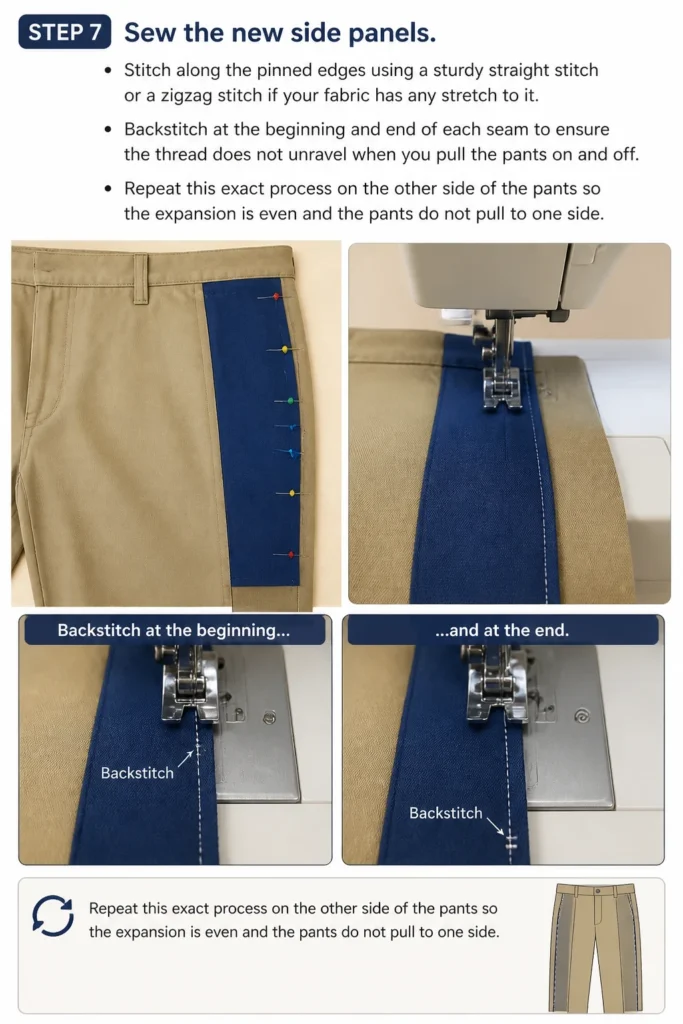
Backstitch at the beginning and end of each seam to ensure the thread does not unravel when you pull the pants on and off.
Repeat this exact process on the other side of the pants so the expansion is even and the pants do not pull to one side.
Step 8: Finish the top edge
Fold the top raw edge of your new fabric insert down so it aligns perfectly with the original top line of the waistband.
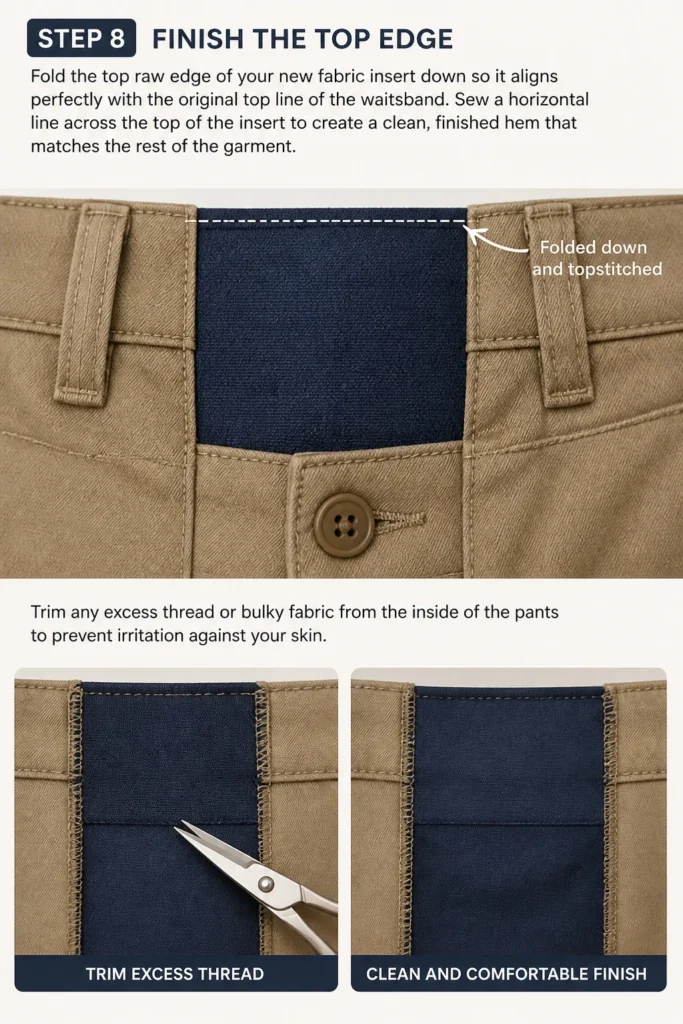
Sew a horizontal line across the top of the insert to create a clean, finished hem that matches the rest of the garment.
Trim any excess thread or bulky fabric from the inside of the pants to prevent irritation against your skin.
Step 9: Press the seams flat
Heat up an iron to the setting appropriate for your fabric type, using steam if the material allows for it.
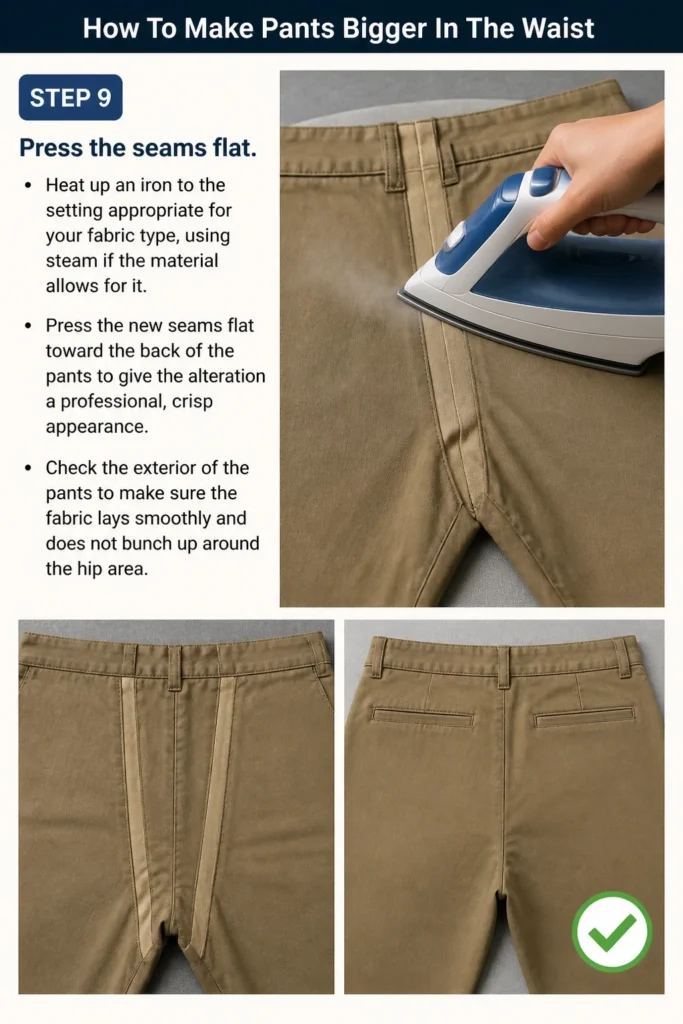
Press the new seams flat toward the back of the pants to give the alteration a professional, crisp appearance.
Check the exterior of the pants to make sure the fabric lays smoothly and does not bunch up around the hip area.
Step 10: Perform a final fit test
Put the pants on and move around, sitting down and standing up to ensure the new waistband is comfortable and secure.
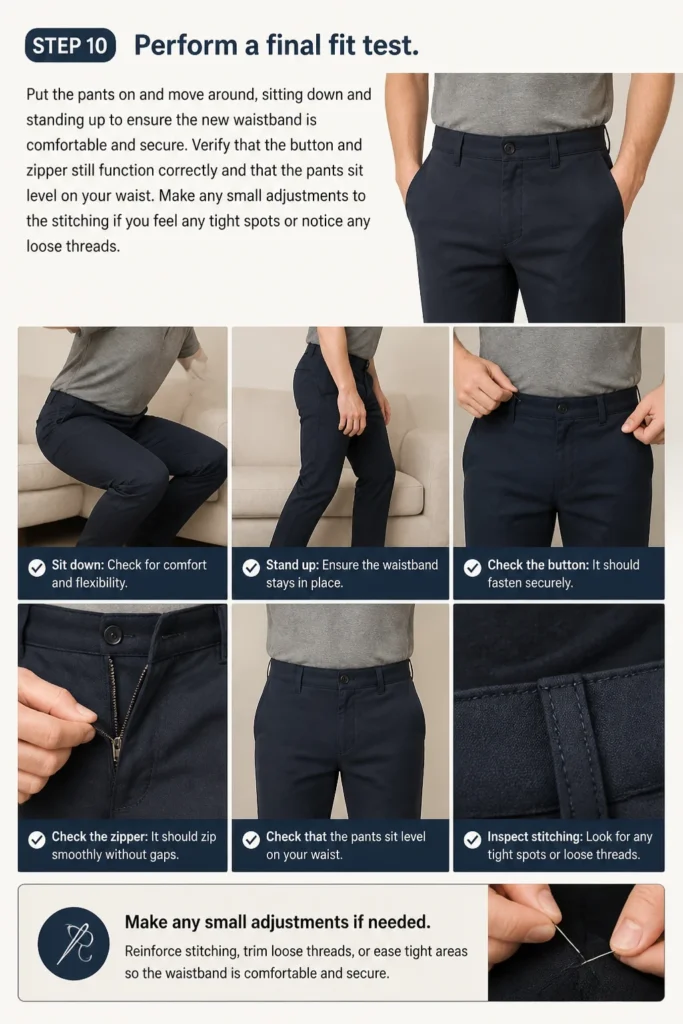
Verify that the button and zipper still function correctly and that the pants sit level on your waist.
Make any small adjustments to the stitching if you feel any tight spots or notice any loose threads.
Common Mistakes to Avoid
Using weak thread for denim
Standard all-purpose thread is often too thin to hold the tension of a denim waistband. If you use weak thread, the seams will likely pop the first time you sit down or bend over. Always opt for heavy-duty or upholstery thread when working with jeans or thick work pants.
Cutting through the belt loops
It is very tempting to cut wherever it seems easiest, but slicing through a belt loop makes the repair much harder to hide. Try to position your fabric inserts between belt loops or carefully remove a loop and sew it back on over the new seam. This keeps the structural integrity of the pants intact and looks much cleaner.
Neglecting the seam allowance
If you cut your fabric insert to the exact size of the gap, the pants will end up being too small once you sew the seams. You must always account for the quarter-inch or half-inch of fabric that gets tucked away during the sewing process. Measuring twice and cutting once is the only way to ensure the final fit is accurate.
Ignoring fabric grain
Fabric has a direction in which it stretches best, known as the grain. If you cut your insert pieces against the grain, they won’t move with your body, making the pants feel stiff and awkward. Always align the stretch of your insert fabric with the stretch of the waistband for maximum comfort.
Troubleshooting
The waistband is wavy after sewing
This usually happens when the fabric was stretched too much while it was being fed through the sewing machine. You can often fix this by steaming the area heavily with an iron and pressing it flat under a heavy book while it cools. If the waviness persists, you may need to rip out the stitches and re-sew the insert without pulling on the fabric.
The insert color is a poor match
If the fabric you added stands out too much and looks obvious, you can hide it by adding a belt to your outfit. Another option is to use fabric markers or dye to blend the insert into the original color of the pants. For denim, you can even use a bit of sandpaper to distress the new fabric so it matches the faded look of the rest of the jeans.
The pants feel loose in the hips but tight in the waist
This indicates that the V-insert was too wide at the top and too narrow at the bottom. To fix this, you should extend the point of the V-cut further down into the hip area to allow for a more gradual transition. This redistributes the tension and allows the pants to contour to your body shape more naturally.
Key Takeaways
- Choose the right method: Use water for minor stretching, extenders for temporary relief, and fabric inserts for permanent fixes.
- Match your materials: Always use heavy-duty thread and similar fabric weights to ensure the repair lasts.
- Start small: You can always cut more fabric away, but you cannot easily replace what has been removed.
- Press your work: Using an iron is the difference between a homemade look and a professional-quality alteration.
- Balance the sides: Adding small inserts to both sides is better than adding one large insert to the back.
Frequently Asked Questions
Can I make my pants bigger without sewing?
Yes, you can use the water-stretching method or a button extender to gain about an inch of space without picking up a needle. These methods are great for pants that are just slightly snug, but they won’t work if you need to go up a full size. For a significant change, sewing in a fabric gusset is the only reliable long-term solution.
Will stretching my jeans ruin the fabric?
Stretching denim while damp is generally safe, but you should avoid over-stretching to the point where the fibers begin to snap. If you hear a popping sound while stretching, stop immediately as you are damaging the structural integrity of the cotton. Always let the fabric dry naturally rather than using high heat, which can cause the fibers to shrink back down.
How many sizes can I actually go up?
Most pants can be safely increased by one or perhaps two sizes using the side-insert method. If you try to go beyond two sizes, the proportions of the pockets, fly, and legs will start to look distorted. At that point, the pants may no longer hang correctly on your frame, and it might be better to look for a different pair.
What fabric should I use for the inserts?
The best fabric is usually a scrap from a similar pair of pants or a heavy-duty twill. If you are altering jeans, you can often find “denim patches” at craft stores that provide the perfect weight and durability. If you want comfort, using a thick elastic band as the insert allows the waistband to move with you throughout the day.
Our Top Recommended Finds
- Heavy-Duty Seam Ripper: A sharp, ergonomic ripper makes opening waistbands much faster and prevents accidental tears in the main fabric.
- Metal Button Extenders: These are much more durable than the plastic versions and can be swapped between different pairs of pants in seconds.
- Fabric Measuring Tape: A flexible tape measure is essential for getting an accurate reading of your waist and the fabric inserts you need to cut.
Take Control Of Your Wardrobe Today
Learning how to alter your own clothing is a liberating skill that saves money and reduces waste.
Now that you know how to expand a waistband, you can stop struggling with tight clothes and start enjoying a custom fit.
Grab an old pair of pants that have been sitting in the back of your drawer and try the stretching or sewing method today to see the results for yourself.
Beginner-friendly templates, step-by-step guides,
and weekly project ideas in your inbox.