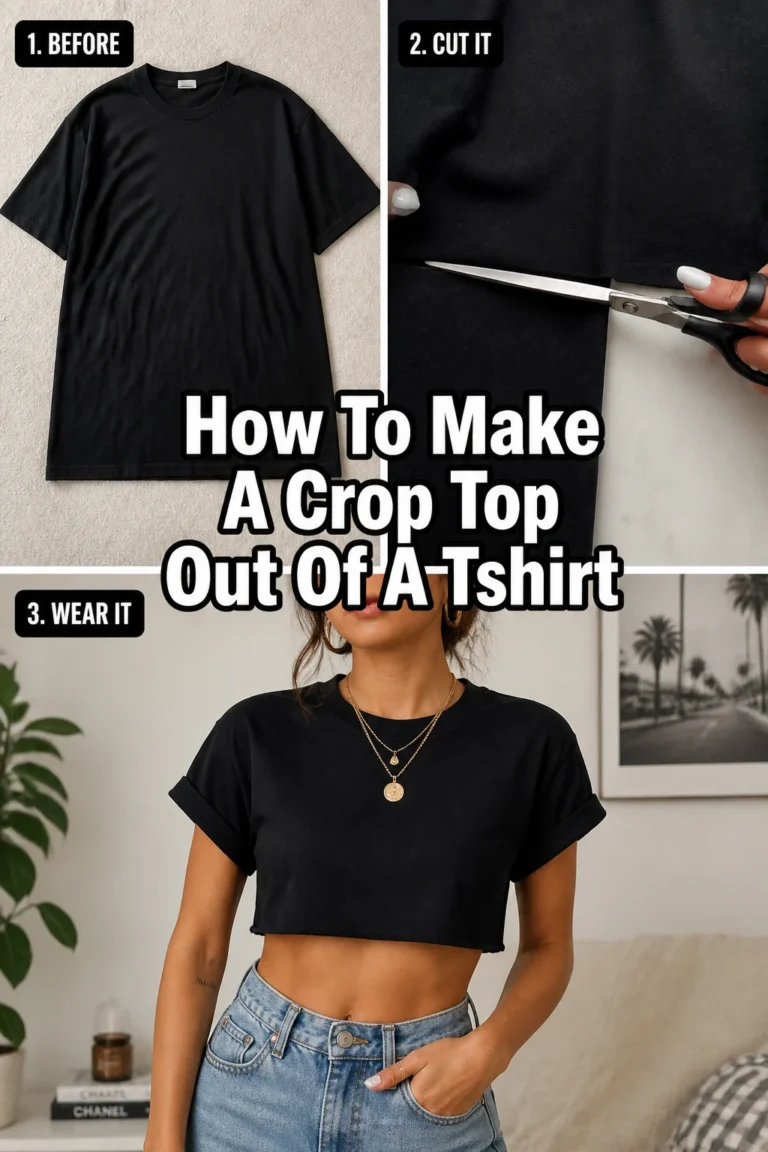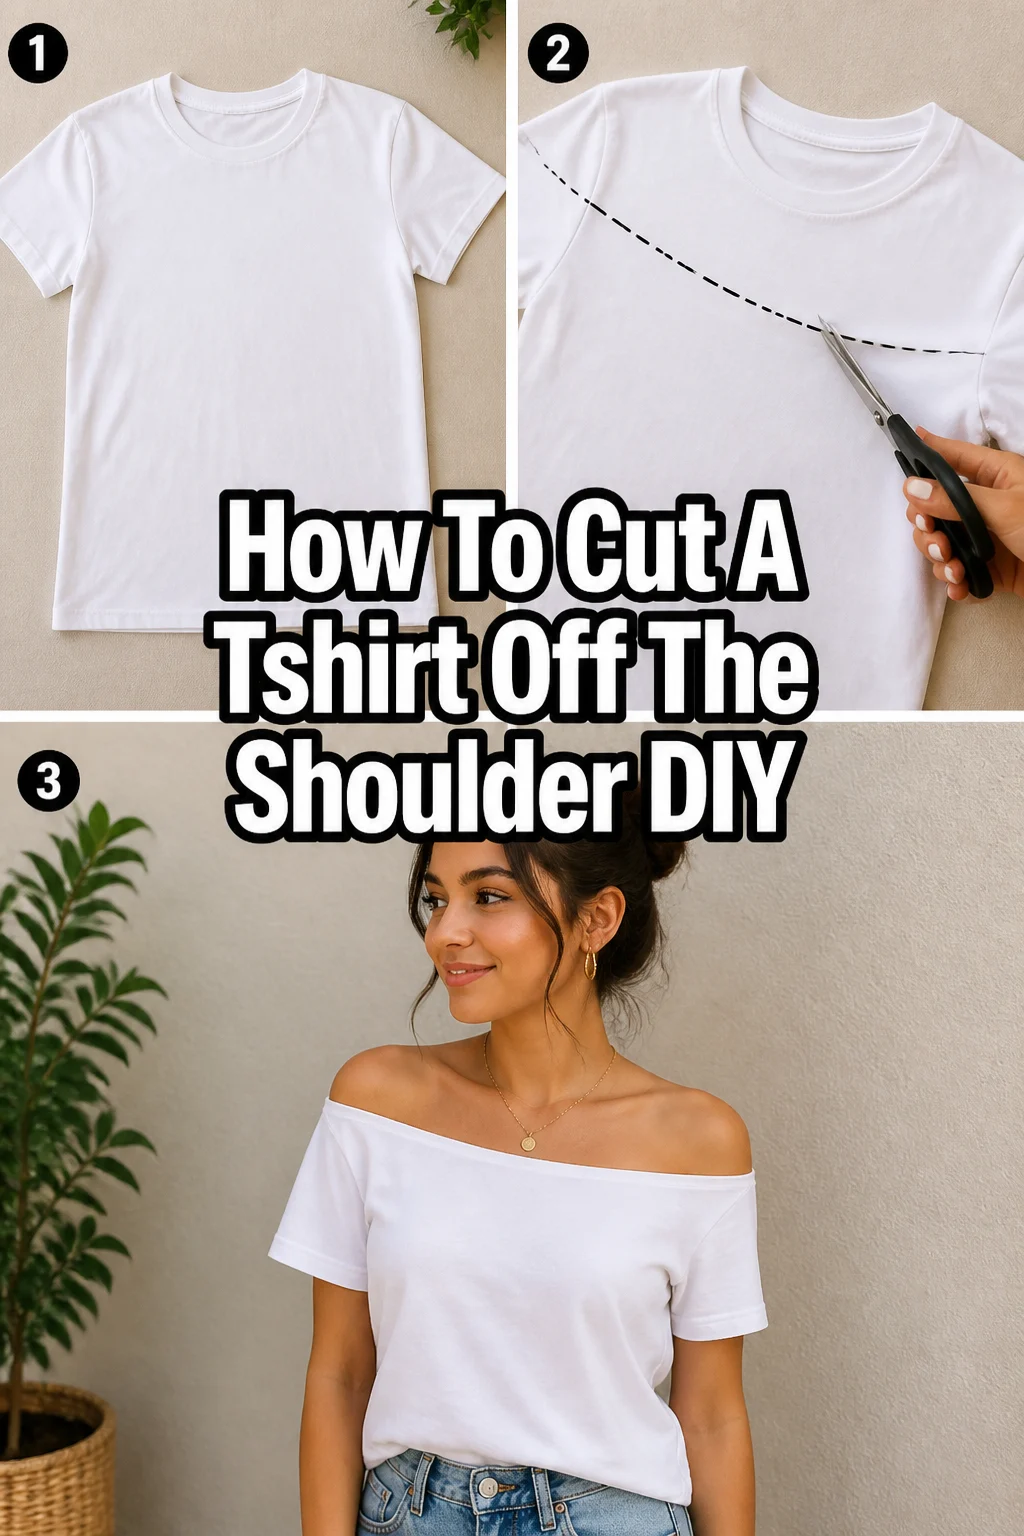
👕 How To Cut A Tshirt Off The Shoulder DIY

Beginner-friendly templates, step-by-step guides,
and weekly project ideas in your inbox.
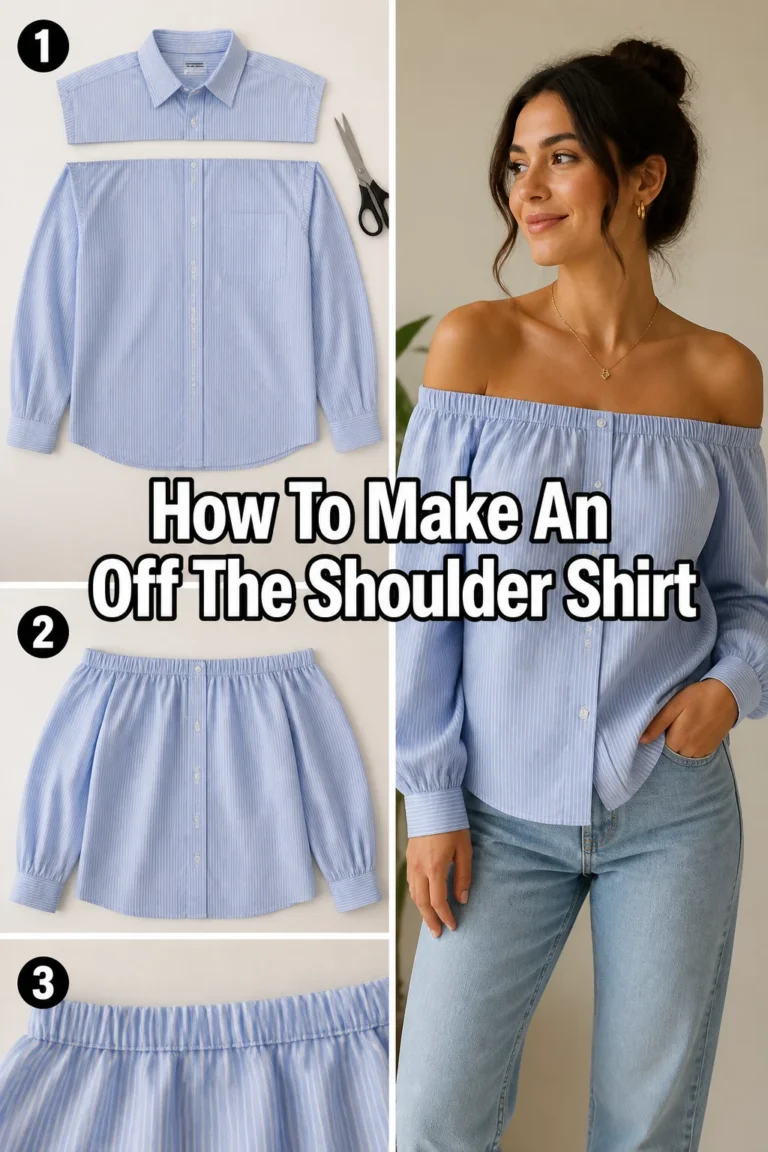
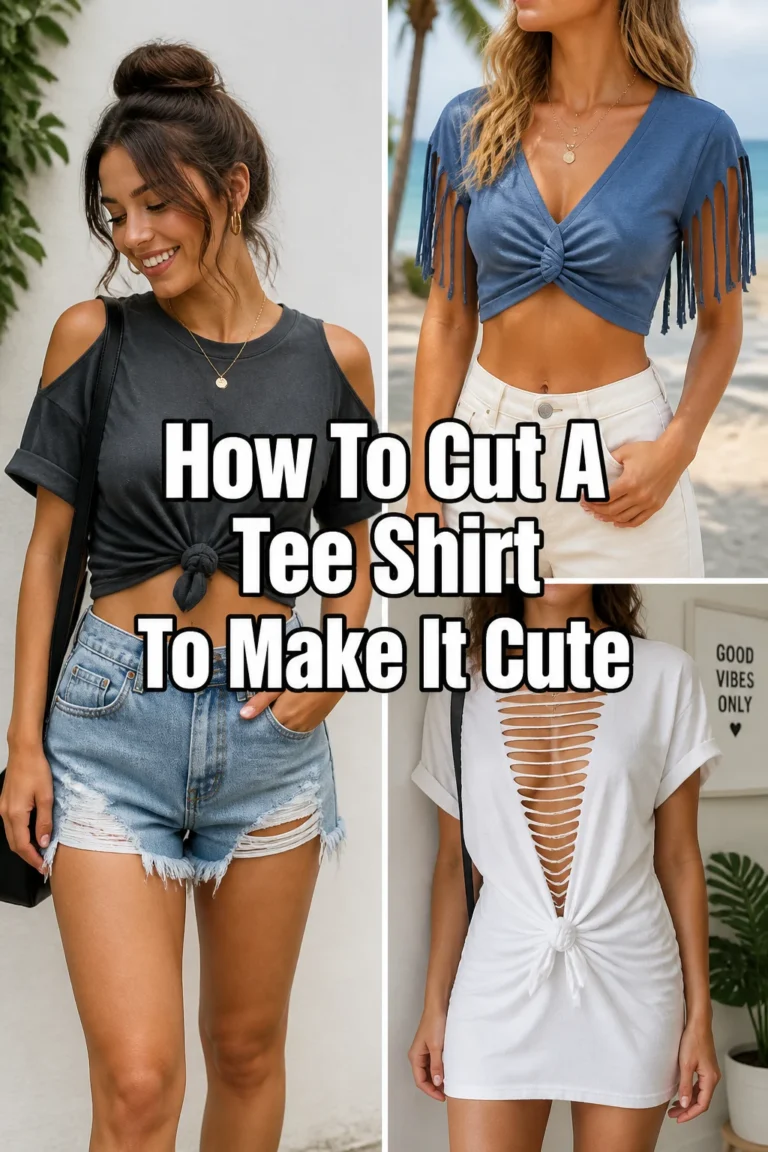
I remember wanting that perfect relaxed, off-the-shoulder look but not wanting to spend extra money on a new top.
Taking a pair of scissors to an old t-shirt felt a bit daunting at first, but with a few simple steps, it became incredibly easy.
This guide shares the exact method I use to transform basic tees into stylish, comfortable off-the-shoulder tops, giving you confidence with every snip.

Quick Overview
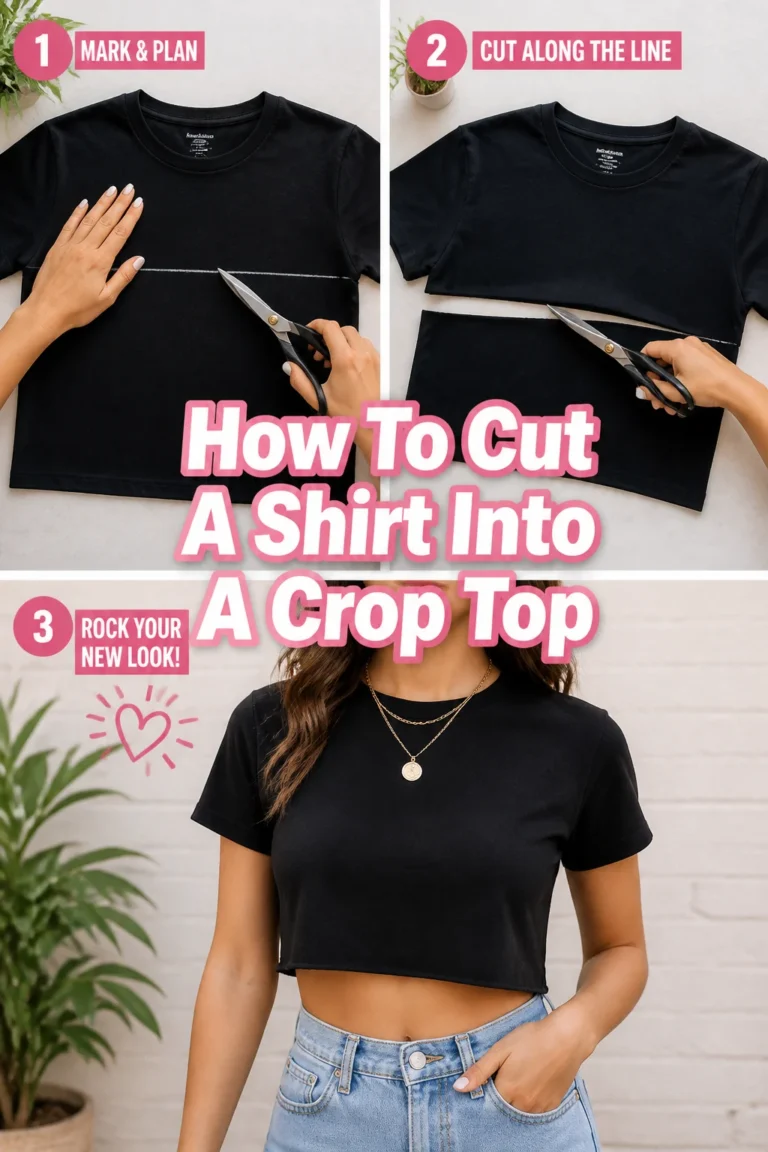
Transforming a regular t-shirt into a trendy off-the-shoulder top is a fun and simple DIY project.
You’ll learn how to measure, cut, and finish your tee for a perfect fit and stylish new look.
- Time needed: 15-30 minutes
- Difficulty: Beginner
- What you’ll need: A t-shirt, sharp fabric scissors, tailor’s chalk or marker, measuring tape, safety pins (optional)
Step-by-Step Instructions
Step 1: Choose Your T-Shirt Wisely
Pick a t-shirt that’s a bit oversized or made from a soft, stretchy material. This provides enough fabric for the drape and ensures comfort.
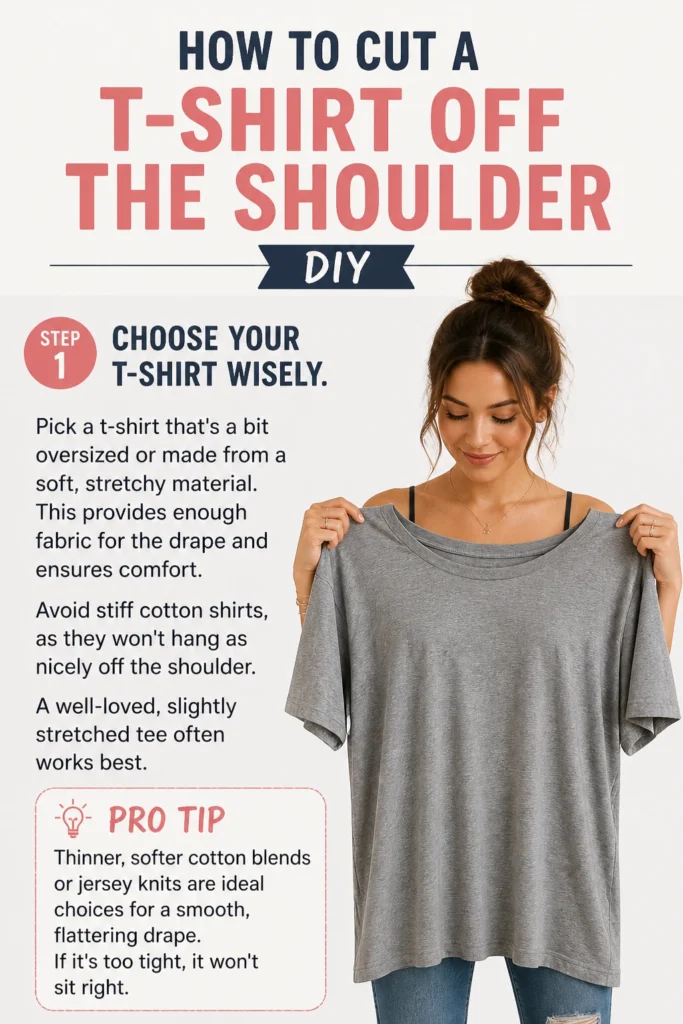
Avoid stiff cotton shirts, as they won’t hang as nicely off the shoulder. A well-loved, slightly stretched tee often works best.
Pro Tip: Thinner, softer cotton blends or jersey knits are ideal choices for a smooth, flattering drape. If it’s too tight, it won’t sit right.
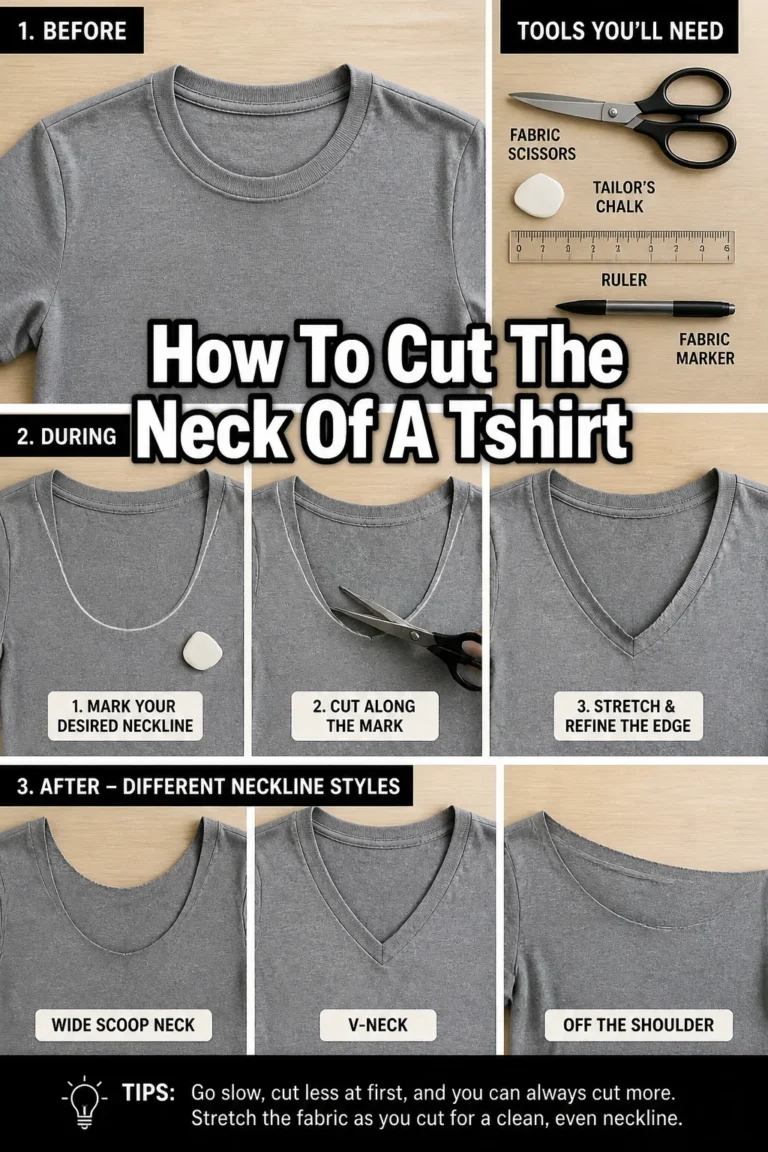
Step 2: Try On and Mark Your Desired Neckline
Put the t-shirt on as you normally would. Stand in front of a mirror to visualize where you want the new neckline to sit.
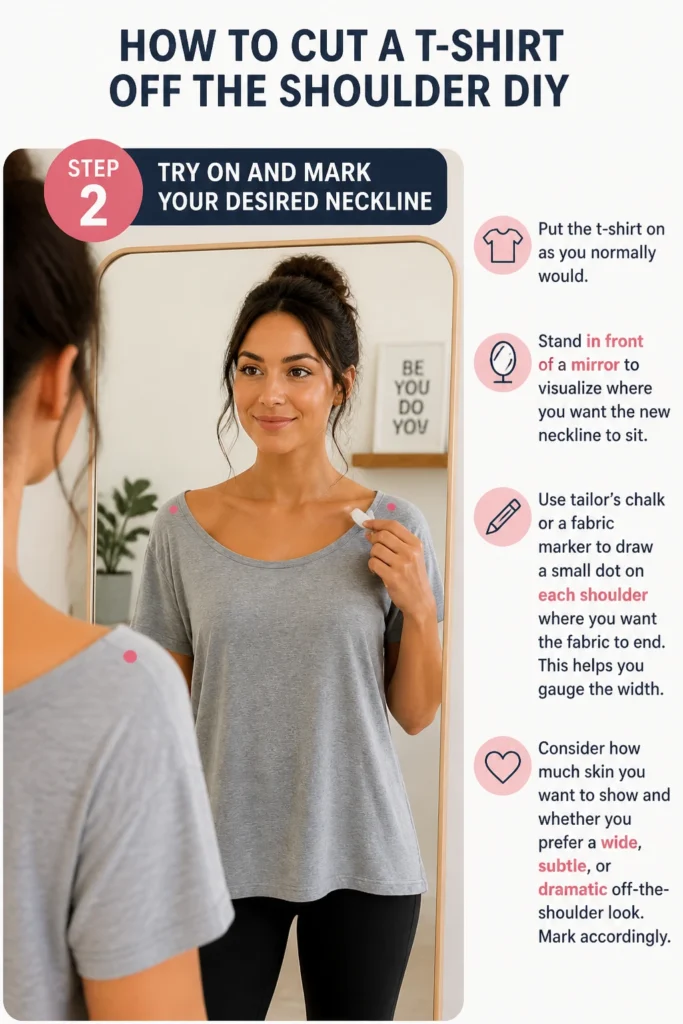
Use tailor’s chalk or a fabric marker to draw a small dot on each shoulder where you want the fabric to end. This helps you gauge the width.
Consider how much skin you want to show and whether you prefer a wide, subtle, or dramatic off-the-shoulder look. Mark accordingly.
Step 3: Lay Flat and Smooth
Take the t-shirt off and lay it flat on a clean, hard surface. Ensure it is perfectly smooth and free of wrinkles.
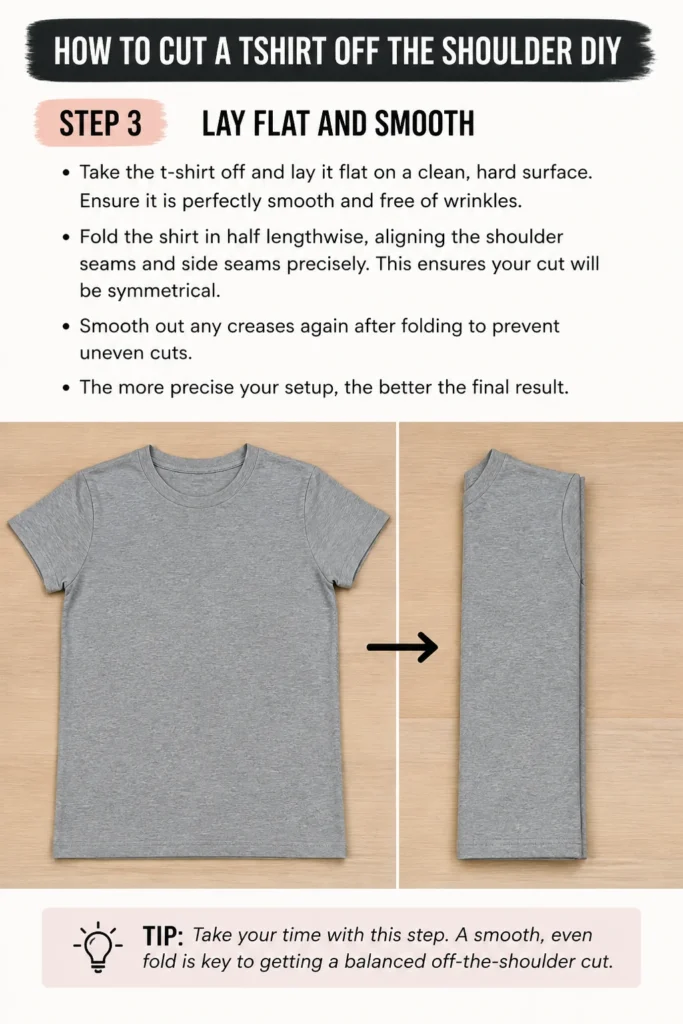
Fold the shirt in half lengthwise, aligning the shoulder seams and side seams precisely. This ensures your cut will be symmetrical.
Smooth out any creases again after folding to prevent uneven cuts. The more precise your setup, the better the final result.
Step 4: Draw Your Cut Line
Start from one of the shoulder dots you marked earlier. Draw a gentle, curved line across the front of the shirt, connecting to the other shoulder dot.
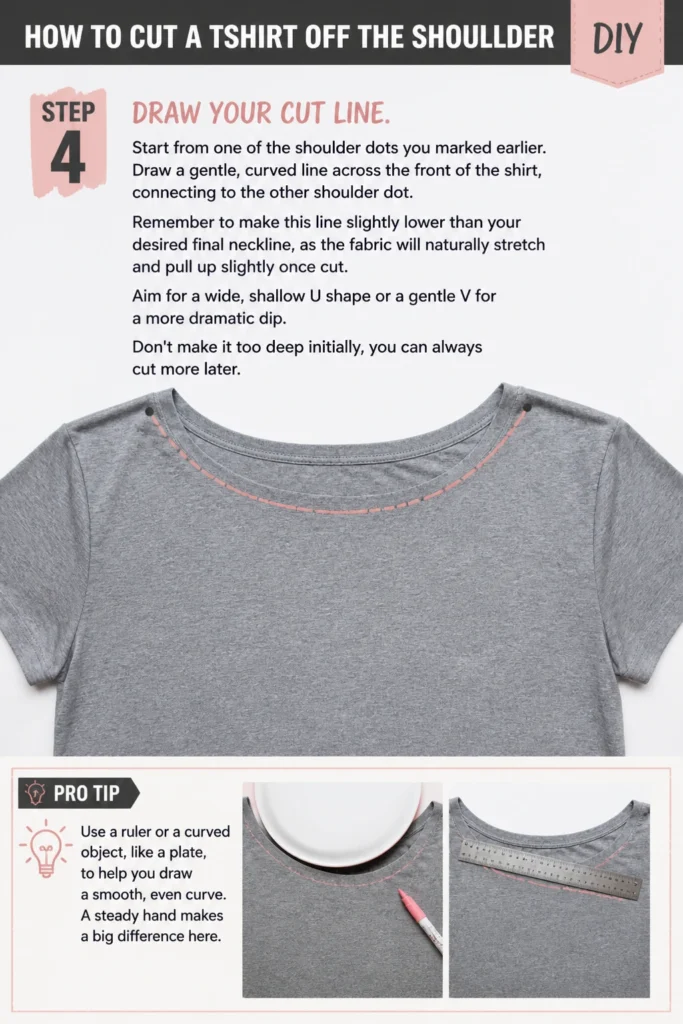
Remember to make this line slightly lower than your desired final neckline, as the fabric will naturally stretch and pull up slightly once cut.
Aim for a wide, shallow “U” shape or a gentle “V” for a more dramatic dip. Don’t make it too deep initially; you can always cut more later.
Pro Tip: Use a ruler or a curved object, like a plate, to help you draw a smooth, even curve. A steady hand makes a big difference here.
Step 5: Cut Along Your Marked Line
Use sharp fabric scissors to carefully cut along the chalk line you just drew. Cut through both layers of the folded shirt simultaneously.
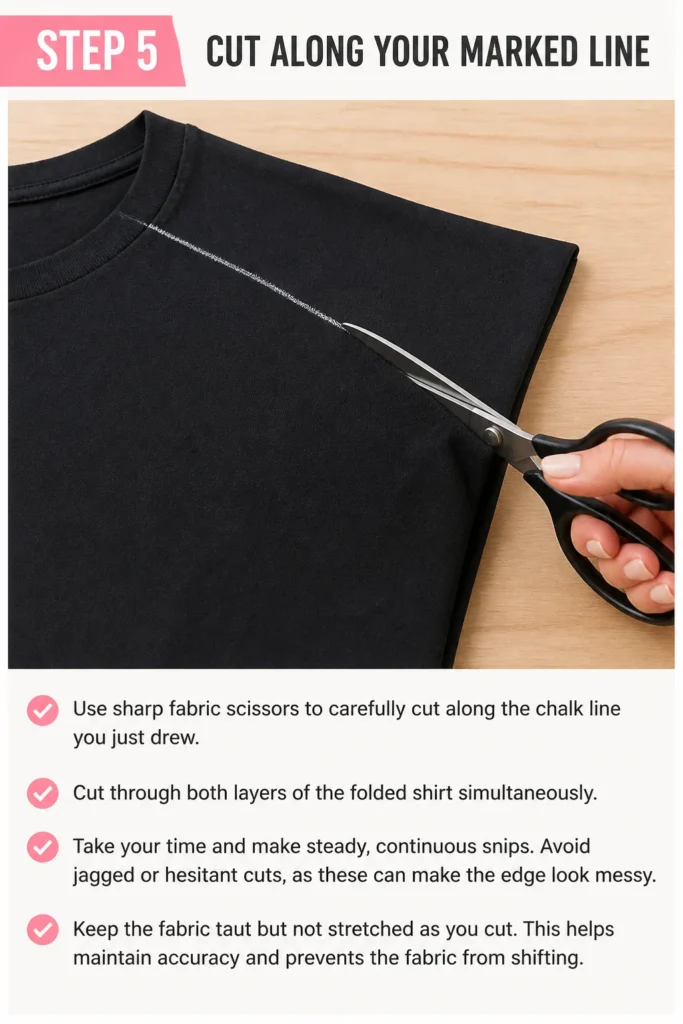
Take your time and make steady, continuous snips. Avoid jagged or hesitant cuts, as these can make the edge look messy.
Keep the fabric taut but not stretched as you cut. This helps maintain accuracy and prevents the fabric from shifting.
Step 6: Assess the Neckline and Adjust
Unfold the t-shirt and try it on again. Check how the new neckline sits off your shoulders.
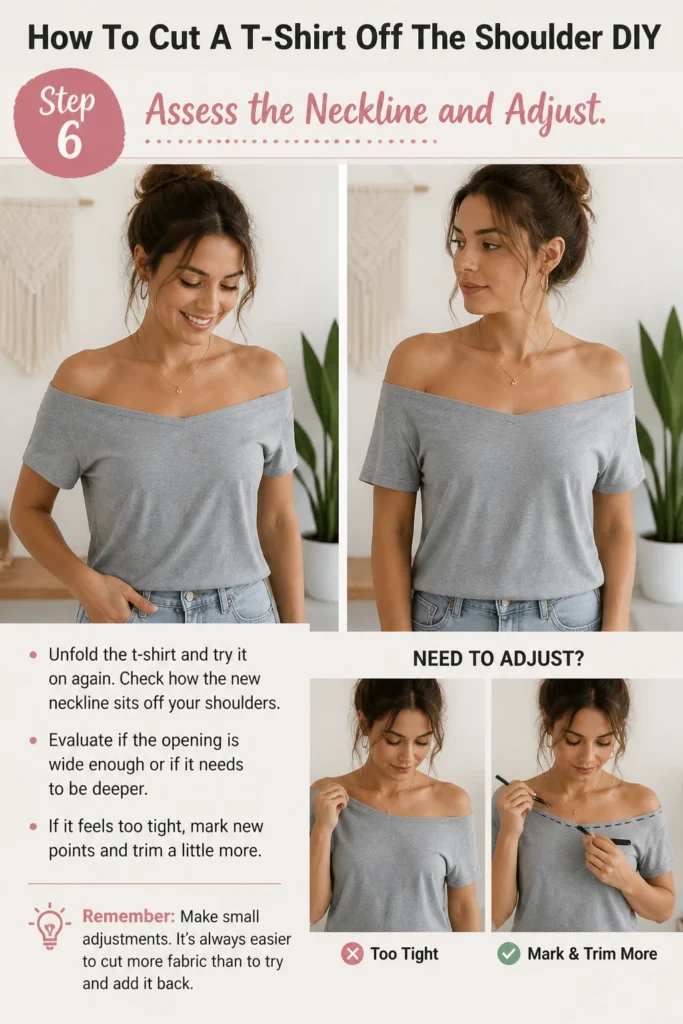
Evaluate if the opening is wide enough or if it needs to be deeper. If it feels too tight, mark new points and trim a little more.
Remember to make small adjustments. It’s always easier to cut more fabric than to try and add it back.
Step 7: Create the Rolled Edge (Optional but Recommended)
Gently pull on the newly cut edge of the fabric. This encourages the raw edge to naturally roll inward, creating a neat, finished look.
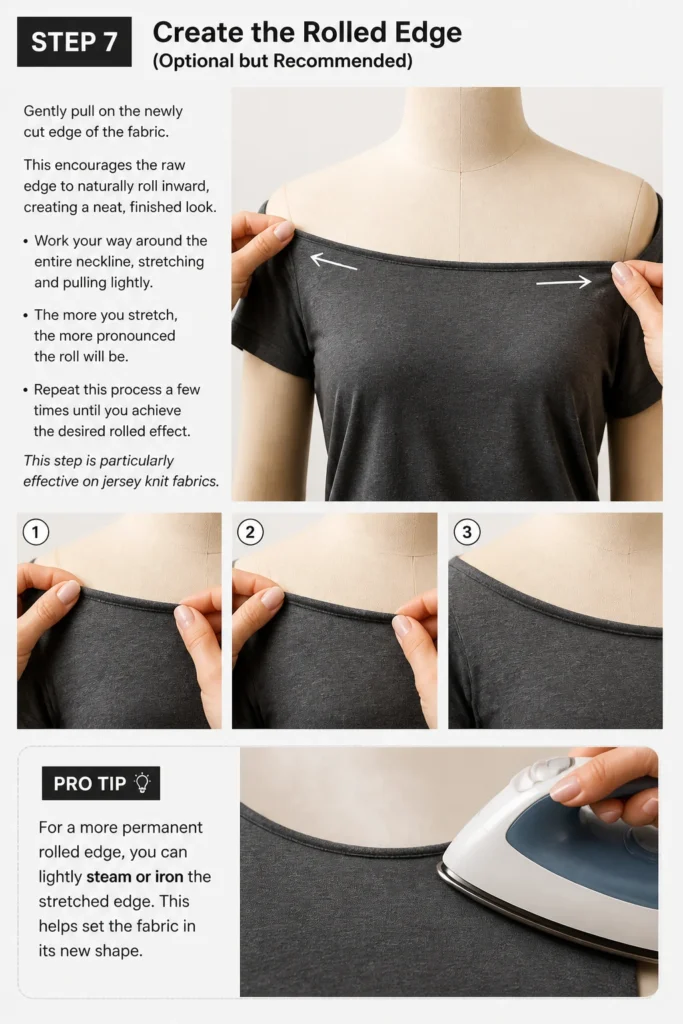
Work your way around the entire neckline, stretching and pulling lightly. The more you stretch, the more pronounced the roll will be.
Repeat this process a few times until you achieve the desired rolled effect. This step is particularly effective on jersey knit fabrics.
Pro Tip: For a more permanent rolled edge, you can lightly steam or iron the stretched edge. This helps set the fabric in its new shape.
Step 8: Reinforce the Shoulders (For Durability)
Consider adding a few small stitches at the shoulder seams where the new neckline meets the sleeve. This helps prevent further stretching or tearing.
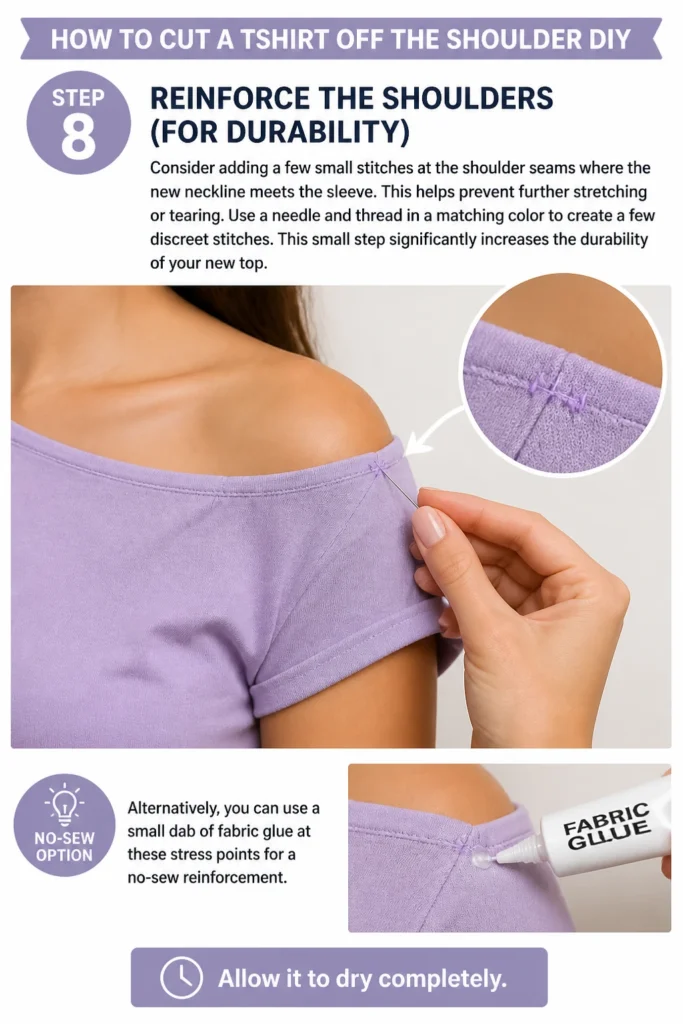
Use a needle and thread in a matching color to create a few discreet stitches. This small step significantly increases the durability of your new top.
Alternatively, you can use a small dab of fabric glue at these stress points for a no-sew reinforcement. Allow it to dry completely.
Common Mistakes to Avoid
Cutting Too Deep Initially
Many people get excited and cut the neckline much deeper than intended on their first try. This often results in a shirt that exposes too much or doesn’t sit comfortably.
Always start with a shallower cut than you think you need. You can always go back and trim a little more, but you can’t add fabric back once it’s cut.
Using Dull Scissors
Attempting to cut fabric with dull scissors can lead to jagged edges, frayed fabric, and a generally messy finish. Dull blades tear rather than cut cleanly.
Invest in a good pair of sharp fabric scissors specifically for crafting. Clean, precise cuts are essential for a professional-looking DIY project.
Skipping the Symmetry Step
Failing to fold the shirt perfectly in half before cutting often leads to an uneven neckline. One side might be higher or wider than the other, making the shirt look lopsided.
Always take the time to carefully fold and align your t-shirt. This simple step ensures a symmetrical and balanced off-the-shoulder opening.
Overstretching While Cutting
Pulling the fabric too taut while you’re making your cut can cause the material to distort and stretch out of shape. This can result in an uneven or wavy neckline.
Keep the fabric flat and smooth but avoid excessive stretching during the cutting process. Gentle tension is fine, but don’t pull aggressively.
Troubleshooting
Neckline Feels Too Tight/Doesn’t Sit Off Shoulder
If your newly cut neckline doesn’t comfortably sit off your shoulders or feels too restrictive, it means you haven’t cut enough fabric away.
Lay the shirt flat again, mark a slightly wider or deeper curve, and trim a small amount more. Try it on after each trim until you achieve the desired drape.
Edges Look Frayed or Messy
Fraying or messy edges usually happen if your scissors weren’t sharp enough or if the fabric itself is prone to unraveling.
Gently pull on the edges to encourage a natural roll. For persistent fraying, you can apply a tiny amount of fabric glue or Fray Check along the raw edge to seal it.
Neckline is Uneven or Lopsided
An uneven neckline is a common issue resulting from not folding the shirt perfectly or shifting the fabric during the cut.
Put the shirt on and identify the higher side. Mark a new, symmetrical line to match the lower side, then carefully trim the excess fabric. Small adjustments are key here.
Key Takeaways
- Always choose a soft, stretchy, and slightly oversized t-shirt for the best drape.
- Mark your desired neckline while wearing the shirt to visualize the cut accurately.
- Fold the t-shirt perfectly in half lengthwise to ensure a symmetrical cut.
- Start with a shallower cut; you can always remove more fabric, but you can’t add it back.
- Use sharp fabric scissors for clean edges and gently pull the cut edge to create a natural roll.
- Reinforce shoulder seams with a few stitches or fabric glue for added durability.
Frequently Asked Questions
Can I do this with any type of t-shirt fabric?
While you can cut most t-shirts, results vary greatly depending on the fabric. Soft, stretchy materials like jersey knit, rayon, or thin cotton blends work best for the natural roll and drape.
Stiffer cotton or thick fabrics may not roll as nicely and could look bulky or rigid off the shoulder. Always consider the fabric’s natural properties.
Do I need to hem the new neckline after cutting?
No, hemming is not typically required or even recommended for this DIY style. The beauty of the off-the-shoulder t-shirt is its raw, slightly distressed edge.
Gently stretching the cut edge encourages the fabric to roll inward, creating a natural, finished look without any sewing. This is what gives it that relaxed, casual vibe.
How do I prevent the neckline from stretching out too much over time?
Overstretching can be a concern, especially with very soft fabrics. Reinforcing the shoulder seams with a few small stitches or a dab of fabric glue can help prevent excessive stretching.
Additionally, avoid pulling the shirt on or off aggressively, and consider air-drying it instead of machine drying to preserve its shape.
Can I make this project reversible?
Once you cut the t-shirt, the modification is permanent. It won’t be reversible back to its original crew neck or V-neck style.
However, you can still wear the shirt as a wider-neck top if you don’t want it completely off the shoulder. Just be mindful that the original neckline is gone.
Our Top Recommended Finds
- Sharp Fabric Scissors: Essential for clean, precise cuts without fraying your fabric. A good pair makes all the difference.
- Tailor’s Chalk or Fabric Marker: Allows you to draw clear, visible lines that disappear or wash out easily after cutting.
- Measuring Tape: Crucial for accurate marking and ensuring your cuts are even and symmetrical.
Embrace Your Inner Designer Today
You now have all the knowledge and steps to confidently transform an ordinary t-shirt into a stylish, custom off-the-shoulder top.
This simple DIY project is a fantastic way to refresh your wardrobe, save money, and express your unique style.
Grab an old tee and your scissors, and start creating your new favorite top this afternoon!
Beginner-friendly templates, step-by-step guides,
and weekly project ideas in your inbox.