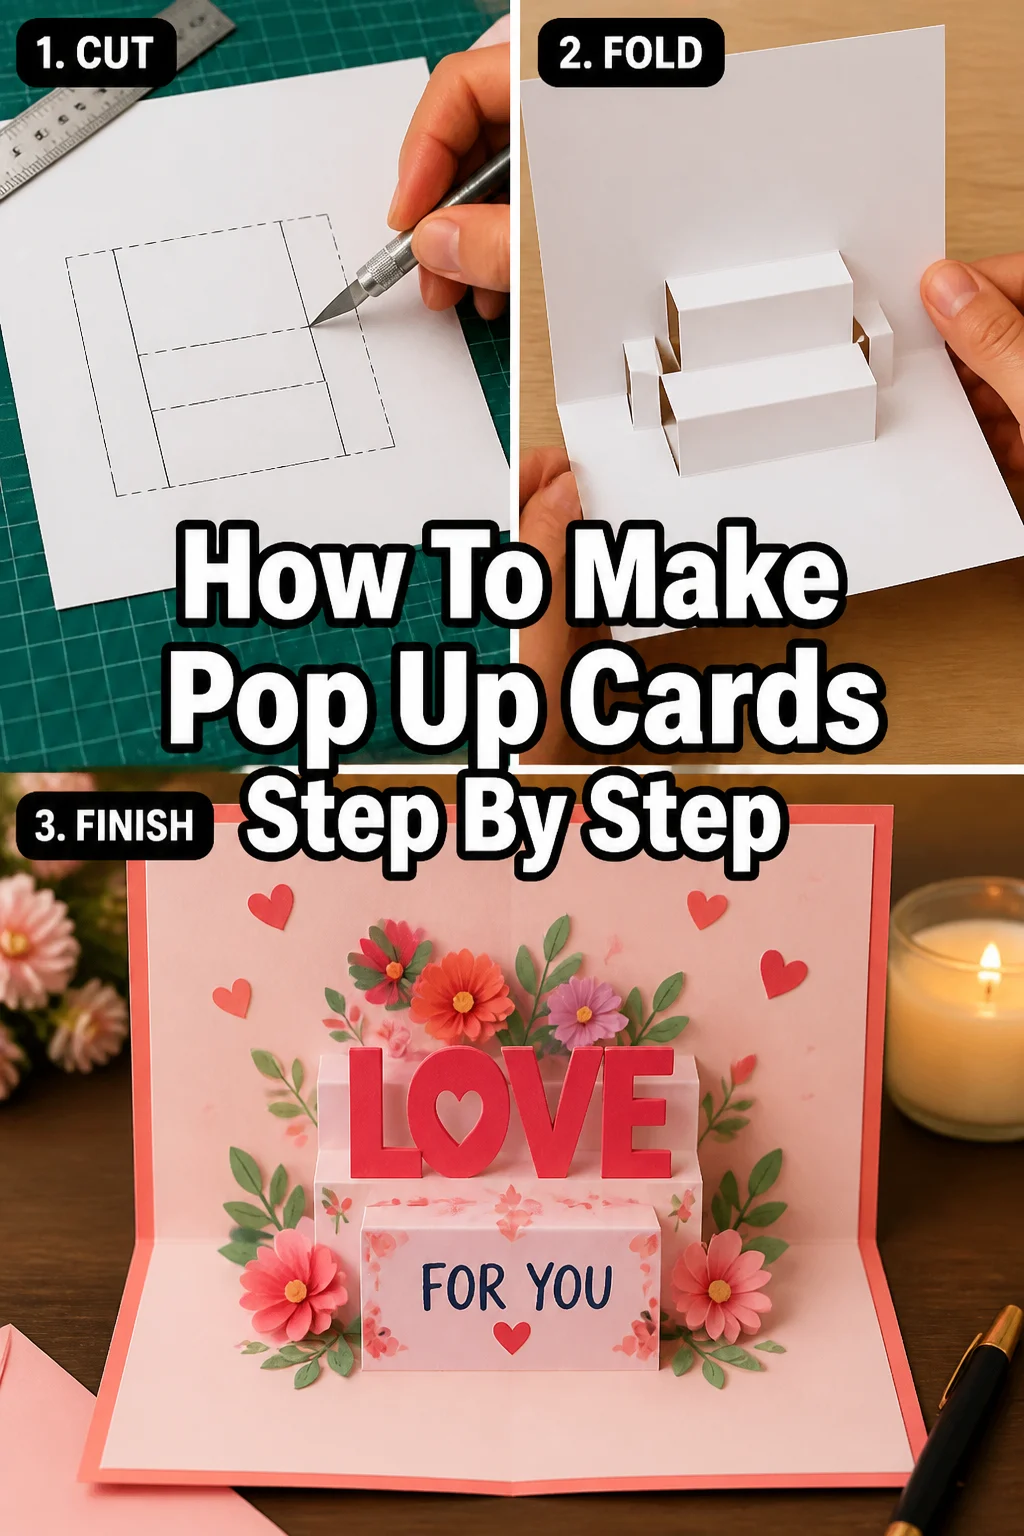
🎁 How To Make Pop Up Cards Step By Step

Beginner-friendly templates, step-by-step guides,
and weekly project ideas in your inbox.
There’s a special magic in a pop-up card.
That moment of surprise when a flat piece of paper transforms into a miniature scene is truly delightful.
I remember the pure joy of making my first pop-up card for my grandmother; her smile was my greatest reward, showing me the power of handmade gifts.

Quick Overview
This guide will walk you through creating a charming basic pop-up card, perfect for any occasion. You’ll learn the fundamental techniques to bring your paper creations to life.
- Time needed: 1-2 hours (depending on complexity and decoration)
- Difficulty: Beginner
- What you’ll need: Cardstock, scissors, craft knife, ruler, scoring tool, glue, pencil
Step-by-Step Instructions
Step 1: Gather Your Materials
Before you begin, ensure all your supplies are ready and within reach. Having everything organized makes the crafting process smoother and more enjoyable.
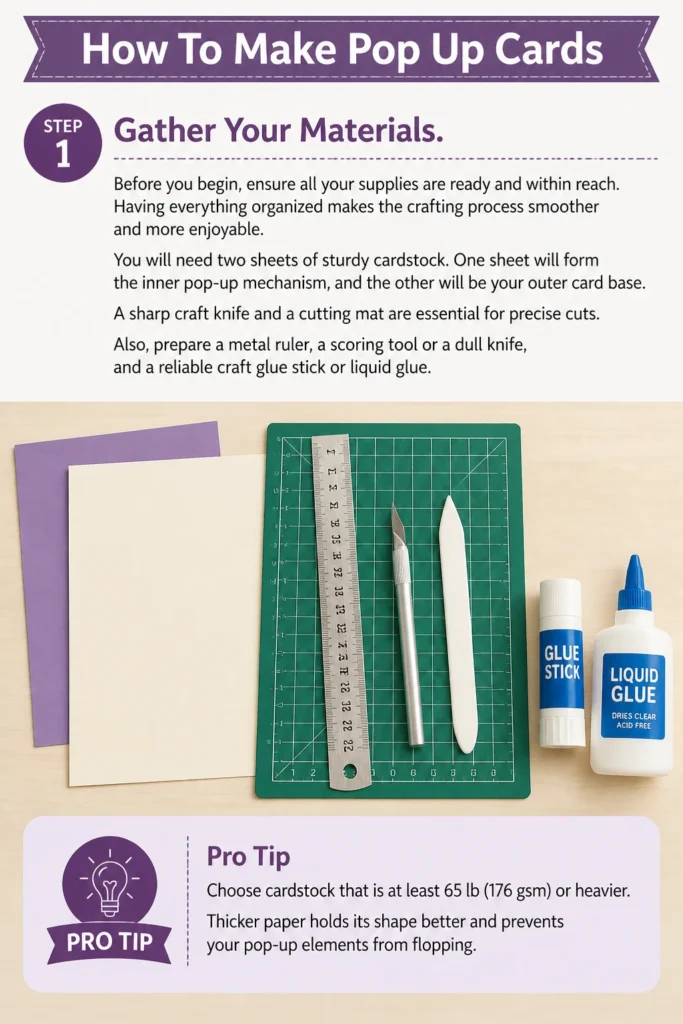
You will need two sheets of sturdy cardstock. One sheet will form the inner pop-up mechanism, and the other will be your outer card base.
A sharp craft knife and a cutting mat are essential for precise cuts. Also, prepare a metal ruler, a scoring tool or a dull knife, and a reliable craft glue stick or liquid glue.
Pro Tip: Choose cardstock that is at least 65 lb (176 gsm) or heavier. Thicker paper holds its shape better and prevents your pop-up elements from flopping.
Step 2: Prepare Your Inner Card Base
Take one sheet of cardstock, which will be the inner part of your pop-up. This piece will hold the actual pop-up mechanism.
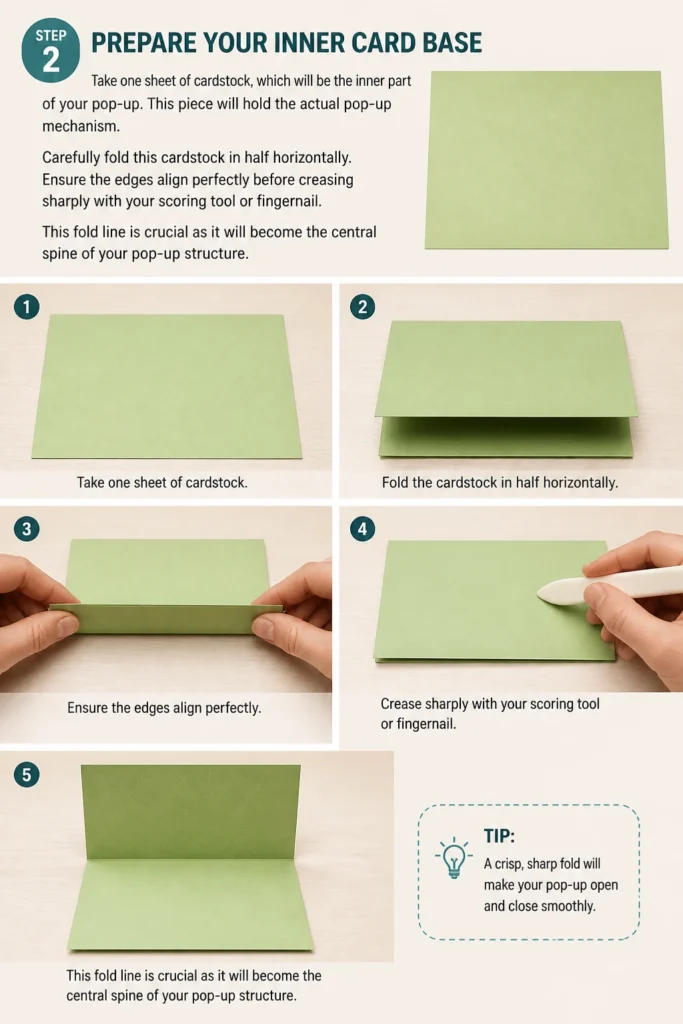
Carefully fold this cardstock in half horizontally. Ensure the edges align perfectly before creasing sharply with your scoring tool or fingernail.
This fold line is crucial as it will become the central spine of your pop-up structure.
Step 3: Mark and Cut the Pop-Up Slits
With the inner cardstock still folded, measure and mark two parallel lines along the folded edge. These lines will determine the width of your pop-up platform.
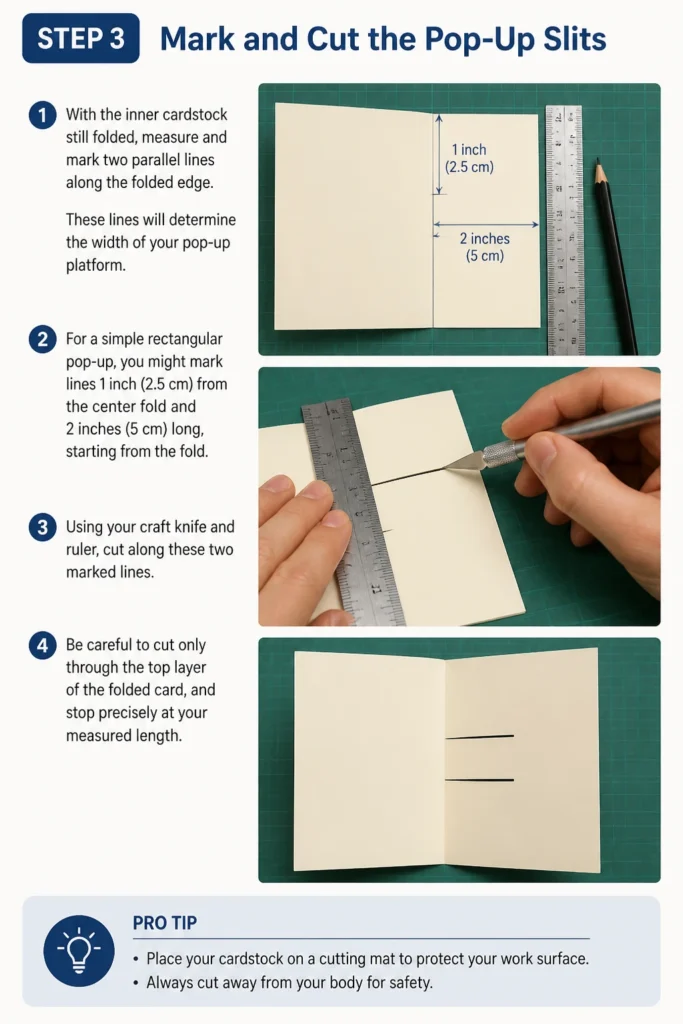
For a simple rectangular pop-up, you might mark lines 1 inch (2.5 cm) from the center fold and 2 inches (5 cm) long, starting from the fold.
Using your craft knife and ruler, cut along these two marked lines. Be careful to cut only through the top layer of the folded card, and stop precisely at your measured length.
Pro Tip: Place your cardstock on a cutting mat to protect your work surface. Always cut away from your body for safety.
Step 4: Create the Pop-Up Platform
After making your two parallel cuts, gently open the folded cardstock. You should see two slits.
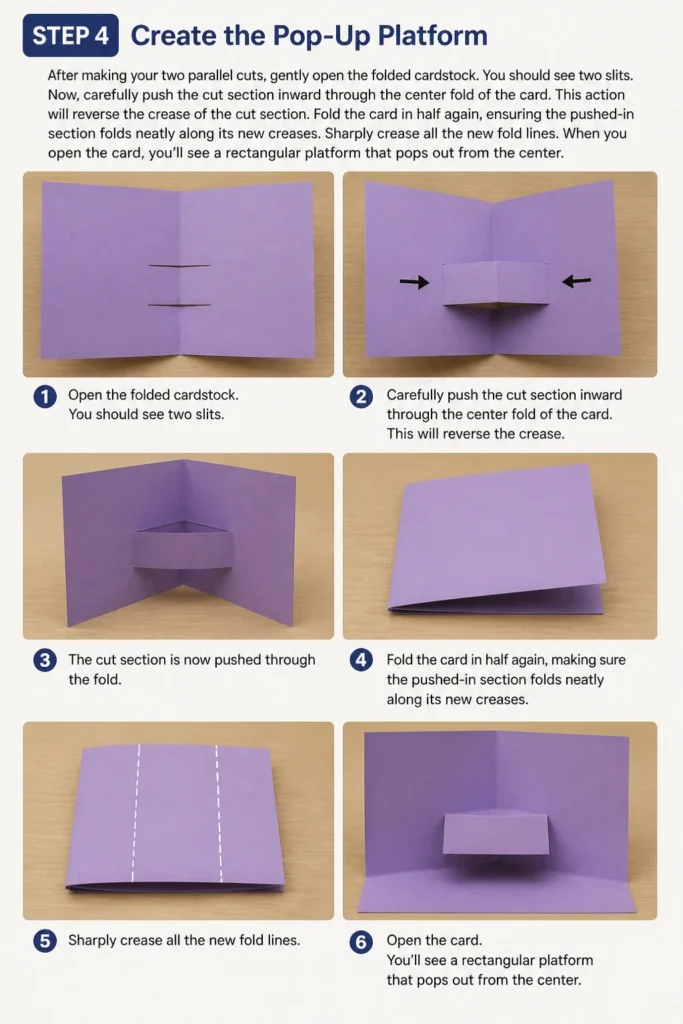
Now, carefully push the cut section inward through the center fold of the card. This action will reverse the crease of the cut section.
Fold the card in half again, ensuring the pushed-in section folds neatly along its new creases. Sharply crease all the new fold lines.
When you open the card, you’ll see a rectangular platform that “pops” out from the center.
Step 5: Design and Prepare Your Pop-Up Element
Now, it’s time to decide what will pop up! This could be a simple shape like a star, a heart, or even a small drawing of a character.
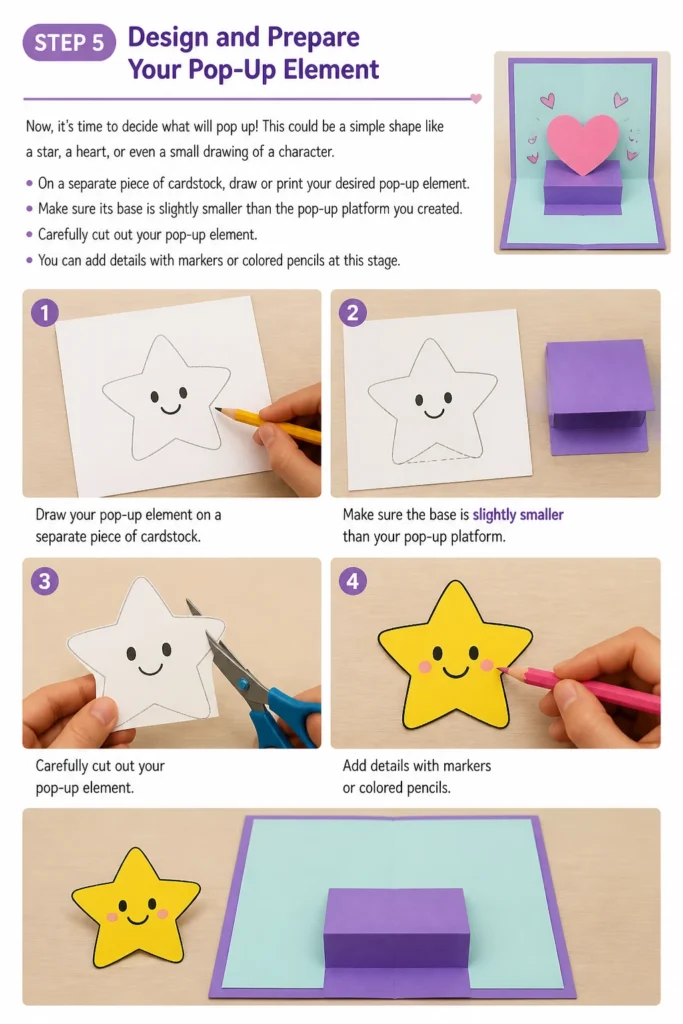
On a separate piece of cardstock, draw or print your desired pop-up element. Make sure its base is slightly smaller than the pop-up platform you created.
Carefully cut out your pop-up element. You can add details with markers or colored pencils at this stage.
Step 6: Attach Your Pop-Up Element
Apply a small amount of glue to the front face of the pop-up platform you created in Step 4. Do not apply glue to the sides or back.
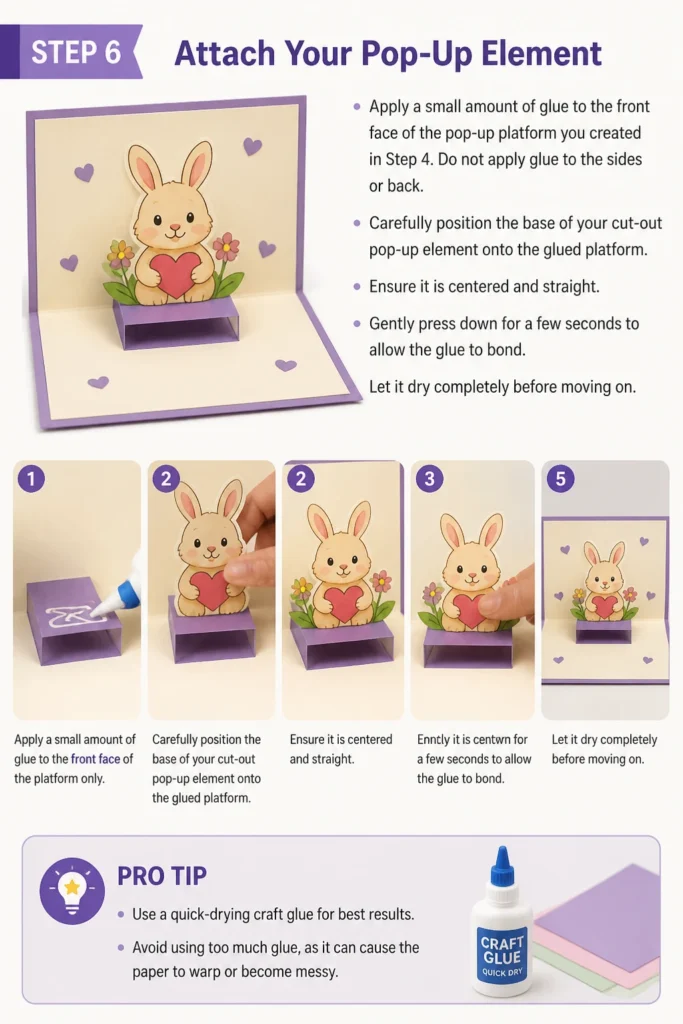
Carefully position the base of your cut-out pop-up element onto the glued platform. Ensure it is centered and straight.
Gently press down for a few seconds to allow the glue to bond. Let it dry completely before moving on.
Pro Tip: Use a quick-drying craft glue for best results. Avoid using too much glue, as it can cause the paper to warp or become messy.
Step 7: Prepare Your Outer Card Base
Take your second sheet of cardstock, which will serve as the outer cover for your pop-up card. This piece should be slightly larger than your inner pop-up card.
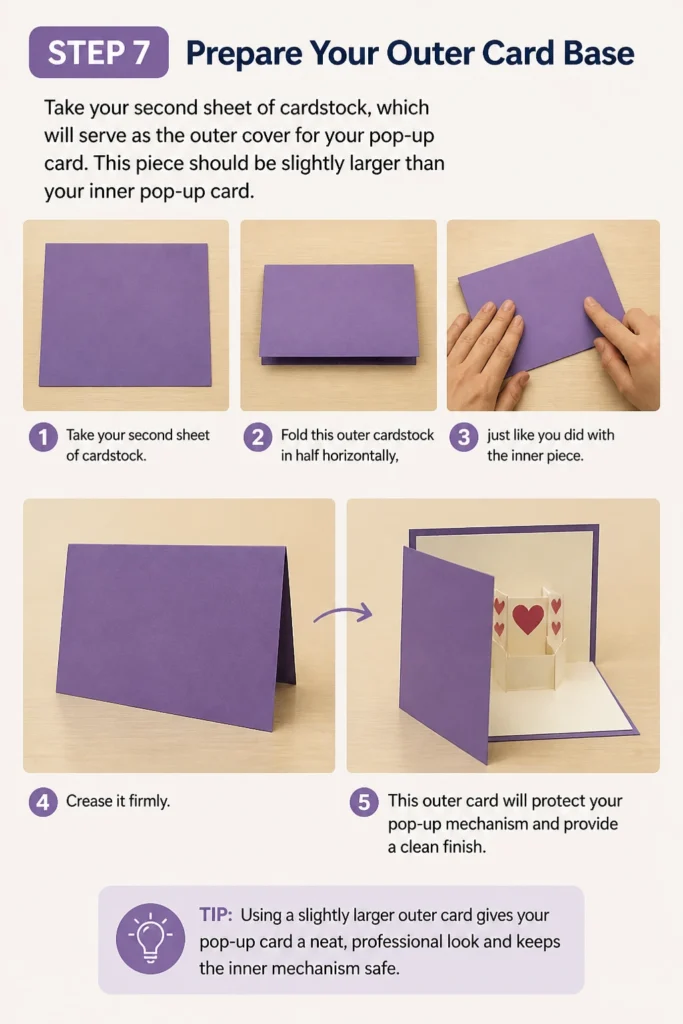
Fold this outer cardstock in half horizontally, just like you did with the inner piece. Crease it firmly.
This outer card will protect your pop-up mechanism and provide a clean finish.
Step 8: Assemble the Card
With both the inner pop-up card and the outer card base folded in half, it’s time to join them.
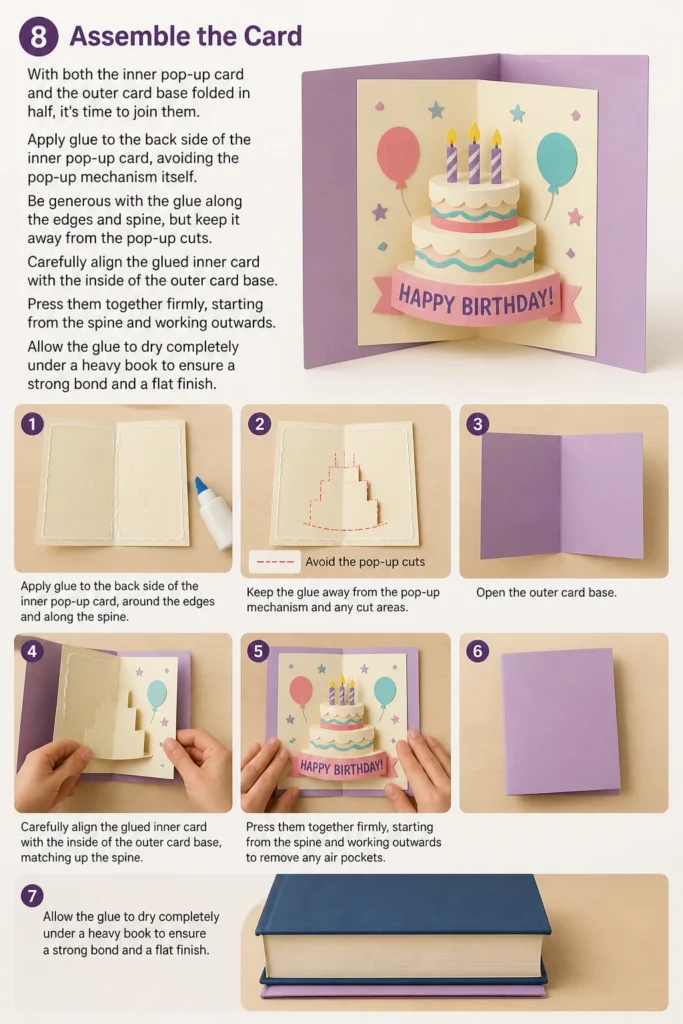
Apply glue to the back side of the inner pop-up card, avoiding the pop-up mechanism itself. Be generous with the glue along the edges and spine, but keep it away from the pop-up cuts.
Carefully align the glued inner card with the inside of the outer card base. Press them together firmly, starting from the spine and working outwards.
Allow the glue to dry completely under a heavy book to ensure a strong bond and a flat finish.
Step 9: Decorate and Personalize
Once the glue is dry, your basic pop-up card structure is complete! Now comes the fun part.
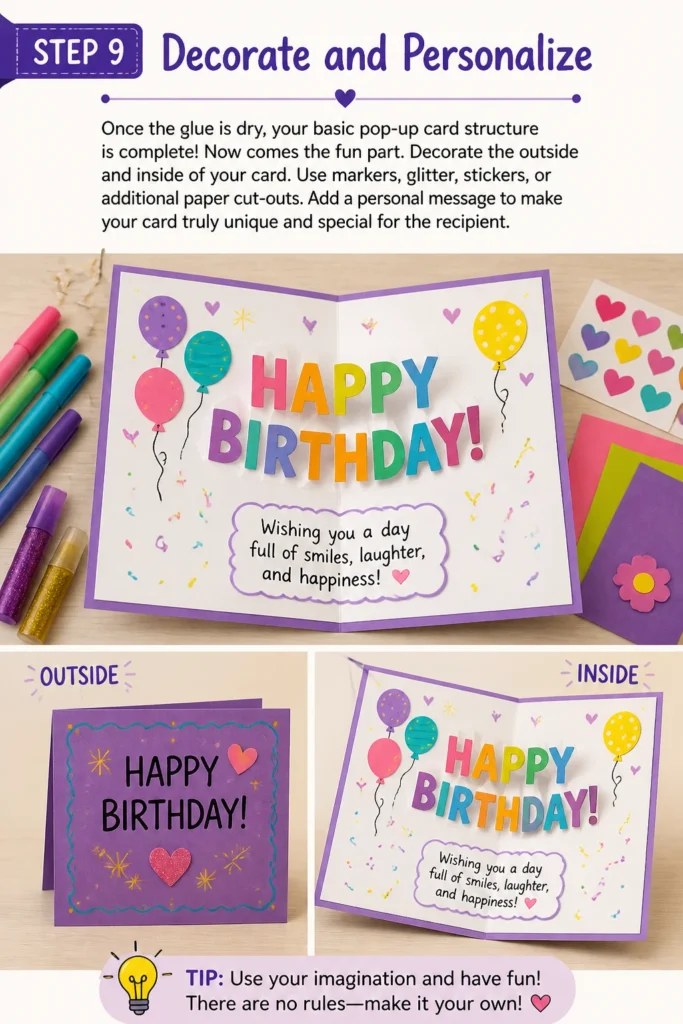
Decorate the outside and inside of your card. Use markers, glitter, stickers, or additional paper cut-outs.
Add a personal message to make your card truly unique and special for the recipient.
Common Mistakes to Avoid
Inaccurate Cuts
Cutting precisely is paramount for a functional pop-up. If your slits are uneven or too long, the pop-up mechanism may not fold correctly or might tear.
Always use a sharp craft knife and a metal ruler for straight lines. Double-check your measurements before making any cuts.
Weak Creases
Pop-up cards rely on strong, defined creases to work smoothly. If your folds are weak, the pop-up element might not spring into action or the card may not close flat.
Always use a scoring tool or the back of a dull knife to create crisp fold lines. Press firmly when creasing.
Incorrect Glue Application
Applying too much glue can warp the paper, create messy bulges, or even glue parts of the pop-up mechanism together, preventing it from working.
Apply glue sparingly and strategically, only where needed to attach elements. Ensure it is fully dry before manipulating the card.
Disproportionate Elements
If your pop-up element is too large for the platform or too wide for the card, it will either get stuck or prevent the card from closing properly.
Always measure your pop-up platform and the inside of your card before cutting your pop-up design. Leave a small margin around the edges.
Troubleshooting
Pop-Up Doesn’t Pop
If your pop-up element isn’t springing into action, the creases might not be sharp enough, or the initial cuts for the platform were not deep enough.
Go back and re-crease all the fold lines firmly, especially the central fold and the folds of the pop-up platform. Ensure the platform was pushed inward correctly.
Card Doesn’t Close Flat
A card that won’t close flat often indicates misaligned inner and outer cards, or that a part of the pop-up element is catching.
Check if your pop-up element is too wide or tall. Gently adjust any elements that might be obstructing the close. Also, ensure the inner and outer cards were perfectly aligned during gluing.
Pop-Up Element Falls Off
If your pop-up design detaches, it means the glue bond was insufficient or the wrong type of adhesive was used.
Reapply a fresh layer of strong craft glue to the pop-up platform and reattach your element. Hold it firmly in place until the glue sets completely. Consider using a more robust liquid glue if a glue stick isn’t holding.
Key Takeaways
- Precision in cutting and scoring is vital for a successful pop-up.
- Always use sturdy cardstock to ensure your pop-up holds its shape.
- Less is often more with glue; apply it carefully and sparingly.
- Practice the folding technique for the pop-up platform until it feels natural.
- Allow adequate drying time for all glued components.
- Start with simple designs before attempting more complex pop-up structures.
Frequently Asked Questions
What kind of paper is best for pop-up cards?
Cardstock is ideal for pop-up cards. Look for paper that is at least 65 lb (176 gsm) or heavier. This weight provides the necessary stiffness for the pop-up mechanism to function well and endure handling.
Can children make pop-up cards?
Absolutely! With adult supervision, especially for cutting with a craft knife, children can enjoy making pop-up cards. Simpler designs with pre-cut shapes or using safety scissors for less intricate cuts are great starting points for younger crafters.
How can I make my pop-up card more complex?
Once you master the basic V-fold or parallel fold, you can experiment with multiple platforms, layered pop-ups, or even box pop-ups. Research different pop-up mechanisms like angle folds or rotating pop-ups to expand your skills.
What if I don’t have a scoring tool?
You can use the back of a dull butter knife, an empty ballpoint pen, or a bone folder as an alternative scoring tool. The goal is to create an indentation without cutting the paper, guiding a clean, crisp fold.
Our Top Recommended Finds
- Heavyweight Cardstock Pack: Essential for durable and functional pop-up cards that stand the test of time.
- Precision Craft Knife Set with Cutting Mat: Provides the sharpness and protection needed for accurate and safe cuts.
- Bone Folder/Scoring Tool: Helps create crisp, professional-looking creases, which are fundamental for smooth pop-up action.
Unfold Your Creativity Today
Creating a pop-up card is a rewarding experience, blending artistry with engineering. Each fold and cut brings your vision closer to a delightful reality.
Don’t stop here! Explore different pop-up mechanisms, incorporate intricate designs, and experiment with colors and textures.
Grab your materials and start crafting your first pop-up card today. The joy of gifting a handmade surprise is waiting for you.
Beginner-friendly templates, step-by-step guides,
and weekly project ideas in your inbox.