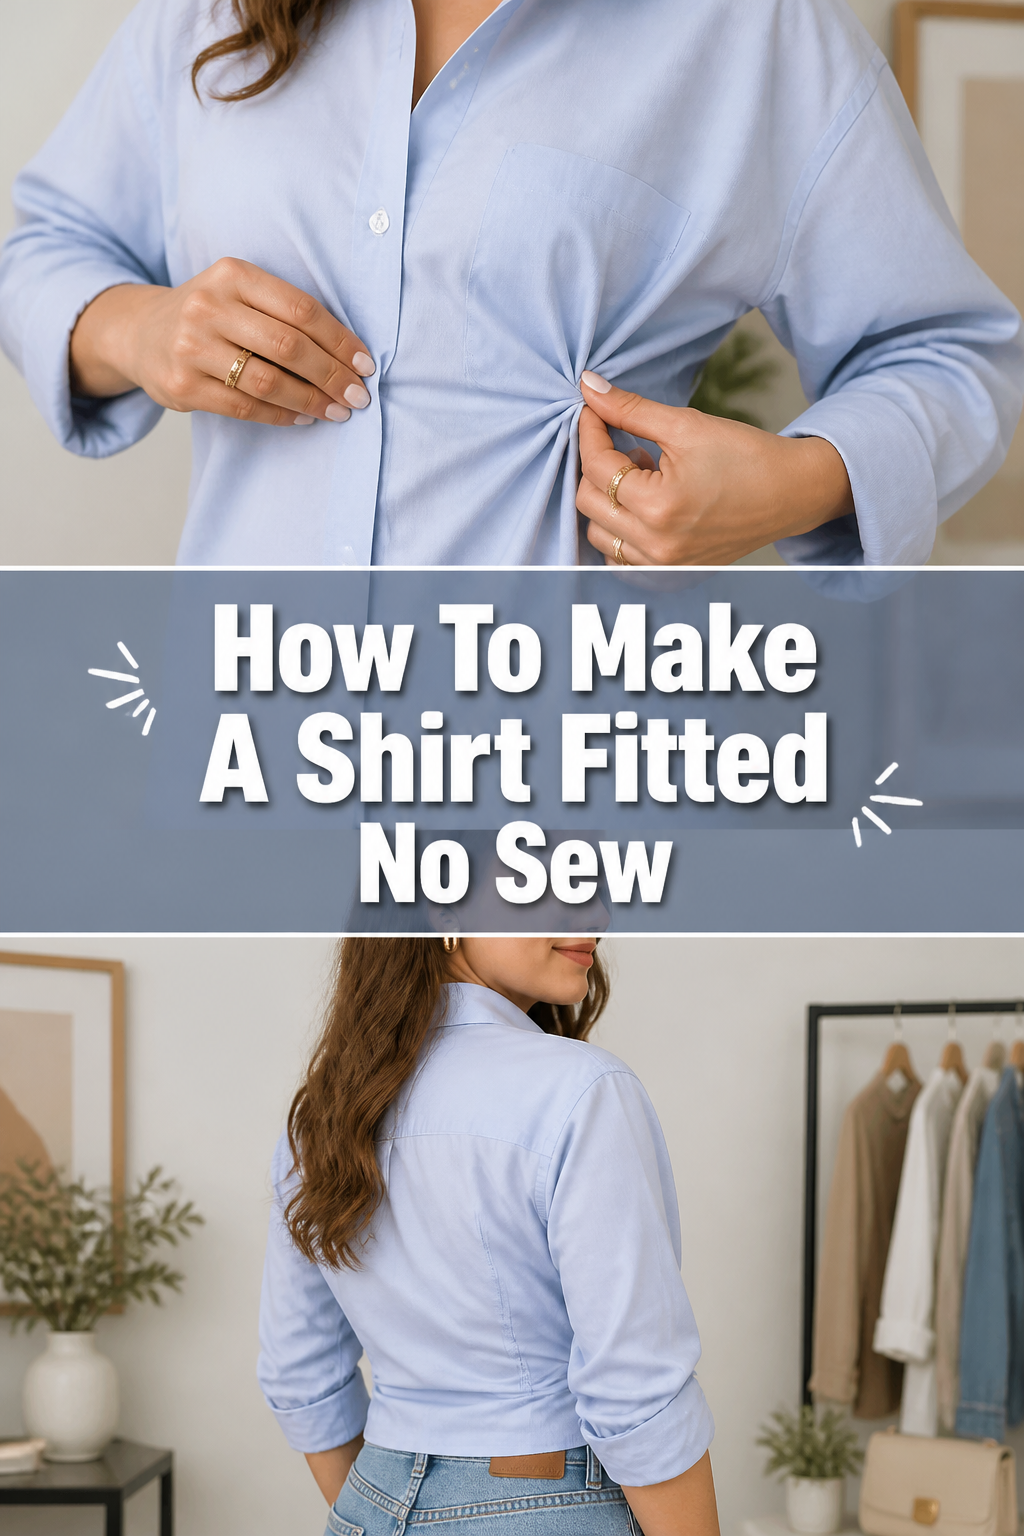
👕 How To Make A Shirt Fitted No Sew

Beginner-friendly templates, step-by-step guides,
and weekly project ideas in your inbox.
Have you ever bought a shirt that was almost perfect, but just a little too baggy? It happens to everyone. That feeling of a garment not quite fitting your unique shape can be frustrating.
I’ve spent years experimenting with clothes, learning how to make them look custom-tailored without ever touching a needle and thread. This guide shares those practical, no-fuss methods. You can trust these techniques to give your shirts a polished, fitted look effortlessly.
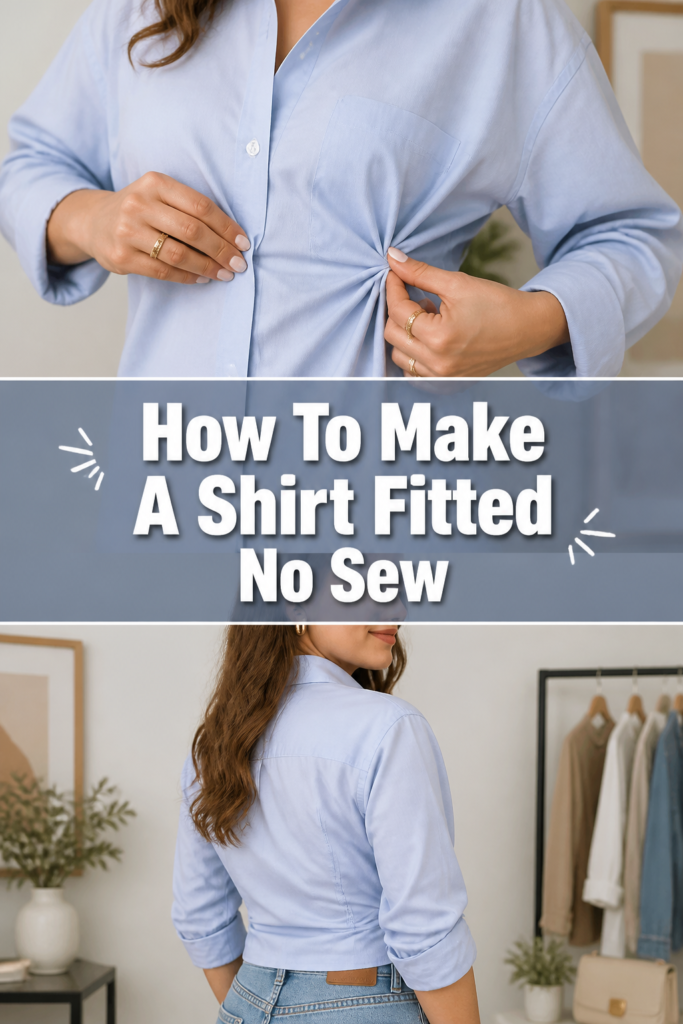
Quick Overview
This guide will show you simple, no-sew ways to make your shirts fit better, enhancing your style and comfort. You’ll learn to transform loose garments into flattering pieces with everyday items.
- Time needed: 10-30 minutes per shirt (depending on method)
- Difficulty: Beginner
- What you’ll need: Hair ties, safety pins, elastic bands, fashion tape, clips, a mirror, and the shirt itself
Step-by-Step Instructions
Step 1: Prepare Your Workspace and Shirt
Choose a well-lit area with a full-length mirror. Good lighting helps you see the shirt’s fit clearly.
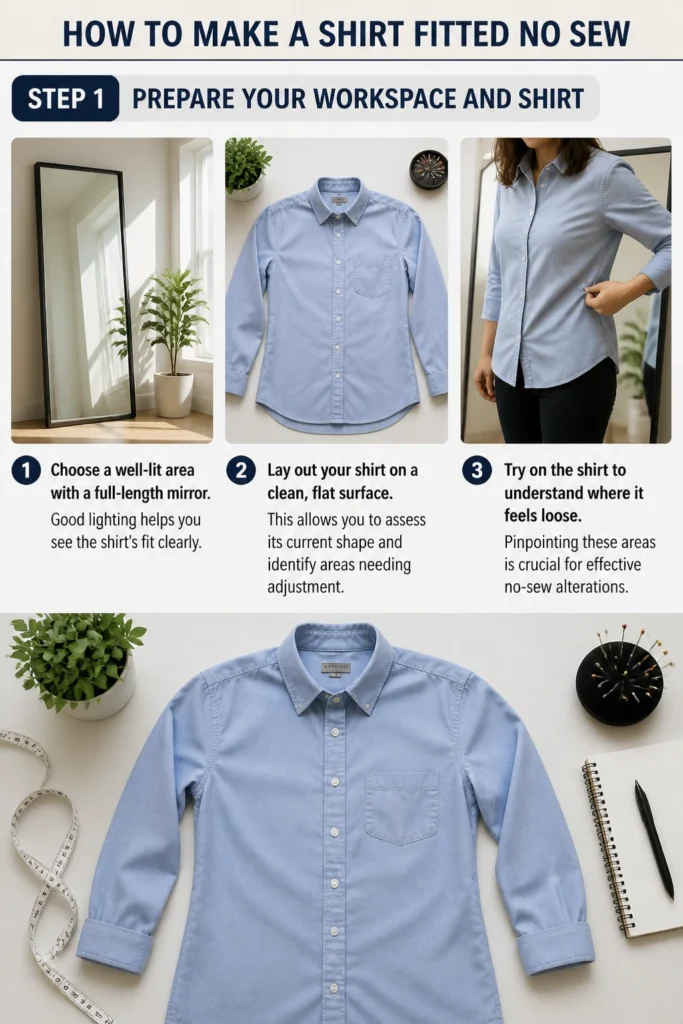
Lay out your shirt on a clean, flat surface. This allows you to assess its current shape and identify areas needing adjustment.
Try on the shirt to understand where it feels loose. Pinpointing these areas is crucial for effective no-sew alterations.
Step 2: Cinch the Waist with Hair Ties or Elastics
Turn the shirt inside out. This hides the adjustment mechanism from view.
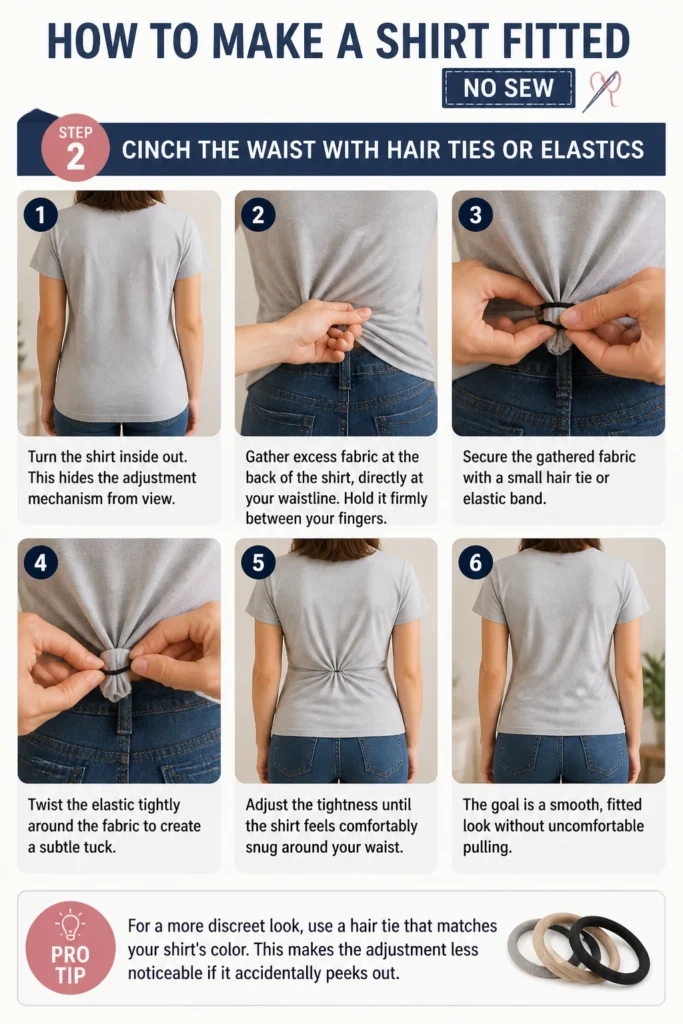
Gather excess fabric at the back of the shirt, directly at your waistline. Hold it firmly between your fingers.
Secure the gathered fabric with a small hair tie or elastic band. Twist the elastic tightly around the fabric to create a subtle tuck.
Adjust the tightness until the shirt feels comfortably snug around your waist. The goal is a smooth, fitted look without uncomfortable pulling.
Pro Tip: For a more discreet look, use a hair tie that matches your shirt’s color. This makes the adjustment less noticeable if it accidentally peeks out.
Step 3: Use Safety Pins for Discreet Tapering
Identify areas on the side seams or back that need tightening. This method works well for minor adjustments.
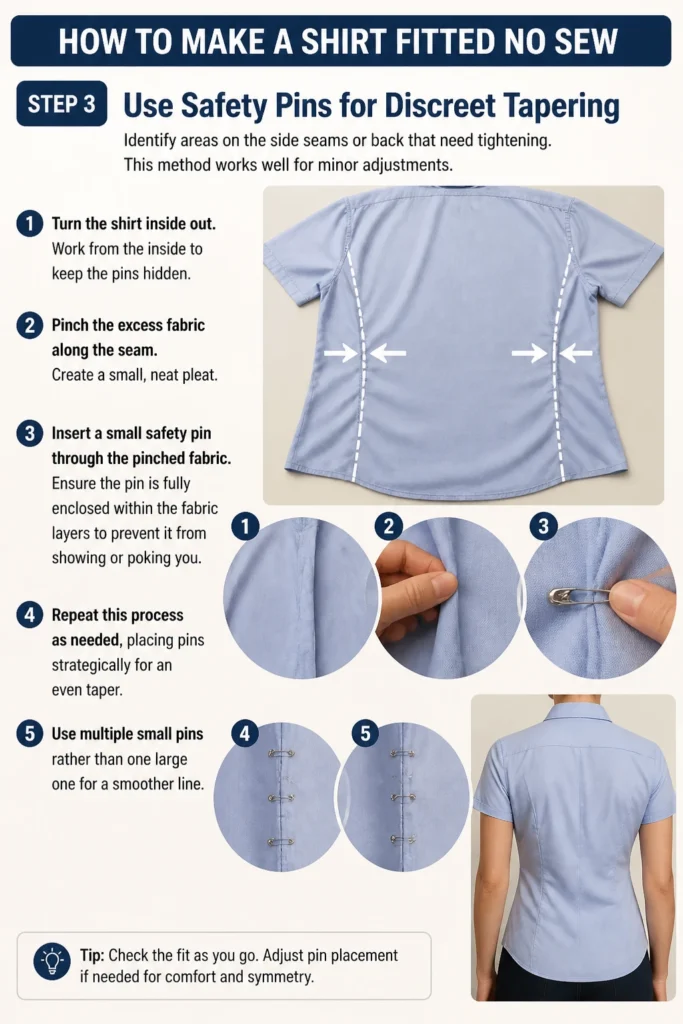
Turn the shirt inside out. Work from the inside to keep the pins hidden.
Pinch the excess fabric along the seam. Create a small, neat pleat.
Insert a small safety pin through the pinched fabric. Ensure the pin is fully enclosed within the fabric layers to prevent it from showing or poking you.
Repeat this process as needed, placing pins strategically for an even taper. Use multiple small pins rather than one large one for a smoother line.
Step 4: Employ Fashion Tape for Smooth Lines
Determine where the shirt gapes or sags, particularly around the collar, placket, or side seams. Fashion tape offers a temporary, invisible fix.
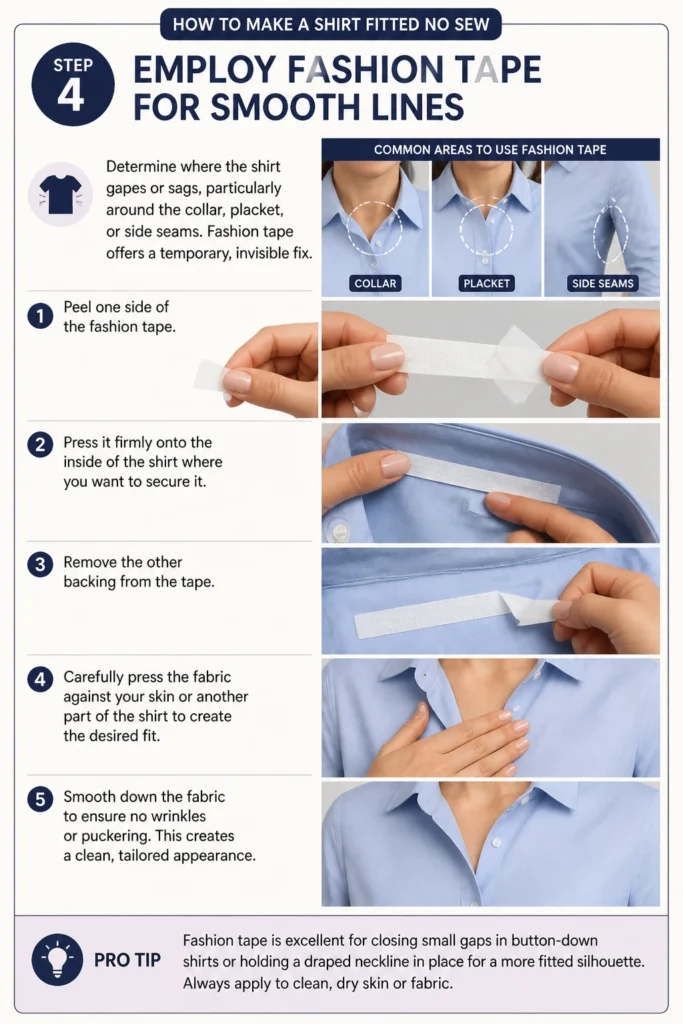
Peel one side of the fashion tape. Press it firmly onto the inside of the shirt where you want to secure it.
Remove the other backing from the tape. Carefully press the fabric against your skin or another part of the shirt to create the desired fit.
Smooth down the fabric to ensure no wrinkles or puckering. This creates a clean, tailored appearance.
Pro Tip: Fashion tape is excellent for closing small gaps in button-down shirts or holding a draped neckline in place for a more fitted silhouette. Always apply to clean, dry skin or fabric.
Step 5: Create a Back Cinch with a Clip or Brooch
Put on the shirt and stand in front of a mirror. Locate the excess fabric at your lower back.
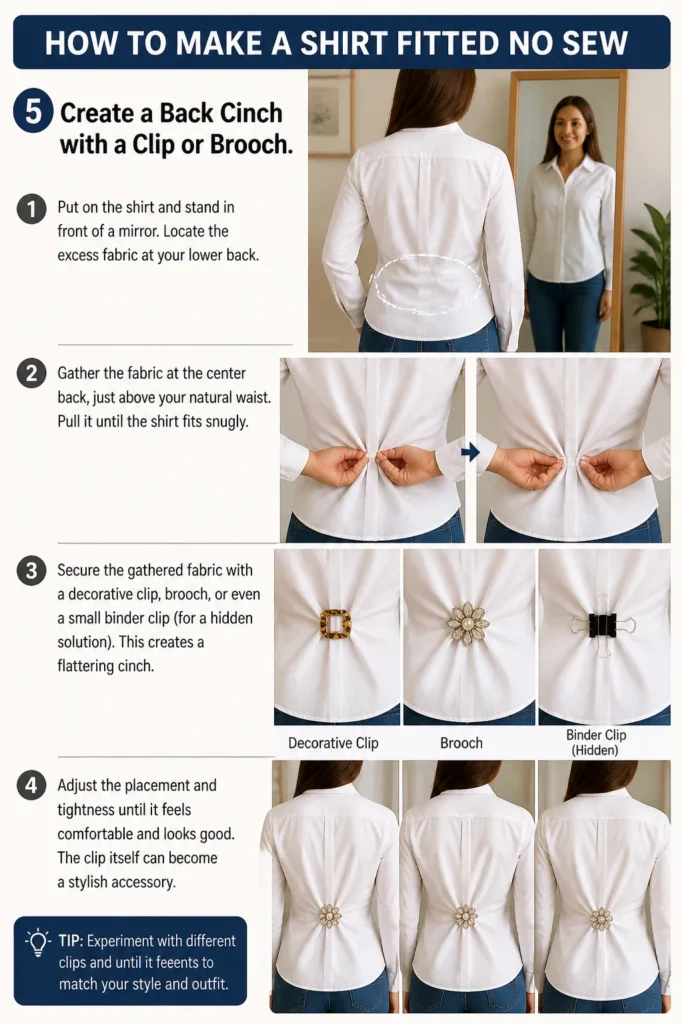
Gather the fabric at the center back, just above your natural waist. Pull it until the shirt fits snugly.
Secure the gathered fabric with a decorative clip, brooch, or even a small binder clip (for a hidden solution). This creates a flattering cinch.
Adjust the placement and tightness until it feels comfortable and looks good. The clip itself can become a stylish accessory.
Step 6: Tuck and Tie for a Casual Fit
Identify if the shirt is too long or wide. This method works best for casual shirts.
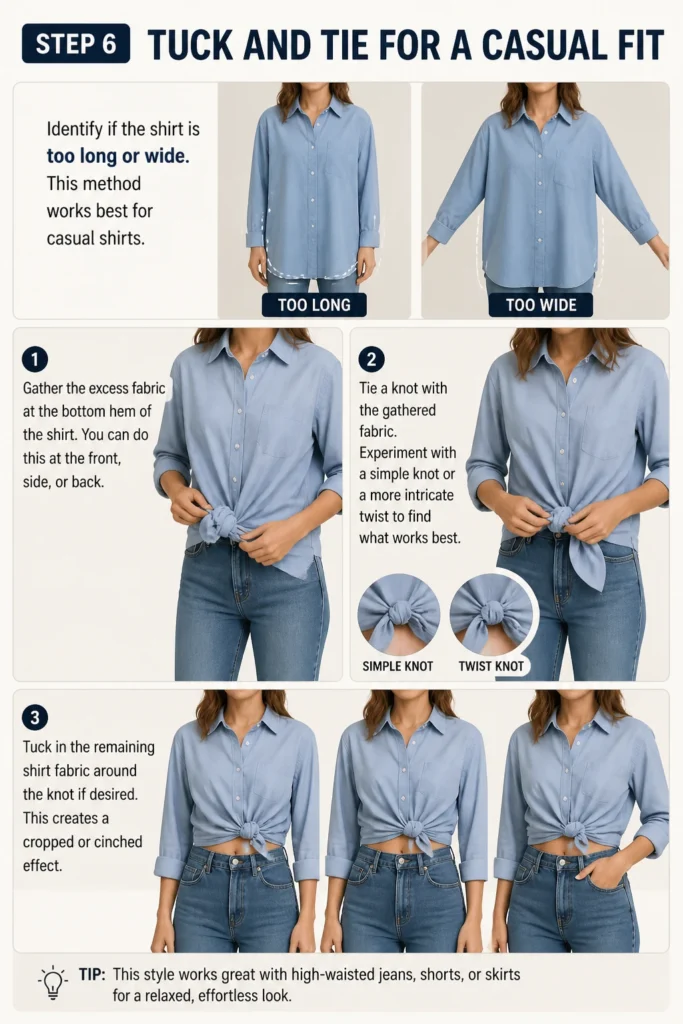
Gather the excess fabric at the bottom hem of the shirt. You can do this at the front, side, or back.
Tie a knot with the gathered fabric. Experiment with a simple knot or a more intricate twist to find what works best.
Tuck in the remaining shirt fabric around the knot if desired. This creates a cropped or cinched effect.
Step 7: Use a Belt for Defined Waistlines
Select a belt that complements your shirt and outfit. Belts are a classic way to add structure.
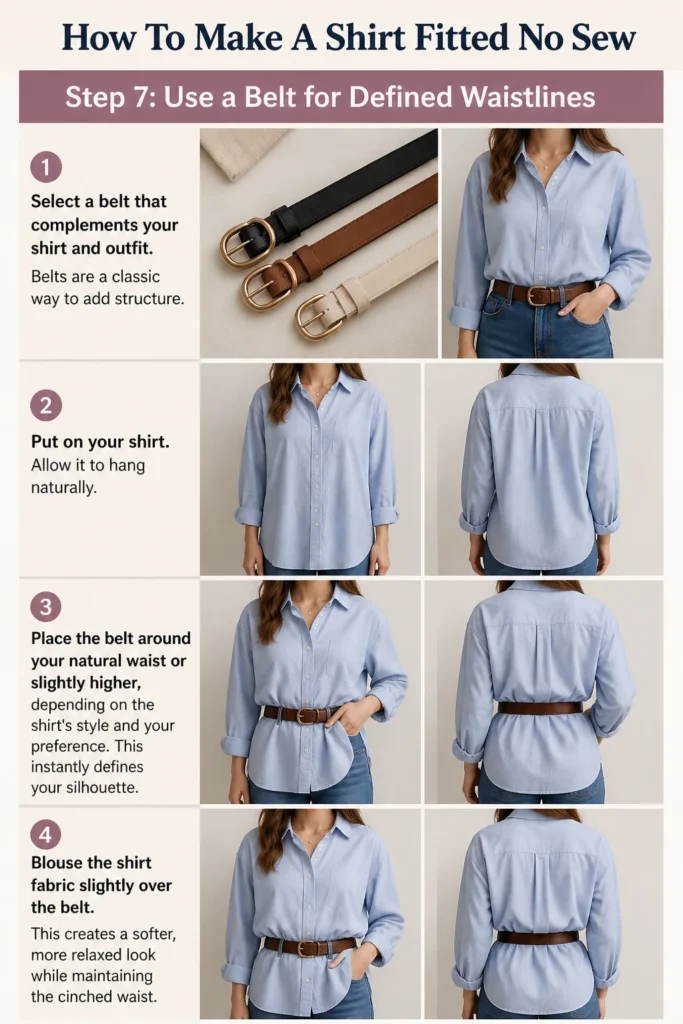
Put on your shirt. Allow it to hang naturally.
Place the belt around your natural waist or slightly higher, depending on the shirt’s style and your preference. This instantly defines your silhouette.
Blouse the shirt fabric slightly over the belt. This creates a softer, more relaxed look while maintaining the cinched waist.
Step 8: The Hair Tie Sleeve Cinch
Find a sleeve that feels too baggy or long. This method is perfect for puffier sleeves.
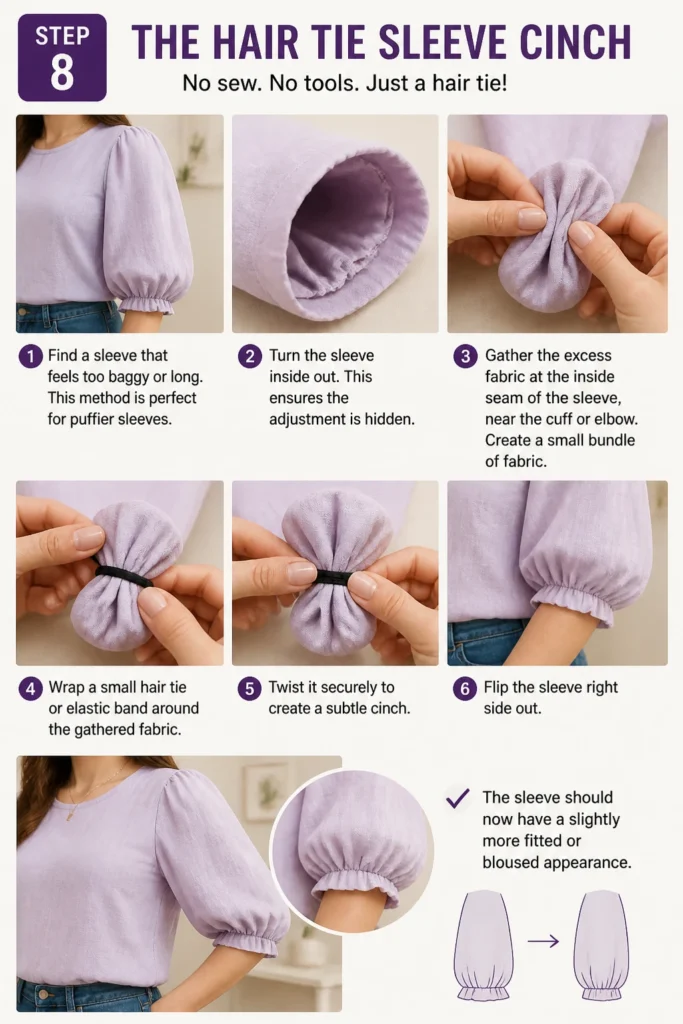
Turn the sleeve inside out. This ensures the adjustment is hidden.
Gather the excess fabric at the inside seam of the sleeve, near the cuff or elbow. Create a small bundle of fabric.
Wrap a small hair tie or elastic band around the gathered fabric. Twist it securely to create a subtle cinch.
Flip the sleeve right side out. The sleeve should now have a slightly more fitted or bloused appearance.
Common Mistakes to Avoid
Over-Tightening
Many people pull the fabric too tight when making adjustments. This can lead to an uncomfortable fit, fabric puckering, and an unnatural look.
Always aim for a comfortable snugness that allows for movement. Check the fit from all angles to ensure it looks smooth and natural, not strained.
Using Visible Fasteners
Leaving safety pins or hair ties exposed ruins the illusion of a custom fit. The goal is to make the adjustment invisible.
Ensure all pins are tucked inside the fabric layers. For hair ties, make sure they are on the inside of the garment and not peeking out. If using a clip, choose a decorative one that enhances the look.
Ignoring Fabric Type
Not all fabrics respond the same way to no-sew methods. Thicker fabrics may hold pleats better, while delicate ones might show pin marks.
Consider your shirt’s material. For delicate fabrics, use smaller, sharper pins or fashion tape. For heavier fabrics, wider gathers and stronger elastics might be necessary.
Focusing Only on One Area
Only tightening the waist can sometimes make other areas, like the shoulders or bust, look disproportionately large. A truly fitted shirt balances all areas.
Assess the overall fit. You might need to make small adjustments in multiple places, such as the waist and sleeves, to achieve a harmonious, fitted look.
Troubleshooting
Shirt Still Feels Baggy After Adjustments
Sometimes, a shirt is simply too large for these methods to create a dramatic difference. You might have only made minor tucks.
Try making slightly larger gathers or using more pins/tape. If it’s still too loose, the shirt might genuinely need professional tailoring or is better suited for a relaxed fit.
Fabric Puckering or Bunching
This usually happens when the fabric is gathered unevenly or secured too tightly in one spot. It can also occur with very thin or stiff fabrics.
Release the adjustment and re-gather the fabric more smoothly. Distribute the excess fabric evenly before securing it. For pins, use more smaller pins instead of one large one to spread the tension.
Adjustments Come Undone
If your hair ties slip or pins come out, they might not have been secured tightly enough or the fabric is too slippery.
Use stronger elastic bands or twist hair ties more times. For pins, ensure they are fully embedded in the fabric and catch enough material to hold. Consider using fashion tape as an extra layer of security.
Key Takeaways
- No-sew methods offer quick and effective ways to improve shirt fit without permanent alterations.
- Always work from the inside of the shirt to keep adjustments discreet and invisible.
- Hair ties and safety pins are versatile tools for cinching waists and tapering seams.
- Fashion tape is excellent for securing small gaps and maintaining smooth lines on delicate areas.
- Experiment with different techniques like belting or knotting to find what best suits your shirt and style.
- Pay attention to comfort and avoid over-tightening to ensure a natural and flattering fit.
Frequently Asked Questions
Can these methods be used on all types of shirts?
Most no-sew methods work well on a variety of shirt types, including cotton, linen, and blends. However, very delicate fabrics like silk or very thick materials like heavy denim might require more careful application or specific tools like smaller pins or stronger tape.
Will these adjustments damage my shirt?
When done correctly, these methods should not damage your shirt. Always use sharp, clean safety pins to avoid snagging fabric. Remove all pins and ties before washing or ironing to prevent damage to the garment or your appliances.
How long do these no-sew adjustments last?
No-sew adjustments are temporary. They will last as long as you wear the shirt, but typically need to be reapplied each time you wear or wash the garment. Fashion tape is usually a single-use application for each wear.
Are these methods comfortable to wear all day?
Yes, if applied correctly and not over-tightened, these adjustments should be comfortable for all-day wear. Regularly check the fit in a mirror and adjust as needed to ensure it feels good and looks smooth.
Our Top Recommended Finds
- Clear Fashion Tape: Essential for invisible fixes on necklines, plackets, and minor gapping.
- Small, Sharp Safety Pins: Ideal for discreetly tapering seams without snagging delicate fabrics.
- Assorted Hair Ties/Elastic Bands: Perfect for cinching waists or sleeves, available in various sizes and colors.
Transform Your Wardrobe Today
Giving your shirts a more fitted look doesn’t require a sewing machine or a tailor. With these simple, no-sew techniques, you can easily enhance your wardrobe and boost your confidence. Stop letting ill-fitting clothes hold you back.
Take a moment to grab a shirt from your closet that you rarely wear because of its baggy fit. Apply one of these methods and see the immediate difference. You’ll be amazed at how a few minutes of effort can completely change your outfit.
Beginner-friendly templates, step-by-step guides,
and weekly project ideas in your inbox.