🎁 How To Wrap A Gift Without A Box DIY

Beginner-friendly templates, step-by-step guides,
and weekly project ideas in your inbox.
Wrapping gifts can be a delightful part of the giving experience.
But what happens when your thoughtful present comes in an awkward shape or lacks a convenient box?
I’ve been there, staring at a plush toy or a uniquely shaped mug, wondering how to make it look presentable without a box. This guide will show you exactly how to achieve beautifully wrapped, box-free gifts, making every present feel special.

Quick Overview
This guide will equip you with the skills to confidently wrap any gift, regardless of its shape, without needing a traditional box. You’ll master techniques for various items, transforming them into elegantly presented surprises.
- Time needed: 15-45 minutes (per gift, depending on complexity)
- Difficulty: Beginner to Intermediate
- What you’ll need: Wrapping paper or fabric, scissors, tape, ribbon or twine, optional embellishments.
Step-by-Step Instructions
Step 1: Gather Your Materials
Before you begin, lay out all your necessary supplies. Having everything within reach streamlines the process and prevents interruptions.
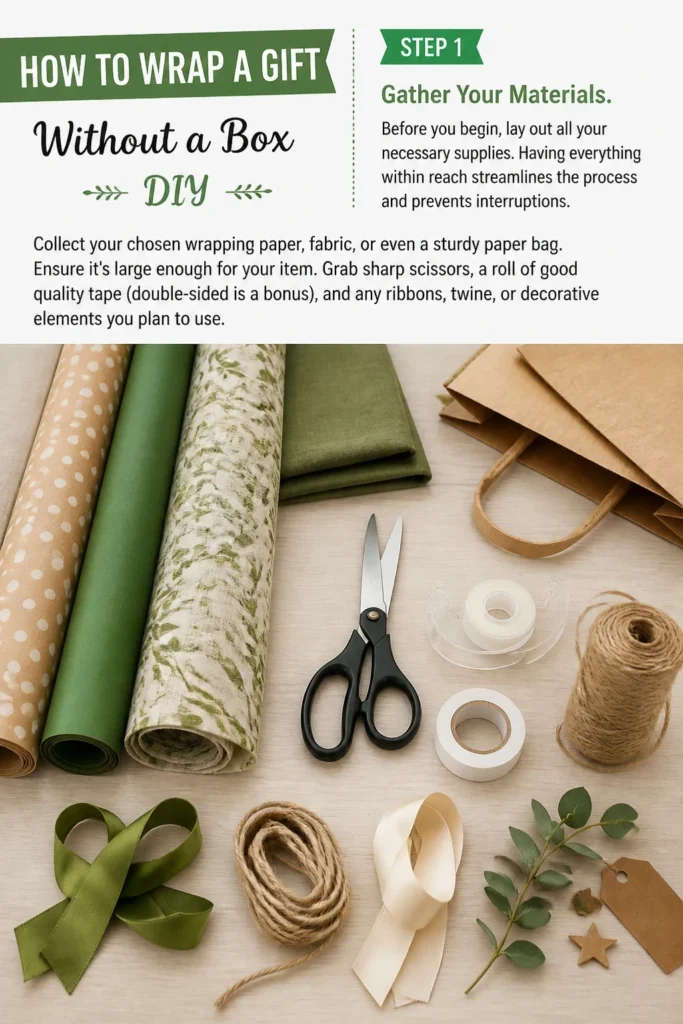
Collect your chosen wrapping paper, fabric, or even a sturdy paper bag. Ensure it’s large enough for your item.
Grab sharp scissors, a roll of good quality tape (double-sided is a bonus), and any ribbons, twine, or decorative elements you plan to use.
Step 2: Choose Your Wrapping Medium Wisely
The type of material you use significantly impacts the final look and ease of wrapping. Consider the item’s weight and shape.
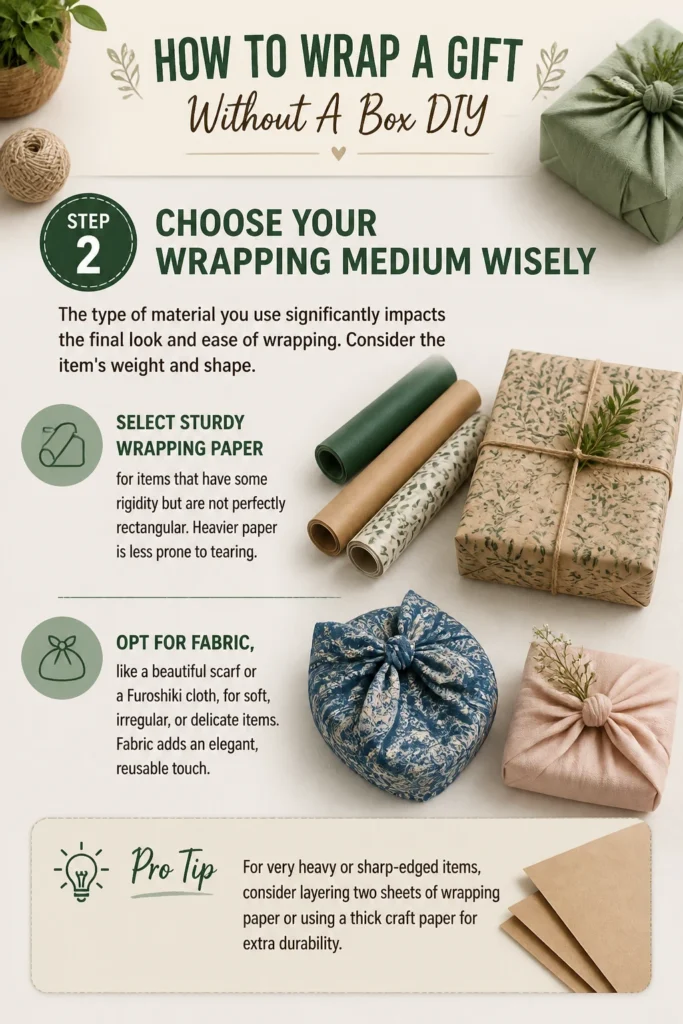
Select sturdy wrapping paper for items that have some rigidity but are not perfectly rectangular. Heavier paper is less prone to tearing.
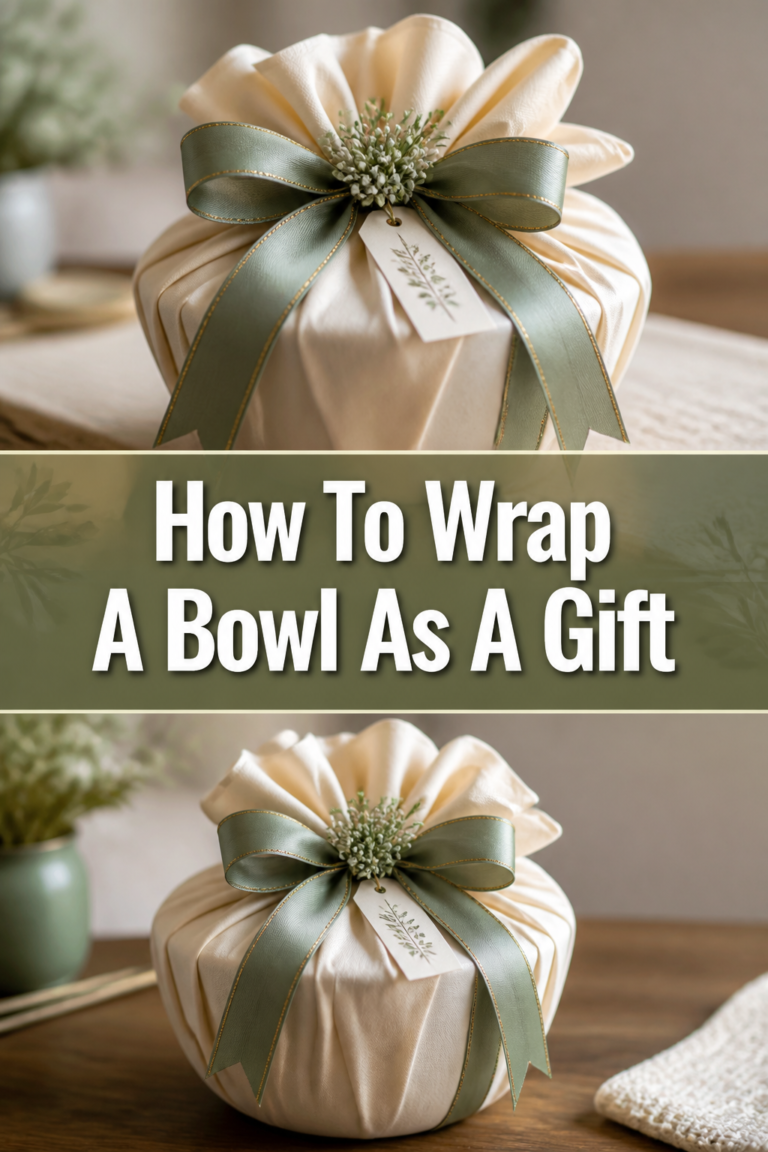
Opt for fabric, like a beautiful scarf or a Furoshiki cloth, for soft, irregular, or delicate items. Fabric adds an elegant, reusable touch.
Pro Tip: For very heavy or sharp-edged items, consider layering two sheets of wrapping paper or using a thick craft paper for extra durability.
Step 3: Measure and Cut Your Wrapping Material
Accurate measurement is key to avoiding waste and achieving a neat finish. Don’t eyeball this step.
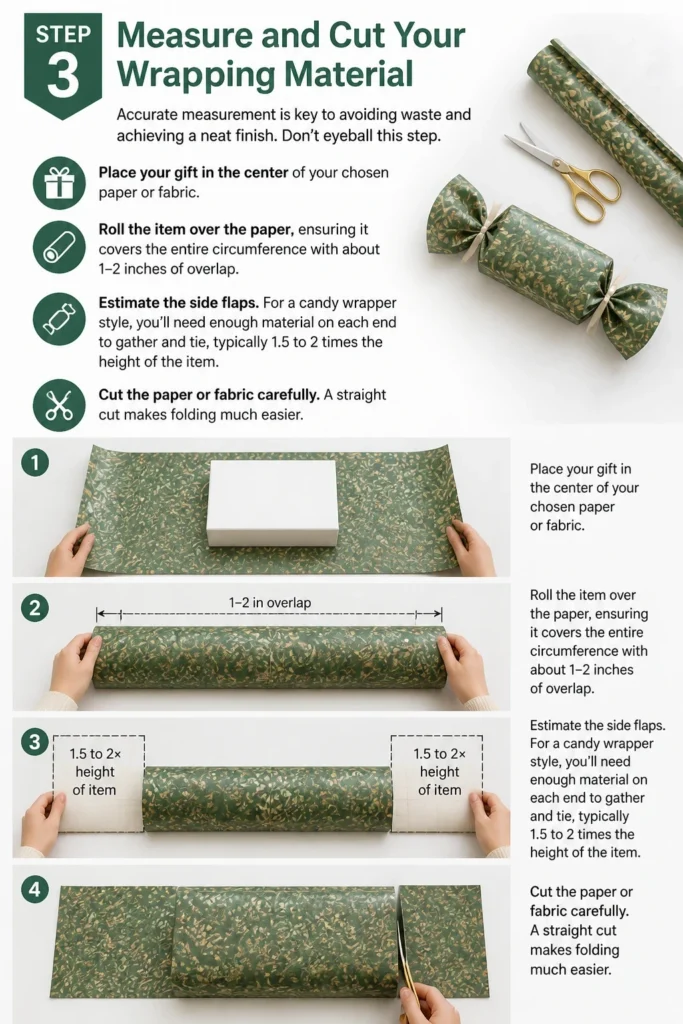
Place your gift in the center of your chosen paper or fabric. Roll the item over the paper, ensuring it covers the entire circumference with about 1-2 inches of overlap.
Estimate the side flaps. For a “candy wrapper” style, you’ll need enough material on each end to gather and tie, typically 1.5 to 2 times the height of the item.
Cut the paper or fabric carefully. A straight cut makes folding much easier.
Step 4: Position and Secure the First Seam
Correct positioning prevents awkward overlaps and ensures a smooth base. This is where the magic begins.
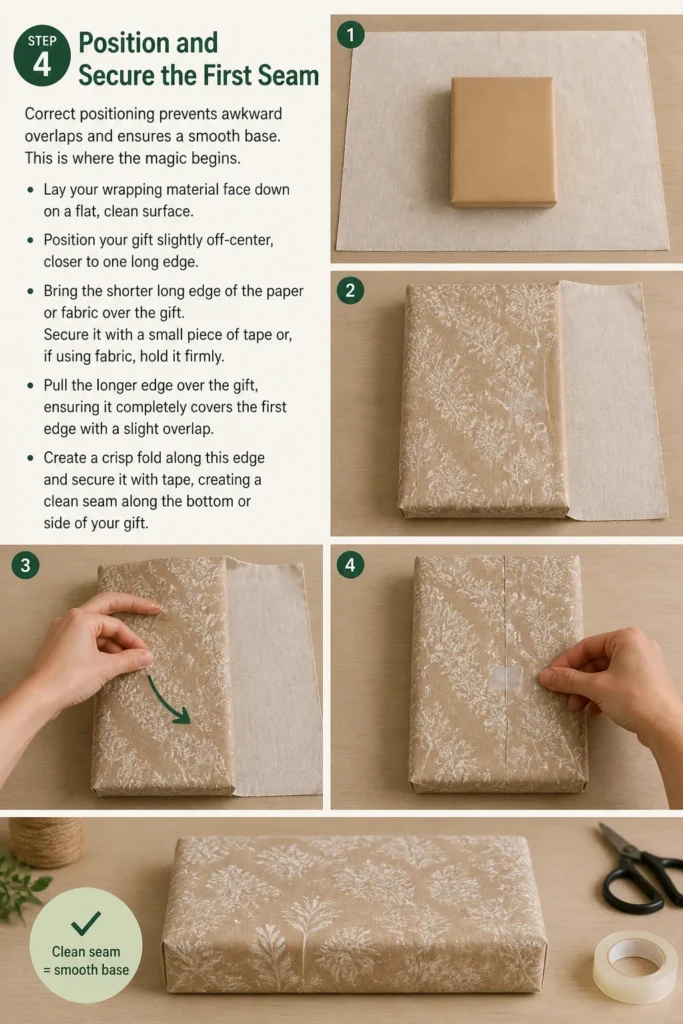
Lay your wrapping material face down on a flat, clean surface. Position your gift slightly off-center, closer to one long edge.
Bring the shorter long edge of the paper or fabric over the gift. Secure it with a small piece of tape or, if using fabric, hold it firmly.
Pull the longer edge over the gift, ensuring it completely covers the first edge with a slight overlap. Create a crisp fold along this edge and secure it with tape, creating a clean seam along the bottom or side of your gift.
Step 5: Master the Cylinder (Roll) Wrap for Long Items
This technique is perfect for bottles, rolled posters, or anything roughly cylindrical. It creates a classic, polished look.
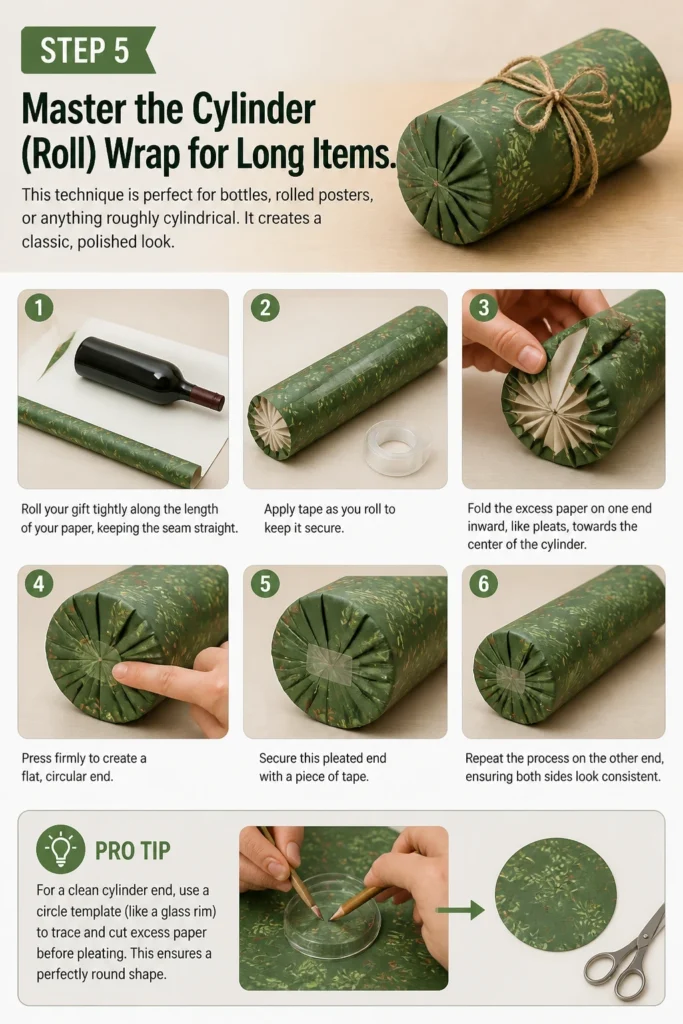
Roll your gift tightly along the length of your paper, keeping the seam straight. Apply tape as you roll to keep it secure.
Fold the excess paper on one end inward, like pleats, towards the center of the cylinder. Press firmly to create a flat, circular end.
Secure this pleated end with a piece of tape. Repeat the process on the other end, ensuring both sides look consistent.
Pro Tip: For a clean cylinder end, use a circle template (like a glass rim) to trace and cut excess paper before pleating. This ensures a perfectly round shape.
Step 6: Handle Irregular Shapes with Gathering and Tying
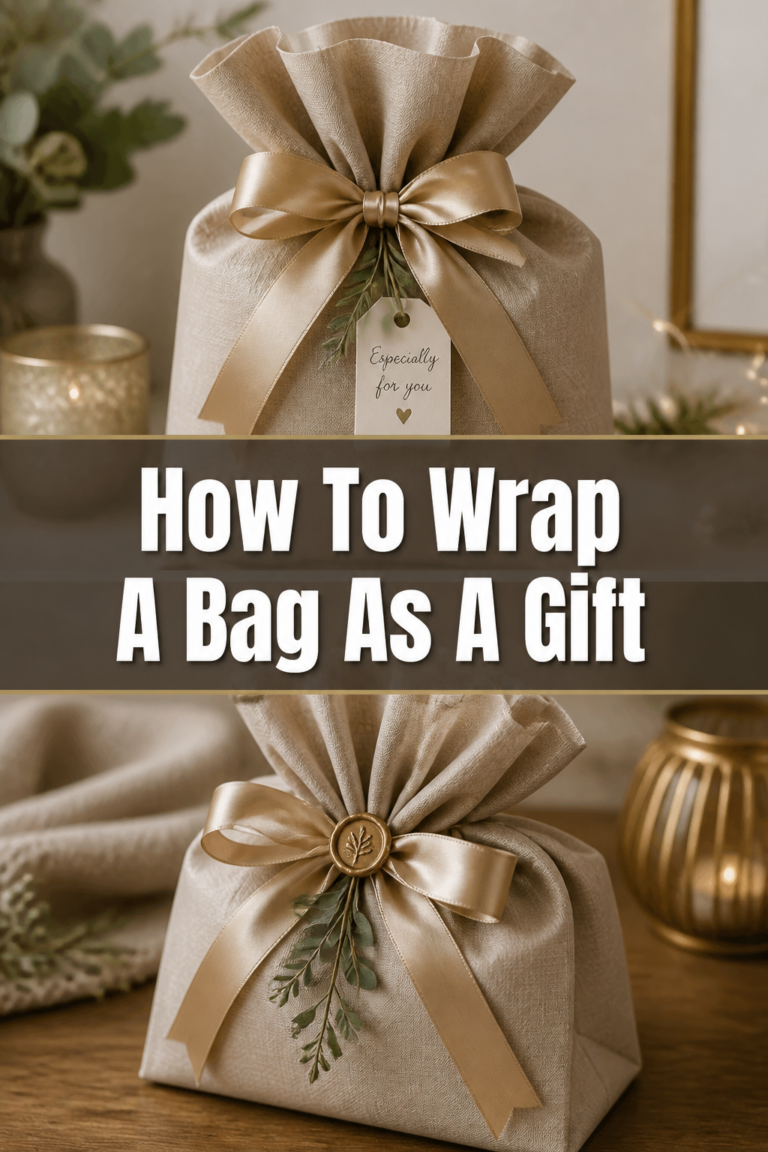
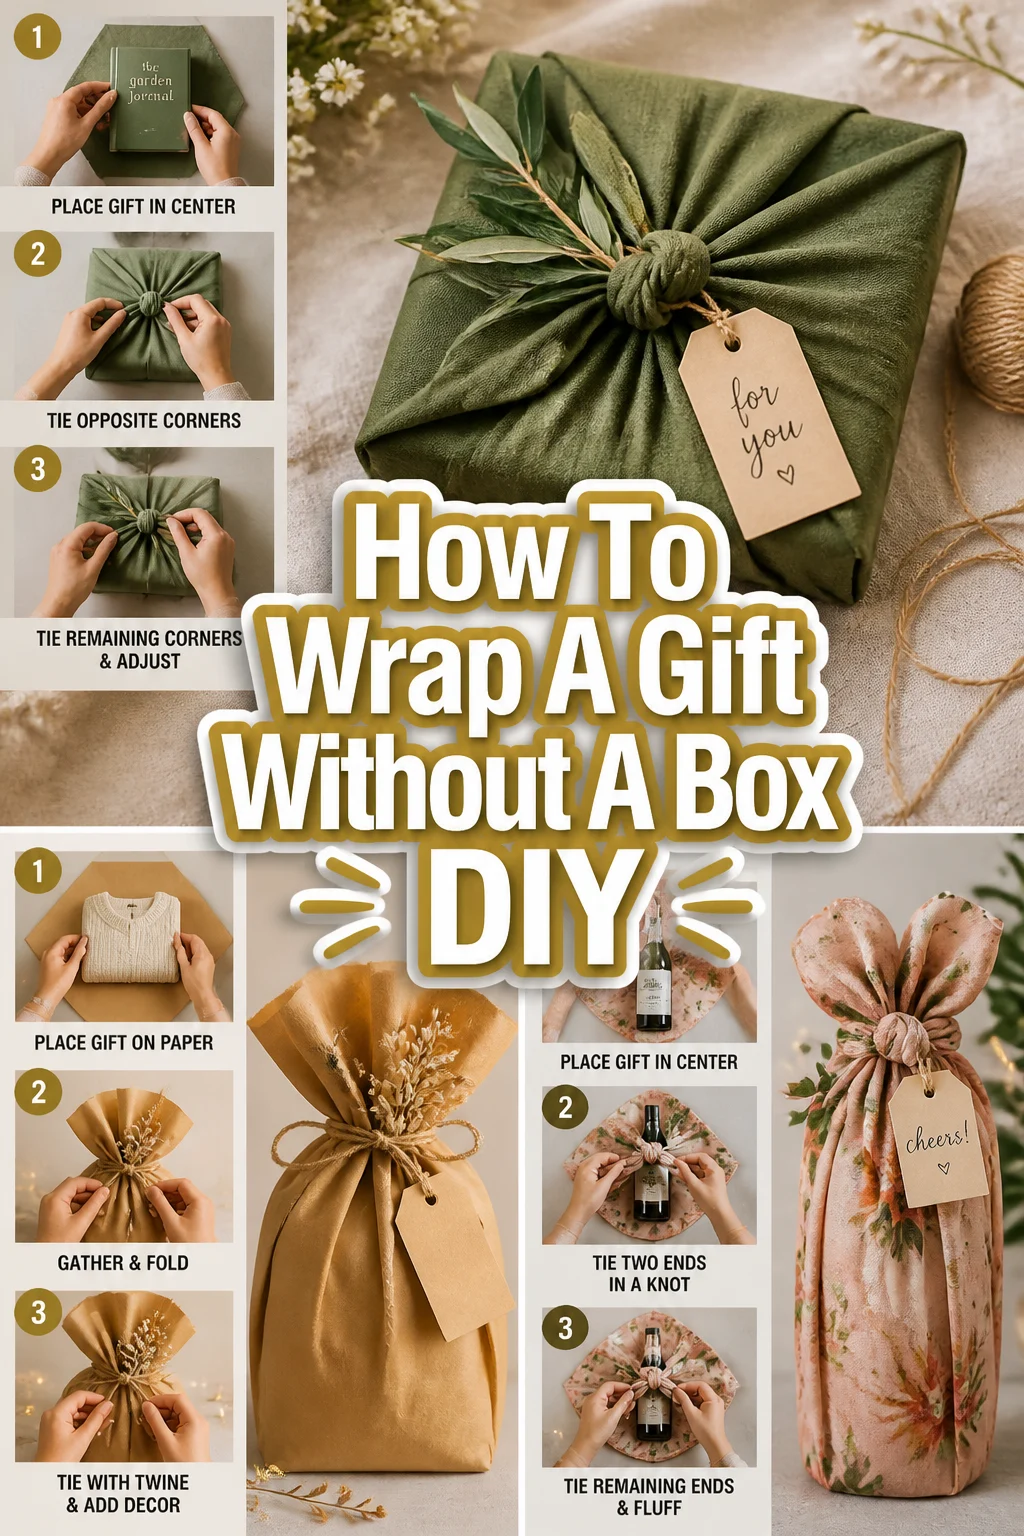
This “candy wrapper” or “pouch” method is incredibly versatile for soft goods, oddly shaped items, or multiple small gifts. It’s forgiving and charming.
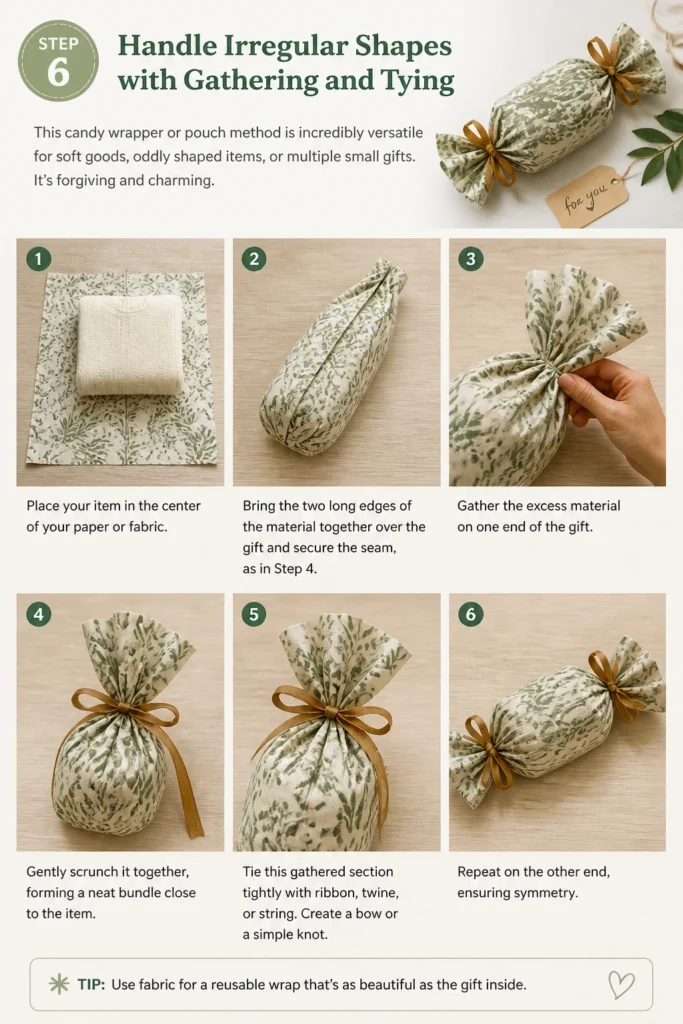
Place your item in the center of your paper or fabric. Bring the two long edges of the material together over the gift and secure the seam, as in Step 4.
Gather the excess material on one end of the gift. Gently scrunch it together, forming a neat bundle close to the item.
Tie this gathered section tightly with ribbon, twine, or string. Create a bow or a simple knot. Repeat on the other end, ensuring symmetry.
Step 7: Create a Pleated Base for Stability (For items with a flat bottom)
If your irregular item has a somewhat flat base, you can create a more stable, box-like bottom. This is a slightly more advanced fold but yields professional results.
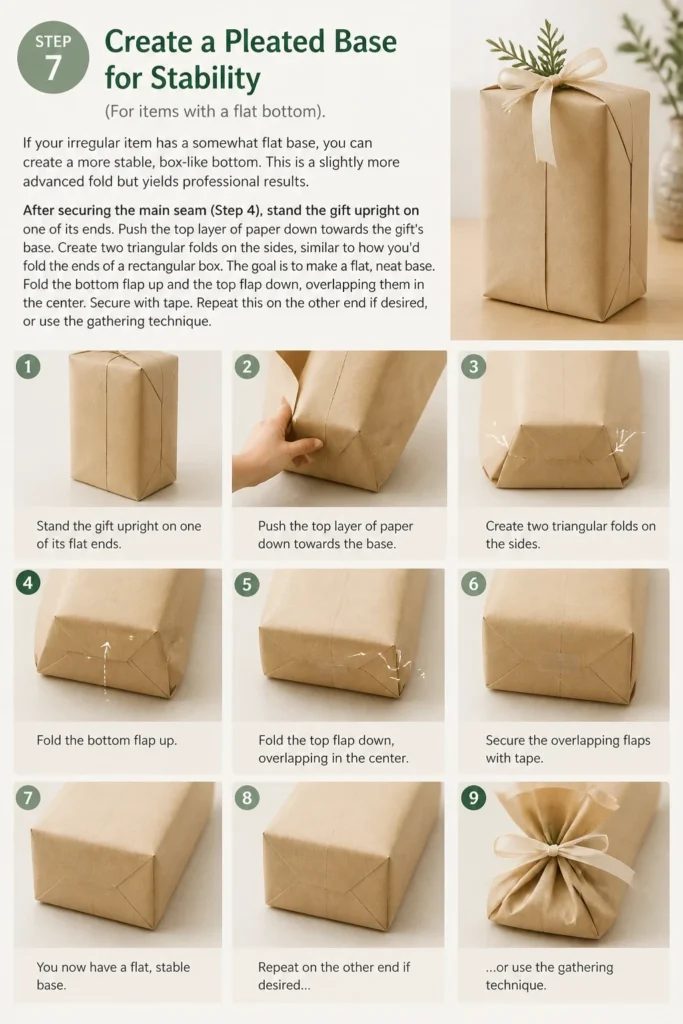
After securing the main seam (Step 4), stand the gift upright on one of its ends. Push the top layer of paper down towards the gift’s base.
Create two triangular folds on the sides, similar to how you’d fold the ends of a rectangular box. The goal is to make a flat, neat base.
Fold the bottom flap up and the top flap down, overlapping them in the center. Secure with tape. Repeat this on the other end if desired, or use the gathering technique.
Step 8: Add Embellishments and Finishing Touches
This is where you infuse personality and elevate your box-free gift. Don’t underestimate the power of thoughtful adornments.
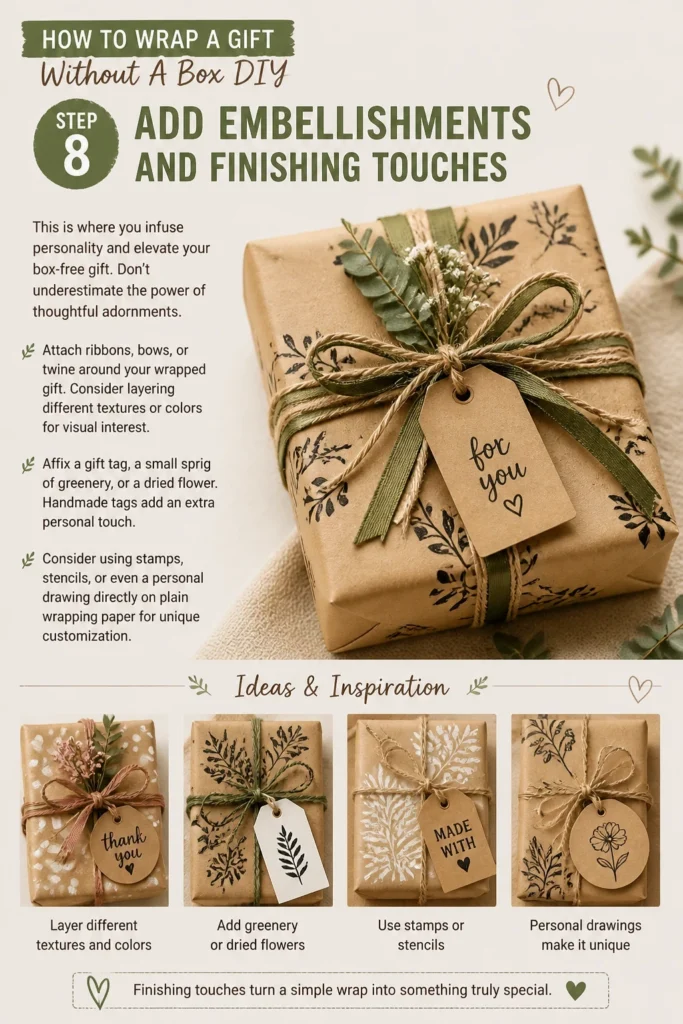
Attach ribbons, bows, or twine around your wrapped gift. Consider layering different textures or colors for visual interest.
Affix a gift tag, a small sprig of greenery, or a dried flower. Handmade tags add an extra personal touch.
Consider using stamps, stencils, or even a personal drawing directly on plain wrapping paper for unique customization.
Common Mistakes to Avoid
Using Too Little Material
Many people underestimate the amount of paper or fabric needed, especially for irregular shapes. This leads to gaps, exposed areas, or a struggle to secure the ends.
Always err on the side of caution and cut more material than you think you’ll need. You can always trim excess, but you can’t add more once it’s cut. Ensure generous overlap for seams and sufficient length for gathering the ends.
Not Creasing Sharply
Lack of crisp folds is a common reason for a messy-looking wrap. Soft, rounded edges make a gift look unkempt and unprofessional.
Use your fingers or a ruler to press down firmly along every fold. Sharp creases define the shape of your wrap and give it a polished, intentional appearance, especially important when shaping around an item without a box.
Using the Wrong Type of Tape
Standard clear office tape can sometimes show through thinner wrapping paper or peel off easily. This can detract from the overall aesthetic and compromise the wrap’s integrity.
Invest in good quality clear tape or, even better, double-sided tape. Double-sided tape creates invisible seams, giving a much cleaner finish. For fabric wraps, consider fabric glue or a small stitch if you want a permanent hold, though ties are usually sufficient.
Rushing the Process
Gift wrapping, especially for box-free items, is an art that benefits from patience. Rushing often leads to tears in the paper, crooked seams, or a generally sloppy presentation.
Take your time with each fold, measurement, and tape application. Enjoy the process of transforming your gift. A few extra minutes spent carefully wrapping can make a significant difference in the final result and the recipient’s delight.
Troubleshooting
Paper Tearing While Wrapping
If your paper is tearing, it could be too thin, or you might be pulling too tightly. Sharp edges on the gift can also be culprits.
Try using a thicker wrapping paper or doubling up on your current paper. For sharp corners on the gift, add a small piece of extra paper or tissue paper over the corner before wrapping to provide a buffer.
Gift Looks Lumpy or Uneven
An uneven appearance often comes from not positioning the item centrally or not distributing the material evenly around it. It can also happen when the item itself is very irregular.
For very lumpy items, try wrapping them first in a layer of tissue paper or batting to create a smoother base. When gathering ends, ensure you pull the material evenly from all sides before tying to avoid one side being tighter than the other.
Tape Isn’t Sticking Well
This can be frustrating and usually means the surface is dirty, oily, or the tape itself is low quality. Humidity can also affect adhesion.
Ensure your hands and the wrapping surface are clean and dry. Use fresh, good-quality tape. If working in a humid environment, consider using a stronger adhesive tape or a glue stick for paper, or fabric ties for fabric wraps.
Key Takeaways
- Always measure your wrapping material generously to avoid shortages.
- Sharp creases and clean seams are crucial for a professional, box-free look.
- Embrace gathering and tying techniques for irregularly shaped gifts.
- Fabric wraps offer an elegant, reusable, and forgiving alternative to paper.
- Personalize your box-free gifts with thoughtful ribbons and embellishments.
- Patience and attention to detail will elevate your wrapping results significantly.
Frequently Asked Questions
What kind of paper is best for wrapping without a box?
Sturdier papers like craft paper, heavyweight wrapping paper, or even decorative cardstock work best. Avoid very thin, flimsy papers as they are prone to tearing and don’t hold their shape well around irregular items.
Can I use fabric instead of paper?
Absolutely! Fabric, especially using the Furoshiki technique, is an excellent, eco-friendly option. Scarves, tea towels, or dedicated Furoshiki cloths create beautiful, reusable wraps perfect for soft or oddly shaped gifts.
How do I wrap very small, irregular items without a box?
For tiny items, consider placing them in a small fabric pouch, a decorative paper bag you make yourself, or wrapping them in several layers of tissue paper before doing a “candy wrapper” style tie with ribbon on the ends.
What if my gift is very large and doesn’t fit standard paper?
For large items, you can piece together multiple sheets of wrapping paper using strong tape on the underside. Alternatively, use a large sheet of fabric, a blanket, or even a decorative tablecloth as your wrapping medium. The gathering and tying method works well for large, soft items.
Our Top Recommended Finds
- Heavyweight Craft Paper Roll: Versatile for any gift, easy to customize, and very durable.
- Double-Sided Tape Dispenser: Creates seamless, invisible joins for a truly professional finish.
- Assorted Satin Ribbon & Twine Set: Offers variety for embellishing and securing gathered ends.
Unleash Your Inner Wrapping Artist
You now possess the knowledge and techniques to tackle any gift, no matter its shape, without the need for a box. This skill not only saves you time and stress but also adds a deeply personal touch to your presents.
Stop letting awkward shapes intimidate you. Grab some paper or fabric, your tape, and a ribbon, and start transforming those challenging items into beautifully presented gifts.
Your recipients will surely appreciate the extra effort and creativity you put into their special surprise.
Beginner-friendly templates, step-by-step guides,
and weekly project ideas in your inbox.