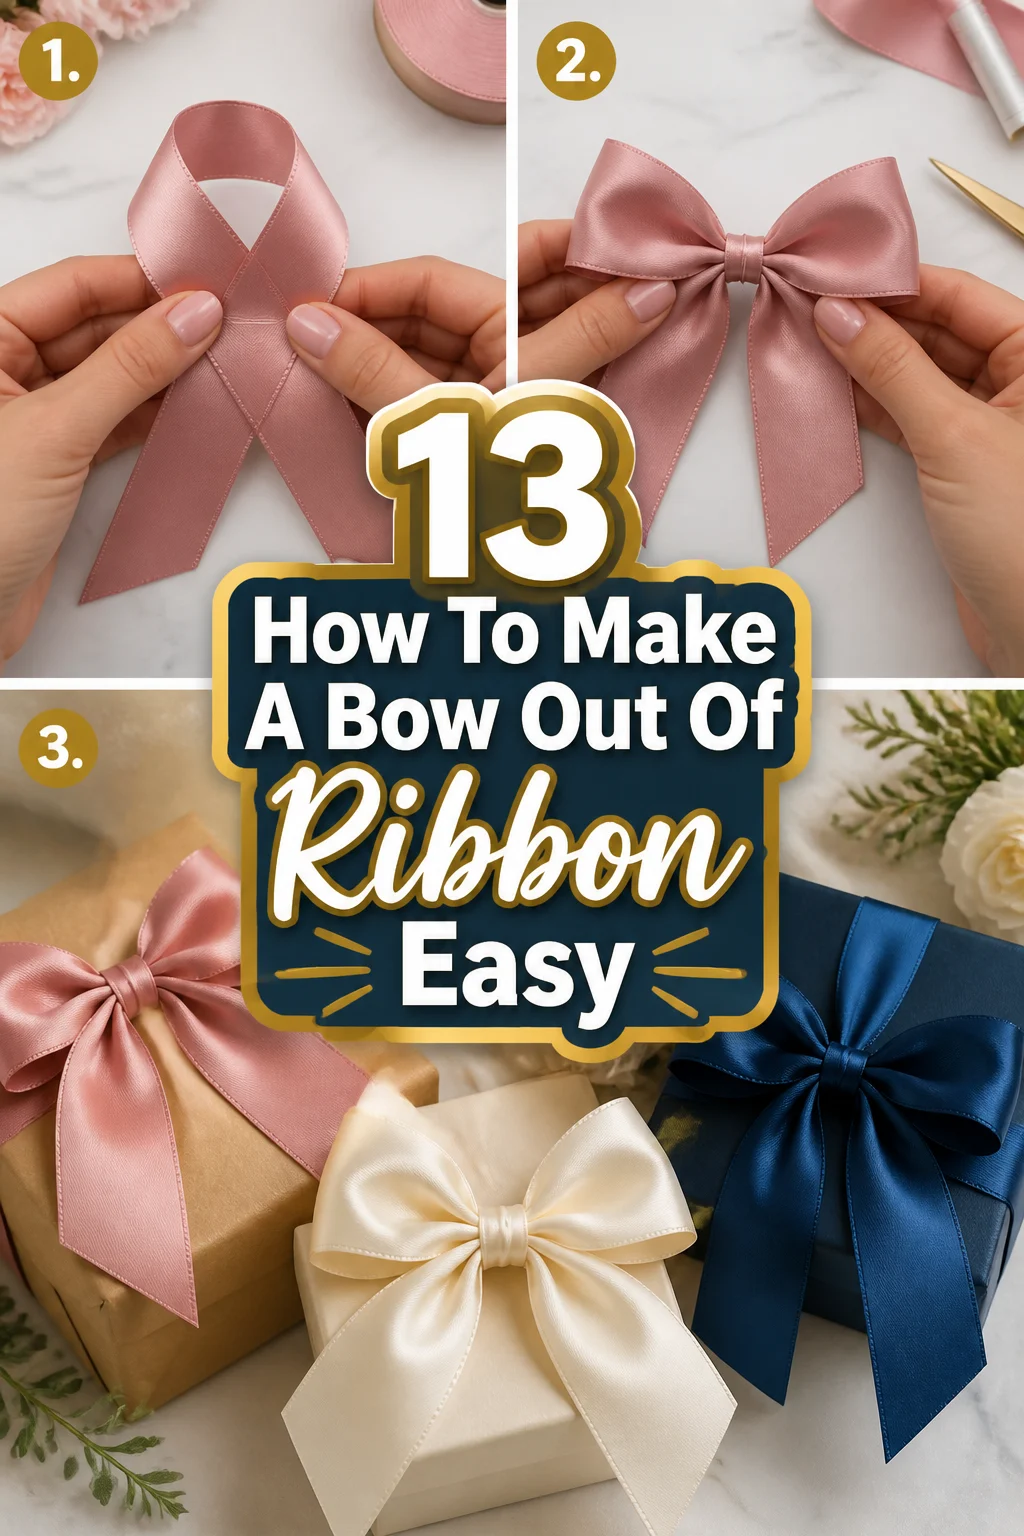
🎀 13 How To Make A Bow Out Of Ribbon Easy

Beginner-friendly templates, step-by-step guides,
and weekly project ideas in your inbox.

I remember sitting on my living room floor surrounded by crumpled wrapping paper and tangled satin strands.
I had spent a small fortune on beautiful gifts, but my bows looked like sad, flat shoelaces.
After years of practicing for craft fairs and holiday parties, I finally discovered that making a professional bow is about technique, not magic.
Quick Overview
This guide will show you how to create the perfect classic bow that stays perky and symmetrical every time.
You will learn the fundamental “Loop, Cross, and Pull” method which serves as the foundation for almost every decorative ribbon style.
- Time needed: 5 to 10 minutes
- Difficulty: Beginner
- What you’ll need: Ribbon (wired or non-wired), sharp fabric scissors, a ruler, and a small piece of floral wire or twine.
Step-by-Step Instructions
Step 1: Choose Your Ribbon Material
Select a ribbon that matches the project you are working on.
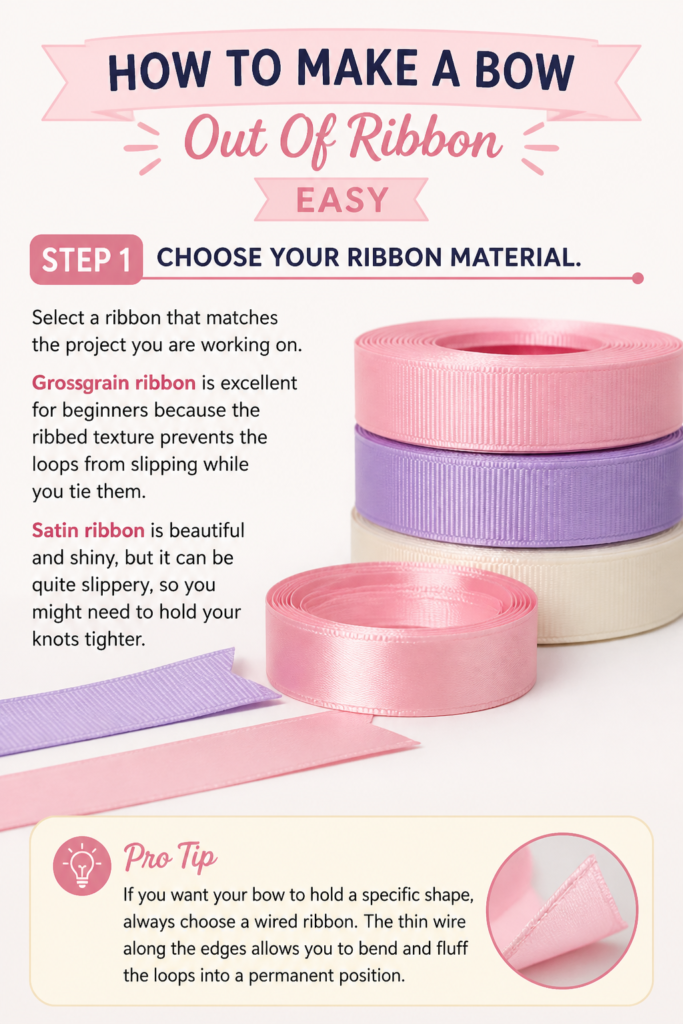
Grosgrain ribbon is excellent for beginners because the ribbed texture prevents the loops from slipping while you tie them.
Satin ribbon is beautiful and shiny, but it can be quite slippery, so you might need to hold your knots tighter.
Pro Tip: If you want your bow to hold a specific shape, always choose a wired ribbon. The thin wire along the edges allows you to bend and fluff the loops into a permanent position.
Step 2: Measure and Cut the Length
Measure about 12 to 15 inches of ribbon for a standard-sized gift bow.
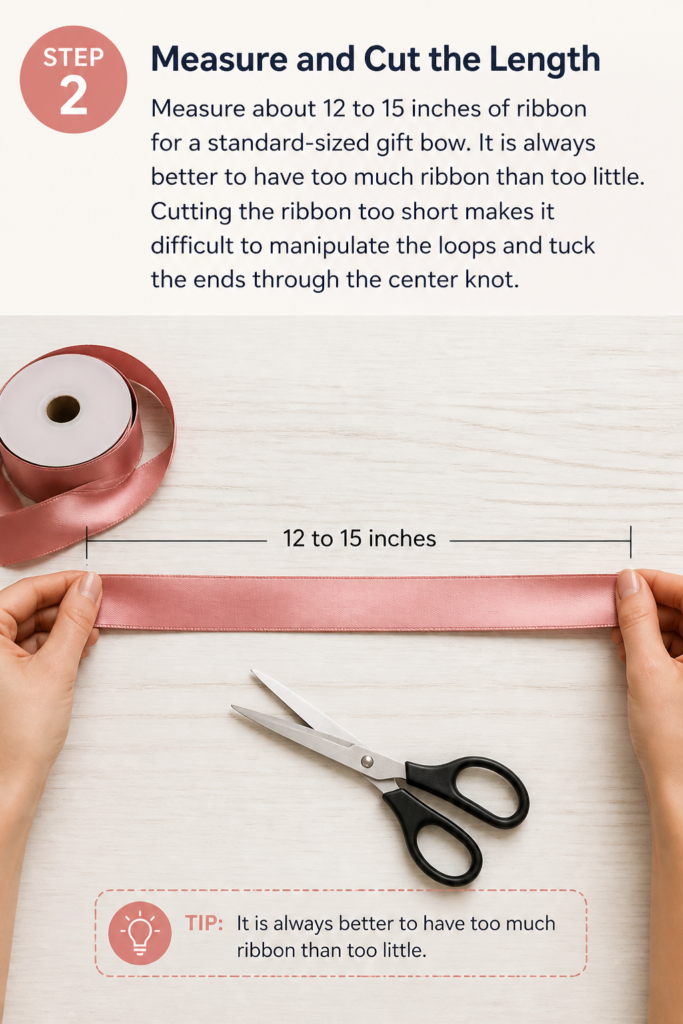
It is always better to have too much ribbon than too little.
Cutting the ribbon too short makes it difficult to manipulate the loops and tuck the ends through the center knot.
Step 3: Create Two Even Loops
Form two loops (often called “bunny ears”) by folding the ribbon over itself.
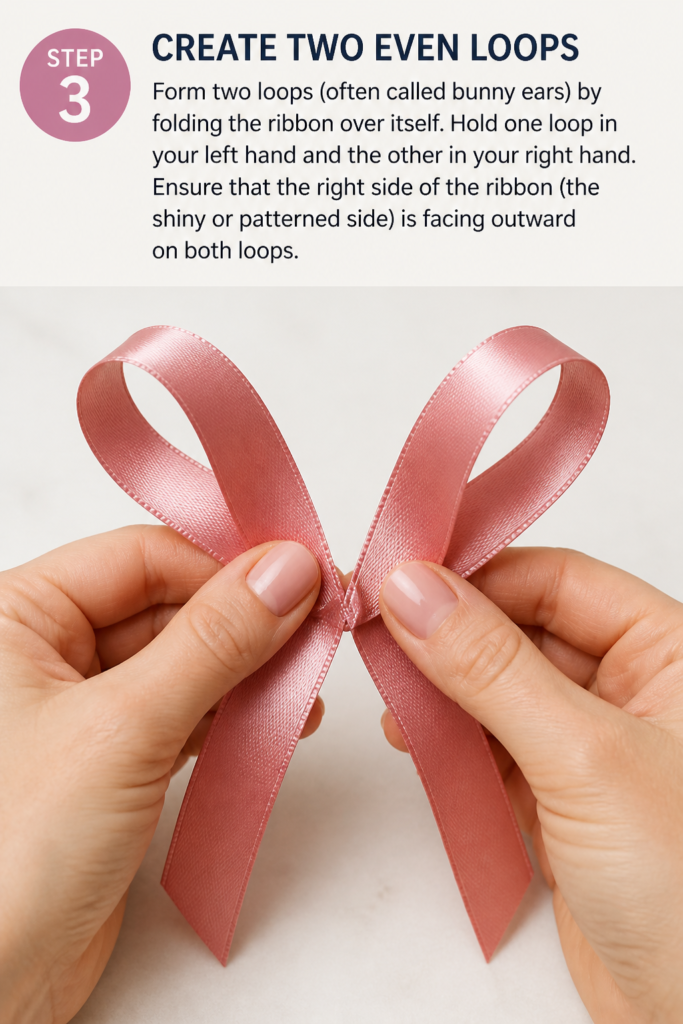
Hold one loop in your left hand and the other in your right hand.
Ensure that the “right” side of the ribbon (the shiny or patterned side) is facing outward on both loops.
Step 4: Cross the Loops
Place the left loop over the right loop to create an “X” shape.
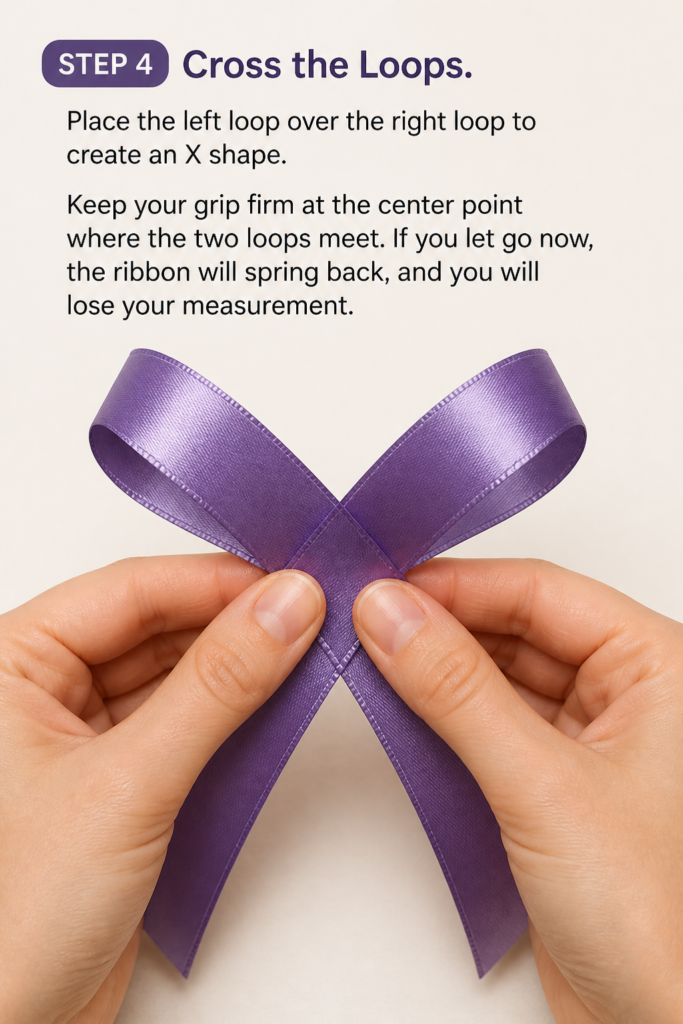
Keep your grip firm at the center point where the two loops meet.
If you let go now, the ribbon will spring back, and you will lose your measurement.
Step 5: Fold the Top Loop Under
Take the loop that is now on top and fold it behind the bottom loop.
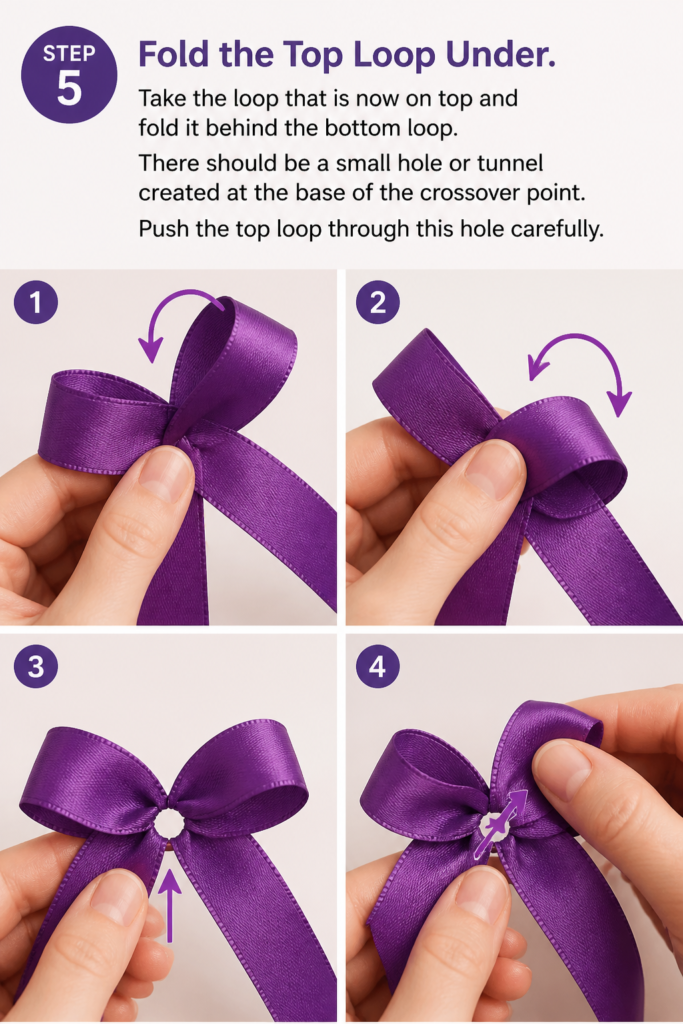
There should be a small hole or “tunnel” created at the base of the crossover point.
Push the top loop through this hole carefully.
Step 6: Pull the Loops Tight
Grasp both loops and pull them away from each other slowly.
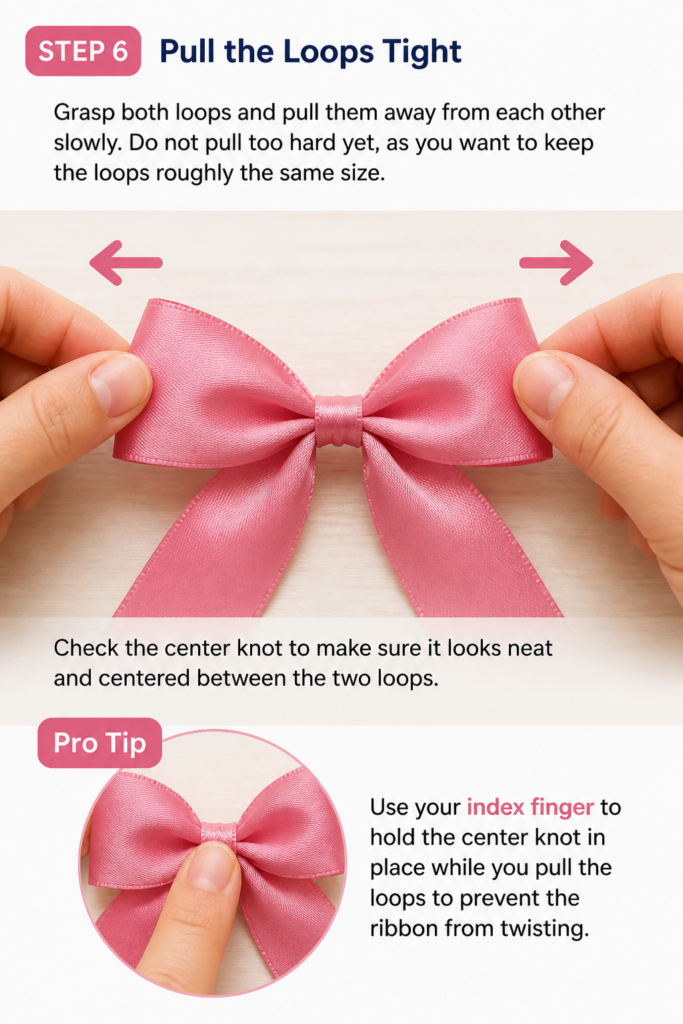
Do not pull too hard yet, as you want to keep the loops roughly the same size.
Check the center knot to make sure it looks neat and centered between the two loops.
Pro Tip: Use your index finger to hold the center knot in place while you pull the loops to prevent the ribbon from twisting.
Step 7: Adjust the Loop Size
Slide the ribbon through the knot to make the loops larger or smaller.
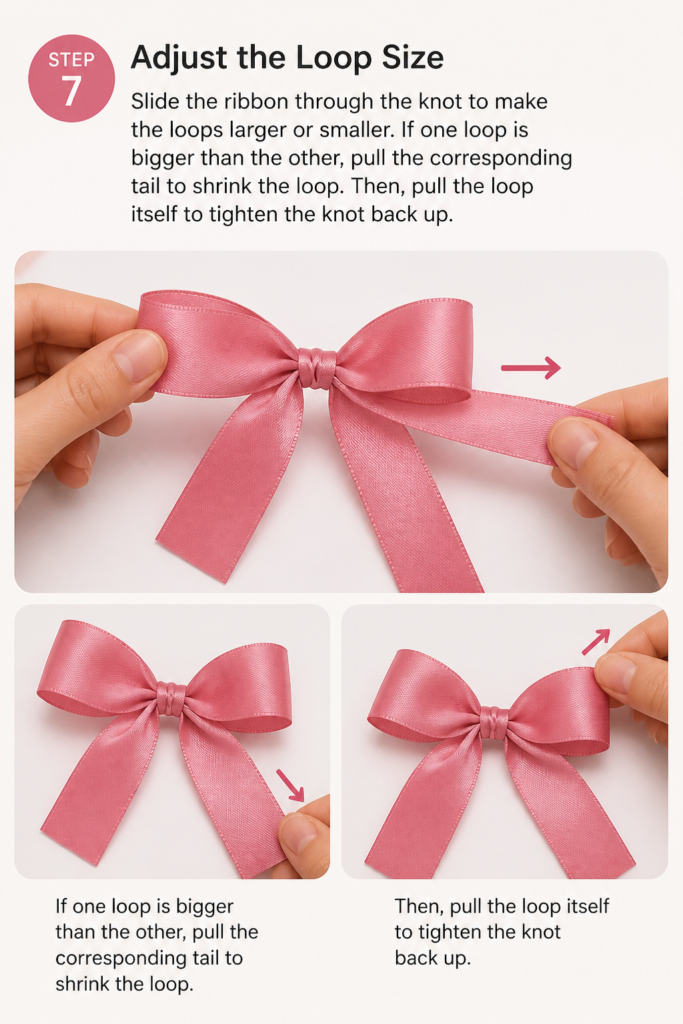
If one loop is bigger than the other, pull the corresponding tail to shrink the loop.
Then, pull the loop itself to tighten the knot back up.
Step 8: Shape the Tails
Straighten the two ends of the ribbon so they hang down evenly.
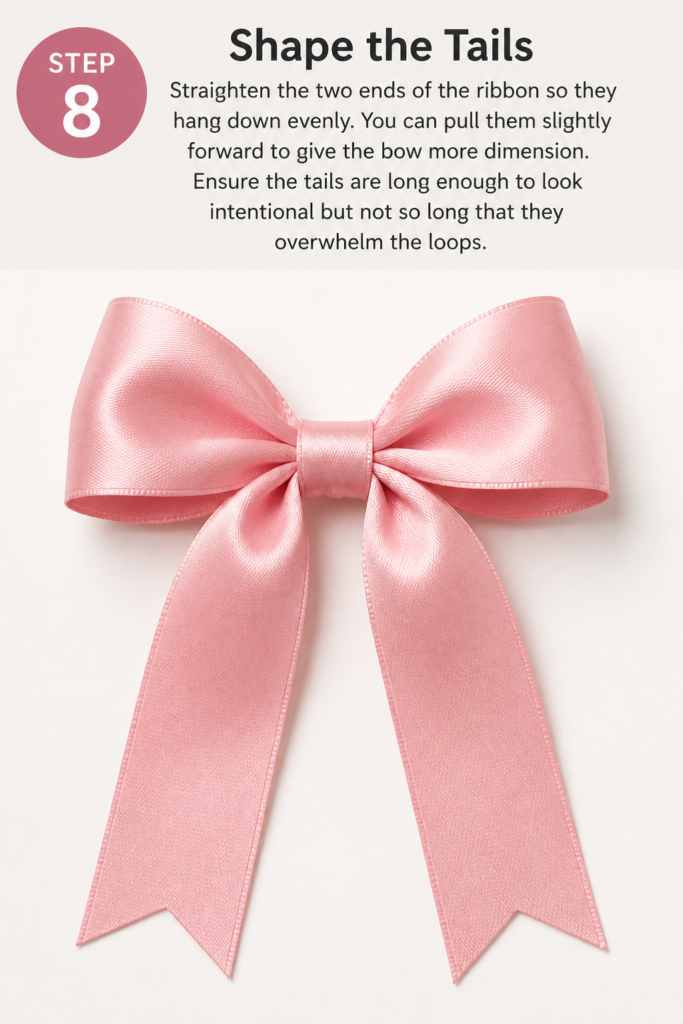
You can pull them slightly forward to give the bow more dimension.
Ensure the tails are long enough to look intentional but not so long that they overwhelm the loops.
Step 9: Trim the Ends Professionally
Cut the ends of the ribbon at a 45-degree angle for a classic look.
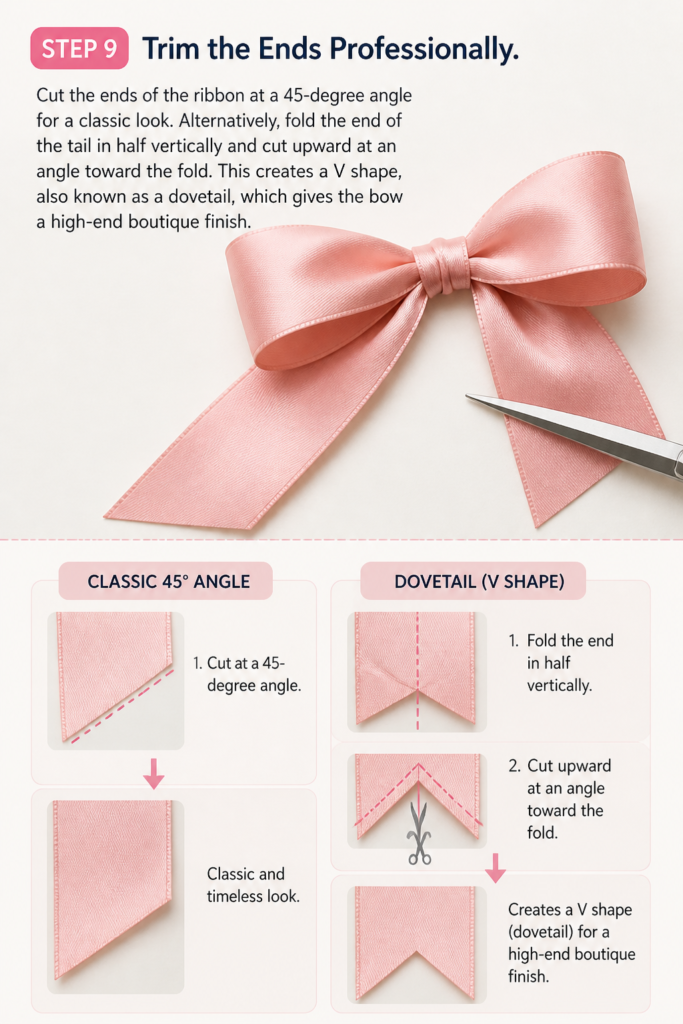
Alternatively, fold the end of the tail in half vertically and cut upward at an angle toward the fold.
This creates a “V” shape, also known as a dovetail, which gives the bow a high-end boutique finish.
Step 10: Fluff and Finish
Insert your fingers into the loops and pull them outward to create volume.
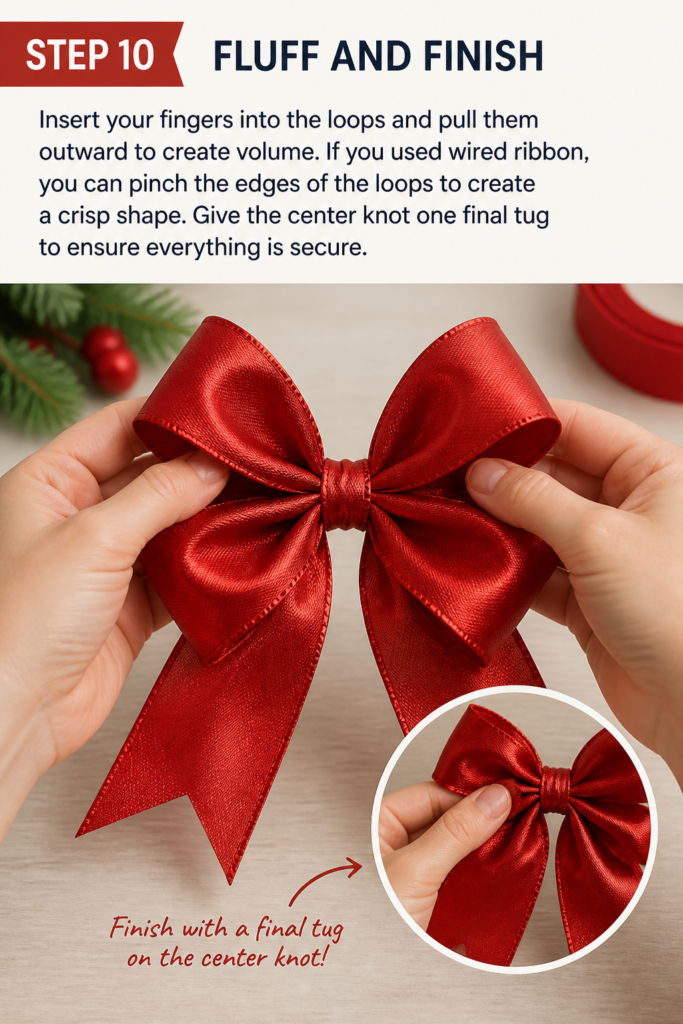
If you used wired ribbon, you can pinch the edges of the loops to create a crisp shape.
Give the center knot one final tug to ensure everything is secure.
13 Easy Bow Variations to Try
Now that you know the basic method, you can try these 13 variations to expand your skills.
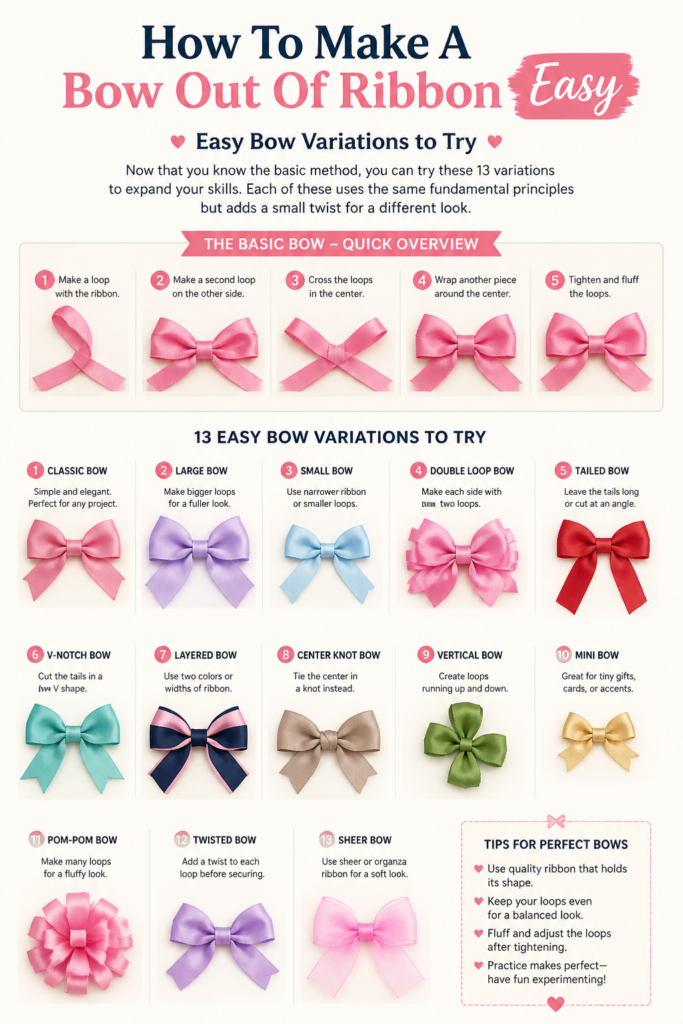
Each of these uses the same fundamental principles but adds a small twist for a different look.
1. The Classic Two-Loop Bow
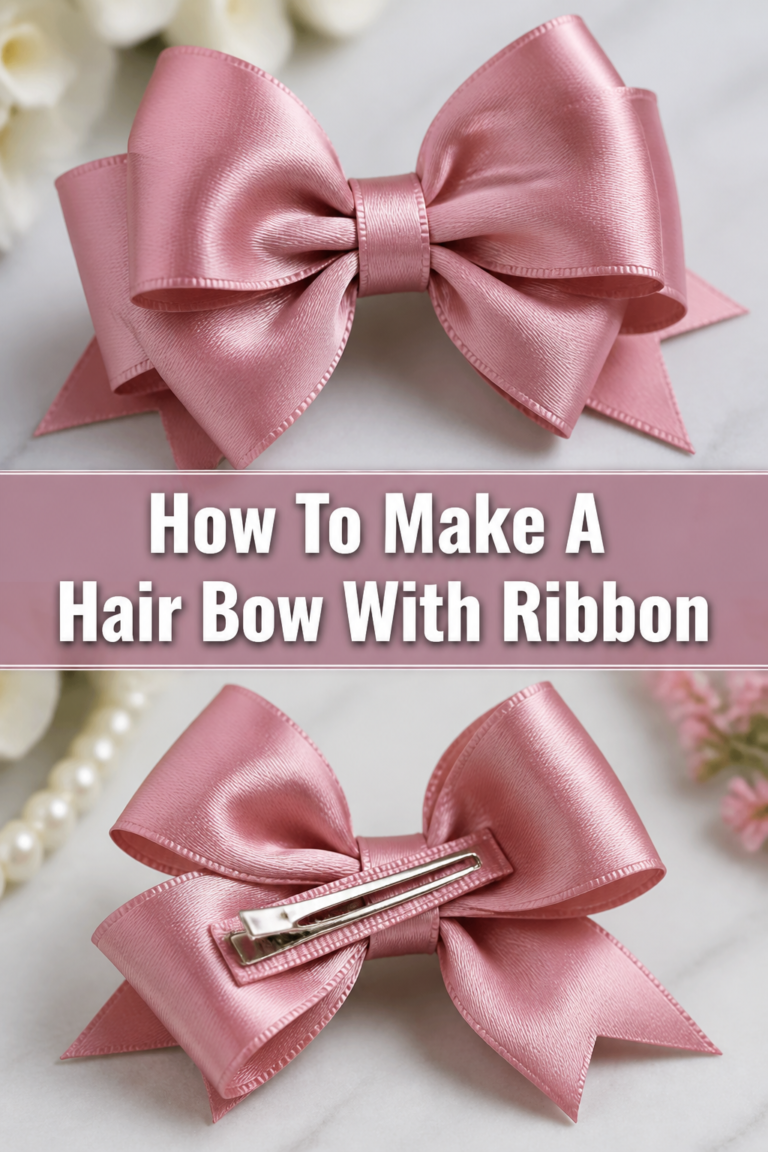
This is the method we just covered in the steps above. It is the most versatile style for gifts and hair accessories.
2. The Multi-Loop Floral Bow
Instead of two loops, you create several loops of the same size and stack them together. Secure the center with floral wire instead of a ribbon knot.
3. The Simple Knot Bow
This style features very small loops and very long tails. It works best with thin velvet or silk ribbons for a minimalist look.
4. The Layered Ribbon Bow
Place a thinner ribbon on top of a wider ribbon before you start tying. Tie them together as if they are a single piece of fabric.
5. The Dior Bow
This is a flat bow made by creating loops that lay on top of each other. It is often secured with a small piece of ribbon wrapped around the middle.
6. The Pom-Pom Bow
Wrap ribbon around your hand about ten times. Slide it off, notch the center, and tie it tight with wire before pulling the loops out in every direction.
7. The Tulle Puff Bow
Use wide tulle ribbon to create a soft, airy bow. Because tulle is so light, you can make the loops much larger without them sagging.
8. The Burlap Rustic Bow
Use stiff burlap ribbon for a farmhouse aesthetic. This material requires more force to tie, but the resulting bow is very sturdy.
9. The Double-Sided Ribbon Bow
If your ribbon has a pattern on only one side, you must twist the ribbon as you tuck it through the knot. This ensures the pattern always faces forward.
10. The Rosette Bow
Twist the ribbon tightly as you wrap it in a circle. This creates a flower-like shape rather than a traditional looped bow.
11. The Fork Bow
For tiny bows, wrap thin ribbon around the tines of a dinner fork. This acts as a loom to keep your loops perfectly tiny and even.
12. The Tree Topper Bow
This uses extra-wide wired ribbon and features extremely long tails that cascade down the sides of a Christmas tree.
13. The Sash Bow
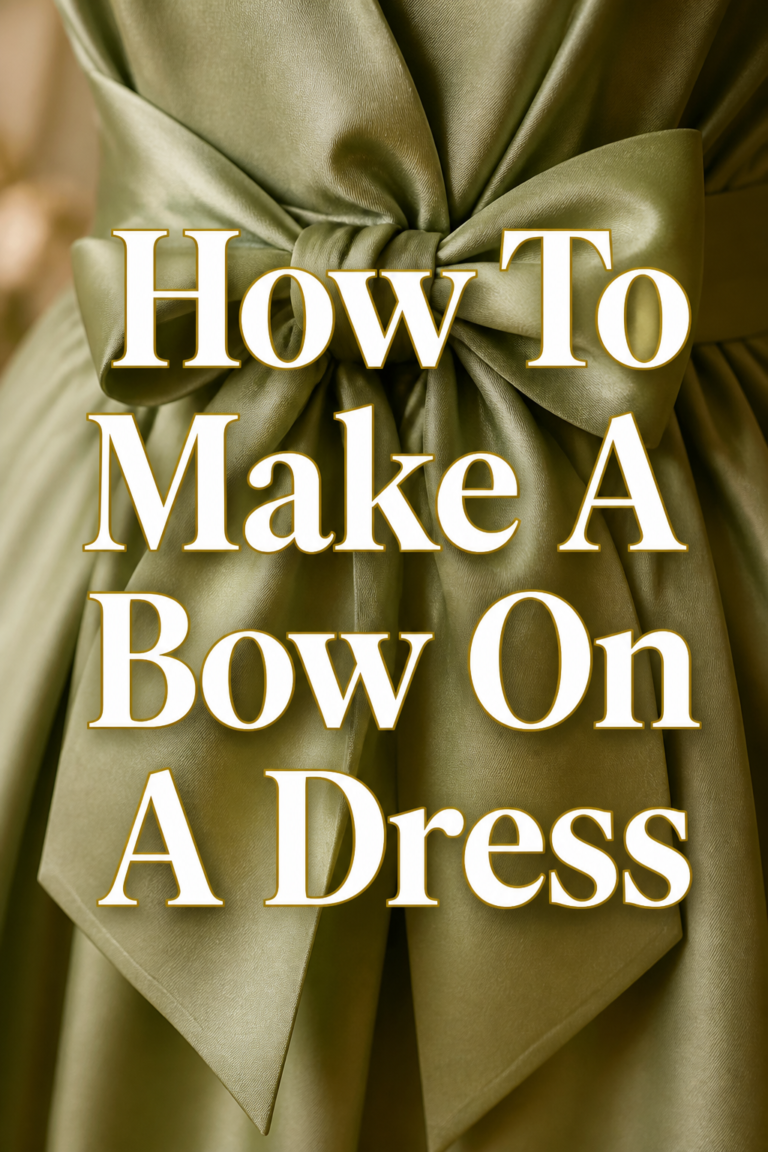
Tie a bow directly onto a chair or a person’s waist. The key here is to keep the loops flat against the surface so they don’t flop over.
Common Mistakes to Avoid
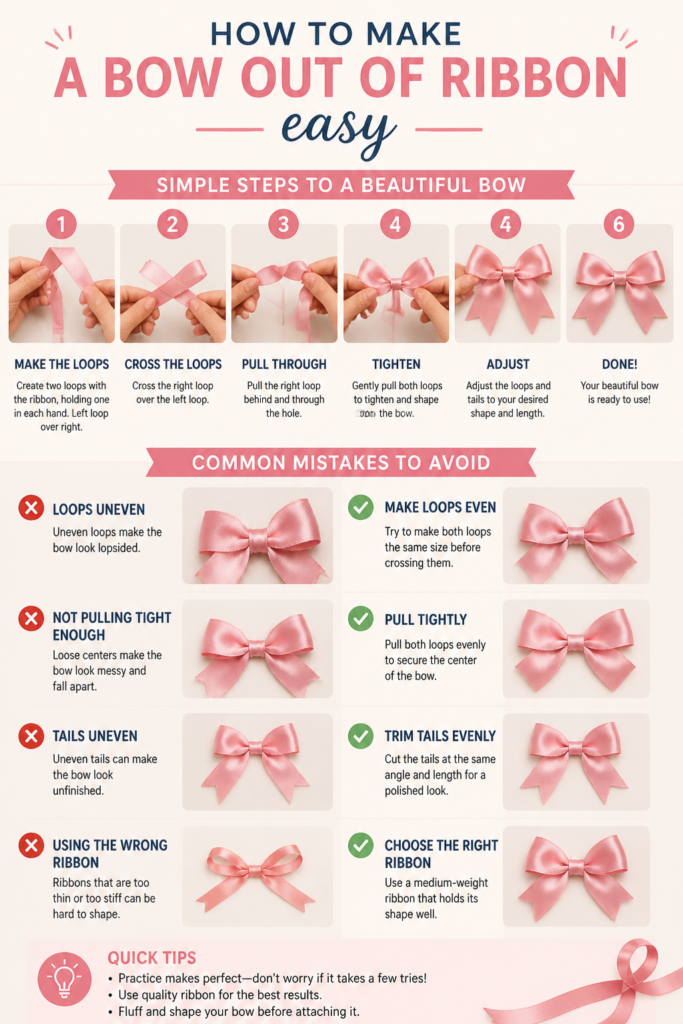
Using Dull Scissors
Nothing ruins a beautiful bow faster than jagged, frayed edges. If your scissors are not sharp, they will chew through the fibers of the ribbon instead of slicing them. Always use dedicated fabric scissors to get that crisp, clean angle on your tails.
Pulling the Knot Too Early
If you tighten the center knot before your loops are even, you will struggle to adjust them later. The friction of a tight knot can actually damage delicate ribbons like silk or organza. Keep the knot slightly loose until you are 100% happy with the symmetry of the loops.
Ignoring the Ribbon Grain
Ribbons like grosgrain have a specific horizontal grain. If you twist the ribbon haphazardly, the grain will catch light differently on each loop. Pay attention to the direction of the fabric to ensure a uniform, professional appearance.
Troubleshooting
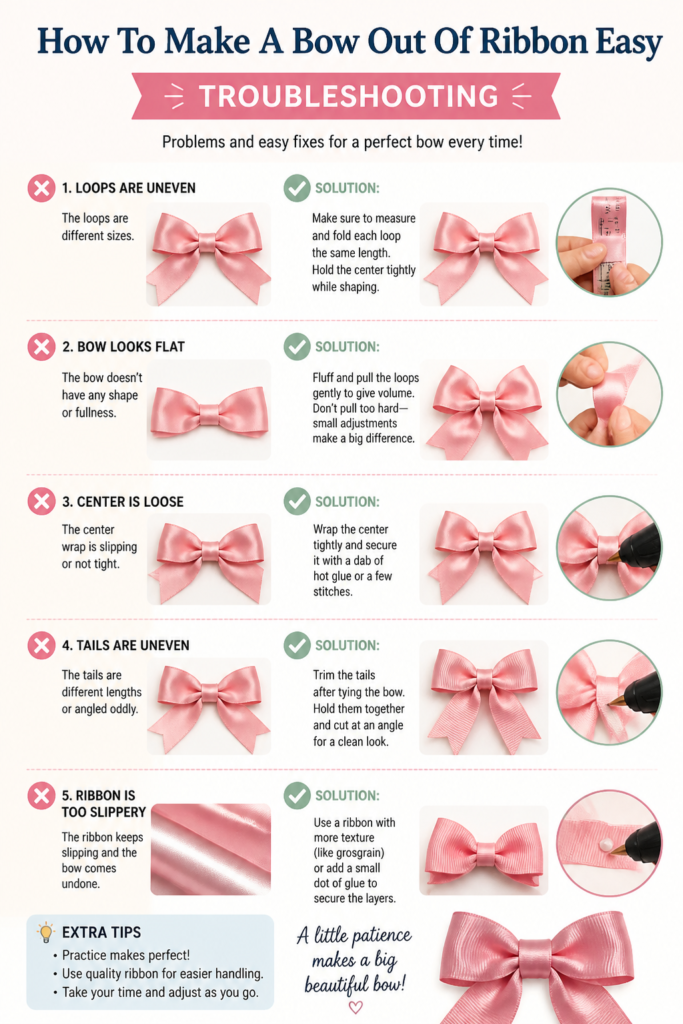
The Bow Keeps Falling Flat
This usually happens when the ribbon is too soft or the loops are too large for the material’s weight. You can fix this by spraying the finished bow with a little bit of heavy-duty hairspray. Alternatively, switch to a wired ribbon that can support its own weight.
The Center Knot Looks Messy
A bulky or twisted center knot often occurs when the ribbon is too wide for the bow size. Try folding the ribbon in half lengthwise just at the point where the knot will be. This reduces the bulk in the center while allowing the loops to remain wide and full.
The Tails Are Curling Upward
Ribbon often retains the curl from the spool it was stored on. To fix this, run the tails over the edge of a table or use a warm (not hot) hair straightener to flatten them. Be careful with synthetic ribbons, as they can melt if the heat is too high.
Key Takeaways
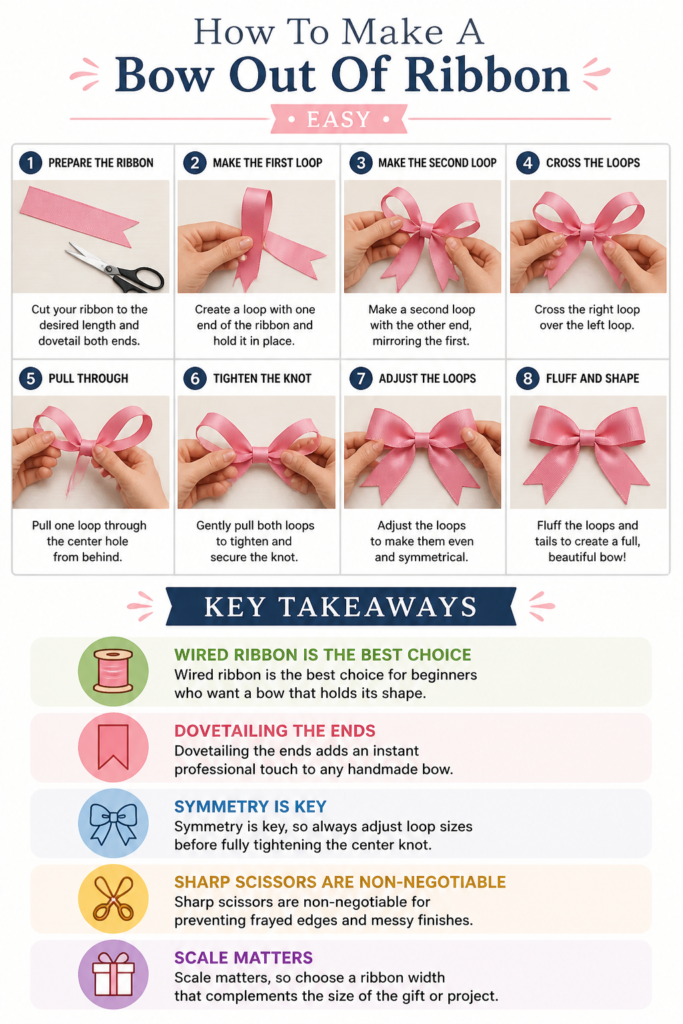
- Wired ribbon is the best choice for beginners who want a bow that holds its shape.
- Dovetailing the ends adds an instant professional touch to any handmade bow.
- Symmetry is key, so always adjust loop sizes before fully tightening the center knot.
- Sharp scissors are non-negotiable for preventing frayed edges and messy finishes.
- Scale matters, so choose a ribbon width that complements the size of the gift or project.
Frequently Asked Questions
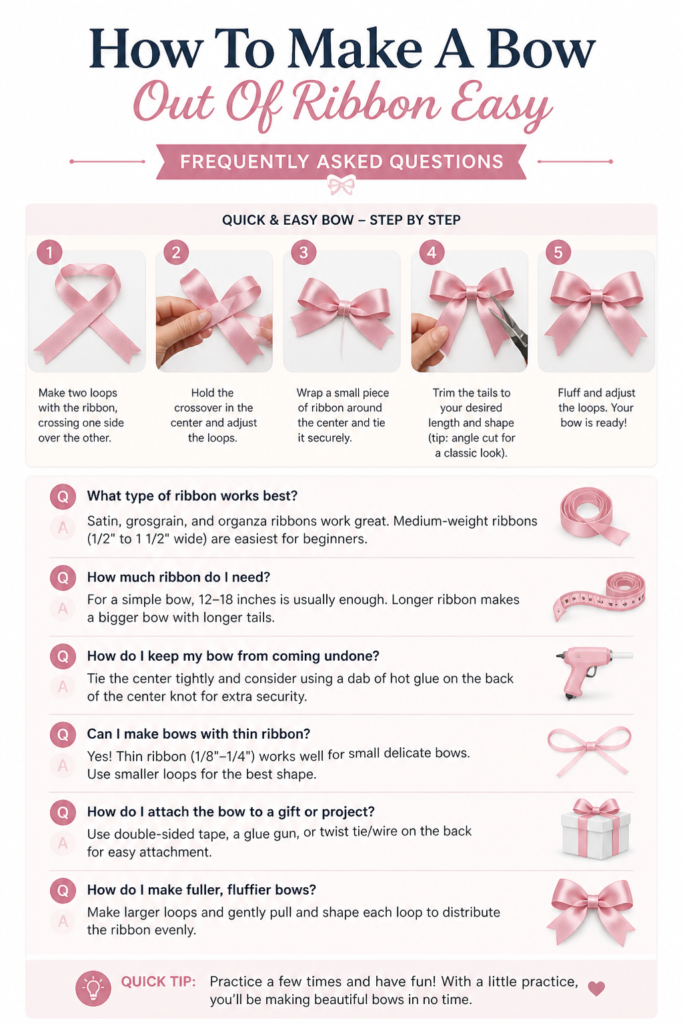
How much ribbon do I need for a standard bow?
For a medium-sized gift, you generally need about 12 to 18 inches of ribbon. If you want very long, cascading tails, you should increase that to 24 inches. It is always safer to have a few extra inches to hold onto while you are tying the knot.
What is the difference between wired and non-wired ribbon?
Wired ribbon has a very thin copper or stainless steel wire embedded in the edges. This allows you to “pose” the bow and fluff the loops so they stay open. Non-wired ribbon is softer and drapes naturally, making it better for clothing or hair bows that need to feel comfortable.
How do I stop ribbon from fraying at the ends?
You can carefully singe the very edge of synthetic ribbons (like polyester or nylon) with a lighter to melt the fibers together. For natural fibers like cotton, use a small amount of clear nail polish or a specialized “fray check” liquid on the cut edge.
Can I wash a ribbon bow?
It depends on the material. Grosgrain and satin bows can usually be hand-washed in cool water and air-dried. However, wired bows should never be washed, as the wire can rust or poke through the fabric when wet.
Our Top Recommended Finds
- Wired Edge Satin Ribbon: This is the gold standard for holiday decorating because it combines the shine of satin with the structural integrity of wire.
- Professional Fabric Shears: Investing in a pair of high-quality scissors will make your cuts smoother and prevent hand fatigue during big projects.
- Green Floral Wire: This is essential for the “13 variations” mentioned above, as it allows you to secure complex, multi-loop bows without the bulk of a fabric knot.
Elevate Your Crafting Skills Today
Now that you have mastered the art of the perfect bow, think about where else you can apply these skills.
You could create custom wreaths for your front door or design unique hair accessories for friends and family.
The best way to get better is to grab a scrap piece of ribbon and practice these steps while watching your favorite show.
Before you know it, you will be the person everyone turns to when they need a gift to look spectacular.
Beginner-friendly templates, step-by-step guides,
and weekly project ideas in your inbox.