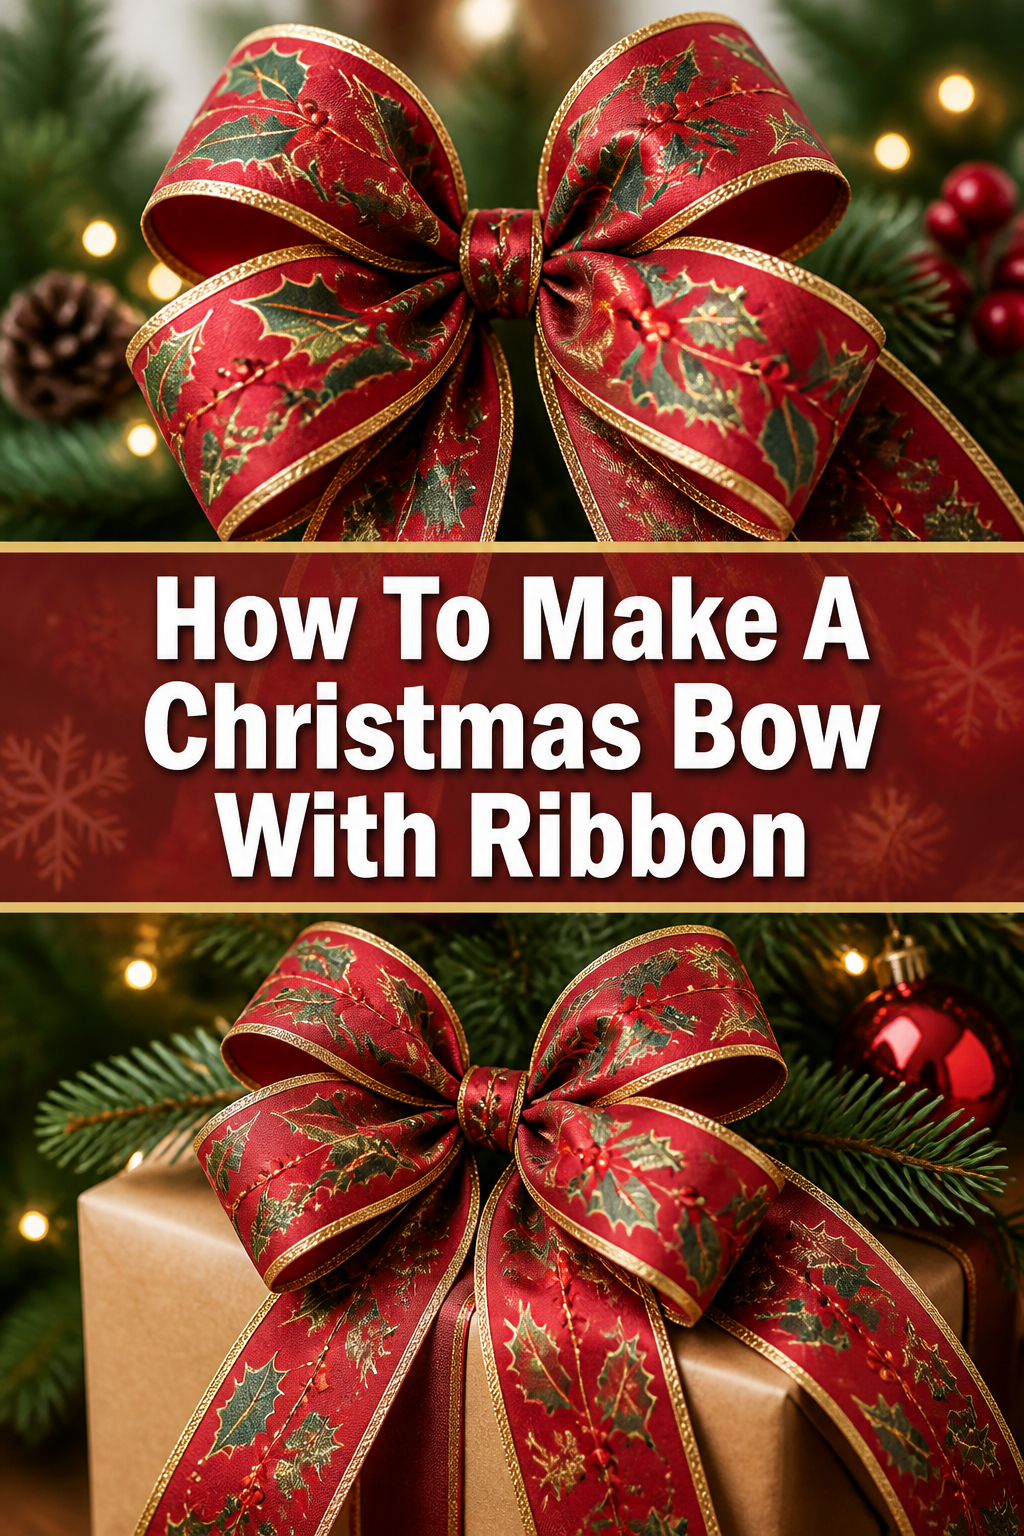
🎀 How To Make A Christmas Bow With Ribbon

Beginner-friendly templates, step-by-step guides,
and weekly project ideas in your inbox.
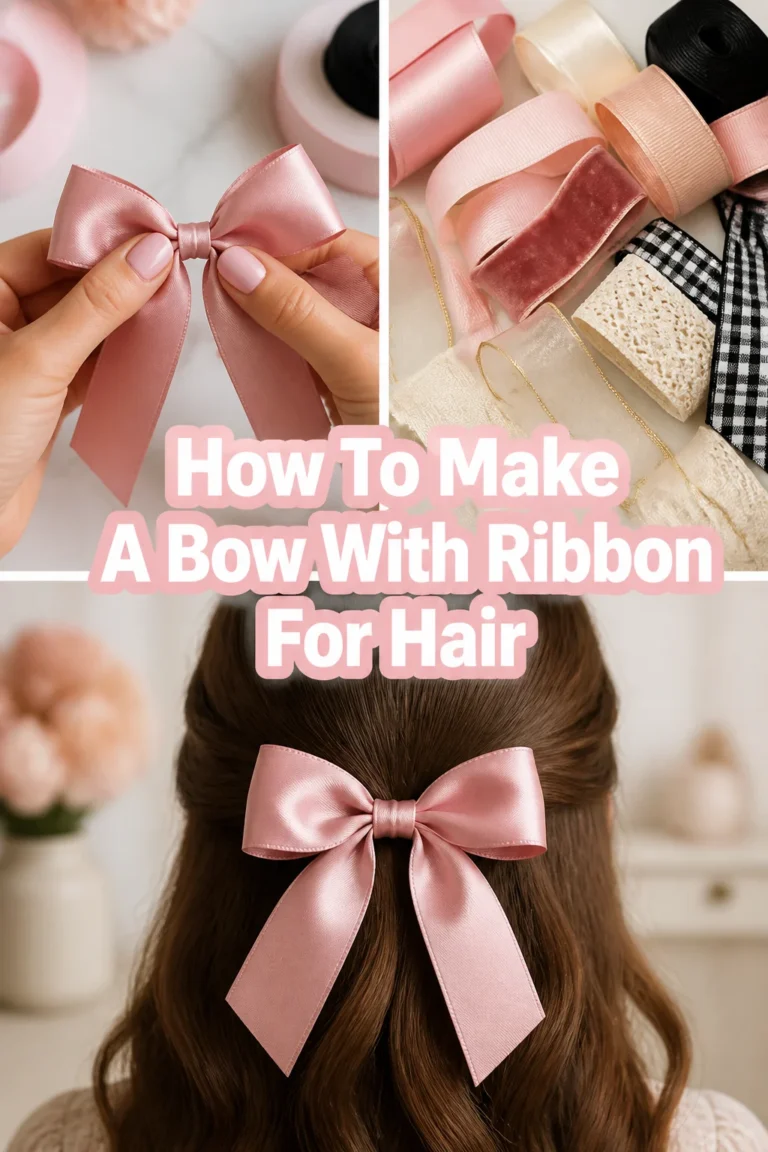
Creating beautiful Christmas bows is a skill I’ve cherished for years, adding a personal touch to countless gifts and decorations. There’s a unique satisfaction in transforming a simple ribbon into a festive flourish. This guide will walk you through the process, making it easy for anyone to craft stunning bows with confidence.
Quick Overview
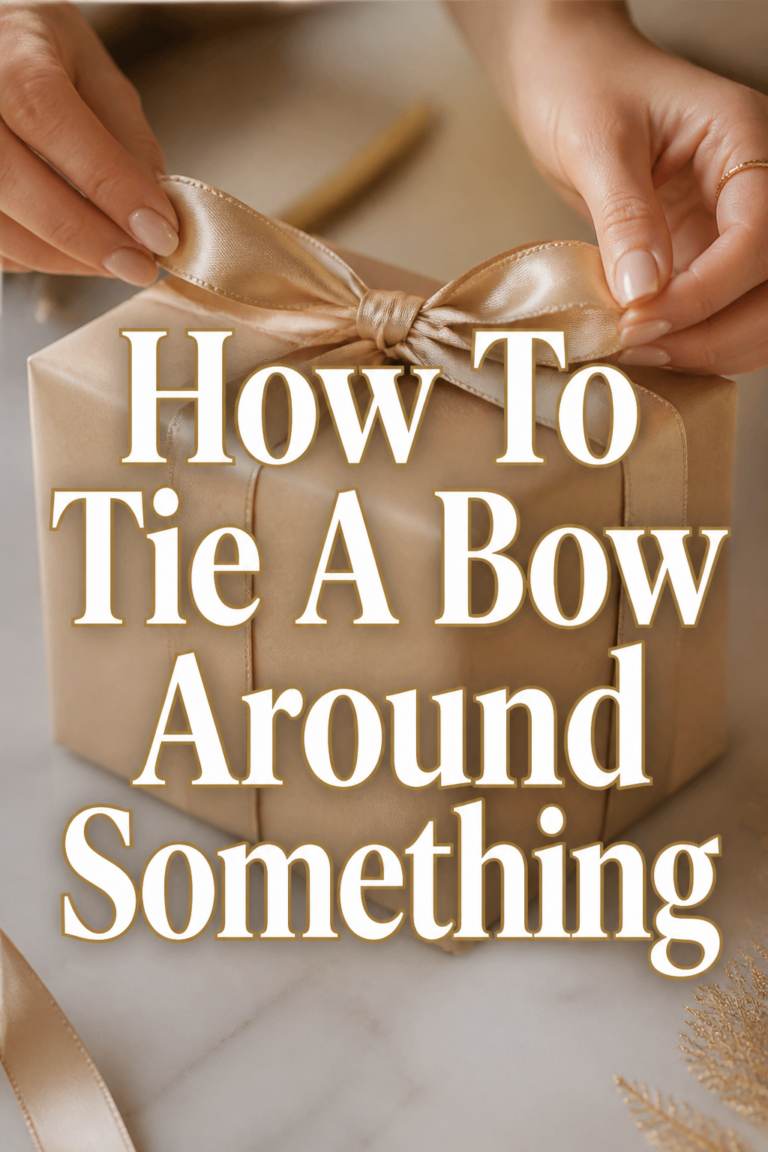
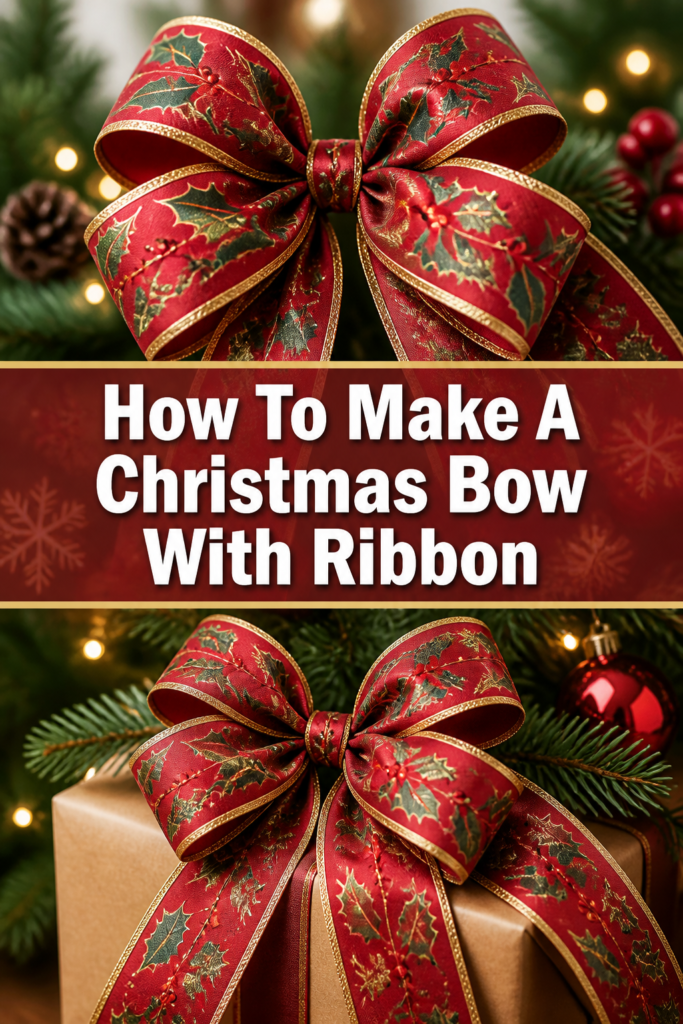
Crafting your own Christmas bows is a delightful way to personalize your holiday decor and gifts. You’ll learn how to create a classic, full bow that looks professionally made. This project is perfect for adding charm to wreaths, presents, and garlands.
- Time needed: 15-20 minutes
- Difficulty: Beginner
- What you’ll need: Wired ribbon, floral wire or pipe cleaner, sharp scissors
Step-by-Step Instructions
Step 1: Gather Your Materials
Before you begin, ensure you have all your supplies ready and within reach. This makes the entire bow-making process smoother and more enjoyable. Choose a ribbon that complements your holiday theme.
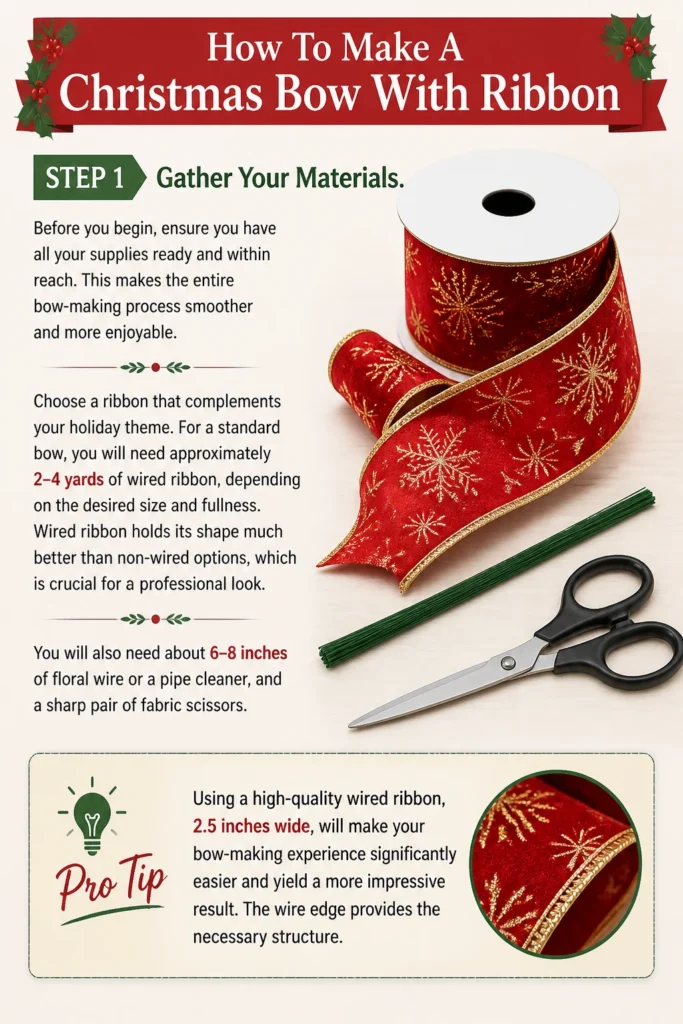
For a standard bow, you will need approximately 2-4 yards of wired ribbon, depending on the desired size and fullness. Wired ribbon holds its shape much better than non-wired options, which is crucial for a professional look. You will also need about 6-8 inches of floral wire or a pipe cleaner, and a sharp pair of fabric scissors.
Pro Tip: Using a high-quality wired ribbon, preferably 2.5 inches wide, will make your bow-making experience significantly easier and yield a more impressive result. The wire edge provides the necessary structure.
Step 2: Measure and Prepare Your Ribbon
To start, unroll a generous length of ribbon but do not cut it from the spool yet. This allows for flexibility and prevents you from running short. You’ll want to create a “tail” first.
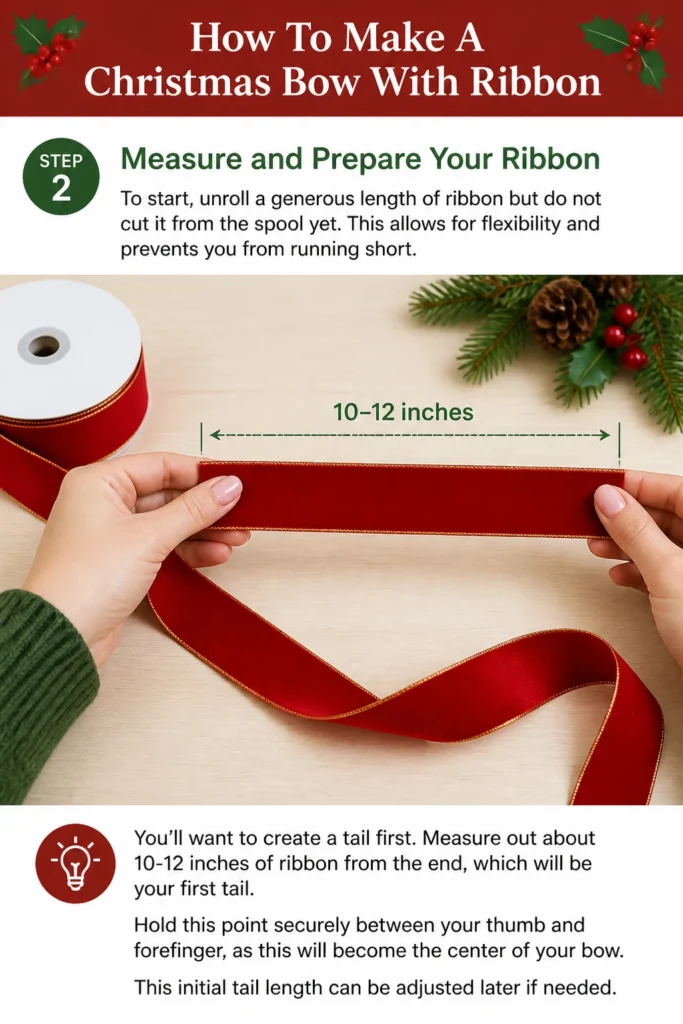
Measure out about 10-12 inches of ribbon from the end, which will be your first tail. Hold this point securely between your thumb and forefinger, as this will become the center of your bow. This initial tail length can be adjusted later if needed.
Step 3: Form the First Loops
With your starting point held firmly, begin creating your first set of loops. Twist the ribbon at the center point so the “right” side of the ribbon is always facing outwards. This twist is essential for a polished appearance.
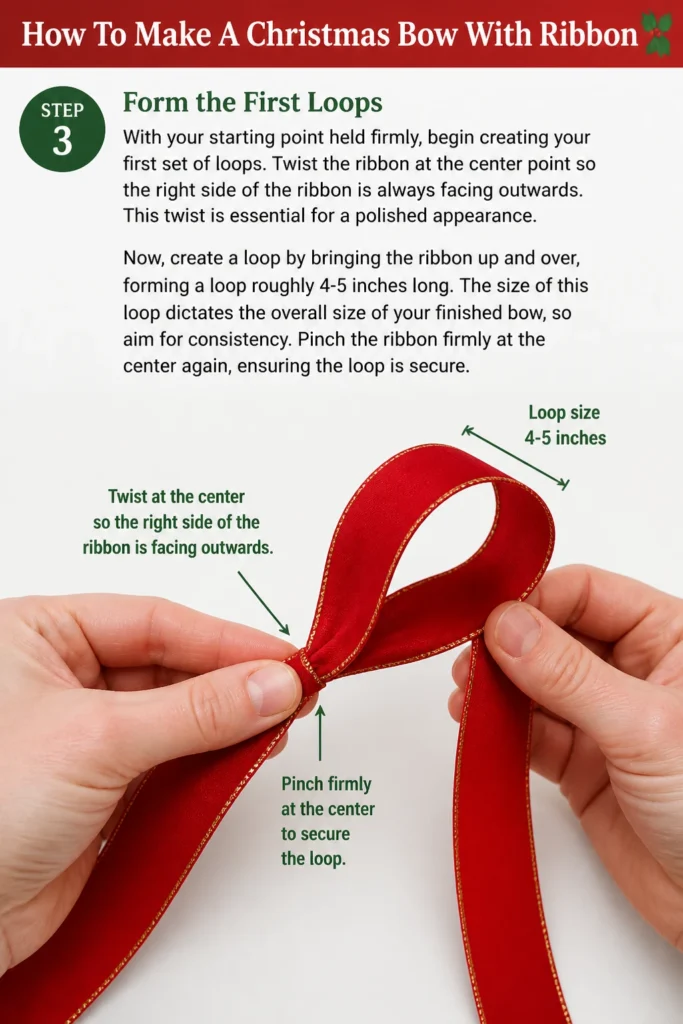
Now, create a loop by bringing the ribbon up and over, forming a loop roughly 4-5 inches long. The size of this loop dictates the overall size of your finished bow, so aim for consistency. Pinch the ribbon firmly at the center again, ensuring the loop is secure.
Step 4: Create Additional Loops
After forming your first loop, twist the ribbon again at the center, ensuring the decorative side faces up. Then, form a second loop on the opposite side, matching the length of the first loop. This creates your first pair of symmetrical loops.
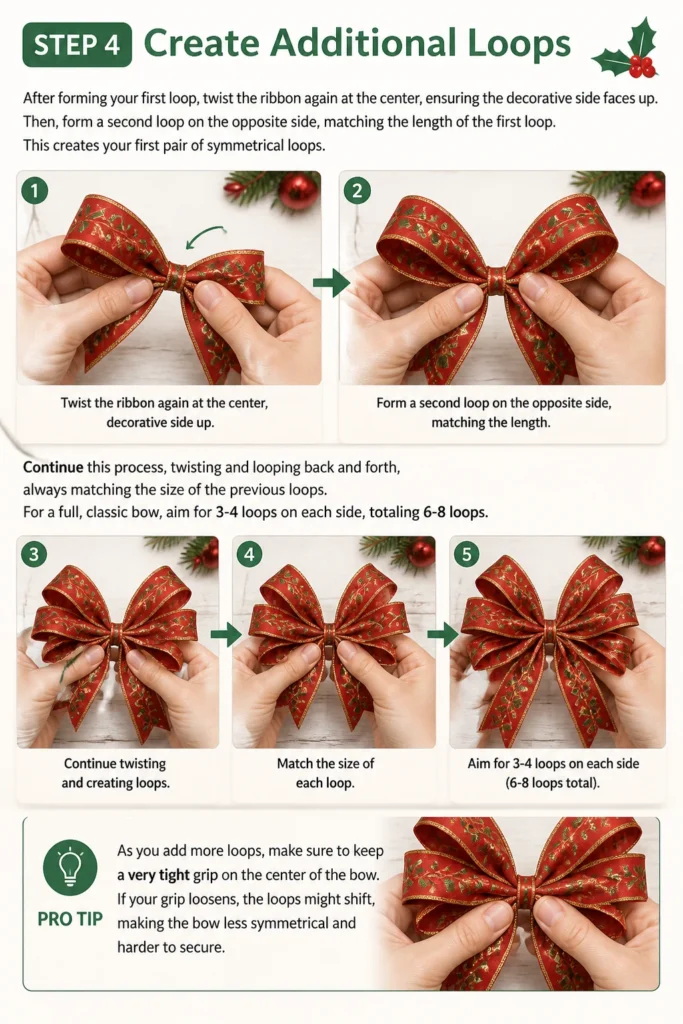
Continue this process, twisting and looping back and forth, always matching the size of the previous loops. For a full, classic bow, aim for 3-4 loops on each side, totaling 6-8 loops. Each twist at the center is vital for maintaining the bow’s structure and ensuring the ribbon’s pattern is visible on all loops.
Pro Tip: As you add more loops, make sure to keep a very tight grip on the center of the bow. If your grip loosens, the loops might shift, making the bow less symmetrical and harder to secure.
Step 5: Add a Center Loop and Secure the Bow
Once you have created all your main loops, you can opt to add a small center loop for a more finished look. Form a final, smaller loop in the very center, bringing the ribbon around your thumb. This loop can be about 1-2 inches long.
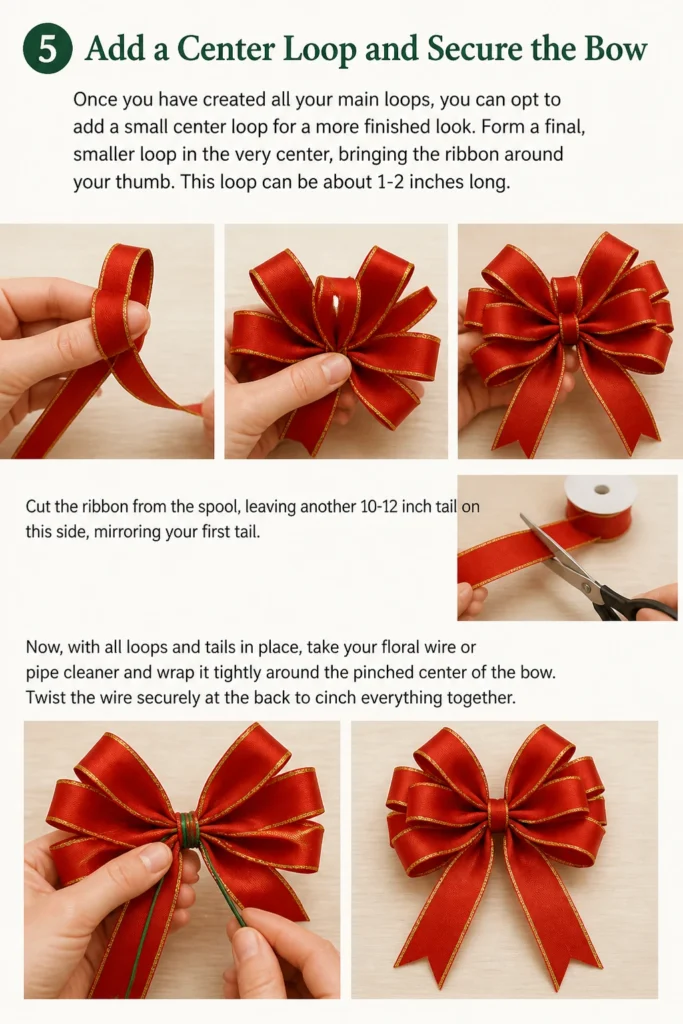
Cut the ribbon from the spool, leaving another 10-12 inch tail on this side, mirroring your first tail. Now, with all loops and tails in place, take your floral wire or pipe cleaner and wrap it tightly around the pinched center of the bow. Twist the wire securely at the back to cinch everything together.
Step 6: Trim and Shape the Tails
After securing the center, your bow will have two long tails. Trim these tails to your desired length. A common and attractive finish is to cut the ends at an angle or create a “V” shape.
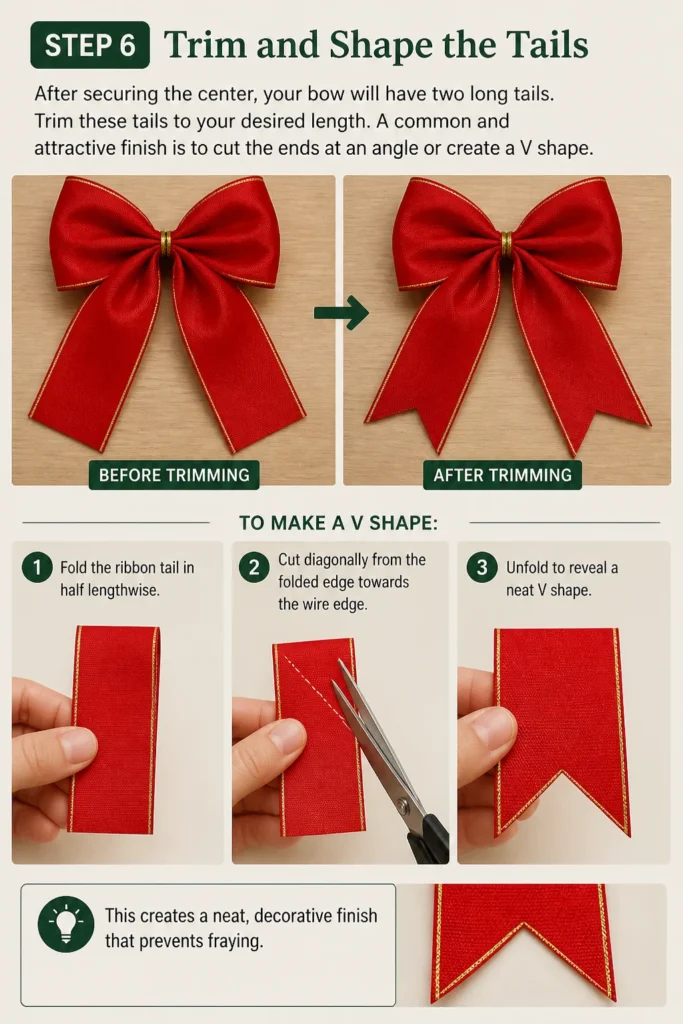
To make a “V” shape, fold the ribbon tail in half lengthwise. Then, cut diagonally from the folded edge towards the wire edge. This creates a neat, decorative finish that prevents fraying.
Step 7: Fluff and Arrange Your Loops
This step is where your bow truly comes to life. Starting from the innermost loops, gently pull and separate each loop. Twist them slightly and puff them out to create volume and dimension.
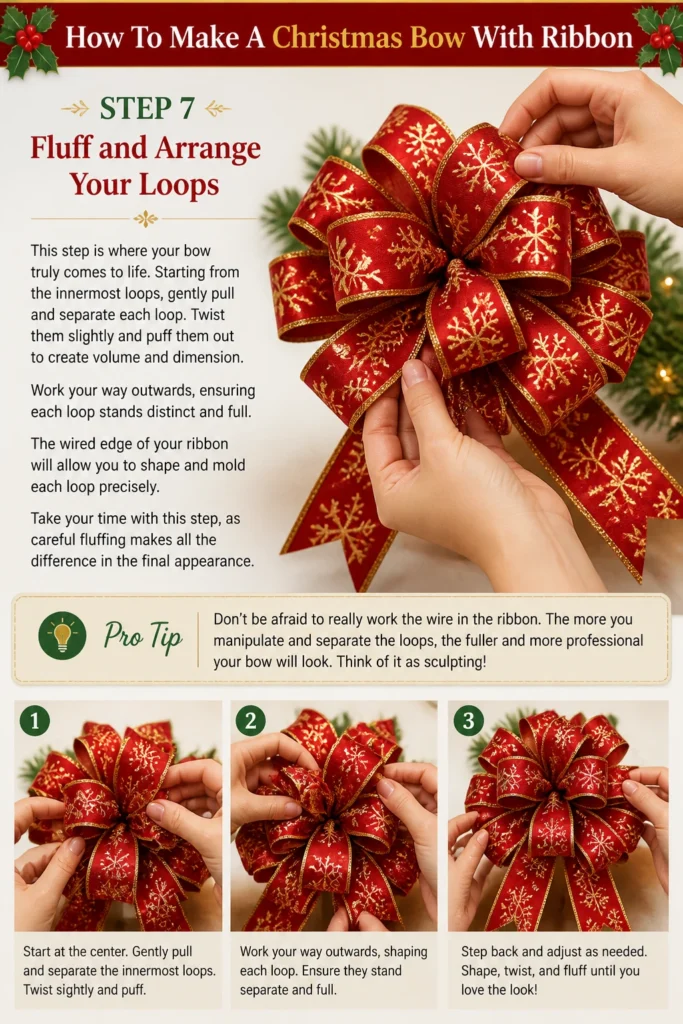
Work your way outwards, ensuring each loop stands distinct and full. The wired edge of your ribbon will allow you to shape and mold each loop precisely. Take your time with this step, as careful fluffing makes all the difference in the final appearance.
Pro Tip: Don’t be afraid to really work the wire in the ribbon. The more you manipulate and separate the loops, the fuller and more professional your bow will look. Think of it as sculpting!
Step 8: (Optional) Add Embellishments
For an extra festive touch, consider adding small embellishments to your finished bow. You can attach small ornaments, berries, pine cones, or even a sprig of greenery to the center of the bow using hot glue or additional floral wire.
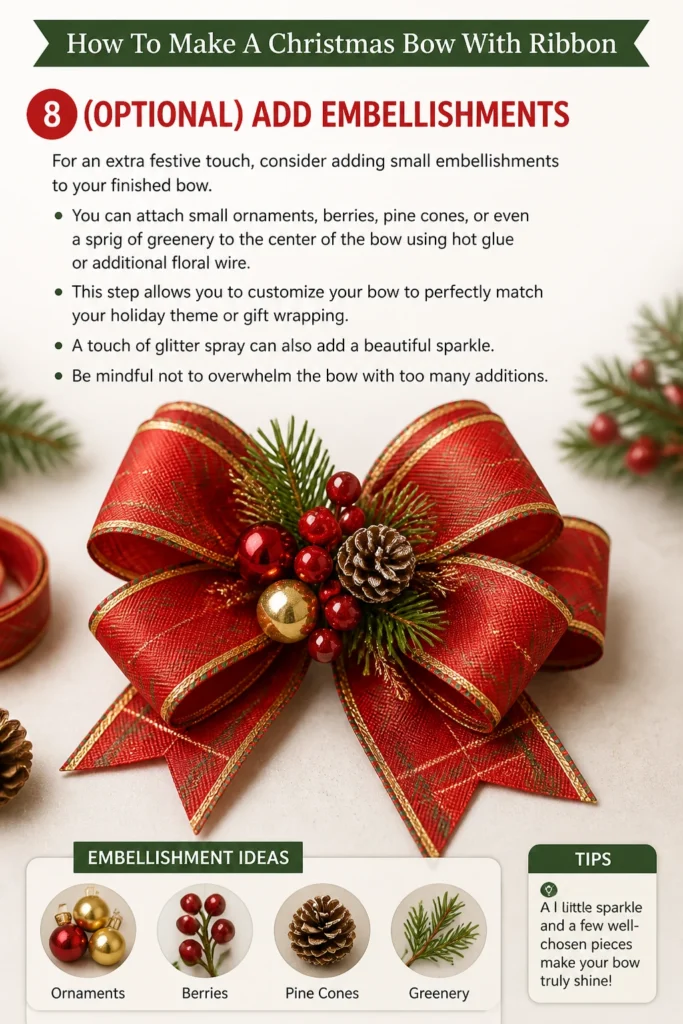
This step allows you to customize your bow to perfectly match your holiday theme or gift wrapping. A touch of glitter spray can also add a beautiful sparkle. Be mindful not to overwhelm the bow with too many additions.
Common Mistakes to Avoid
Not Using Wired Ribbon
One of the most frequent errors is attempting to make a structured bow with plain, non-wired ribbon. While possible for simpler designs, it will result in a floppy, shapeless bow that quickly loses its appeal. Wired ribbon provides the essential structure to hold your loops in place.
Loose Grip at the Center
Throughout the looping process, many beginners tend to loosen their grip on the center of the bow. This causes loops to shift, become uneven, and makes securing the bow with wire difficult. Maintain a consistently firm pinch at the center point from start to finish.
Uneven Loop Sizes
A common pitfall is creating loops of varying sizes. This leads to an unbalanced and less professional-looking bow. Strive for consistency in loop length by visually comparing each new loop to the previous ones as you form them.
Improper Ribbon Twisting
Forgetting to twist the ribbon at the center after each loop will result in the “wrong” side of the ribbon showing. This breaks the pattern and reduces the bow’s aesthetic appeal. Always twist the ribbon so the decorative side faces outwards for every loop.
Troubleshooting
My Bow Looks Flat
If your bow appears flat and lacks volume, it likely needs more fluffing. The wired edges of the ribbon are designed to be manipulated. Go back through each loop, gently pulling and twisting them away from the center to create space and dimension. Ensure you’ve separated all the loops and truly “puffed” them out.
The Ribbon is Fraying
Fraying can occur if your scissors are dull or if you are using a lower-quality ribbon. Always use very sharp fabric scissors for clean cuts. If fraying persists, you can carefully apply a tiny dab of clear fabric glue or fray check to the cut edges of the tails, or even lightly singe the very edge with a lighter (use extreme caution and only for synthetic ribbons).
My Bow Won’t Stay Attached
If your bow isn’t staying where you want it, ensure you’re using the floral wire or pipe cleaner correctly for attachment. For wreaths, thread the wire through the back of the bow and twist it around the wreath frame. For gifts, you can tie the wire around the package or use hot glue for a more permanent fixture on a gift bag or box. Consider adding a small loop of fishing line to the back of the bow if you need to hang it.
Key Takeaways
- Always use wired ribbon for structured, professional-looking bows.
- Maintain a firm grip on the bow’s center throughout the looping process.
- Twist the ribbon at the center with each loop to ensure the decorative side is always visible.
- Consistency in loop size is crucial for a symmetrical and balanced bow.
- Take your time to thoroughly fluff and shape each loop for maximum volume and impact.
- Don’t be afraid to experiment with ribbon types, colors, and embellishments to personalize your creations.
Frequently Asked Questions
What is the best type of ribbon for Christmas bows?
Wired ribbon, especially those made from a sturdy fabric like burlap, velvet, or a wired sheer, is ideal for Christmas bows. The wire allows the bow to hold its shape beautifully, making it easy to create full, voluminous loops that stay put.
Can I make smaller or larger bows using this method?
Absolutely! The size of your loops directly determines the size of your finished bow. For smaller bows, create shorter loops (e.g., 2-3 inches). For larger, more dramatic bows, extend your loop lengths (e.g., 6-8 inches or more) and use a wider ribbon. The technique remains the same, just adjust your measurements.
How do I attach my finished bow to a wreath or gift?
The floral wire or pipe cleaner you used to secure the bow’s center also serves as your attachment mechanism. For a wreath, simply thread the two ends of the wire through the wreath material and twist them tightly at the back. For gifts, you can tie the wire around the package or use a dab of hot glue if the bow is strictly decorative.
Can I reuse these homemade bows next year?
Yes, with proper care, your handmade bows can last for many seasons. Gently flatten them for storage in a box or bag to prevent crushing. When you’re ready to use them again, simply re-fluff and reshape the loops to bring them back to life.
Our Top Recommended Finds
- High-Quality Wired Ribbon Assortment: Look for rolls of 2.5-inch wide wired ribbon in festive colors and patterns. A good quality ribbon will be easier to work with and produce a more durable bow.
- Sharp Fabric Scissors: A dedicated pair of sharp fabric scissors will ensure clean cuts, prevent fraying, and make the trimming process effortless. Dull scissors are a common cause of frustration.
- Floral Wire or Green Pipe Cleaners: These are essential for securely cinching the center of your bow and providing a sturdy means of attachment. Floral wire is often preferred for its subtle appearance.
Your Festive Creations Await
Now you possess the knowledge and steps to craft stunning Christmas bows that will add warmth and personality to your holiday season. Imagine the joy of presenting a gift adorned with a bow you made yourself, or seeing your handmade creations enhancing your home decor. Gather your ribbon and scissors today and start creating beautiful bows that reflect your unique style.
Beginner-friendly templates, step-by-step guides,
and weekly project ideas in your inbox.