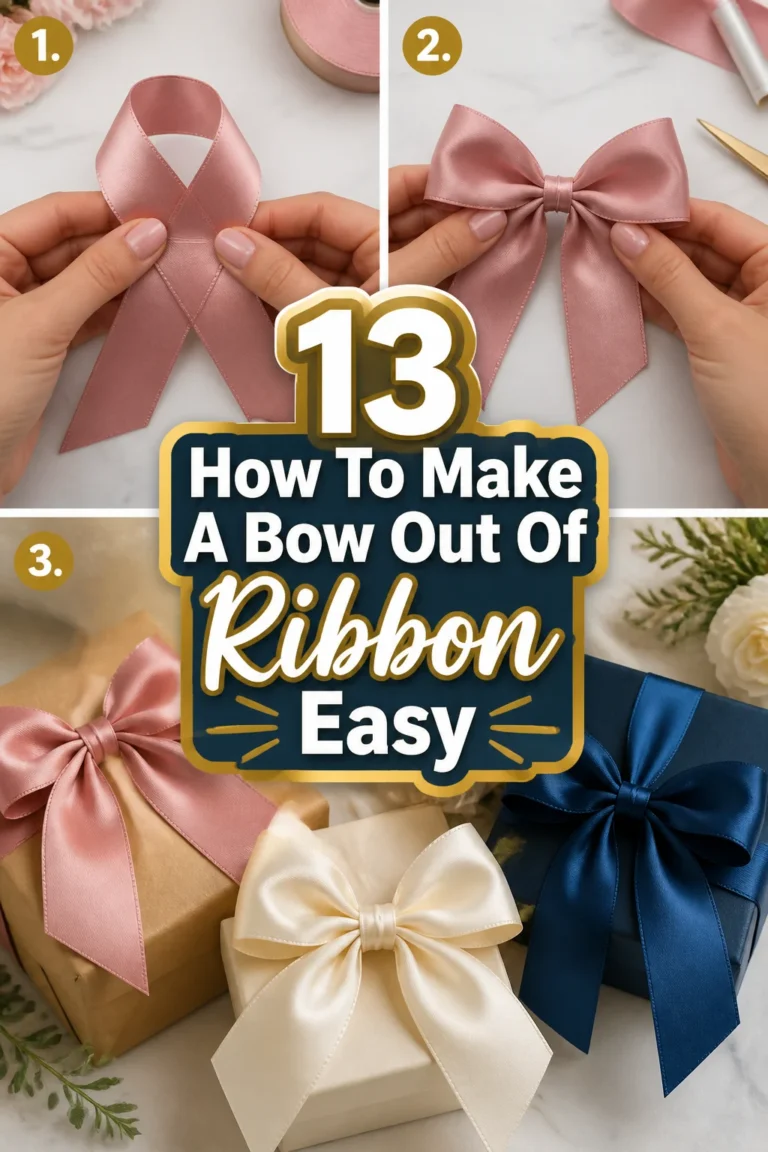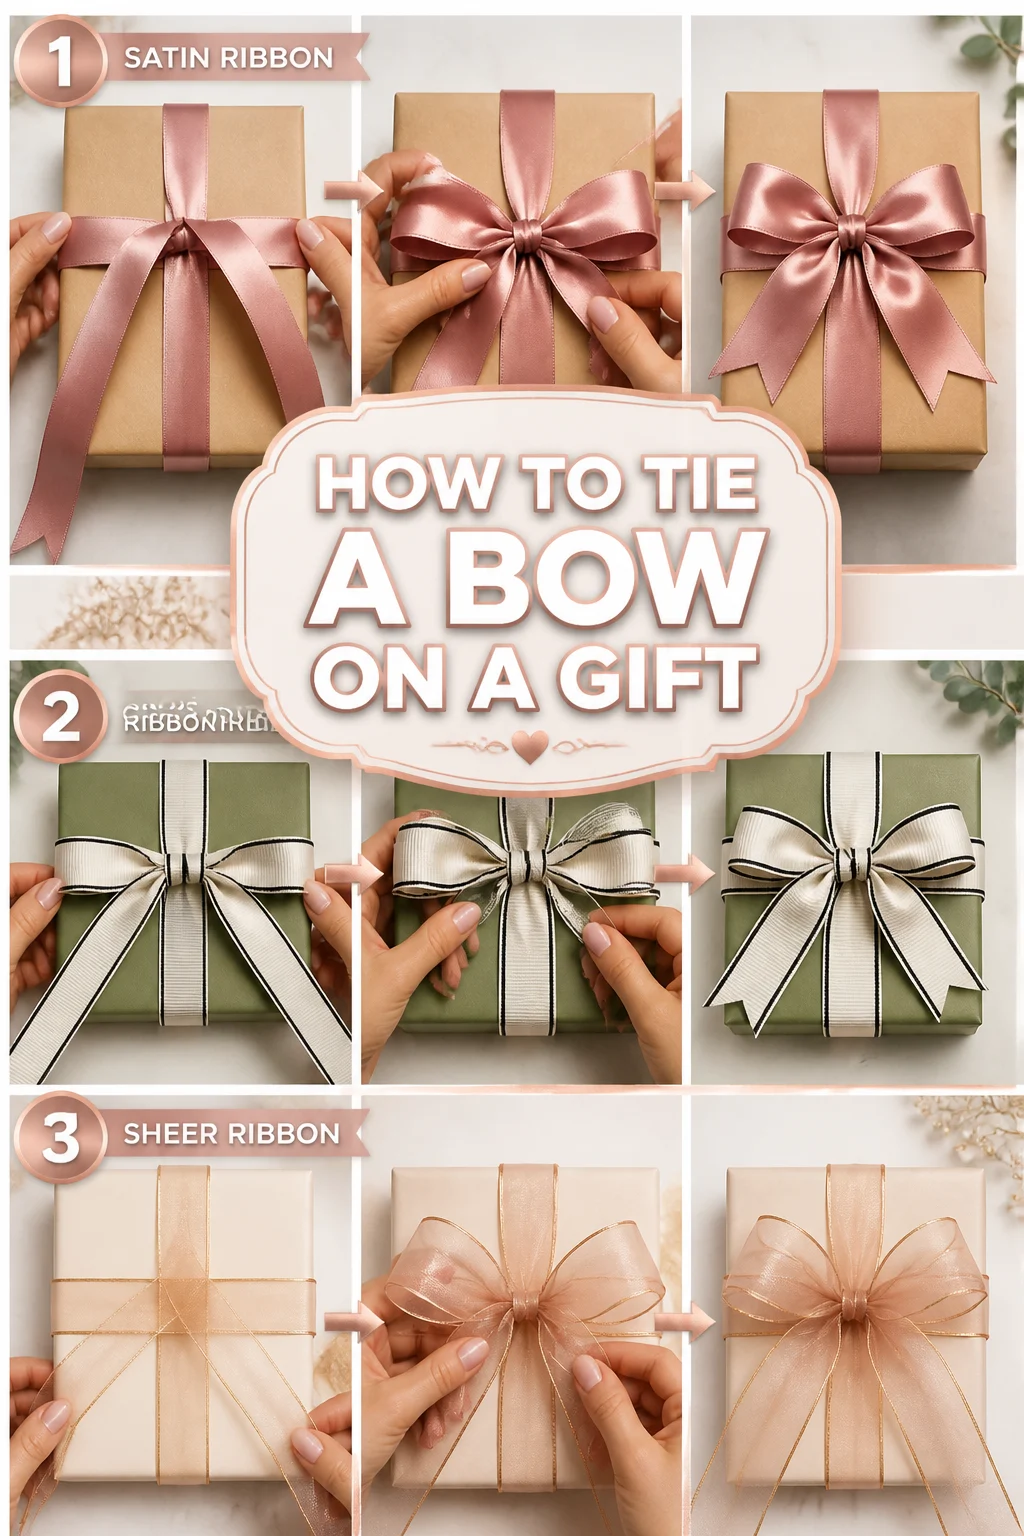
🎁 How To Tie A Bow On A Gift

Beginner-friendly templates, step-by-step guides,
and weekly project ideas in your inbox.
There is a special kind of magic in a perfectly wrapped gift that makes the recipient pause before opening it.
I spent years working in a high-end boutique where I tied thousands of bows for every occasion imaginable.
This guide shares the exact techniques I used to ensure every ribbon looked professional and stayed secure.

Quick Overview
Tying a professional-grade bow is a skill that elevates any simple package into a work of art.
- Time needed: 5 to 10 minutes
- Difficulty: Beginner
- What you’ll need: High-quality ribbon, sharp fabric scissors, a wrapped gift box, and optional double-sided tape.
Step-by-Step Instructions
Step 1: Measure Your Ribbon Length
Calculate the amount of ribbon you need by wrapping it loosely around the long side of the box six times.
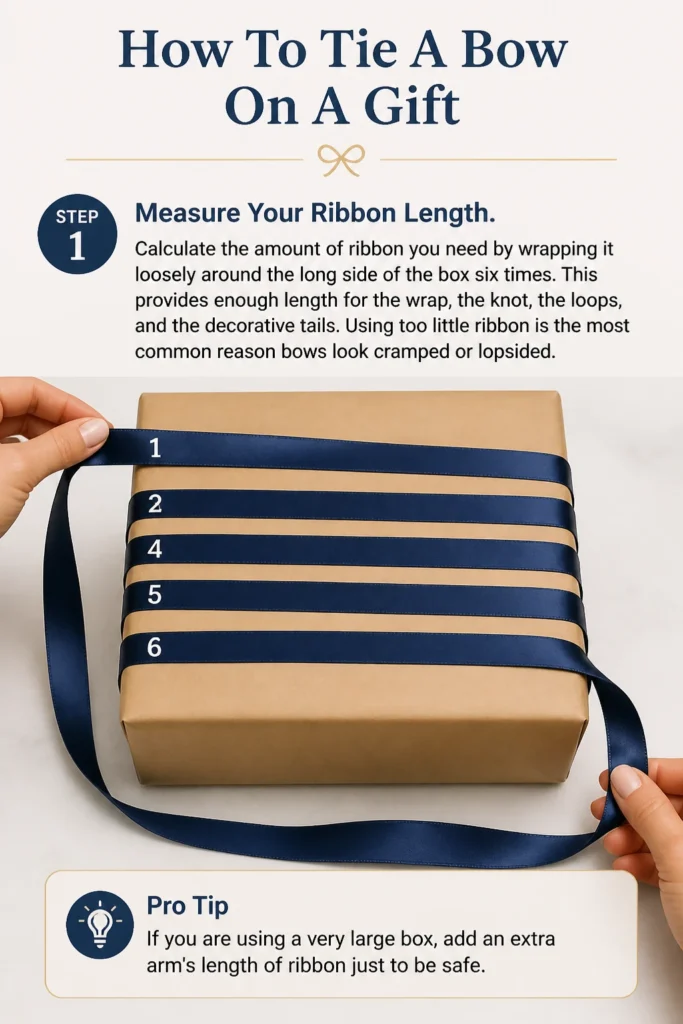
This provides enough length for the wrap, the knot, the loops, and the decorative tails.
Using too little ribbon is the most common reason bows look cramped or lopsided.
Pro Tip: If you are using a very large box, add an extra arm’s length of ribbon just to be safe.
Step 2: Position the Ribbon and the Box
Lay the ribbon flat on your workspace and place your gift box face down on top of it.
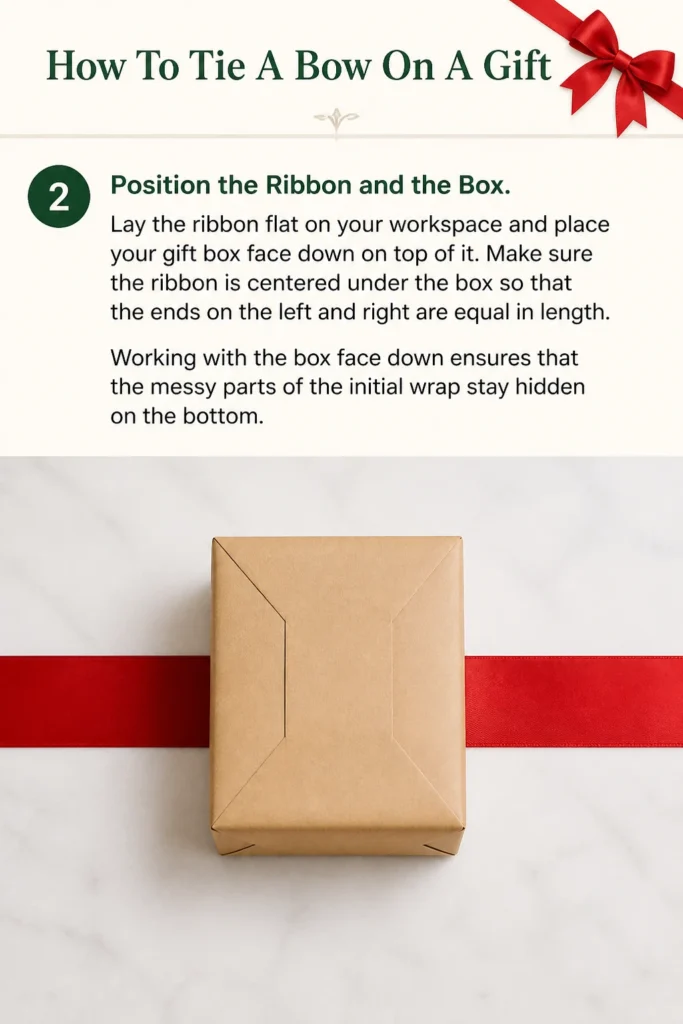
Make sure the ribbon is centered under the box so that the ends on the left and right are equal in length.
Working with the box face down ensures that the “messy” parts of the initial wrap stay hidden on the bottom.
Step 3: Perform the First Cross and Twist
Bring both ends of the ribbon up to the center of the box bottom and cross them over each other.
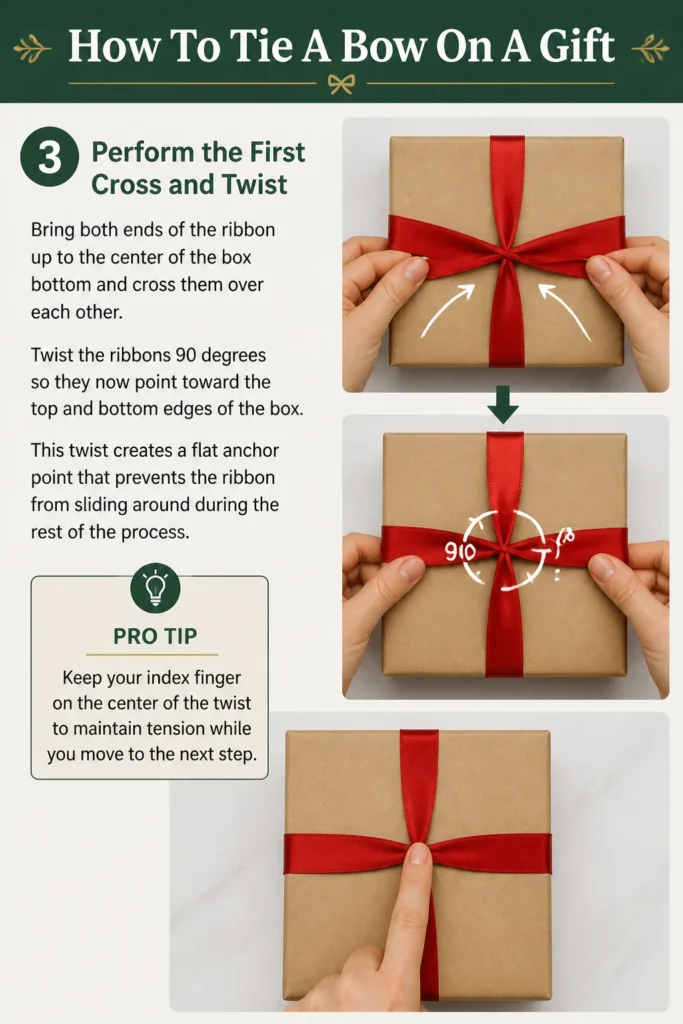
Twist the ribbons 90 degrees so they now point toward the top and bottom edges of the box.
This twist creates a flat anchor point that prevents the ribbon from sliding around during the rest of the process.
Pro Tip: Keep your index finger on the center of the twist to maintain tension while you move to the next step.
Step 4: Wrap the Vertical Sides
Pull the two ends of the ribbon around the remaining sides of the box and bring them to the front.
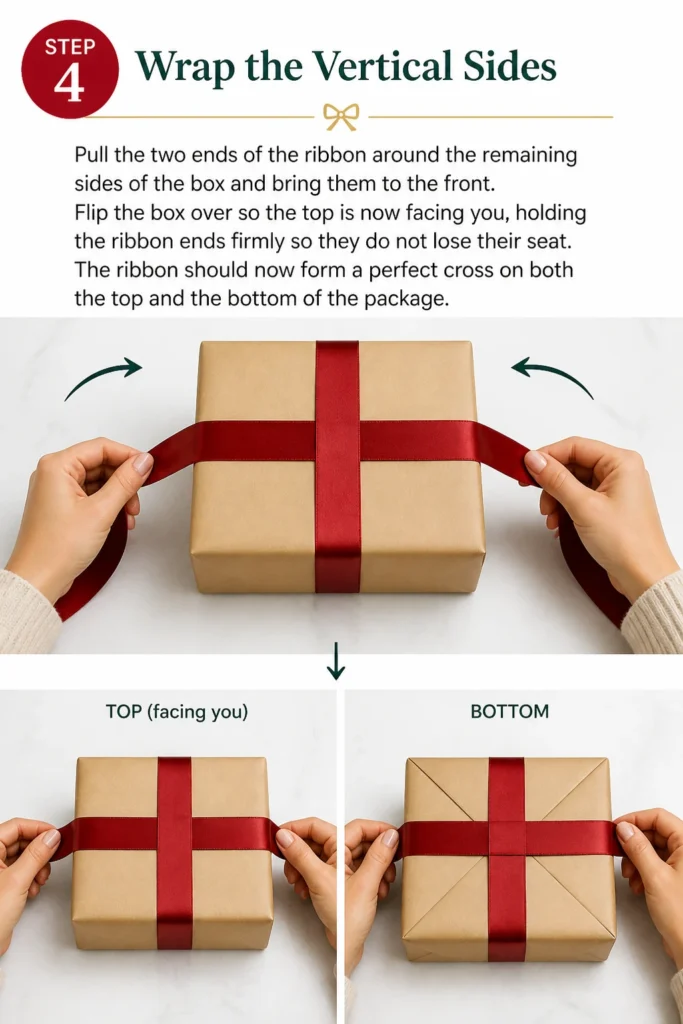
Flip the box over so the top is now facing you, holding the ribbon ends firmly so they do not lose their seat.
The ribbon should now form a perfect cross on both the top and the bottom of the package.
Step 5: Secure the Base Knot
Thread one end of the ribbon under the existing horizontal ribbon that is already lying across the top of the box.
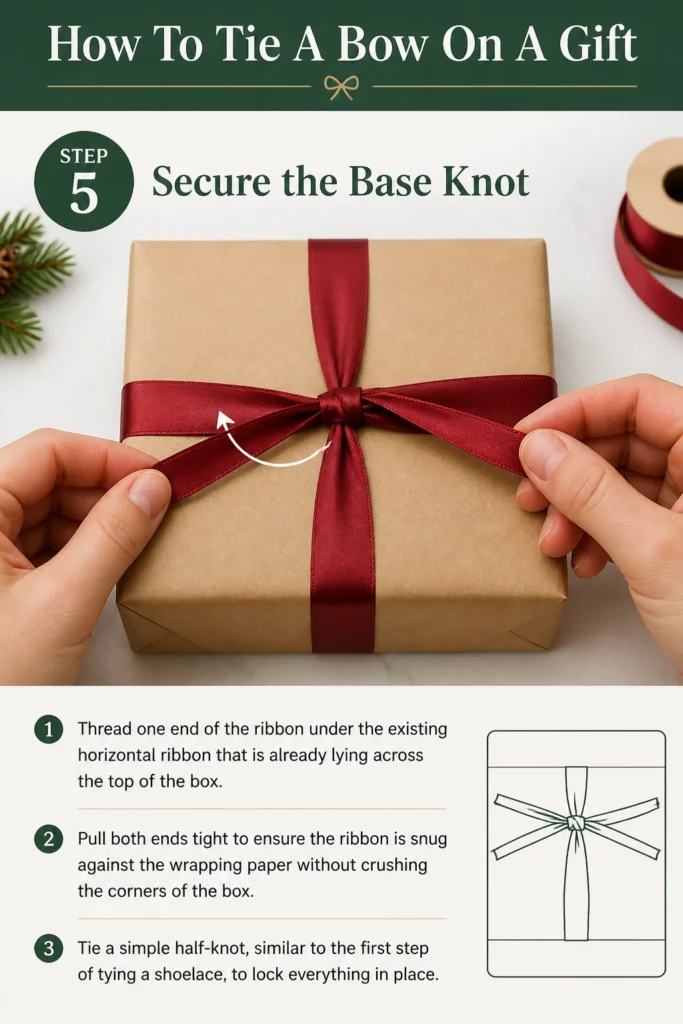
Pull both ends tight to ensure the ribbon is snug against the wrapping paper without crushing the corners of the box.
Tie a simple half-knot, similar to the first step of tying a shoelace, to lock everything in place.
Step 6: Form the First Loop
Create a loop with the bottom ribbon end, holding it firmly between your thumb and forefinger.
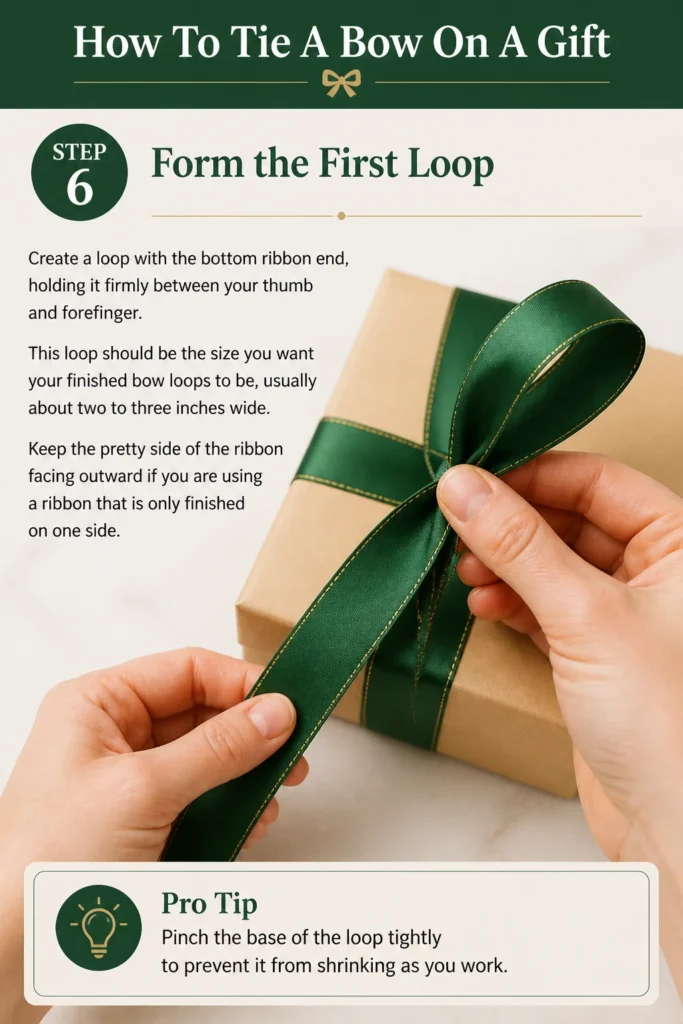
This loop should be the size you want your finished bow loops to be, usually about two to three inches wide.
Keep the “pretty” side of the ribbon facing outward if you are using a ribbon that is only finished on one side.
Pro Tip: Pinch the base of the loop tightly to prevent it from shrinking as you work.
Step 7: Wrap and Pull Through
Take the other free end of the ribbon and wrap it over the top of your first loop.
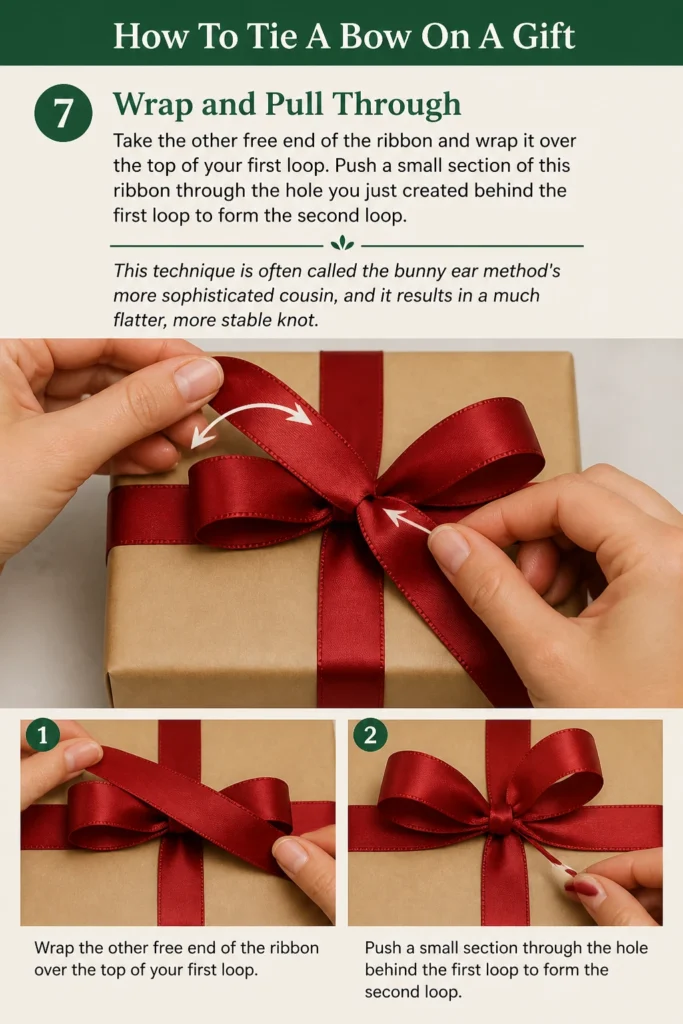
Push a small section of this ribbon through the hole you just created behind the first loop to form the second loop.
This technique is often called the “bunny ear” method’s more sophisticated cousin, and it results in a much flatter, more stable knot.
Step 8: Adjust the Loops for Symmetry
Grasp both loops and pull them gently away from each other to tighten the central knot.
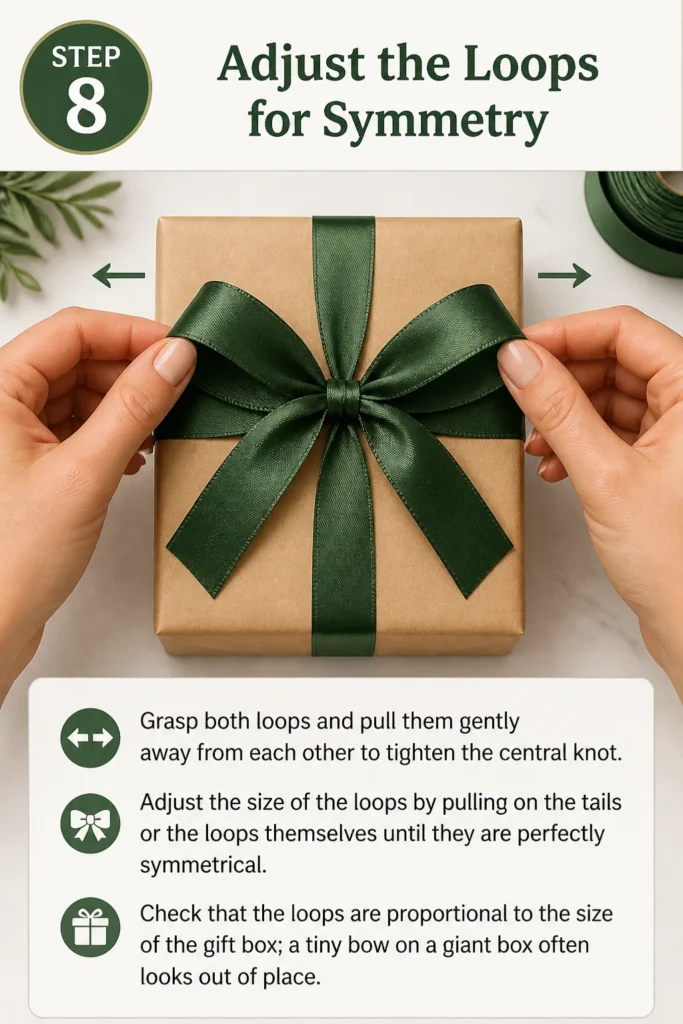
Adjust the size of the loops by pulling on the tails or the loops themselves until they are perfectly symmetrical.
Check that the loops are proportional to the size of the gift box; a tiny bow on a giant box often looks out of place.
Step 9: Detail the Ribbon Tails
Smooth out the tails of the ribbon so they lay flat against the box surface.
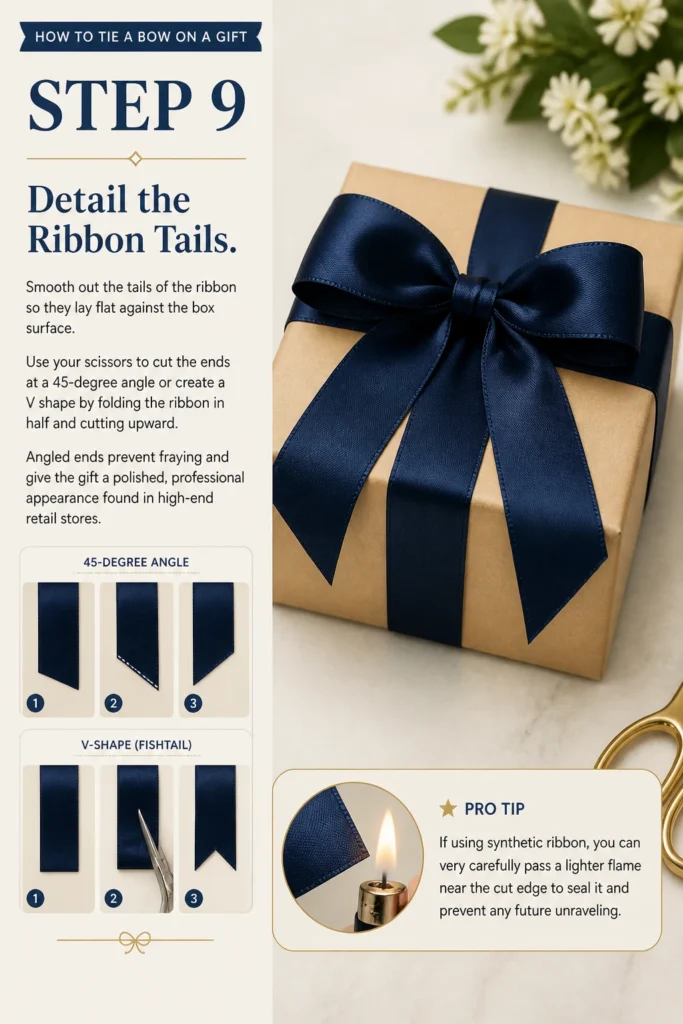
Use your scissors to cut the ends at a 45-degree angle or create a “V” shape by folding the ribbon in half and cutting upward.
Angled ends prevent fraying and give the gift a polished, professional appearance found in high-end retail stores.
Pro Tip: If using synthetic ribbon, you can very carefully pass a lighter flame near the cut edge to seal it and prevent any future unraveling.
Common Mistakes to Avoid
Using Dull Scissors
Attempting to cut ribbon with kitchen or paper scissors often leads to jagged, chewed edges.
Ribbon fibers are delicate and require a very sharp blade to achieve a clean, crisp finish.
Always test your scissors on a scrap piece of ribbon before making the final decorative cuts on your gift.
Over-Tightening the Ribbon
Pulling the ribbon too hard can cause the gift box to bow or the wrapping paper to tear at the corners.
You want the ribbon to be taut enough to stay in place, but not so tight that it distorts the shape of the package.
If you see the cardboard starting to collapse, loosen your grip and redistribute the tension along the sides.
Ignoring the Ribbon Texture
Different materials behave in different ways, and a technique that works for satin might fail for grosgrain.
Slippery ribbons like silk or satin require a double knot at the base to prevent the bow from sliding open.
Stiffer ribbons like organza or wired varieties hold their shape better but can be harder to pull through small loops.
Troubleshooting
The Bow Is Floppy and Won’t Stand Up
This usually happens when the ribbon material is too thin or soft for the size of the bow you are trying to make.
You can fix this by inserting a small piece of clear tape behind the loops to anchor them to the box.
Alternatively, try making the loops smaller, as shorter loops have more structural integrity than long, heavy ones.
The Ribbon Is Twisted on the Bottom
If the ribbon looks messy on the underside of the gift, it is likely because the 90-degree twist was not executed flatly.
Remove the ribbon and restart, ensuring that the ribbons cross each other like a “plus” sign rather than a “multiplication” sign.
Keeping the ribbon flat against the box at every turn is the secret to a professional look from every angle.
Key Takeaways
- Always measure your ribbon to be at least six times the length of the box to avoid running out of material.
- Work with the box face down during the initial wrap to hide the structural twists and turns.
- Maintain constant tension with your fingers at the center point to keep the ribbon from slipping.
- Use sharp fabric shears to create clean, angled cuts on the tails for a high-end finish.
- Match the scale of the bow to the size of the gift for the most aesthetically pleasing result.
- Practice with scrap ribbon first if you are using expensive velvet or silk materials.
Frequently Asked Questions
What is the best type of ribbon for a beginner?
Grosgrain ribbon is excellent for beginners because it has a ribbed texture that creates natural friction.
This friction helps the knots stay in place while you are adjusting the loops, unlike slippery satin.
Wired ribbon is also a great choice because it allows you to “sculpt” the bow and hide any minor mistakes in your tying technique.
How do I stop my ribbon from fraying at the ends?
The best way to prevent fraying is to use sharp scissors and cut at a sharp 45-degree angle.
For ribbon made of synthetic materials like polyester, you can lightly singe the very edge with a lighter to melt the fibers together.
Clear nail polish applied sparingly to the very tip of the ribbon tail can also act as a sealant for natural fibers.
Can I tie a bow separately and tape it on?
While you can certainly do this, a bow that is tied directly around the package is much more secure and looks more authentic.
Tying it around the box also allows the ribbon to act as a structural element that keeps the wrapping paper tight.
If you choose to tie a separate bow, use a high-quality adhesive or a glue dot to ensure it doesn’t fall off during transport.
Our Top Recommended Finds
- Professional Fabric Shears: A pair of heavy-duty, stainless steel scissors dedicated only to cutting fabric and ribbon will ensure clean edges every time.
- Wired Edge Ribbon: This type of ribbon contains a thin wire along the edges, making it incredibly easy to shape and fluff your bows into 3D masterpieces.
- Double-Sided Craft Tape: Use this to discreetly secure ribbon to the box, preventing it from sliding off-center during the tying process.
Mastering the Art of Presentation
Once you have mastered the basic bow, you can begin experimenting with layering different colors and textures of ribbon.
Try adding a small sprig of dried lavender or a holiday ornament into the central knot for a personalized touch.
The effort you put into the presentation reflects the care you feel for the person receiving the gift.
Grab a roll of ribbon and a spare box today to practice these steps until the movements become second nature.
Beginner-friendly templates, step-by-step guides,
and weekly project ideas in your inbox.