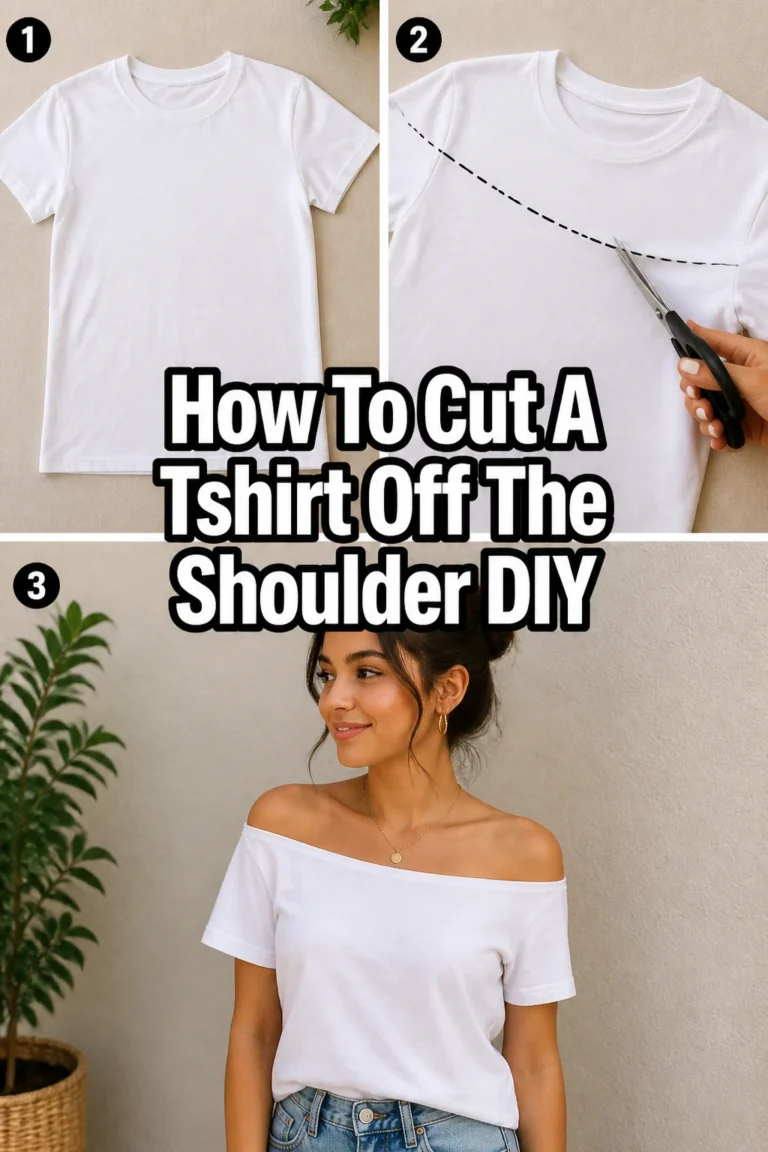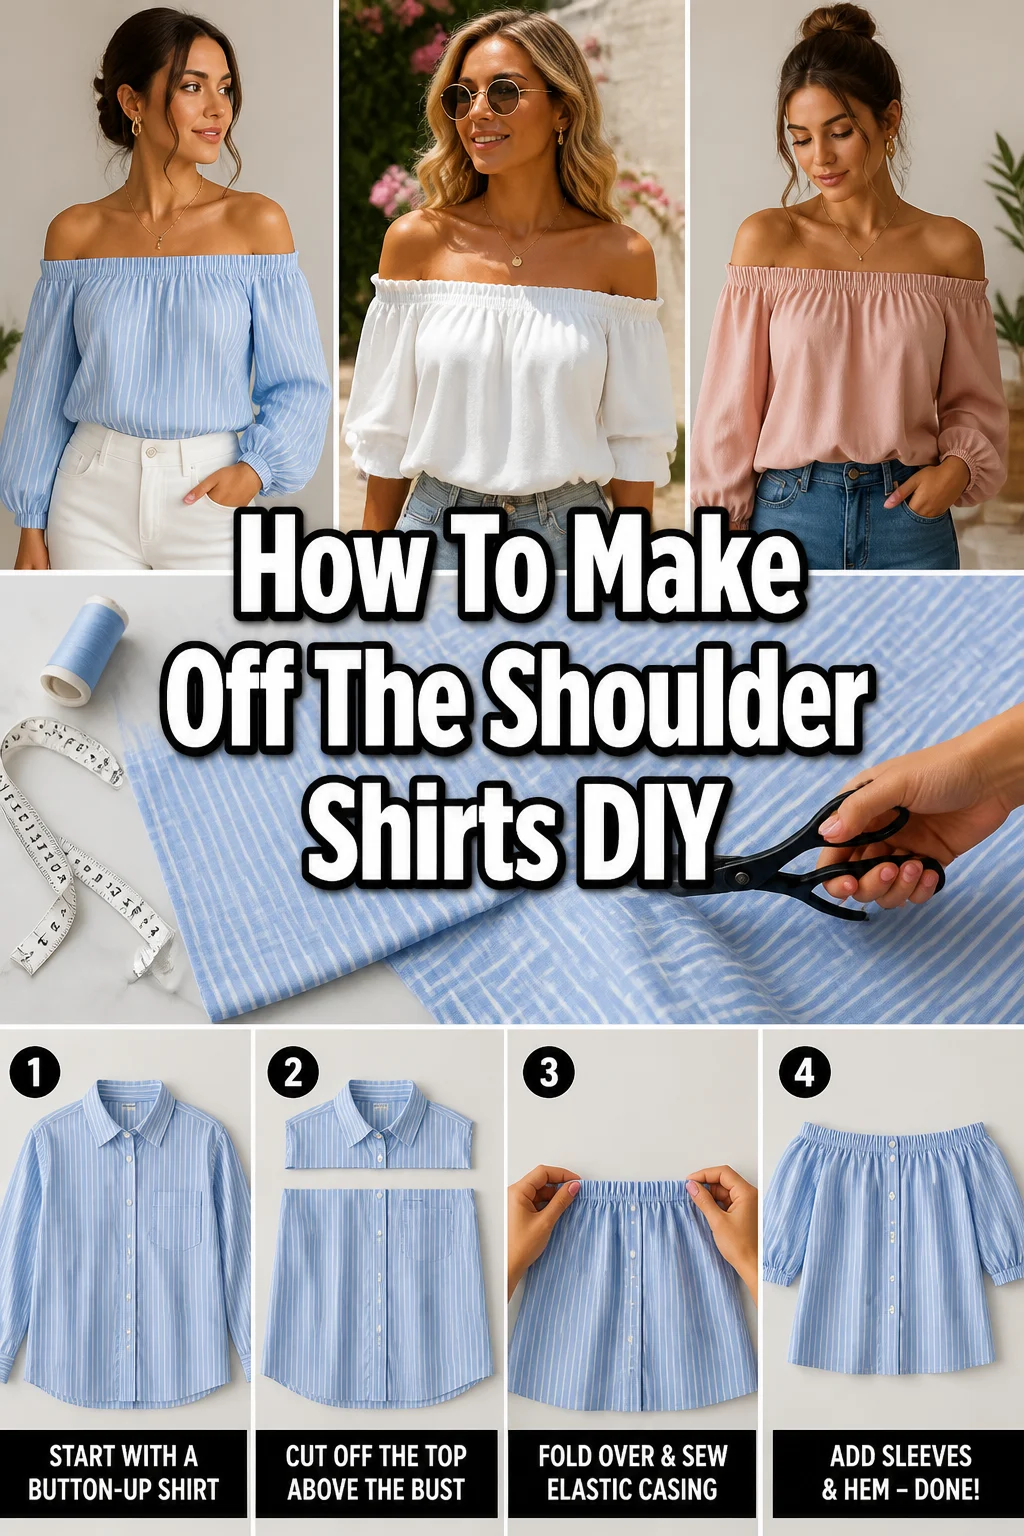
👚 How To Make Off The Shoulder Shirts DIY

Beginner-friendly templates, step-by-step guides,
and weekly project ideas in your inbox.
Transforming an ordinary top into a stylish off-the-shoulder piece is incredibly satisfying.
I’ve personally upcycled countless blouses and t-shirts, giving them a fresh, trendy look with just a few simple steps.
This guide shares all my practical tips and tricks, ensuring you can create your own fashionable off-the-shoulder shirt with confidence.

Quick Overview
You’re about to craft a chic, personalized off-the-shoulder top, perfect for any casual outing or a relaxed evening.
It’s a fantastic way to repurpose existing garments or start fresh with new fabric.
- Time needed: 1-3 hours (depending on your sewing experience and shirt complexity)
- Difficulty: Beginner to Intermediate
- What you’ll need: An existing shirt or fabric, elastic, sewing machine (or needle and thread), scissors, measuring tape, fabric marker, safety pin.
Step-by-Step Instructions
Step 1: Choose Your Shirt or Fabric
Start with a shirt that you already own and want to transform. A loose-fitting t-shirt, a button-down, or even a basic long-sleeve top works wonderfully.
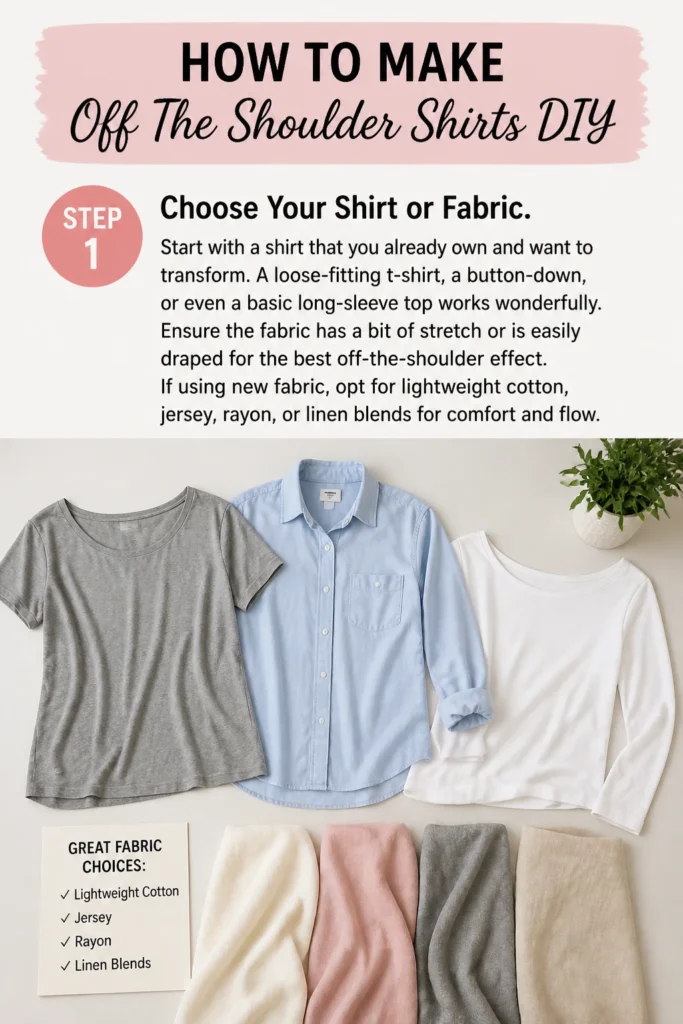
Ensure the fabric has a bit of stretch or is easily draped for the best off-the-shoulder effect.
If using new fabric, opt for lightweight cotton, jersey, rayon, or linen blends for comfort and flow.
Step 2: Prepare Your Work Area and Gather Supplies
Clear a flat, spacious surface where you can lay out your shirt smoothly.
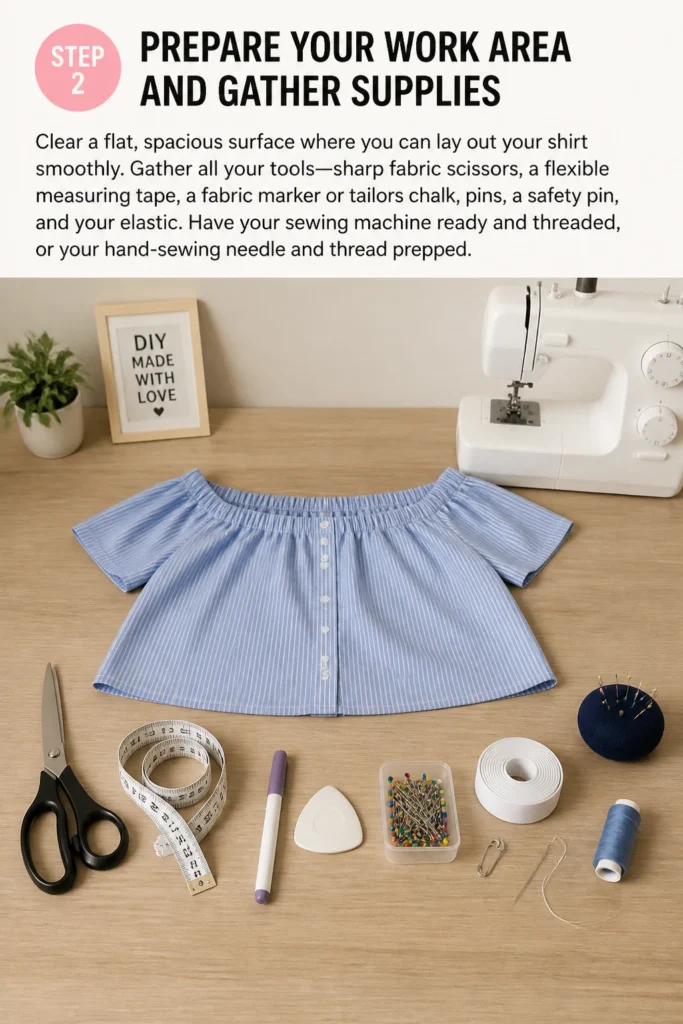
Gather all your tools: sharp fabric scissors, a flexible measuring tape, a fabric marker or tailor’s chalk, pins, a safety pin, and your elastic.
Have your sewing machine ready and threaded, or your hand-sewing needle and thread prepped.
Step 3: Measure and Mark the Cut Line
Put on the shirt you plan to alter. Stand in front of a mirror and decide how low you want the off-the-shoulder neckline to sit.
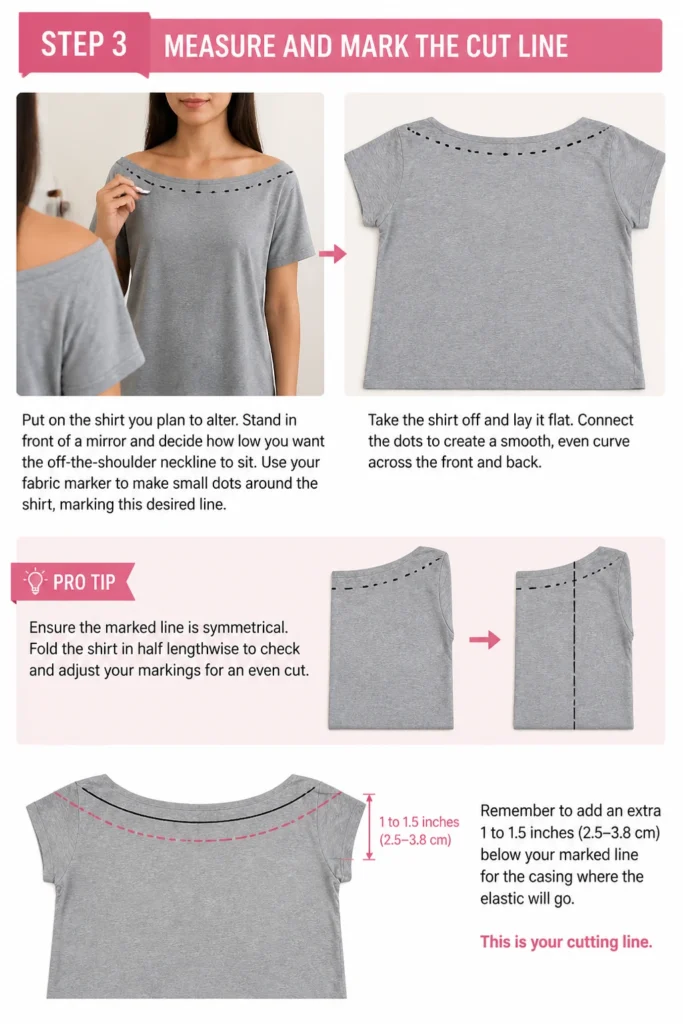
Use your fabric marker to make small dots around the shirt, marking this desired line.
Take the shirt off and lay it flat. Connect the dots to create a smooth, even curve across the front and back.
Pro Tip: Ensure the marked line is symmetrical. Fold the shirt in half lengthwise to check and adjust your markings for an even cut. Remember to add an extra 1 to 1.5 inches (2.5-3.8 cm) below your marked line for the casing where the elastic will go. This is your cutting line.
Step 4: Cut the Neckline
Carefully cut along the marked cutting line you just drew.
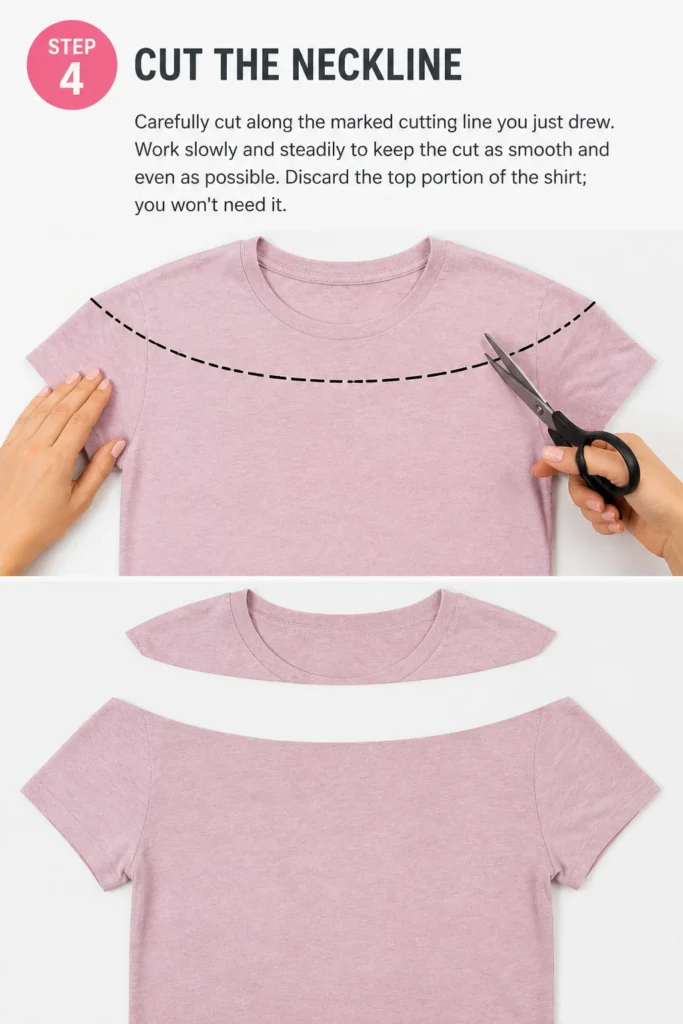
Work slowly and steadily to keep the cut as smooth and even as possible.
Discard the top portion of the shirt; you won’t need it.
Step 5: Create the Elastic Casing
Fold the raw edge of the new neckline down towards the inside of the shirt by about 1/4 inch (0.6 cm).
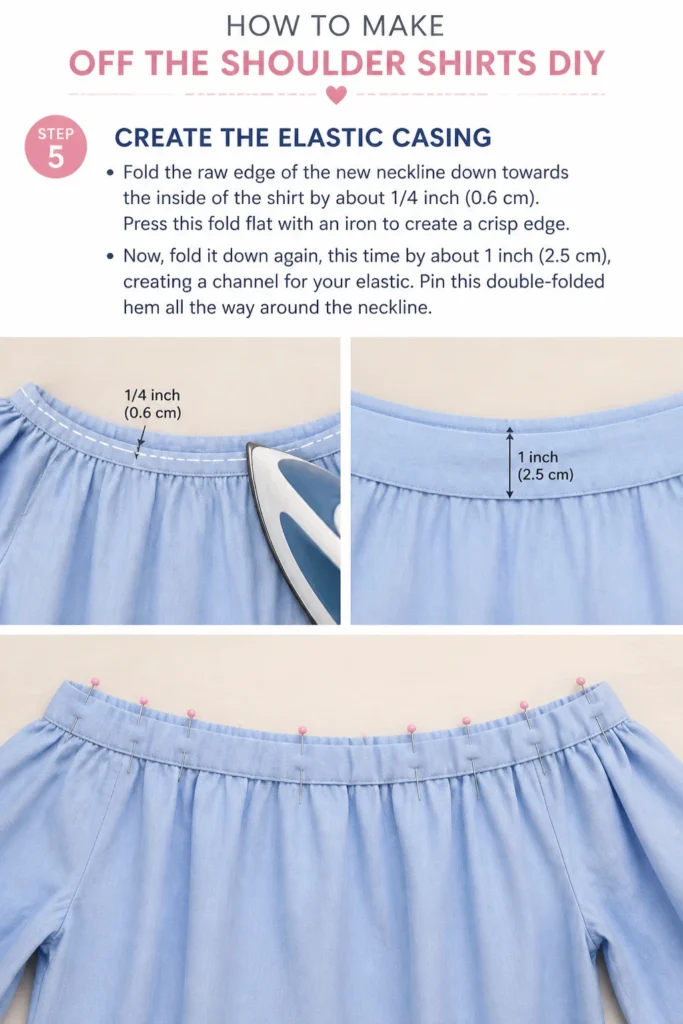
Press this fold flat with an iron to create a crisp edge.
Now, fold it down again, this time by about 1 inch (2.5 cm), creating a channel for your elastic.
Pin this double-folded hem all the way around the neckline.
Step 6: Stitch the Casing
Using your sewing machine (or hand-sewing), stitch around the folded casing.
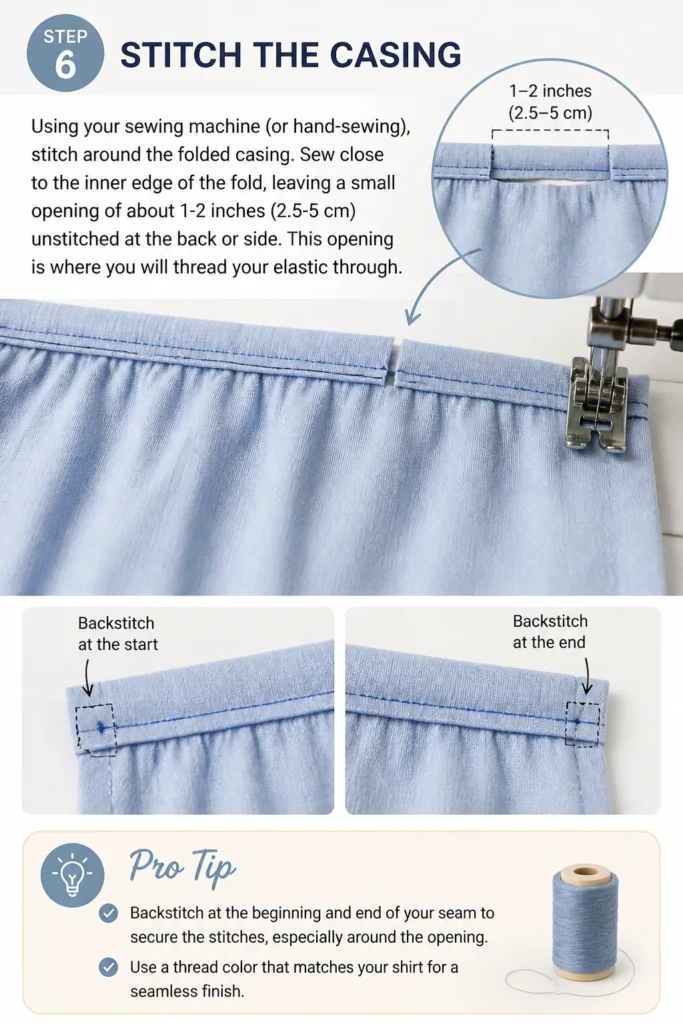
Sew close to the inner edge of the fold, leaving a small opening of about 1-2 inches (2.5-5 cm) unstitched at the back or side.
This opening is where you will thread your elastic through.
Pro Tip: Backstitch at the beginning and end of your seam to secure the stitches, especially around the opening. Use a thread color that matches your shirt for a seamless finish.
Step 7: Measure and Cut Your Elastic
Measure around your shoulders, just below where the new neckline will sit.
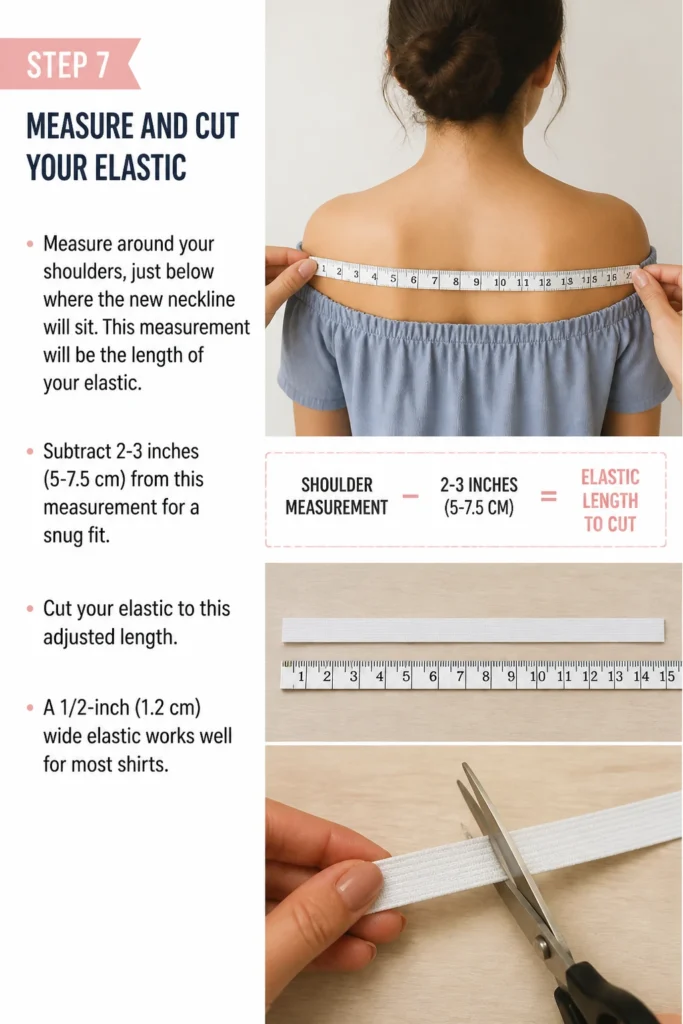
This measurement will be the length of your elastic. Subtract 2-3 inches (5-7.5 cm) from this measurement for a snug fit.
Cut your elastic to this adjusted length. A 1/2-inch (1.2 cm) wide elastic works well for most shirts.
Step 8: Thread the Elastic
Attach a safety pin to one end of your cut elastic.
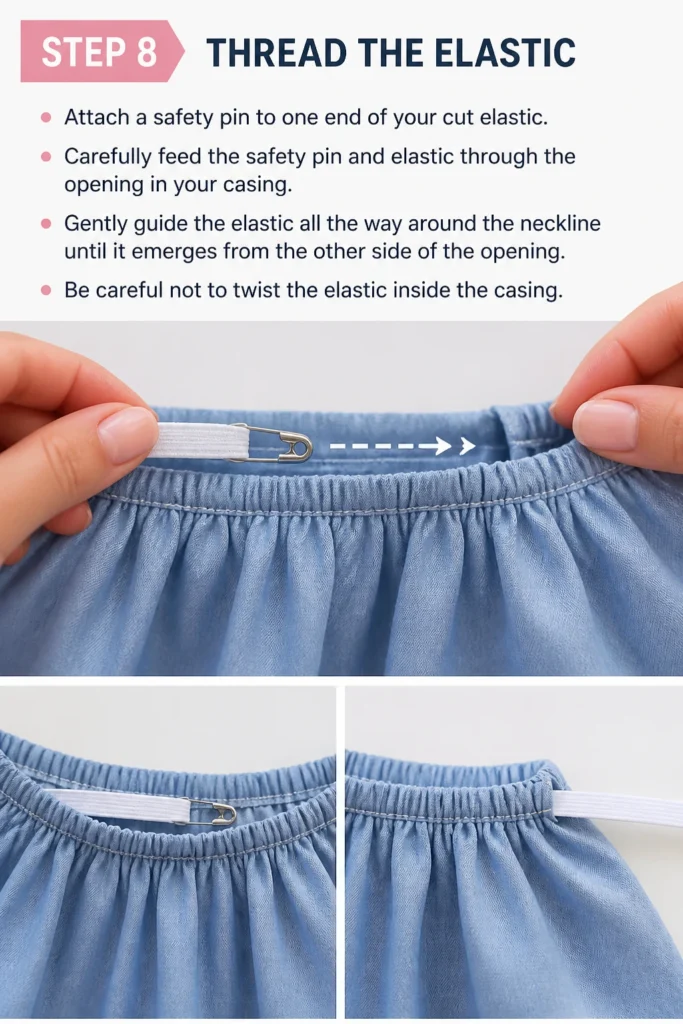
Carefully feed the safety pin and elastic through the opening in your casing.
Gently guide the elastic all the way around the neckline until it emerges from the other side of the opening.
Be careful not to twist the elastic inside the casing.
Step 9: Secure the Elastic
Once both ends of the elastic are out of the casing, overlap them by about 1/2 inch (1.2 cm).
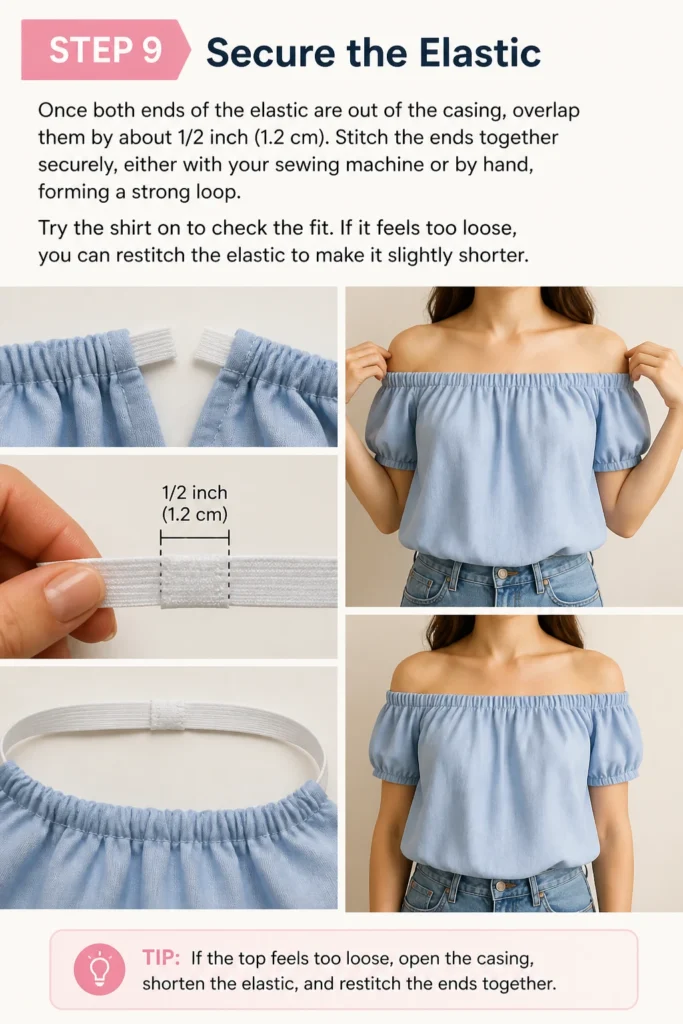
Stitch the ends together securely, either with your sewing machine or by hand, forming a strong loop.
Try the shirt on to check the fit. If it feels too loose, you can restitch the elastic to make it slightly shorter.
Step 10: Close the Casing Opening
Tuck the joined elastic ends fully into the casing.
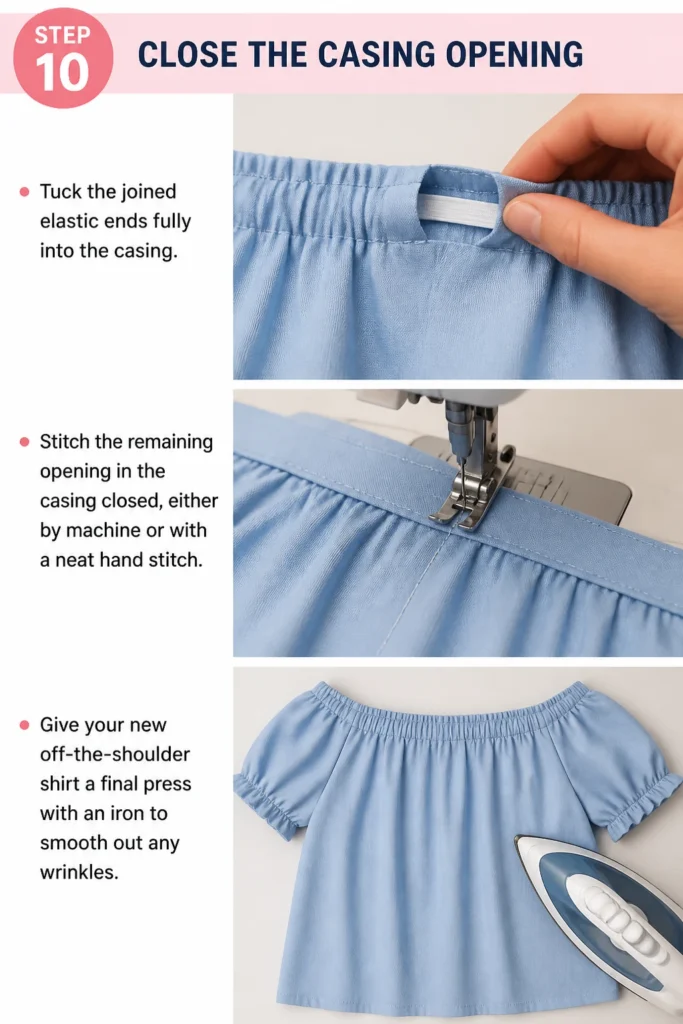
Stitch the remaining opening in the casing closed, either by machine or with a neat hand stitch.
Give your new off-the-shoulder shirt a final press with an iron to smooth out any wrinkles.
Common Mistakes to Avoid
Cutting Too Much Fabric
A frequent error is cutting the neckline too low right from the start. This can result in a shirt that exposes more than intended or doesn’t sit properly.
Always mark a conservative line first, allowing for the casing, and remember you can always cut more later, but you can’t add fabric back.
Uneven Casing or Stitching
If your casing is uneven or your stitches wobble, the elastic might not sit flat or the neckline could look sloppy.
Take your time pressing the folds and pinning meticulously. Practice straight lines on scrap fabric if you’re new to machine sewing.
Elastic Too Tight or Too Loose
The wrong length of elastic can make your shirt uncomfortable or cause it to fall down. Guessing the elastic length is risky.
Always measure your shoulders and subtract a small amount for tension. Test the fit before permanently stitching the elastic ends together.
Twisted Elastic
Threading the elastic through the casing can sometimes lead to it twisting inside, creating an uncomfortable and lumpy neckline.
Periodically check the elastic as you thread it through. Keep a firm grip on both ends as you guide it to prevent twists.
Troubleshooting
Neckline Doesn’t Stay Up
If your off-the-shoulder shirt keeps riding up or doesn’t stay in place, the elastic is likely too long.
Carefully unpick a small section of the casing to expose the elastic ends. Unstitch the elastic, shorten it by an inch or two, and re-stitch.
Neckline Feels Too Tight
A neckline that feels restrictive or digs into your skin indicates the elastic is too short.
You can either replace the elastic with a slightly longer piece or, if possible, carefully unpick the elastic seam and try to stretch the fabric slightly before re-stitching, adding a small fabric extender if needed.
Fabric Bunching Unevenly
If the fabric around the neckline bunches more in some areas than others, it could be due to uneven casing width or inconsistent elastic tension.
Check the casing for consistent width. If the elastic is twisted, carefully unthread and re-thread it. For minor bunching, gentle steaming can sometimes help redistribute the fabric.
Key Takeaways
- Careful measurement is crucial for a flattering fit.
- Adding seam allowance for the casing is an essential step.
- Pressing your fabric folds creates crisp, professional-looking seams.
- Always leave an opening in the casing to thread your elastic.
- Test the elastic length before permanently stitching it.
- Patience and precision lead to the best DIY results.
Frequently Asked Questions
Can I make an off-the-shoulder shirt without a sewing machine?
Yes, absolutely! While a sewing machine speeds things up, you can hand-sew the casing with a strong running stitch or backstitch. It will take more time, but the result can be just as durable and neat.
What type of elastic is best for this project?
Braided or knit elastic, typically 1/2 to 3/4 inch (1.2-1.9 cm) wide, works well. Avoid clear elastic as it can be difficult to work with and less durable for this application. Look for elastic labeled “sew-through” or “all-purpose.”
Can I use a shirt that is already fitted?
It’s generally better to start with a slightly loose-fitting shirt. A fitted shirt might become too tight or restrictive once the neckline is gathered with elastic, making it uncomfortable or difficult to wear off the shoulder.
How do I prevent the raw edge from fraying after cutting?
The double-fold method for the casing effectively encloses the raw edge, preventing fraying. If you’re not creating a casing, you could finish the raw edge with a serger, zigzag stitch, or bias tape before folding.
Our Top Recommended Finds
- Good Quality Fabric Scissors: Sharp scissors make precise cuts, which are vital for a clean neckline.
- All-Purpose Polyester Thread: Durable and available in a wide range of colors to match any fabric.
- Flexible Measuring Tape: Essential for accurate body and fabric measurements, ensuring a perfect fit.
Ready to Embrace Your Inner Designer?
You now have all the knowledge and steps to create your very own custom off-the-shoulder shirt.
It’s a rewarding project that adds a unique touch to your wardrobe and breathes new life into old favorites.
Why not try it this weekend? You might discover a new passion for upcycling and garment design, perhaps leading you to explore other DIY fashion projects like creating a peasant top or adding ruffles to a hem.
Beginner-friendly templates, step-by-step guides,
and weekly project ideas in your inbox.