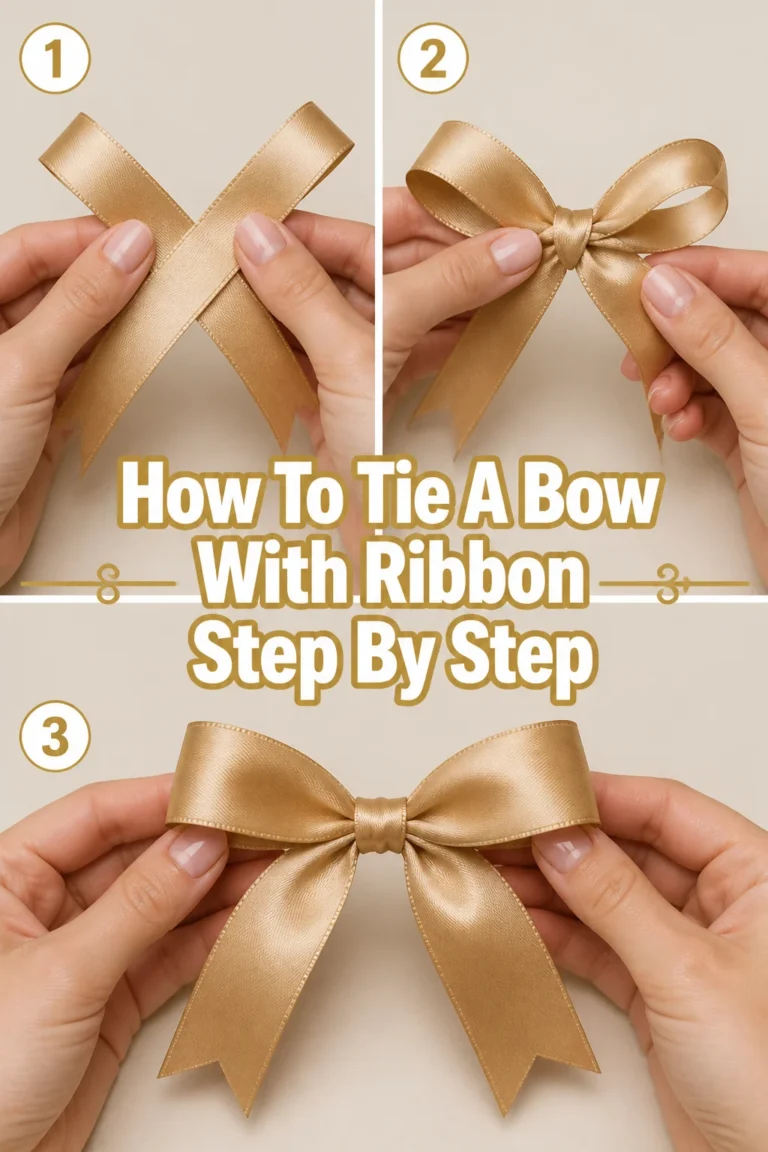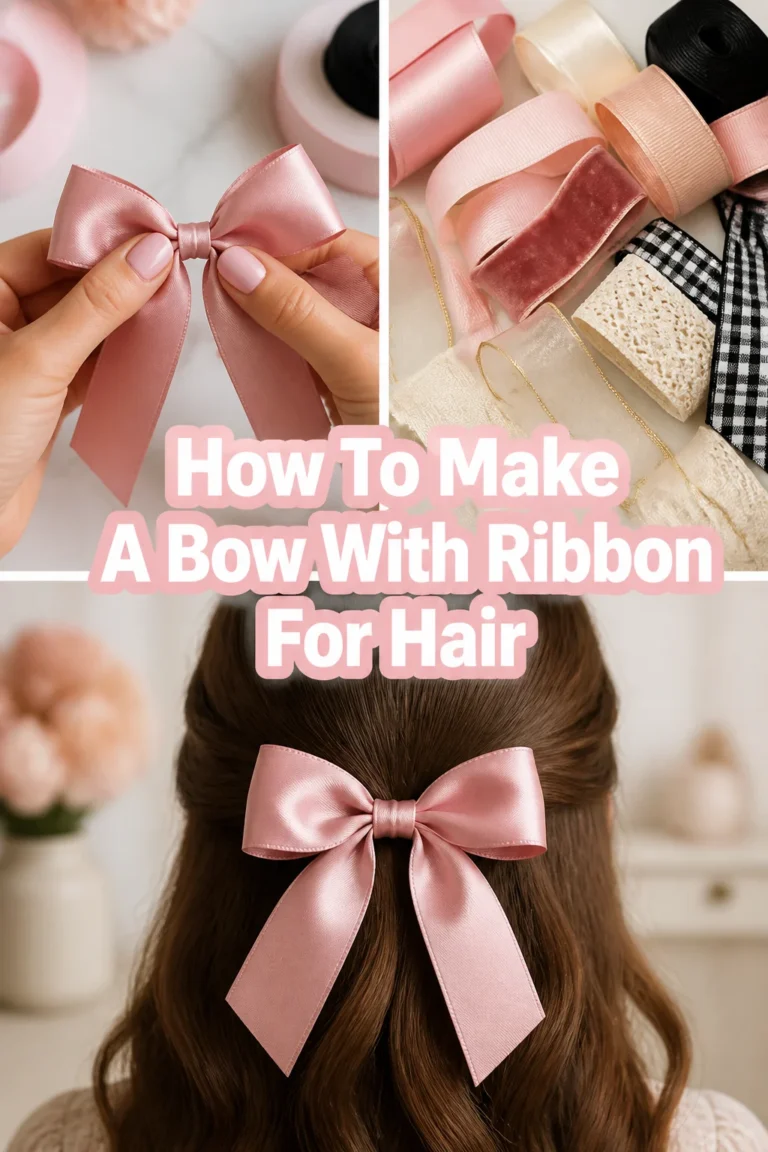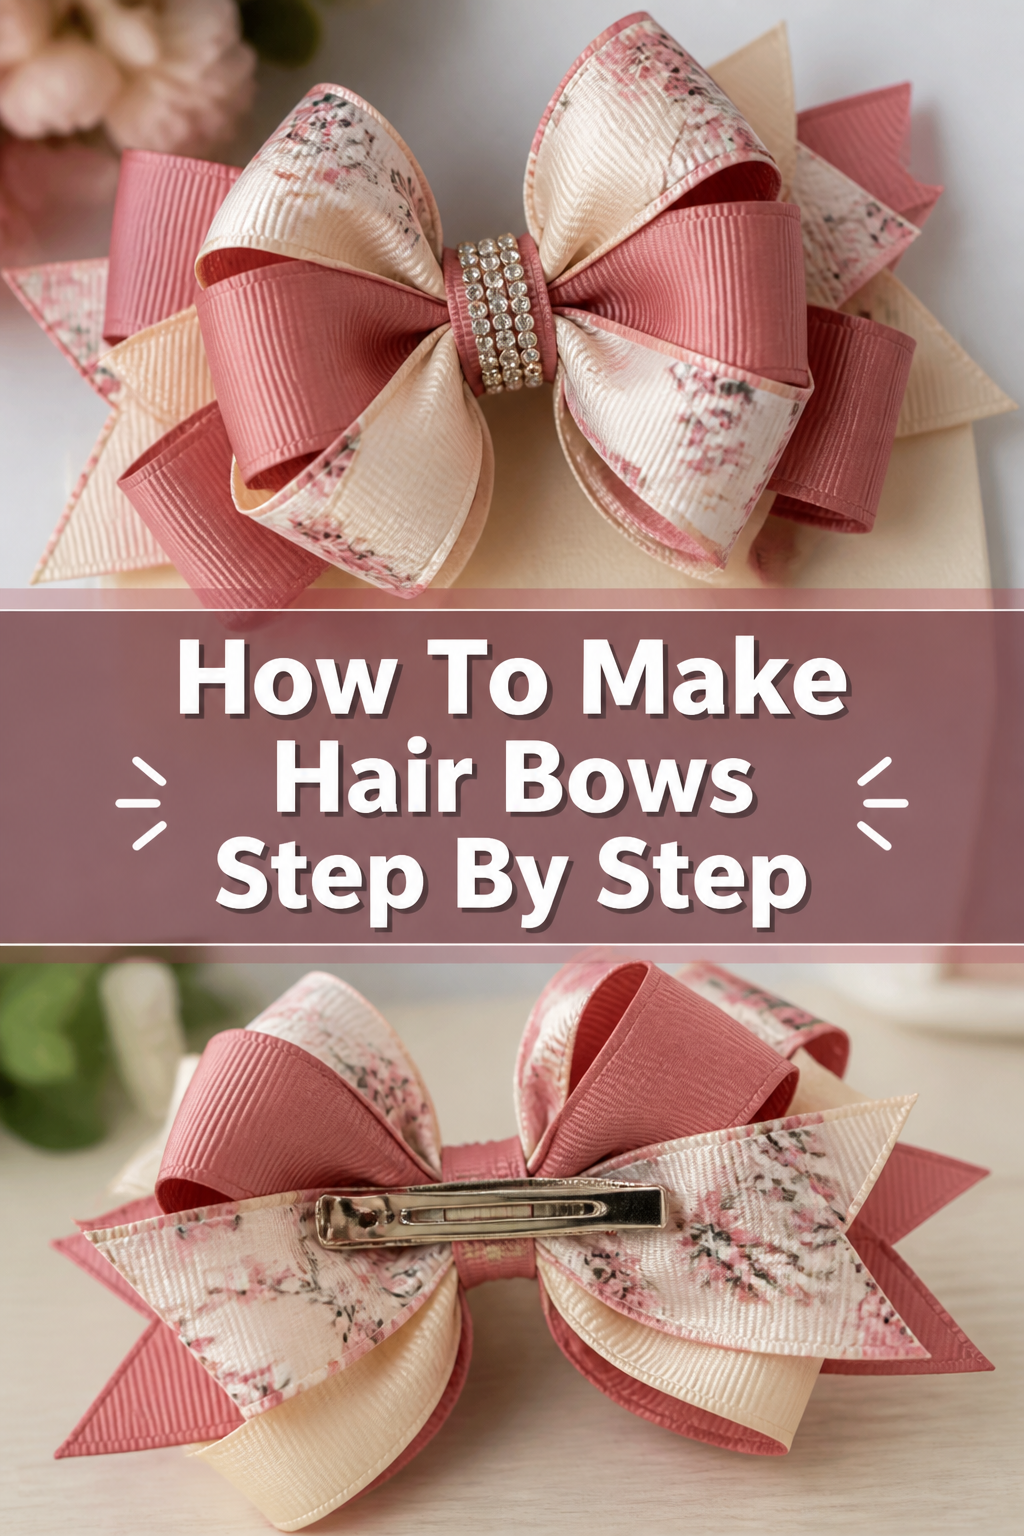
🎀 How To Make Hair Bows Step By Step

Beginner-friendly templates, step-by-step guides,
and weekly project ideas in your inbox.
I remember the first time I tried to make a boutique-style bow for my niece and ended up with a sticky mess of ribbon and hot glue.
After years of crafting and experimenting with different techniques, I have perfected a foolproof method that creates professional results every time.
This guide is designed to help you master the art of bow making, whether you are a total beginner or looking to refine your skills.
Quick Overview
Making a custom hair bow is a rewarding project that allows you to match any outfit perfectly.
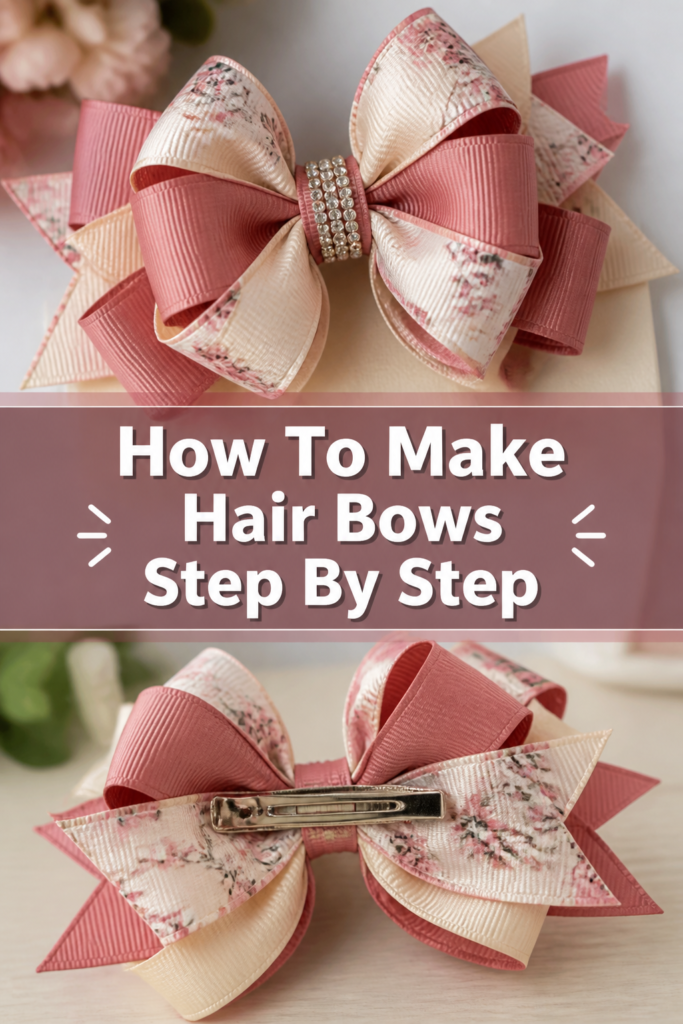
You will be creating a classic boutique-style bow with a professional finish and a sturdy clip attachment.
- Time needed: 15 to 20 minutes
- Difficulty: Beginner
- What you’ll need: Grosgrain ribbon, fabric scissors, a lighter or wood burner, upholstery thread, a hot glue gun, and alligator clips.
Step-by-Step Instructions
Step 1: Choose and Measure Your Ribbon
Select a high-quality grosgrain ribbon for your first project because it holds its shape much better than satin or silk.
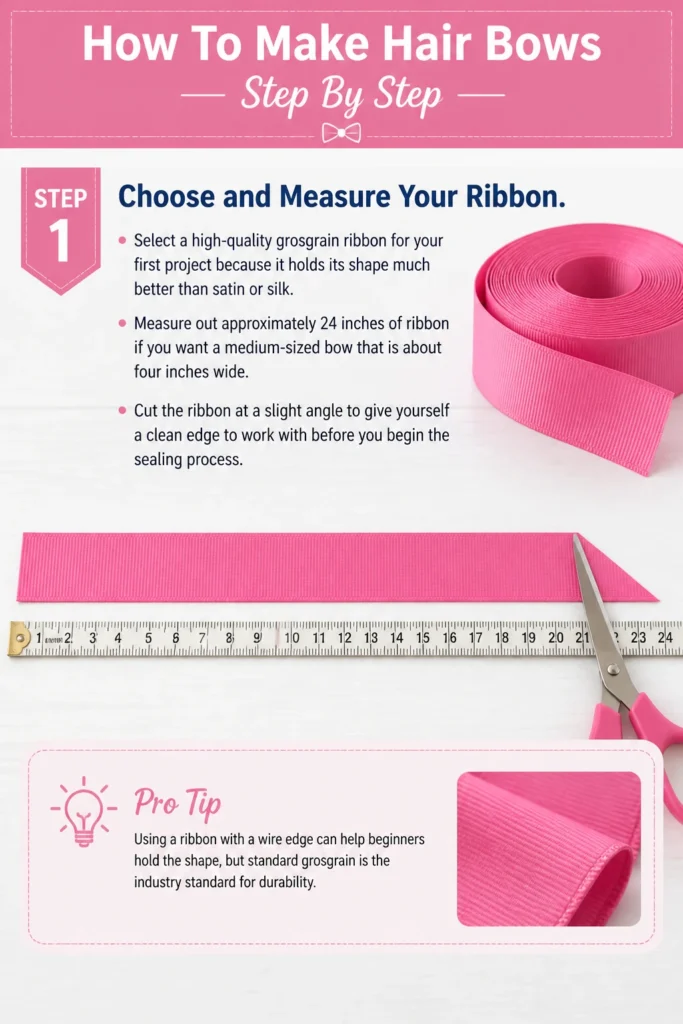
Measure out approximately 24 inches of ribbon if you want a medium-sized bow that is about four inches wide.
Cut the ribbon at a slight angle to give yourself a clean edge to work with before you begin the sealing process.
Pro Tip: Using a ribbon with a wire edge can help beginners hold the shape, but standard grosgrain is the industry standard for durability.
Step 2: Seal the Ribbon Ends
Hold the cut edge of your ribbon near the blue part of a lighter flame to melt the fibers slightly.
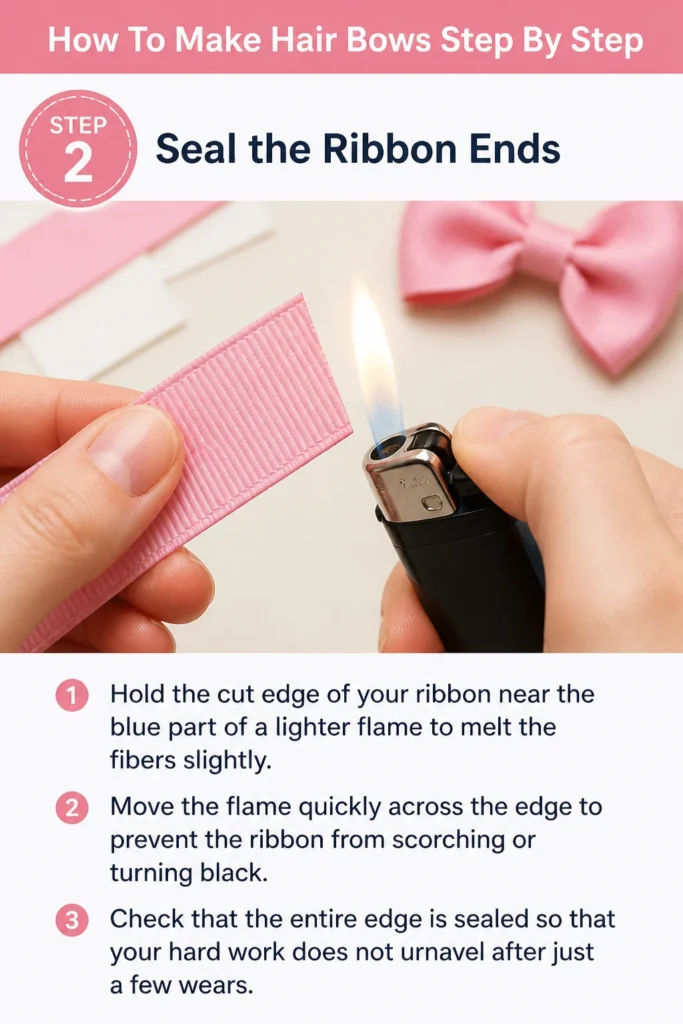
Move the flame quickly across the edge to prevent the ribbon from scorching or turning black.
Check that the entire edge is sealed so that your hard work does not unravel after just a few wears.
Step 3: Find and Mark the Center
Fold your length of ribbon exactly in half to find the midpoint of the material.
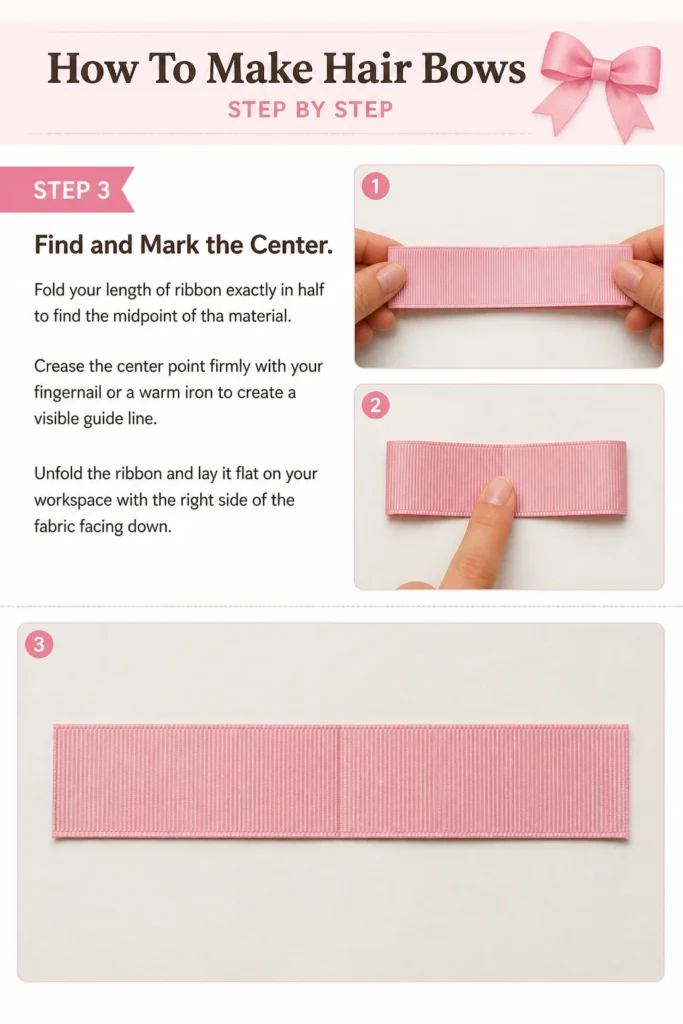
Crease the center point firmly with your fingernail or a warm iron to create a visible guide line.
Unfold the ribbon and lay it flat on your workspace with the “right” side of the fabric facing down.
Step 4: Form the First Loop
Take the right end of the ribbon and bring it toward the center crease you just made.
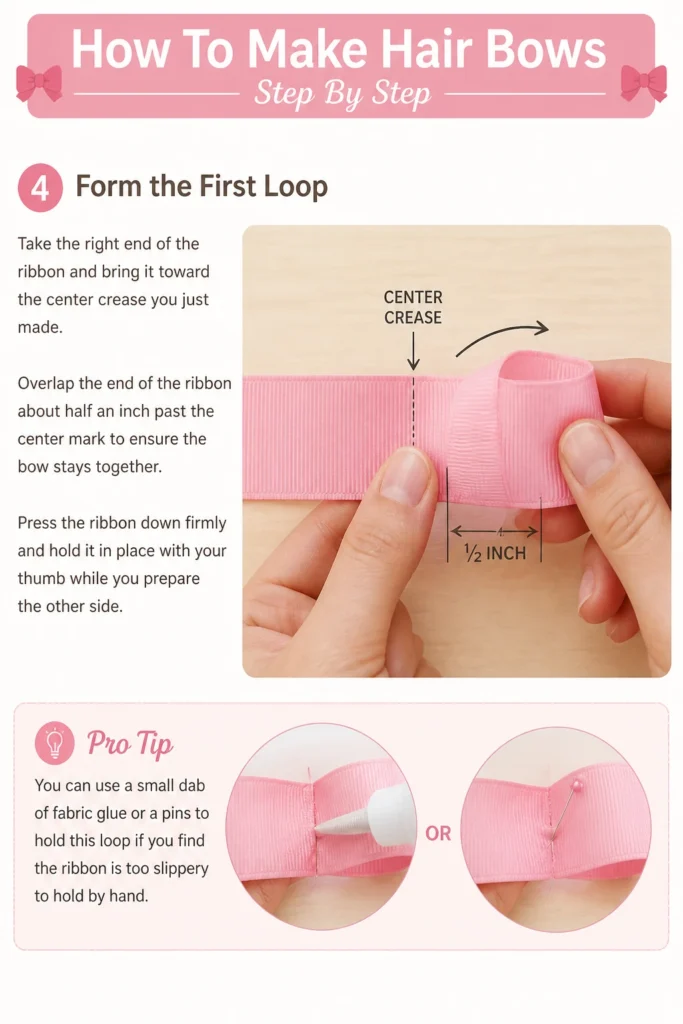
Overlap the end of the ribbon about half an inch past the center mark to ensure the bow stays together.
Press the ribbon down firmly and hold it in place with your thumb while you prepare the other side.
Pro Tip: You can use a small dab of fabric glue or a pins to hold this loop if you find the ribbon is too slippery to hold by hand.
Step 5: Create the Second Loop
Bring the left end of the ribbon over to the center, overlapping the first end you positioned.
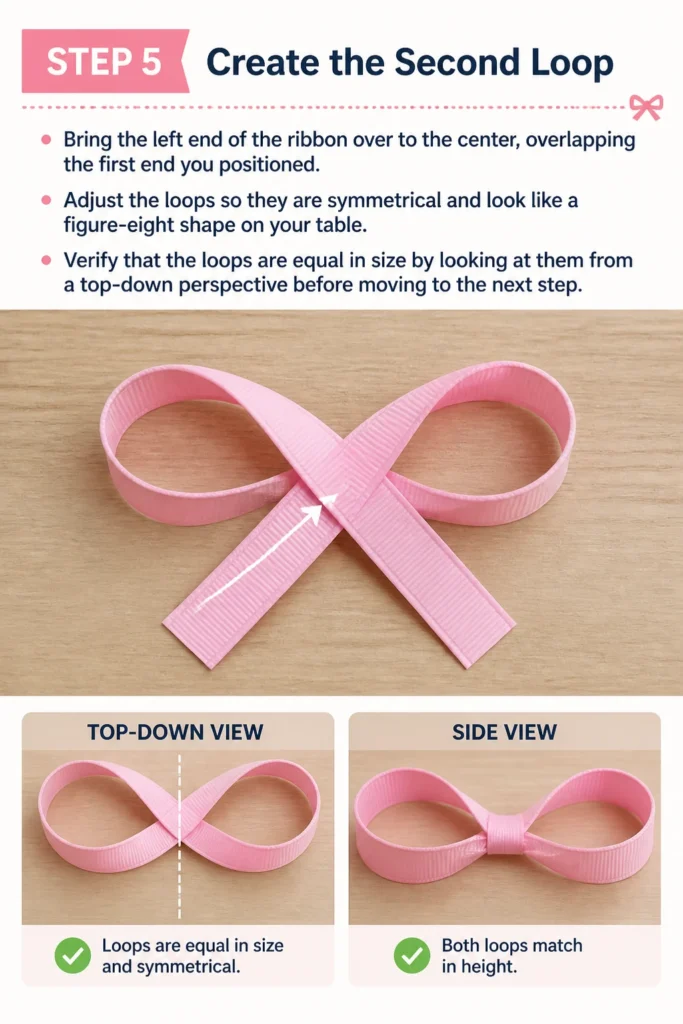
Adjust the loops so they are symmetrical and look like a figure-eight shape on your table.
Verify that the loops are equal in size by looking at them from a top-down perspective before moving to the next step.
Step 6: Create the Accordion Fold
Pinch the center of the ribbon where all the layers overlap using your thumb and forefinger.
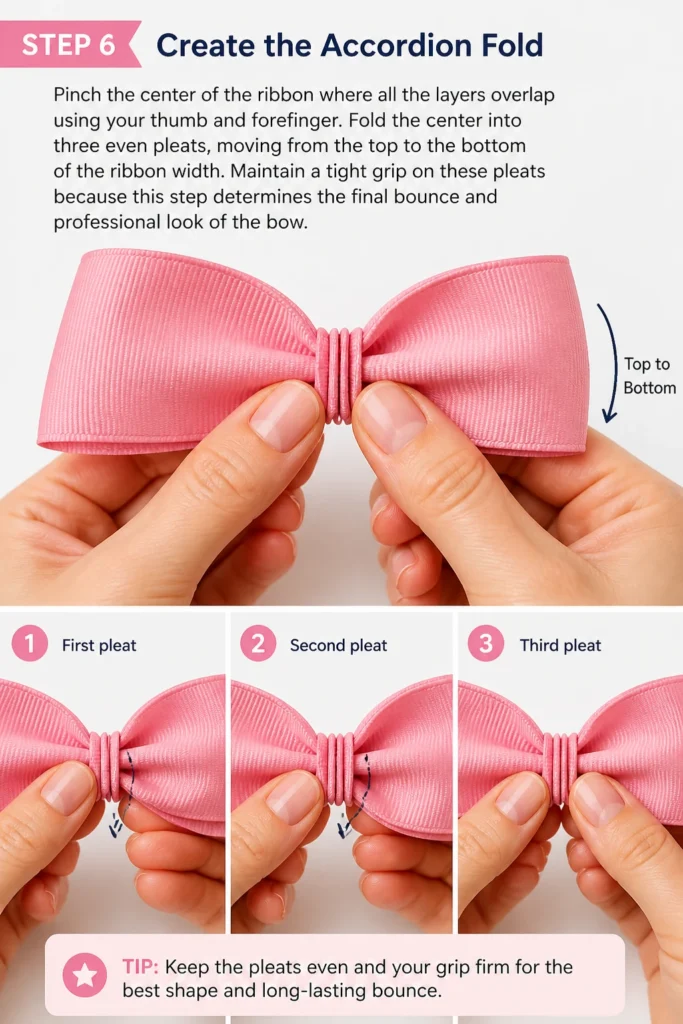
Fold the center into three even pleats, moving from the top to the bottom of the ribbon width.
Maintain a tight grip on these pleats because this step determines the final “bounce” and professional look of the bow.
Step 7: Secure the Center with Thread
Wrap a piece of strong upholstery thread around the pinched center at least four or five times.
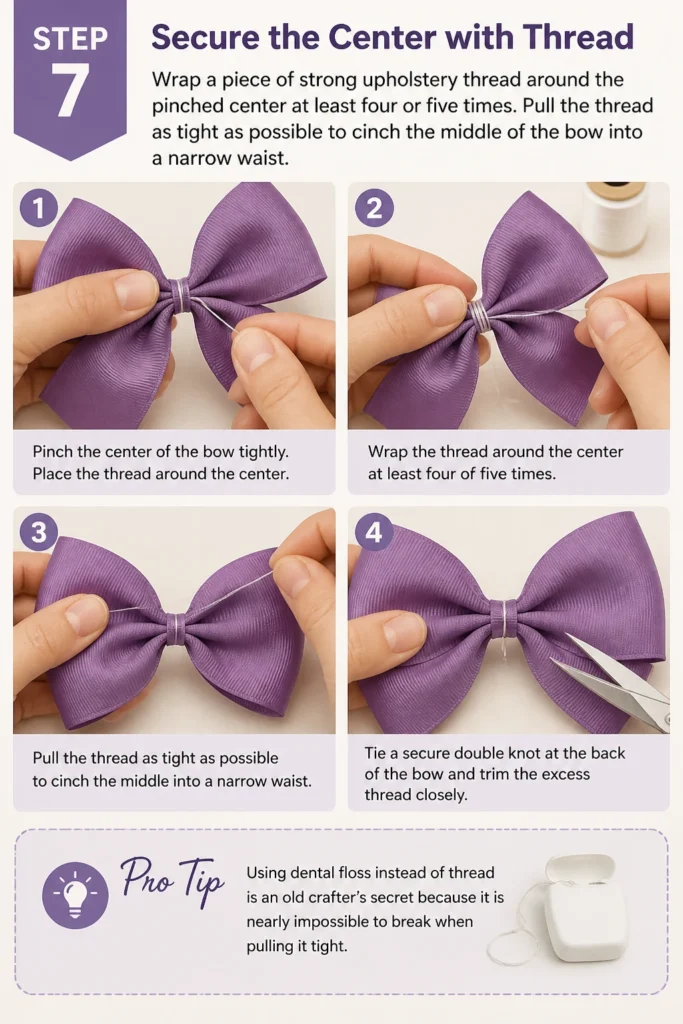
Pull the thread as tight as possible to cinch the middle of the bow into a narrow “waist.”
Tie a secure double knot at the back of the bow and trim the excess thread closely.
Pro Tip: Using dental floss instead of thread is an old crafter’s secret because it is nearly impossible to break when pulling it tight.
Step 8: Prepare the Center Knot
Cut a smaller piece of ribbon, roughly four inches long, to serve as the center wrap.
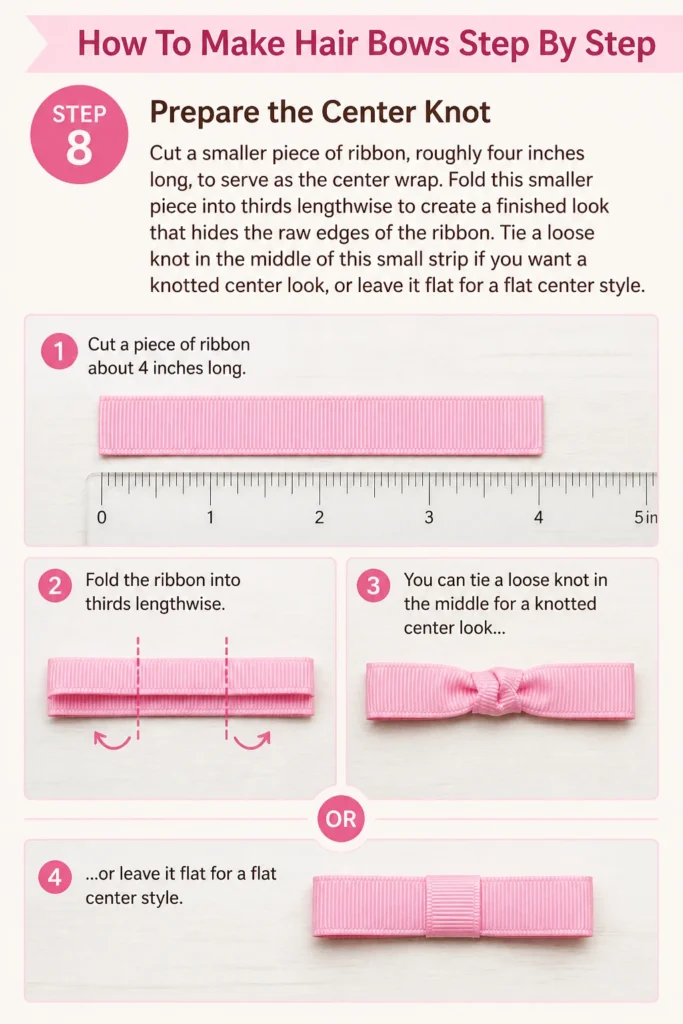
Fold this smaller piece into thirds lengthwise to create a finished look that hides the raw edges of the ribbon.
Tie a loose knot in the middle of this small strip if you want a “knotted center” look, or leave it flat for a “flat center” style.
Step 9: Attach the Hardware
Apply a small line of hot glue to the top of an alligator clip or a barrette.
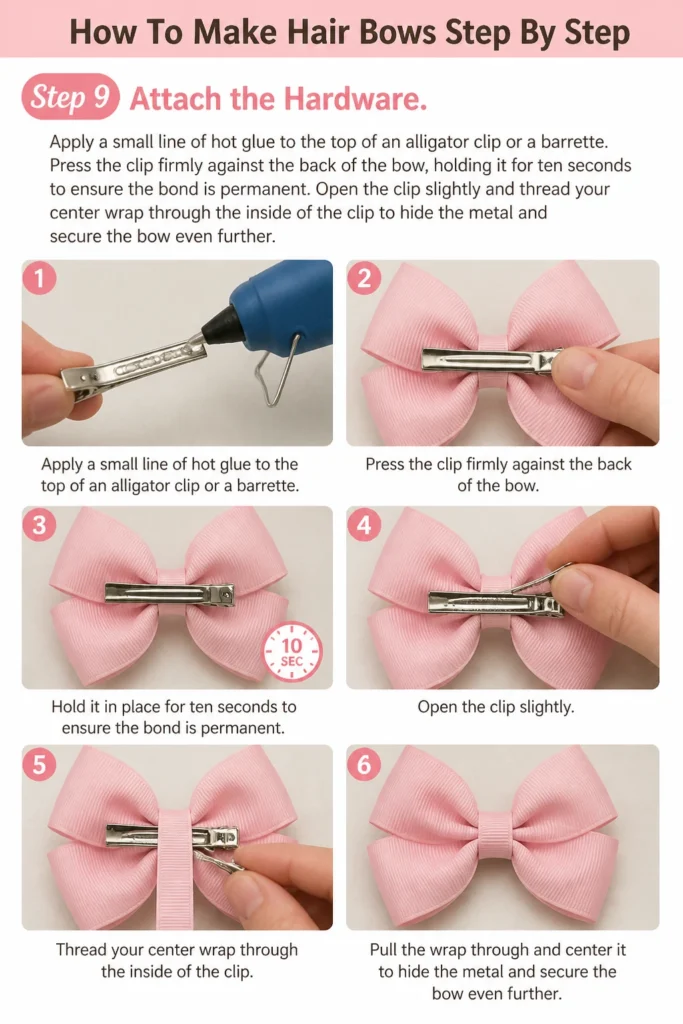
Press the clip firmly against the back of the bow, holding it for ten seconds to ensure the bond is permanent.
Open the clip slightly and thread your center wrap through the inside of the clip to hide the metal and secure the bow even further.
Step 10: Final Shaping and Finishing
Insert your fingers into the loops of the bow and gently pull them outward to add volume.
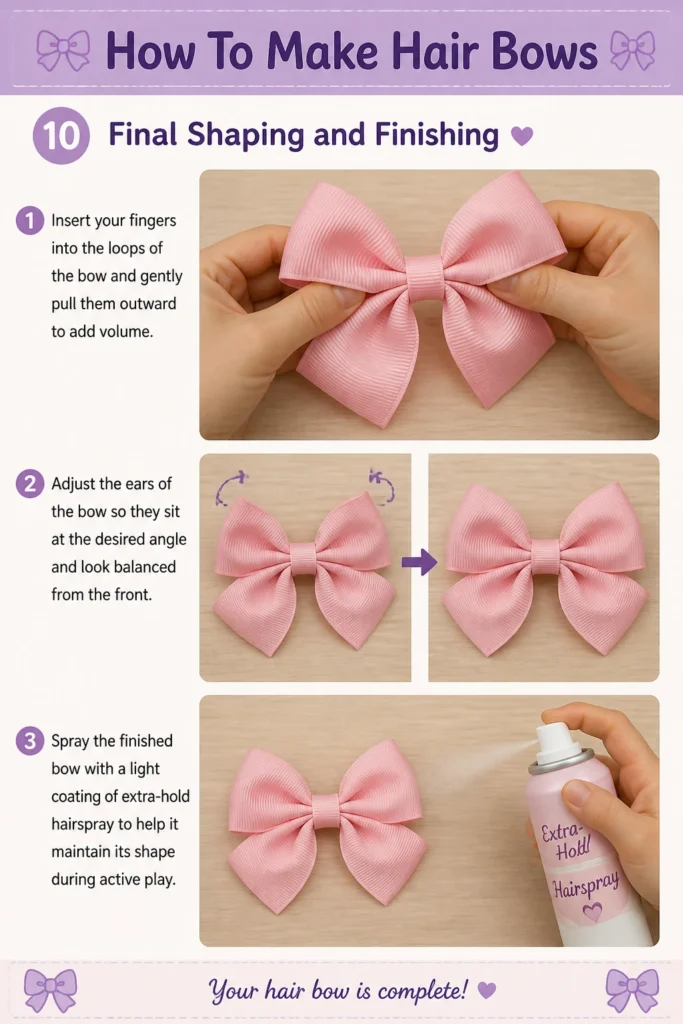
Adjust the “ears” of the bow so they sit at the desired angle and look balanced from the front.
Spray the finished bow with a light coating of extra-hold hairspray to help it maintain its shape during active play.
Common Mistakes to Avoid
Using Weak Thread
Many beginners use standard sewing thread which often snaps when you try to cinch the center of the bow. This leads to a loose center that makes the bow look floppy and unprofessional. Always opt for heavy-duty thread or even thin wire to ensure the bow stays tight and crisp.
Skipping the Heat Sealing
If you do not seal the ends of your ribbon, the bow will begin to fray within hours of being worn. This is the most common reason homemade bows look “cheap” compared to store-bought versions. A quick pass with a lighter is all it takes to make your accessory last for years.
Applying Too Much Hot Glue
Excessive glue can seep out from under the ribbon and create hard, unsightly lumps on your project. Use small, controlled dots of glue and press firmly to spread it thin. If glue does seep out, wait for it to dry completely before trying to pick it off with tweezers.
Troubleshooting
The Bow Loops Are Uneven
This usually happens if the ribbon wasn’t centered perfectly before you started the accordion fold. You can often fix this by gently tugging the smaller loop while holding the center tight. If that doesn’t work, it is best to unwrap the thread and re-center the ribbon before cinching it again.
The Ribbon Is Too Limp
Some ribbons are simply too soft to stand up on their own, especially certain types of satin. You can fix this by applying a fabric stiffener spray to the ribbon before you start the project. Alternatively, you can double-layer the ribbon to give the loops more structural integrity.
The Clip Keeps Falling Off
Hot glue does not always bond well to smooth metal surfaces like alligator clips. To fix this, you should “line” the clip with a small piece of ribbon first. Glue the ribbon to the clip, and then glue the bow to that ribbon-covered surface for a much stronger hold.
Key Takeaways
- Grosgrain ribbon is the best choice for beginners due to its texture and ability to hold a shape.
- Heat sealing every cut edge is a non-negotiable step for a long-lasting hair accessory.
- The “accordion fold” in the center is what creates the professional boutique look.
- Strong thread or dental floss is essential for cinching the bow tight enough to create volume.
- Lining your clips with ribbon first will prevent the bow from detaching during use.
- Final shaping and a bit of hairspray can make a huge difference in the finished appearance.
Frequently Asked Questions
What is the best width of ribbon for hair bows?
For a standard boutique bow, 1.5-inch wide ribbon is the most popular choice. It provides enough surface area to show off patterns while remaining easy to fold and manipulate. If you are making bows for infants, a 7/8-inch width is usually more appropriate for their smaller scale.
Can I make hair bows without a hot glue gun?
Yes, you can use specialized fabric glue or even hand-sew the entire bow together. However, hot glue is preferred by most crafters because it sets almost instantly. This allows you to move through the steps quickly without waiting for liquid glue to dry.
How do I make the bow loops stay open and “poofy”?
The secret to “poofy” bows is a combination of tight cinching in the middle and using a stiff ribbon. If your ribbon is naturally soft, you can use a starch spray or a dedicated fabric stiffener. Some crafters also put small pieces of wadded tissue inside the loops while the bow is being stored to maintain the shape.
What is the best way to cut the “tails” of a bow?
The most professional look is achieved with a “V” cut, also known as a dovetail. Fold the end of the ribbon in half vertically and cut at an upward angle toward the folded edge. When you unfold it, you will have a perfect, symmetrical “V” shape that looks high-end.
Our Top Recommended Finds
- Precision Fabric Scissors: A sharp pair of shears will prevent the ribbon from snagging or bunching while you cut.
- High-Temp Glue Gun: High-temperature glue creates a more permanent bond than low-temp versions, which is vital for items that will be handled frequently.
- Silicone Finger Protectors: These are lifesavers when you are pressing small pieces of ribbon into hot glue and want to avoid burns.
Master Your Crafting Skills
Now that you have mastered the basic boutique bow, you can start experimenting with different colors and patterns.
Try layering different widths of ribbon on top of each other to create a “stacked” bow look that adds even more personality.
You might also consider adding embellishments like rhinestones, buttons, or small silk flowers to the center knot for a custom touch.
Pick up some ribbon today and start practicing your folds so you can create a whole collection of accessories.
Beginner-friendly templates, step-by-step guides,
and weekly project ideas in your inbox.