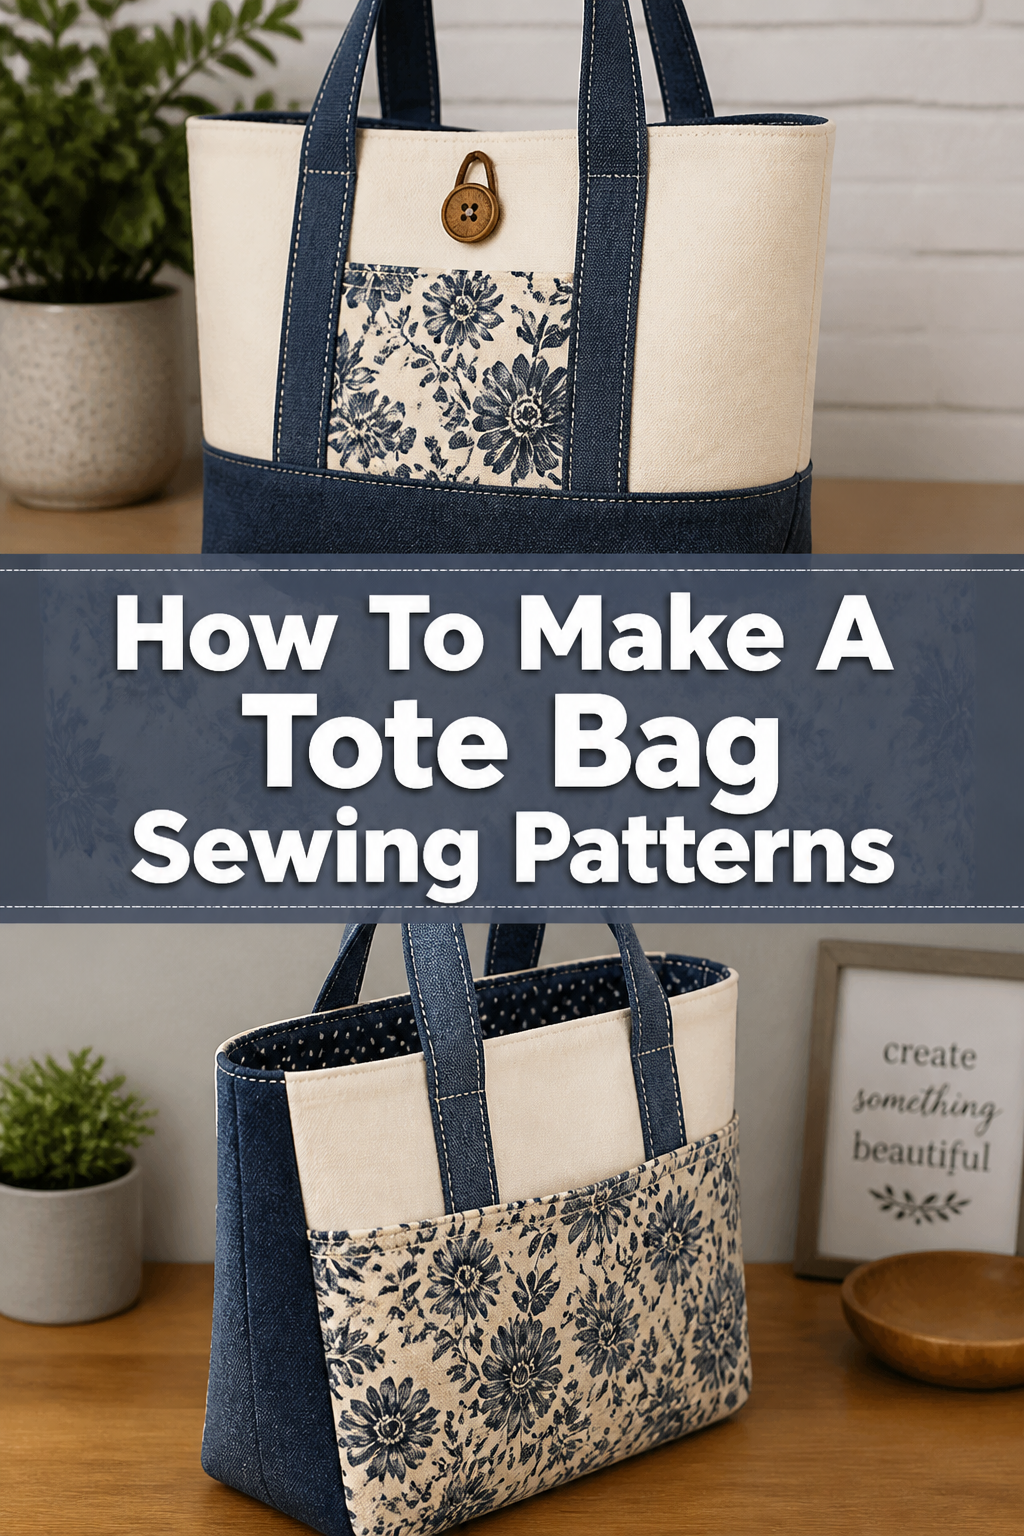
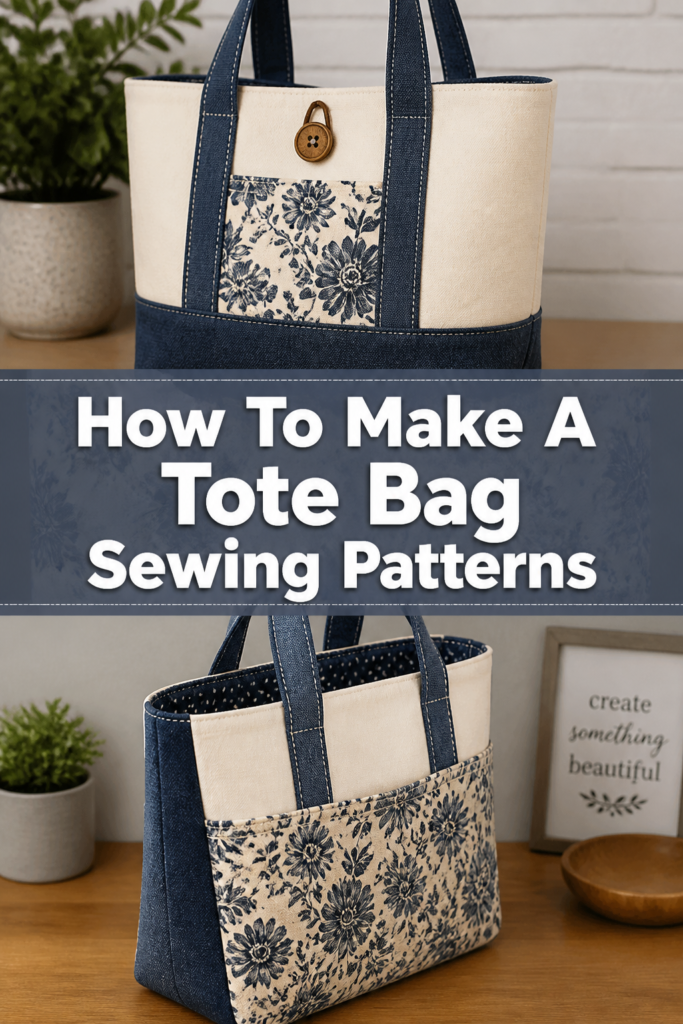
🧵 How To Make A Tote Bag Sewing Patterns

Beginner-friendly templates, step-by-step guides,
and weekly project ideas in your inbox.
Creating your own sewing patterns for a tote bag is incredibly rewarding. It allows you to design a bag that perfectly fits your needs and style. I remember the first time I drafted a pattern from scratch, the sense of accomplishment was immense. This guide will help you experience that same creative freedom and success.
Quick Overview
You’ll learn to design and draft a custom tote bag pattern, tailored to your exact specifications. This process gives you full control over the final look and functionality of your bag.
- Time needed: 2-4 hours (for drafting the pattern, not sewing the bag)
- Difficulty: Intermediate
- What you’ll need: Large paper, ruler, measuring tape, pencil, scissors, fabric scraps for testing
Step-by-Step Instructions
Step 1: Define Your Tote Bag Vision
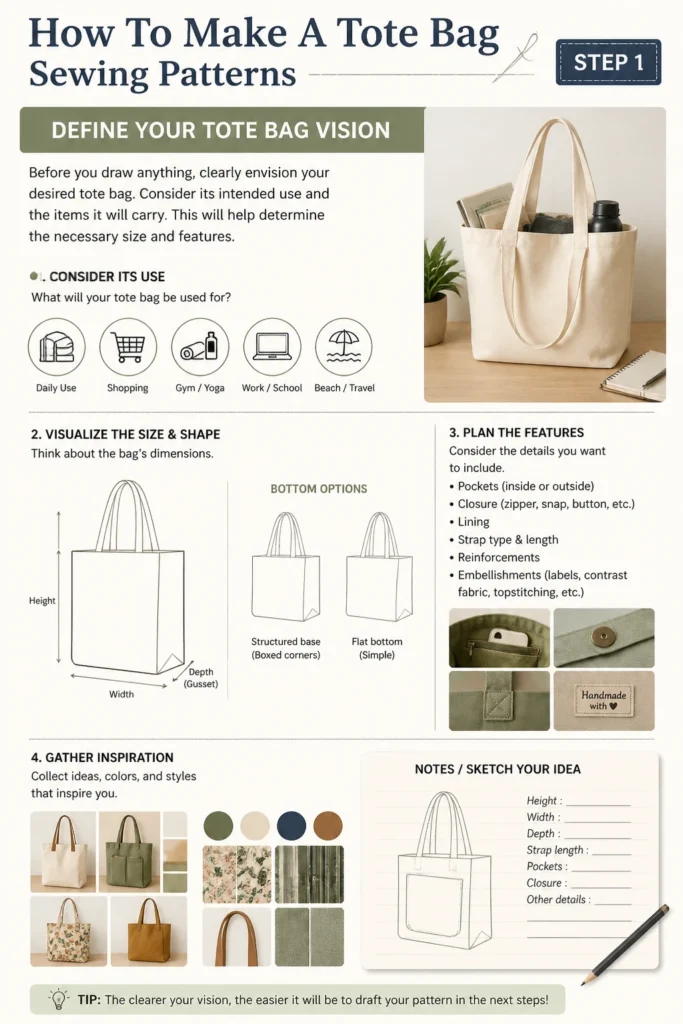
Before you draw anything, clearly envision your desired tote bag. Consider its intended use and the items it will carry. This will help determine the necessary size and features.
Visualize the bag’s dimensions: height, width, and depth. Think about whether you want a structured base or a simple flat bottom. Also, consider any specific pockets, closures, or embellishments you wish to include.
Step 2: Gather Your Pattern Drafting Tools
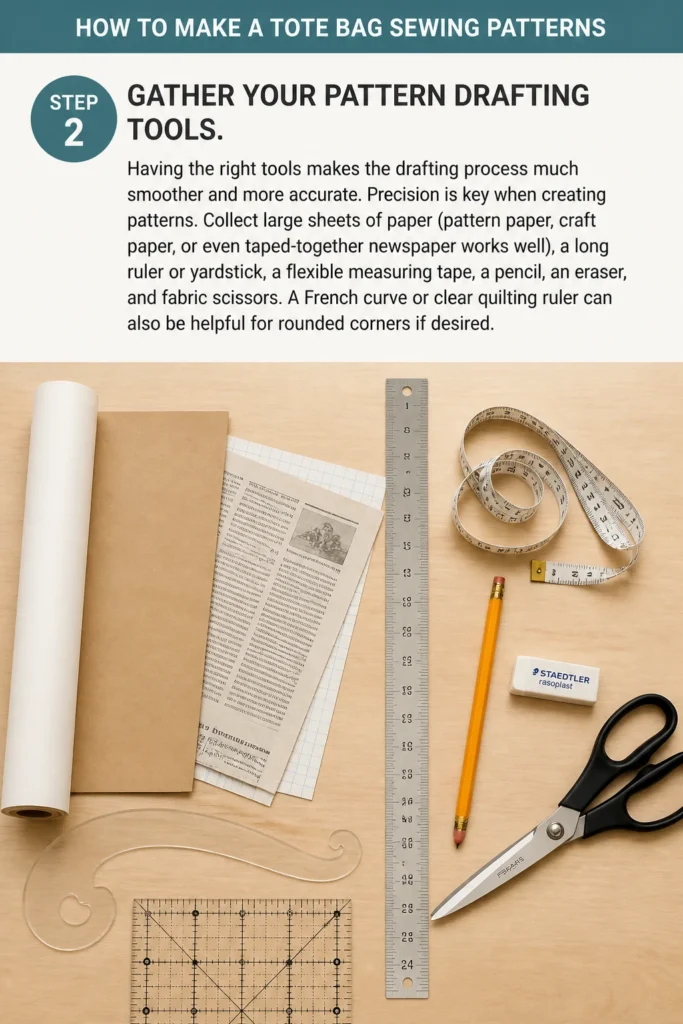
Having the right tools makes the drafting process much smoother and more accurate. Precision is key when creating patterns.
Collect large sheets of paper (pattern paper, craft paper, or even taped-together newspaper works well), a long ruler or yardstick, a flexible measuring tape, a pencil, an eraser, and fabric scissors. A French curve or clear quilting ruler can also be helpful for rounded corners if desired.
Step 3: Sketch and Determine Core Dimensions
Begin by sketching a rough outline of your tote bag on a piece of scrap paper. This doesn’t need to be perfect, just a visual guide.
Assign specific measurements to your sketch for the main body piece. For example, if you want a bag that is 14 inches wide and 16 inches tall, note these down. Remember to account for the bag’s depth when planning your main body piece or separate base.
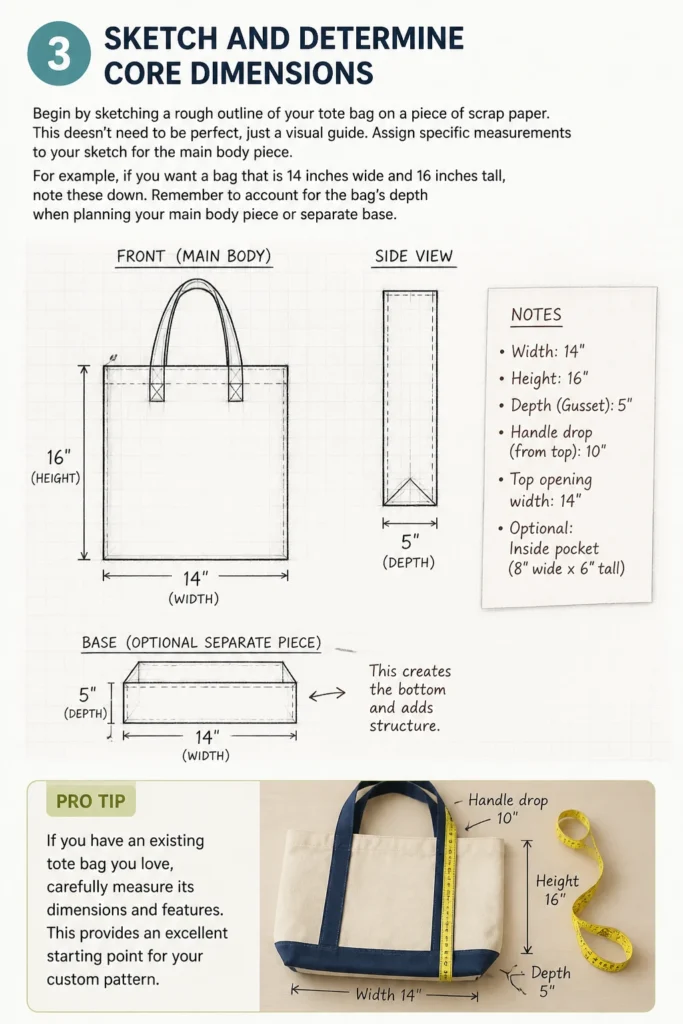
Pro Tip: If you have an existing tote bag you love, carefully measure its dimensions and features. This provides an excellent starting point for your custom pattern.
Step 4: Draft the Main Body Pattern Piece
Most tote bags start with a simple rectangular main body. This piece forms the front and back of your bag.
Draw a large rectangle on your pattern paper using your decided width and height. Add a seam allowance (typically 1/2 inch or 5/8 inch) around all four sides of this rectangle. This outer line will be your cutting line.
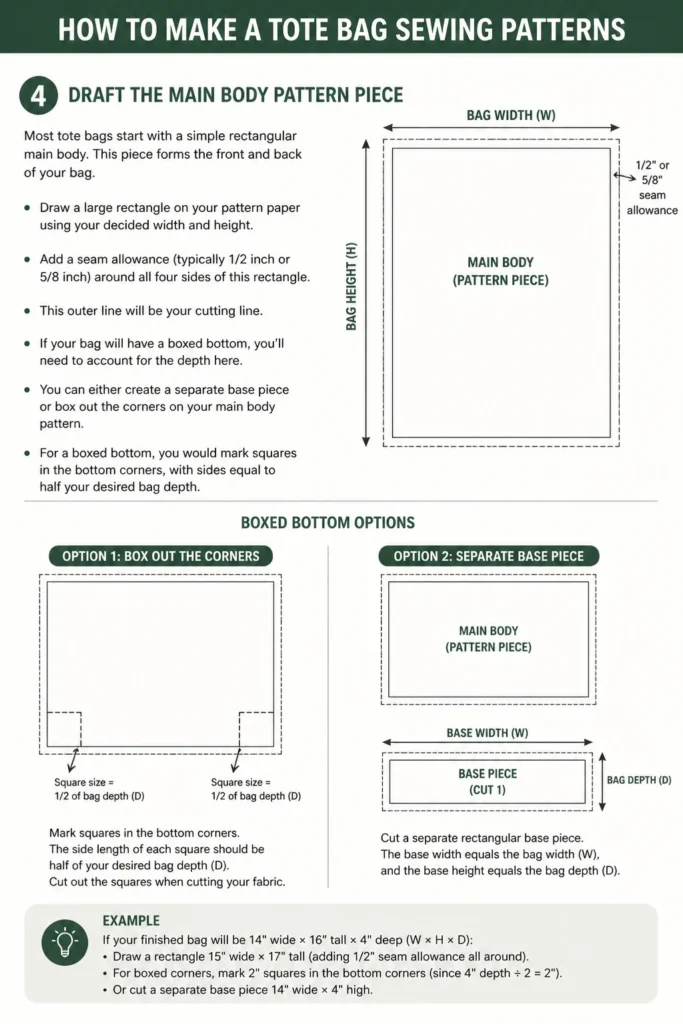
If your bag will have a boxed bottom, you’ll need to account for the depth here. You can either create a separate base piece or “box out” the corners on your main body pattern. For a boxed bottom, you would mark squares in the bottom corners, with sides equal to half your desired bag depth.
Step 5: Design and Draft the Tote Bag Base (Optional)
A separate base piece provides more structure and a professional finish. This is ideal for bags that need to stand upright.
Determine the desired width and depth of your bag’s base. Draw a rectangle on your pattern paper with these dimensions, adding seam allowances on all four sides. This piece will be sewn to the bottom edges of your main body panels.
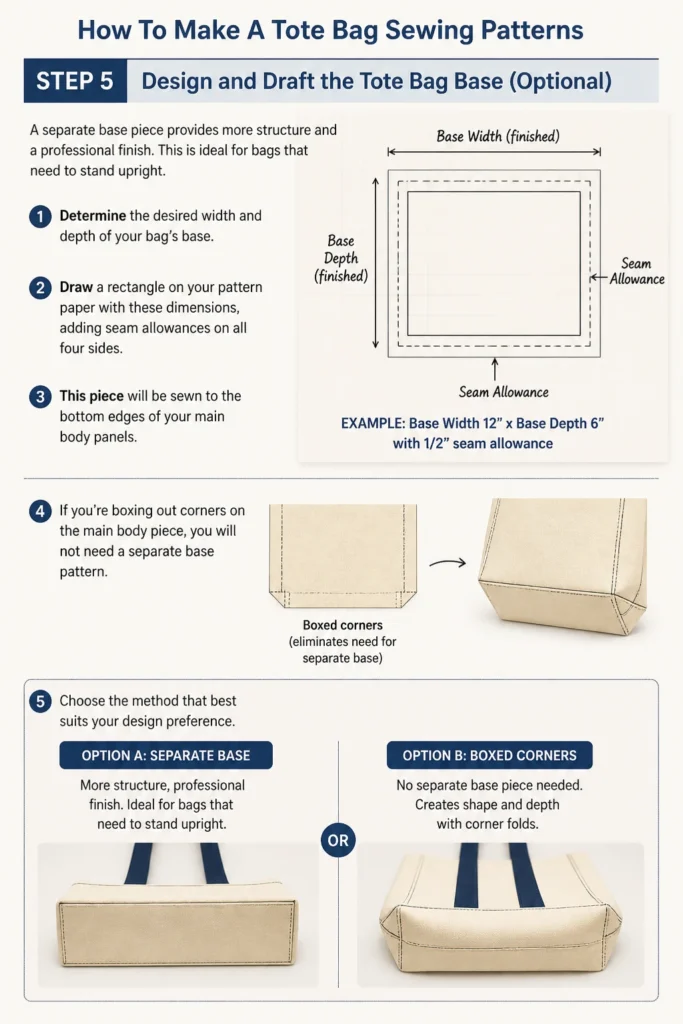
If you’re boxing out corners on the main body piece, you will not need a separate base pattern. Choose the method that best suits your design preference.
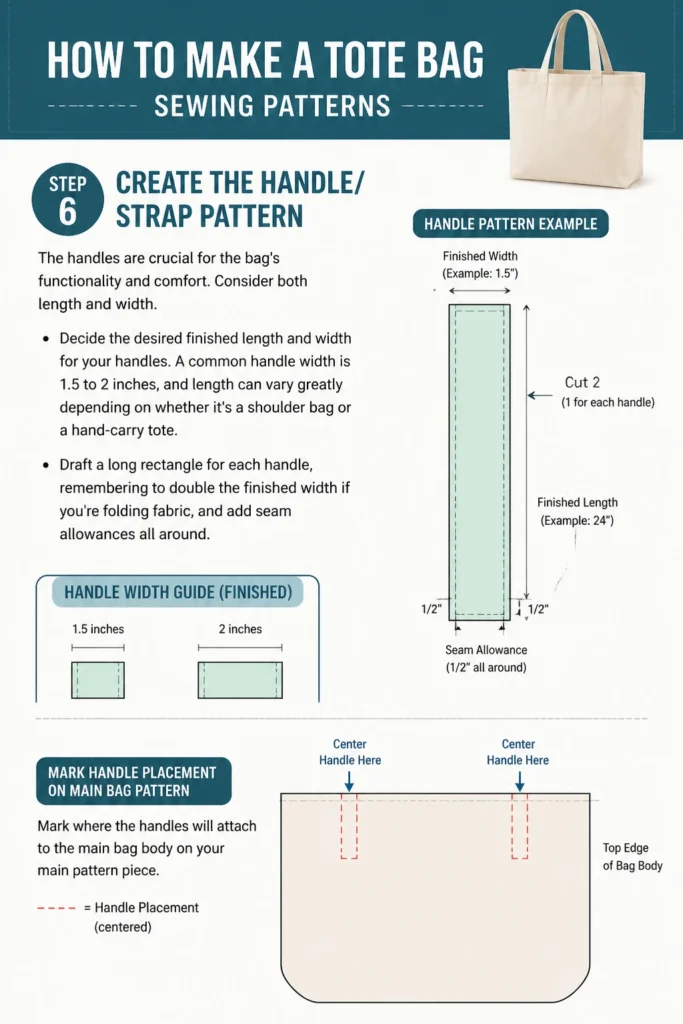
Step 6: Create the Handle/Strap Pattern
The handles are crucial for the bag’s functionality and comfort. Consider both length and width.
Decide the desired finished length and width for your handles. A common handle width is 1.5 to 2 inches, and length can vary greatly depending on whether it’s a shoulder bag or a hand-carry tote. Draft a long rectangle for each handle, remembering to double the finished width if you’re folding fabric, and add seam allowances all around. Mark where the handles will attach to the main bag body on your main pattern piece.
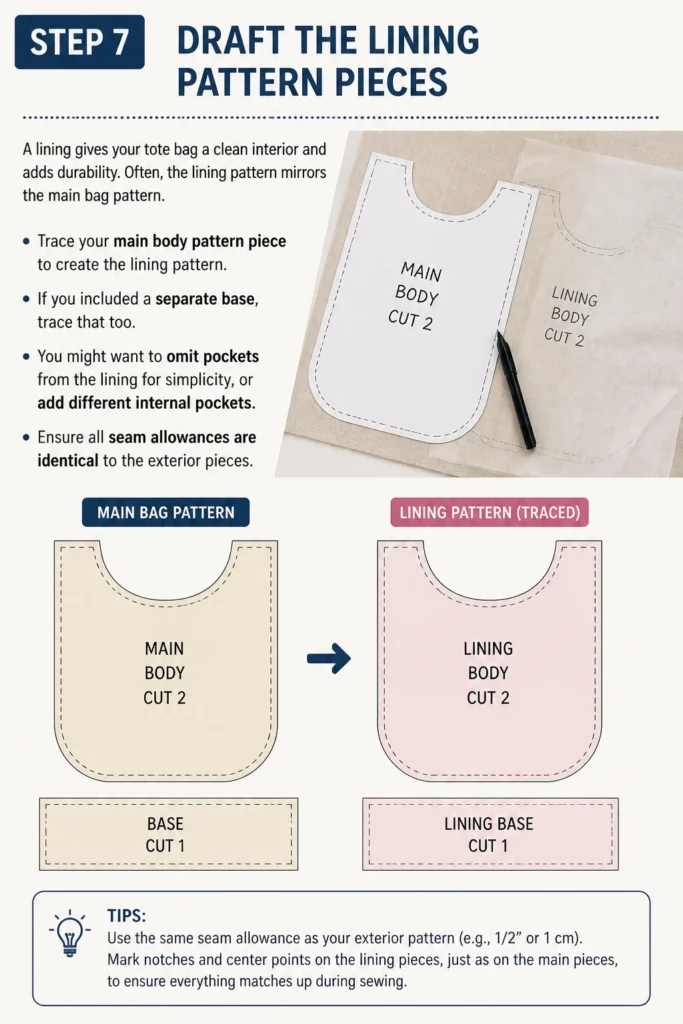
Step 7: Draft the Lining Pattern Pieces
A lining gives your tote bag a clean interior and adds durability. Often, the lining pattern mirrors the main bag pattern.
Trace your main body pattern piece to create the lining pattern. If you included a separate base, trace that too. You might want to omit pockets from the lining for simplicity, or add different internal pockets. Ensure all seam allowances are identical to the exterior pieces.
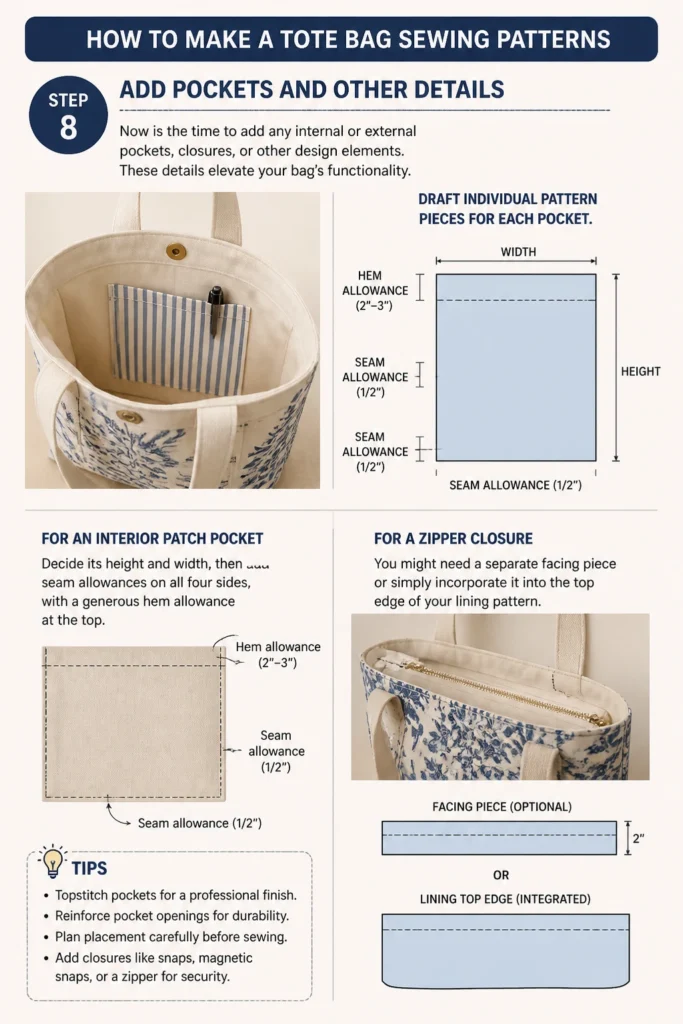
Step 8: Add Pockets and Other Details
Now is the time to add any internal or external pockets, closures, or other design elements. These details elevate your bag’s functionality.
Draft individual pattern pieces for each pocket. For an interior patch pocket, decide its height and width, then add seam allowances on all four sides, with a generous hem allowance at the top. For a zipper closure, you might need a separate facing piece or simply incorporate it into the top edge of your lining pattern.
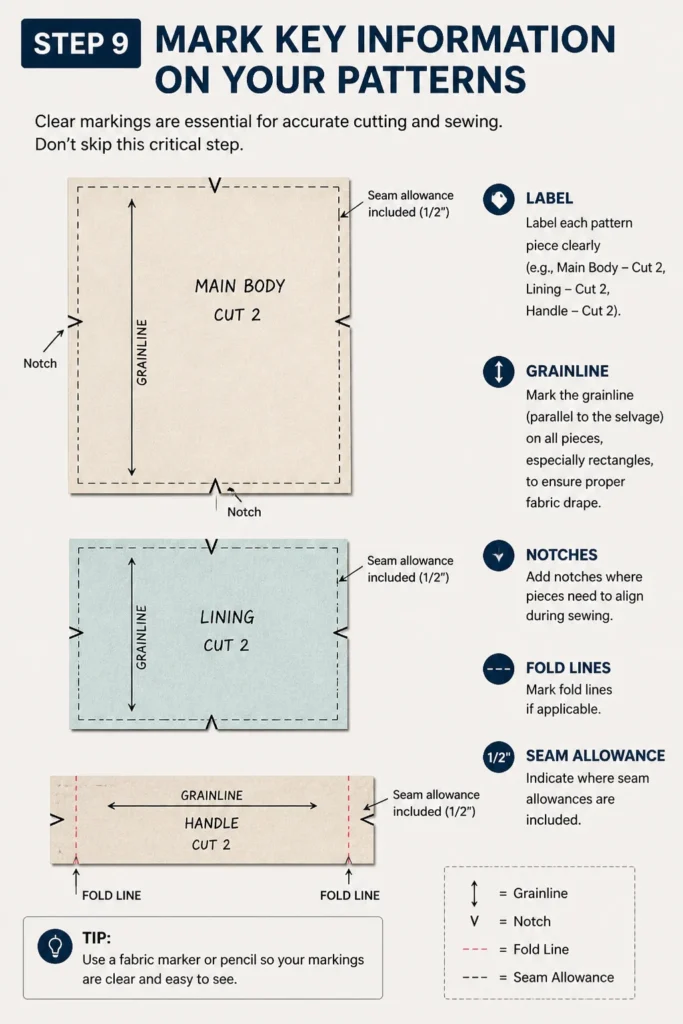
Step 9: Mark Key Information on Your Patterns
Clear markings are essential for accurate cutting and sewing. Don’t skip this critical step.
Label each pattern piece clearly (e.g., “Main Body – Cut 2,” “Lining – Cut 2,” “Handle – Cut 2”). Mark the grainline (parallel to the selvage) on all pieces, especially rectangles, to ensure proper fabric drape. Add notches where pieces need to align during sewing, and mark fold lines if applicable. Indicate where seam allowances are included.
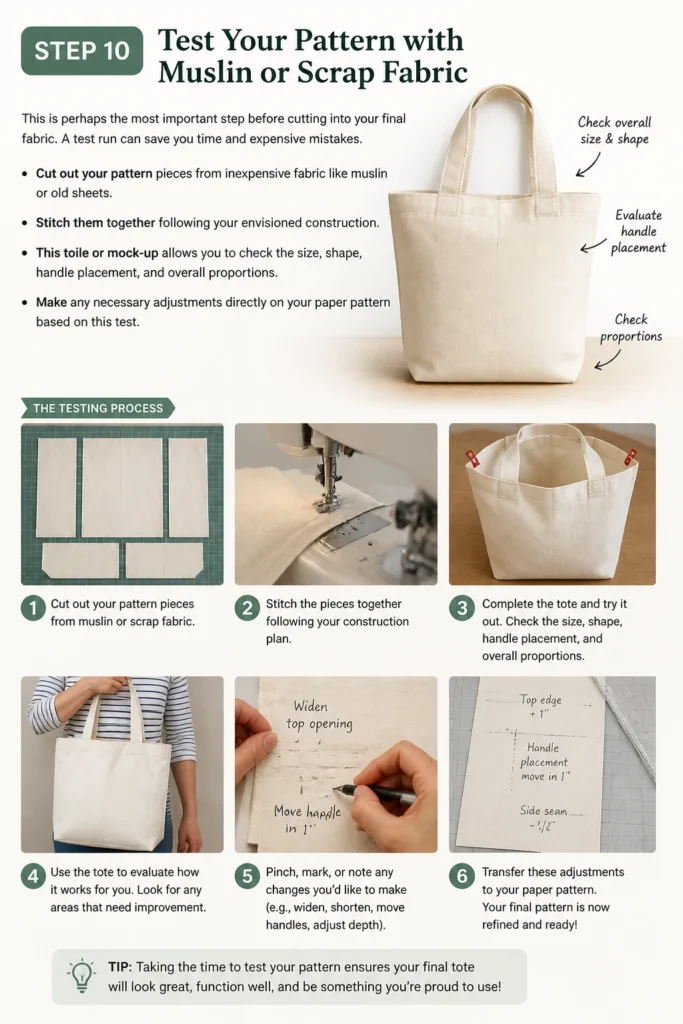
Step 10: Test Your Pattern with Muslin or Scrap Fabric
This is perhaps the most important step before cutting into your final fabric. A test run can save you time and expensive mistakes.
Cut out your pattern pieces from inexpensive fabric like muslin or old sheets. Stitch them together following your envisioned construction. This “toile” or “mock-up” allows you to check the size, shape, handle placement, and overall proportions. Make any necessary adjustments directly on your paper pattern based on this test.
Common Mistakes to Avoid
Forgetting Seam Allowances
One of the most frequent errors is drafting pieces to the exact finished size without adding seam allowances. This results in a bag that is too small once sewn.
Always remember to add a consistent seam allowance (e.g., 1/2 inch or 5/8 inch) around all edges of every pattern piece. This ensures your final bag dimensions match your design.
Inaccurate Measurements
Even slight inaccuracies in measuring or drawing can lead to lopsided or ill-fitting bag components. Precision is paramount in pattern making.
Double-check all your measurements and lines with a ruler and measuring tape. Use a square ruler to ensure corners are truly 90 degrees. Take your time to draw straight, clean lines.
Not Labeling Pattern Pieces
Once you have several pieces, it’s easy to get them confused if they aren’t clearly labeled. This can lead to cutting the wrong number of pieces or misaligning them.
Immediately after drafting each pattern piece, write its name, the number of pieces to cut, and any specific instructions (like “cut on fold”). Include the grainline and any notches.
Skipping the Test Run (Muslin)
It’s tempting to jump straight to cutting your beautiful final fabric. However, skipping the muslin test can lead to costly mistakes in fabric and time.
Always create a mock-up of your bag using inexpensive fabric. This allows you to identify and correct any design flaws or fit issues before committing to your good fabric. It’s an invaluable step in the pattern-making process.
Troubleshooting
The Bag Feels Too Flimsy
If your test bag lacks structure and feels too soft, it likely needs more support. The fabric choice and interfacing play a big role.
Consider adding a layer of fusible interfacing to your main body and lining pieces. There are various weights of interfacing; choose one appropriate for the desired stiffness of your tote. You might also want to use a heavier weight canvas or duck cloth for the exterior fabric.
The Handles Are Too Short or Uncomfortable
After sewing your test bag, you might find the handles aren’t quite right for carrying. This is a common adjustment.
Measure how much longer or shorter you need the handles to be. Adjust your handle pattern piece accordingly, making sure to add the seam allowance back in. Consider the width as well; wider handles can be more comfortable for heavy loads.
The Bag Looks Lopsided or Distorted
If your sewn test bag doesn’t look symmetrical, or edges don’t meet up correctly, it points to issues with your pattern drafting or cutting.
Go back to your pattern pieces and re-measure every edge and angle. Ensure all seam allowances are consistent. When cutting your fabric, lay it flat and use sharp scissors or a rotary cutter for precise edges. Align your pattern pieces carefully with the fabric’s grainline.
Key Takeaways
- Plan Your Design Thoroughly: Define your bag’s purpose, size, and features before you start drawing.
- Measure and Draft Precisely: Accuracy in every line and measurement prevents issues later in the sewing process.
- Include All Seam Allowances: Always add a consistent seam allowance to every pattern piece for correct sizing.
- Label Everything Clearly: Mark all pattern pieces with names, cutting instructions, grainlines, and notches.
- Test Your Pattern with Muslin: A mock-up helps identify and fix design flaws before cutting your final fabric.
- Embrace Iteration: Pattern making is an iterative process; be prepared to make adjustments and refinements.
Frequently Asked Questions
Can I use an old tote bag as a guide for my pattern?
Absolutely, using an existing bag you love is an excellent way to start. Carefully deconstruct it or measure all its components. You can then translate these measurements into your own custom pattern pieces, adding or modifying features as you go.
What kind of paper is best for drafting patterns?
Large rolls of brown craft paper, medical exam table paper, or specific pattern drafting paper are ideal. Even old newspaper or large sheets of drawing paper taped together can work in a pinch. The key is having a surface large enough for your pieces.
How do I scale a pattern up or down?
To scale a pattern, you’ll need to adjust all dimensions proportionally. For example, if you want a bag that’s 25% larger, multiply all original length and width measurements by 1.25. Remember to re-draw and re-measure carefully after scaling.
Do I need separate patterns for the exterior and lining?
Generally, yes. While they often share the same basic shape, the lining might omit certain exterior details (like a separate base or complex pockets) or include different internal pockets. Having separate patterns ensures clarity and accuracy for each component.
Our Top Recommended Finds
- Large Self-Healing Cutting Mat: Provides a protected surface for cutting and features grid lines for easy measuring.
- Rotary Cutter and Quilting Rulers: For precise, straight cuts and accurate measurement of pattern pieces.
- Pattern Weights: Holds your pattern pieces securely in place on the fabric without the need for pins, ensuring stability while cutting.
Design Your Dream Tote Today
You now have the steps to create your very own tote bag sewing patterns. The journey from idea to a tangible pattern is incredibly rewarding. Don’t be afraid to experiment with different shapes, sizes, and features.
Take this guide and start sketching your next project. Imagine the possibilities of a custom-designed bag that truly reflects your style. Once you master pattern drafting, you can apply these skills to create other accessories or even garments.
Beginner-friendly templates, step-by-step guides,
and weekly project ideas in your inbox.