
📌 How To Get Stains Out Of White Clothes

Beginner-friendly templates, step-by-step guides,
and weekly project ideas in your inbox.
There’s nothing quite like the crisp, clean look of white clothes. But a single spill can feel like a disaster, threatening to ruin your favorite shirt or pristine linens.
I’ve battled countless coffee rings, grass stains, and mystery marks on everything from dress shirts to baby onesies.
Through years of trial and error, I’ve learned the most effective ways to restore whites to their original glory, and I’m here to share those proven methods with you.

Quick Overview
This guide will equip you with the knowledge and techniques to confidently tackle a variety of stains on your white garments. You’ll learn how to identify stains, choose the right treatment, and effectively remove even stubborn marks, preserving your whites for longer.
- Time needed: 15-60 minutes (depending on stain type and severity)
- Difficulty: Beginner to Intermediate
- What you’ll need: Stain remover, laundry detergent, oxygen bleach, white vinegar, baking soda, clean cloths, soft brush, access to a washing machine.
Step-by-Step Instructions
Step 1: Act Quickly and Assess the Stain
The faster you address a stain, the better your chances of complete removal. Time is truly of the essence when it comes to white fabrics.
As soon as you notice a stain, pause what you’re doing.
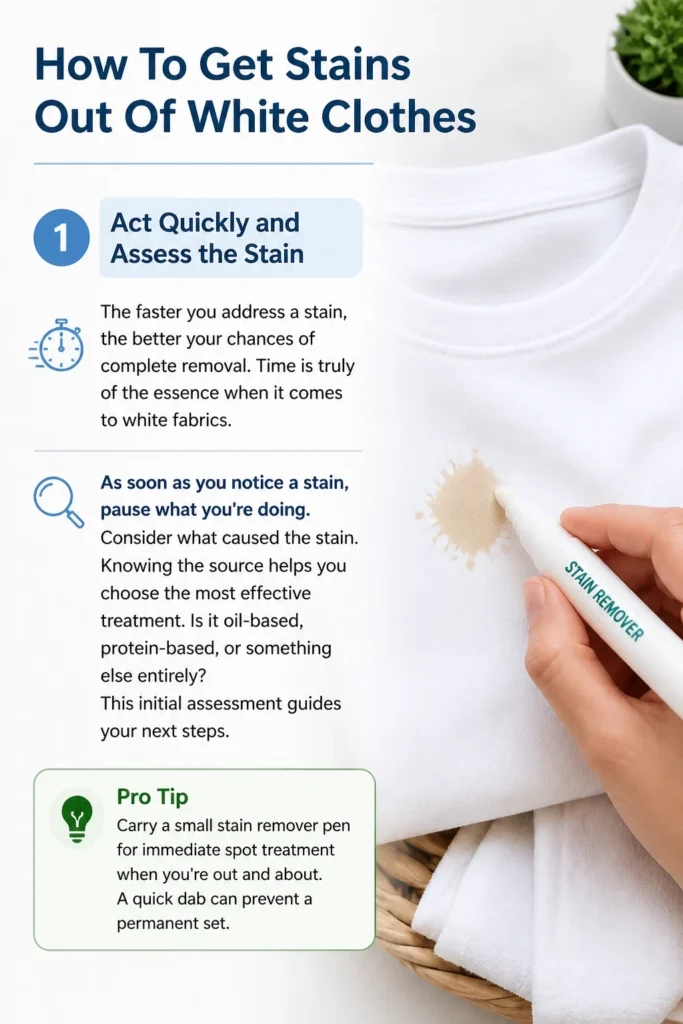
Consider what caused the stain. Knowing the source helps you choose the most effective treatment.
Is it oil-based, protein-based, or something else entirely? This initial assessment guides your next steps.
Pro Tip: Carry a small stain remover pen for immediate spot treatment when you’re out and about. A quick dab can prevent a permanent set.
Step 2: Scrape or Blot Excess Material
Before applying any cleaning agents, remove as much of the staining substance as possible. This prevents it from spreading or being pushed deeper into the fabric fibers.
For solid or semi-solid stains like food, gently scrape away the excess with a dull knife or the edge of a credit card.
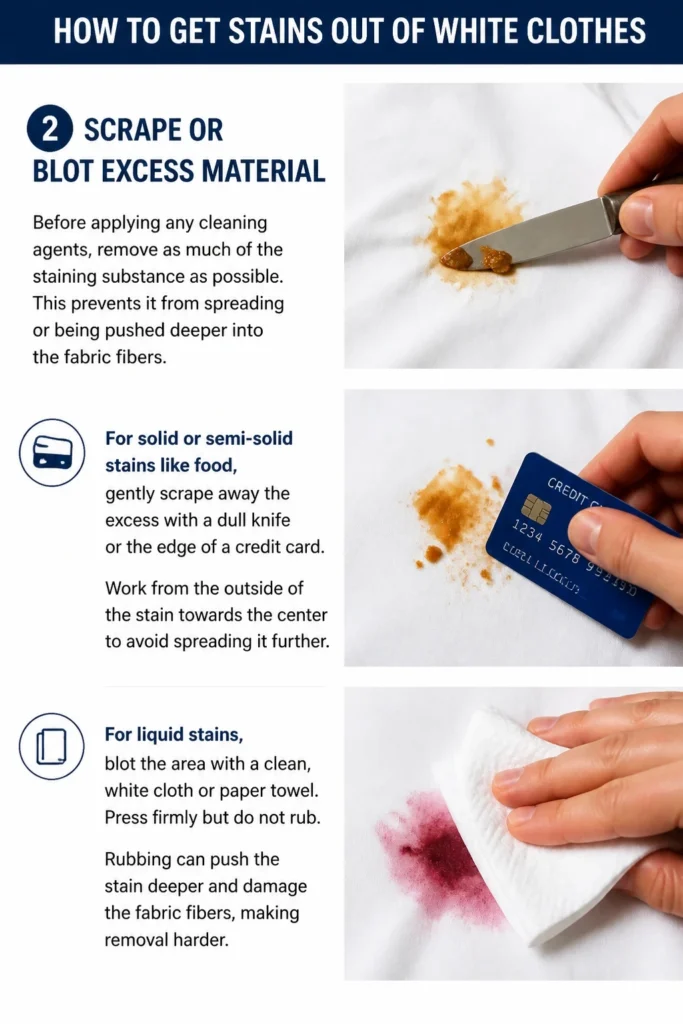
Work from the outside of the stain towards the center to avoid spreading it further.
For liquid stains, blot the area with a clean, white cloth or paper towel. Press firmly but do not rub.
Rubbing can push the stain deeper and damage the fabric fibers, making removal harder.
Step 3: Test Your Chosen Stain Remover
Always test any stain treatment on an inconspicuous area of the garment first. This is crucial for white clothes, as some products can cause discoloration or damage.
Choose a hidden spot, like an inside seam or the hem of the garment.
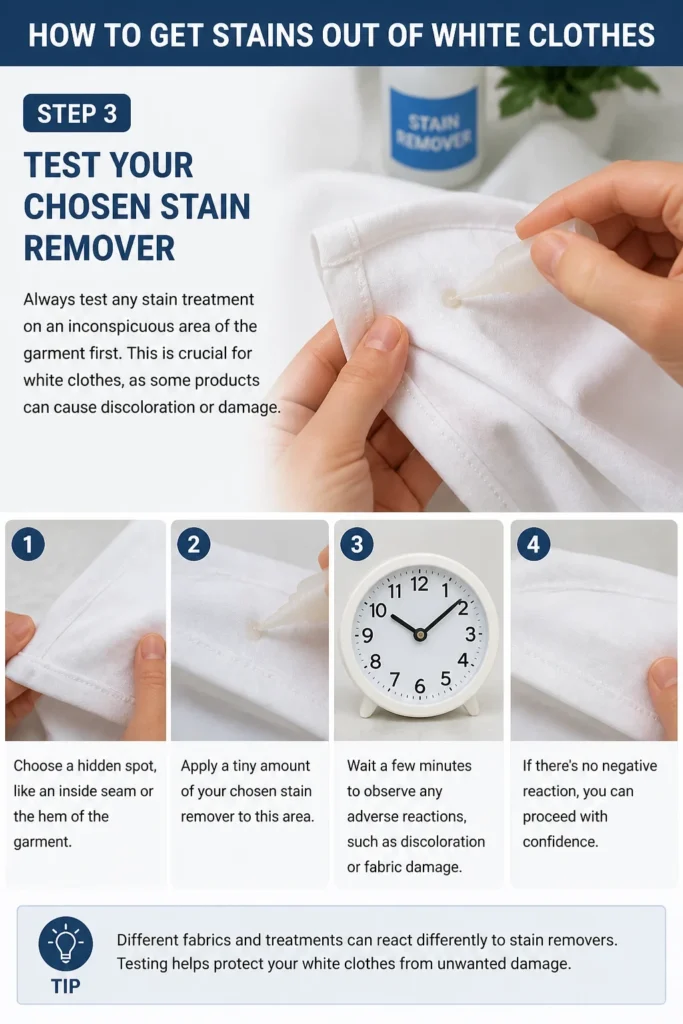
Apply a tiny amount of your chosen stain remover to this area.
Wait a few minutes to observe any adverse reactions, such as discoloration or fabric damage.
If there’s no negative reaction, you can proceed with confidence.
Step 4: Pretreat the Stain with a Targeted Solution
The type of stain dictates the best pretreatment method. Different substances react differently to various cleaning agents.
For oil-based stains (grease, makeup, certain foods):
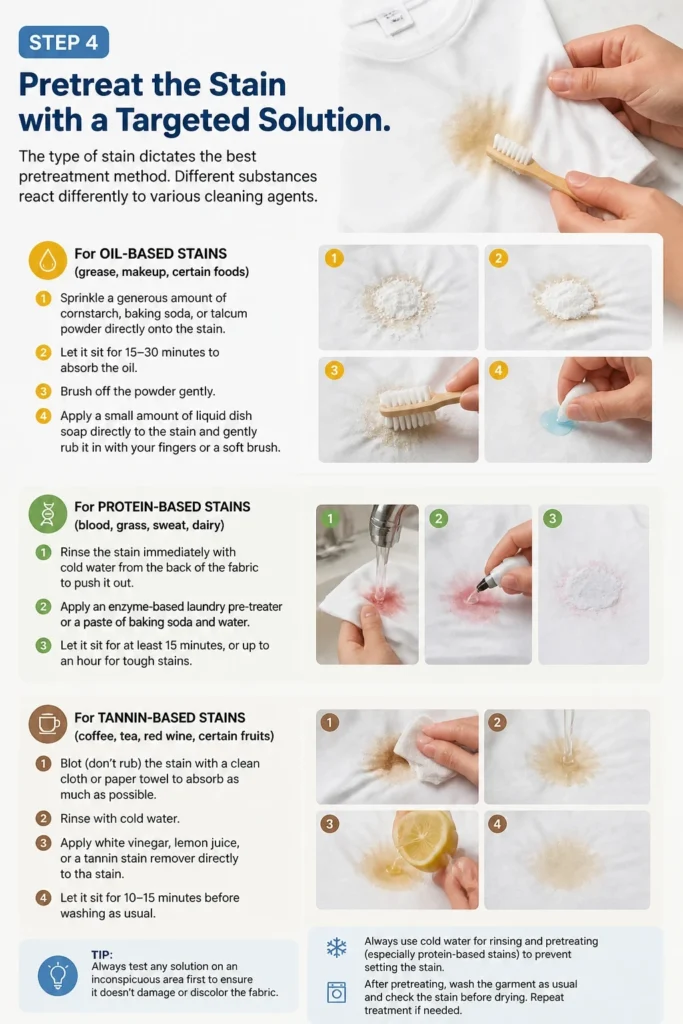
- Sprinkle a generous amount of cornstarch, baking soda, or talcum powder directly onto the stain.
- Let it sit for 15-30 minutes to absorb the oil.
- Brush off the powder gently.
- Apply a small amount of liquid dish soap directly to the stain and gently rub it in with your fingers or a soft brush.
For protein-based stains (blood, grass, sweat, dairy):
- Rinse the stain immediately with cold water from the back of the fabric to push it out.
- Apply an enzyme-based laundry pre-treater or a paste of baking soda and water.
- Let it sit for at least 15 minutes, or up to an hour for tough stains.
For tannin-based stains (coffee, tea, fruit juice, wine):
- Rinse with cold water.
- Mix equal parts white vinegar and water, or use a commercial stain remover designed for these types of stains.
- Dab the solution onto the stain and let it sit for 10-15 minutes.
For general or unknown stains:
- Apply a good quality laundry pre-treater or a dab of liquid laundry detergent directly to the stain.
- Gently rub it in with your fingers or a soft brush.
- Allow it to penetrate the stain for 5-10 minutes.
Step 5: Soak the Garment (Optional but Recommended for Tough Stains)
Soaking can significantly improve the chances of removing stubborn or set-in stains. It allows the cleaning agents more time to break down the stain molecules.
Fill a basin or bucket with cool or lukewarm water, depending on the garment’s care label.
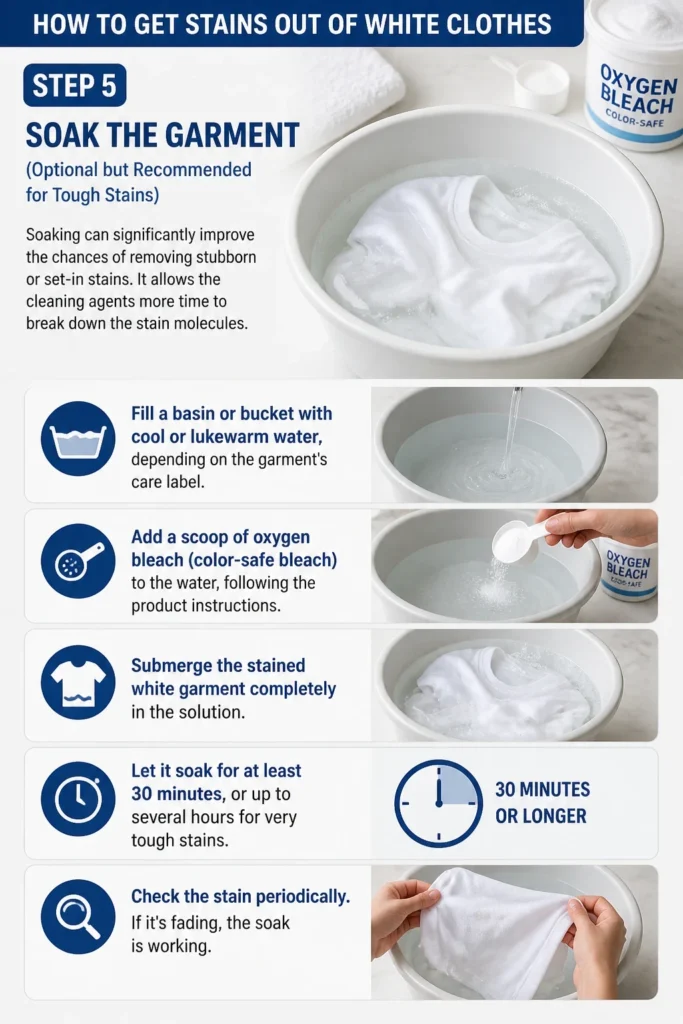
Add a scoop of oxygen bleach (color-safe bleach) to the water, following the product instructions.
Submerge the stained white garment completely in the solution.
Let it soak for at least 30 minutes, or up to several hours for very tough stains.
Check the stain periodically. If it’s fading, the soak is working.
Step 6: Wash the Garment
After pretreatment and optional soaking, it’s time to wash the garment. Always wash white clothes separately from colors to prevent dye transfer.
Place the pretreated white garment into your washing machine.
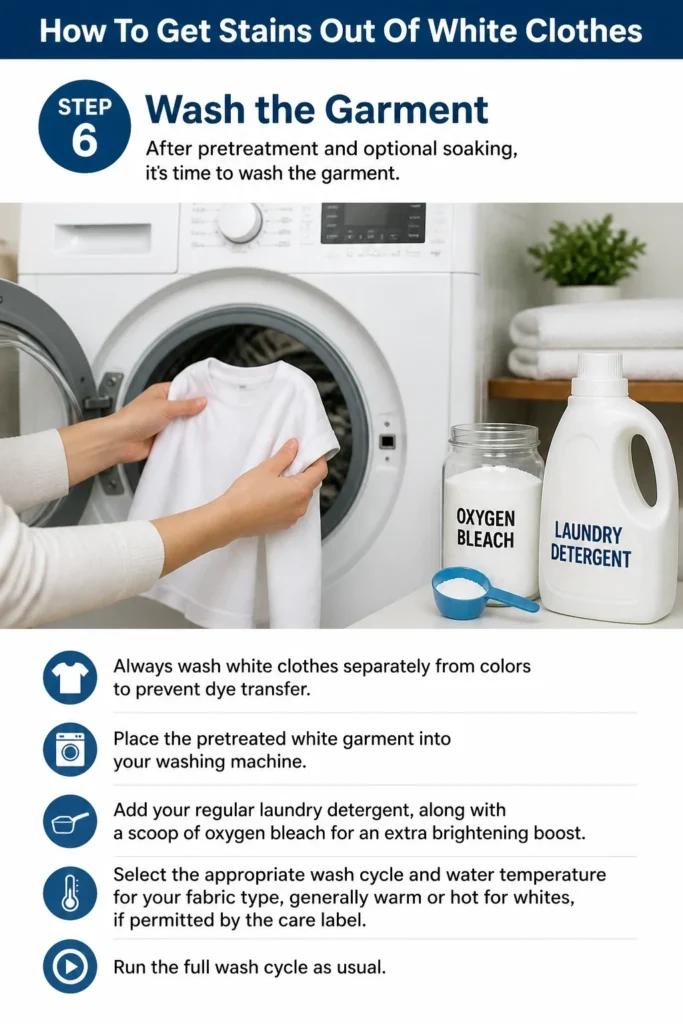
Add your regular laundry detergent, along with a scoop of oxygen bleach for an extra brightening boost.
Select the appropriate wash cycle and water temperature for your fabric type, generally warm or hot for whites, if permitted by the care label.
Run the full wash cycle as usual.
Step 7: Check the Stain Before Drying
This is a critical step that many people miss. Heat from a dryer can permanently set a stain, making it almost impossible to remove later.
After the wash cycle finishes, immediately inspect the stained area.
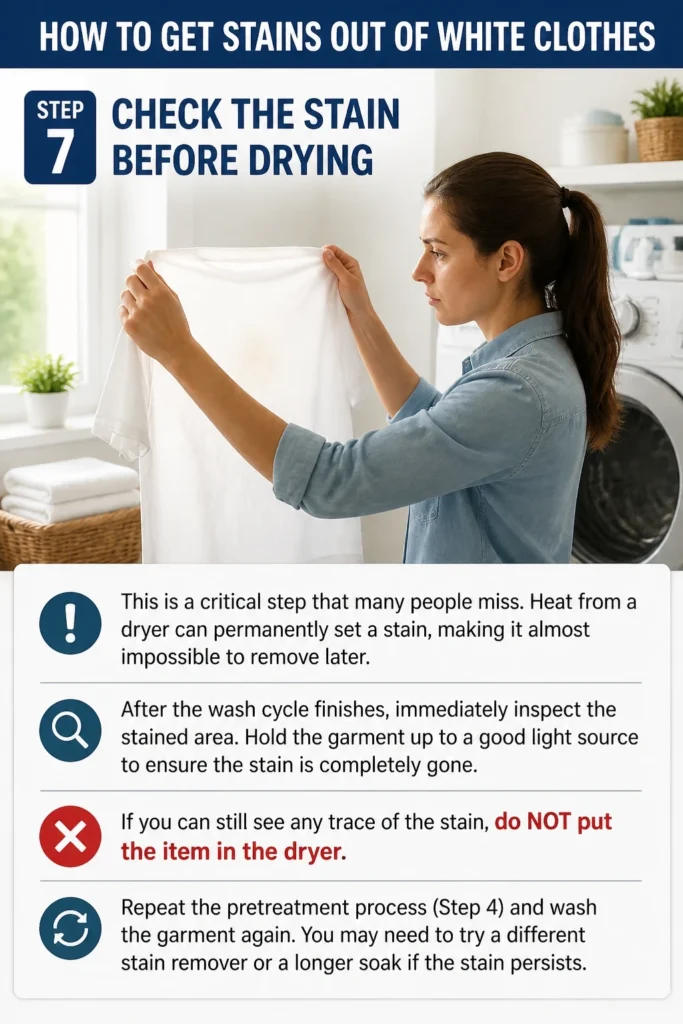
Hold the garment up to a good light source to ensure the stain is completely gone.
If you can still see any trace of the stain, do NOT put the item in the dryer.
Repeat the pretreatment process (Step 4) and wash the garment again.
You may need to try a different stain remover or a longer soak if the stain persists.
Step 8: Air Dry or Machine Dry Once Stain-Free
Once you are absolutely certain the stain is gone, you can proceed with drying your garment. Proper drying helps maintain the integrity of your whites.
If the stain is completely gone, you can machine dry the garment according to its care instructions.
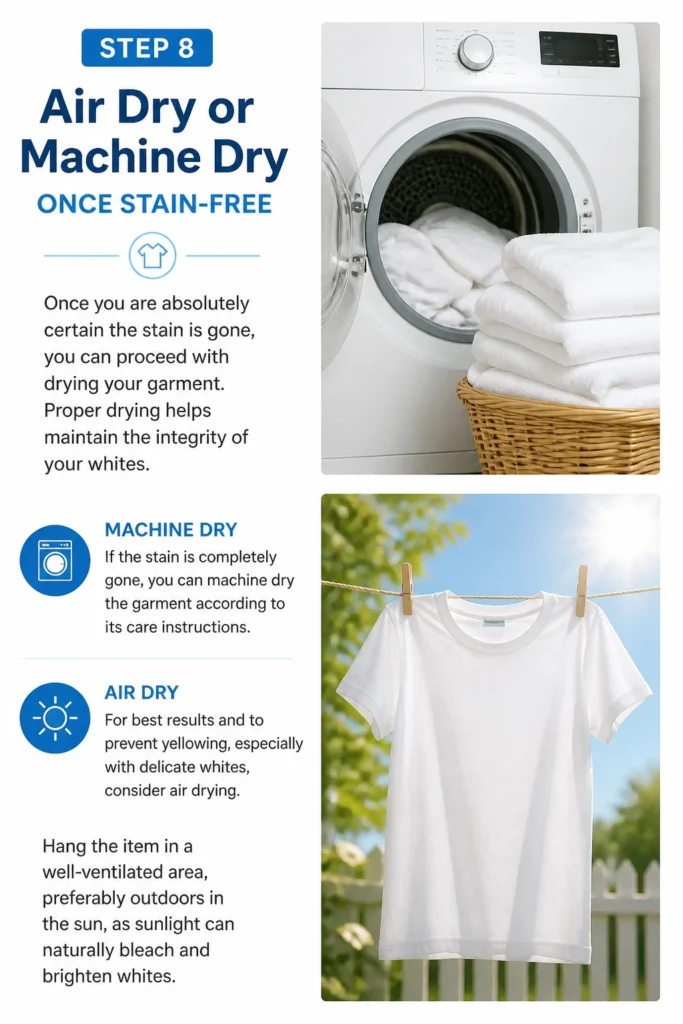
For best results and to prevent yellowing, especially with delicate whites, consider air drying.
Hang the item in a well-ventilated area, preferably outdoors in the sun, as sunlight can naturally bleach and brighten whites.
Common Mistakes to Avoid
Rubbing the Stain Vigorously
Many people’s first instinct is to rub a stain hard, hoping to scrub it away. This often does more harm than good. Rubbing can spread the stain, push it deeper into the fabric fibers, and even damage the fabric, leading to pilling or thinning.
Instead of rubbing, always blot liquid stains with a clean cloth, working from the outside in. For solid stains, gently scrape away excess material first. This controlled approach helps lift the stain without causing further damage.
Using Hot Water Immediately on All Stains
While hot water is excellent for sanitizing and breaking down some dirt, it can be detrimental to certain types of stains. Hot water can “cook” protein-based stains like blood, sweat, or dairy, causing the proteins to coagulate and bond permanently with the fabric fibers.
Always start with cold water for protein stains. For oil or grease, lukewarm water might be acceptable after initial absorption, but never boiling hot. Always refer to the garment’s care label for maximum safe water temperature.
Drying a Stained Garment
This is perhaps the most common and irreversible mistake. The heat from a dryer will permanently set almost any remaining stain into the fabric. Once a stain is “cooked” into the fibers, it becomes incredibly difficult, if not impossible, to remove.
Always inspect your garment carefully after washing and before putting it in the dryer. If even a faint trace of the stain remains, repeat the treatment process. Air dry the item if you are unsure, allowing for further treatment if needed.
Applying Bleach Directly to a Stain (Chlorine Bleach)
While chlorine bleach is powerful for whitening, applying it undiluted directly to a stain on white fabric can cause more problems than it solves. It can weaken fabric fibers, create holes, or even leave a yellowish residue, especially on synthetic materials or if not rinsed thoroughly.
Opt for oxygen bleach (color-safe bleach) for soaking or adding to your wash cycle. If using chlorine bleach, always dilute it significantly in water according to product instructions before applying it to the garment, or use it only in the wash cycle.
Troubleshooting
Stain Still Visible After First Wash
It’s common for stubborn stains to not fully disappear after the initial treatment and wash. Don’t despair; it doesn’t mean the stain is permanent. The key is to avoid drying the garment.
If the stain persists, repeat the pretreatment process. Consider using a different stain remover, trying a longer soak with oxygen bleach, or gently scrubbing with a soft brush. Sometimes a second or third attempt with a slightly different method will do the trick.
Yellowing on White Fabric
White fabrics can sometimes develop a yellowish tint over time or after certain treatments. This can be caused by detergent residue, hard water minerals, or even too much chlorine bleach.
To combat yellowing, try soaking the garment in a solution of warm water and oxygen bleach for several hours or overnight. You can also try a vinegar rinse in your washing machine’s fabric softener dispenser during the wash cycle. For severe yellowing, a specialized whitener product might be necessary.
Fabric Damage from Stain Remover
Occasionally, a strong stain remover can leave a faded spot or weaken the fabric, especially if left on too long or used on delicate materials. This is why patch testing is so important.
If you notice damage, unfortunately, it can be difficult to reverse. For future stain removal, always test products first. Opt for gentler, natural solutions like baking soda or vinegar before resorting to stronger chemicals, and follow product instructions carefully regarding contact time.
Key Takeaways
- Act immediately: The quicker you treat a stain, the higher your success rate.
- Identify the stain: Knowing the stain type (oil, protein, tannin) guides your treatment choice.
- Always blot, don’t rub: Rubbing spreads stains and can damage fabric.
- Test products first: Apply stain removers to an inconspicuous area before full application.
- Never dry a stained item: Heat sets stains permanently; re-treat until the stain is completely gone.
- Oxygen bleach is your friend: Use it for soaking and in the wash cycle for safe whitening and stain removal.
Frequently Asked Questions
Can I use hydrogen peroxide on white clothes?
Yes, hydrogen peroxide can be an effective, gentle whitener and stain remover for white clothes, especially for blood or mildew stains. It’s a milder alternative to chlorine bleach. Always dilute it with water (1:1 ratio) and test on an inconspicuous area first, as it can occasionally cause discoloration on certain synthetic fibers or if left on too long.
What if the stain is old and set-in?
Old, set-in stains are more challenging but not always impossible to remove. Start by soaking the item in a strong solution of oxygen bleach and warm water for several hours or even overnight. You might need multiple rounds of pretreatment and soaking. Enzyme-based stain removers can also be very effective for breaking down old organic stains. Patience is key.
Are natural remedies effective for white clothes?
Many natural remedies are surprisingly effective for white clothes. White vinegar is great for brightening and removing mildew or yellowing. Baking soda can absorb oils and deodorize. Lemon juice and sunlight offer a natural bleaching effect. While effective for many stains, very tough or old stains might require commercial products.
How do I prevent white clothes from yellowing or dulling?
To prevent yellowing and dulling, wash whites separately from colors, use the hottest water temperature safe for the fabric, and add oxygen bleach to your wash. Avoid overloading the washing machine. Rinse clothes thoroughly to remove all detergent residue. Also, consider adding a cup of white vinegar to the rinse cycle periodically to combat hard water mineral buildup.
Our Top Recommended Finds
- Enzyme-Based Laundry Pre-Treater: Essential for breaking down protein and complex organic stains before washing.
- Oxygen Bleach Powder: A versatile, color-safe whitener and stain booster that’s gentle on fabrics but tough on stains.
- Microfiber Cleaning Cloths: Ideal for blotting stains without spreading them, and they’re highly absorbent.
Embrace Pristine Whites Once More
Don’t let a stray spill or an accidental smudge dictate the lifespan of your favorite white garments. You now have a powerful arsenal of techniques and knowledge to tackle almost any stain that comes your way.
Taking action quickly and applying the right method can make all the difference, transforming a potential discard into a cherished piece once again. Start applying these strategies today and reclaim the brilliant beauty of your white wardrobe.
Beginner-friendly templates, step-by-step guides,
and weekly project ideas in your inbox.