👟 How To Tie Your Shoes In One Second

Beginner-friendly templates, step-by-step guides,
and weekly project ideas in your inbox.
I remember countless mornings, fumbling with my laces, always running late. It felt like a tiny, unnecessary chore that added minutes to my day. Then I discovered this method.
It transformed a frustrating ritual into a blink-and-you-miss-it action. Trust me, if I can master it, anyone can.
Quick Overview
This guide will walk you through a revolutionary shoelace tying technique. It allows for incredible speed and a secure knot, making fumbling a thing of the past. You’ll learn the setup and the simultaneous motion that makes “one-second” tying possible.
- Time needed: 10-15 minutes to learn and practice; 1 second to execute once mastered.
- Difficulty: Intermediate (requires initial coordination and practice).
- What you’ll need: A pair of shoes with laces, ideally flat or oval laces for easier grip.
Step-by-Step Instructions
This method, often called the “Ian’s Secure Knot” or “Two-Finger Knot,” relies on creating two loops simultaneously and pulling them through each other. It’s fast, strong, and incredibly satisfying.
Step 1: Prepare Your Laces
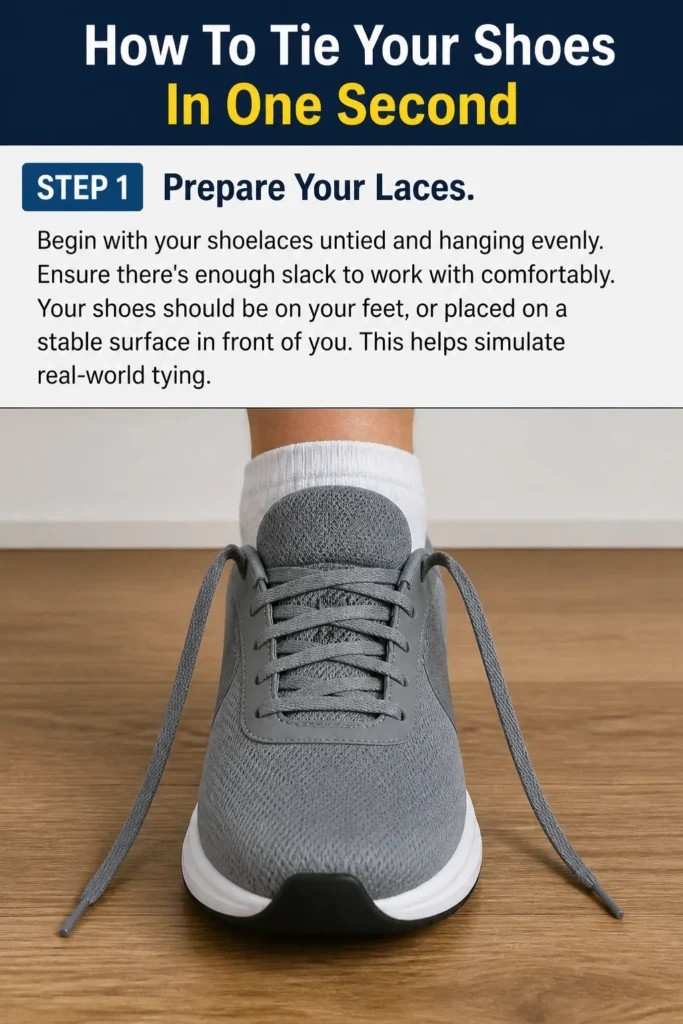
Begin with your shoelaces untied and hanging evenly. Ensure there’s enough slack to work with comfortably.
Your shoes should be on your feet, or placed on a stable surface in front of you. This helps simulate real-world tying.
Step 2: Form the Starting Knot
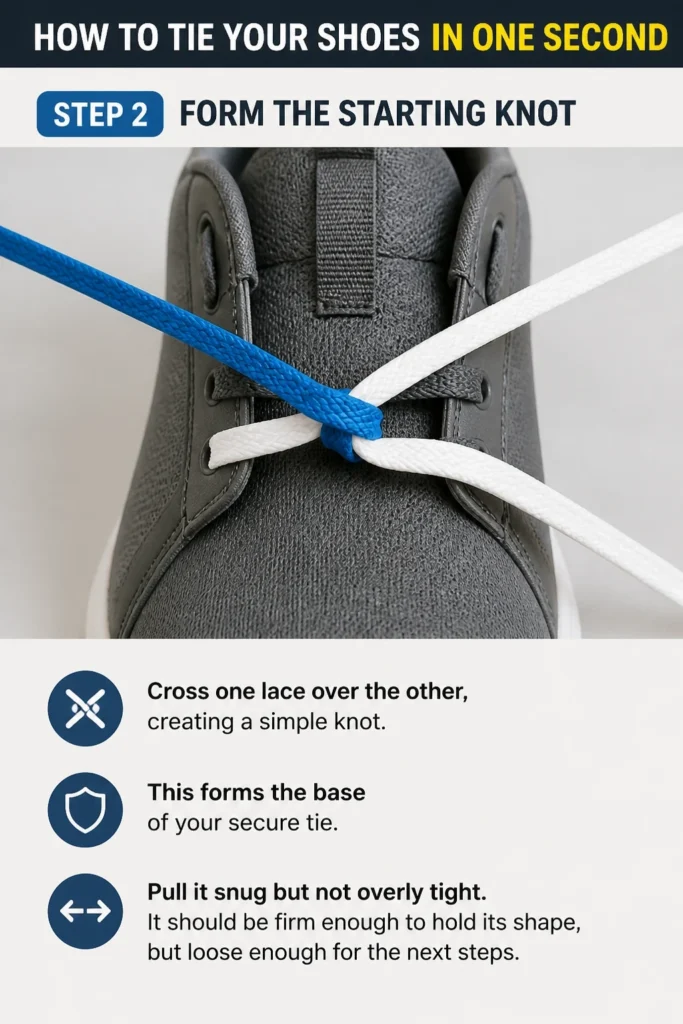
Cross one lace over the other, creating a simple knot. This forms the base of your secure tie.
Pull it snug but not overly tight. It should be firm enough to hold its shape, but loose enough for the next steps.
Step 3: Position Your Hands
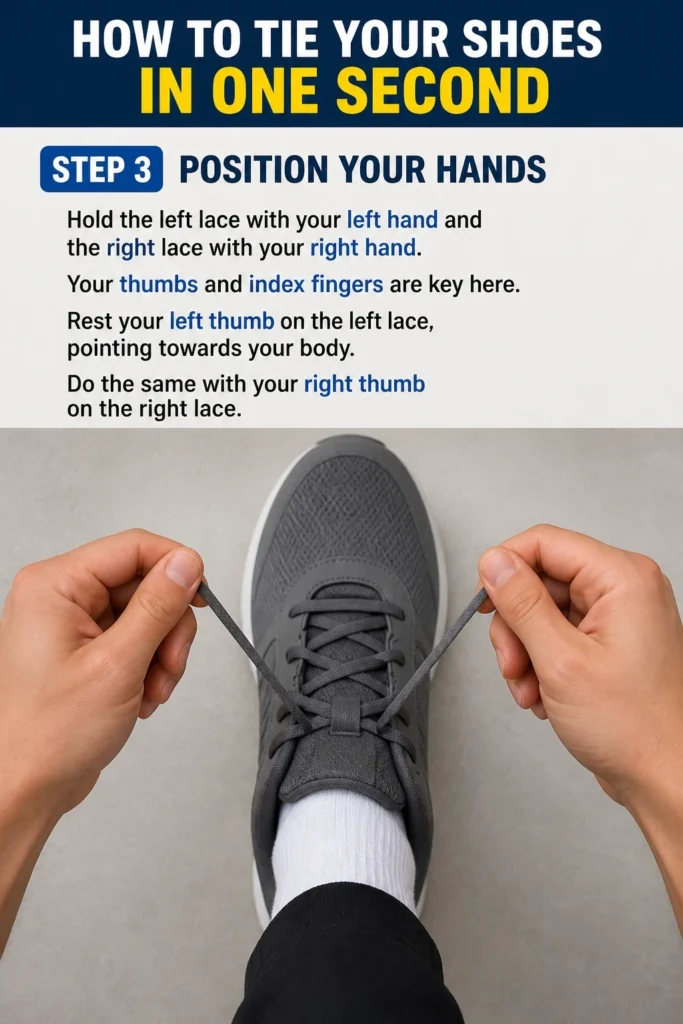
Hold the left lace with your left hand and the right lace with your right hand. Your thumbs and index fingers are key here.
Rest your left thumb on the left lace, pointing towards your body. Do the same with your right thumb on the right lace.
Step 4: Create the Left Loop
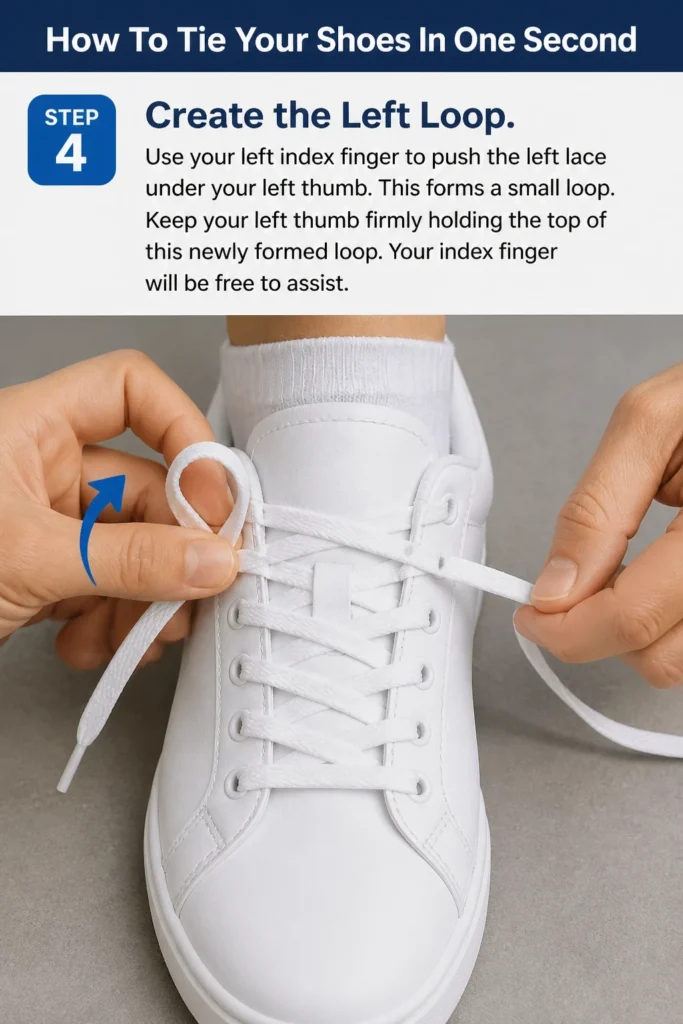
Use your left index finger to push the left lace under your left thumb. This forms a small loop.
Keep your left thumb firmly holding the top of this newly formed loop. Your index finger will be free to assist.
Step 5: Create the Right Loop
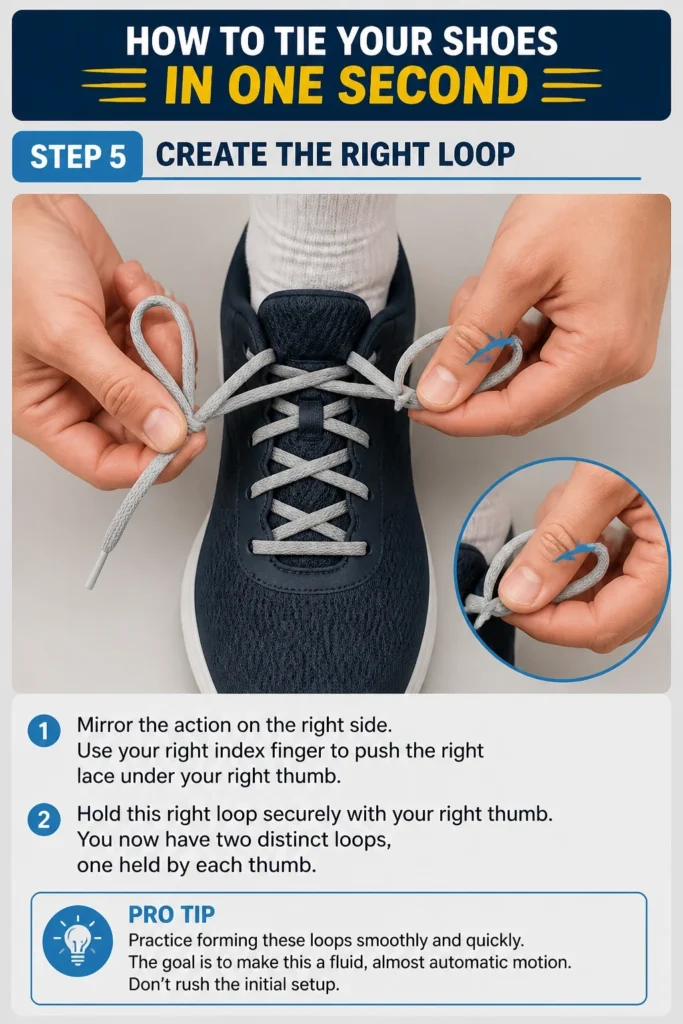
Mirror the action on the right side. Use your right index finger to push the right lace under your right thumb.
Hold this right loop securely with your right thumb. You now have two distinct loops, one held by each thumb.
Pro Tip: Practice forming these loops smoothly and quickly. The goal is to make this a fluid, almost automatic motion. Don’t rush the initial setup.
Step 6: Guide the Left Lace for Crossing
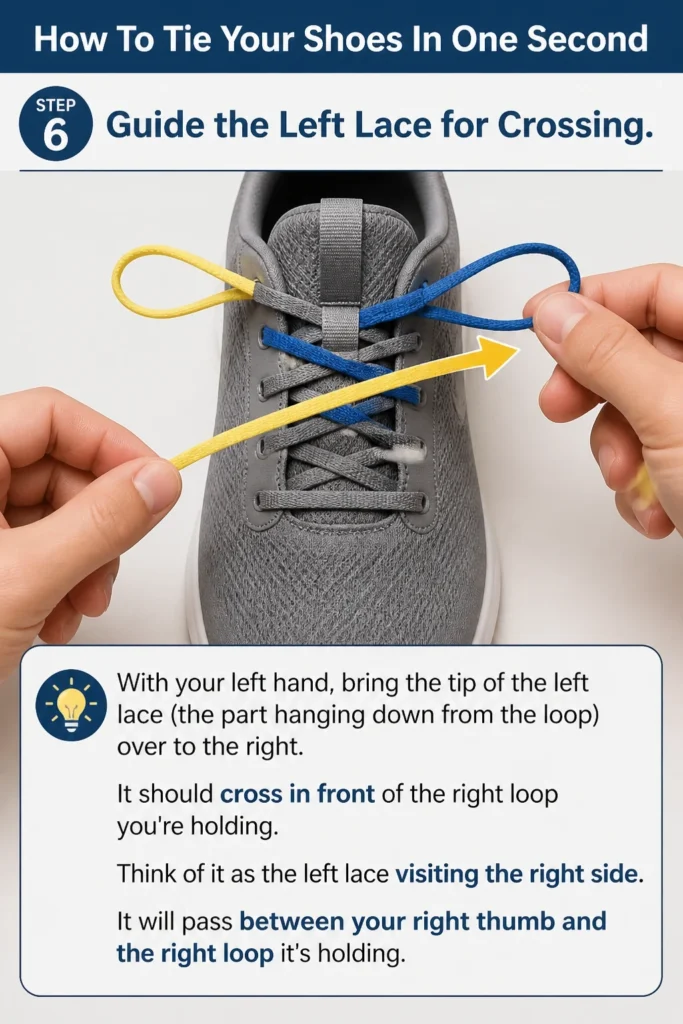
With your left hand, bring the tip of the left lace (the part hanging down from the loop) over to the right. It should cross in front of the right loop you’re holding.
Think of it as the left lace “visiting” the right side. It will pass between your right thumb and the right loop it’s holding.
Step 7: Guide the Right Lace for Crossing
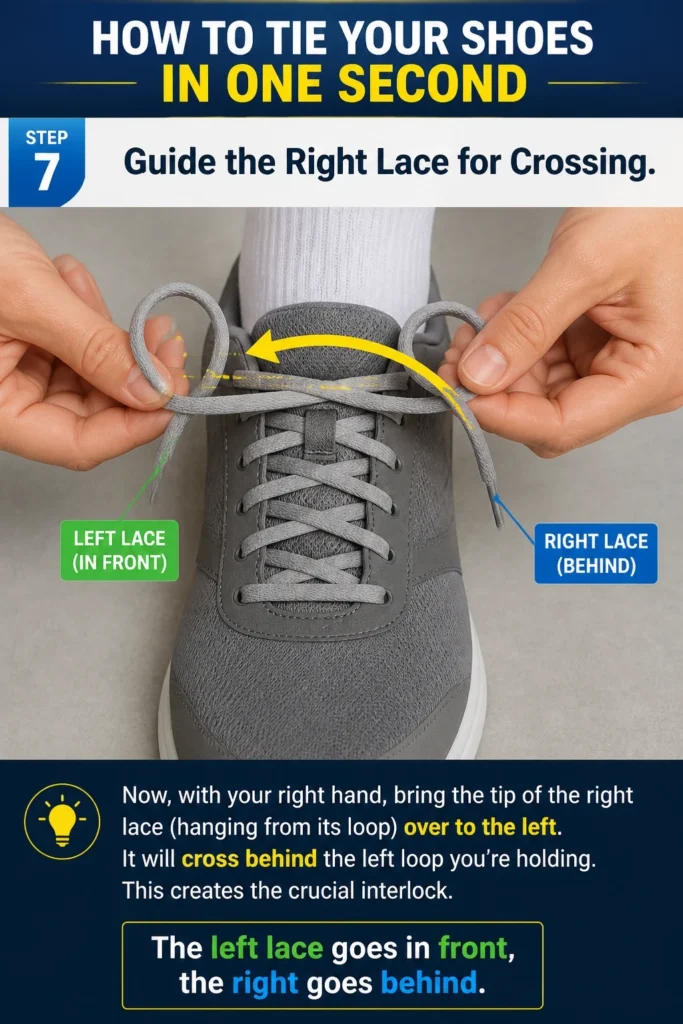
Now, with your right hand, bring the tip of the right lace (hanging from its loop) over to the left. It will cross behind the left loop you’re holding.
This creates the crucial interlock. The left lace goes in front, the right goes behind.
Step 8: The Simultaneous Grab and Pull
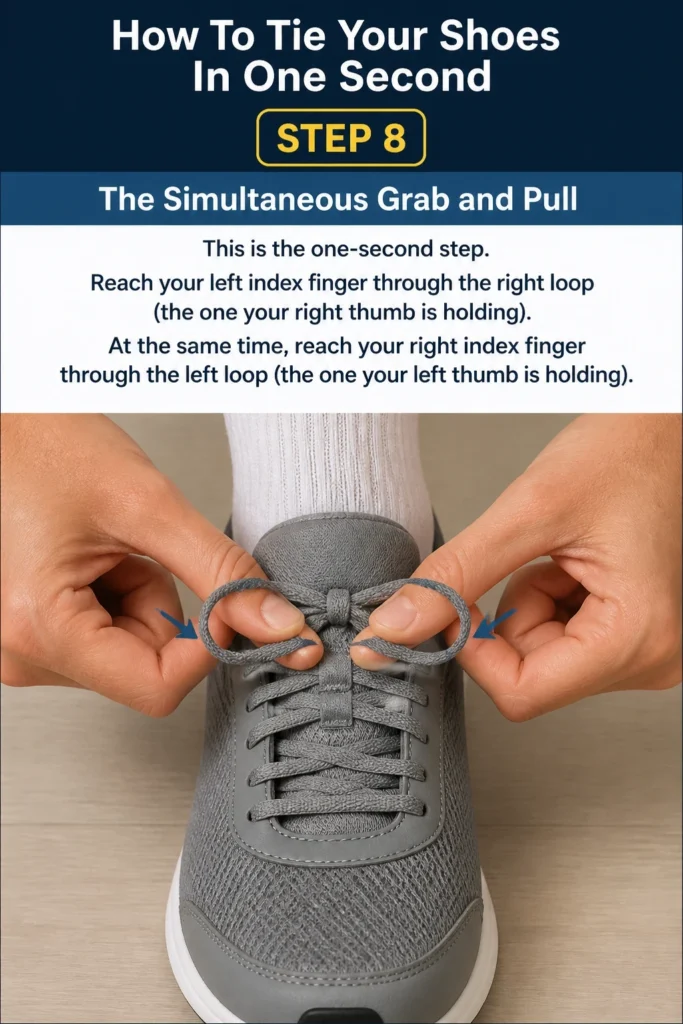
This is the “one-second” step. Reach your left index finger through the right loop (the one your right thumb is holding).
At the same time, reach your right index finger through the left loop (the one your left thumb is holding).
Step 9: Exchange and Pull Through
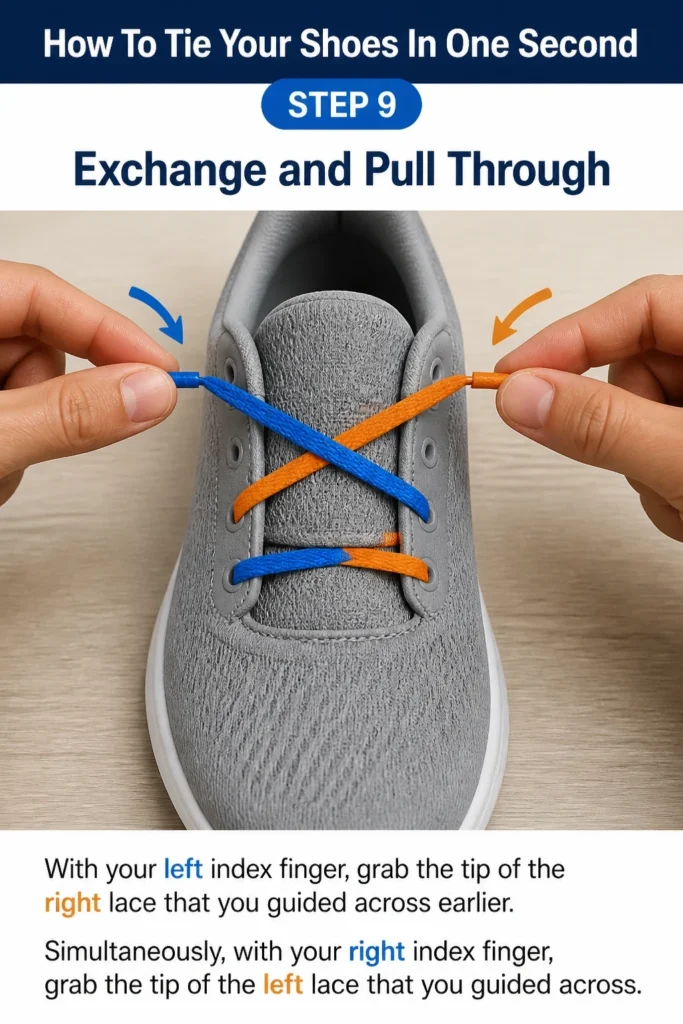
With your left index finger, grab the tip of the right lace that you guided across earlier.
Simultaneously, with your right index finger, grab the tip of the left lace that you guided across.
Step 10: Tighten the Knot
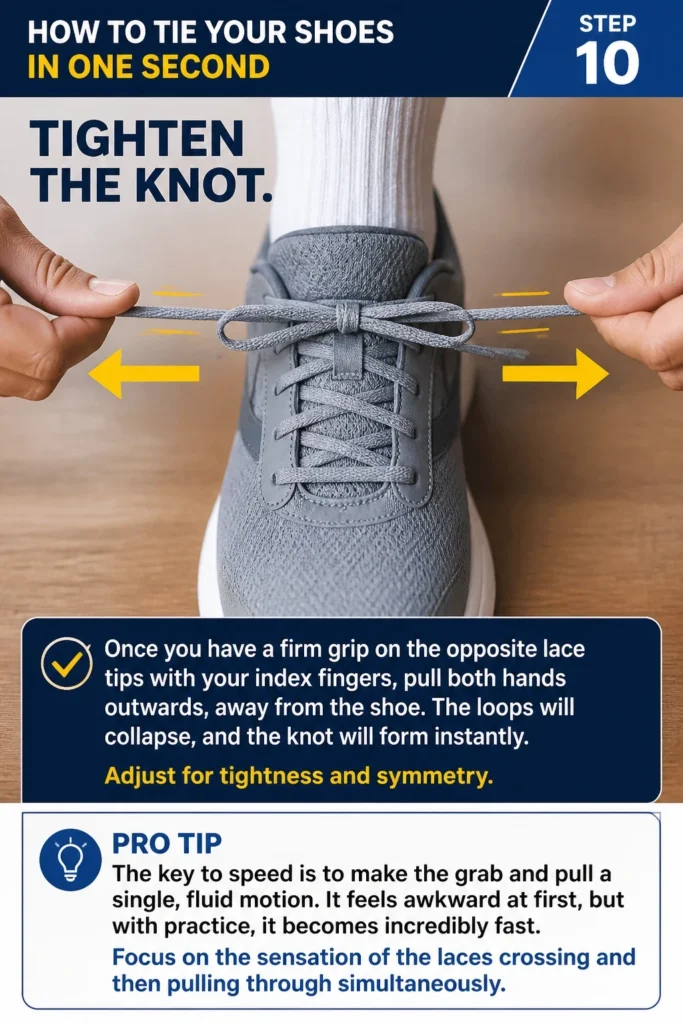
Once you have a firm grip on the opposite lace tips with your index fingers, pull both hands outwards, away from the shoe.
The loops will collapse, and the knot will form instantly. Adjust for tightness and symmetry.
Pro Tip: The key to speed is to make the grab and pull a single, fluid motion. It feels awkward at first, but with practice, it becomes incredibly fast. Focus on the sensation of the laces crossing and then pulling through simultaneously.
Common Mistakes to Avoid
Mastering the one-second tie takes a bit of deliberate practice. Be aware of these common pitfalls that can slow you down or result in a weak knot.
Twisting the Laces
If your laces are twisted before you even start, the final knot will look messy and might not hold as well. Always ensure your laces hang flat and untangled from the initial crossover knot. A flat knot is a strong knot.
Take an extra second at the beginning to smooth out any twists. This foundational step ensures the rest of the process flows correctly.
Incorrect Loop Direction
The critical part of this method involves the left lace crossing in front and the right lace crossing behind. If you reverse this, the knot won’t form correctly, or it will be a “granny knot” that comes undone easily.
Pay close attention to which lace goes over and which goes under during the crossing phase. Visualizing the path of each lace helps prevent this common error.
Pulling Too Early or Unevenly
Trying to pull the laces through before both index fingers have a firm grip on the opposing lace tips will lead to frustration. The knot won’t form, or it will unravel. Similarly, pulling one side harder than the other can cause an imbalanced knot.
Ensure both hands are ready and pull with equal, firm pressure. The simultaneous action is what makes the knot snap into place so quickly.
Not Practicing Slowly First
It’s tempting to jump straight to speed, but this often leads to errors and discouragement. The “one-second” speed is a result of muscle memory built through deliberate, slow practice.
Start by going through each step slowly, focusing on precision. Once you can consistently tie the knot correctly at a slow pace, gradually increase your speed.
Troubleshooting
Even with the best instructions, new techniques can present challenges. Here are solutions to common issues you might encounter.
Knot Comes Undone Easily
This is often a sign of a “granny knot” instead of a “reef knot” (the secure one). The granny knot happens when your initial crossover and subsequent loops are formed in the same direction. The one-second method specifically aims for a reef knot.
Double-check your initial crossover and the direction of your loops. Ensure that the left lace goes in front of the right loop and the right lace goes behind the left loop. This opposing motion is what creates a strong, self-locking knot.
Laces Get Tangled During Pull
If your laces are tangling as you try to pull them through, it usually means your loops are too small or your fingers aren’t guiding the lace tips cleanly. The space for the laces to pass through is restricted.
Make sure your initial loops (held by your thumbs) are generous enough. Also, ensure your index fingers are reaching through the loops and grasping the tips of the laces firmly before pulling. Don’t grab the middle of the lace.
Can’t Get the “Simultaneous Grab” Right
This is the most challenging part for many beginners. It requires hand-eye coordination and a bit of spatial awareness. It might feel like your hands are doing different things at once.
Practice the grab and pull motion without actually having laces in your hand first. Mimic the action. Then, use laces but go extremely slowly. Break it down: left finger through right loop, right finger through left loop, then grab. Focus on one hand’s action, then the other, then try to blend them.
Key Takeaways
- The “one-second” shoelace tie is a specific, efficient method for a secure knot.
- It relies on forming two opposing loops simultaneously and pulling them through.
- Initial practice should focus on precision and understanding each step, not speed.
- Correct hand positioning and lace direction are crucial for a strong, lasting knot.
- The simultaneous grab and pull is the core of the speed, requiring dedicated practice.
- Patience and consistent repetition will transform this complex motion into muscle memory.
Frequently Asked Questions
Learning a new skill always brings up questions. Here are some common ones about the one-second shoe tying method.
Is this method suitable for all types of shoelaces?
This method works well with most shoelaces. Flat or oval laces tend to be easiest to grip and manipulate, especially during the initial learning phase. Very thin or very thick, round laces might require a bit more finger dexterity, but the technique remains the same.
Will this knot come undone more easily than a traditional knot?
No, quite the opposite. This method, often called Ian’s Secure Knot, creates a very strong and balanced knot. It’s less likely to untie itself compared to a poorly tied standard knot or a “granny knot,” which many people mistakenly tie.
How long does it typically take to master the one-second tie?
Most people can perform the steps slowly and correctly within 10-15 minutes of practice. Achieving true “one-second” speed, where it’s a fluid, unconscious motion, can take anywhere from a few days to a couple of weeks of consistent practice. It’s about building muscle memory.
Can children learn this method?
Absolutely! While it might be slightly more complex than the traditional “bunny ears” method, children with good fine motor skills and patience can certainly learn it. It’s a fantastic skill for them to develop, fostering coordination and independence. Start very slowly and make it a fun challenge.
Our Top Recommended Finds
To make your shoelace tying experience even better, consider these helpful items. They can improve comfort, durability, or ease of tying.
- Flat Waxed Cotton Laces: These laces offer excellent grip and reduce slippage, making the one-second method easier to learn and more secure.
- Shoe Horn: While not directly related to tying, a good shoe horn protects the heel of your shoe and makes putting them on effortless, especially with a freshly tied, snug knot.
- Lace Locks/Elastic Laces: If you find yourself needing to tie your shoes less often, elastic laces or lace locks can convert your shoes into slip-ons while maintaining a secure fit.
Tie With Confidence, Every Time
You now hold the secrets to a shoelace tying method that is both incredibly fast and remarkably secure. No more fumbling, no more loose laces, and certainly no more wasted time. This isn’t just about tying shoes; it’s about gaining a small, satisfying mastery over a daily task.
Imagine the small joy of a perfectly tied shoe in a flash. Start practicing today, and soon you’ll be tying your shoes with a speed and confidence you never thought possible. Embrace the efficiency, and stride forward with perfectly secured laces!
Beginner-friendly templates, step-by-step guides,
and weekly project ideas in your inbox.