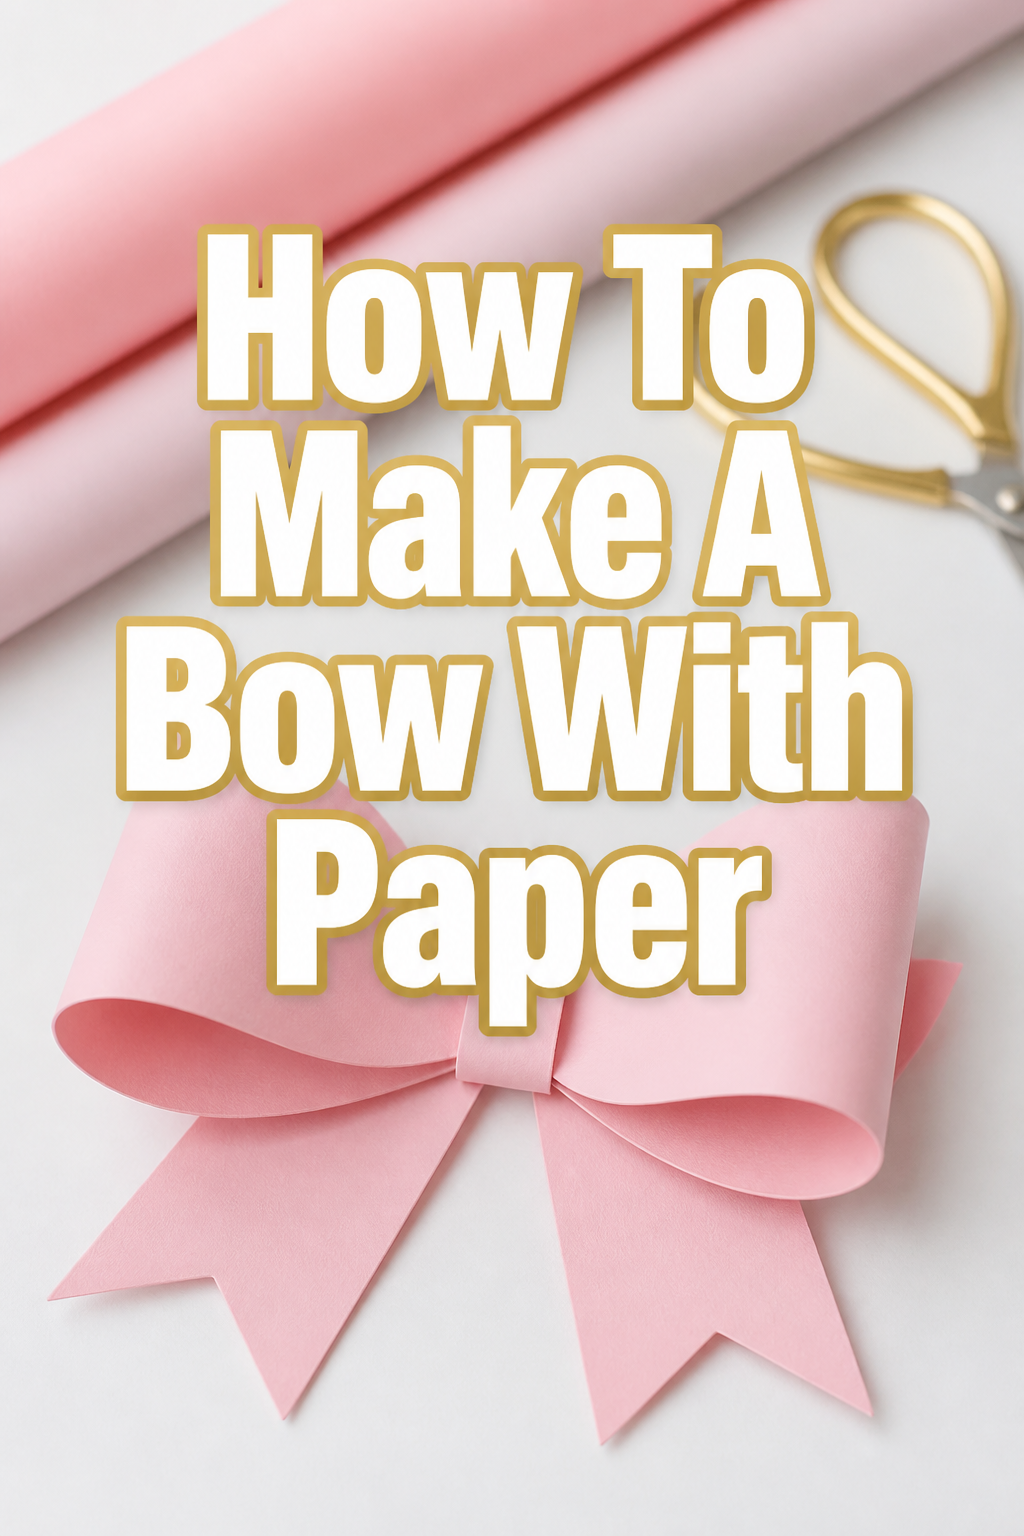
🎀 How To Make A Bow With Paper

Beginner-friendly templates, step-by-step guides,
and weekly project ideas in your inbox.
Crafting a beautiful paper bow is a delightful skill. It adds a personal touch to any gift or decoration. I remember making my first paper bow for a friend’s birthday present, and the joy it brought was immediate.
This guide will walk you through creating your own perfect paper bow, step by simple step. You’ll soon be adding a handmade charm to all your projects.
Quick Overview
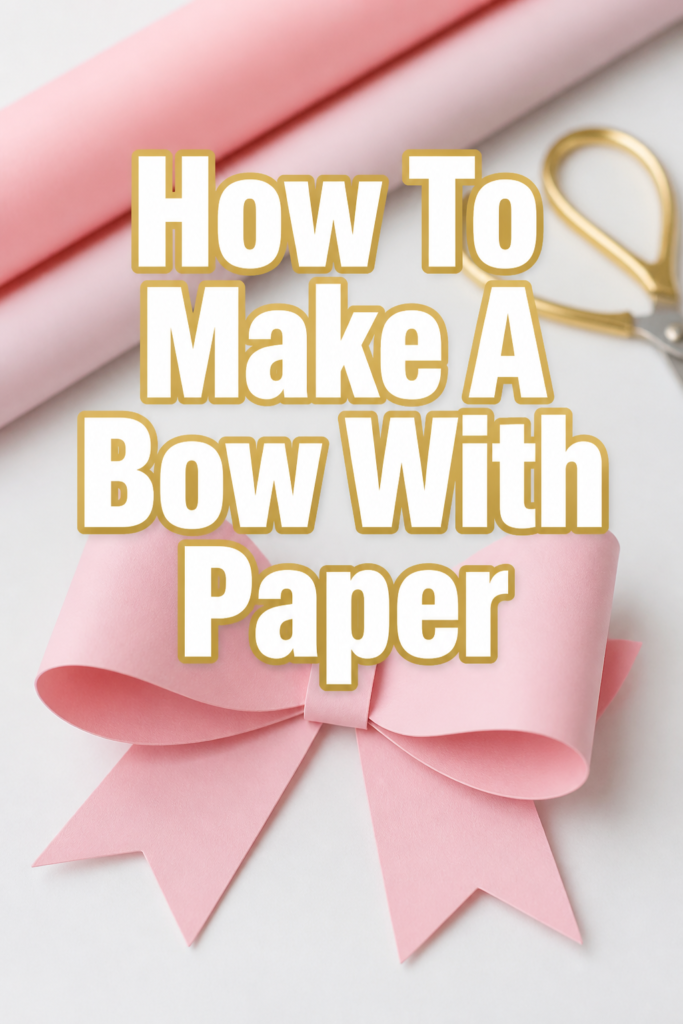
You’re about to learn how to transform a simple sheet of paper into an elegant bow. This process is surprisingly straightforward and incredibly rewarding. You’ll create a lovely decorative element that can enhance gifts, party favors, or even home decor.
- Time needed: 15-30 minutes (depending on complexity and paper choice)
- Difficulty: Beginner
- What you’ll need: Paper, scissors, ruler, pencil, adhesive
Step-by-Step Instructions
Step 1: Gather Your Materials
Before you begin, ensure you have all your tools ready. A tidy workspace makes the crafting process much smoother. Choose your paper wisely, as it significantly impacts the final look of your bow.
Select a paper type that suits your project. Cardstock or decorative craft paper works best for sturdy bows. Lighter paper, like origami paper, can also be used for delicate designs.
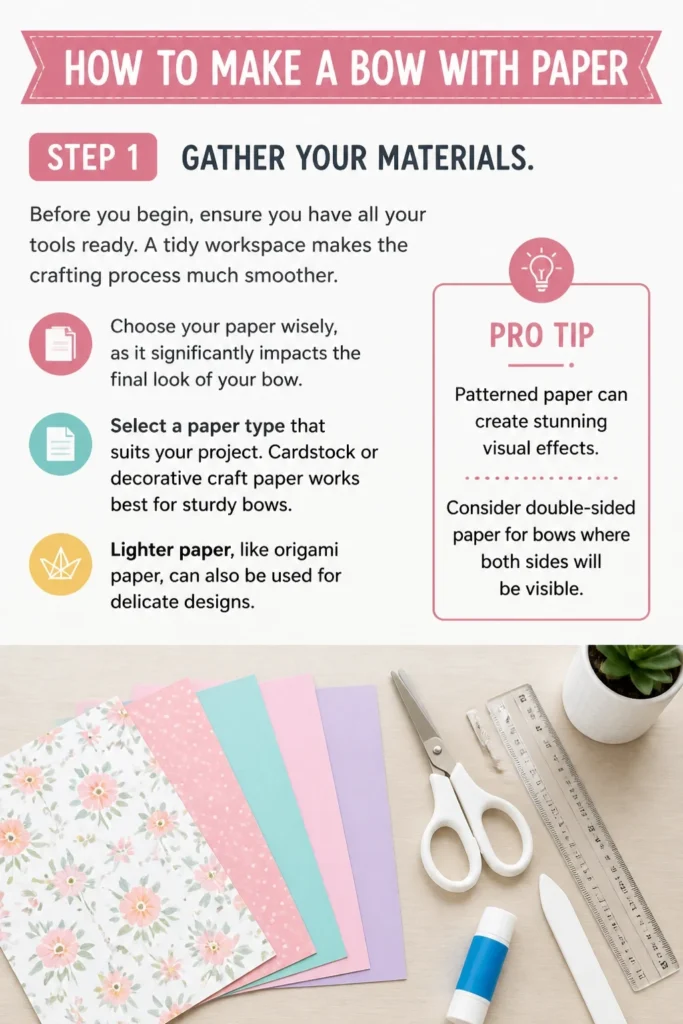
Pro Tip: Patterned paper can create stunning visual effects. Consider double-sided paper for bows where both sides will be visible.
Step 2: Measure and Cut Your Paper Strips
Precision is key for a well-formed bow. Use your ruler and pencil to mark out your strips accurately. This ensures symmetry in your final design.
Cut three strips of paper. The dimensions depend on your desired bow size. For a medium bow, try strips of 1 inch by 10 inches (2.5 cm by 25 cm), 1 inch by 9 inches (2.5 cm by 22.5 cm), and 1 inch by 8 inches (2.5 cm by 20 cm).
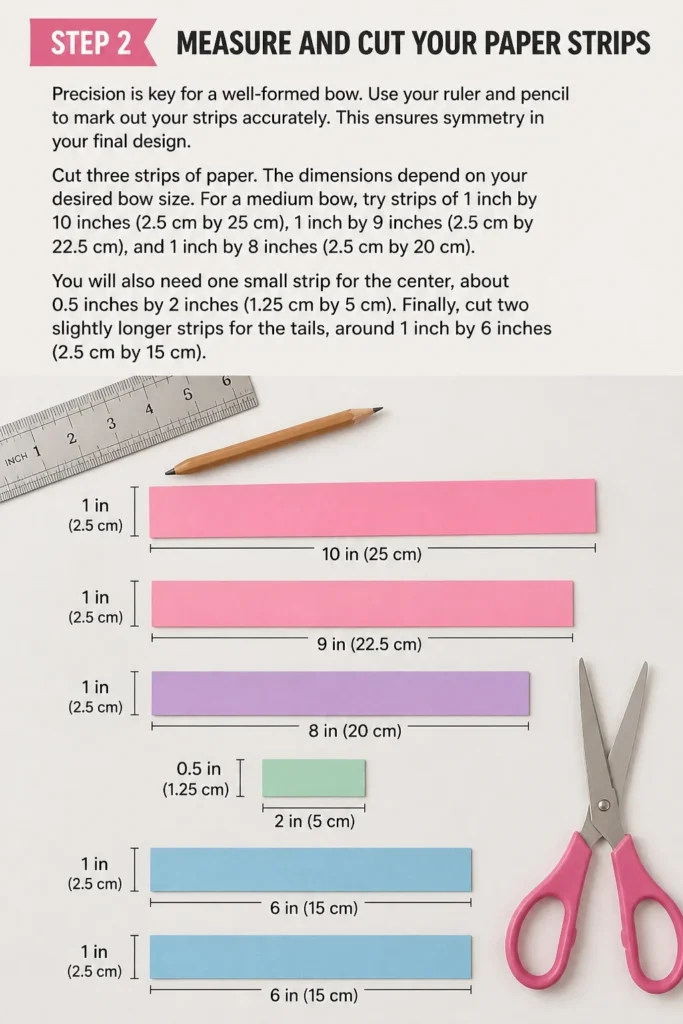
You will also need one small strip for the center, about 0.5 inches by 2 inches (1.25 cm by 5 cm). Finally, cut two slightly longer strips for the tails, around 1 inch by 6 inches (2.5 cm by 15 cm).
Step 3: Form the Main Loops
This is where your bow starts to take shape. Each of the three longer strips will become a set of loops. Work carefully to keep your folds neat.
Take your longest strip. Bring both ends to the center, overlapping them slightly to form two loops. Secure this overlap with a small dab of glue or a piece of double-sided tape.
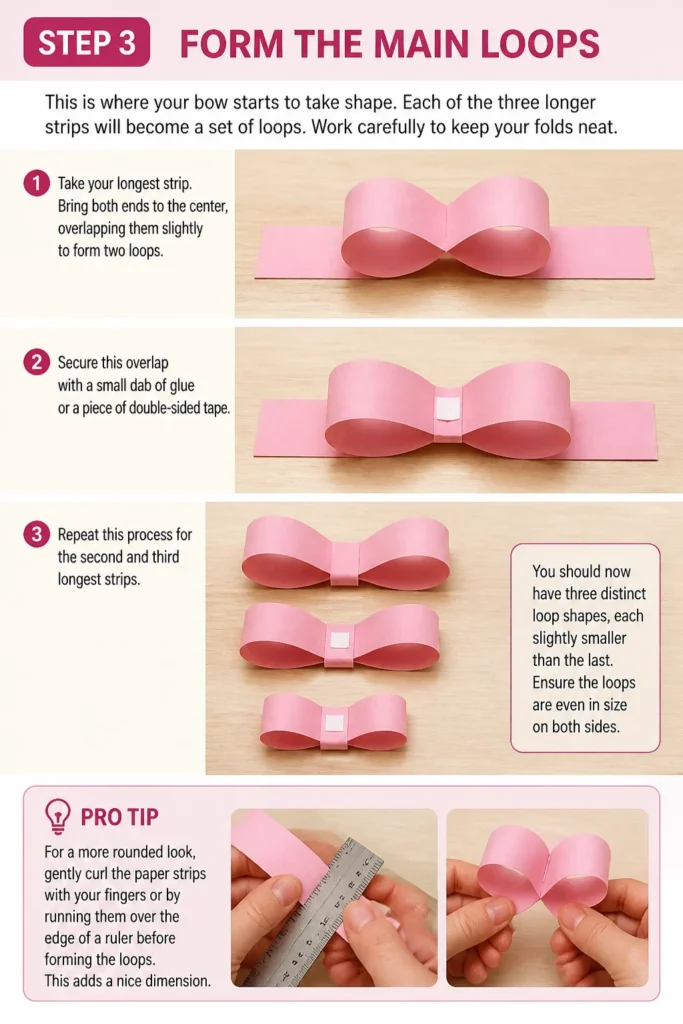
Repeat this process for the second and third longest strips. You should now have three distinct loop shapes, each slightly smaller than the last. Ensure the loops are even in size on both sides.
Pro Tip: For a more rounded look, gently curl the paper strips with your fingers or by running them over the edge of a ruler before forming the loops. This adds a nice dimension.
Step 4: Assemble the Loop Layers
Now you will stack your loops to create the full body of the bow. This layering technique gives the bow its characteristic fullness. Start with the largest loop at the bottom.
Place the largest loop flat on your workspace. Apply a small amount of adhesive to its center. Carefully center the next largest loop on top of it, rotating it slightly (about 45 degrees) to fill out the spaces between the bottom loops.
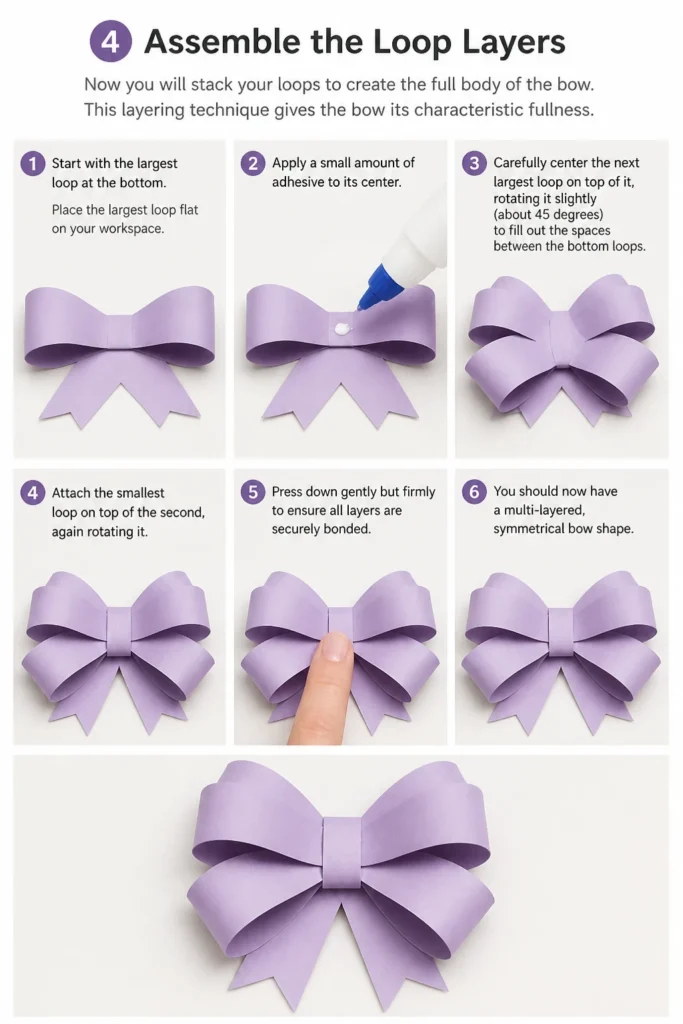
Attach the smallest loop on top of the second, again rotating it. Press down gently but firmly to ensure all layers are securely bonded. You should now have a multi-layered, symmetrical bow shape.
Step 5: Add the Center Piece
The center piece ties everything together and hides any adhesive points. It gives your bow a polished and professional finish. This small detail makes a big difference.
Wrap your smallest strip (0.5 by 2 inches) around the center of your stacked loops. Pull it snugly but not so tightly that it crushes the loops.
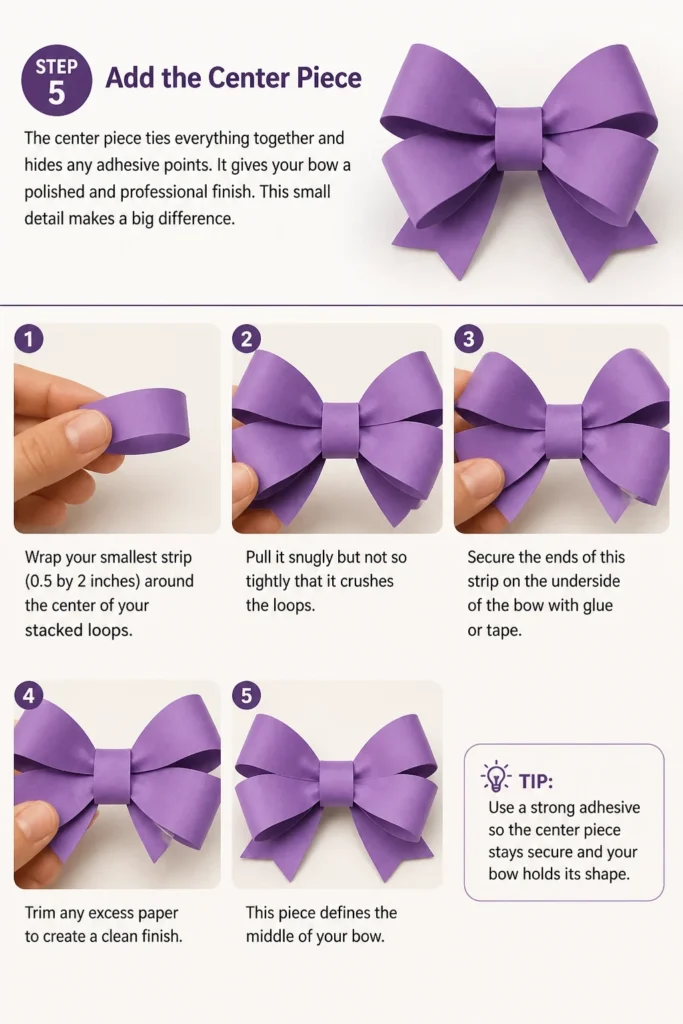
Secure the ends of this strip on the underside of the bow with glue or tape. Trim any excess paper to create a clean finish. This piece defines the middle of your bow.
Step 6: Attach the Tails
The tails add elegance and movement to your bow. They can be straight, V-cut, or angled, depending on the look you prefer. This step completes the classic bow silhouette.
Take your two tail strips. You can leave them straight or cut a decorative V-notch or diagonal slant at one end of each strip. This often enhances the visual appeal.
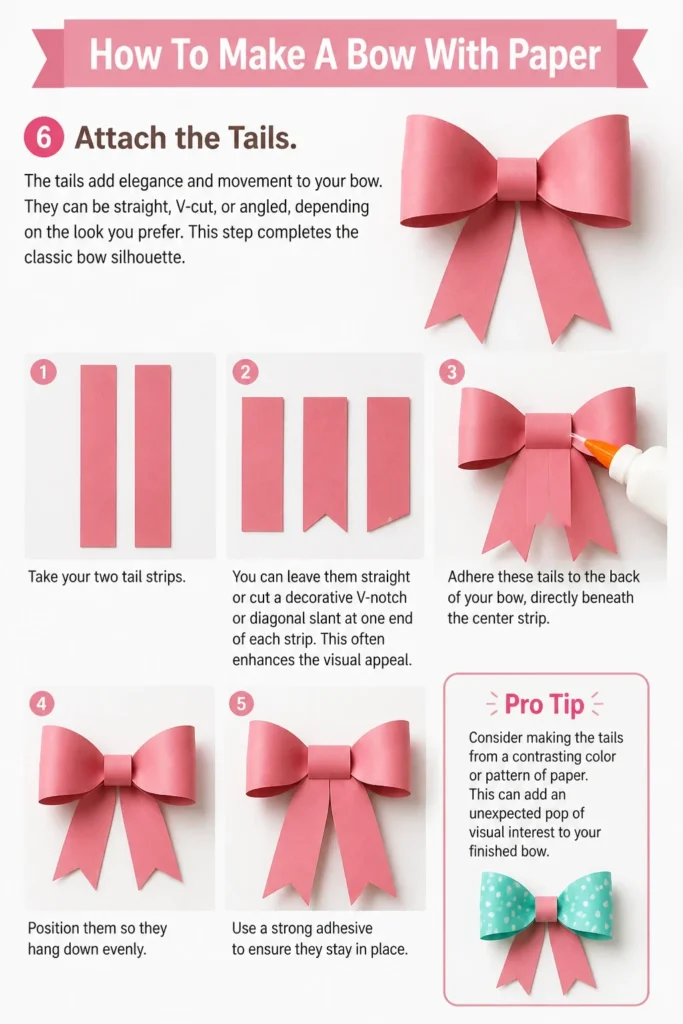
Adhere these tails to the back of your bow, directly beneath the center strip. Position them so they hang down evenly. Use a strong adhesive to ensure they stay in place.
Pro Tip: Consider making the tails from a contrasting color or pattern of paper. This can add an unexpected pop of visual interest to your finished bow.
Step 7: Refine and Adjust
The final touches are crucial for a perfect bow. Take a moment to inspect your creation from all angles. Small adjustments can significantly improve its appearance.
Gently fluff out the loops of your bow to give it more volume and dimension. Ensure all the layers are aligned and that the center is neat. Trim any stray edges or uneven sections of paper.
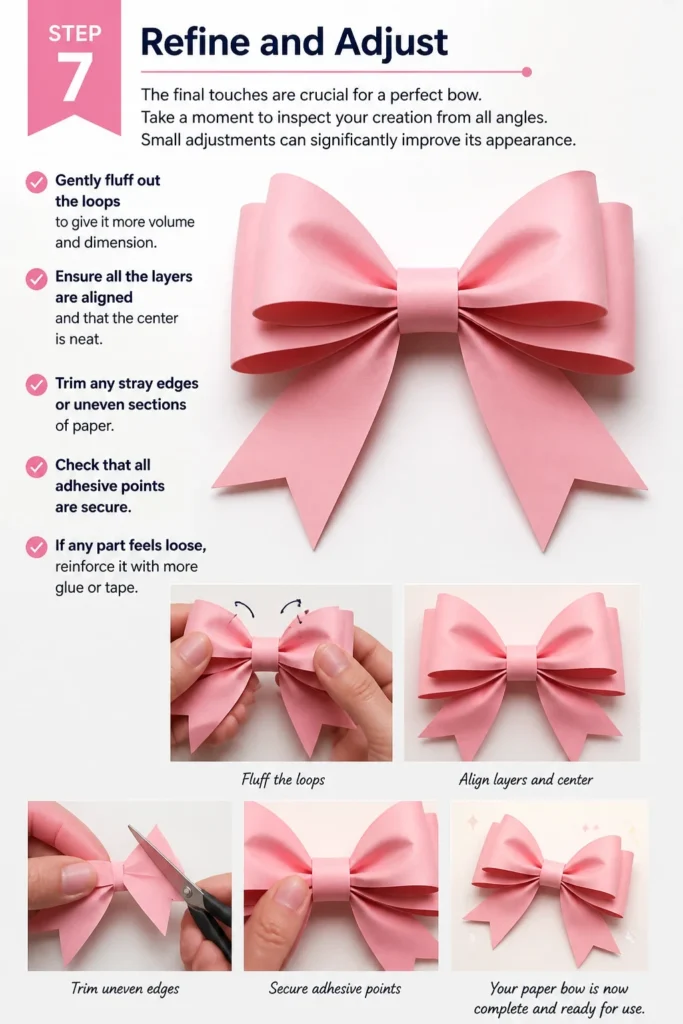
Check that all adhesive points are secure. If any part feels loose, reinforce it with more glue or tape. Your paper bow is now complete and ready for use.
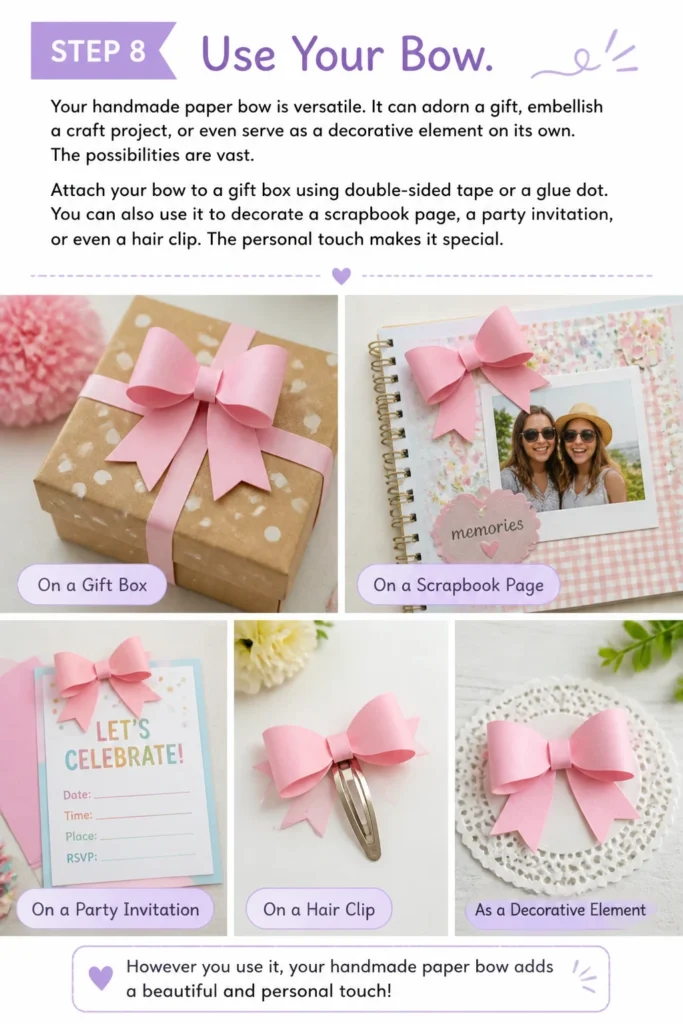
Step 8: Use Your Bow
Your handmade paper bow is versatile. It can adorn a gift, embellish a craft project, or even serve as a decorative element on its own. The possibilities are vast.
Attach your bow to a gift box using double-sided tape or a glue dot. You can also use it to decorate a scrapbook page, a party invitation, or even a hair clip. The personal touch makes it special.
Common Mistakes to Avoid
Using Flimsy Paper
Trying to make a bow with very thin paper often leads to frustration. The loops won’t hold their shape well, and the bow can look saggy or flat. Thin paper is also prone to tearing during the folding and securing process.
Always opt for paper that has some body to it, like cardstock or heavier craft paper. This provides the necessary structure for a crisp, dimensional bow. If you only have thin paper, consider doubling it up or reinforcing it with a stiffer backing.
Uneven Cutting and Measuring
Inaccurate measurements or wobbly cuts will result in a lopsided bow. If your strips are not perfectly uniform, the loops will be different sizes, creating an unbalanced appearance. This detracts from the overall neatness of your finished craft.
Always use a ruler and a sharp pair of scissors or a craft knife for precise cuts. Take your time marking your lines before cutting. Precision in these initial steps saves time and ensures a professional-looking result.
Not Securing the Center Tightly Enough
A loose center means your bow layers might shift or even fall apart. If the adhesive isn’t strong enough, or if the center strip isn’t wrapped snugly, the integrity of the bow is compromised. This can make the bow look messy and unfinished.
Use a strong adhesive, such as double-sided tape or a quick-drying craft glue, for the center. Ensure the center strip is wrapped firmly around all the loops before securing it. Hold it in place for a moment to allow the adhesive to bond properly.
Over-Handling the Loops
Constantly adjusting and fiddling with the loops can cause the paper to crease or become worn. This can make the bow look tired and less crisp, especially with delicate paper types. Too much manipulation can also weaken the paper fibers.
Once the loops are formed and secured, try to handle them gently. Make small, deliberate adjustments rather than constantly reshaping. Allow the adhesive to dry completely before making final tweaks to the bow’s form.
Troubleshooting
My Bow Looks Flat and Lacks Volume
If your paper bow appears flat, it likely needs some gentle persuasion to gain dimension. This is a common issue, especially with stiffer paper that doesn’t naturally curve. It can also happen if the loops are not rotated enough when layered.
To fix this, gently curl each individual loop with your fingers or by running it over the edge of a ruler. Ensure that when you stack the loops, you rotate each layer approximately 45 degrees. This staggered placement helps fill out the bow and create a fuller appearance.
The Loops Are Uneven or Crooked
Uneven loops often stem from imprecise cutting or inconsistent folding. If the initial paper strips aren’t identical in length and width, the resulting loops will naturally be different sizes. Crookedness can also occur if the center is not aligned perfectly.
Go back to your initial measurements. Always use a ruler and sharp scissors for perfectly straight and uniform strips. When forming the loops, try to overlap the ends at the exact center point. If they are already glued, you might carefully trim the edges of the larger loops to match the smaller ones, or gently adjust the center wrap to hide minor imperfections.
My Bow Won’t Stay Attached to the Gift
The type of adhesive used and the surface it’s applied to can affect how well your bow sticks. Sometimes, a quick fix is all that’s needed to secure your beautiful creation firmly in place. A bow falling off a gift diminishes its presentation.
Use a strong, permanent adhesive like double-sided tape, glue dots, or a hot glue gun (on a low setting for paper) for attaching the bow. Ensure the surface of the gift wrap is clean and dry. For heavier bows, use multiple glue dots or a longer strip of double-sided tape. If possible, apply the adhesive to a flat part of the bow’s back for maximum contact.
Key Takeaways
- Choose the Right Paper: Cardstock or heavier craft paper offers the best structure for a sturdy, attractive bow.
- Measure with Precision: Accurate cutting of strips is essential for symmetrical and balanced loops.
- Layer and Rotate: Stacking loops while rotating each layer creates a full, multi-dimensional bow.
- Secure the Center Firmly: A tight, well-adhered center piece holds all the layers together and provides a neat finish.
- Add Decorative Tails: Tails enhance the bow’s elegance; consider V-cuts or contrasting colors for extra flair.
- Fluff and Refine: Gentle fluffing and minor adjustments are crucial for achieving a polished, professional look.
Frequently Asked Questions
Can I use any type of paper for making a bow?
While you technically can use almost any paper, the results vary greatly. Thin printer paper or wrapping paper will create a very flimsy bow that struggles to hold its shape. For the best outcome, choose heavier paper like cardstock, scrapbook paper, or specialized craft paper. These materials provide the necessary body and stiffness for a crisp, dimensional bow.
How do I make my paper bow more durable or waterproof?
To increase durability, use thicker paper from the start. For a degree of water resistance, you can lightly spray the finished bow with a clear acrylic sealant or a craft varnish. Apply thin, even coats and allow each to dry completely. This will protect the paper from minor splashes and strengthen the bow, but it won’t make it fully waterproof.
How can I make different sized bows?
The size of your bow is directly proportional to the length and width of your initial paper strips. To make a larger bow, simply increase the dimensions of all your strips proportionally. For a smaller bow, reduce them. Experiment with different ratios; for example, if you double the length, you might also slightly increase the width to maintain balance.
What if I want a double-layered or extra-full bow?
To create an even fuller or double-layered bow, simply add more sets of loops. Instead of three main loop layers, you could use four or five, each progressively smaller and rotated. You can also vary the width of the strips within the same bow for more texture. Just ensure your center strip is wide enough to cover all the layers and secure them properly.
Our Top Recommended Finds
- Assorted Craft Cardstock Pack: Provides a variety of colors and patterns, perfect for matching any project theme. Its weight is ideal for holding bow shapes.
- Precision Craft Scissors: Sharp, comfortable scissors make clean, straight cuts, which are crucial for symmetrical bow strips. This ensures a professional finish.
- Double-Sided Permanent Tape Roller: Offers a mess-free and strong adhesive solution, perfect for securing bow loops and layers without waiting for glue to dry.
Unwrap Your Creativity
You’ve now mastered the art of making a paper bow. This simple craft opens up a world of creative possibilities. From dressing up birthday gifts to adding a festive touch to holiday decor, your handmade bows will surely impress.
Don’t stop here. Experiment with different paper textures, colors, and patterns. Try adding glitter, stamps, or small embellishments to your bows. The more you practice, the more unique and beautiful your creations will become. Start crafting your next paper bow today and let your imagination take flight.
Beginner-friendly templates, step-by-step guides,
and weekly project ideas in your inbox.