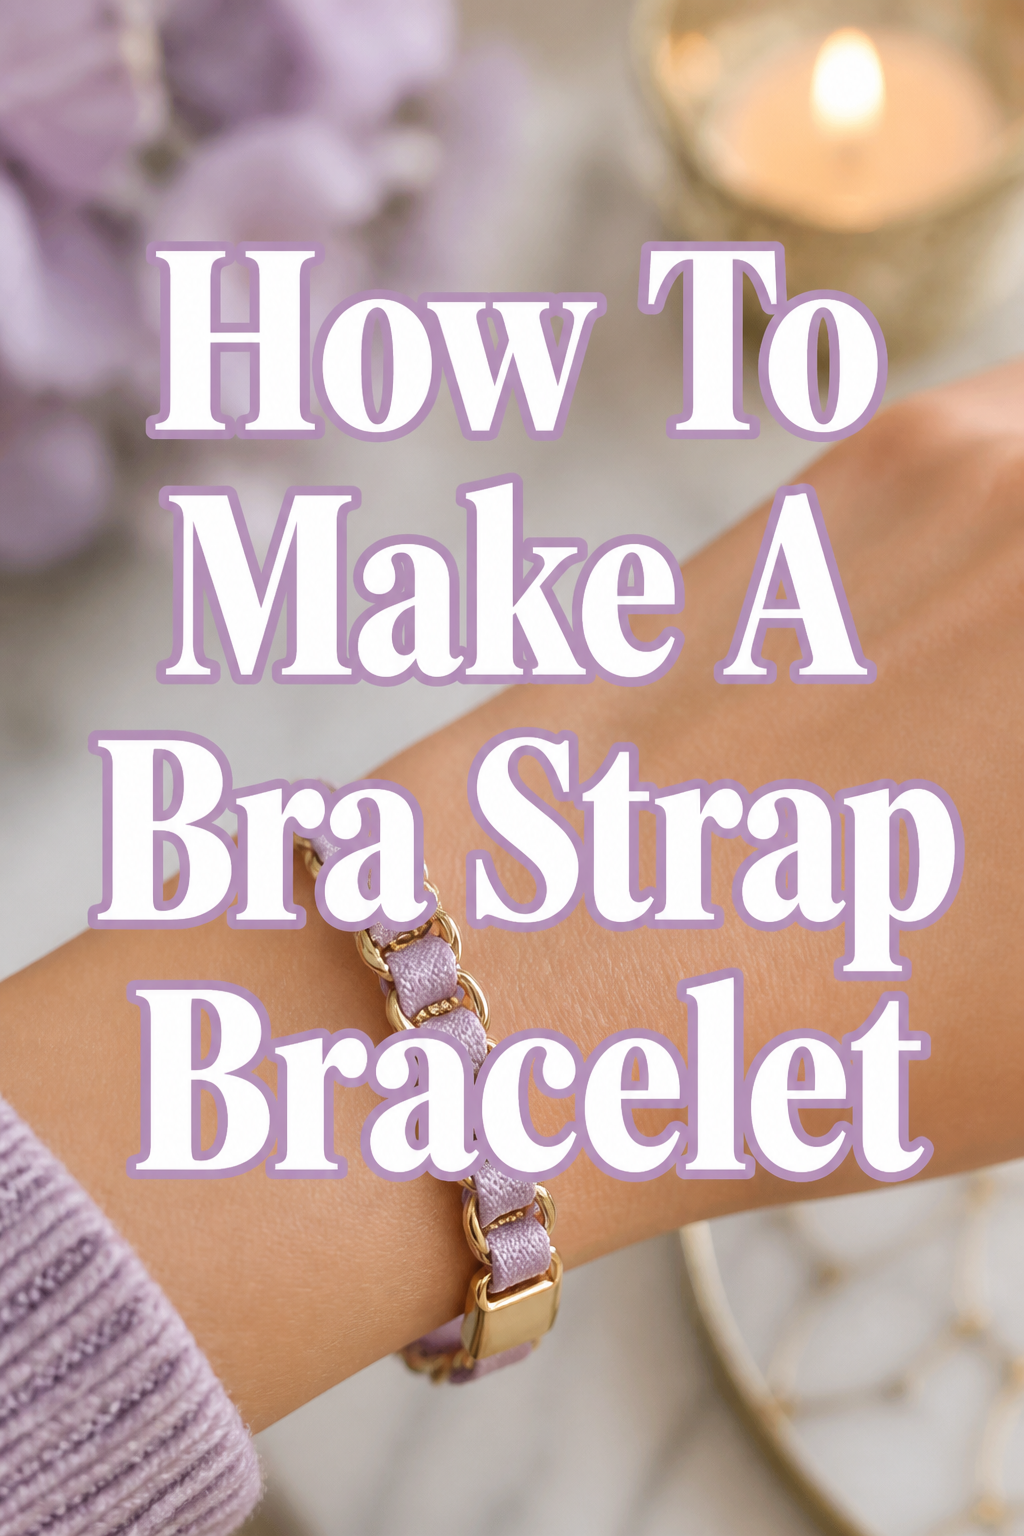
✨ How To Make A Bra Strap Bracelet

Beginner-friendly templates, step-by-step guides,
and weekly project ideas in your inbox.
Do you have old bras tucked away, perhaps with straps that are still perfectly good?
Instead of letting them gather dust, imagine transforming them into a chic, personalized accessory.
This guide will show you how to repurpose those forgotten straps into stylish bracelets, adding a unique touch to your wardrobe.
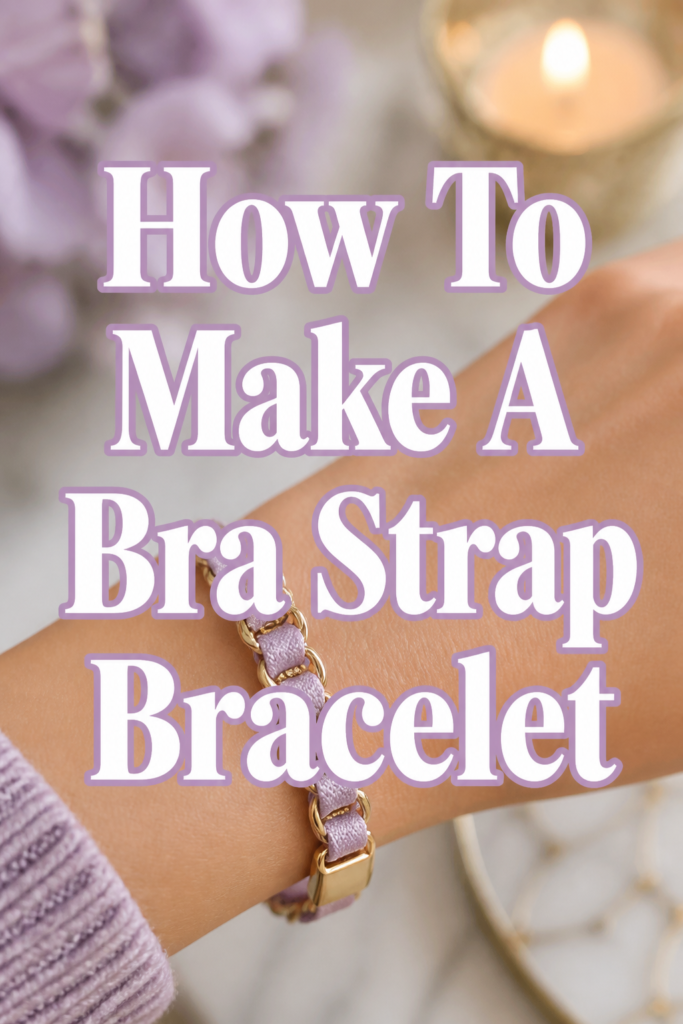
Quick Overview
You’re about to embark on a fun, creative journey. By the end, you’ll have a custom-made bracelet, crafted from an unexpected material. This project is not only sustainable but also incredibly rewarding.
Here’s what you can expect:
- Time needed: 30-60 minutes
- Difficulty: Beginner
- What you’ll need: An old bra strap, sharp scissors, a measuring tape, strong fabric glue or a lighter, and jewelry clasps.
Step-by-Step Instructions
Step 1: Gather Your Materials
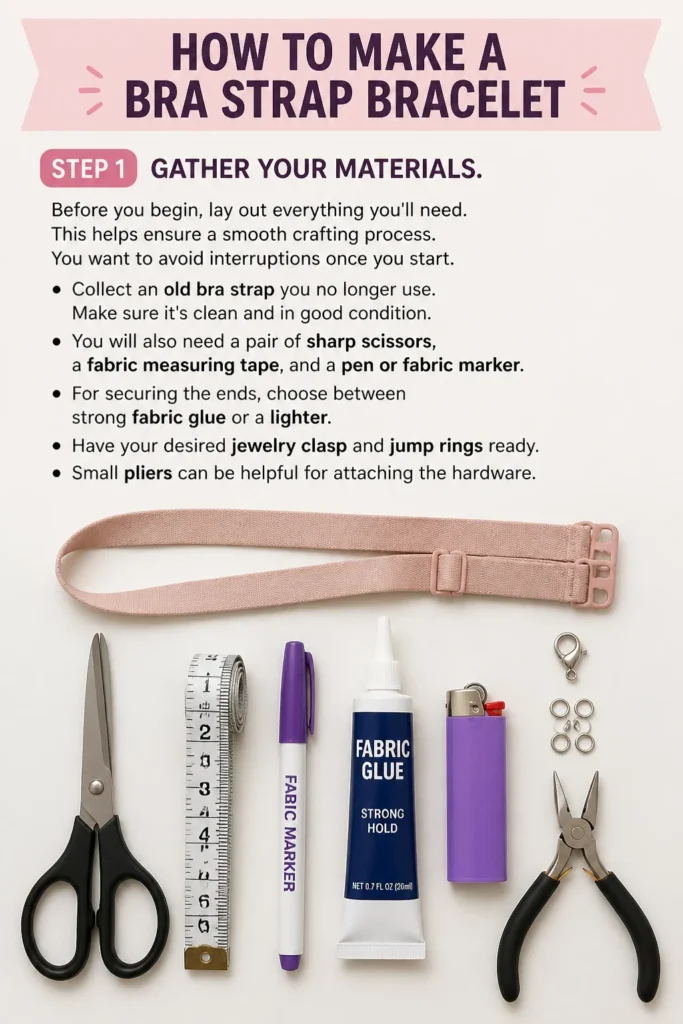
Before you begin, lay out everything you’ll need. This helps ensure a smooth crafting process. You want to avoid interruptions once you start.
Collect an old bra strap you no longer use. Make sure it’s clean and in good condition. You will also need a pair of sharp scissors, a fabric measuring tape, and a pen or fabric marker.
For securing the ends, choose between strong fabric glue or a lighter. Have your desired jewelry clasp and jump rings ready. Small pliers can be helpful for attaching the hardware.
Step 2: Prepare the Bra Strap
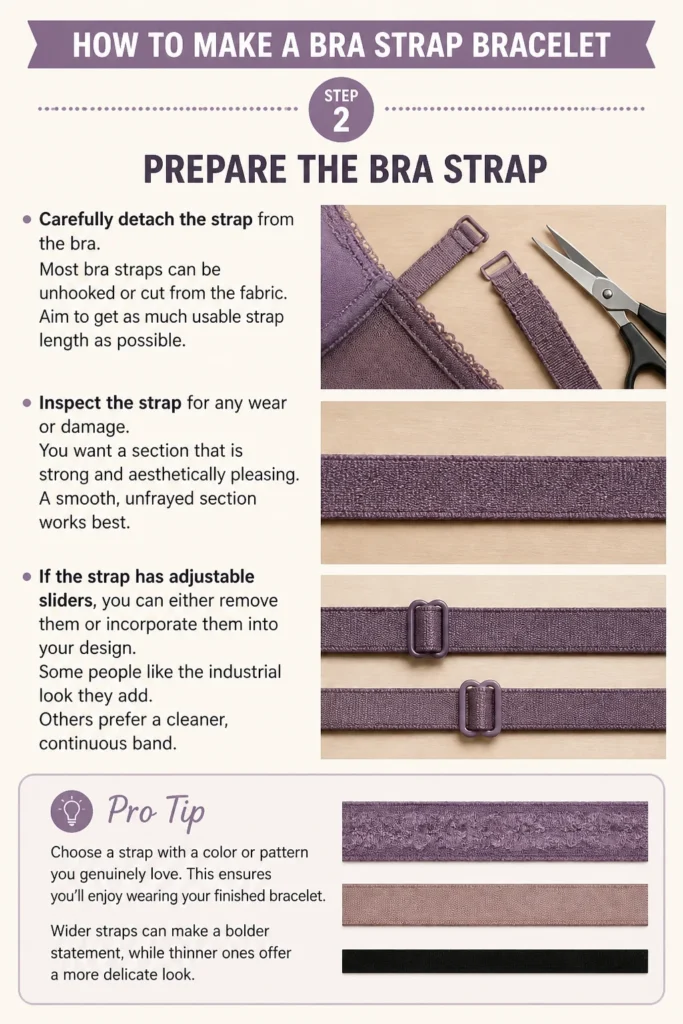
Carefully detach the strap from the bra. Most bra straps can be unhooked or cut from the fabric. Aim to get as much usable strap length as possible.
Inspect the strap for any wear or damage. You want a section that is strong and aesthetically pleasing. A smooth, unfrayed section works best.
If the strap has adjustable sliders, you can either remove them or incorporate them into your design. Some people like the industrial look they add. Others prefer a cleaner, continuous band.
Pro Tip: Choose a strap with a color or pattern you genuinely love. This ensures you’ll enjoy wearing your finished bracelet. Wider straps can make a bolder statement, while thinner ones offer a more delicate look.
Step 3: Measure Your Wrist
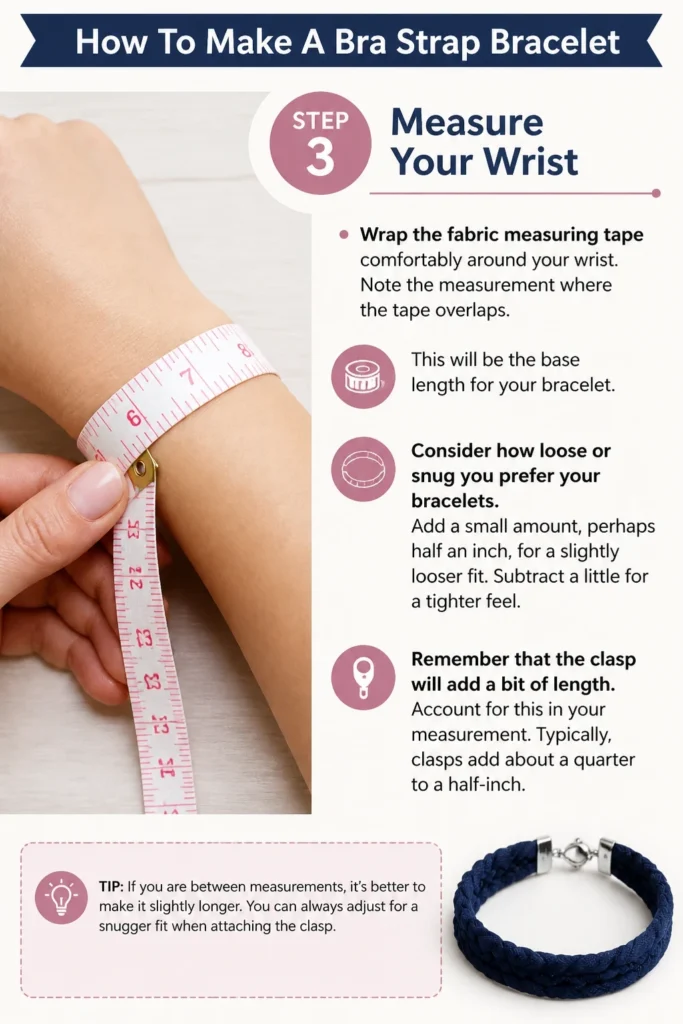
Wrap the fabric measuring tape comfortably around your wrist. Note the measurement where the tape overlaps. This will be the base length for your bracelet.
Consider how loose or snug you prefer your bracelets. Add a small amount, perhaps half an inch, for a slightly looser fit. Subtract a little for a tighter feel.
Remember that the clasp will add a bit of length. Account for this in your measurement. Typically, clasps add about a quarter to a half-inch.
Step 4: Cut the Strap to Length
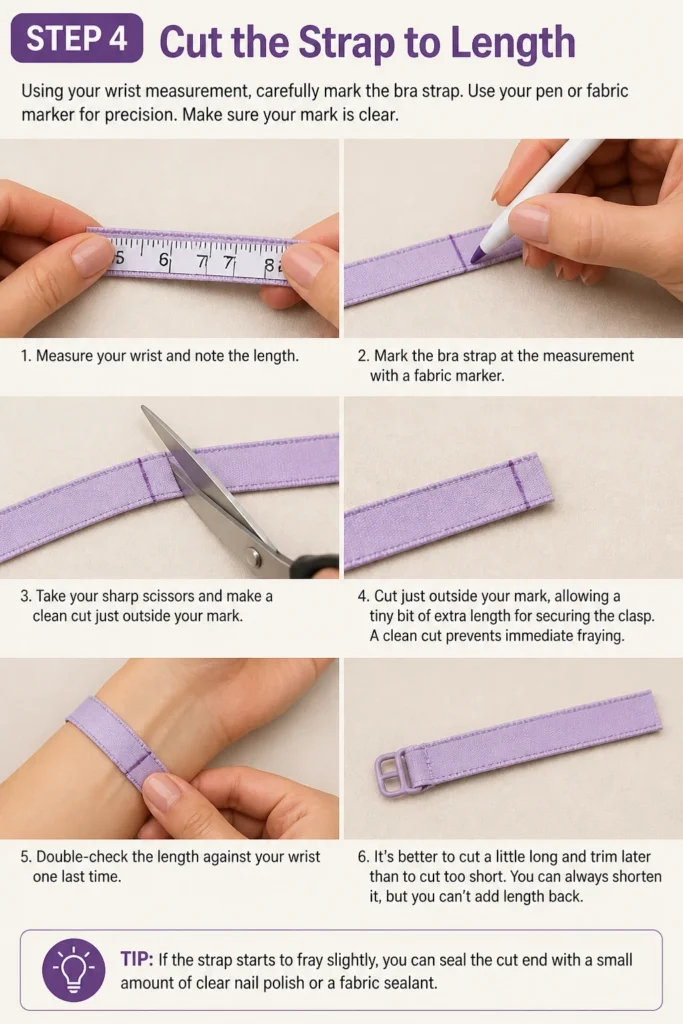
Using your wrist measurement, carefully mark the bra strap. Use your pen or fabric marker for precision. Make sure your mark is clear.
Take your sharp scissors and make a clean cut. Cut just outside your mark, allowing a tiny bit of extra length for securing the clasp. A clean cut prevents immediate fraying.
Double-check the length against your wrist one last time. It’s better to cut a little long and trim later than to cut too short. You can always shorten it, but you can’t add length back.
Step 5: Secure the Ends
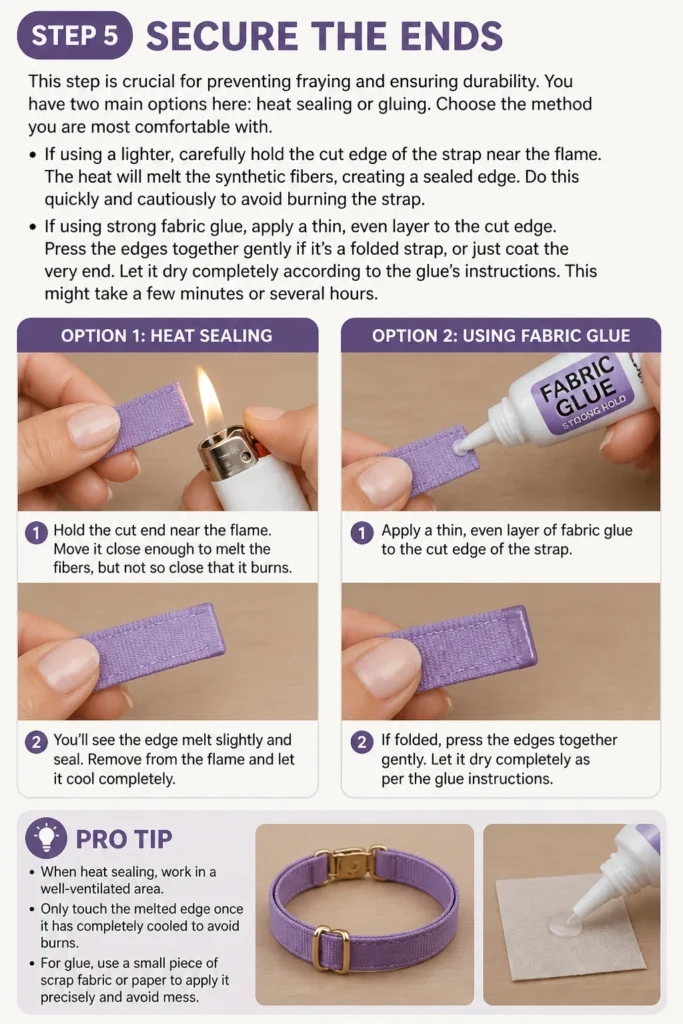
This step is crucial for preventing fraying and ensuring durability. You have two main options here: heat sealing or gluing. Choose the method you are most comfortable with.
If using a lighter, carefully hold the cut edge of the strap near the flame. The heat will melt the synthetic fibers, creating a sealed edge. Do this quickly and cautiously to avoid burning the strap.
If using strong fabric glue, apply a thin, even layer to the cut edge. Press the edges together gently if it’s a folded strap, or just coat the very end. Let it dry completely according to the glue’s instructions. This might take a few minutes or several hours.
Pro Tip: When heat sealing, work in a well-ventilated area. Only touch the melted edge once it has completely cooled to avoid burns. For glue, use a small piece of parchment paper to protect your work surface.
Step 6: Attach the Clasps
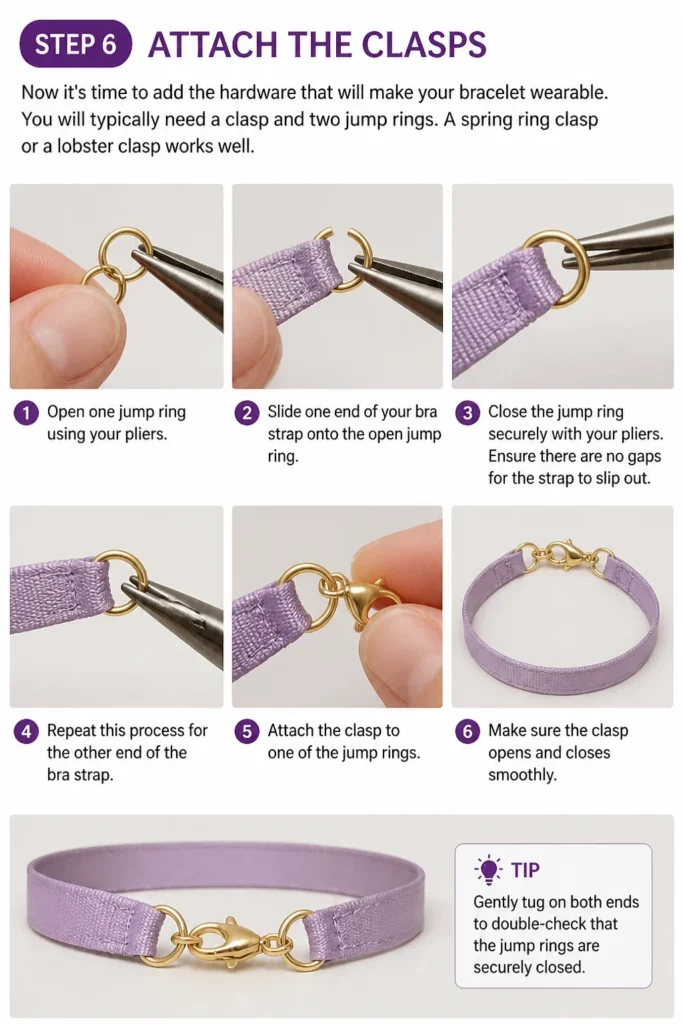
Now it’s time to add the hardware that will make your bracelet wearable. You will typically need a clasp and two jump rings. A spring ring clasp or a lobster clasp works well.
Open one jump ring using your pliers. Slide one end of your bra strap onto the open jump ring. Close the jump ring securely with your pliers. Ensure there are no gaps for the strap to slip out.
Repeat this process for the other end of the bra strap. Attach the clasp to one of the jump rings. Make sure the clasp opens and closes smoothly.
Step 7: Final Adjustments and Decoration (Optional)
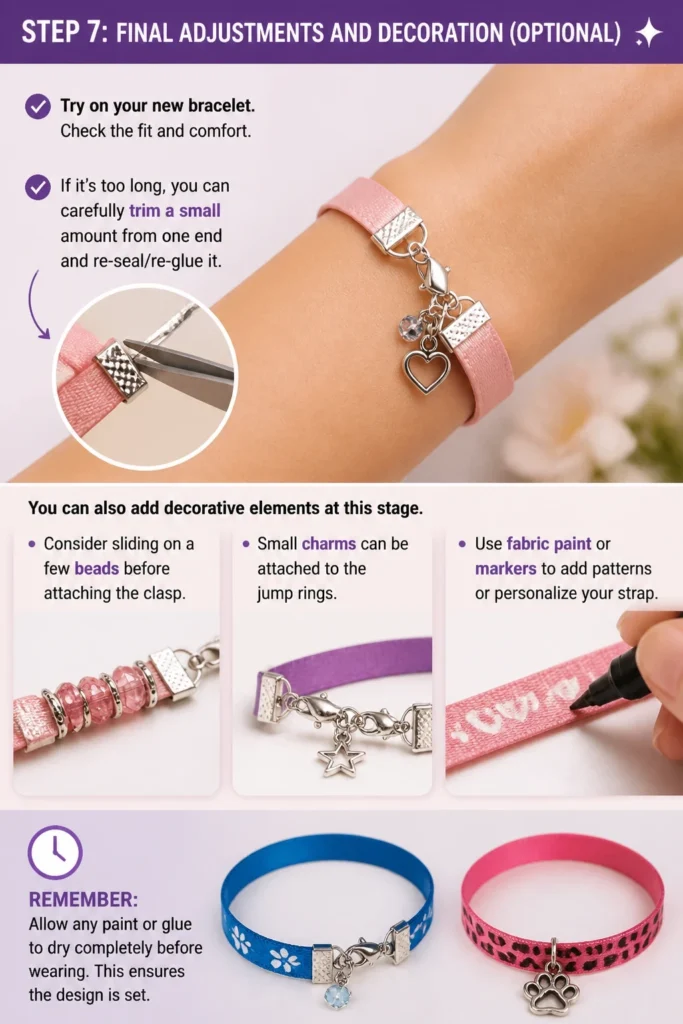
Try on your new bracelet. Check the fit and comfort. If it’s too long, you can carefully trim a small amount from one end and re-seal/re-glue it.
You can also add decorative elements at this stage. Consider sliding on a few beads before attaching the clasp. Small charms can be attached to the jump rings.
Use fabric paint or markers to add patterns or personalize your strap. Remember to allow any paint or glue to dry completely before wearing. This ensures the design is set.
Common Mistakes to Avoid
Improper Measurement
Cutting the strap without accurately measuring your wrist is a common pitfall. A bracelet that is too tight will be uncomfortable, while one that is too loose might fall off. Always measure your wrist first, then add or subtract a small amount based on your preferred fit.
Not Securing the Ends Properly
Skipping the step of sealing or gluing the ends will lead to a quickly fraying bracelet. Bra strap material is often synthetic and prone to unraveling. A properly secured end ensures your bracelet lasts and looks neat. Take the time to do this correctly, whether with heat or strong adhesive.
Using Weak Hardware
Choosing flimsy clasps or jump rings can result in your bracelet breaking or falling off easily. Invest in or use sturdy jewelry findings. Stainless steel or plated brass clasps and jump rings are generally reliable. This ensures your hard work doesn’t go to waste due to a weak link.
Rushing the Drying Process
If you use fabric glue, allowing adequate drying time is essential. Removing clamps or wearing the bracelet before the glue is fully cured can weaken the bond. This might cause the strap to detach from the hardware. Always follow the manufacturer’s drying recommendations for any adhesives used.
Troubleshooting
Bracelet is Too Loose or Too Tight
If your finished bracelet doesn’t fit quite right, don’t worry. If it’s too loose, you can carefully remove one clasp. Trim a small section from that end of the strap, re-seal it, and reattach the clasp. If it’s too tight, you might need to add an extender chain to one of the jump rings. Alternatively, you could start over with a slightly longer piece of strap, but an extender chain is usually the quicker fix.
Ends are Fraying After Wearing
Even with initial sealing, sometimes wear and tear can cause ends to fray. This usually indicates the initial seal wasn’t strong enough or has worn down. Re-apply a small amount of strong fabric glue to the frayed area, pressing the fibers together. Let it dry completely. For heat-sealed ends, a quick touch-up with a lighter can re-melt the fibers, but be very careful not to burn the existing bracelet.
Clasp Keeps Breaking or Opening
A persistent issue with the clasp suggests it might be too weak or improperly attached. First, check that the jump rings are fully closed and not allowing the clasp to slip out. If the clasp itself is breaking, consider replacing it with a stronger, higher-quality one. Jewelry pliers can help you open and close jump rings securely, ensuring a tight connection.
Key Takeaways
- Repurposing bra straps is a creative and sustainable way to make unique jewelry.
- Accurate wrist measurement is crucial for a comfortable and well-fitting bracelet.
- Always secure the cut ends of the strap using heat or strong fabric glue to prevent fraying.
- Use sturdy jewelry clasps and jump rings to ensure the bracelet’s durability.
- Don’t be afraid to personalize your bracelet with beads, charms, or fabric paint.
- This project is an excellent entry point into DIY crafting, offering quick and satisfying results.
Frequently Asked Questions
Can I use any type of bra strap?
Most bra straps made from synthetic materials like nylon or polyester work best. These materials melt cleanly for heat sealing and bond well with fabric glue. Cotton or natural fiber straps might fray more easily and require more robust gluing or even stitching to secure. Always test a small piece first if you’re unsure.
How do I clean my bra strap bracelet?
For general cleaning, gently wipe your bracelet with a damp cloth and a very mild soap. Avoid harsh chemicals or excessive scrubbing, as this could damage the strap or the glue. Allow it to air dry completely. For more delicate straps or decorated pieces, simply wiping with a dry cloth might be sufficient.
What if I don’t have a lighter to seal the ends?
Strong fabric glue is an excellent alternative to heat sealing. Look for glues specifically designed for synthetic fabrics or jewelry. Apply a thin, even layer to the cut edge and allow it to dry completely according to the product instructions. You can also use a clear nail polish on the very edge as a temporary sealant, though glue offers a stronger, more permanent bond.
Can kids make this project?
This project can be suitable for older children or teenagers with adult supervision, especially for the cutting and sealing steps. Younger children can participate in measuring and decorating. Always ensure sharp tools and lighters are handled safely and responsibly by an adult. It’s a great way to introduce them to basic crafting skills.
Our Top Recommended Finds
- Jewelry Pliers Set: A basic set of round-nose and flat-nose pliers makes attaching jump rings and clasps much easier and more secure.
- E6000 Craft Adhesive: This industrial-strength glue is excellent for securing fabric ends to metal findings, offering a durable and flexible bond.
- Assorted Jewelry Clasps Kit: A kit with various clasps (lobster, spring ring, toggle) and jump rings provides options for different styles and ensures you have the right hardware on hand.
Your Next Creative Endeavor Awaits!
You’ve just transformed something ordinary into something extraordinary. This simple bra strap bracelet is more than just an accessory; it’s a testament to your creativity and resourcefulness. Wearing it will spark conversations and inspire others to look at their old items with new eyes.
Don’t let your crafting journey end here. Consider making matching bracelets for friends, experimenting with different strap widths, or adding more intricate embellishments. The skills you’ve learned are transferable to countless other DIY projects. Pick up another old bra strap and start creating today!
Beginner-friendly templates, step-by-step guides,
and weekly project ideas in your inbox.