🛏️ How To Make A Canopy For A Bed

Beginner-friendly templates, step-by-step guides,
and weekly project ideas in your inbox.
Transforming a bedroom into a cozy retreat does not require a massive budget or a brand-new furniture set.
I spent years wanting a four-poster bed before realizing I could create the same look using simple hardware store supplies and some basic tools.
This guide provides a clear path to building a professional-looking ceiling-mounted canopy that stays secure and looks high-end.

Quick Overview
This project involves mounting lightweight curtain rods to your ceiling to create a frame for fabric panels. It creates a “built-in” look that mimics the structure of an expensive canopy bed without the bulk of a heavy wooden frame.
- Time needed: 2 to 3 hours
- Difficulty: Beginner to Intermediate
- What you’ll need: Four curtain rods, ceiling-mount brackets, drywall anchors, sheer fabric panels, a drill, and a measuring tape.
Step-by-Step Instructions
Step 1: Measure Your Bed Dimensions
Measure the length and width of your mattress to determine where the rods will sit on the ceiling. You want the canopy to frame the bed, so the rods should be slightly wider than the bed frame itself.
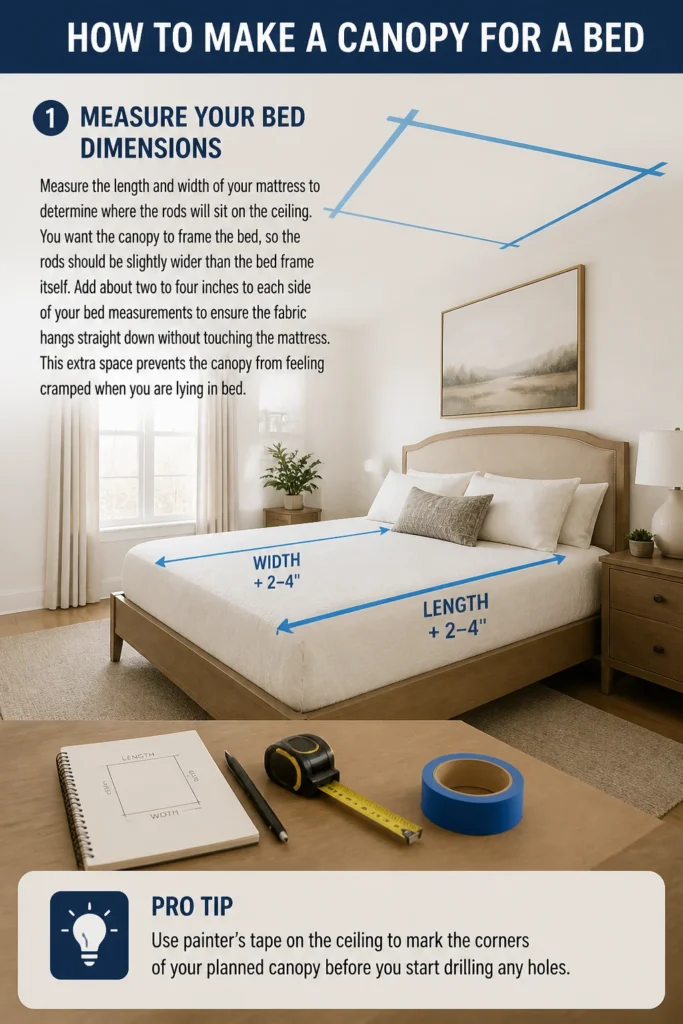
Add about two to four inches to each side of your bed measurements to ensure the fabric hangs straight down without touching the mattress. This extra space prevents the canopy from feeling cramped when you are lying in bed.
Pro Tip: Use painter’s tape on the ceiling to mark the corners of your planned canopy before you start drilling any holes.
Step 2: Choose Your Fabric Wisely
Select a fabric that is lightweight and breathable to avoid putting too much stress on your ceiling anchors. Sheer polyester, light linen, or cotton voile are excellent choices because they drape beautifully and allow air to circulate.
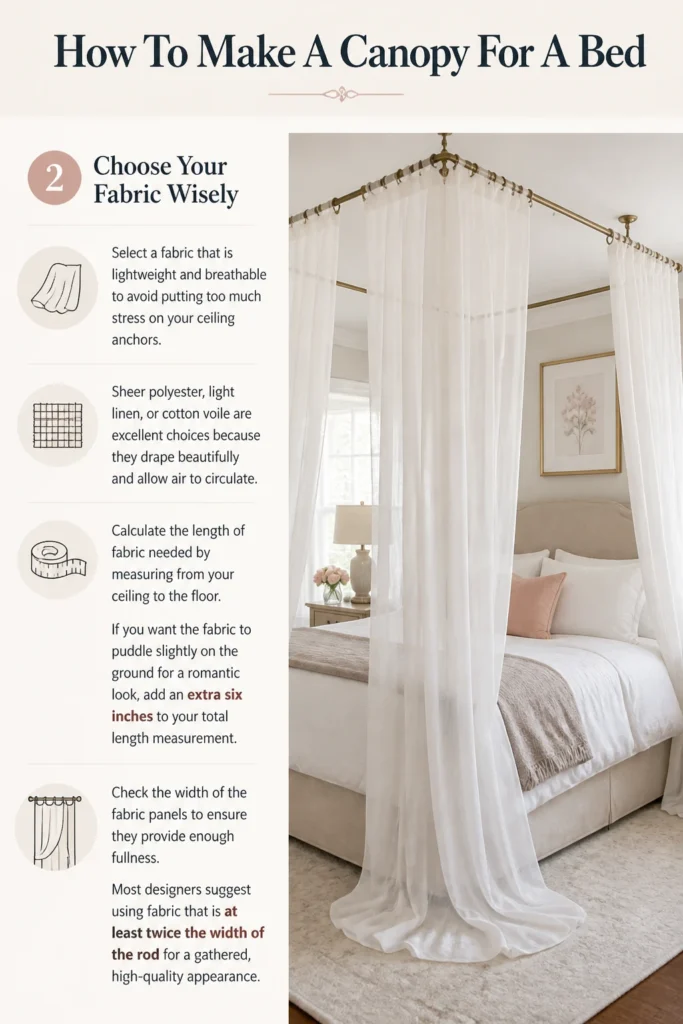
Calculate the length of fabric needed by measuring from your ceiling to the floor. If you want the fabric to “puddle” slightly on the ground for a romantic look, add an extra six inches to your total length measurement.
Check the width of the fabric panels to ensure they provide enough fullness. Most designers suggest using fabric that is at least twice the width of the rod for a gathered, high-quality appearance.
Step 3: Locate Your Ceiling Joists
Use a stud finder to check if there are wooden joists running above your bed where you plan to mount the brackets. If you can screw directly into wood, your canopy will be incredibly sturdy and safe.
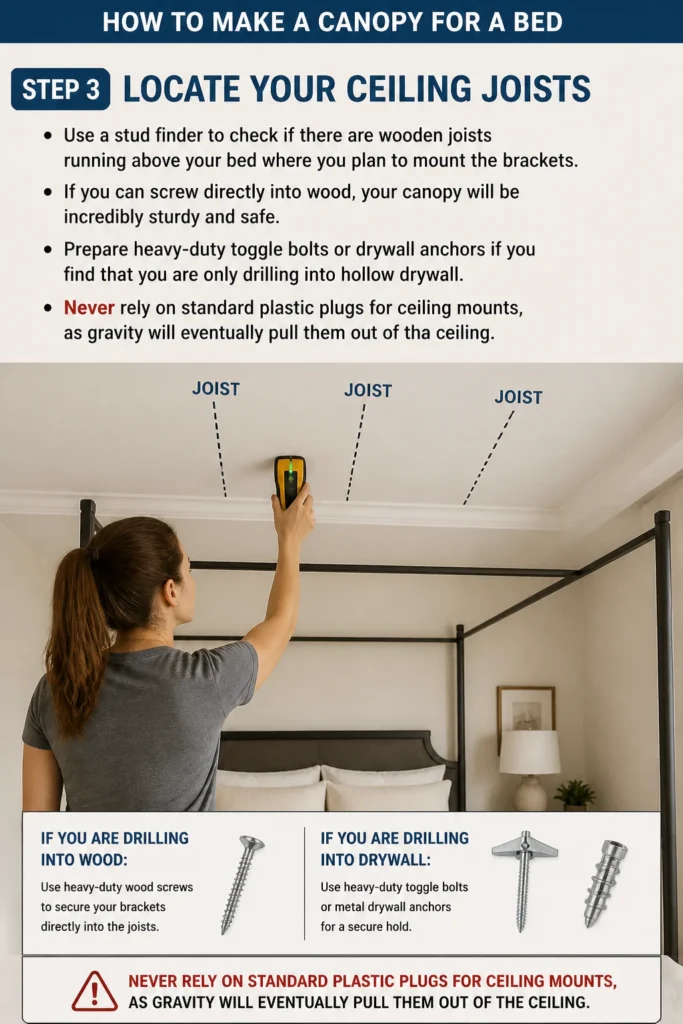
Prepare heavy-duty toggle bolts or drywall anchors if you find that you are only drilling into hollow drywall. Never rely on standard plastic plugs for ceiling mounts, as gravity will eventually pull them out of the ceiling.
Step 4: Install the Ceiling Brackets
Mark the screw holes for your first bracket using a pencil while holding the bracket against your tape marks. Ensure the bracket is oriented so the rod will run parallel to the edge of the bed.
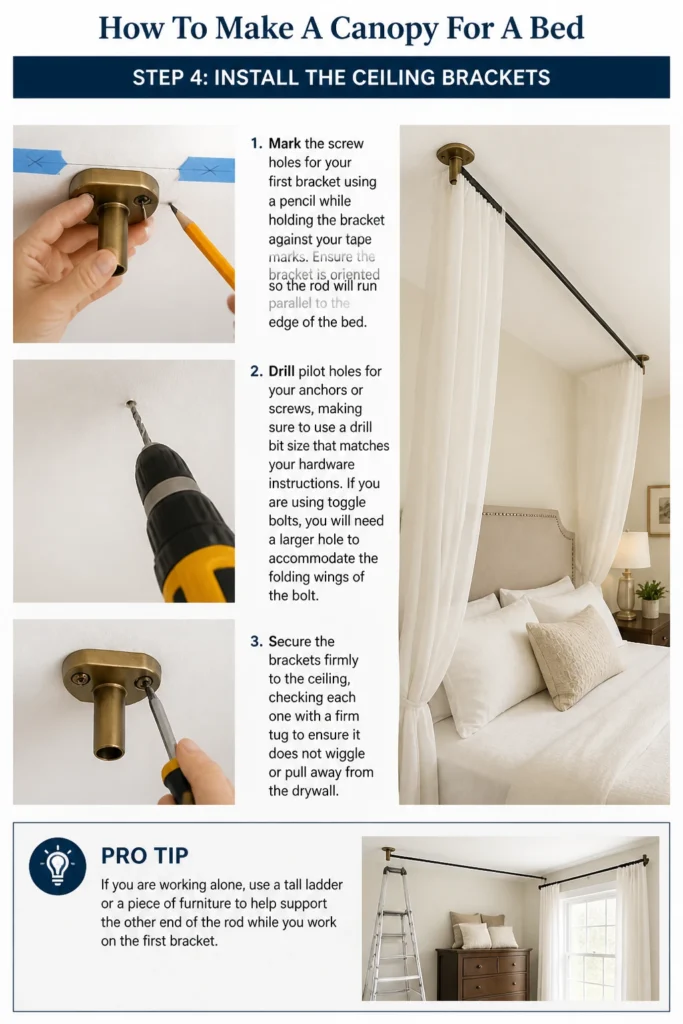
Drill pilot holes for your anchors or screws, making sure to use a drill bit size that matches your hardware instructions. If you are using toggle bolts, you will need a larger hole to accommodate the folding wings of the bolt.
Secure the brackets firmly to the ceiling, checking each one with a firm tug to ensure it does not wiggle or pull away from the drywall.
Pro Tip: If you are working alone, use a tall ladder or a piece of furniture to help support the other end of the rod while you work on the first bracket.
Step 5: Prepare the Curtain Rods
Adjust your curtain rods to the correct length based on your initial measurements. Most DIY canopies use four rods to create a full rectangle, but you can use two long rods on the sides if you prefer a simpler look.
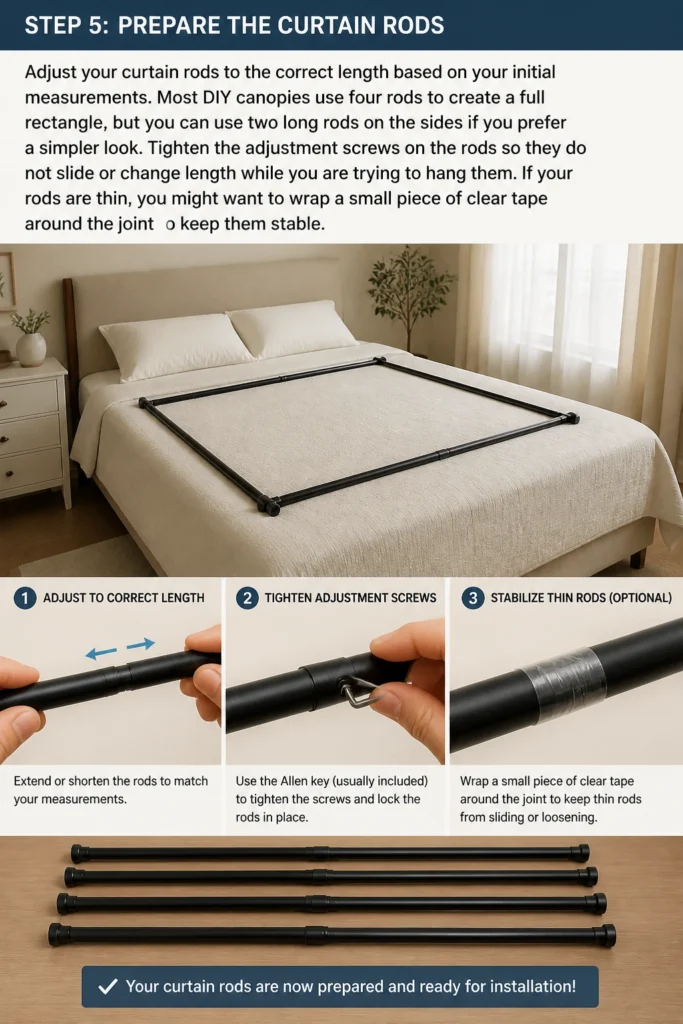
Tighten the adjustment screws on the rods so they do not slide or change length while you are trying to hang them. If your rods are thin, you might want to wrap a small piece of clear tape around the joint to keep them stable.
Step 6: Slide Fabric Onto the Rods
Thread your fabric panels onto the rods before you lift the rods into the ceiling brackets. It is much easier to manage the fabric on the ground than it is while standing on a ladder.
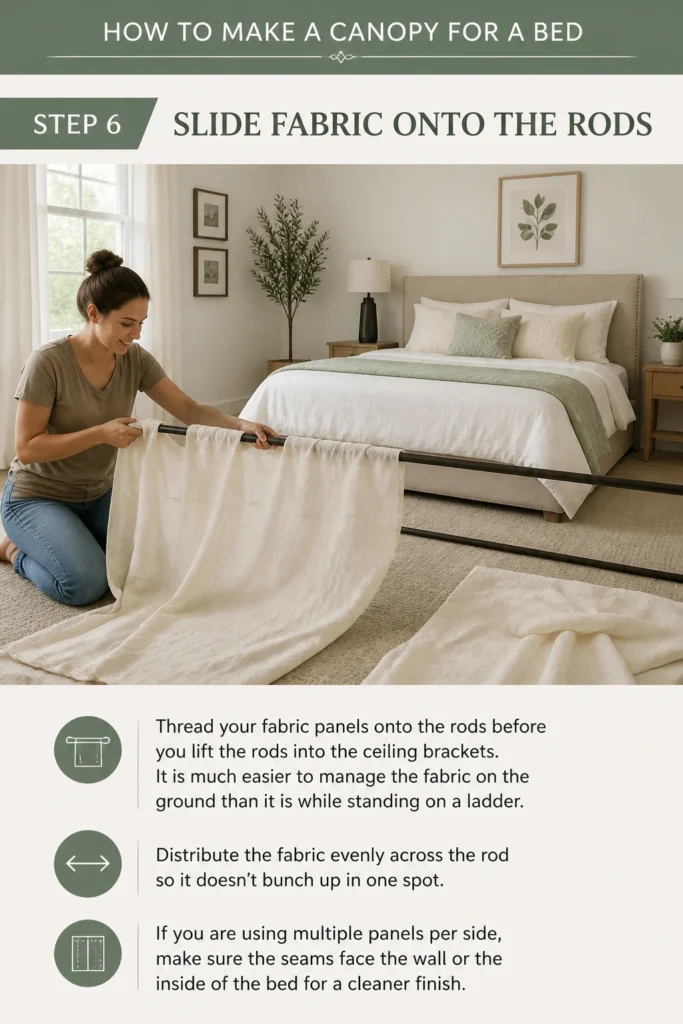
Distribute the fabric evenly across the rod so it doesn’t bunch up in one spot. If you are using multiple panels per side, make sure the seams face the wall or the inside of the bed for a cleaner finish.
Step 7: Mount the Rods and Secure
Lift the rod into the brackets and tighten the small set screws that hold the rod in place. These screws are vital because they prevent the rod from sliding out if someone accidentally pulls on the fabric.
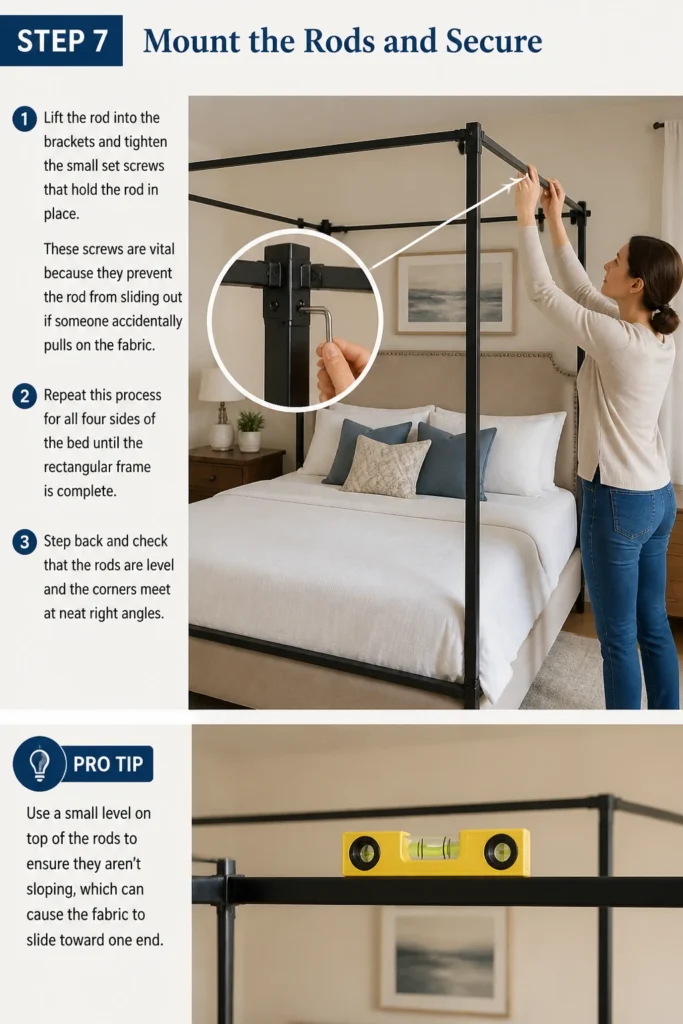
Repeat this process for all four sides of the bed until the rectangular frame is complete. Step back and check that the rods are level and the corners meet at neat right angles.
Pro Tip: Use a small level on top of the rods to ensure they aren’t sloping, which can cause the fabric to slide toward one end.
Step 8: Final Styling and Adjustments
Arrange the fabric at the corners of the bed. You can let the panels hang straight for a modern look or use ribbon or fabric ties to pull them back against the corners of the bed frame.
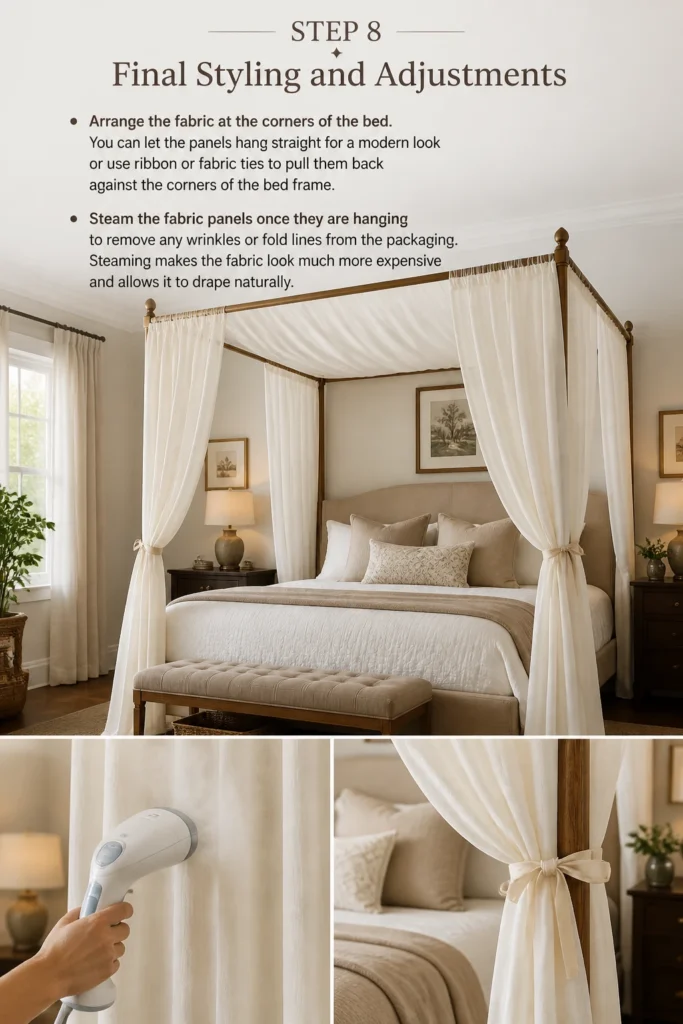
Steam the fabric panels once they are hanging to remove any wrinkles or fold lines from the packaging. Steaming makes the fabric look much more expensive and allows it to drape naturally.
Common Mistakes to Avoid
Using Weak Anchors
Many people try to hang canopies using small plastic wall plugs or even adhesive hooks. These methods almost always fail because the weight of the fabric and the constant movement of air create downward pressure.
Always use toggle bolts for hollow ceilings. These bolts expand behind the drywall and distribute the weight across a larger surface area, preventing the hardware from falling on you while you sleep.
Choosing Heavy Fabric
Velvet or heavy canvas might look luxurious, but they put immense strain on ceiling-mounted hardware. Over time, heavy fabrics can cause the drywall to crack or the rods to bow in the middle.
Stick to lightweight materials that provide the look you want without the physical weight. If you must use a heavier fabric, you will need to install extra support brackets in the center of each rod.
Ignoring Ceiling Height
If you have very low ceilings, a full canopy can make the room feel small and claustrophobic. It can also make it difficult to get in and out of bed without tangling yourself in the fabric.
For rooms with lower ceilings, consider a “half-canopy” or a hoop style that only covers the head of the bed. This provides the aesthetic benefit without overwhelming the vertical space of the room.
Troubleshooting
The Rods Are Sagging in the Middle
This usually happens if the rod is extended to its maximum length or if the fabric is too heavy for the rod’s diameter. You can fix this by adding a third bracket in the center of the rod to provide extra support.
If you don’t want to add a bracket, try replacing the adjustable rod with a solid piece of electrical conduit or a wooden dowel. Solid pieces are much more rigid than telescoping rods and will resist bending over long spans.
The Fabric Is Uneven or Too Short
If your fabric panels are slightly different lengths, you can often hide the discrepancy by adjusting how they sit on the rod. Pushing more fabric into the “gather” can sometimes lift the hem slightly.
For panels that are significantly too short, you can add a decorative trim or a contrasting fabric border to the bottom. This solves the length issue while adding a custom design element to your project.
Key Takeaways
- Measure twice to ensure your canopy frames the bed perfectly without feeling too tight or too loose.
- Use toggle bolts for any ceiling installation where a wooden stud is not available to ensure safety.
- Pick lightweight fabrics like sheer polyester or linen to keep the weight manageable and the airflow high.
- Steam your panels after installation to give the canopy a professional, high-end finish.
- Secure the set screws on your brackets so the rods cannot move once they are mounted.
Frequently Asked Questions
Is it safe to hang a canopy over a child’s bed?
Canopies can be safe for older children, but they are generally discouraged for infants or toddlers who might pull on the fabric. If you do install one in a child’s room, ensure the fabric is lightweight and the rods are mounted into ceiling joists for maximum security.
How do I clean the canopy fabric once it is installed?
Most sheer fabrics can be machine washed on a delicate cycle, but you will need to remove them from the rods first. For a quick refresh, you can use a handheld steamer or a vacuum attachment to remove dust without taking the whole structure down.
Can I make a canopy in a rental apartment?
Yes, you can make a ceiling-mounted canopy in a rental, but you will need to patch the small screw holes when you move out. If your landlord forbids drilling, you might consider a floor-standing canopy frame that doesn’t attach to the walls or ceiling at all.
What if my ceiling is slanted?
Hanging a canopy on a slanted ceiling is possible, but you will need adjustable-angle brackets. These allow the mounting plate to sit flush against the slope while the rod remains perfectly horizontal over the bed.
Our Top Recommended Finds
- Heavy-Duty Toggle Bolts: These are essential for a secure ceiling mount in drywall. They provide the peace of mind that your canopy won’t come down unexpectedly.
- Handheld Garment Steamer: This tool is the secret to making cheap fabric look like high-end drapery. It removes wrinkles quickly while the fabric is already hanging.
- Laser Level: Using a laser level makes it much easier to align four different brackets across a large ceiling area. It ensures your rectangle is perfectly straight.
Start Your Bedroom Refresh Today
Creating a bed canopy is one of the most effective ways to change the entire atmosphere of your room without spending a lot of money. Once you have the hardware in place, you can easily swap out the fabric panels to match different seasons or decor styles.
If you enjoyed this project, you might also want to look into DIY headboard ideas or custom lighting solutions to further personalize your space. Take the first step by measuring your bed tonight and picking out a fabric that makes you feel relaxed.
Beginner-friendly templates, step-by-step guides,
and weekly project ideas in your inbox.