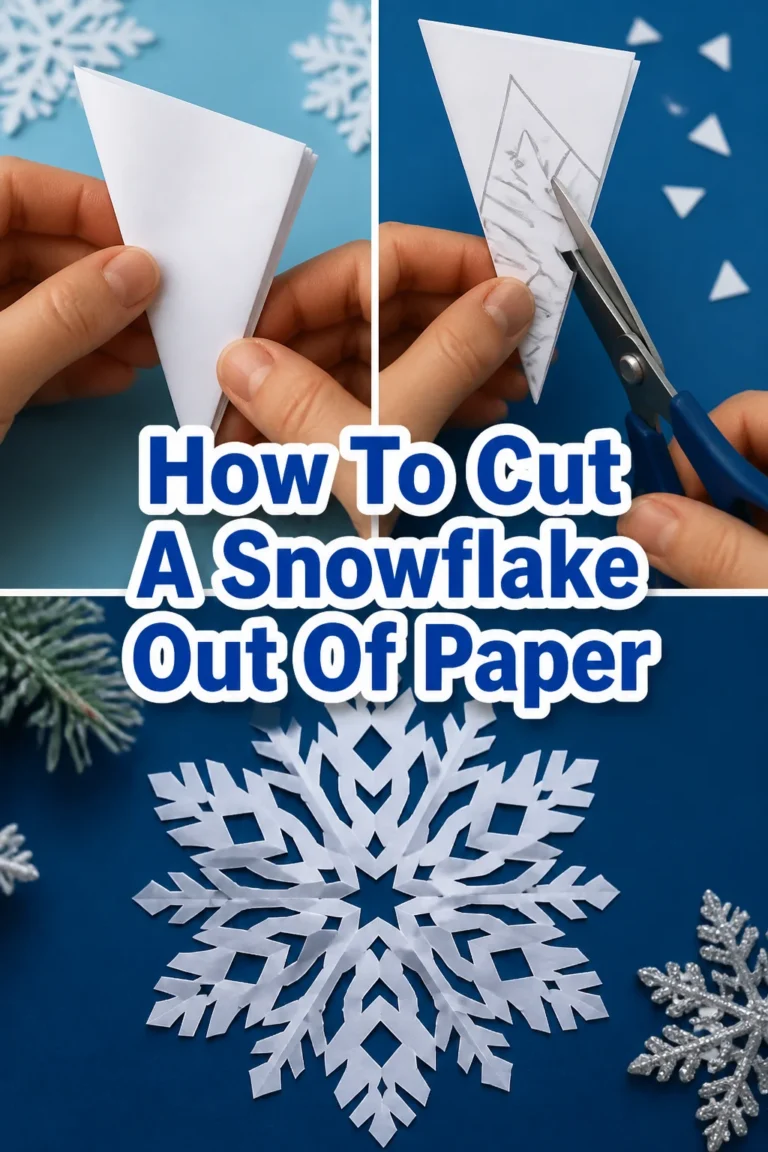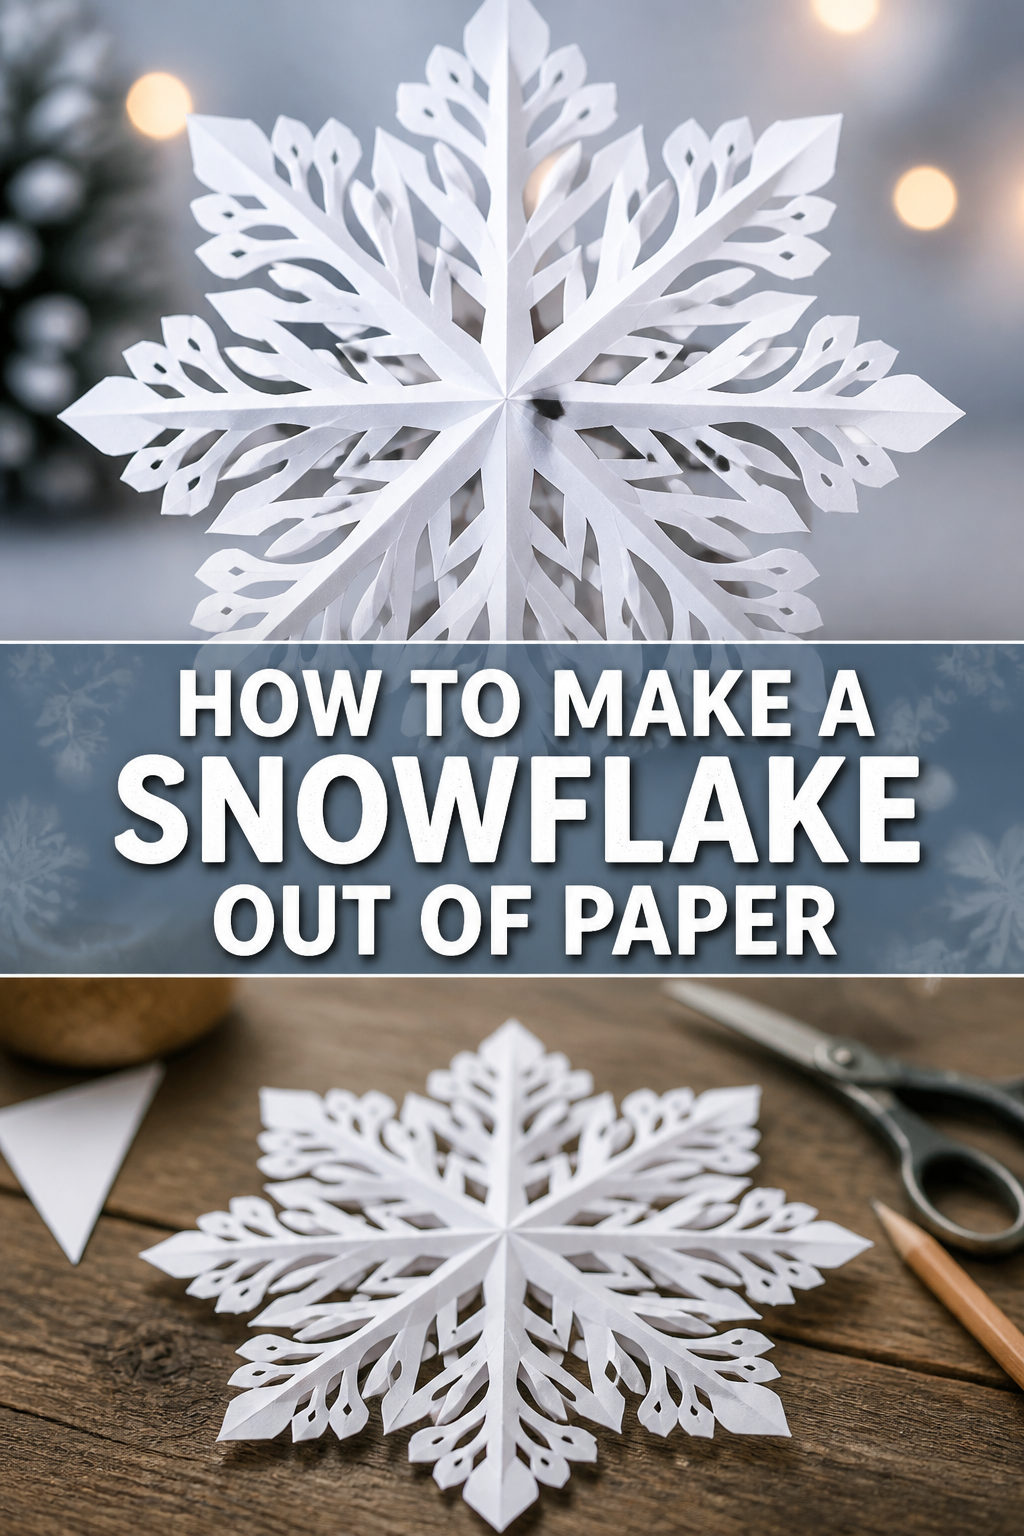
❄️ How To Make A Snowflake Out Of Paper

Beginner-friendly templates, step-by-step guides,
and weekly project ideas in your inbox.
There’s something truly magical about a perfectly crafted paper snowflake.
It’s a simple, elegant piece of art you can create with just a few basic supplies.
I’ve spent countless hours folding and snipping, discovering the joy in each unique design, and I’m excited to share my go-to method for beautiful results every time.
Quick Overview
This guide will walk you through the process of transforming a plain sheet of paper into a delicate, intricate snowflake design.
You’ll learn the essential folds and cutting techniques to create stunning decorations.
- Time needed: 15-30 minutes per snowflake (depending on complexity)
- Difficulty: Beginner
- What you’ll need: Paper, scissors, ruler (optional), pencil (optional)
Step-by-Step Instructions
Step 1: Prepare Your Paper
The foundation of any great paper snowflake is a perfectly square piece of paper.
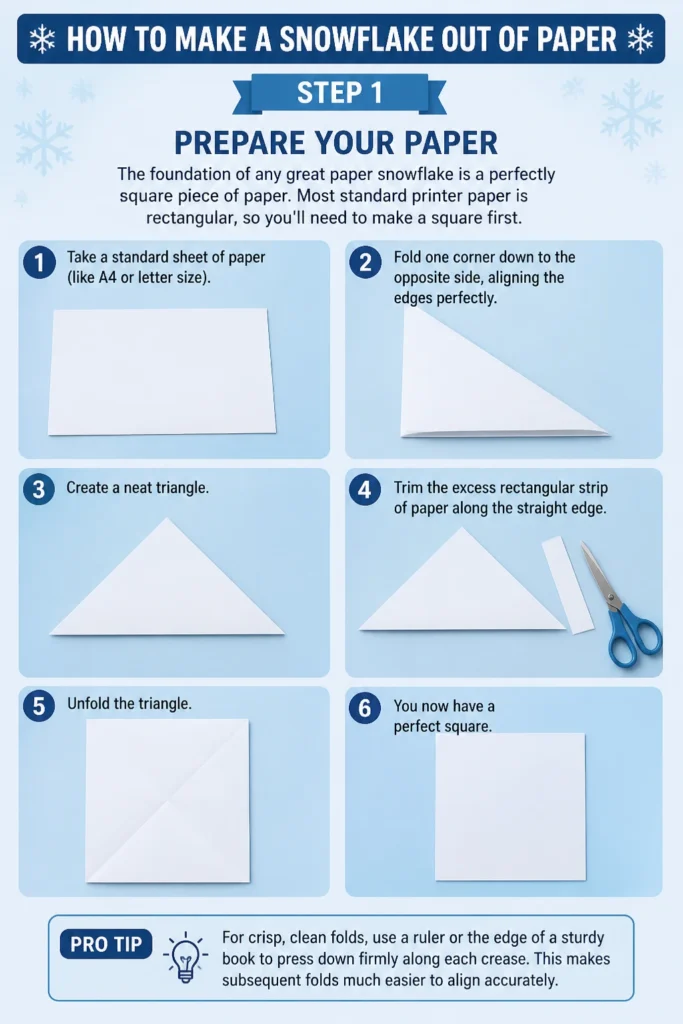
Most standard printer paper is rectangular, so you’ll need to make a square first.
- Take a standard sheet of paper (like A4 or letter size).
- Fold one corner down to the opposite side, aligning the edges perfectly.
- Create a neat triangle.
- Trim the excess rectangular strip of paper along the straight edge.
- Unfold the triangle. You now have a perfect square.
Pro Tip: For crisp, clean folds, use a ruler or the edge of a sturdy book to press down firmly along each crease. This makes subsequent folds much easier to align accurately.
Step 2: Fold into a Triangle
Now that you have your square, it’s time for the first diagonal fold.
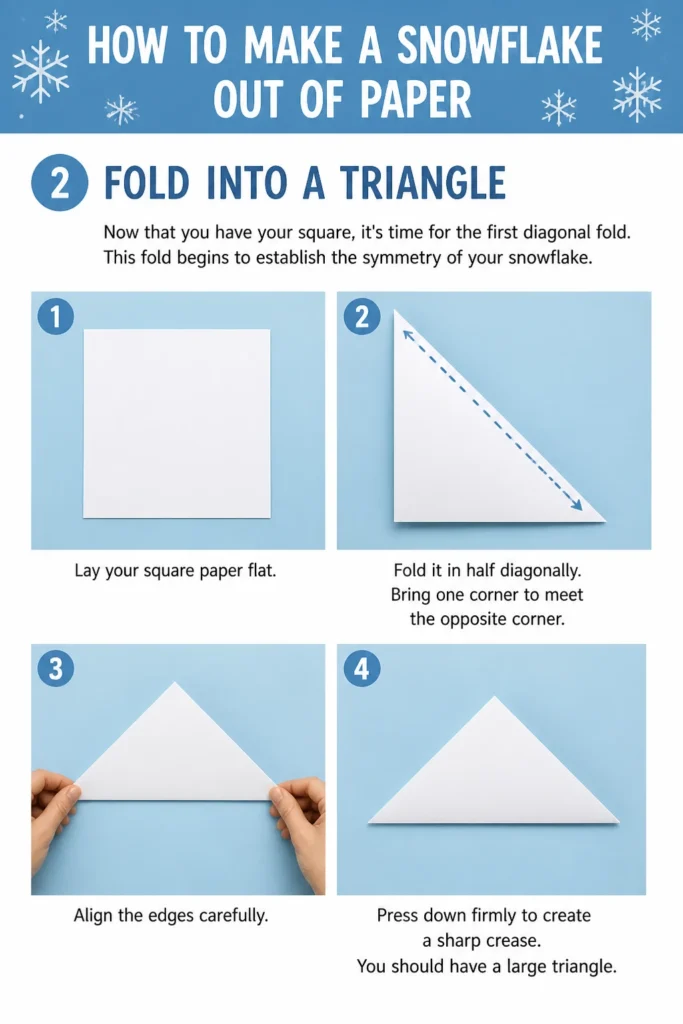
This fold begins to establish the symmetry of your snowflake.
- Lay your square paper flat.
- Fold it in half diagonally.
- Bring one corner to meet the opposite corner.
- Align the edges carefully.
- Press down firmly to create a sharp crease. You should have a large triangle.
Step 3: Fold Again for a Smaller Triangle
You’re going to repeat the diagonal fold one more time.
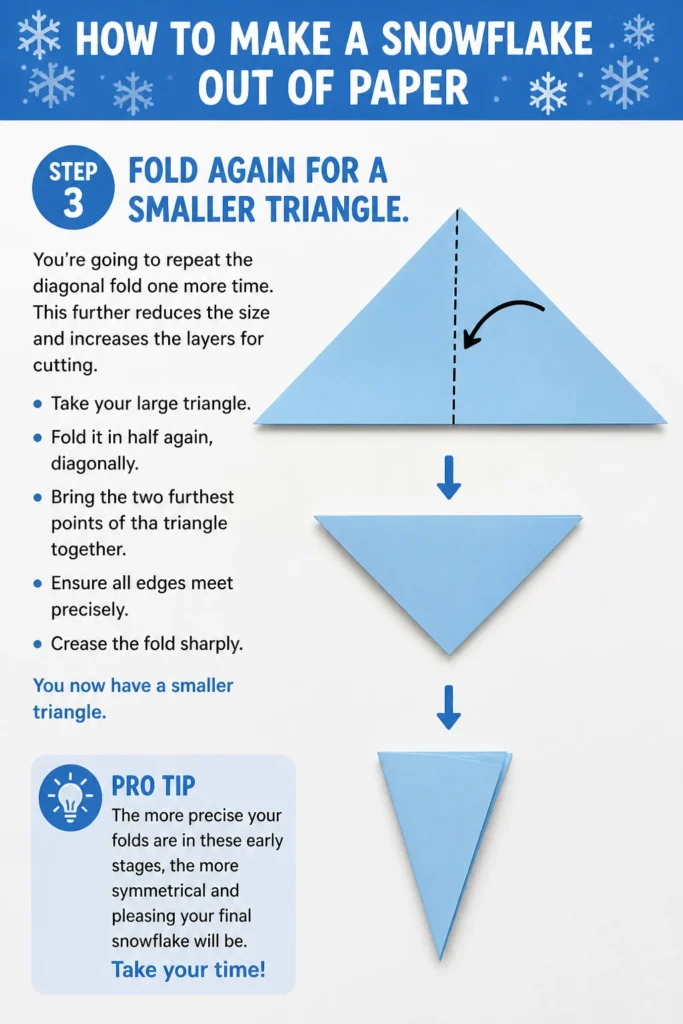
This further reduces the size and increases the layers for cutting.
- Take your large triangle.
- Fold it in half again, diagonally.
- Bring the two furthest points of the triangle together.
- Ensure all edges meet precisely.
- Crease the fold sharply. You now have a smaller triangle.
Pro Tip: The more precise your folds are in these early stages, the more symmetrical and pleasing your final snowflake will be. Take your time!
Step 4: Master the “Ice Cream Cone” Fold
This is arguably the most crucial fold for creating a six-sided snowflake.
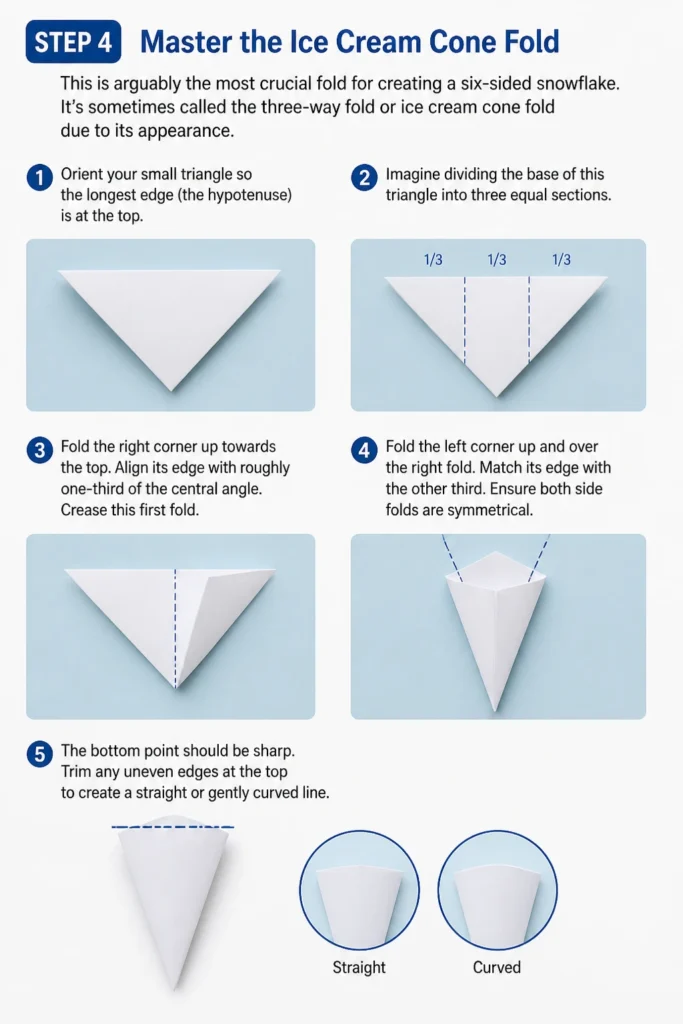
It’s sometimes called the “three-way fold” or “ice cream cone” fold due to its appearance.
- Orient your small triangle so the longest edge (the hypotenuse) is at the top.
- Imagine dividing the base of this triangle into three equal sections.
- Fold the right corner up towards the top.
- Align its edge with roughly one-third of the central angle.
- Crease this first fold.
- Fold the left corner up and over the right fold.
- Match its edge with the other third.
- Ensure both side folds are symmetrical. The bottom point should be sharp.
- Trim any uneven edges at the top to create a straight or gently curved line.
Step 5: Trim the Top Edge
After your “ice cream cone” fold, you’ll likely have a jagged or angled top edge.
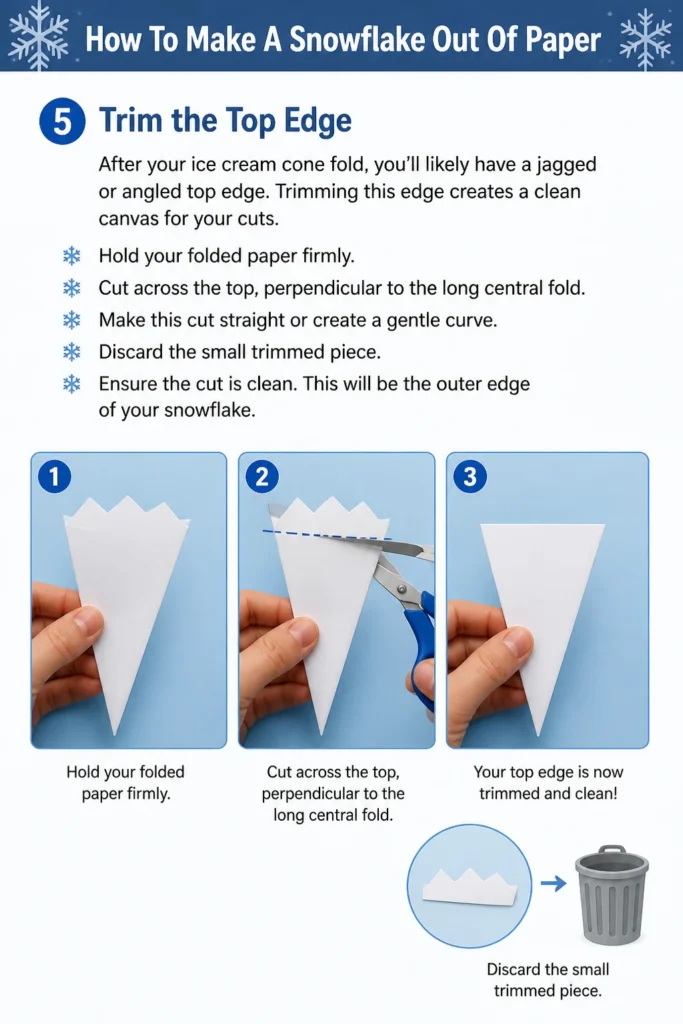
Trimming this edge creates a clean canvas for your cuts.
- Hold your folded paper firmly.
- Cut across the top, perpendicular to the long central fold.
- Make this cut straight or create a gentle curve.
- Discard the small trimmed piece.
- Ensure the cut is clean. This will be the outer edge of your snowflake.
Step 6: Start Cutting Shapes
Now for the fun part – the creative cutting!
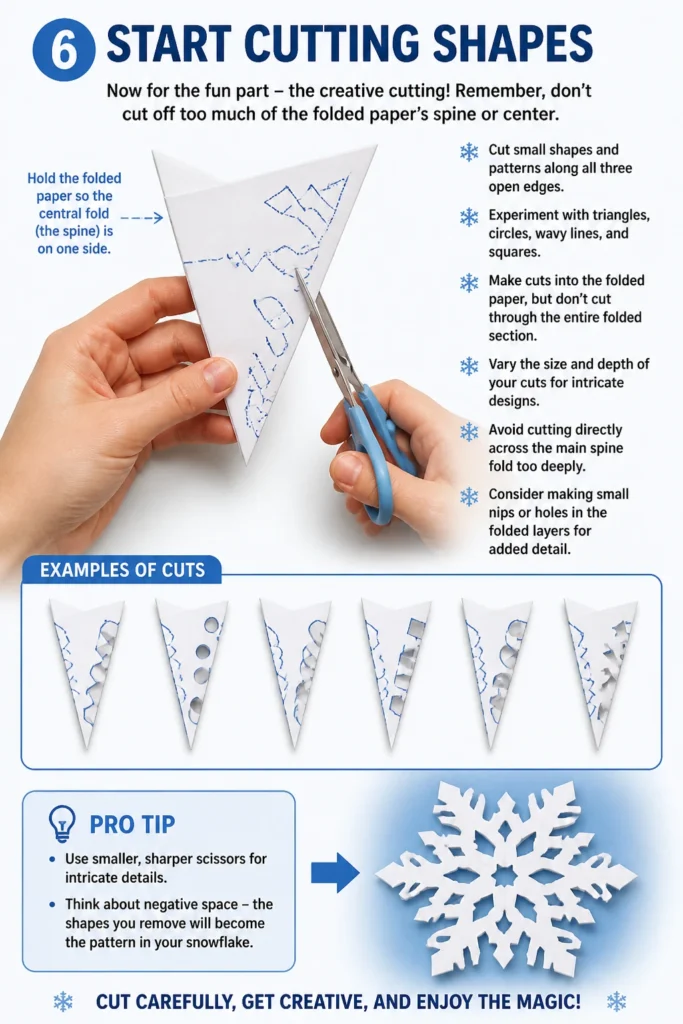
Remember, don’t cut off too much of the folded paper’s “spine” or center.
- Hold the folded paper so the central fold (the “spine”) is on one side.
- Cut small shapes and patterns along all three open edges.
- Experiment with triangles, circles, wavy lines, and squares.
- Make cuts into the folded paper, but don’t cut through the entire folded section.
- Vary the size and depth of your cuts for intricate designs.
- Avoid cutting directly across the main spine fold too deeply.
- Consider making small nips or holes in the folded layers for added detail.
Pro Tip: Use smaller, sharper scissors for intricate details. Think about negative space – the shapes you remove will become the pattern in your snowflake.
Step 7: Unfold Carefully
This is the moment of truth, where your design comes to life.
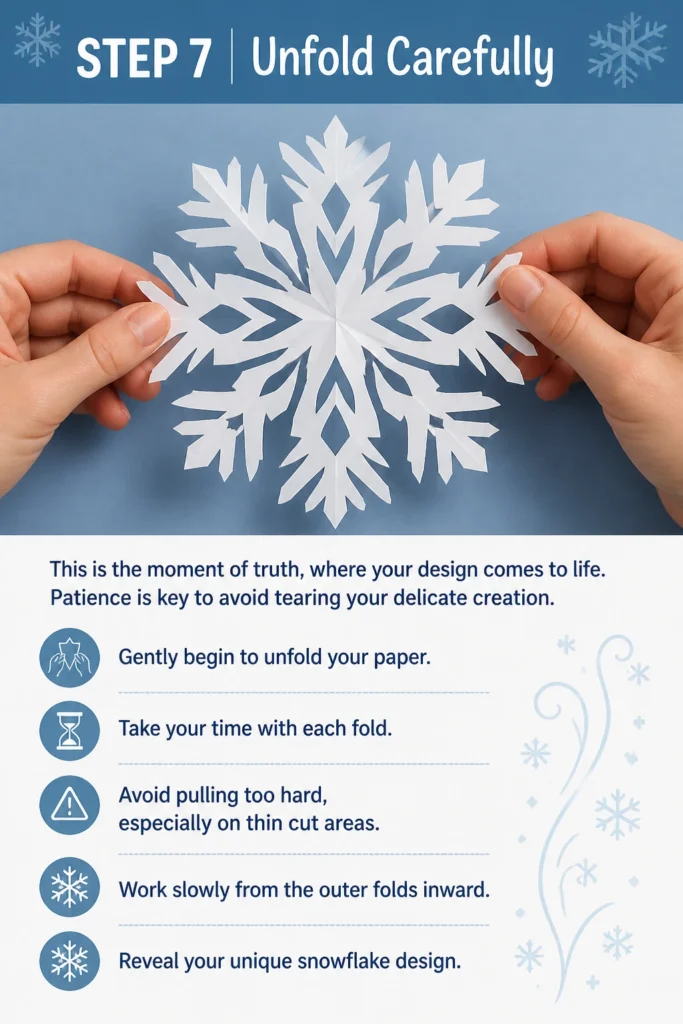
Patience is key to avoid tearing your delicate creation.
- Gently begin to unfold your paper.
- Take your time with each fold.
- Avoid pulling too hard, especially on thin cut areas.
- Work slowly from the outer folds inward.
- Reveal your unique snowflake design.
Step 8: Flatten and Display
Your snowflake might be a little crinkled from all the folding.
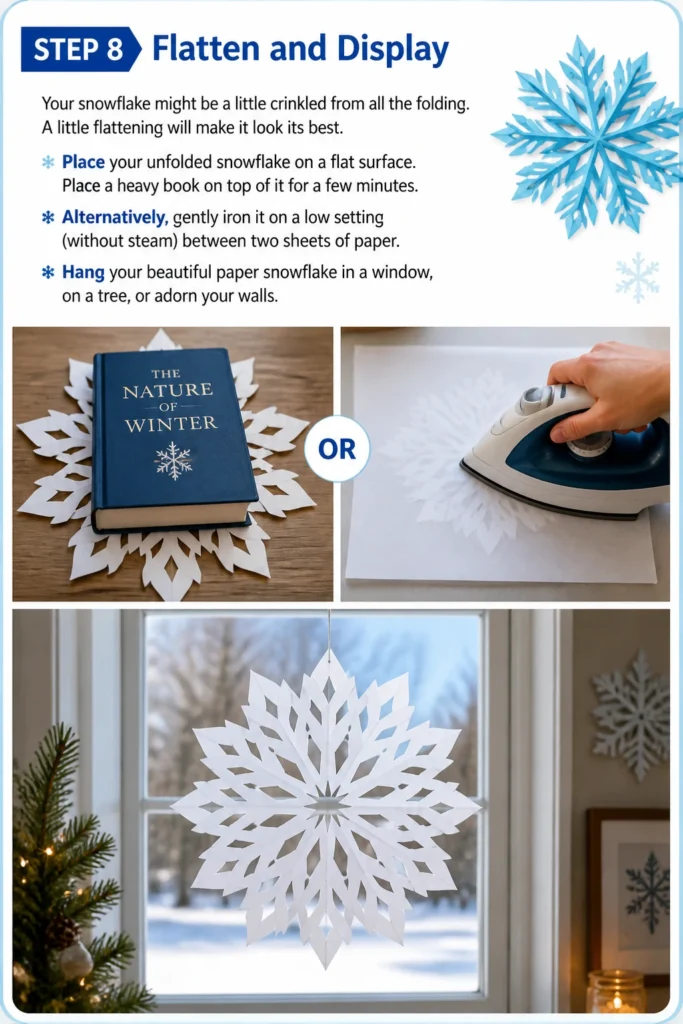
A little flattening will make it look its best.
- Place your unfolded snowflake on a flat surface.
- Place a heavy book on top of it for a few minutes.
- Alternatively, gently iron it on a low setting (without steam) between two sheets of paper.
- Hang your beautiful paper snowflake in a window, on a tree, or adorn your walls.
Common Mistakes to Avoid
Cutting Too Much Off the Spine
This is a very common error, especially for beginners.
If you cut too much of the central folded edge (the spine), your snowflake will fall apart into separate pieces when unfolded.
Always leave a continuous connection along the spine to ensure the snowflake holds together as one piece.
Uneven Folds
If your initial folds aren’t precise, your snowflake will lack symmetry.
This can result in a lopsided or irregular shape, which might not be the desired effect.
Take extra care to align edges perfectly at each folding step to ensure a beautifully balanced design.
Using Dull or Large Scissors
Attempting intricate cuts with blunt or oversized scissors can lead to frustration and messy results.
Dull scissors tear the paper, while large ones make precise detail work nearly impossible.
Invest in small, sharp craft scissors for clean, crisp cuts and finer designs.
Not Varying Cut Shapes
If all your cuts are the same shape (e.g., only triangles), your snowflake might look a bit plain.
The beauty of snowflakes comes from their intricate and varied patterns.
Experiment with different shapes – curves, waves, tiny circles, and squares – to create a more dynamic and interesting design.
Troubleshooting
My Snowflake Tore When Unfolding
This usually happens if the paper was cut too thin in certain areas or if it was unfolded too quickly.
To prevent this, make sure your cuts leave enough paper for structural integrity, especially near the center.
Always unfold very slowly and gently, starting from the outer layers and working your way inward.
The Snowflake Doesn’t Look Symmetrical
Lack of symmetry often stems from uneven initial folds, particularly the “ice cream cone” fold.
Go back to the folding steps and pay extra attention to aligning edges perfectly and ensuring the side folds are mirrored.
Using a pencil to lightly mark guide points for the “ice cream cone” fold can help achieve better balance.
My Cuts Are Rough and Jagged
Rough cuts are typically a sign of dull scissors or trying to cut too many layers of paper at once.
Ensure your scissors are sharp and suitable for detailed work.
If you’re using thicker paper, you might need to make fewer, simpler cuts or use a craft knife for precision (with caution).
Key Takeaways
- Precision in your initial folds is critical for a symmetrical snowflake.
- The “ice cream cone” fold creates the six-sided structure.
- Avoid cutting through the central spine to keep your snowflake intact.
- Experiment with various cut shapes and sizes for unique designs.
- Use sharp, small scissors for the best cutting results.
- Unfold your finished snowflake slowly and gently to prevent tearing.
Frequently Asked Questions
What kind of paper is best for making snowflakes?
Standard printer paper (copy paper) is excellent for beginners because it’s readily available and easy to fold and cut. For more delicate or intricate designs, tissue paper or thin craft paper works well. Thicker cardstock can be challenging to cut, so it’s generally not recommended.
How can I make my snowflake truly unique?
The key to uniqueness lies in your cutting patterns. Don’t be afraid to experiment with different shapes, negative space, and varying depths of cuts. Try cutting small holes or slits in the folded layers, or incorporate abstract designs. Each snowflake is inherently unique, so embrace the creative process!
Can I make snowflakes with more or fewer than six sides?
Yes, you can! The method described here creates a six-sided snowflake due to the specific “ice cream cone” fold. To make a four-sided snowflake, you would simply fold your square paper in half, then in half again, creating a smaller square before cutting. For eight sides, the folding gets a bit more complex, often requiring more precise angle estimations or templates.
How do I hang my finished paper snowflakes?
There are several ways to display your beautiful creations. You can use a small piece of clear tape to attach them to windows or walls. For hanging, gently poke a small hole near one edge and thread a piece of string, fishing line, or thin ribbon through it. They look wonderful strung together as garlands or individually hanging from light fixtures.
Our Top Recommended Finds
- Small Craft Scissors: Essential for intricate details and clean cuts.
- Assorted White Paper Pack: Provides a variety of paper weights and textures to experiment with.
- Self-Healing Cutting Mat: Great for protecting your surfaces when making initial square cuts with a craft knife (optional).
Unfold Your Creativity
Making paper snowflakes is more than just a craft; it’s a delightful journey into geometry and design.
Each snip of the scissors holds the promise of a unique, intricate pattern waiting to be revealed.
Don’t be afraid to experiment, make mistakes, and discover your own signature style.
Grab your paper and scissors today, and start creating a flurry of your very own handmade winter magic!
Beginner-friendly templates, step-by-step guides,
and weekly project ideas in your inbox.