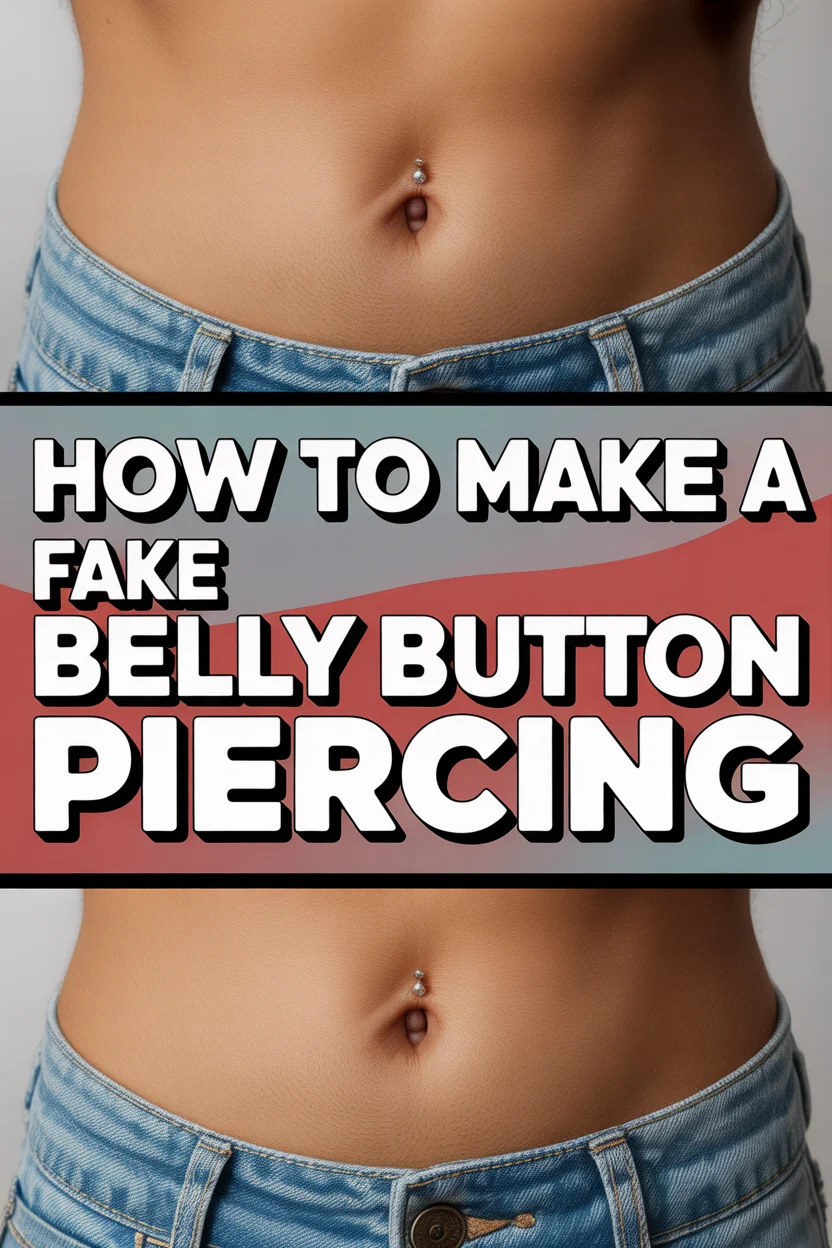
✨ How To Make A Fake Belly Button Piercing

Beginner-friendly templates, step-by-step guides,
and weekly project ideas in your inbox.
Ever wondered what a belly button piercing would look like on you without the commitment? Many of us have. I remember experimenting with different styles in my teen years, curious about new looks.
This guide comes from my own playful explorations and a desire to help others try out this fun aesthetic safely. You don’t need to visit a professional or make a permanent decision.
Quick Overview
Creating a temporary, fake belly button piercing is a fantastic way to experiment with your style. You’ll achieve a convincing look that can be worn for an event or just for fun. It’s all about creativity and a little bit of patience.
- Time needed: 15-30 minutes (initial setup), 5 minutes (daily application)
- Difficulty: Beginner
- What you’ll need: Craft wire, adhesive gems, body-safe adhesive, small pliers, scissors, rubbing alcohol.
Step-by-Step Instructions
Step 1: Gather Your Materials
Before you begin, make sure you have everything laid out and ready. This will make the process much smoother and more enjoyable. It saves you from scrambling mid-project.
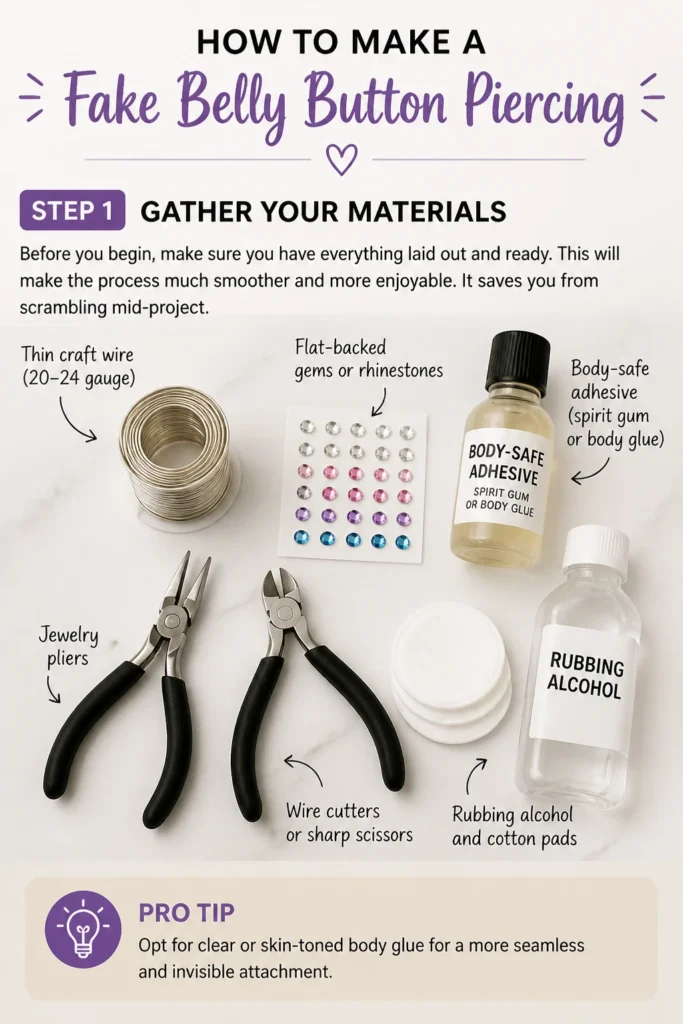
You’ll need thin craft wire, ideally 20-24 gauge, which is flexible but holds its shape. Look for non-tarnishing or hypoallergenic options if possible.
Pick out some small, flat-backed adhesive gems or rhinestones in your preferred color and size. A body-safe adhesive, like spirit gum or specialized body glue, is crucial for skin application.
You will also need a pair of small jewelry pliers, wire cutters or sharp scissors, and rubbing alcohol with cotton pads for cleaning. Having all these items at hand prevents any interruptions.
Pro Tip: Opt for clear or skin-toned body glue for a more seamless and invisible attachment. Test any adhesive on a small patch of skin first to check for sensitivities.
Step 2: Clean and Prepare Your Skin
Hygiene is important when applying anything to your skin. Begin by washing your hands thoroughly with soap and water. This prevents transferring oils or dirt.
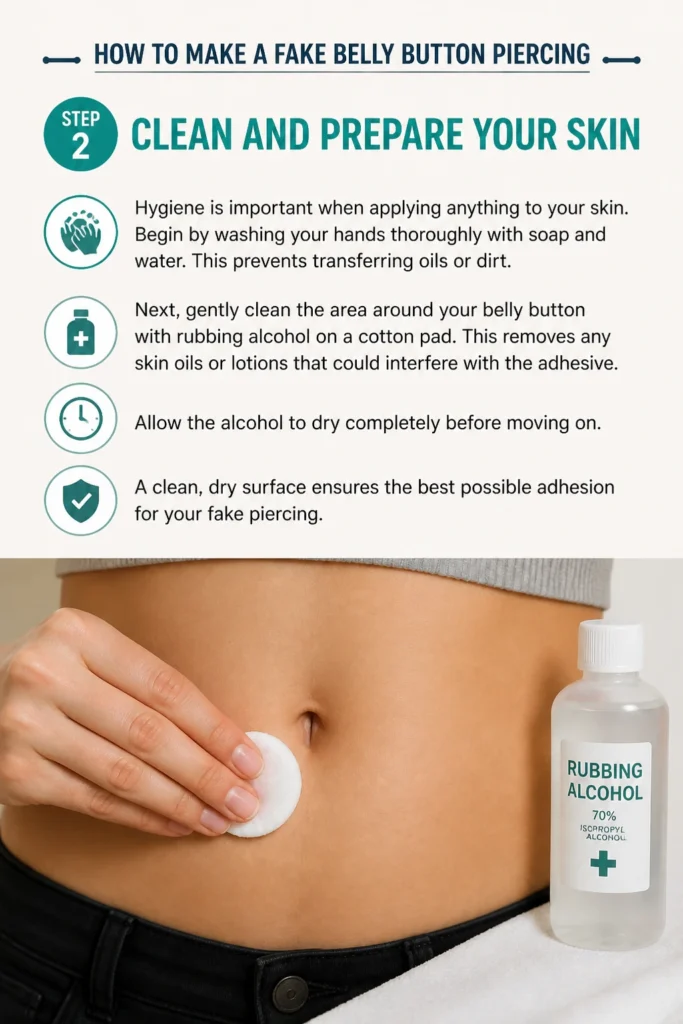
Next, gently clean the area around your belly button with rubbing alcohol on a cotton pad. This removes any skin oils or lotions that could interfere with the adhesive.
Allow the alcohol to dry completely before moving on. A clean, dry surface ensures the best possible adhesion for your fake piercing.
Step 3: Design Your Piercing Jewelry
Now for the creative part. Take your craft wire and cut a piece about 3-4 inches long. This gives you enough length to work with comfortably.
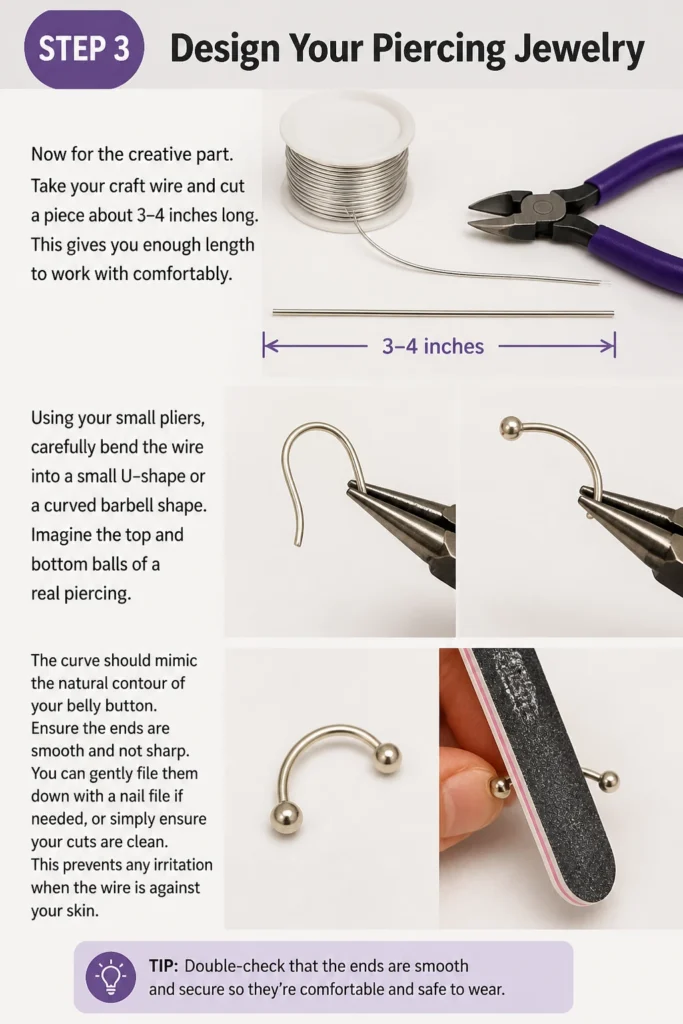
Using your small pliers, carefully bend the wire into a small U-shape or a curved barbell shape. Imagine the top and bottom balls of a real piercing. The curve should mimic the natural contour of your belly button.
Ensure the ends are smooth and not sharp. You can gently file them down with a nail file if needed, or simply ensure your cuts are clean. This prevents any irritation when the wire is against your skin.
Step 4: Attach the Decorative Gems
Select the adhesive gems you want to use for your fake piercing. Often, one gem goes at the top and one at the bottom of the wire.
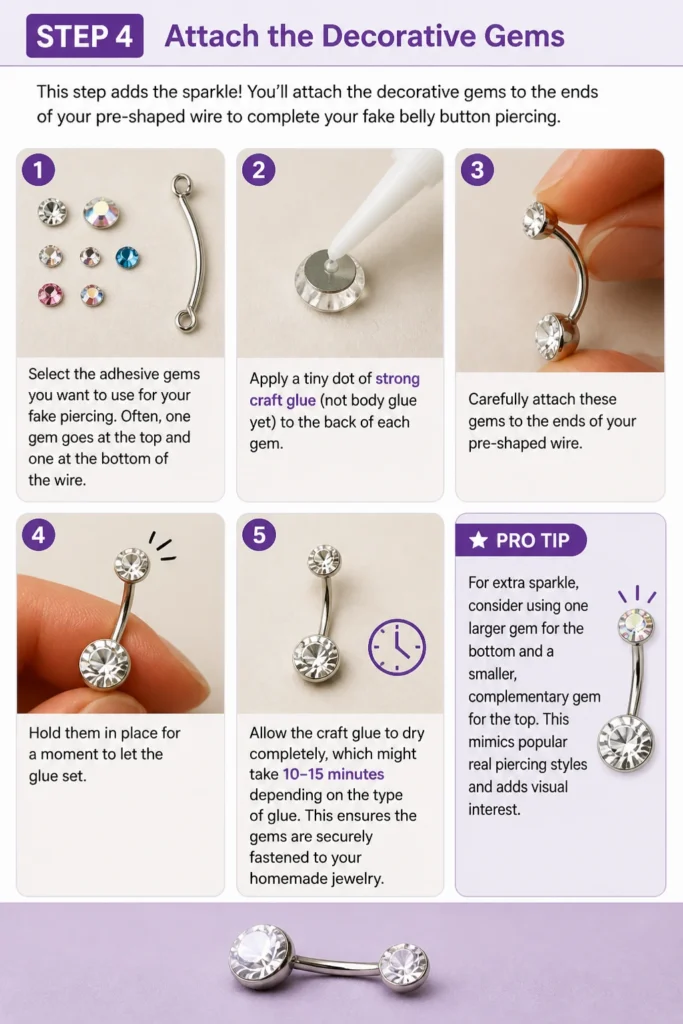
Apply a tiny dot of strong craft glue (not body glue yet) to the back of each gem. Carefully attach these gems to the ends of your pre-shaped wire. Hold them in place for a moment to let the glue set.
Allow the craft glue to dry completely, which might take 10-15 minutes depending on the type of glue. This ensures the gems are securely fastened to your homemade jewelry.
Pro Tip: For extra sparkle, consider using one larger gem for the bottom and a smaller, complementary gem for the top. This mimics popular real piercing styles and adds visual interest.
Step 5: Position and Adhere the Piercing
Once your homemade jewelry is dry, it’s time for application. Hold the crafted piece up to your belly button to find the perfect placement.
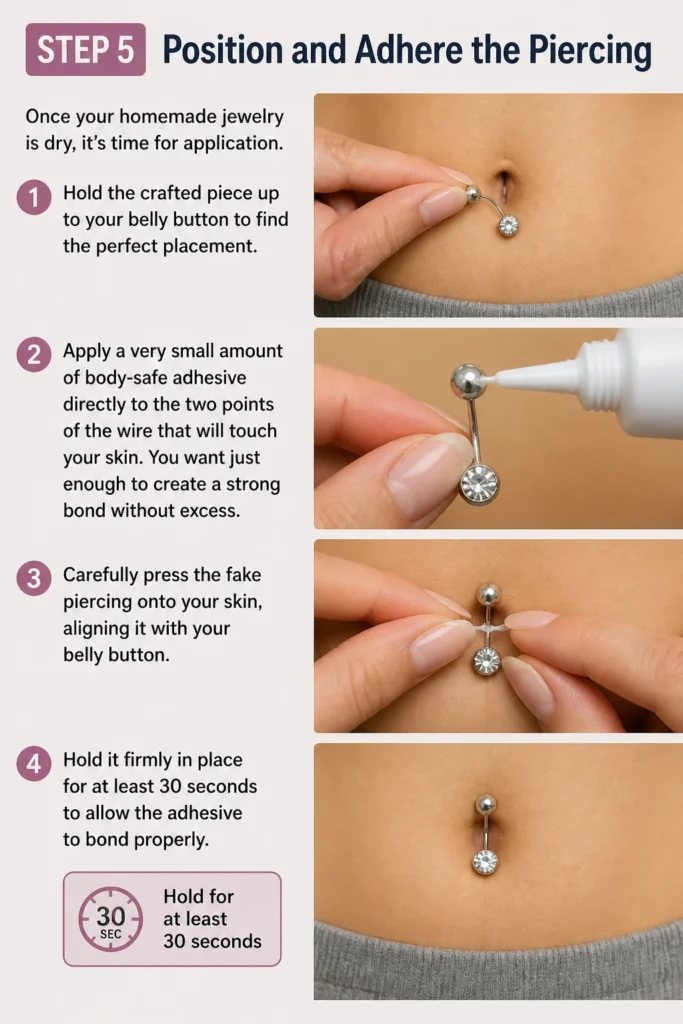
Apply a very small amount of body-safe adhesive directly to the two points of the wire that will touch your skin. You want just enough to create a strong bond without excess.
Carefully press the fake piercing onto your skin, aligning it with your belly button. Hold it firmly in place for at least 30 seconds to allow the adhesive to bond properly.
Step 6: Fine-Tune and Secure
After the initial hold, gently check if the piercing feels secure. If any part feels loose, add another tiny dab of body glue to that specific spot and press again.
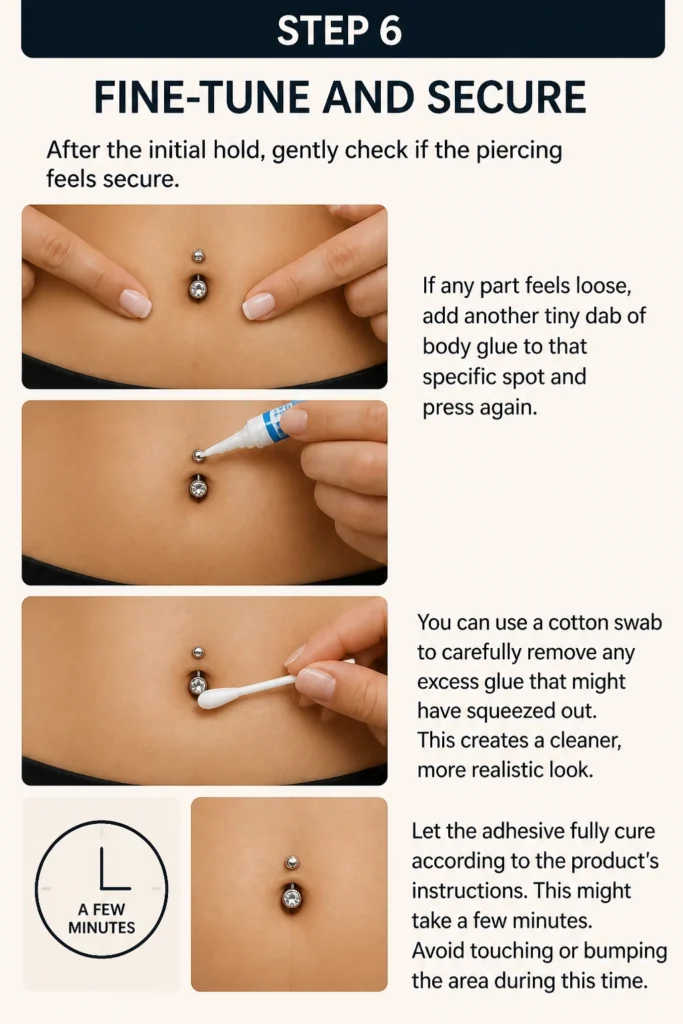
You can use a cotton swab to carefully remove any excess glue that might have squeezed out. This creates a cleaner, more realistic look.
Let the adhesive fully cure according to the product’s instructions. This might take a few minutes. Avoid touching or bumping the area during this time.
Step 7: Add Makeup for Realism (Optional)
For an even more convincing effect, you can use a little makeup. A subtle touch of contouring can enhance the illusion.
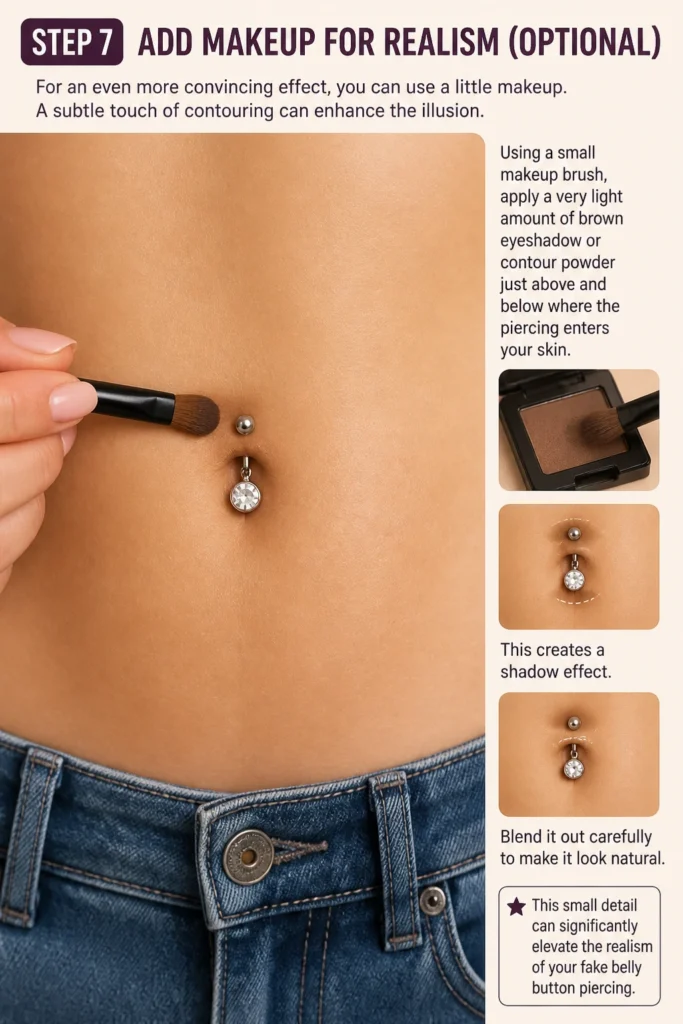
Using a small makeup brush, apply a very light amount of brown eyeshadow or contour powder just above and below where the “piercing” enters your skin. This creates a shadow effect.
Blend it out carefully to make it look natural. This small detail can significantly elevate the realism of your fake belly button piercing.
Common Mistakes to Avoid
Using Non-Body-Safe Adhesives
A common mistake is using regular craft glue or super glue directly on your skin. These adhesives are not designed for skin contact and can cause irritation, allergic reactions, or even chemical burns. Always use products specifically labeled as body-safe, like spirit gum or theatrical adhesive, to protect your skin.
Skipping Skin Preparation
Failing to clean your skin properly before application is a frequent oversight. Oils, lotions, and dirt on your skin will prevent the adhesive from sticking effectively. This leads to your fake piercing falling off prematurely. Always clean the area with rubbing alcohol and let it dry completely for the best adhesion.
Over-Applying Adhesive
While you want a strong bond, using too much body glue can be counterproductive. Excess glue creates a messy look, makes the piercing less convincing, and can be harder to remove without residue. Apply a thin, precise amount only to the contact points of the jewelry. Less is often more for a clean finish.
Rushing the Drying Process
Impatience is another pitfall. Not allowing the craft glue to fully dry when attaching gems to the wire, or not letting the body glue cure on your skin, will result in the components detaching. Always follow the drying times recommended by the adhesive manufacturers to ensure a durable and long-lasting fake piercing.
Troubleshooting
Piercing Won’t Stick or Falls Off Quickly
If your fake piercing isn’t adhering well, the most likely culprit is insufficient skin preparation or too little adhesive. Ensure your skin is completely clean and dry, free from any oils or lotions, before application. Re-clean the area with rubbing alcohol. Then, apply a fresh, small amount of body-safe adhesive to the contact points of your jewelry and hold it firmly in place for a full minute, allowing it to bond.
Skin Irritation or Redness
Should you experience any redness, itching, or irritation, remove the fake piercing immediately. This could indicate a sensitivity to the adhesive or the metal wire. Gently wash the area with mild soap and water. In the future, try a different brand of body-safe adhesive or ensure your craft wire is specifically labeled as hypoallergenic. Always perform a patch test on a small, inconspicuous area of skin before full application.
Gems Detach from the Wire
If the decorative gems keep falling off the wire, the initial craft glue used to attach them might not have been strong enough or didn’t fully cure. Re-attach the gems using a stronger, fast-drying craft glue (ensure it’s not the glue you’ll put on your skin). Apply a small dot of glue to the gem’s backing and press it firmly onto the wire, holding it for an extended period. Allow ample time for the glue to dry completely, ideally several hours, before handling or applying the piece to your skin.
Key Takeaways
- Always use body-safe adhesives and hypoallergenic wire to prevent skin irritation.
- Thorough skin cleaning with rubbing alcohol is essential for proper adhesion.
- Craft your jewelry carefully, ensuring smooth edges for comfort and a realistic look.
- Apply body glue sparingly and precisely to avoid a messy appearance.
- Allow all glues to dry and cure completely for maximum durability.
- Consider adding subtle makeup contouring to enhance the piercing’s realism.
Frequently Asked Questions
How long does a fake belly button piercing last?
The lifespan of your fake piercing depends on the adhesive used and your activity level. With a good body-safe adhesive and proper application, it can last anywhere from a few hours to a full day. Sweating, swimming, or vigorous movement will likely reduce its staying power. It’s best for single-event wear.
Is it safe to sleep with a fake belly button piercing on?
It’s generally not recommended to sleep with a fake belly button piercing. The adhesive could become uncomfortable, and the jewelry might shift, get caught on bedding, or detach. This could potentially cause skin irritation or even accidentally get stuck if you roll onto it. It’s best to remove it before bed.
How do I remove the fake piercing and adhesive residue?
To remove the fake piercing, gently peel it away from your skin. For any stubborn adhesive residue, use rubbing alcohol or a specialized adhesive remover designed for body glues. Apply it to a cotton pad and gently rub the area until the residue dissolves. Always moisturize your skin afterward to keep it hydrated.
Can I reuse the fake belly button jewelry?
Yes, if crafted carefully, you can often reuse the wire and gem jewelry. After removal, gently clean any remaining adhesive from the wire and gems using rubbing alcohol. Store it in a small, clean container to prevent bending or damage. This makes it ready for your next application.
Our Top Recommended Finds
- Hypoallergenic Craft Wire: Look for 22-gauge stainless steel or sterling silver wire from craft stores. It’s flexible and less likely to cause irritation.
- Body-Safe Adhesive: Spirit gum or Pros-Aide cosmetic adhesive are excellent choices for secure, temporary skin application. They are designed for theatrical use and are generally safe.
- Flat-Backed Rhinestones/Gems: Available in various sizes and colors at craft supply stores, these are perfect for adding sparkle to your fake piercing.
Embrace Your Inner Style Explorer
Creating a fake belly button piercing is more than just a craft project; it’s an invitation to explore your personal style without any long-term commitment. It offers a fantastic way to test out a new look for a special occasion, a themed party, or simply to satisfy your curiosity.
So, why not gather your materials today and give it a try? Experiment with different gem colors and wire shapes to find what truly reflects your unique aesthetic. This small, fun change could be just the confidence boost you’re looking for!
Beginner-friendly templates, step-by-step guides,
and weekly project ideas in your inbox.