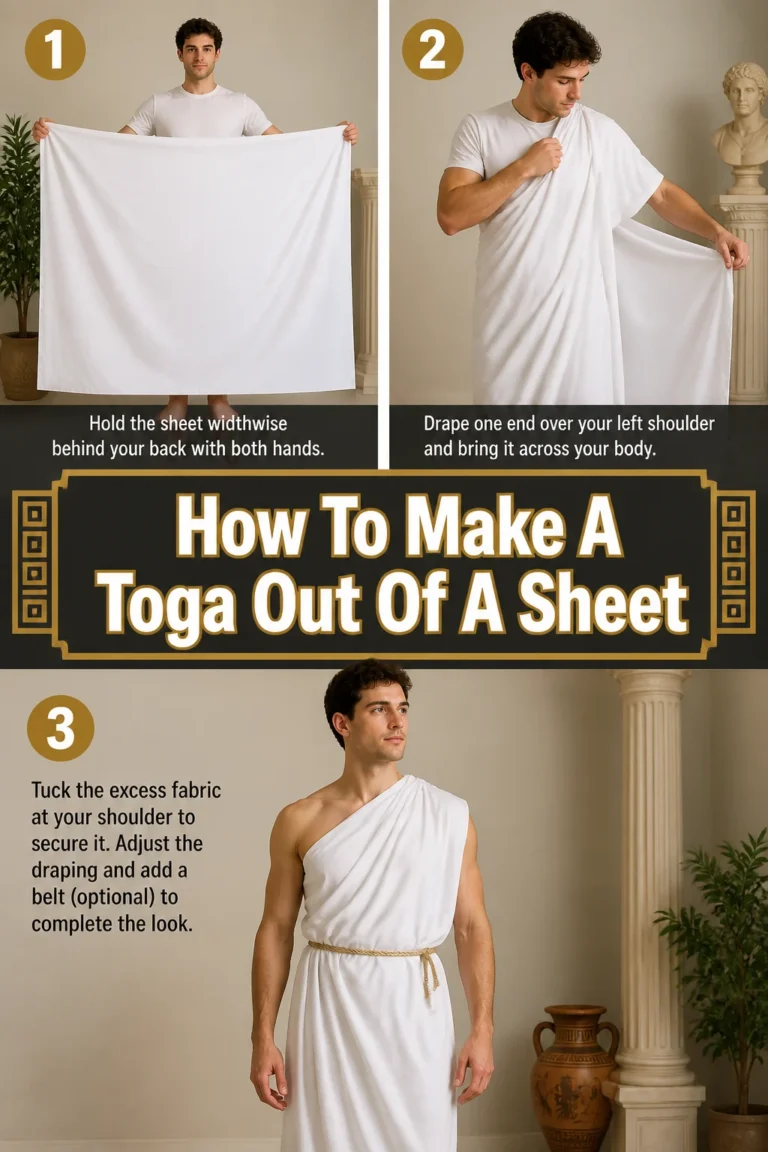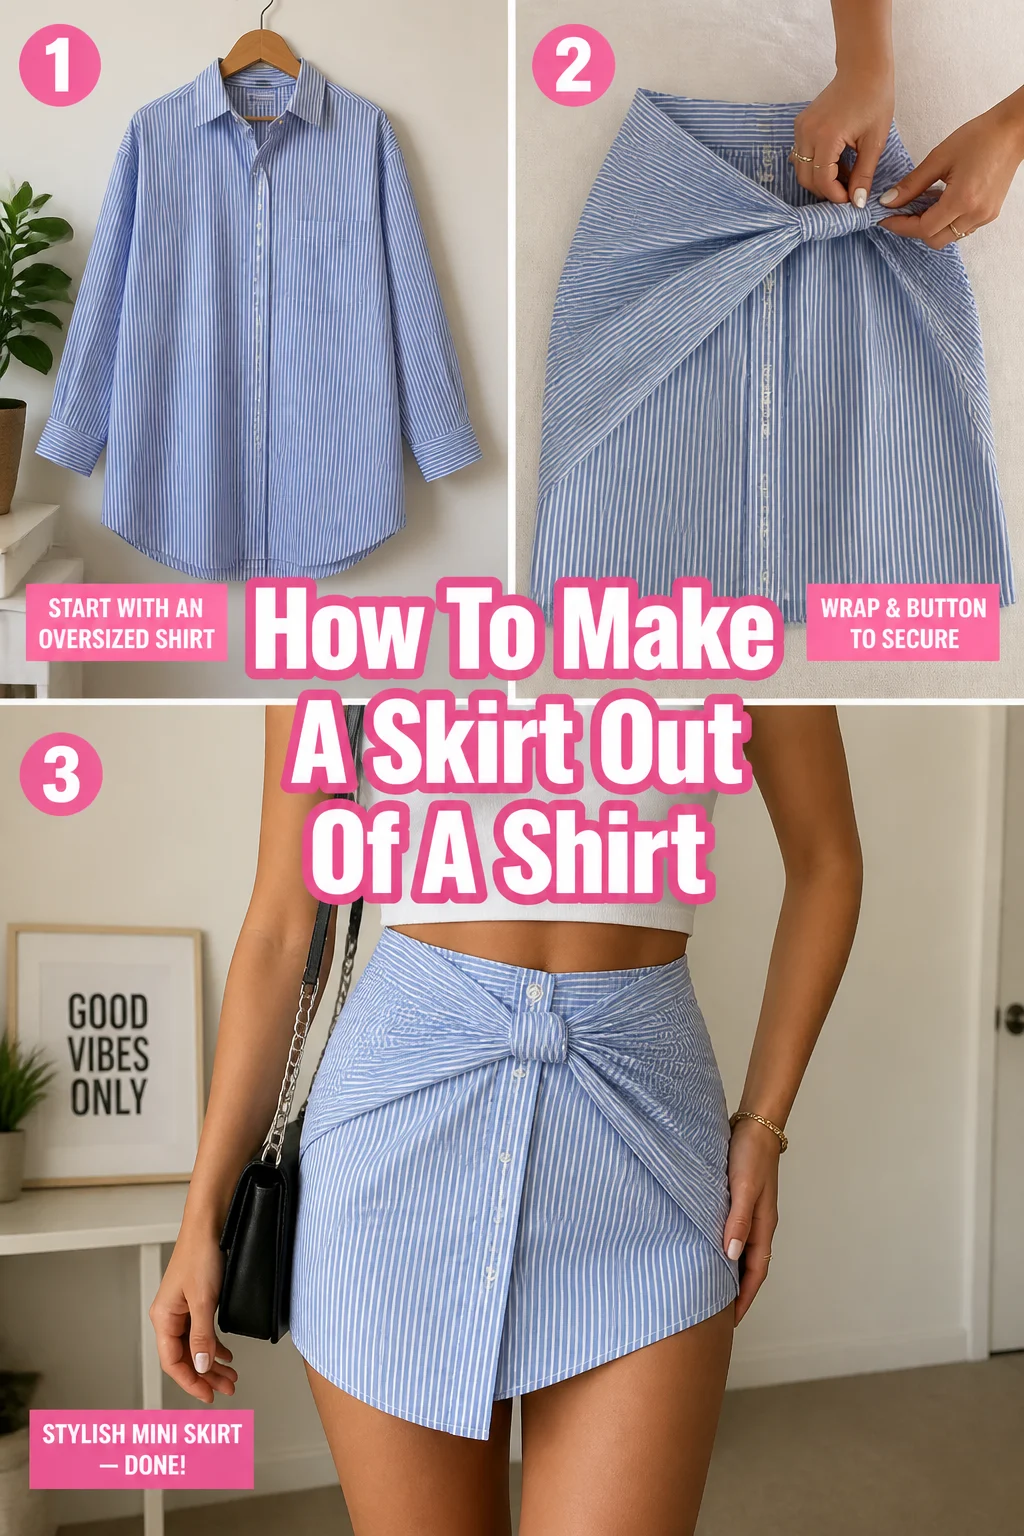
🧵 How To Make A Skirt Out Of A Shirt

Beginner-friendly templates, step-by-step guides,
and weekly project ideas in your inbox.
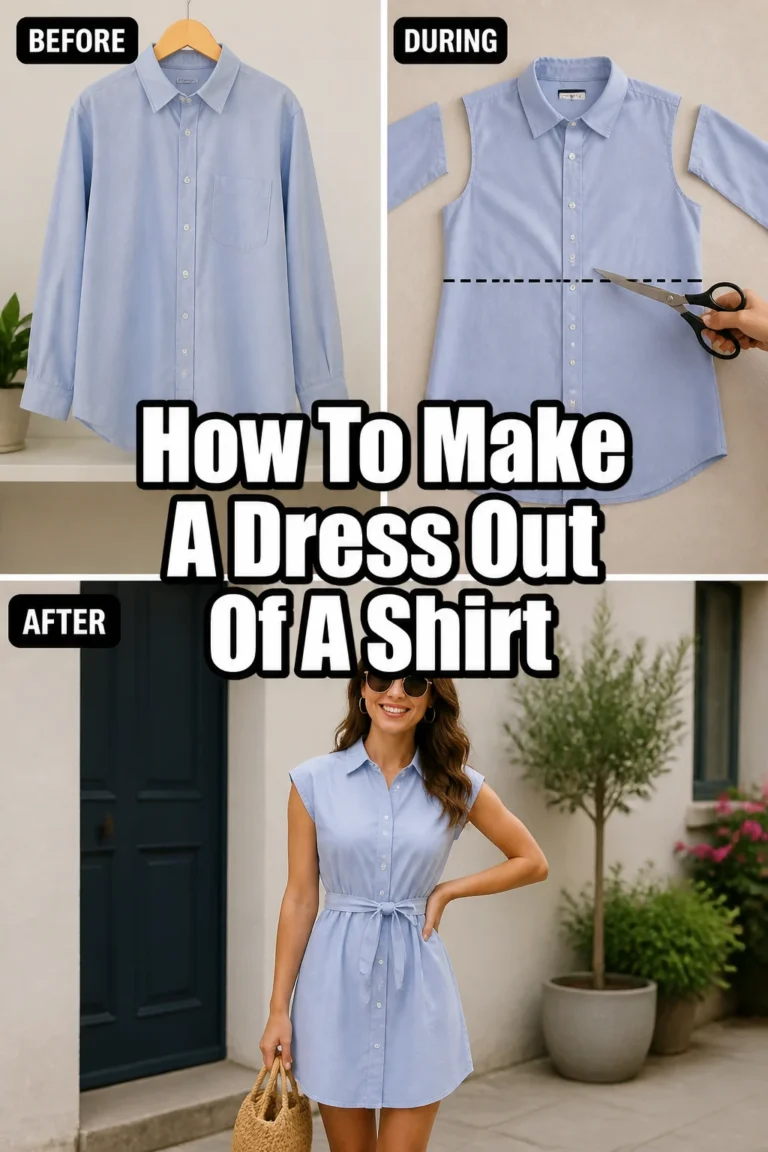
Transforming an old shirt into a stylish skirt is a fantastic way to refresh your wardrobe and practice your sewing skills.
I’ve made several skirts this way, finding joy in giving forgotten garments a new life.
This guide will walk you through each step, making the process simple and rewarding.

Quick Overview
You’re about to create a custom-fit skirt, perfect for casual wear or as a unique gift. It’s an eco-friendly project that turns textile waste into a fashion statement.
- Time needed: 2-4 hours (depending on sewing experience)
- Difficulty: Beginner
- What you’ll need: An old shirt, fabric scissors, sewing machine (or needle and thread), pins, measuring tape, elastic (optional), iron.
Step-by-Step Instructions
Step 1: Choose Your Shirt and Plan
Select a shirt that has enough fabric and a suitable print or color. T-shirts, button-downs, or even oversized men’s shirts work well. Consider the fabric type; stretchy knits are forgiving, while woven fabrics offer more structure.
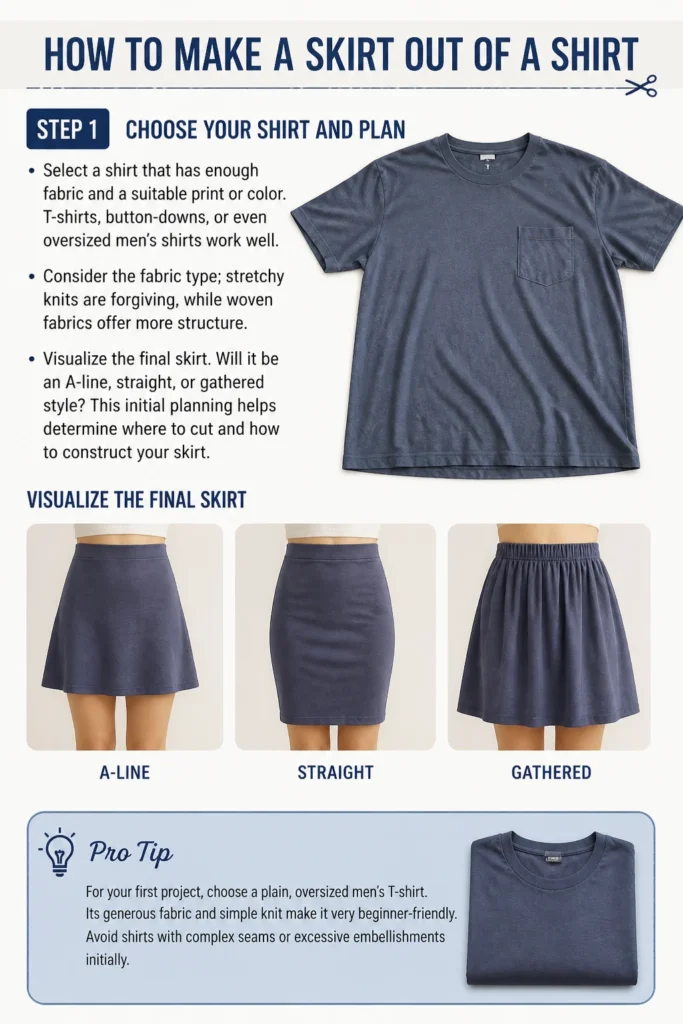
Visualize the final skirt. Will it be an A-line, straight, or gathered style? This initial planning helps determine where to cut and how to construct your skirt.
Pro Tip: For your first project, choose a plain, oversized men’s T-shirt. Its generous fabric and simple knit make it very beginner-friendly. Avoid shirts with complex seams or excessive embellishments initially.
Step 2: Prepare the Shirt for Cutting
Lay your chosen shirt flat on a large, clean surface. Smooth out any wrinkles. An iron can help here, ensuring precise measurements.
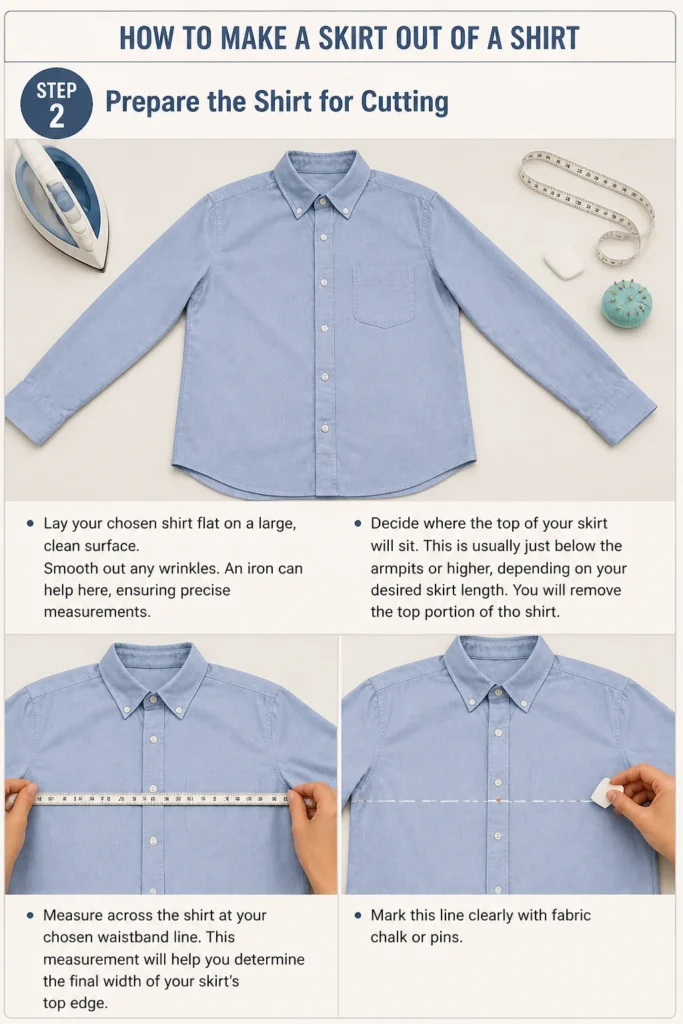
Decide where the top of your skirt will sit. This is usually just below the armpits or higher, depending on your desired skirt length. You will remove the top portion of the shirt.
Measure across the shirt at your chosen waistband line. This measurement will help you determine the final width of your skirt’s top edge. Mark this line clearly with fabric chalk or pins.
Step 3: Cut the Shirt Body
Carefully cut straight across the marked line, separating the top of the shirt (sleeves, collar, shoulders) from the main body. Use sharp fabric scissors for a clean edge. Try to cut as straight as possible.
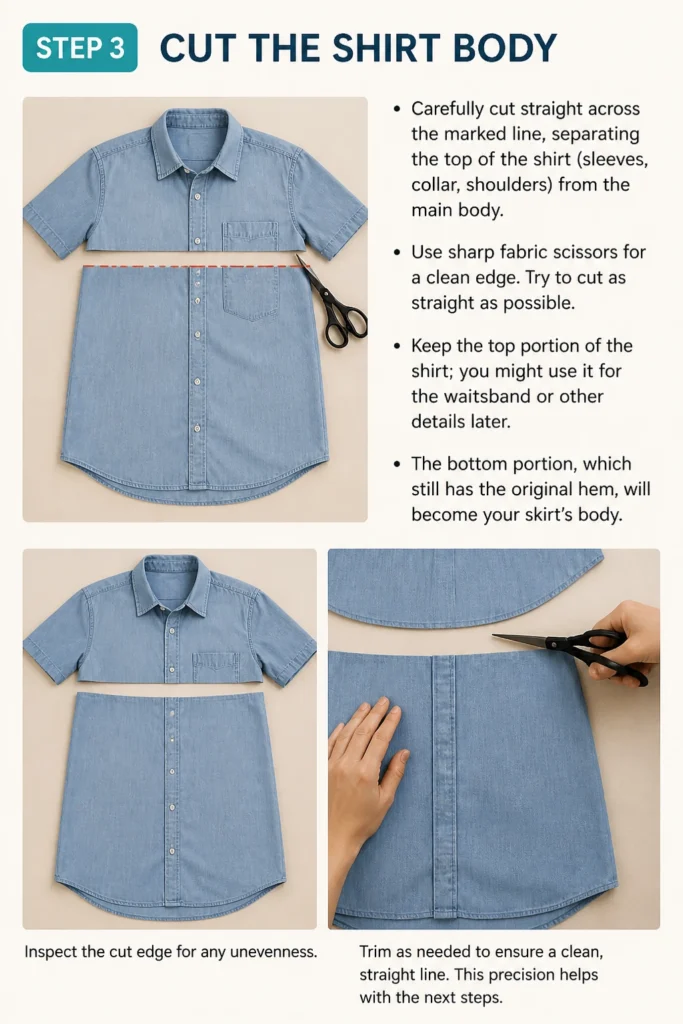
Keep the top portion of the shirt; you might use it for the waistband or other details later. The bottom portion, which still has the original hem, will become your skirt’s body.
Inspect the cut edge for any unevenness. Trim as needed to ensure a clean, straight line. This precision helps with the next steps.
Step 4: Determine Skirt Length and Hem Allowance
Try on the cut shirt body (or hold it up to yourself) to gauge the desired length. Remember that the original hem of the shirt will become the bottom hem of your skirt.
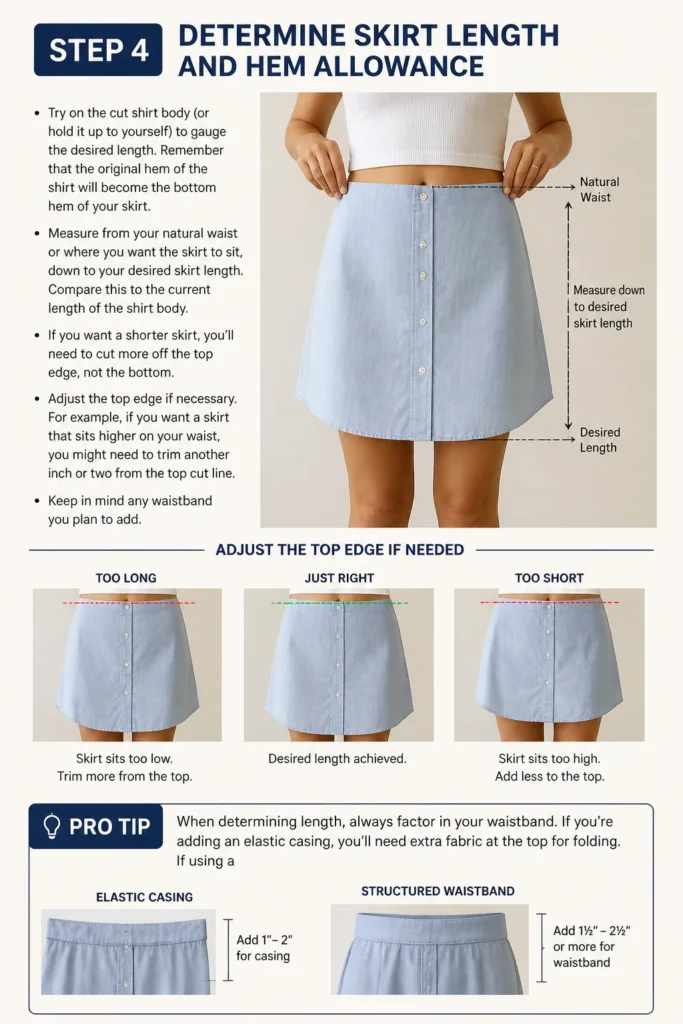
Measure from your natural waist or where you want the skirt to sit, down to your desired skirt length. Compare this to the current length of the shirt body. If you want a shorter skirt, you’ll need to cut more off the top edge, not the bottom.
Adjust the top edge if necessary. For example, if you want a skirt that sits higher on your waist, you might need to trim another inch or two from the top cut line. Keep in mind any waistband you plan to add.
Pro Tip: When determining length, always factor in your waistband. If you’re adding an elastic casing, you’ll need extra fabric at the top for folding. If using a separate fabric waistband, the skirt body length should be exactly what you want the finished skirt to be, sans waistband.
Step 5: Create the Waistband (Elastic Casing Method)
Fold the raw top edge of your skirt body down towards the inside by about 1/4 inch. Press it flat with an iron. This initial fold creates a neat edge.
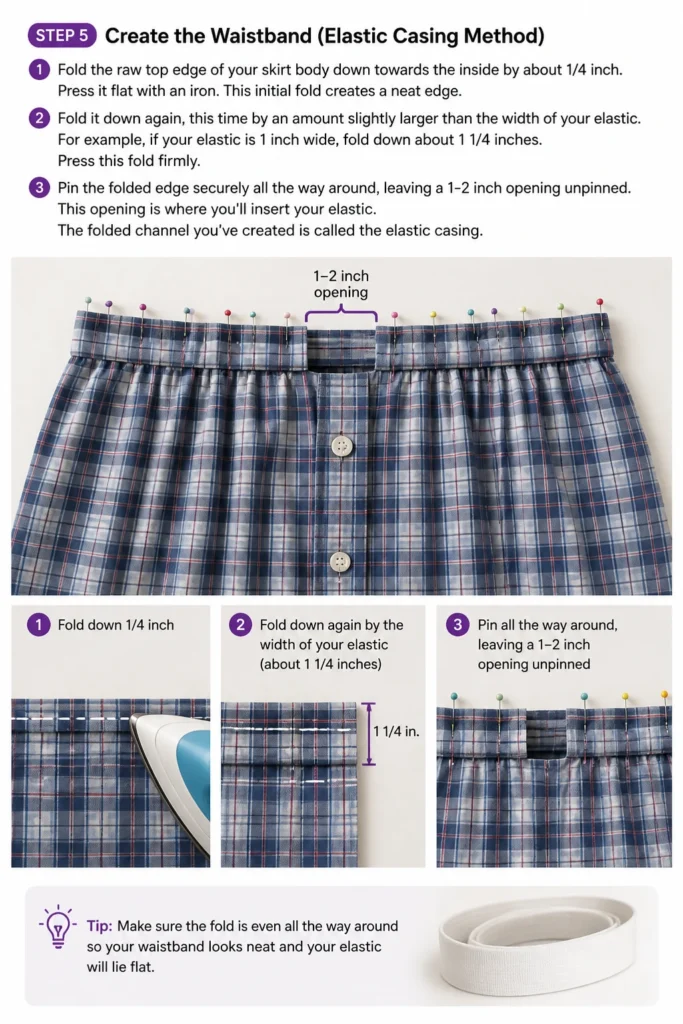
Fold it down again, this time by an amount slightly larger than the width of your elastic. For example, if your elastic is 1 inch wide, fold down about 1 1/4 inches. Press this fold firmly.
Pin the folded edge securely all the way around, leaving a 1-2 inch opening unpinned. This opening is where you’ll insert your elastic. The folded channel you’ve created is called the elastic casing.
Step 6: Stitch the Waistband Casing
Sew along the inner edge of the folded casing, close to the raw edge of the fabric. Use a straight stitch on your sewing machine. Make sure to backstitch at the beginning and end of your seam.
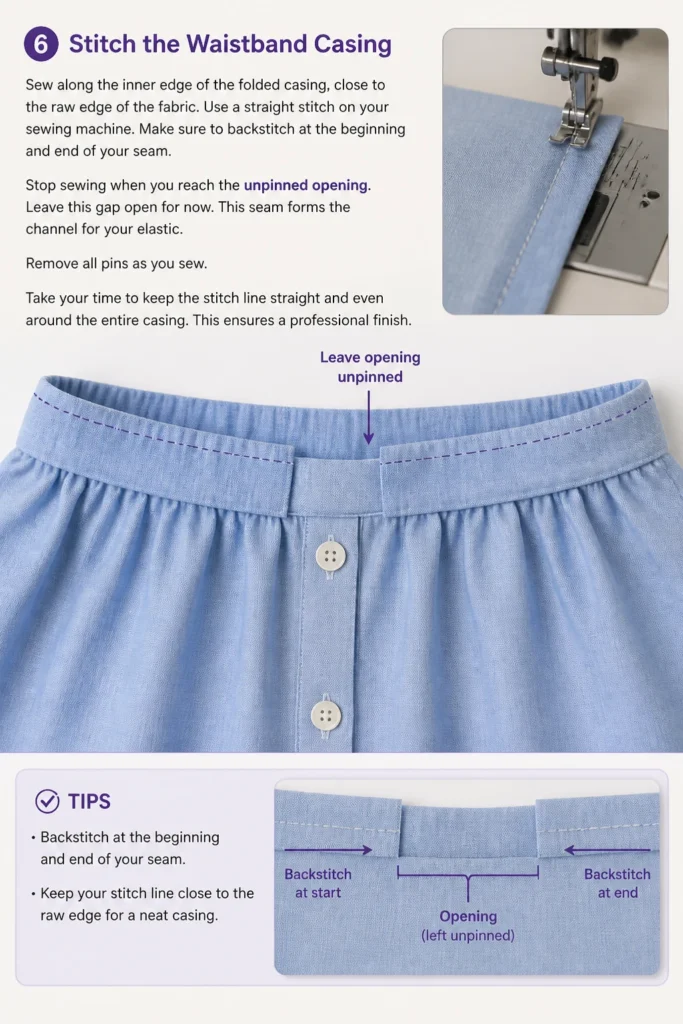
Stop sewing when you reach the unpinned opening. Leave this gap open for now. This seam forms the channel for your elastic.
Remove all pins as you sew. Take your time to keep the stitch line straight and even around the entire casing. This ensures a professional finish.
Step 7: Insert the Elastic
Measure your waist (or where you want the skirt to sit). Cut a piece of elastic that is 2-3 inches shorter than this measurement. This ensures a snug but comfortable fit.
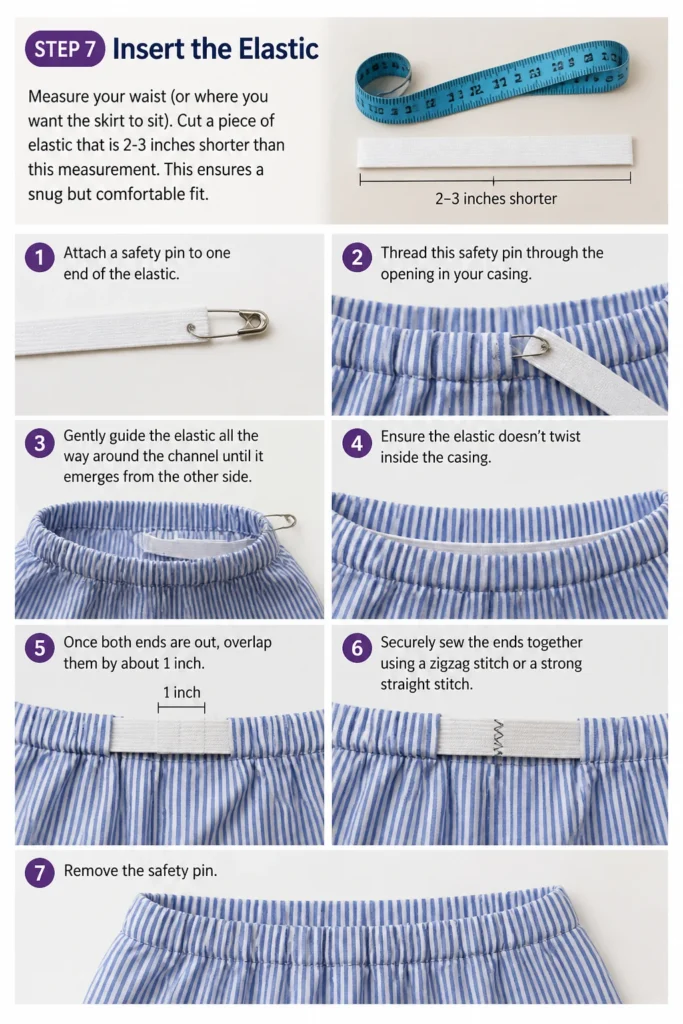
Attach a safety pin to one end of the elastic. Thread this safety pin through the opening in your casing. Gently guide the elastic all the way around the channel until it emerges from the other side.
Ensure the elastic doesn’t twist inside the casing. Once both ends are out, overlap them by about 1 inch. Securely sew the ends together using a zigzag stitch or a strong straight stitch. Remove the safety pin.
Step 8: Close the Waistband Opening and Finish
Tuck the joined elastic ends fully into the casing. The fabric will naturally gather around the elastic. Distribute the gathers evenly around the skirt.
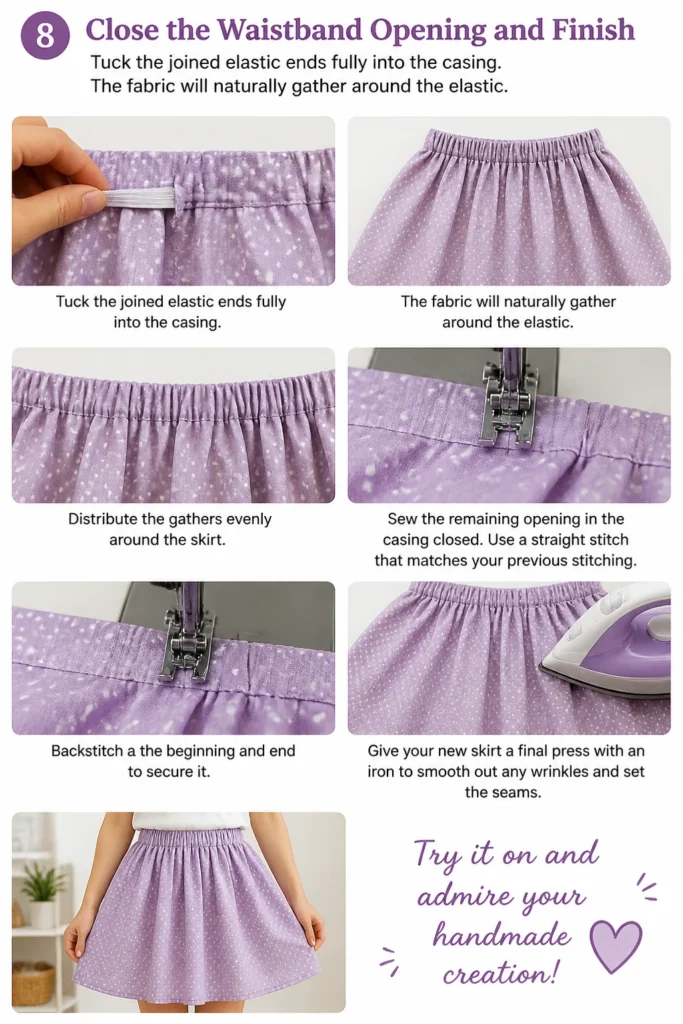
Sew the remaining opening in the casing closed. Use a straight stitch that matches your previous stitching. Backstitch at the beginning and end to secure it.
Give your new skirt a final press with an iron to smooth out any wrinkles and set the seams. Try it on and admire your handmade creation!
Common Mistakes to Avoid
Uneven Cuts
Rushing the initial cutting can lead to a crooked skirt. Always lay your shirt perfectly flat, use a ruler or measuring tape, and make clear marks before cutting. Sharp fabric scissors are essential for a clean, straight line.
Wrong Elastic Length
Cutting elastic too long makes the skirt fall down, while too short makes it uncomfortably tight. Measure your waist accurately and subtract 2-3 inches for a comfortable fit. Test the elastic length around your body before sewing the ends together.
Skipping Pre-Washing
Fabrics can shrink, especially cotton. Always wash and dry your shirt before you start cutting and sewing. This prevents your finished skirt from shrinking unexpectedly after its first wash, ensuring it maintains its size and shape.
Rushing the Hem
While the original shirt hem becomes your skirt’s bottom hem, the top waistband hem needs care. Skimping on pressing or pinning the waistband casing can result in a wavy, unprofessional finish. Take your time to fold, press, and pin meticulously before stitching.
Troubleshooting
Skirt Too Tight/Loose
If your skirt feels too tight, the elastic might be too short. Carefully unpick a small section of your waistband casing, cut the elastic, and add a small extension piece, then re-sew. If it’s too loose, unpick the casing, pull out the elastic, trim it shorter, and re-sew.
Uneven Hem
Since you’re using the shirt’s original hem, this is less common. However, if your initial cut for the skirt body was uneven, the skirt might hang crookedly. If the top edge is uneven, it can cause the skirt to twist. Carefully unpick the waistband, re-trim the top edge evenly, and re-sew the casing. For the bottom hem, if it’s truly uneven, you might need to trim and re-hem, though this is more advanced.
Seams Unraveling
This usually happens if you didn’t backstitch at the beginning and end of your seams, or if your stitch length was too long. Go back over the unraveling section with your machine, making sure to backstitch firmly at both ends. Consider using a slightly shorter stitch length for stronger seams, especially on stretchy fabrics.
Key Takeaways
- Precision is key: Accurate measuring and cutting ensure a well-fitting and professional-looking skirt.
- Pre-wash your fabric: Always wash and dry your shirt before starting to prevent shrinkage issues later.
- Use sharp tools: Good fabric scissors make clean cuts, and an iron helps create crisp folds.
- Take your time: Rushing steps like pinning and sewing can lead to mistakes and a less refined finish.
- Elastic is your friend: It creates a comfortable, adjustable waistband, perfect for beginner projects.
- Embrace creativity: Don’t be afraid to experiment with different shirt types and embellishments as you gain confidence.
Frequently Asked Questions
What type of shirt works best for this project?
Oversized T-shirts, especially men’s styles, are ideal due to their generous fabric and often simple construction. Knit fabrics are forgiving and comfortable. Button-down shirts can also work, but they might require more advanced techniques to manage the placket and side seams for a smooth skirt shape.
Can I hand sew this skirt instead of using a machine?
Yes, you absolutely can hand sew this skirt. It will take significantly longer, but it’s entirely possible. Use a strong running stitch or backstitch for all seams, ensuring they are secure. A thimble will be helpful to protect your fingers.
How can I add pockets to my skirt?
Adding pockets is a great next step once you’re comfortable with the basic construction. You can add simple patch pockets to the outside of the skirt, or for a more integrated look, add in-seam pockets. This involves cutting pocket pieces and sewing them into the side seams of the skirt before completing the waistband.
How do I care for my new skirt?
Care for your new skirt based on the original shirt’s fabric content. Check the care label of the shirt (if available) or use general guidelines for the fabric type (e.g., machine wash cold, tumble dry low for cotton knits). Pre-washing the shirt helps ensure consistent care instructions.
Our Top Recommended Finds
- Fiskars Fabric Scissors: Sharp, ergonomic scissors make cutting fabric a breeze and prevent fraying.
- Dritz Braided Elastic: High-quality elastic holds its stretch and provides a comfortable fit for waistbands.
- Singer Start 1304 Sewing Machine: A basic, user-friendly sewing machine perfect for beginners learning to stitch.
Your Next Creative Adventure Awaits
You’ve successfully transformed a simple shirt into a unique, wearable skirt. This project is just the beginning of your sewing journey.
Consider trying out different shirt types, adding embellishments, or even experimenting with patterns. The skills you’ve learned here are transferable to countless other DIY fashion projects.
Don’t let your creativity stop now. Pick out another old garment and see what new life you can breathe into it today!
Beginner-friendly templates, step-by-step guides,
and weekly project ideas in your inbox.