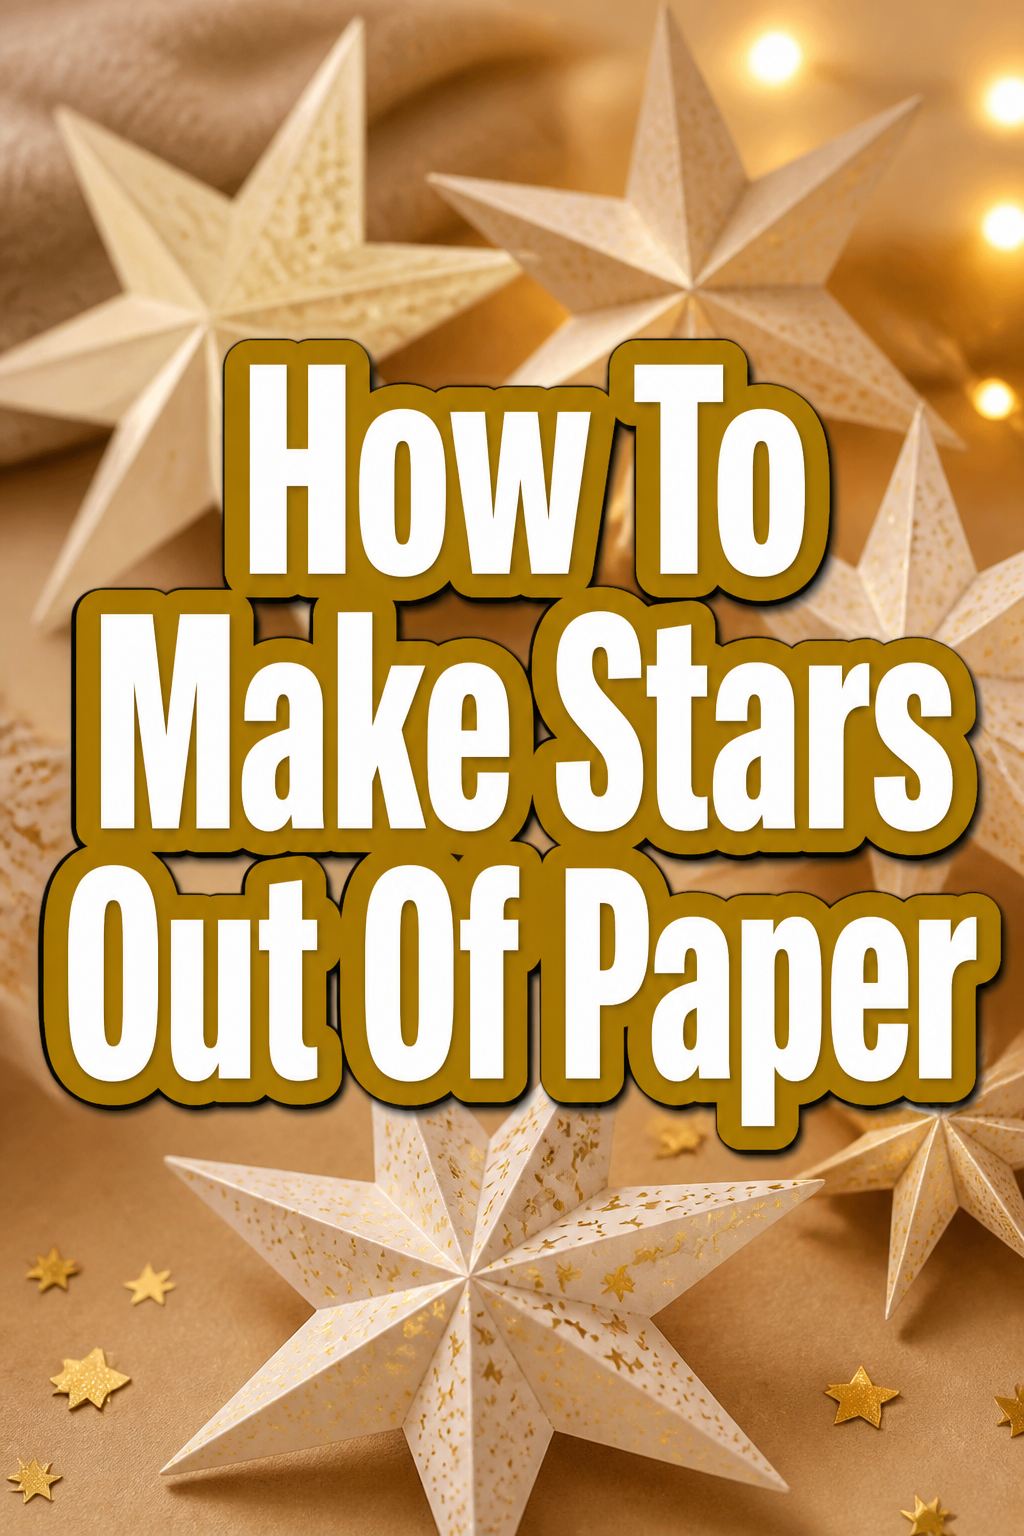
✨ How To Make Stars Out Of Paper

Beginner-friendly templates, step-by-step guides,
and weekly project ideas in your inbox.
I’ve folded countless paper stars over the years, turning simple strips into tiny treasures. This guide shares all my best tips and tricks for making them.
You’ll discover how satisfying it is to transform a flat piece of paper into a charming three-dimensional star. Get ready to create beautiful decorations or thoughtful gifts.
Quick Overview
You’re about to learn the delightful craft of making paper stars, perfect for decoration or sharing. This simple folding technique is surprisingly addictive once you get the hang of it.
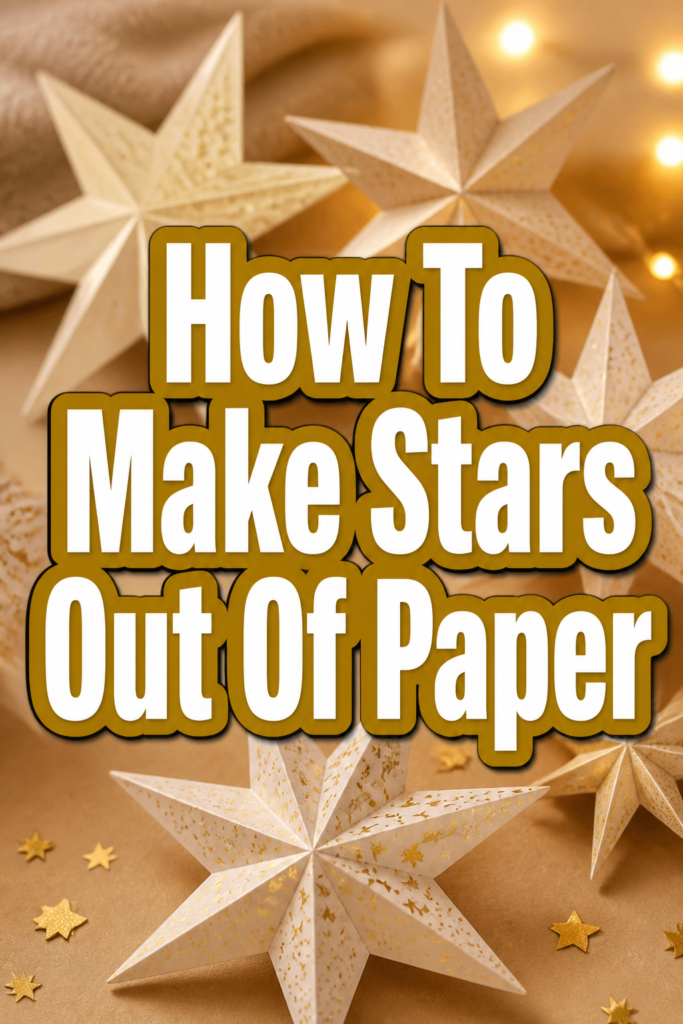
You’ll end up with a collection of puffy, five-pointed stars, ready to brighten any space.
- Time needed: 5-10 minutes per star (once you’ve practiced)
- Difficulty: Beginner
- What you’ll need: Paper strips (ideally 1/2 inch x 11 inches or similar), optional ruler and scissors
Step-by-Step Instructions
Step 1: Prepare Your Paper Strips
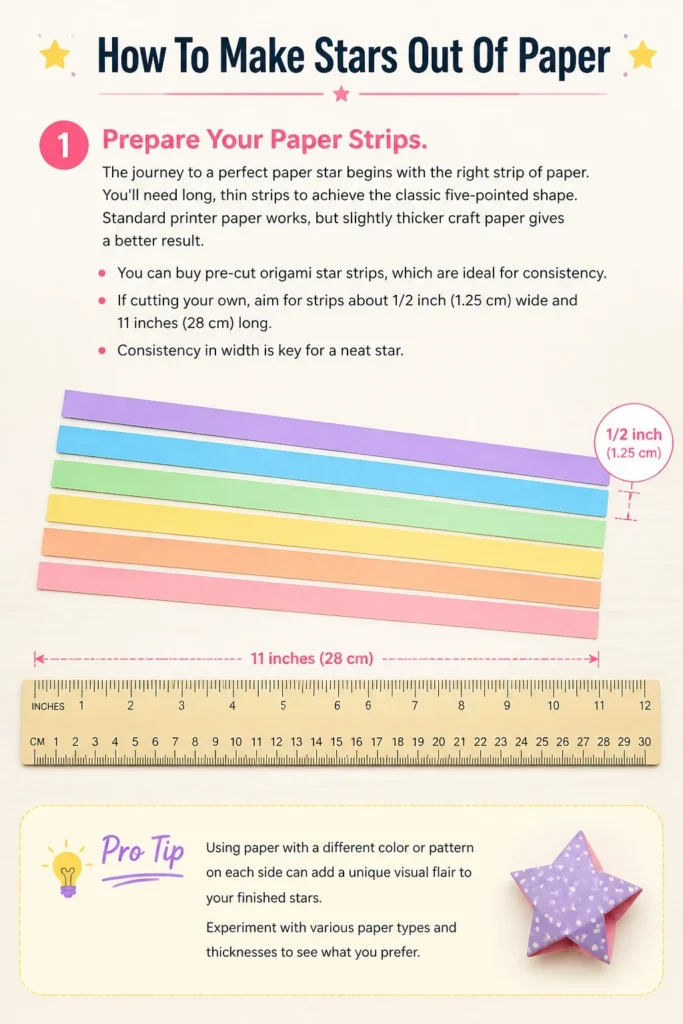
The journey to a perfect paper star begins with the right strip of paper. You’ll need long, thin strips to achieve the classic five-pointed shape. Standard printer paper works, but slightly thicker craft paper gives a better result.
You can buy pre-cut origami star strips, which are ideal for consistency. If cutting your own, aim for strips about 1/2 inch (1.25 cm) wide and 11 inches (28 cm) long. Consistency in width is key for a neat star.
Pro Tip: Using paper with a different color or pattern on each side can add a unique visual flair to your finished stars. Experiment with various paper types and thicknesses to see what you prefer.
Step 2: Form the Initial Knot
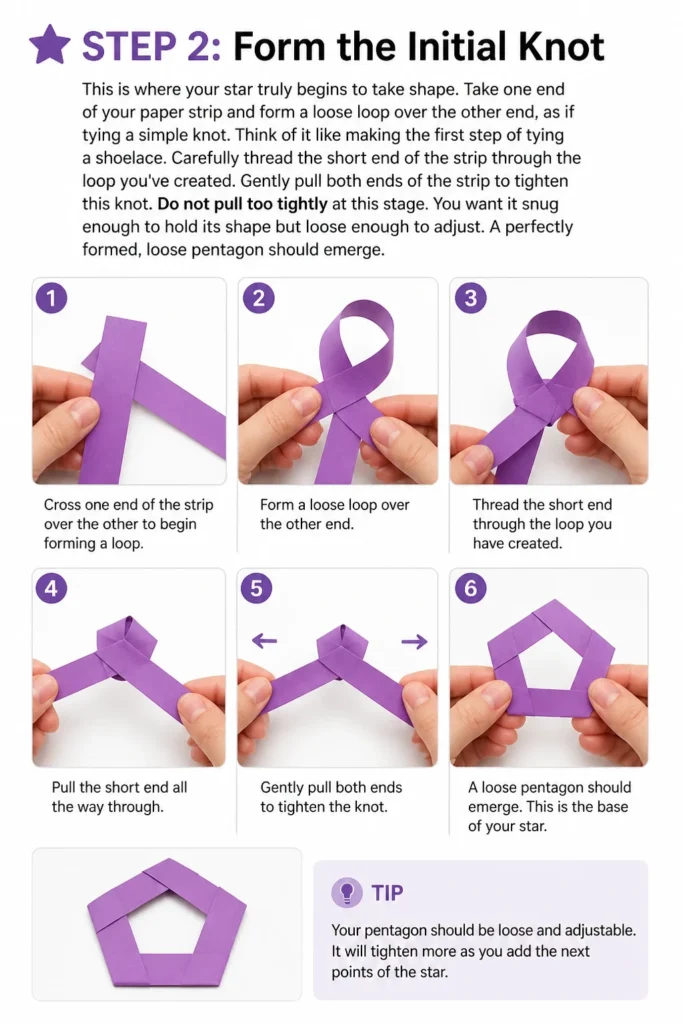
This is where your star truly begins to take shape. Take one end of your paper strip and form a loose loop over the other end, as if tying a simple knot. Think of it like making the first step of tying a shoelace.
Carefully thread the short end of the strip through the loop you’ve created. Gently pull both ends of the strip to tighten this knot. Do not pull too tightly at this stage.
You want it snug enough to hold its shape but loose enough to adjust. A perfectly formed, loose pentagon should emerge.
Step 3: Flatten the Pentagon
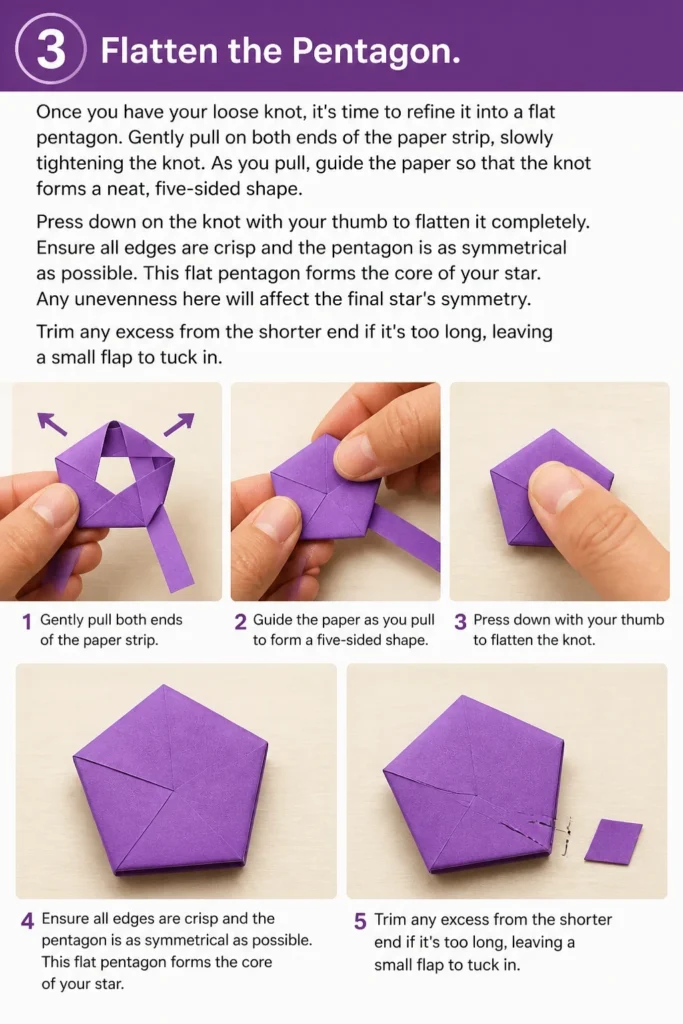
Once you have your loose knot, it’s time to refine it into a flat pentagon. Gently pull on both ends of the paper strip, slowly tightening the knot. As you pull, guide the paper so that the knot forms a neat, five-sided shape.
Press down on the knot with your thumb to flatten it completely. Ensure all edges are crisp and the pentagon is as symmetrical as possible. This flat pentagon forms the core of your star.
Any unevenness here will affect the final star’s symmetry. Trim any excess from the shorter end if it’s too long, leaving a small flap to tuck in.
Step 4: Begin Wrapping the Pentagon
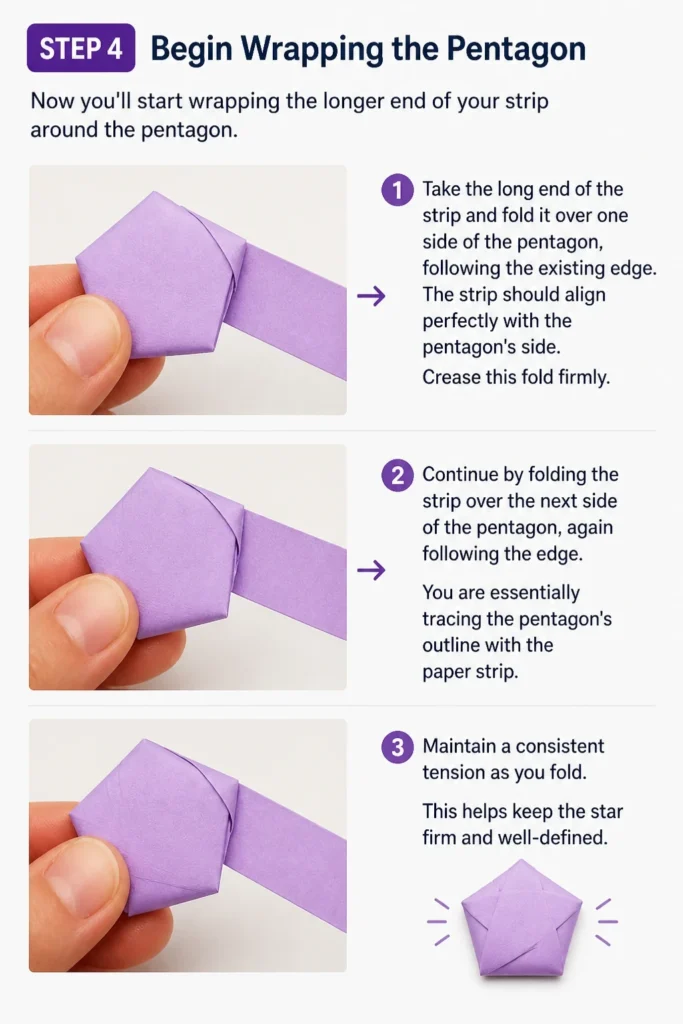
Now you’ll start wrapping the longer end of your strip around the pentagon. Take the long end of the strip and fold it over one side of the pentagon, following the existing edge. The strip should align perfectly with the pentagon’s side.
Crease this fold firmly. Continue by folding the strip over the next side of the pentagon, again following the edge. You are essentially tracing the pentagon’s outline with the paper strip.
Maintain a consistent tension as you fold. This helps keep the star firm and well-defined.
Step 5: Continue Wrapping Neatly
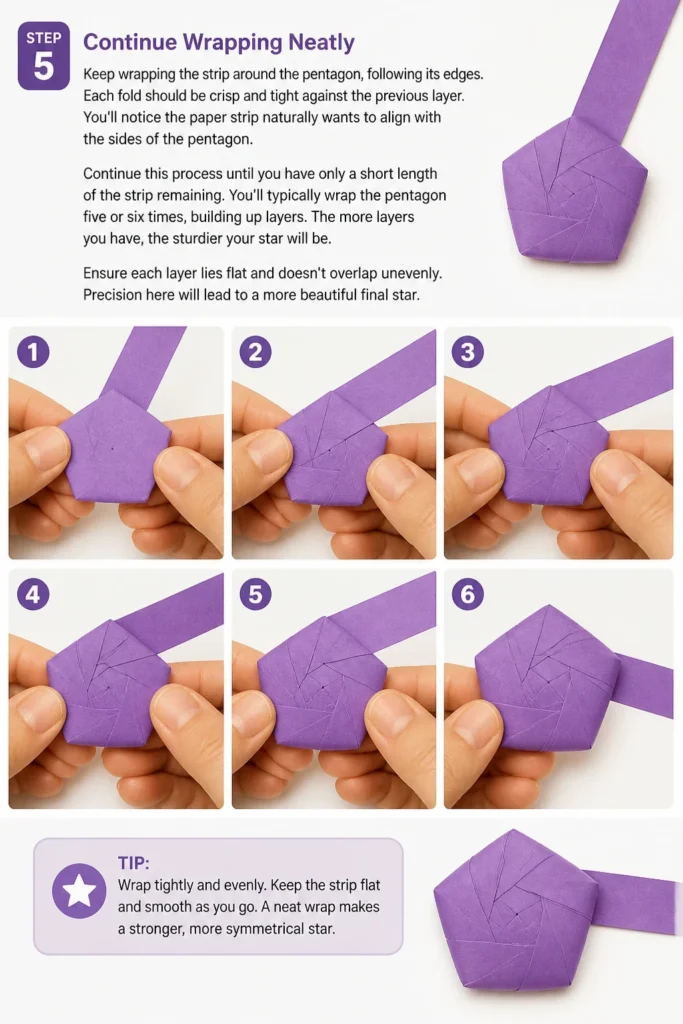
Keep wrapping the strip around the pentagon, following its edges. Each fold should be crisp and tight against the previous layer. You’ll notice the paper strip naturally wants to align with the sides of the pentagon.
Continue this process until you have only a short length of the strip remaining. You’ll typically wrap the pentagon five or six times, building up layers. The more layers you have, the sturdier your star will be.
Ensure each layer lies flat and doesn’t overlap unevenly. Precision here will lead to a more beautiful final star.
Step 6: Tuck in the Final Strip End
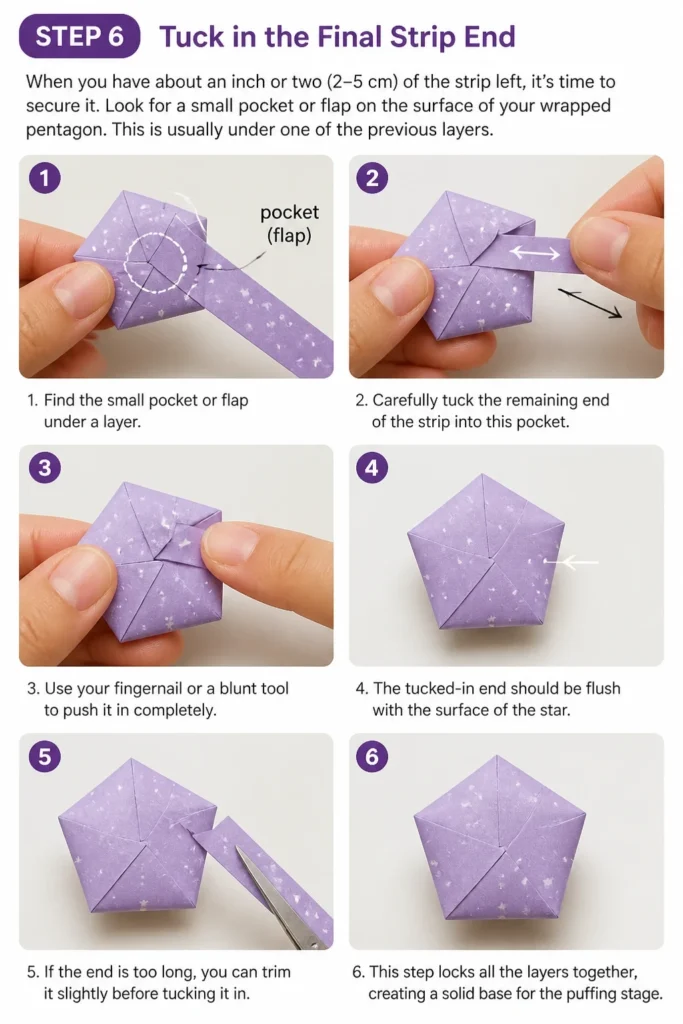
When you have about an inch or two (2-5 cm) of the strip left, it’s time to secure it. Look for a small pocket or flap on the surface of your wrapped pentagon. This is usually under one of the previous layers.
Carefully tuck the remaining end of the strip into this pocket. Use your fingernail or a blunt tool to push it in completely. The tucked-in end should be flush with the surface of the star.
If the end is too long, you can trim it slightly before tucking it in. This step locks all the layers together, creating a solid base for the puffing stage.
Step 7: Puff Up Your Star
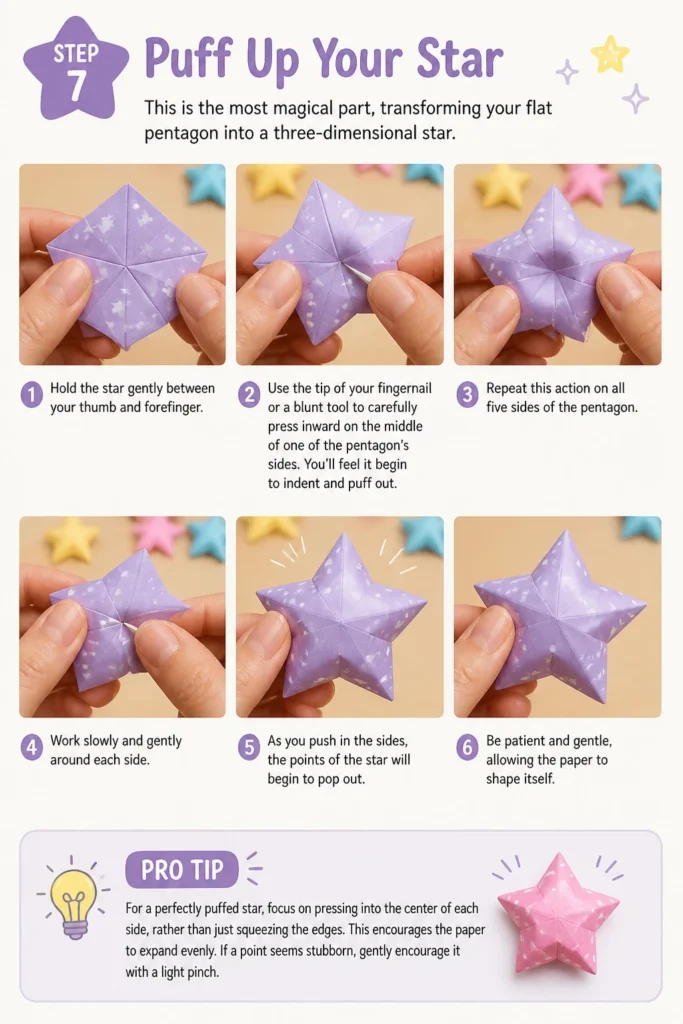
This is the most magical part, transforming your flat pentagon into a three-dimensional star. Hold the star gently between your thumb and forefinger. Use the tip of your fingernail or a blunt tool to carefully press inward on the middle of one of the pentagon’s sides.
You’ll feel it begin to indent and puff out. Repeat this action on all five sides of the pentagon. Work slowly and gently around each side.
As you push in the sides, the points of the star will begin to pop out. Be patient and gentle, allowing the paper to shape itself.
Pro Tip: For a perfectly puffed star, focus on pressing into the center of each side, rather than just squeezing the edges. This encourages the paper to expand evenly. If a point seems stubborn, gently encourage it with a light pinch.
Common Mistakes to Avoid
Uneven Strips
Starting with paper strips that aren’t consistently wide can lead to a lopsided star. If your strips vary in width, your folds won’t align properly. This makes it difficult to form a neat pentagon and wrap it evenly.
Always use a ruler and a sharp pair of scissors or a paper cutter to ensure your strips are uniform. Precision at the beginning saves frustration later on.
Over-tightening the Initial Knot
When you form the first knot, resist the urge to pull it too tight immediately. An overly tight knot makes it impossible to adjust the pentagon’s shape. It can also crease the paper too sharply, making the star look messy.
Aim for a snug but adjustable knot in Step 2. You’ll tighten it fully in Step 3, once the pentagon is properly formed.
Rushing the Puffing Stage
The final puffing step requires patience and a light touch. If you try to force the star to puff up too quickly or aggressively, the paper can tear. This is especially true with thinner papers.
Take your time, gently pressing each side inward. Work your way around the star, allowing the paper to naturally expand into its three-dimensional form. A slow, even approach yields the best results.
Troubleshooting
Star Doesn’t Look Like a Pentagon
If your initial knot or flattened shape doesn’t resemble a clear pentagon, don’t worry. This is a common issue for beginners. It usually means the knot wasn’t formed correctly or wasn’t flattened evenly.
Go back to Step 2. Gently undo the knot and try again, ensuring the short end passes cleanly through the loop. Take extra care in Step 3 to flatten the shape, guiding the paper into a five-sided form. Adjust the tension slowly until it looks right.
Star Tears While Puffing
Tears during the puffing stage are frustrating but often preventable. This usually happens because too much force was applied in one spot, or the paper itself was too thin or brittle.
If you’re using thin paper, try a slightly thicker craft paper for more durability. When puffing, use the soft pad of your finger or a rounded, blunt tool instead of a sharp fingernail. Apply even, gentle pressure to all five sides, rather than concentrating force on a single point.
Key Takeaways
- Start with uniformly cut paper strips for the best results.
- Form a loose initial knot, then carefully flatten it into a perfect pentagon.
- Wrap the strip around the pentagon with consistent tension for a sturdy base.
- Tuck the final end securely into a hidden pocket to lock the star’s structure.
- Puff your star gently and patiently, pressing inwards on each side to create its 3D shape.
- Practice makes perfect; don’t be discouraged if your first few stars aren’t flawless.
Frequently Asked Questions
What kind of paper is best for making paper stars?
The best paper is one that is slightly thicker than standard printer paper but not as thick as cardstock. Origami paper or craft paper strips specifically designed for stars work wonderfully. They offer enough stability to hold the puff but are flexible enough to fold without tearing.
Can I use different sizes of paper strips?
Absolutely! The size of your paper strips directly determines the size of your finished star. For small, delicate stars, use narrower and shorter strips (e.g., 1/4 inch x 8 inches). For larger stars, you’ll need wider and longer strips (e.g., 3/4 inch x 14 inches). Just ensure the width-to-length ratio remains consistent for good results.
How do I make my stars last longer?
To increase the longevity of your paper stars, you can apply a thin coat of clear sealant or craft varnish once they are fully puffed and dry. This adds a protective layer, making them more resistant to moisture and general wear. Handle them gently, as paper is always delicate.
Are there other ways to decorate paper stars?
Beyond using patterned paper, you can get creative with decorations. Try stamping small designs on the strips before folding. After the star is finished, you can add a touch of glitter glue to the tips, use fine-tipped markers for details, or even string them together to create a garland.
Our Top Recommended Finds
- Pre-cut Origami Star Paper Strips: These are a game-changer for beginners, ensuring perfect dimensions every time. They come in a vast array of colors and patterns.
- Small, Sharp Craft Scissors: Essential for precise paper cutting if you’re making your own strips. A sharp blade prevents ragged edges.
- Craft Mat and Ruler: Ideal for accurately measuring and cutting your own paper strips. A self-healing mat protects your work surface.
Embrace the Art of Paper Stars
You now have all the knowledge and steps to create your very own collection of charming paper stars. This craft is a wonderful way to relax and engage your creativity.
Don’t be afraid to experiment with different papers and colors. Each star you make will carry a unique charm.
Start folding today and watch as simple paper transforms into something truly special. These little stars are perfect for decorating, gifting, or simply enjoying the process of creation.
Beginner-friendly templates, step-by-step guides,
and weekly project ideas in your inbox.