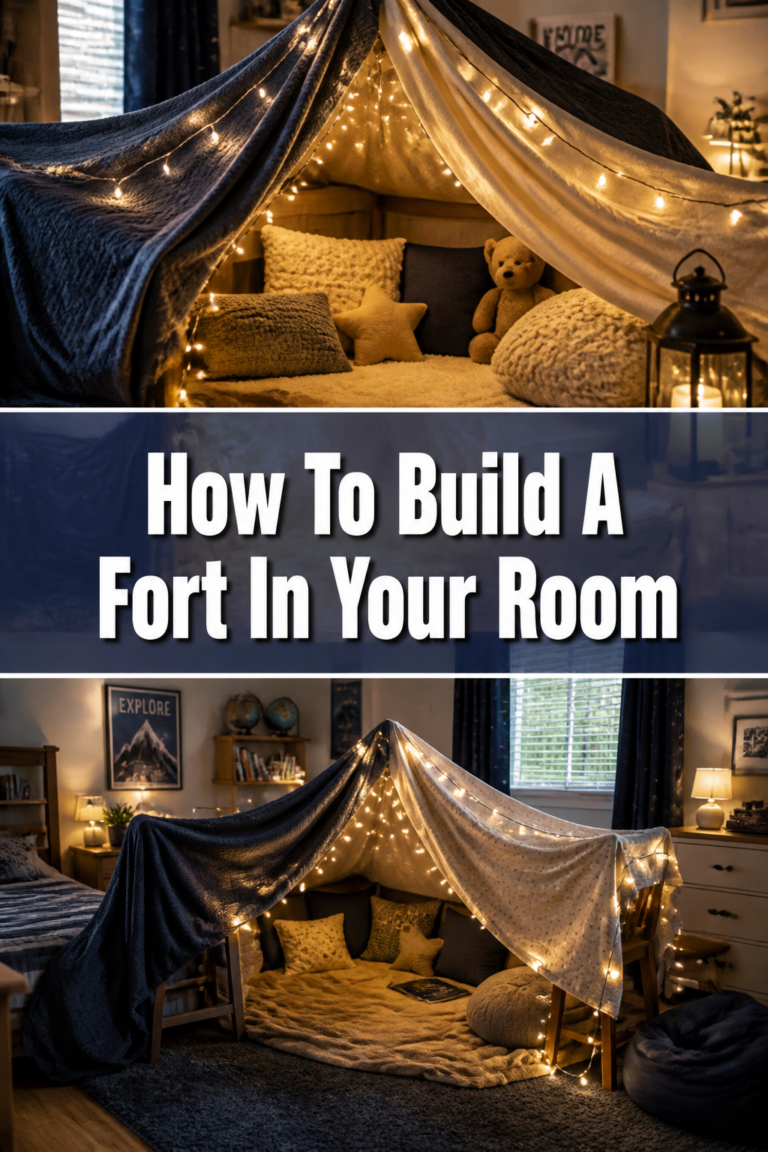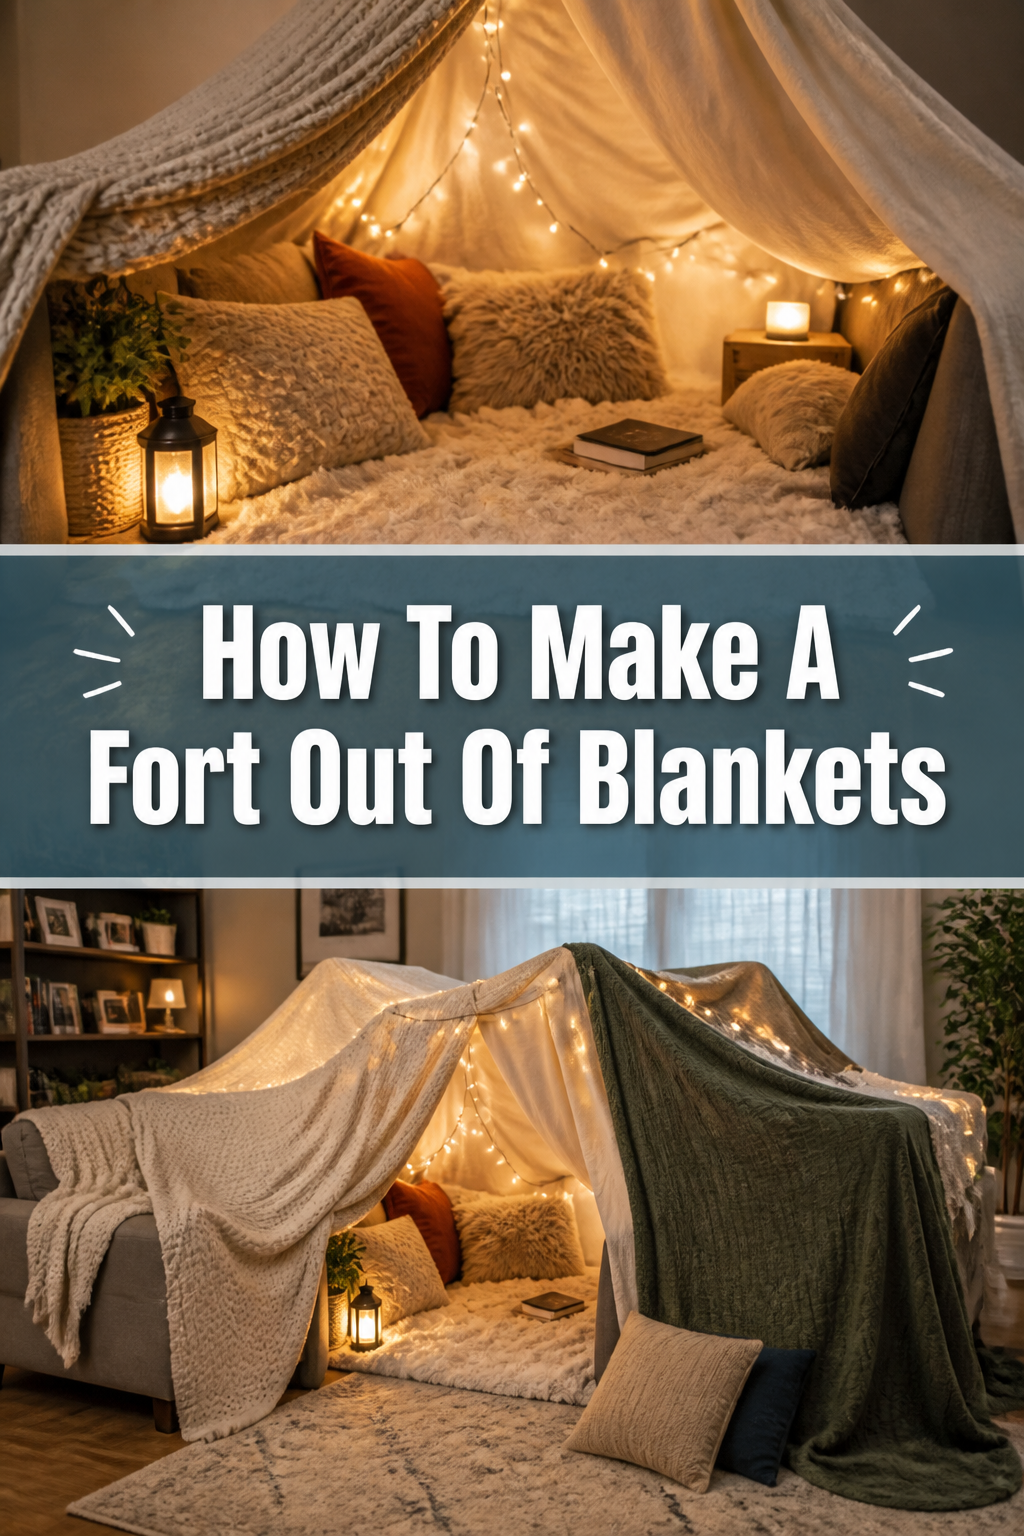
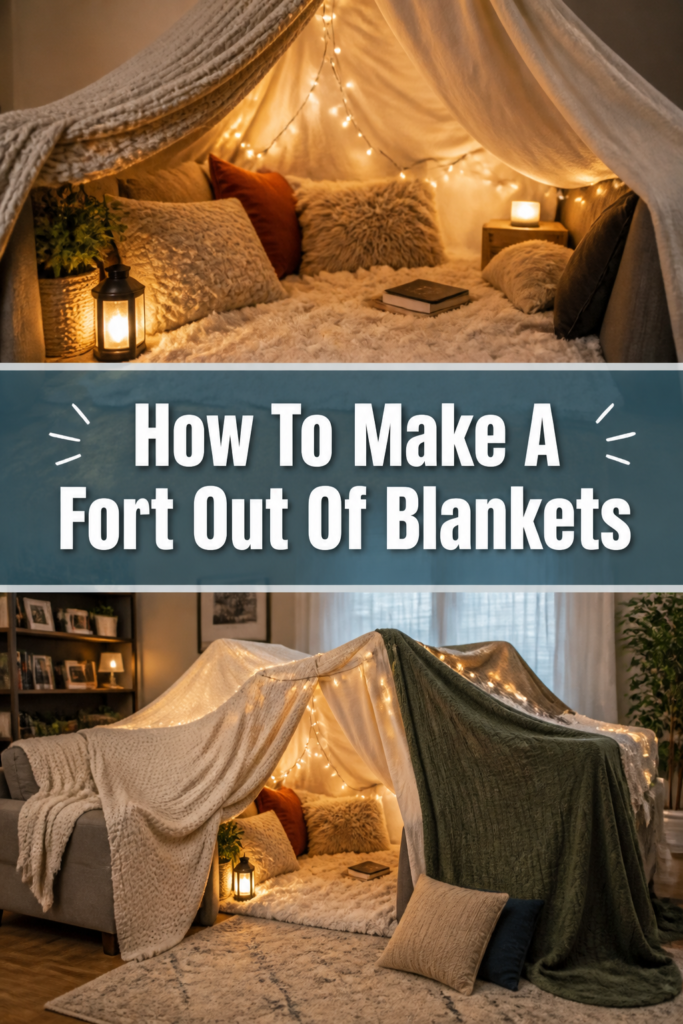
🏠 How To Make A Fort Out Of Blankets

Beginner-friendly templates, step-by-step guides,
and weekly project ideas in your inbox.
There’s a special kind of magic in building a blanket fort.
It’s a timeless activity that sparks imagination, creates cozy hideaways, and builds lasting memories.
Having built countless forts in my childhood — and a few as an adult — I’m excited to share the secrets to a truly epic and stable creation.
Quick Overview
This guide will help you construct a sturdy, inviting blanket fort, perfect for reading, playing, or just relaxing.
You’ll learn the fundamental techniques to keep your fort from collapsing and how to make it a truly special space.
- Time needed: 30-60 minutes (depending on complexity and number of builders)
- Difficulty: Beginner
- What you’ll need: Blankets, pillows, chairs, couch cushions, string/rope, clothespins/clips, heavy books/weights.
Step-by-Step Instructions
Step 1: Gather Your Supplies
Before you begin building, collect everything you might need in one place.
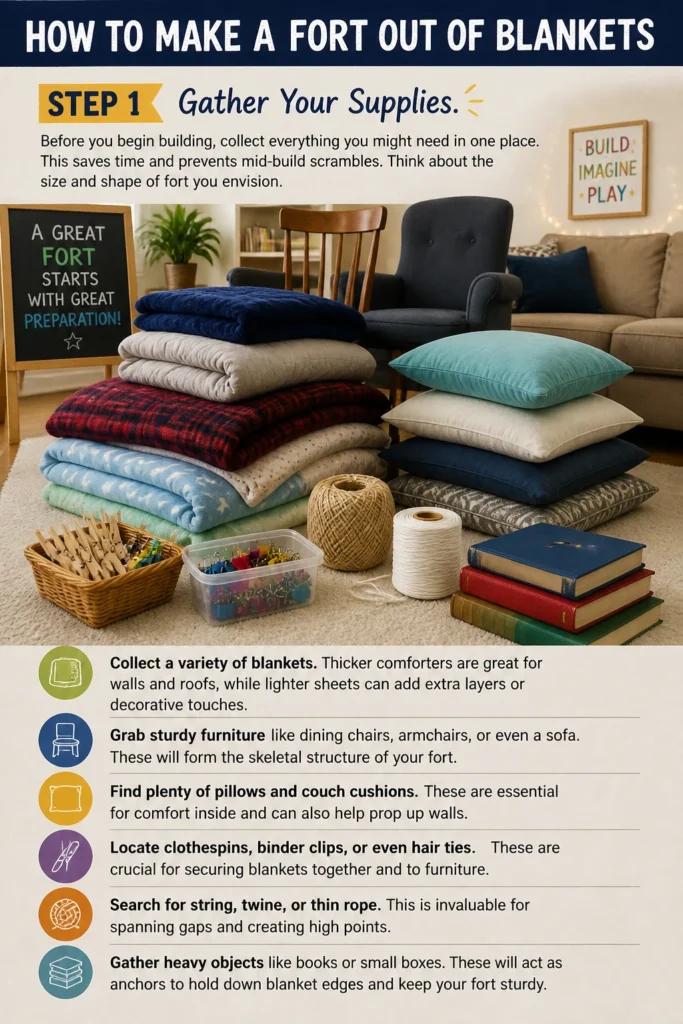
This saves time and prevents mid-build scrambles.
Think about the size and shape of fort you envision.
- Collect a variety of blankets. Thicker comforters are great for walls and roofs, while lighter sheets can add extra layers or decorative touches.
- Grab sturdy furniture like dining chairs, armchairs, or even a sofa. These will form the skeletal structure of your fort.
- Find plenty of pillows and couch cushions. These are essential for comfort inside and can also help prop up walls.
- Locate clothespins, binder clips, or even hair ties. These are crucial for securing blankets together and to furniture.
- Search for string, twine, or thin rope. This is invaluable for spanning gaps and creating high points.
- Gather heavy objects like books, small dumbbells, or even full water bottles. These act as anchors for blanket edges.
Pro Tip: Consider the color scheme! Using blankets with different textures or patterns can add visual interest to your fort, both inside and out.
Step 2: Plan Your Layout
Don’t just start throwing blankets around.
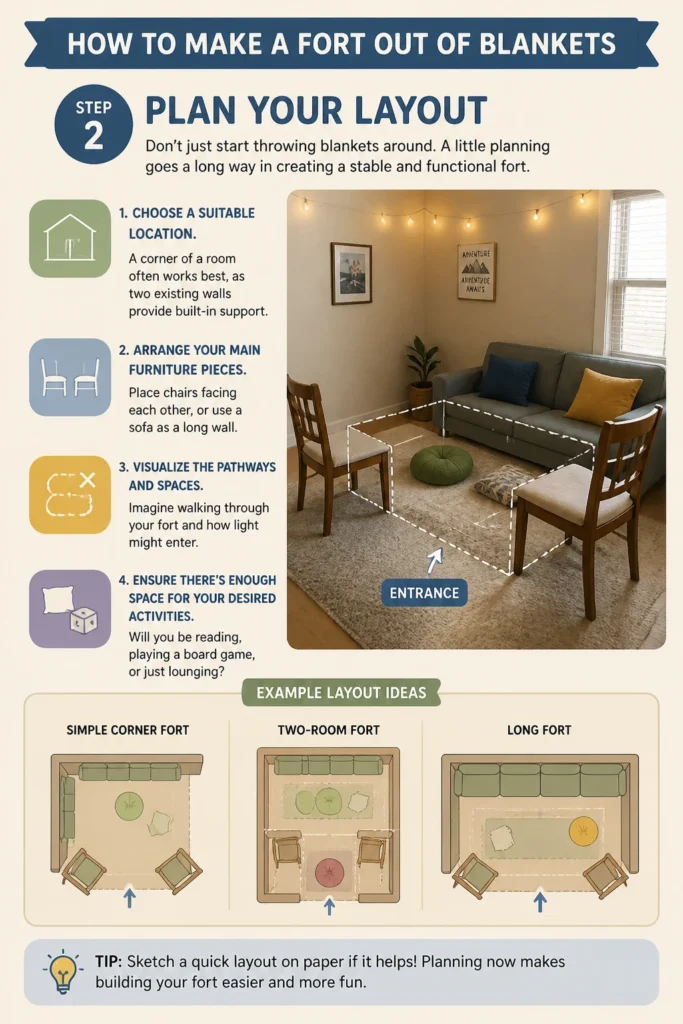
A little planning goes a long way in creating a stable and functional fort.
Think about where you want the entrance and how many “rooms” you might want.
- Choose a suitable location. A corner of a room often works best, as two existing walls provide built-in support.
- Arrange your main furniture pieces. Place chairs facing each other, or use a sofa as a long wall.
- Visualize the pathways and spaces. Imagine walking through your fort and how light might enter.
- Ensure there’s enough space for your desired activities. Will you be reading, playing a board game, or just lounging?
Step 3: Build the Frame
The frame is the backbone of your fort.
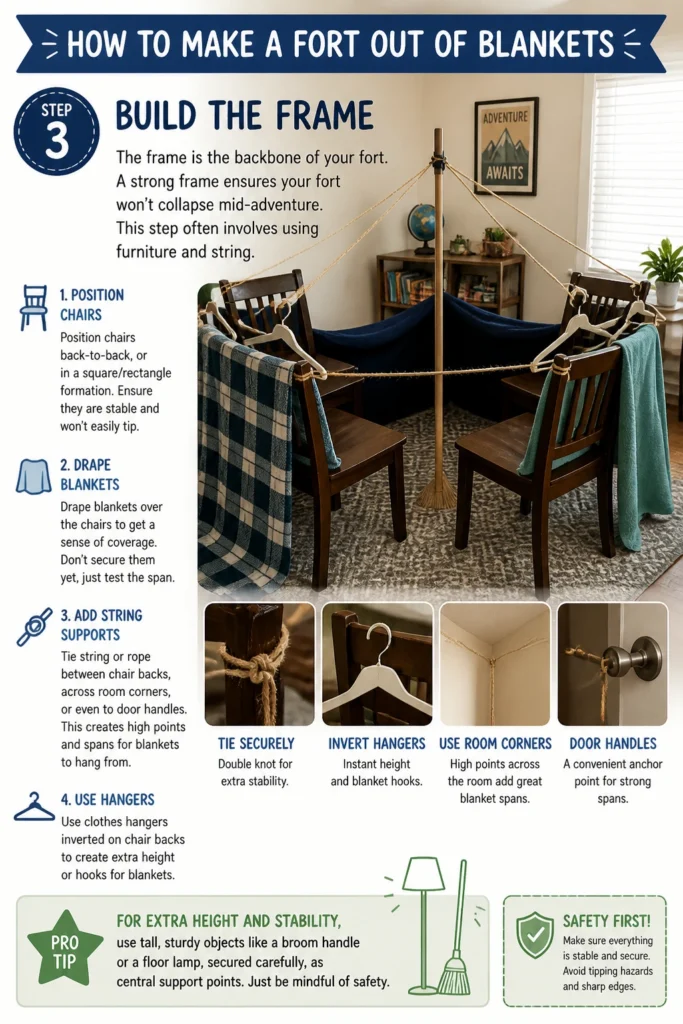
A strong frame ensures your fort won’t collapse mid-adventure.
This step often involves using furniture and string.
- Position chairs back-to-back, or in a square/rectangle formation. Ensure they are stable and won’t easily tip.
- Drape blankets over the chairs to get a sense of coverage. Don’t secure them yet, just test the span.
- Tie string or rope between chair backs, across room corners, or even to door handles. This creates high points and spans for blankets to hang from.
- Use clothes hangers inverted on chair backs to create extra height or hooks for blankets.
Pro Tip: For extra height and stability, use tall, sturdy objects like a broom handle or a floor lamp, secured carefully, as central support points. Just be mindful of safety.
Step 4: Drape the Roof
The roof is crucial for both enclosure and stability.
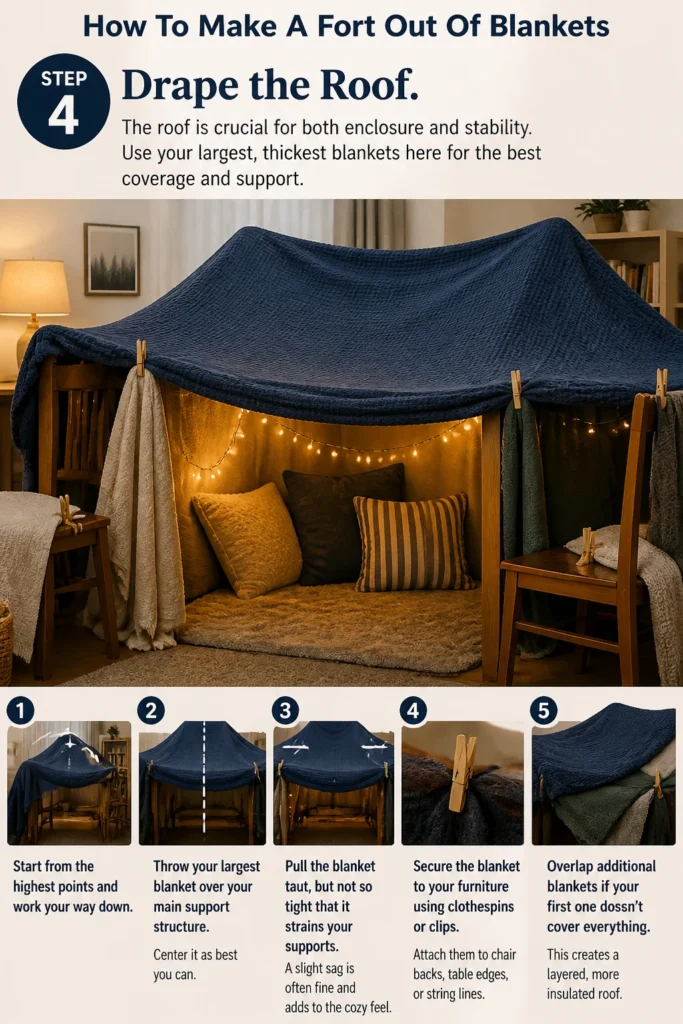
Use your largest, thickest blankets here for the best coverage and support.
Start from the highest points and work your way down.
- Throw your largest blanket over your main support structure. Center it as best you can.
- Pull the blanket taut, but not so tight that it strains your supports. A slight sag is often fine and adds to the cozy feel.
- Secure the blanket to your furniture using clothespins or clips. Attach them to chair backs, table edges, or string lines.
- Overlap additional blankets if your first one doesn’t cover everything. This creates a layered, more insulated roof.
Step 5: Construct the Walls
Once the roof is in place, the walls define the interior space.
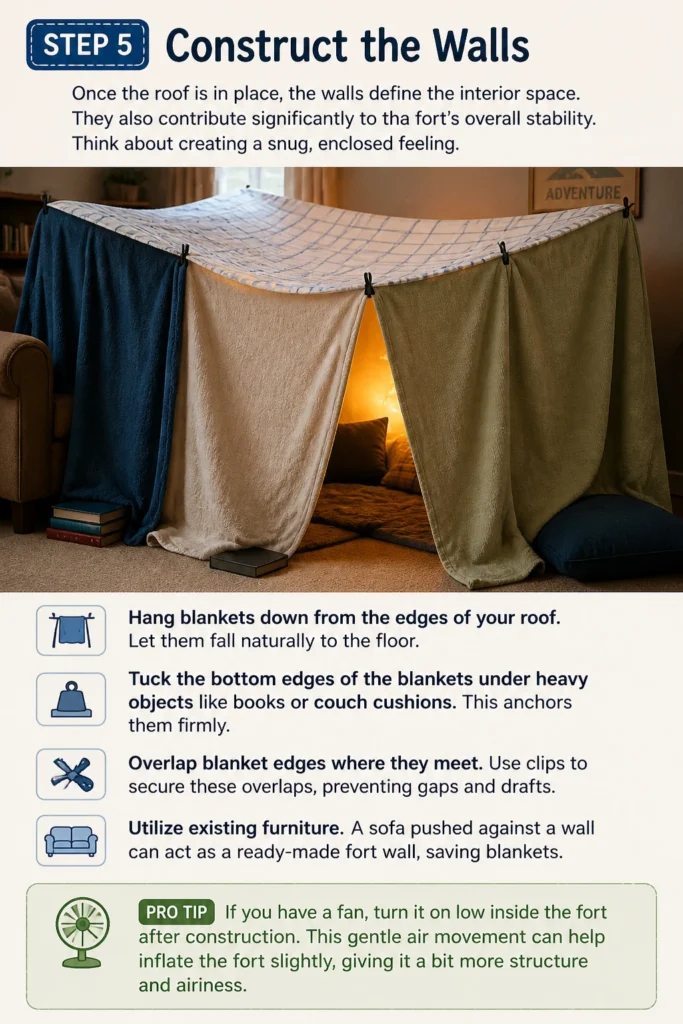
They also contribute significantly to the fort’s overall stability.
Think about creating a snug, enclosed feeling.
- Hang blankets down from the edges of your roof. Let them fall naturally to the floor.
- Tuck the bottom edges of the blankets under heavy objects like books or couch cushions. This anchors them firmly.
- Overlap blanket edges where they meet. Use clips to secure these overlaps, preventing gaps and drafts.
- Utilize existing furniture. A sofa pushed against a wall can act as a ready-made fort wall, saving blankets.
Pro Tip: If you have a fan, turn it on low inside the fort after construction. This gentle air movement can help inflate the fort slightly, giving it a bit more structure and airiness.
Step 6: Create an Entrance
Every good fort needs a way in and out.
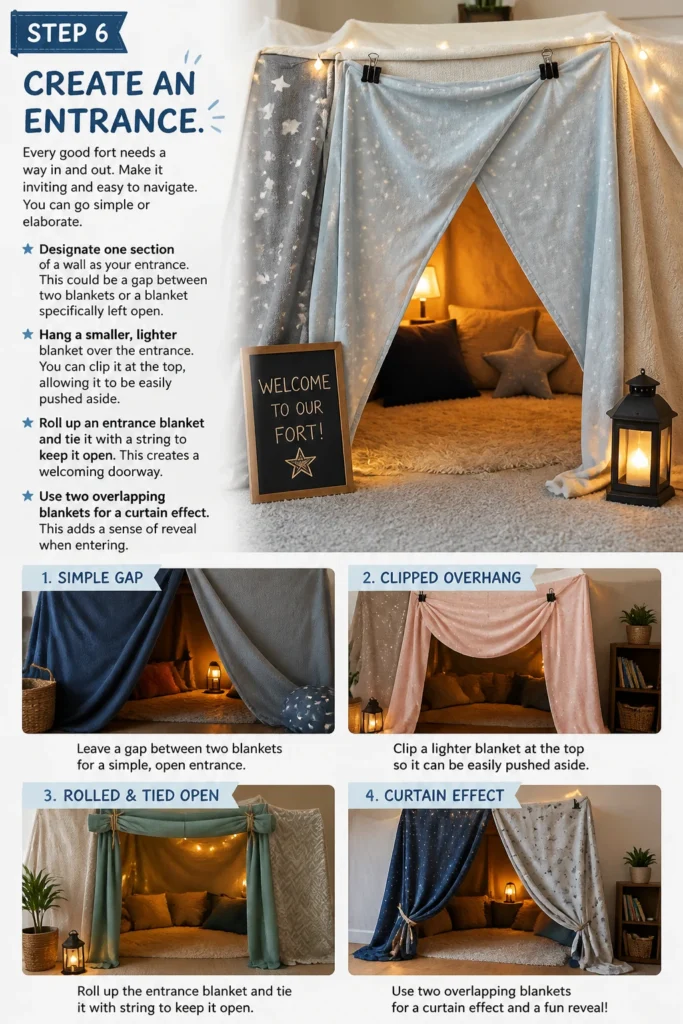
Make it inviting and easy to navigate.
You can go simple or elaborate.
- Designate one section of a wall as your entrance. This could be a gap between two blankets or a blanket specifically left open.
- Hang a smaller, lighter blanket over the entrance. You can clip it at the top, allowing it to be easily pushed aside.
- Roll up an entrance blanket and tie it with a string to keep it open. This creates a welcoming doorway.
- Use two overlapping blankets for a “curtain” effect. This adds a sense of reveal when entering.
Step 7: Furnish the Interior
Now for the best part: making your fort comfortable and fun!
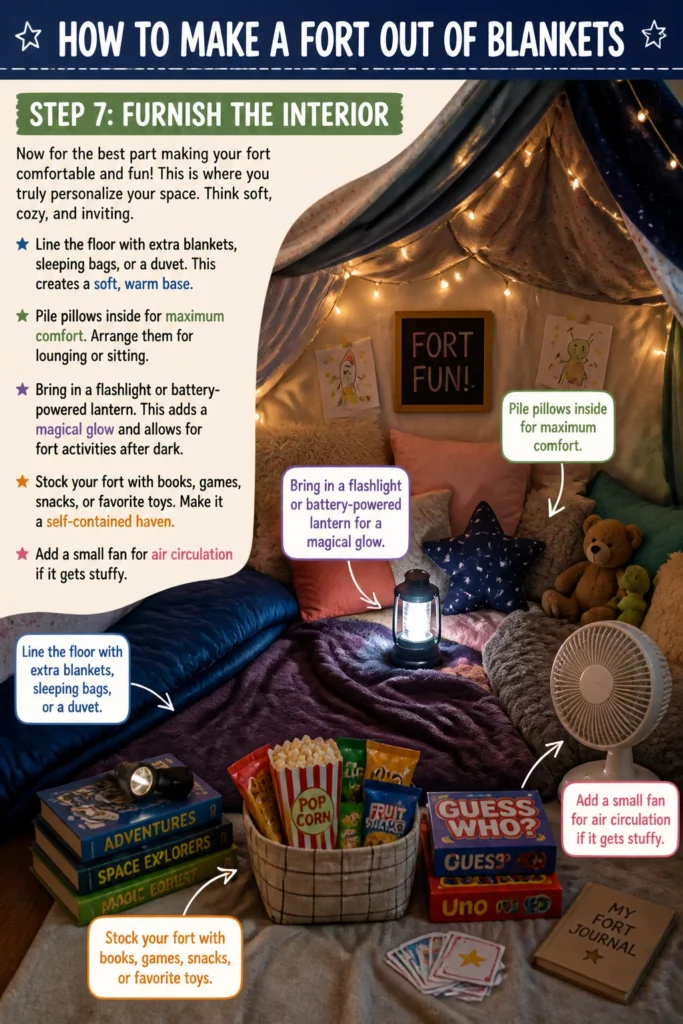
This is where you truly personalize your space.
Think soft, cozy, and inviting.
- Line the floor with extra blankets, sleeping bags, or a duvet. This creates a soft, warm base.
- Pile pillows inside for maximum comfort. Arrange them for lounging or sitting.
- Bring in a flashlight or battery-powered lantern. This adds a magical glow and allows for fort activities after dark.
- Stock your fort with books, games, snacks, or favorite toys. Make it a self-contained haven.
- Add a small fan for air circulation if it gets stuffy.
Common Mistakes to Avoid
The “Too Loose” Fort
One of the most common fort-building mistakes is not securing your blankets tightly enough. Loose blankets will sag, slip, and eventually bring your entire structure down. Always pull blankets taut and use plenty of clips or weights to anchor them firmly to your supports.
Ignoring Structural Support
Relying solely on blankets for structural integrity is a recipe for disaster. Blankets are meant to cover, not to hold themselves up. Always use sturdy furniture, string, or other rigid objects to create a strong frame before draping your blankets. This provides the necessary skeleton for your fort.
Overloading the Roof
While a thick roof is cozy, putting too many heavy blankets on top of a flimsy frame will cause it to collapse. Choose your roof blankets wisely, prioritizing coverage and reasonable weight. If you need more insulation, layer lighter sheets rather than adding multiple heavy comforters.
Blocking All Airflow
A fort should be cozy, but not stuffy. Completely sealing off every opening can lead to poor air circulation, making the fort uncomfortable. Ensure there’s a small opening, even if it’s just a loose flap, or consider a small battery-operated fan to keep the air fresh.
Troubleshooting
Fort Keeps Collapsing
If your fort repeatedly falls, the primary issue is likely inadequate support or insufficient anchoring. Re-evaluate your frame: are your chairs stable? Is your string taut? Add more supports, strengthen existing ones, and ensure all blanket edges are heavily weighted or securely clipped to prevent slippage. Sometimes, starting with a simpler design can help you master the basics before attempting more elaborate structures.
Too Dark or Stuffy Inside
A fort should be a sanctuary, not a cave. To combat darkness, introduce battery-powered lights like string lights or a lantern. Avoid using candles or anything with an open flame for safety. For stuffiness, check for airflow. You might need to leave a small gap in a wall, or incorporate a small, quiet, battery-operated fan. Ensure your entrance isn’t completely sealed.
Blankets Keep Slipping Off Furniture
This is a common issue, especially with slicker blankets. The solution lies in better grip and more anchors. Use more clothespins or binder clips to firmly attach blankets to chair backs, table edges, or string lines. For blankets draped over furniture, try tucking them deeply into crevices or placing heavy books on the edges that rest on the furniture to create friction and weight.
Key Takeaways
- Planning your fort’s layout and frame before draping blankets saves time and prevents frustration.
- Sturdy furniture and taut string are essential for a stable, long-lasting blanket fort structure.
- Secure all blankets firmly with clips, clothespins, or heavy weights to prevent sagging and collapse.
- Prioritize comfort and safety by adding soft flooring, pillows, and battery-powered lighting.
- Don’t be afraid to experiment with different designs and materials to find what works best for your space.
- The true joy of a blanket fort comes from the imaginative play and cozy relaxation it provides.
Frequently Asked Questions
What kind of blankets are best for a fort?
A mix is ideal. Use heavier comforters or quilts for the roof and main structural walls, as they provide better coverage and stay in place. Lighter sheets can be good for inner layers, decorative touches, or smaller wall sections. Avoid overly silky blankets that tend to slip easily.
Can I build a fort without furniture?
It’s challenging but possible. You’ll need alternative supports like clothes drying racks, broom handles held up by heavy buckets, or even tension rods placed across a doorway. The key is to create a rigid frame to drape your blankets over, as blankets alone lack structural integrity.
How can I make my fort stay up for a long time?
Focus on robust construction. Use strong, stable furniture for the frame. Ensure all blankets are pulled taut and anchored securely with plenty of clips and heavy weights. Minimize foot traffic that might bump into supports. A well-built fort can last for days, even weeks!
Is it safe to use string lights inside a blanket fort?
Yes, as long as they are battery-operated LED string lights. Avoid any lights that plug into an outlet, as these can overheat or pose an electrical hazard, especially when covered by blankets. Battery-powered LEDs are cool to the touch and perfectly safe for fort interiors.
Our Top Recommended Finds
- Binder Clips (Large): Incredibly versatile for securing blankets to furniture, string, and even other blankets. Their strong grip is invaluable.
- Battery-Operated LED String Lights: Essential for creating a magical, safe glow inside your fort without the risks of traditional lights.
- A Lightweight Camping Tarp: If you’re building a very large fort, a lightweight tarp can be a fantastic, durable, and easily cleanable roof layer that won’t absorb spills.
Build Your Cozy Hideaway Today
The allure of a blanket fort is undeniable, a simple pleasure that transports you to a world of your own making.
With these steps, you have all the knowledge to create a fort that’s not just fun, but sturdy and inviting.
Don’t wait for a rainy day; gather your supplies and start building your ultimate cozy haven right now!
Beginner-friendly templates, step-by-step guides,
and weekly project ideas in your inbox.