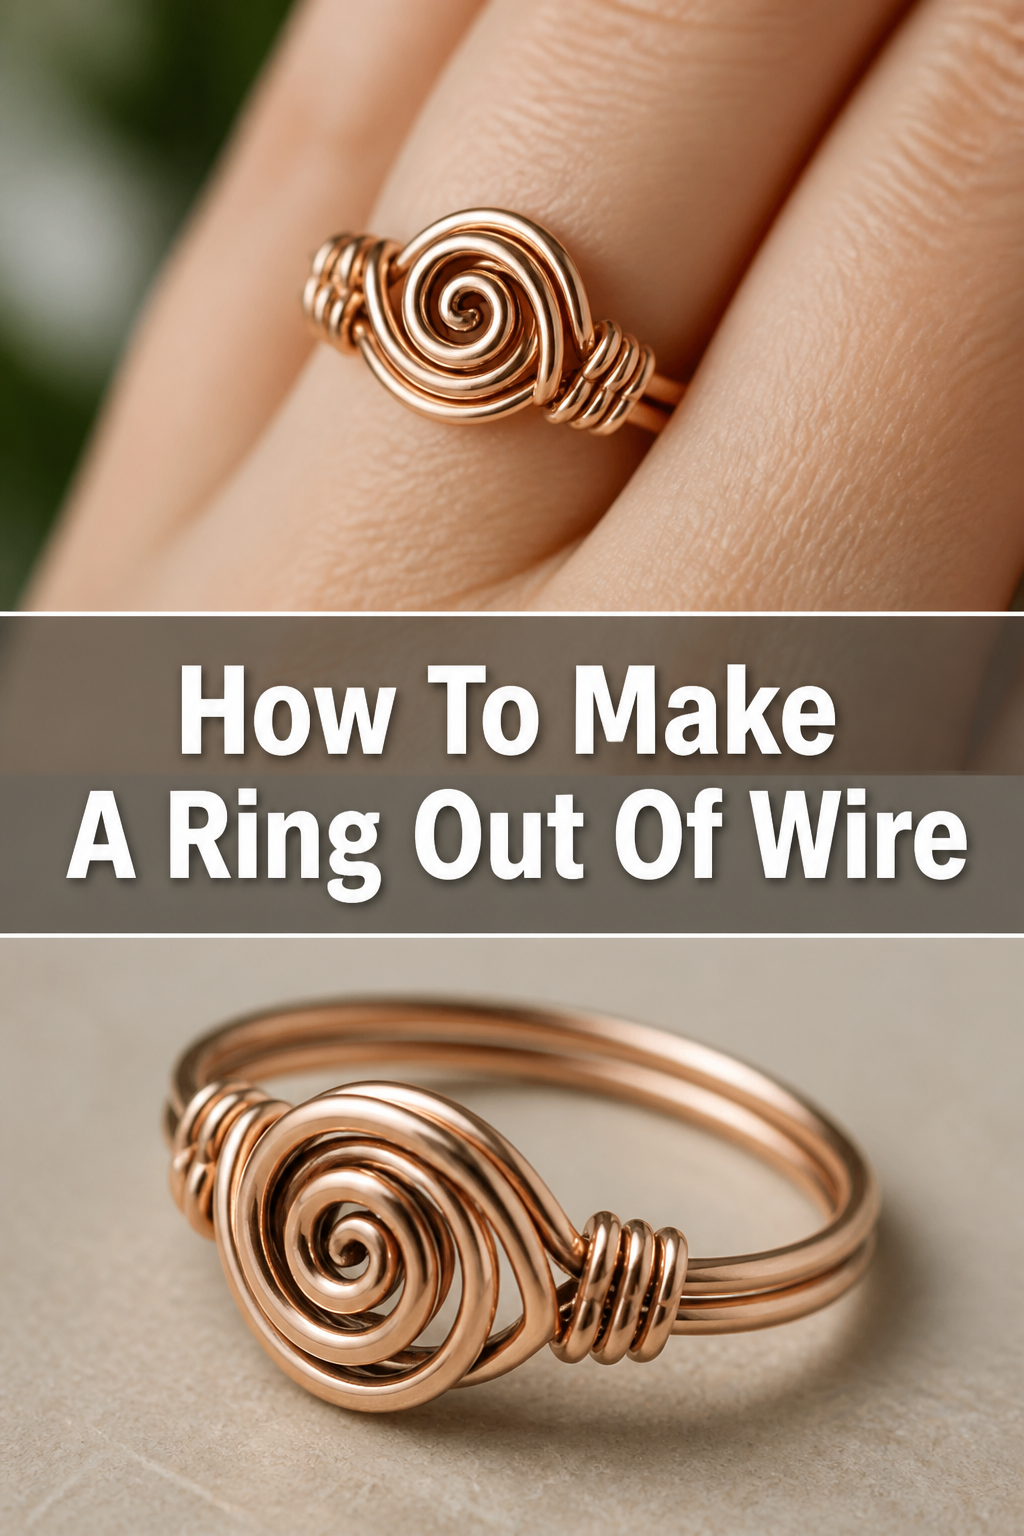
💍 How To Make A Ring Out Of Wire

Beginner-friendly templates, step-by-step guides,
and weekly project ideas in your inbox.
There’s a unique satisfaction in creating something beautiful with your own hands. I remember the first wire ring I ever made; it was a simple spiral, a bit lopsided, but utterly mine.
That initial spark of creativity led me to explore countless designs and techniques. This guide shares everything I’ve learned, helping you craft your own stunning wire rings with confidence.
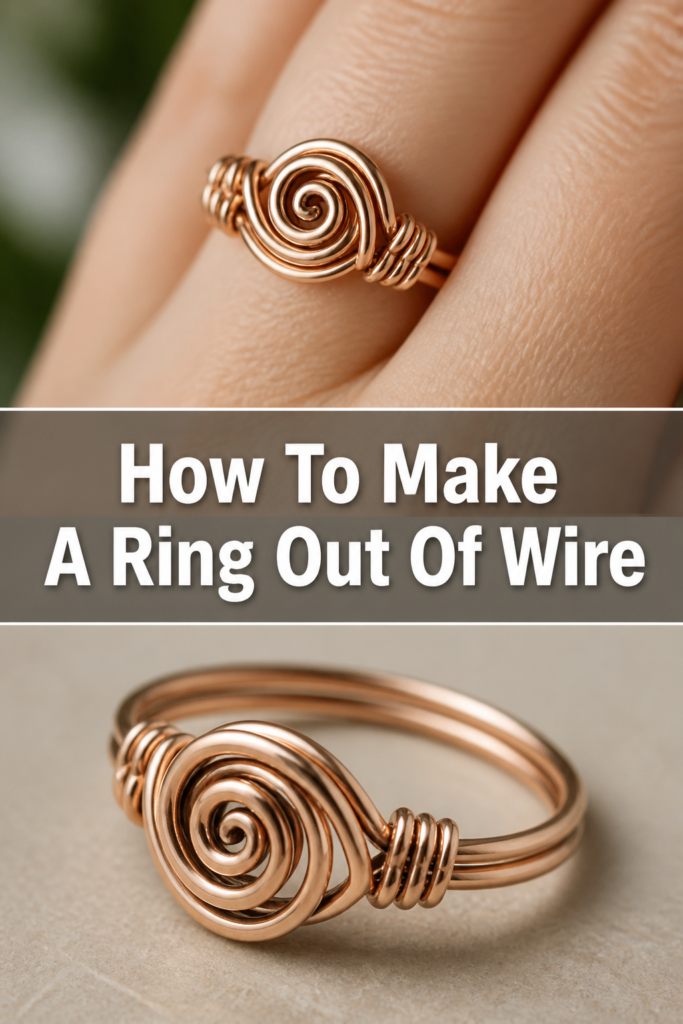
Quick Overview
You’re about to embark on a fun, rewarding project that results in a custom piece of jewelry. This guide will walk you through selecting materials, shaping your wire, and finishing your ring. By the end, you’ll have a wearable creation and the skills to make many more.
- Time needed: 30-60 minutes
- Difficulty: Beginner
- What you’ll need: Jewelry wire, various pliers, a ring mandrel, wire cutters.
Step-by-Step Instructions
Step 1: Gather Your Tools and Materials
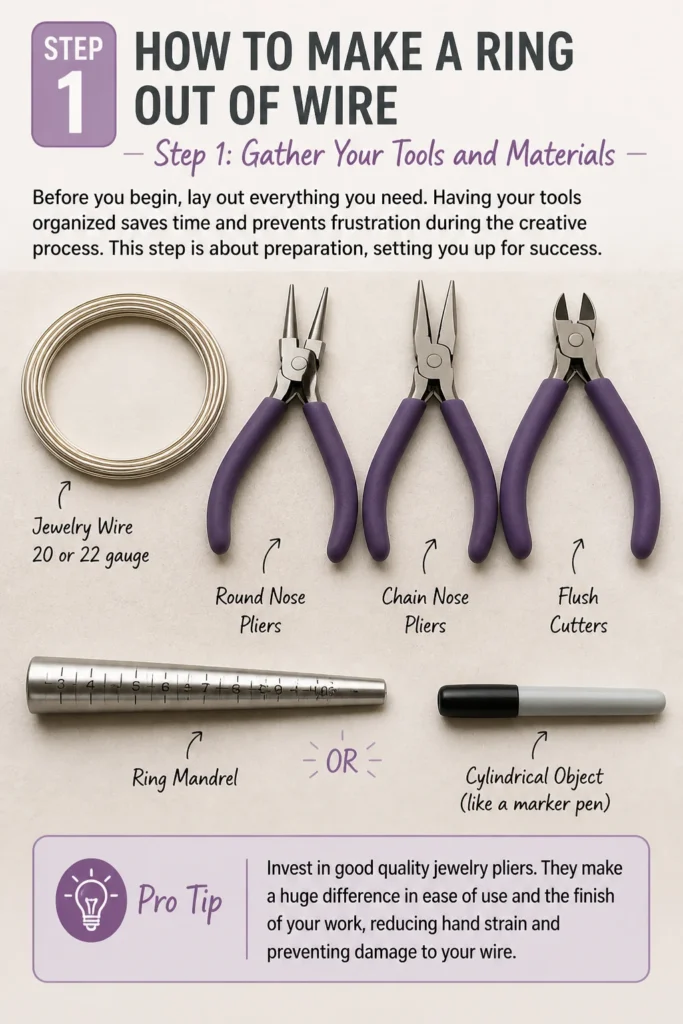
Before you begin, lay out everything you need. Having your tools organized saves time and prevents frustration during the creative process. This step is about preparation, setting you up for success.
You will need jewelry wire, ideally 20 or 22 gauge for a good balance of flexibility and durability. Round nose pliers, chain nose pliers, and flush cutters are essential. A ring mandrel or a cylindrical object like a marker pen will help shape your ring.
Pro Tip: Invest in good quality jewelry pliers. They make a huge difference in ease of use and the finish of your work, reducing hand strain and preventing damage to your wire.
Step 2: Choose Your Wire
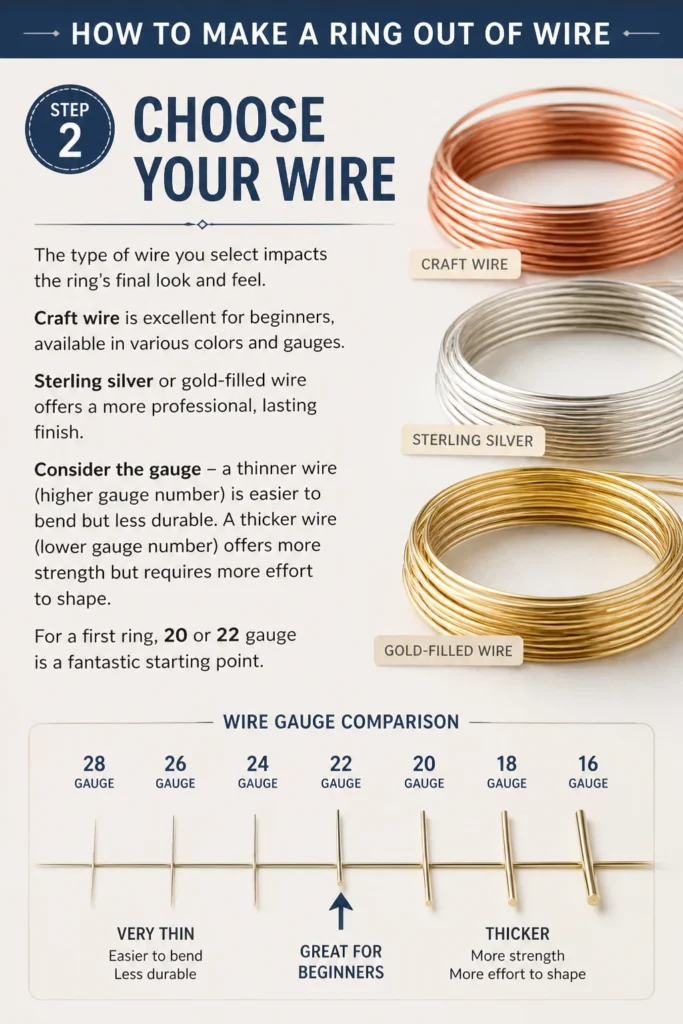
The type of wire you select impacts the ring’s final look and feel. Craft wire is excellent for beginners, available in various colors and gauges. Sterling silver or gold-filled wire offers a more professional, lasting finish.
Consider the gauge – a thinner wire (higher gauge number) is easier to bend but less durable. A thicker wire (lower gauge number) offers more strength but requires more effort to shape. For a first ring, 20 or 22 gauge is a fantastic starting point.
Step 3: Measure Your Finger Size
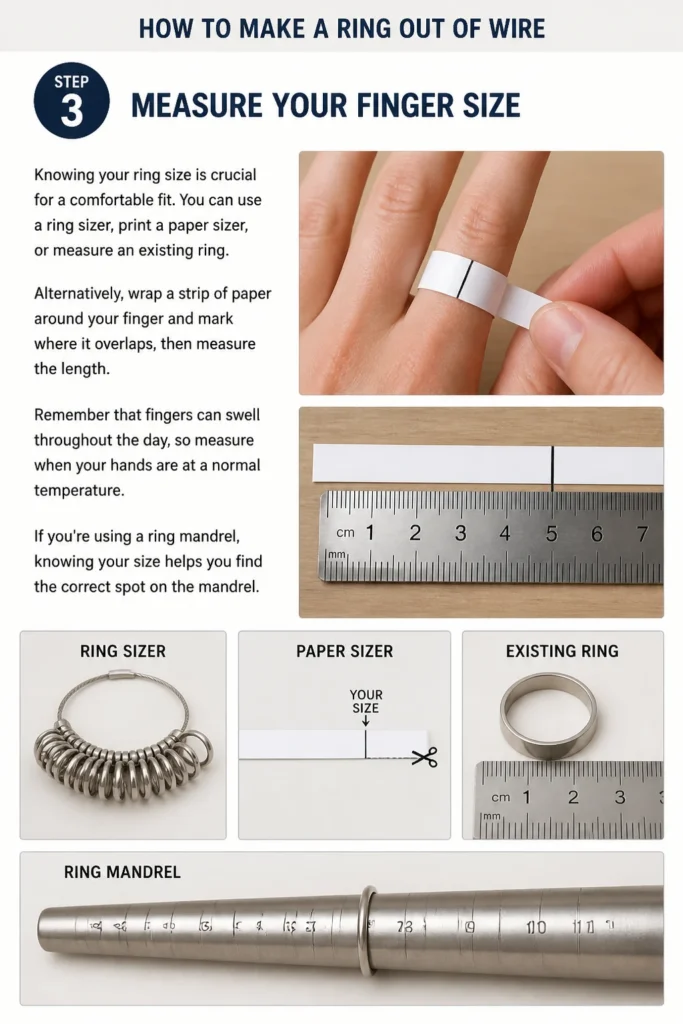
Knowing your ring size is crucial for a comfortable fit. You can use a ring sizer, print a paper sizer, or measure an existing ring. Alternatively, wrap a strip of paper around your finger and mark where it overlaps, then measure the length.
Remember that fingers can swell throughout the day, so measure when your hands are at a normal temperature. If you’re using a ring mandrel, knowing your size helps you find the correct spot on the mandrel.
Step 4: Cut Your Wire
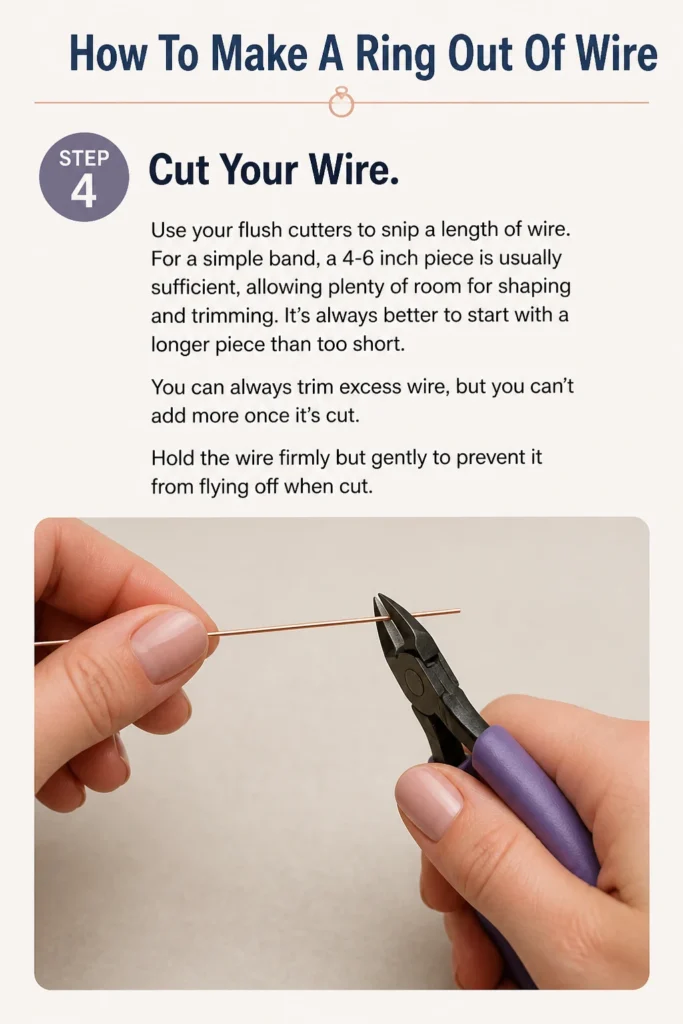
Use your flush cutters to snip a length of wire. For a simple band, a 4-6 inch piece is usually sufficient, allowing plenty of room for shaping and trimming. It’s always better to start with a longer piece than too short.
You can always trim excess wire, but you can’t add more once it’s cut. Hold the wire firmly but gently to prevent it from flying off when cut.
Step 5: Create the Ring Band Base
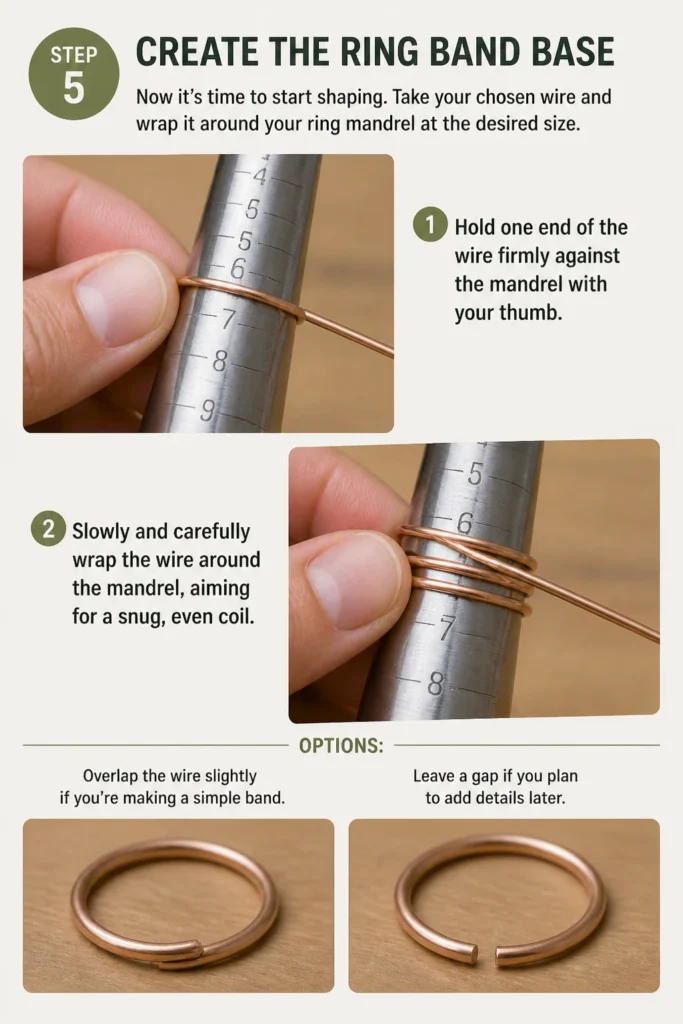
Now it’s time to start shaping. Take your chosen wire and wrap it around your ring mandrel at the desired size. Hold one end of the wire firmly against the mandrel with your thumb.
Slowly and carefully wrap the wire around the mandrel, aiming for a snug, even coil. Overlap the wire slightly if you’re making a simple band, or leave a gap if you plan to add details later.
Step 6: Form the Main Loop
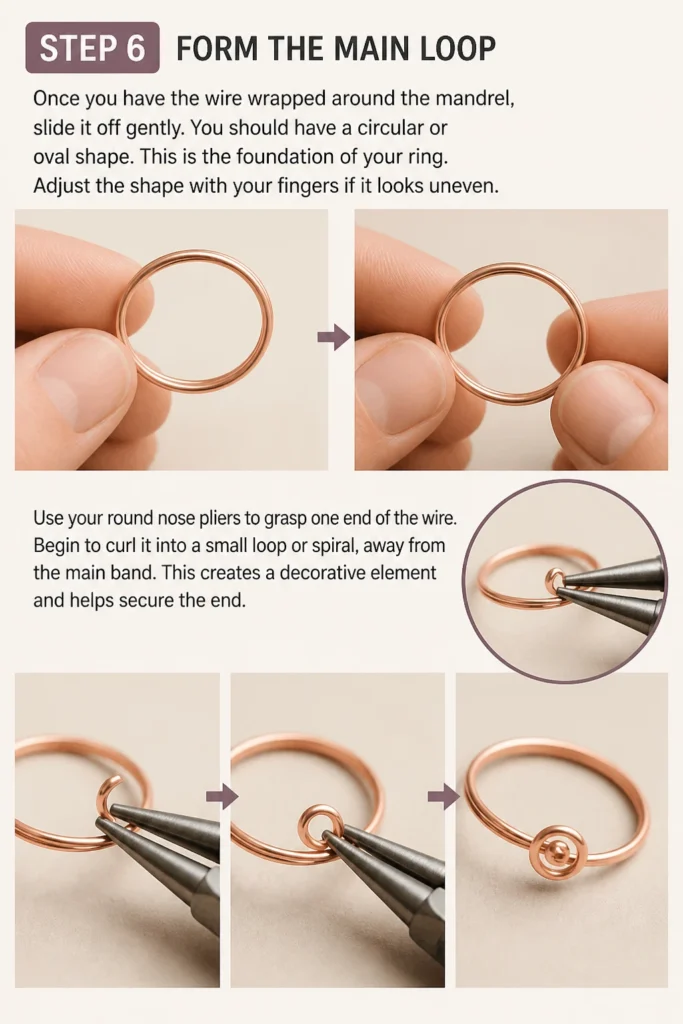
Once you have the wire wrapped around the mandrel, slide it off gently. You should have a circular or oval shape. This is the foundation of your ring. Adjust the shape with your fingers if it looks uneven.
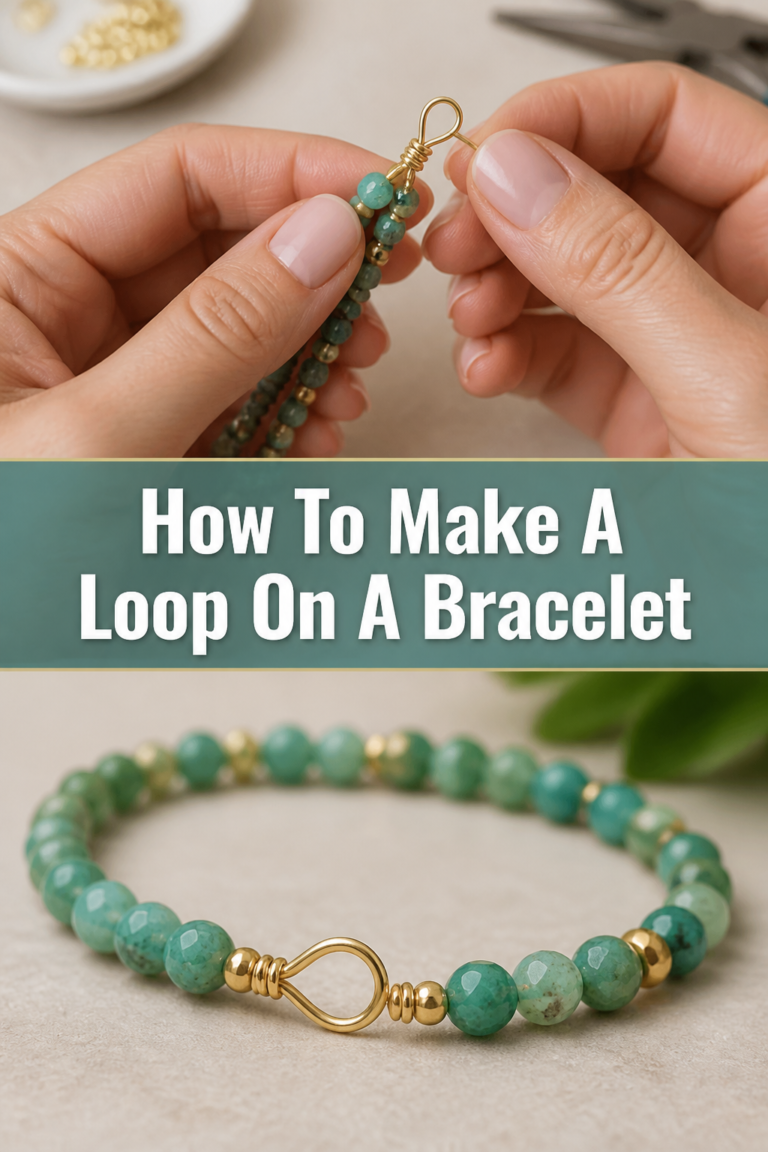
Use your round nose pliers to grasp one end of the wire. Begin to curl it into a small loop or spiral, away from the main band. This creates a decorative element and helps secure the end.
Step 7: Add Embellishments or Details
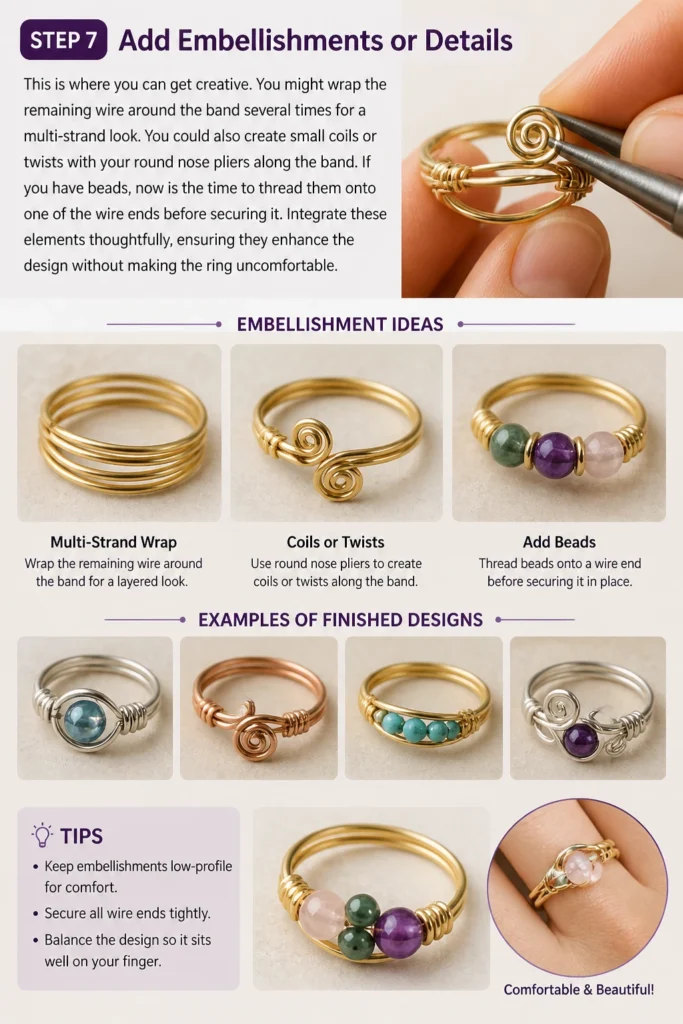
This is where you can get creative. You might wrap the remaining wire around the band several times for a multi-strand look. You could also create small coils or twists with your round nose pliers along the band.
If you have beads, now is the time to thread them onto one of the wire ends before securing it. Integrate these elements thoughtfully, ensuring they enhance the design without making the ring uncomfortable.
Step 8: Secure the Ends
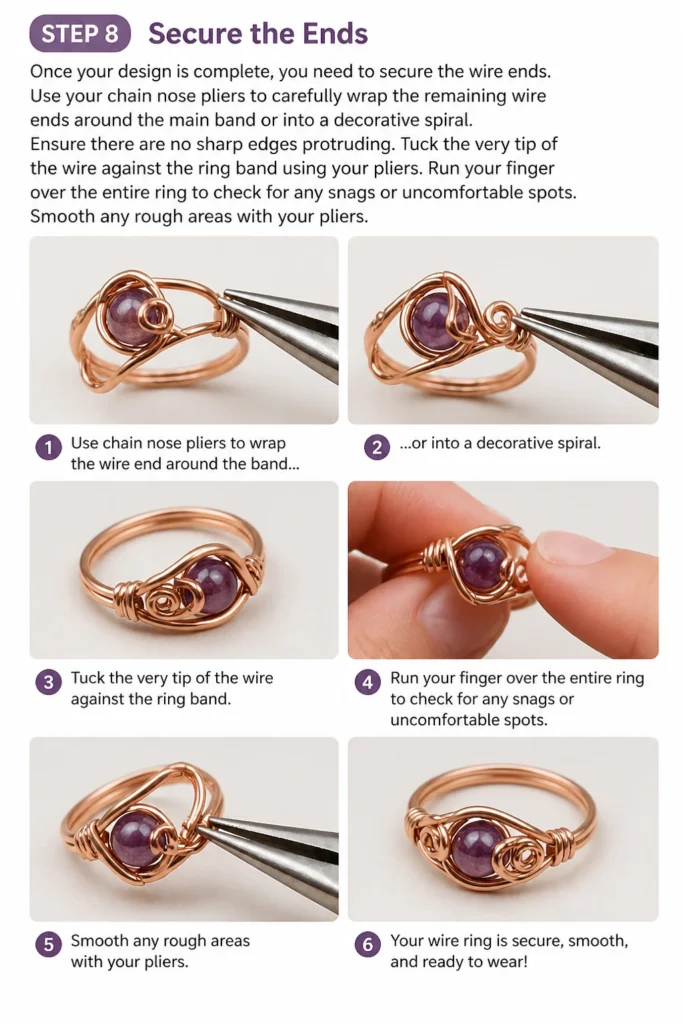
Once your design is complete, you need to secure the wire ends. Use your chain nose pliers to carefully wrap the remaining wire ends around the main band or into a decorative spiral. Ensure there are no sharp edges protruding.
Tuck the very tip of the wire against the ring band using your pliers. Run your finger over the entire ring to check for any snags or uncomfortable spots. Smooth any rough areas with your pliers.
Step 9: Refine and Polish Your Ring
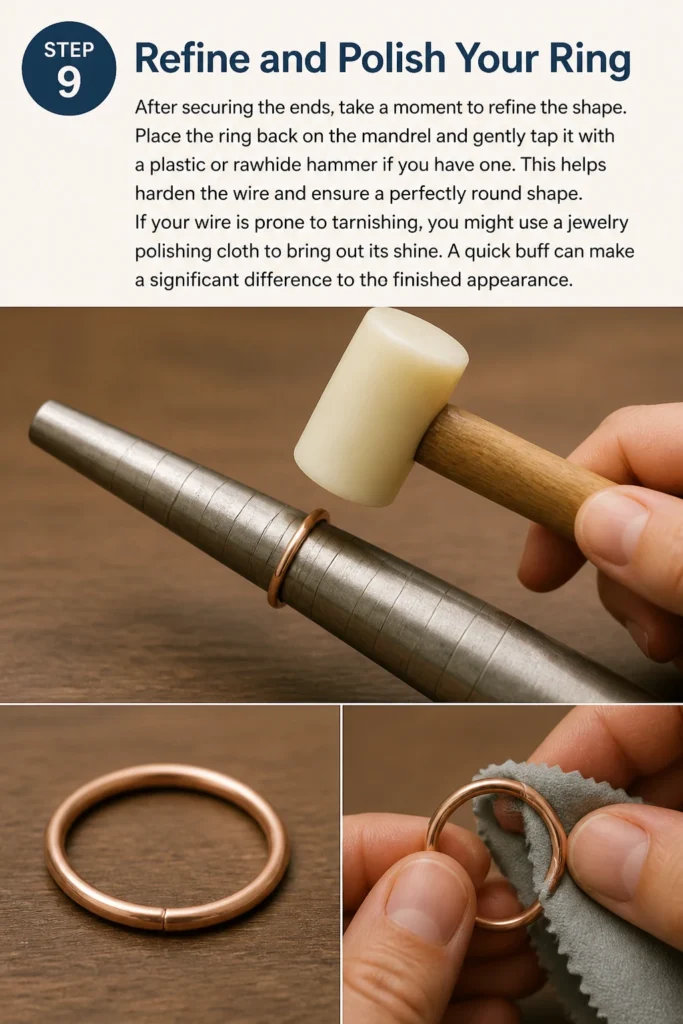
After securing the ends, take a moment to refine the shape. Place the ring back on the mandrel and gently tap it with a plastic or rawhide hammer if you have one. This helps harden the wire and ensure a perfectly round shape.
If your wire is prone to tarnishing, you might use a jewelry polishing cloth to bring out its shine. A quick buff can make a significant difference to the finished appearance.
Step 10: Try On and Adjust
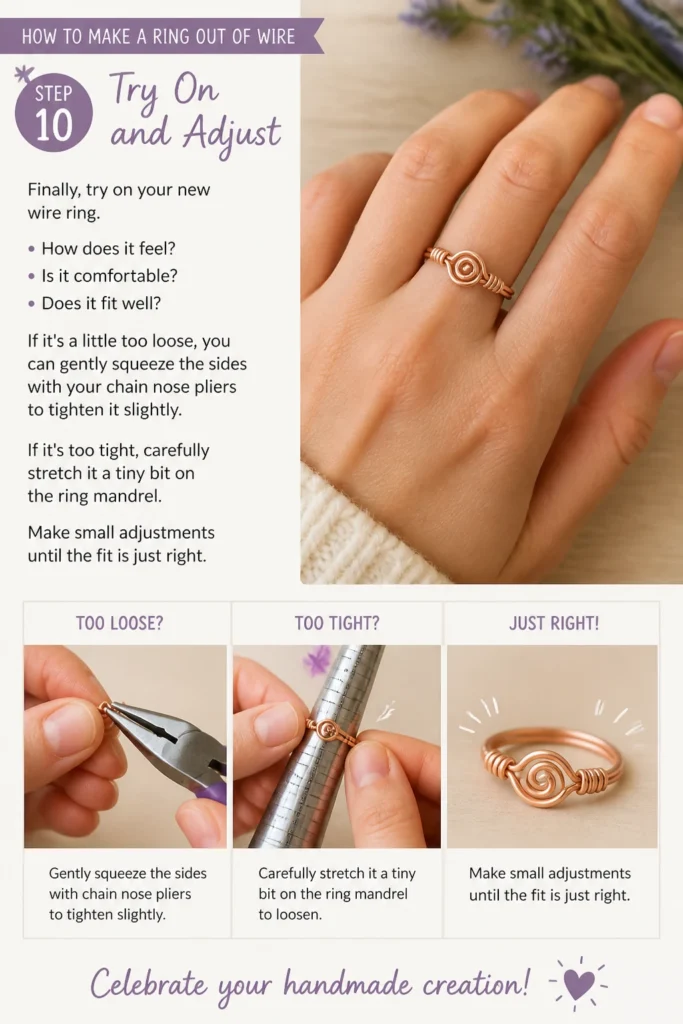
Finally, try on your new wire ring. How does it feel? Is it comfortable? Does it fit well? If it’s a little too loose, you can gently squeeze the sides with your chain nose pliers to tighten it slightly.
If it’s too tight, carefully stretch it a tiny bit on the ring mandrel. Make small adjustments until the fit is just right. Celebrate your handmade creation!
Common Mistakes to Avoid
Using the Wrong Wire Gauge
Many beginners grab whatever wire is handy. Using wire that is too thin (e.g., 26-gauge) will result in a flimsy ring that easily deforms. Conversely, wire that is too thick (e.g., 16-gauge) will be incredibly difficult to bend and shape without specialized tools and strength. Stick to 20 or 22 gauge for most general-purpose rings, as it offers a good balance of workability and durability.
Improper Wire Tension
When wrapping wire, it’s tempting to pull it as tight as possible. Excessive tension can cause the wire to stretch unevenly, resulting in a distorted shape or even breaking. Too little tension leaves the wire loose and uneven. Aim for firm, consistent tension that allows the wire to lay smoothly without deforming its cross-section. Practice will help you find the right feel.
Skipping Proper Finishing
Neglecting to properly finish the wire ends is a common oversight. Sharp wire ends can scratch your skin, snag clothing, or even fall out of place. Always use flush cutters to get the cleanest cut, then use chain nose pliers to tuck the ends securely against the ring. Gently press them flat and run your finger over the area to ensure there are no uncomfortable protrusions.
Ignoring Finger Swelling
Our fingers naturally swell and shrink throughout the day due to temperature, activity, and diet. Making a ring that is perfectly snug when your hands are cold might mean it’s uncomfortably tight later. Always measure your finger when it’s at a normal temperature, ideally in the afternoon. If in doubt, err slightly on the side of a looser fit, as it’s easier to make a ring slightly smaller than larger.
Troubleshooting
Ring Feels Too Loose/Tight
If your finished ring is a bit too loose, you can gently squeeze the sides of the band with your chain nose pliers. Apply even pressure and check the fit frequently. If it’s too tight, place the ring back on your ring mandrel and gently push it down a tiny bit, allowing the wire to stretch. Do this slowly, as overstretching can damage the wire.
Wire Scratches or Snags
This issue usually means a wire end isn’t properly tucked. Locate the offending end and use your chain nose pliers to firmly press it against the main body of the ring. You might need to re-wrap a small section to ensure it’s flush. Sometimes, a tiny bit of careful filing with a very fine grit jeweler’s file can smooth out a stubborn spot, but be cautious not to scratch the main surface.
Ring Loses Its Shape
If your wire ring becomes misshapen after wearing, it often indicates the wire gauge was too thin for the design, or the wire wasn’t properly hardened. For future rings, consider using a slightly thicker gauge wire (e.g., 18 or 20 gauge). You can also gently tap the finished ring on a ring mandrel with a rawhide or plastic hammer. This process, called “work hardening,” makes the metal stiffer and more durable.
Key Takeaways
- Choosing the right wire gauge is fundamental for both ease of crafting and the ring’s durability.
- Accurate finger measurement ensures a comfortable and wearable piece of jewelry.
- Mastering basic plier techniques, especially for securing ends, prevents snags and enhances safety.
- Patience and consistent tension are crucial for creating a smooth, professional-looking band.
- Don’t be afraid to experiment with different wire types and embellishments to personalize your designs.
- Always check for sharp edges and refine the shape for a comfortable, finished product.
Frequently Asked Questions
What’s the best wire for rings?
For beginners, colored craft wire (e.g., copper core with a colored coating) in 20 or 22 gauge is excellent due to its affordability and workability. For more durable and professional-looking rings, sterling silver, gold-filled, or even stainless steel wire are great choices. The best wire depends on your budget, desired aesthetic, and skill level.
Can I use household pliers?
While you can technically use household pliers, it’s not recommended. Regular pliers often have serrated jaws that will scratch and mar your jewelry wire, leaving unsightly marks. Jewelry pliers have smooth jaws specifically designed to grip wire without causing damage. Investing in a basic set of jewelry pliers will significantly improve the quality of your work.
How do I make a ring larger/smaller?
To make a wire ring slightly larger, gently push it down a ring mandrel to stretch the wire. Do this in small increments. To make it smaller, you generally need to re-wrap or trim a section of the wire. For simple bands, you can sometimes gently squeeze the sides with pliers, but this can distort the shape. It’s often easier to start fresh if a significant size adjustment is needed.
Is wire jewelry safe to wear?
Yes, wire jewelry is generally safe to wear, provided it’s made with appropriate materials and finished correctly. Ensure all wire ends are securely tucked and smoothed to prevent scratches or snags. If you have metal allergies, choose hypoallergenic wires like sterling silver, gold-filled, or stainless steel. Avoid wires containing nickel if you have a known nickel allergy.
Our Top Recommended Finds
- Jewelry Pliers Set: A basic set including round nose, chain nose, and flush cutters is indispensable for all wire work.
- Steel Ring Mandrel: Essential for consistent sizing and shaping, ensuring your rings are perfectly round.
- Assorted Jewelry Wire Pack: A variety pack with different gauges and colors lets you experiment without committing to large spools.
Your Wire Ring Journey Begins Now
You now have all the practical steps and insights to create your very own wire ring. Don’t be afraid to experiment with different wire types, gauges, and designs as you gain confidence. Each ring you make will refine your skills and spark new ideas.
Why not try adding beads, or creating more intricate wire wraps next? The possibilities are endless when you embrace the art of wire crafting. Grab your tools and start shaping your unique jewelry today.
Beginner-friendly templates, step-by-step guides,
and weekly project ideas in your inbox.