🧵 How To Fix A Hole In A Shirt

Beginner-friendly templates, step-by-step guides,
and weekly project ideas in your inbox.
Finding a hole in your favorite shirt can feel like a small disaster.
You don’t have to throw it away or relegate it to sleepwear, though.
I’ve mended countless garments over the years, saving beloved pieces from the discard pile, and I’ll show you exactly how to do it too.

Quick Overview
This guide will help you mend a hole in a shirt, restoring its appearance and extending its life. You’ll learn simple, effective techniques suitable for various fabric types.
- Time needed: 15-45 minutes (depending on hole size and method)
- Difficulty: Beginner
- What you’ll need: Needle, thread, scissors, fabric adhesive (optional), iron (optional), scrap fabric (optional)
Step-by-Step Instructions
Step 1: Assess the Damage and Choose Your Method
First, carefully examine the hole. Is it a clean tear, a small snag, or a larger frayed area?
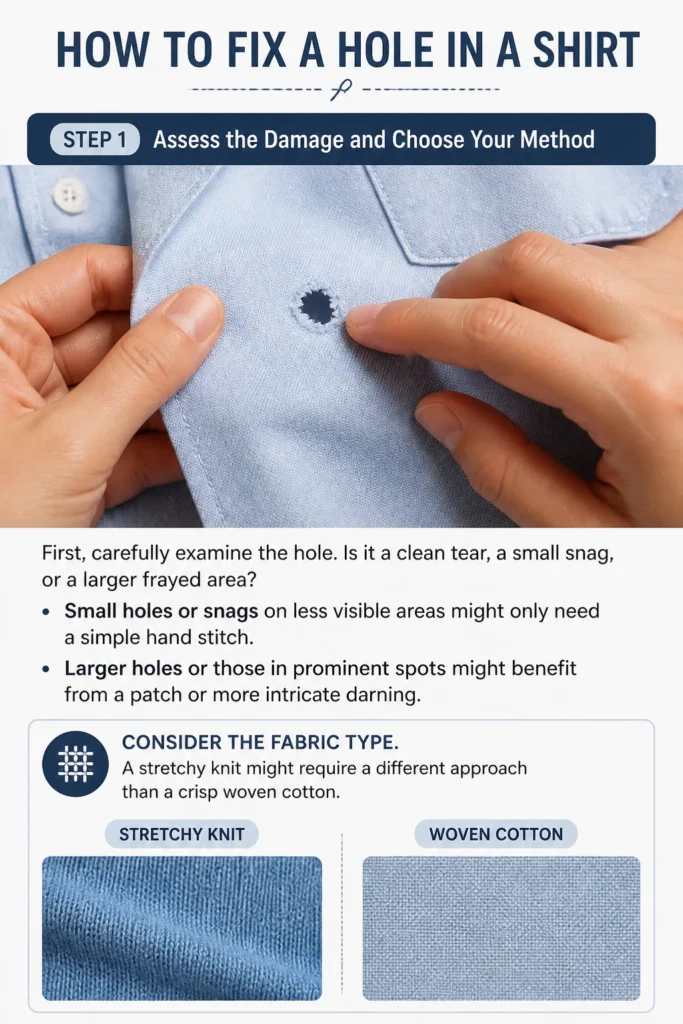
Small holes or snags on less visible areas might only need a simple hand stitch.
Larger holes or those in prominent spots might benefit from a patch or more intricate darning.
Consider the fabric type. A stretchy knit might require a different approach than a crisp woven cotton.
Step 2: Gather Your Supplies
Before you begin, make sure you have everything ready. This prevents interruptions.
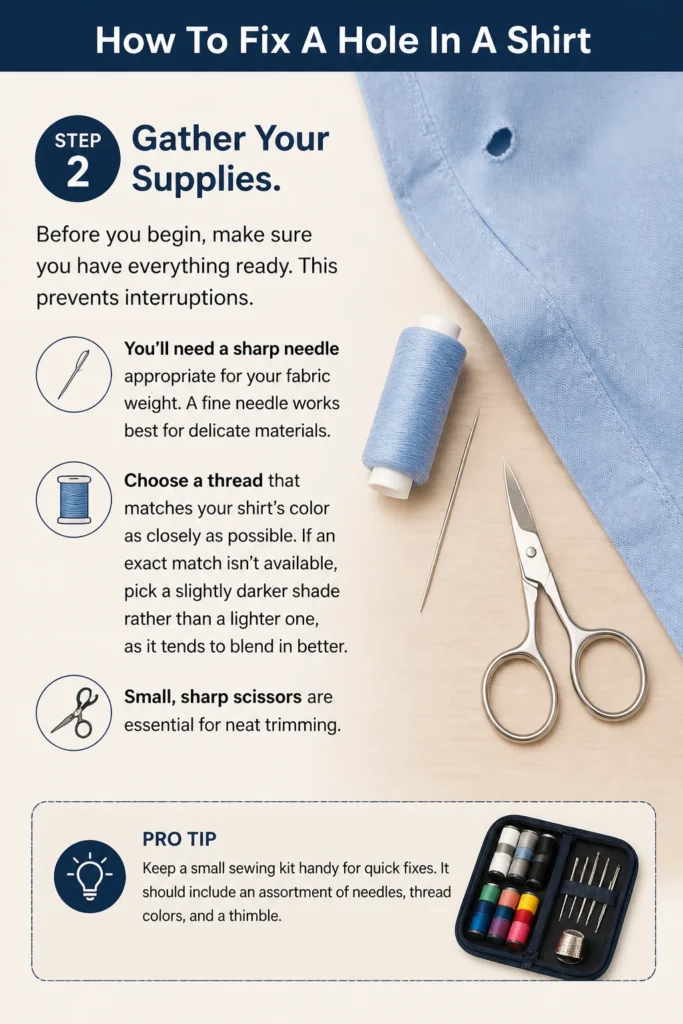
You’ll need a sharp needle appropriate for your fabric weight. A fine needle works best for delicate materials.
Choose a thread that matches your shirt’s color as closely as possible. If an exact match isn’t available, pick a slightly darker shade rather than a lighter one, as it tends to blend in better.
Small, sharp scissors are essential for neat trimming.
Pro Tip: Keep a small sewing kit handy for quick fixes. It should include an assortment of needles, thread colors, and a thimble.
Step 3: Prepare the Fabric
Lay your shirt flat on a clean, well-lit surface. Smooth out any wrinkles around the hole.
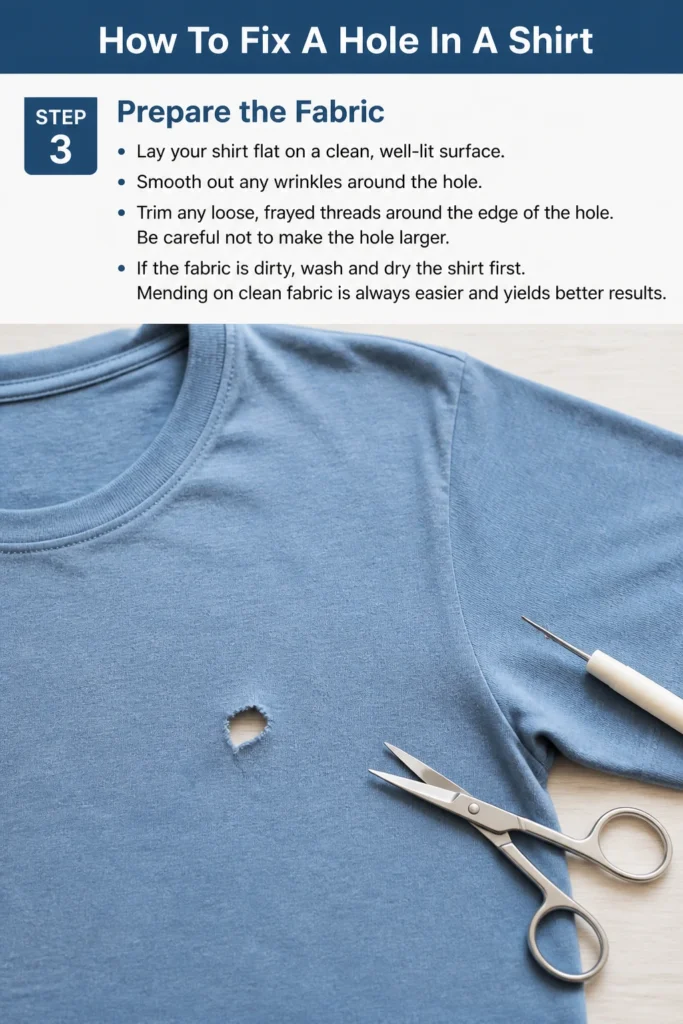
Trim any loose, frayed threads around the edge of the hole. Be careful not to make the hole larger.
If the fabric is dirty, wash and dry the shirt first. Mending on clean fabric is always easier and yields better results.
Step 4: The Simple Hand Stitch (For Small Holes/Snags)
Thread your needle with about 18-24 inches of matching thread. Tie a small knot at the end of the double thread.
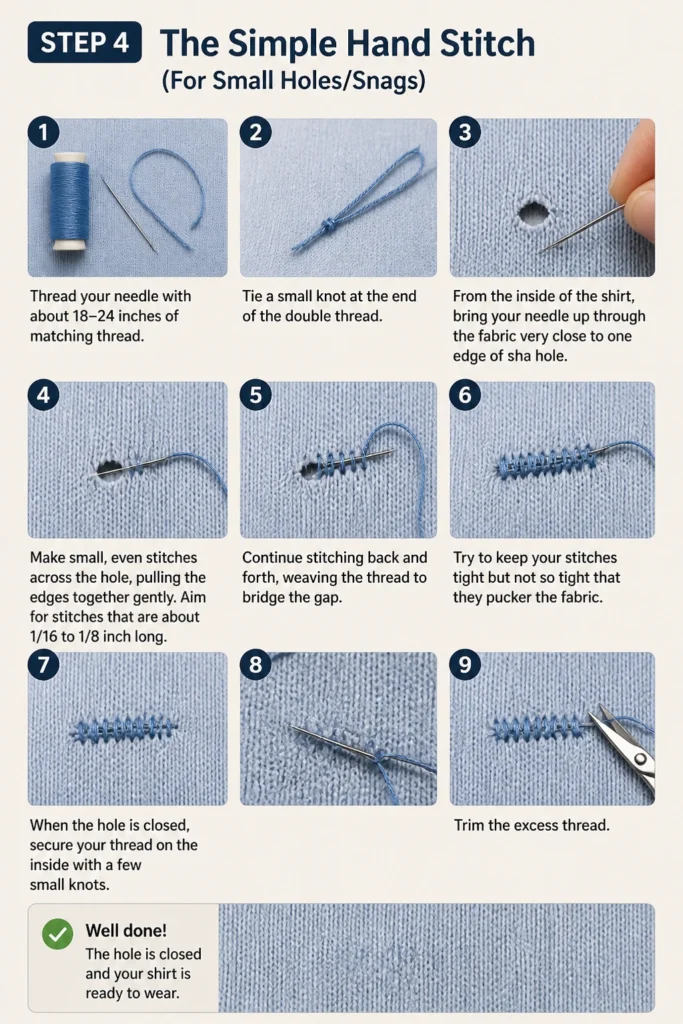
From the inside of the shirt, bring your needle up through the fabric very close to one edge of the hole.
Make small, even stitches across the hole, pulling the edges together gently. Aim for stitches that are about 1/16 to 1/8 inch long.
Continue stitching back and forth, weaving the thread to bridge the gap. Try to keep your stitches tight but not so tight that they pucker the fabric.
When the hole is closed, secure your thread on the inside with a few small knots. Trim the excess thread.
Step 5: Reinforcing with Darning (For Slightly Larger Holes)
Darning creates a woven patch directly into the fabric. It’s ideal for worn areas or small holes in knits.
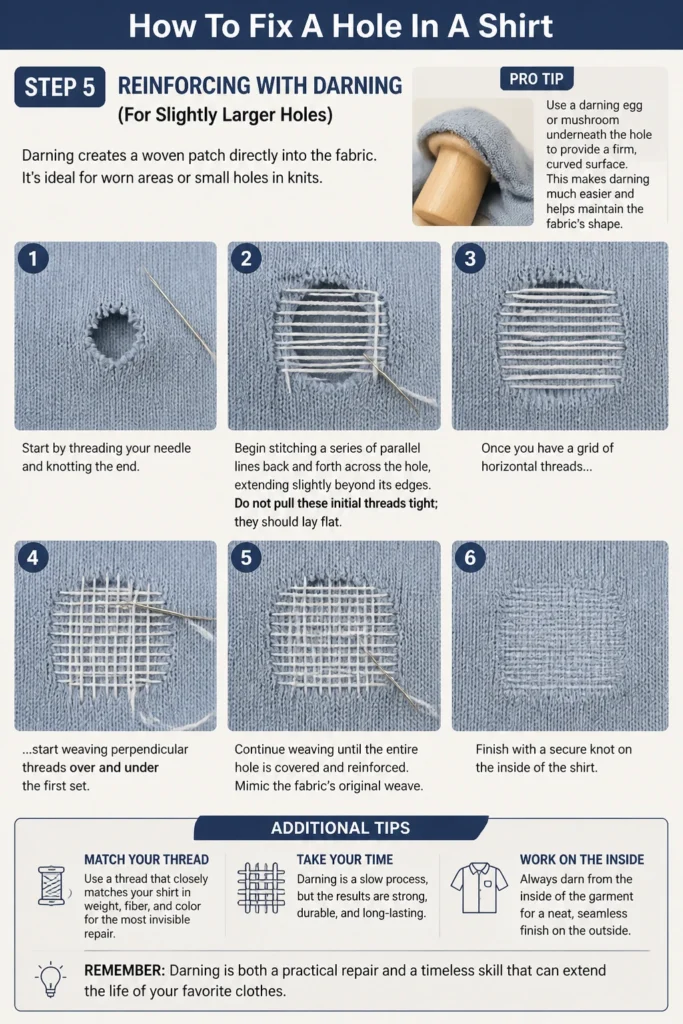
Start by threading your needle and knotting the end, as in the simple stitch method.
Begin stitching a series of parallel lines back and forth across the hole, extending slightly beyond its edges. Do not pull these initial threads tight; they should lay flat.
Once you have a grid of horizontal threads, start weaving perpendicular threads over and under the first set. This mimics the fabric’s original weave.
Continue weaving until the entire hole is covered and reinforced. Finish with a secure knot on the inside of the shirt.
Pro Tip: Use a darning egg or mushroom underneath the hole to provide a firm, curved surface. This makes darning much easier and helps maintain the fabric’s shape.
Step 6: Iron-On Patch Method (For Quick Fixes or Non-Visible Areas)
Iron-on patches are a fast solution, especially for areas that won’t show or for heavier fabrics.
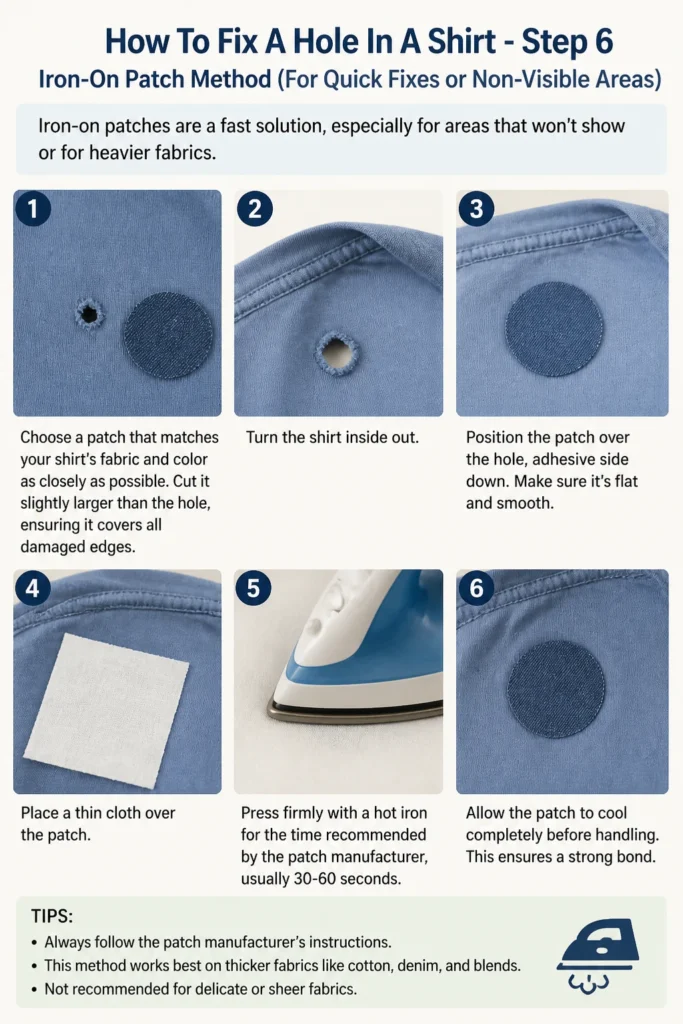
Choose a patch that matches your shirt’s fabric and color as closely as possible. Cut it slightly larger than the hole, ensuring it covers all damaged edges.
Turn the shirt inside out. Position the patch over the hole, adhesive side down. Make sure it’s flat and smooth.
Place a thin cloth over the patch. Press firmly with a hot iron for the time recommended by the patch manufacturer, usually 30-60 seconds.
Allow the patch to cool completely before handling. This ensures a strong bond.
Step 7: Fabric Patch Method (For Durable and Aesthetic Repairs)
For a more durable or decorative fix, use a piece of scrap fabric. Choose fabric that matches the shirt or offers a pleasing contrast.
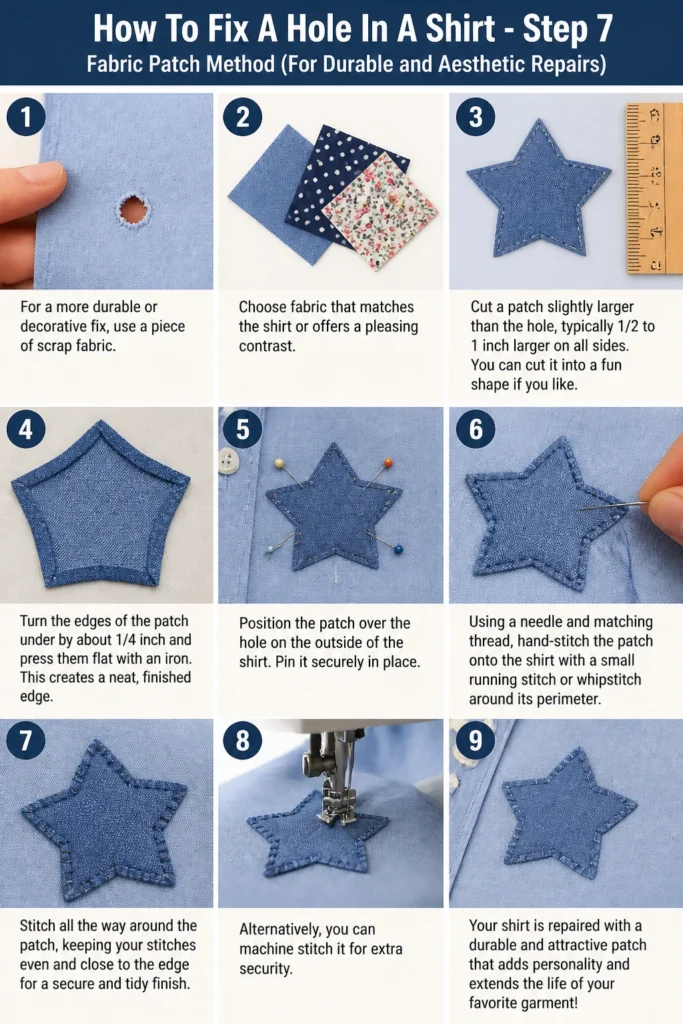
Cut a patch slightly larger than the hole, typically 1/2 to 1 inch larger on all sides. You can cut it into a fun shape if you like.
Turn the edges of the patch under by about 1/4 inch and press them flat with an iron. This creates a neat, finished edge.
Position the patch over the hole on the outside of the shirt. Pin it securely in place.
Using a needle and matching thread, hand-stitch the patch onto the shirt with a small running stitch or whipstitch around its perimeter. Alternatively, you can machine stitch it for extra security.
Step 8: Finishing Touches and Aftercare
Once your mend is complete, check both the inside and outside of the shirt.
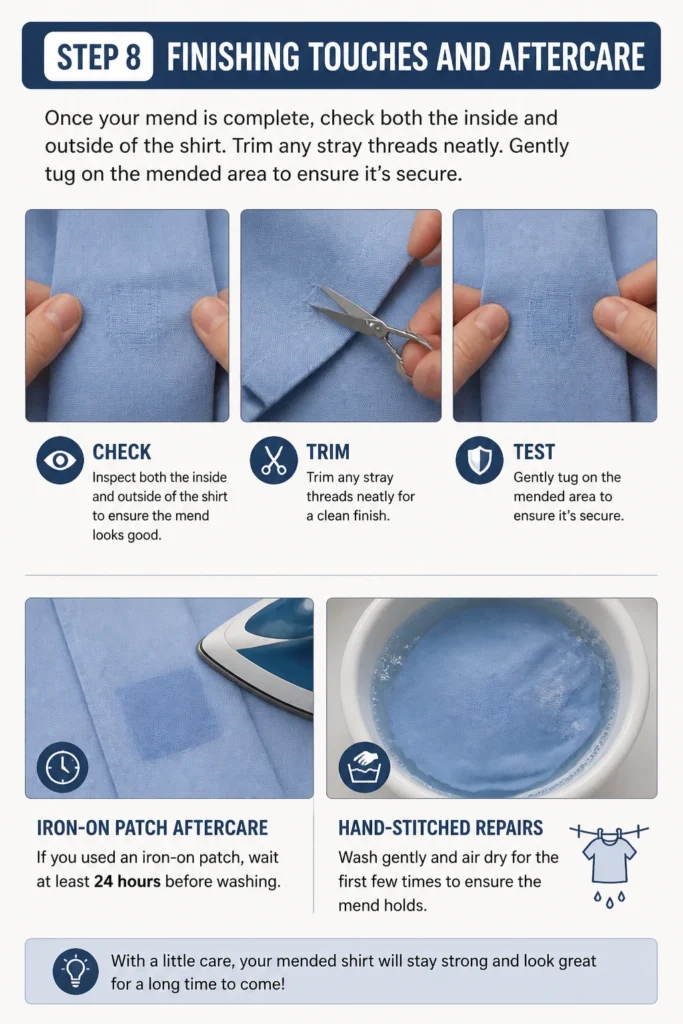
Trim any stray threads neatly. Gently tug on the mended area to ensure it’s secure.
If you used an iron-on patch, wait at least 24 hours before washing. For hand-stitched repairs, wash gently and air dry for the first few times to ensure the mend holds.
Common Mistakes to Avoid
Using the Wrong Needle or Thread
A thick needle can leave visible holes in delicate fabrics, while a thin thread might break easily on sturdy materials. Always match your needle and thread to the fabric weight and type of your shirt. The right tools make a significant difference in the final look and durability.
Pulling Stitches Too Tight
Overly tight stitches will cause the fabric around the hole to pucker and gather. This creates an uneven, unsightly repair. Aim for snug, even stitches that gently bring the fabric edges together without distorting the material.
Not Trimming Frayed Edges
Leaving frayed threads around the hole can lead to the repair unraveling or the hole growing larger. Always trim away any loose threads neatly before you begin stitching. This provides a clean foundation for your mend.
Ignoring Fabric Direction
Fabrics have a grain, which is the direction the threads run. When darning or patching, try to align your stitches or the patch with the fabric’s grain. This helps the repair blend in more seamlessly and prevents distortion.
Troubleshooting
Repair Looks Bulky or Noticeable
If your mend feels thick or stands out too much, you might be using thread that’s too heavy or making stitches that are too large. Try using a finer thread and smaller, more precise stitches. For patches, consider a lighter weight fabric or a smaller patch size.
Hole Reappears or Expands
This often happens if the original fabric around the hole was very weak or if the mend wasn’t secured properly. Reinforce the area by extending your stitches further into the healthy fabric around the hole. You might also need to add a small, lightweight backing patch on the inside for extra strength.
Fabric Puckers After Washing
Puckering after washing usually indicates that your stitches were too tight, or the fabric was stretched during the repair. Ensure you’re not pulling too hard when stitching. If using a patch, pre-wash your patch fabric to account for any shrinkage before attaching it to the shirt.
Key Takeaways
- Always assess the hole first to choose the best repair method.
- Use the correct needle and thread for your shirt’s fabric type.
- Prepare the fabric by trimming frayed edges for a clean start.
- Strive for small, even stitches to create a smooth, less noticeable mend.
- Darning provides a durable, woven repair for worn areas.
- Patches offer a strong solution for larger holes, either iron-on or stitched.
- Secure all stitches with knots on the inside of the garment.
- Gentle aftercare helps preserve your repair.
Frequently Asked Questions
Can I fix a hole in a stretchy t-shirt?
Yes, you can! For stretchy knits, use a ballpoint needle to avoid snagging threads. A darning technique or a stretch fabric patch with a flexible stitch (like a zigzag stitch if using a machine) works best to maintain the fabric’s elasticity.
What if I don’t have matching thread?
If an exact match isn’t possible, choose a thread color that is slightly darker than the shirt. Darker threads tend to blend in better than lighter ones. You can also embrace the repair by choosing a contrasting thread for a visible mending aesthetic.
Are iron-on patches permanent?
Iron-on patches offer a good, temporary to semi-permanent solution. Their longevity depends on the patch quality, fabric type, and how often the garment is washed. They can sometimes peel or stiffen over time. For a more permanent fix, hand-stitch or machine-stitch an iron-on patch around its edges.
How do I fix a tiny pinhole?
For a very small pinhole, you might not even need to stitch. Gently push the fabric threads back into place with a fine needle. If it’s still visible, use a single strand of very fine, matching thread and make a few tiny, almost invisible stitches to pull the edges together.
Our Top Recommended Finds
- Assorted Hand Sewing Needles: A pack with various sizes ensures you always have the right needle for different fabric weights.
- All-Purpose Polyester Thread Kit: A kit with multiple colors covers most basic repairs and provides good durability.
- Fabric Scissors: Sharp, dedicated fabric scissors prevent snagging and allow for clean cuts.
Bring Your Favorite Shirt Back to Life
Don’t let a small hole spell the end for a cherished shirt. With these straightforward steps, you have the power to extend its lifespan and keep it in your wardrobe rotation.
Mending is a practical skill that saves money and reduces waste. It’s also incredibly satisfying to give a beloved item a second chance.
Gather your supplies today and tackle that hole you’ve been meaning to fix. Your shirt—and your wallet—will thank you.
Beginner-friendly templates, step-by-step guides,
and weekly project ideas in your inbox.