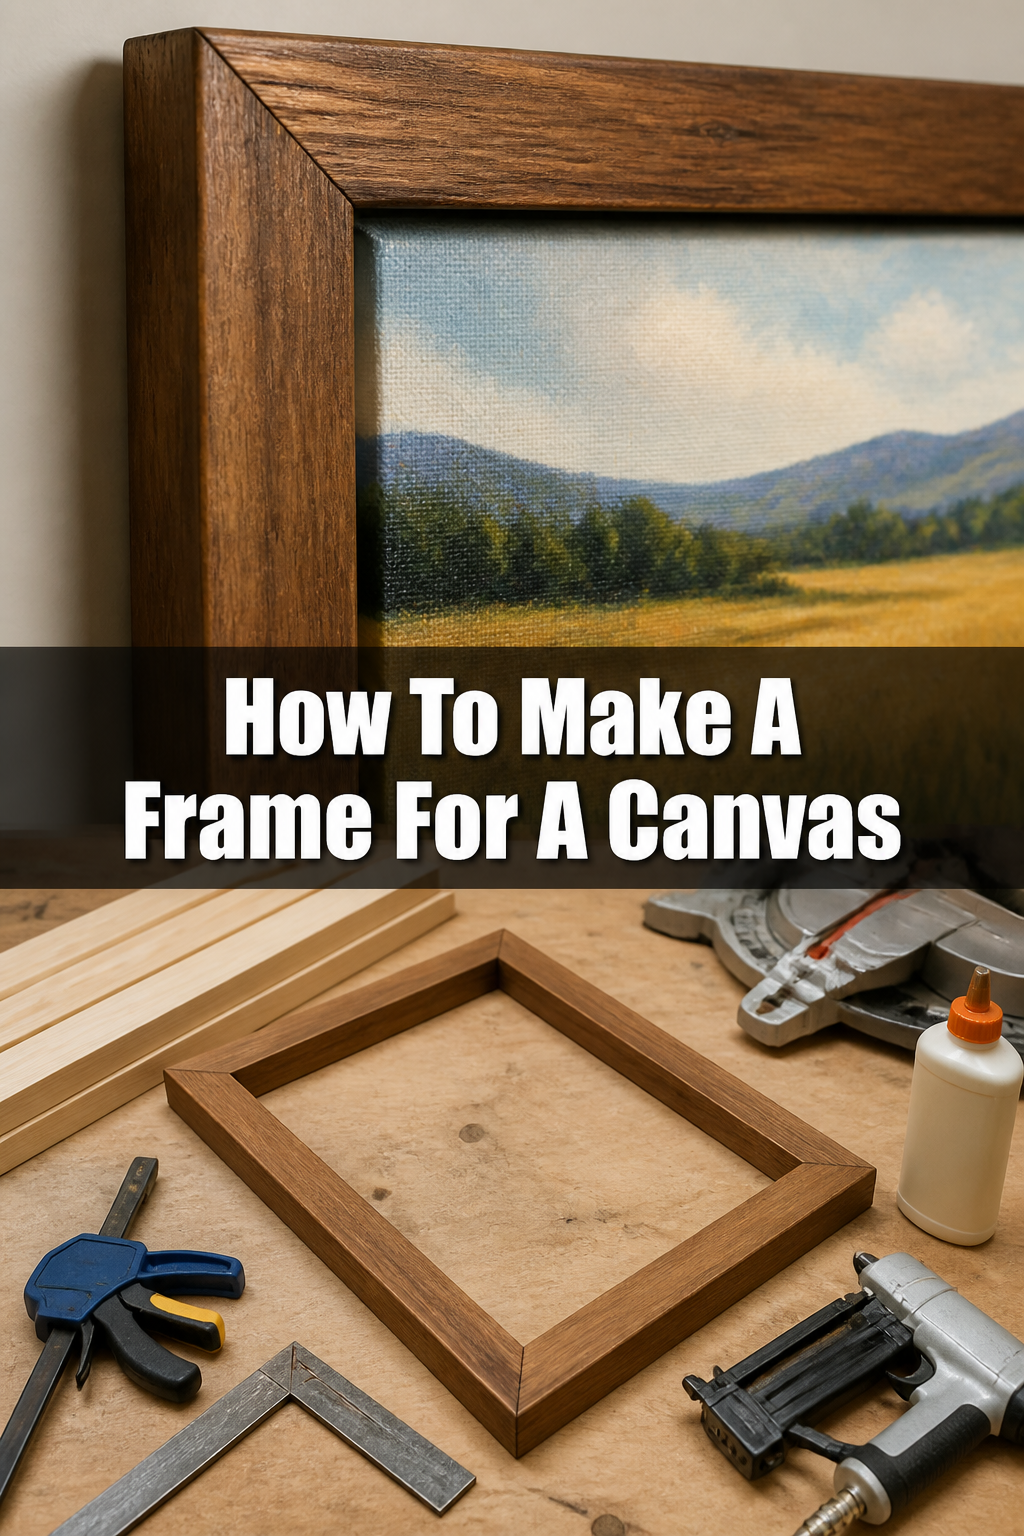
🖼️ How To Make A Frame For A Canvas

Beginner-friendly templates, step-by-step guides,
and weekly project ideas in your inbox.
Building your own canvas frame brings a unique sense of accomplishment. It’s a skill I’ve honed over many years, creating custom pieces for my own art and for clients. This guide shares that practical experience, helping you craft a sturdy, beautiful frame for your artwork.
You’ll gain the confidence to tackle this rewarding DIY project.
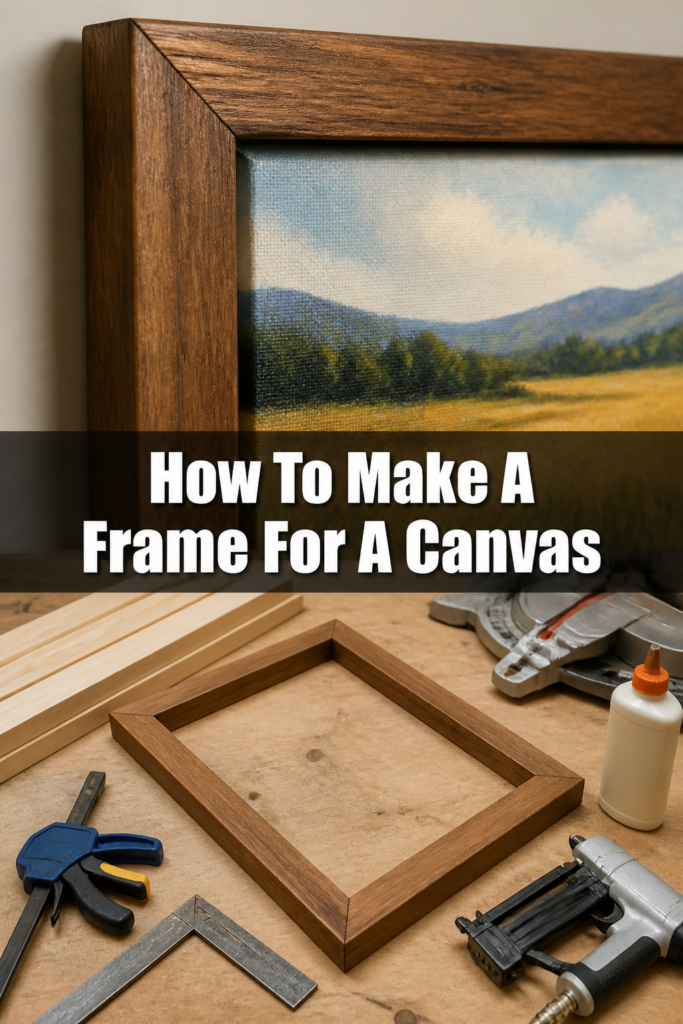
Quick Overview
This guide will walk you through the process of constructing a professional-looking frame for your canvas, from initial measurements to final assembly. You’ll learn the techniques needed to ensure your artwork is beautifully presented and protected.
- Time needed: 3-5 hours (depending on experience and drying times)
- Difficulty: Intermediate
- What you’ll need: Wood strips, miter saw, wood glue, clamps, measuring tape, fasteners, sandpaper.
Step-by-Step Instructions
Step 1: Gather Your Materials and Tools
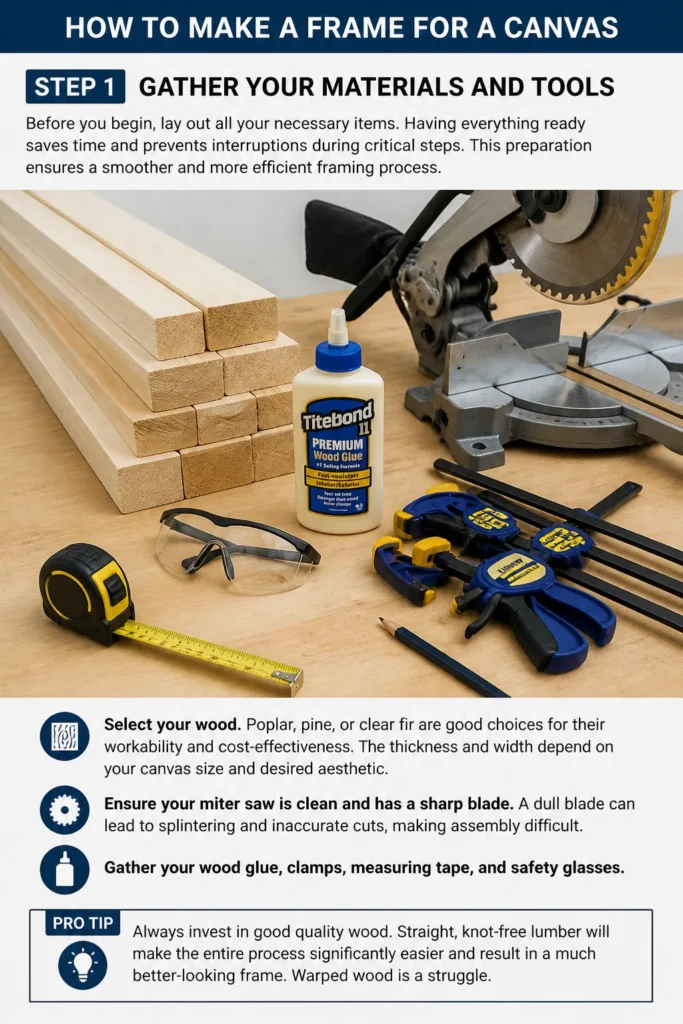
Before you begin, lay out all your necessary items. Having everything ready saves time and prevents interruptions during critical steps. This preparation ensures a smoother and more efficient framing process.
Select your wood. Poplar, pine, or clear fir are good choices for their workability and cost-effectiveness. The thickness and width depend on your canvas size and desired aesthetic.
Ensure your miter saw is clean and has a sharp blade. A dull blade can lead to splintering and inaccurate cuts, making assembly difficult. Gather your wood glue, clamps, measuring tape, and safety glasses.
Pro Tip: Always invest in good quality wood. Straight, knot-free lumber will make the entire process significantly easier and result in a much better-looking frame. Warped wood is a struggle.
Step 2: Measure Your Canvas Accurately
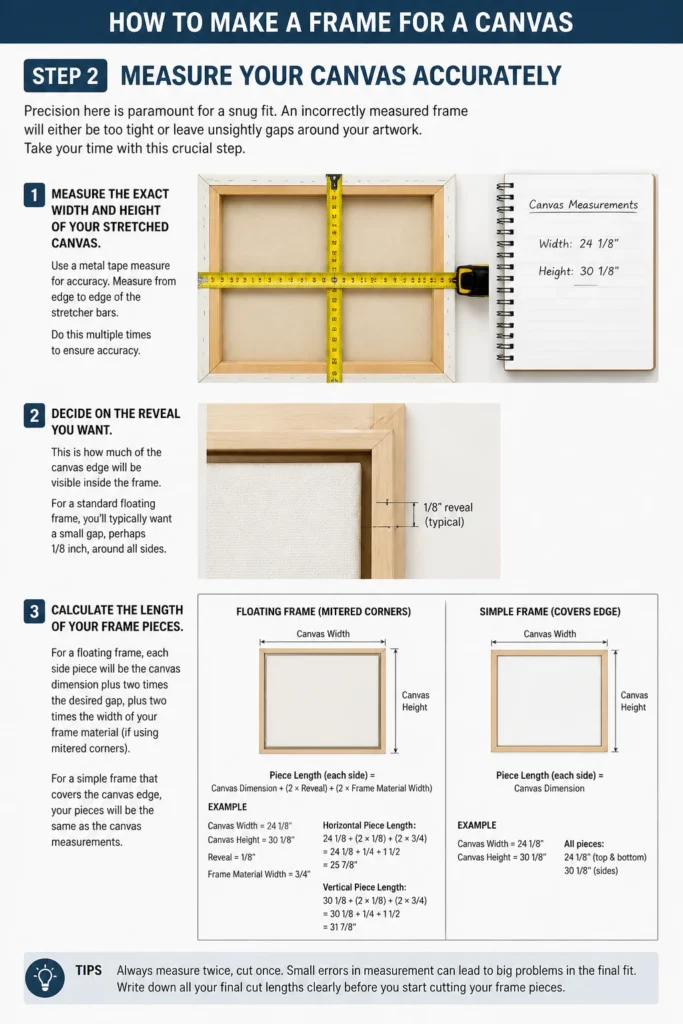
Precision here is paramount for a snug fit. An incorrectly measured frame will either be too tight or leave unsightly gaps around your artwork. Take your time with this crucial step.
Measure the exact width and height of your stretched canvas. Do this multiple times to ensure accuracy. Note these measurements down clearly.
Decide on the reveal you want. This is how much of the canvas edge will be visible inside the frame. For a standard floating frame, you’ll typically want a small gap, perhaps 1/8 inch, around all sides.
Calculate the length of your frame pieces. For a floating frame, each side piece will be the canvas dimension plus two times the desired gap, plus two times the width of your frame material (if using mitered corners). For a simple frame that covers the canvas edge, your inside dimensions should match the canvas.
Step 3: Cut Your Wood Strips to Size
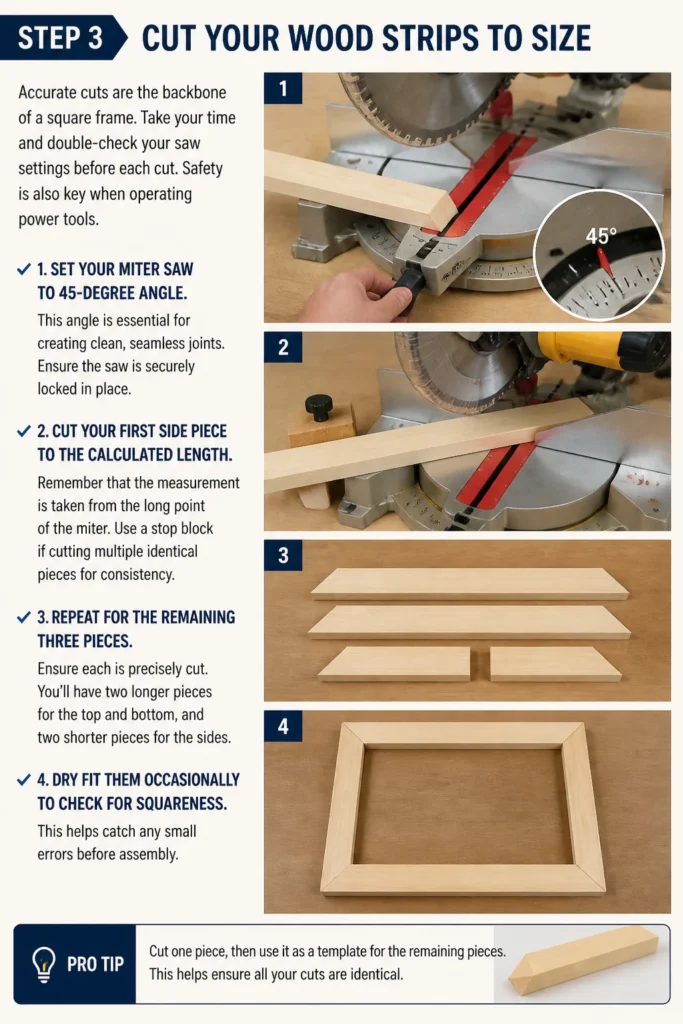
Accurate cuts are the backbone of a square frame. Take your time and double-check your saw settings before each cut. Safety is also key when operating power tools.
Set your miter saw to a 45-degree angle for mitered corners. This angle is essential for creating clean, seamless joints. Ensure the saw is securely locked in place.
Cut your first side piece to the calculated length. Remember that the measurement is taken from the long point of the miter. Use a stop block if cutting multiple identical pieces for consistency.
Repeat for the remaining three pieces, ensuring each is precisely cut. You’ll have two longer pieces for the top and bottom, and two shorter pieces for the sides. Dry fit them occasionally to check for squareness.
Pro Tip: Cut one piece, then use it as a template for the corresponding parallel piece. This helps maintain symmetry and ensures your frame’s opposing sides are exactly the same length.
Step 4: Prepare Your Joints
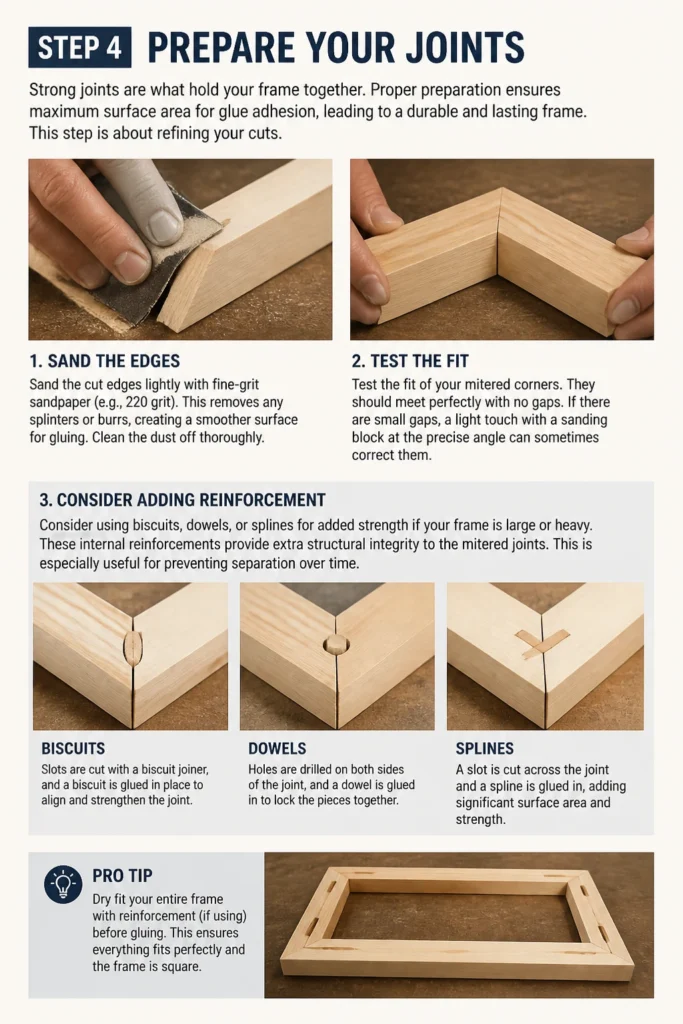
Strong joints are what hold your frame together. Proper preparation ensures maximum surface area for glue adhesion, leading to a durable and lasting frame. This step is about refining your cuts.
Sand the cut edges lightly with fine-grit sandpaper (e.g., 220 grit). This removes any splinters or burrs, creating a smoother surface for gluing. Clean the dust off thoroughly.
Test the fit of your mitered corners. They should meet perfectly with no gaps. If there are small gaps, a light touch with a sanding block at the precise angle can sometimes correct them.
Consider using biscuits, dowels, or splines for added strength if your frame is large or heavy. These internal reinforcements provide extra structural integrity to the mitered joints. This is especially useful for preventing separation over time.
Step 5: Assemble the Frame Sides
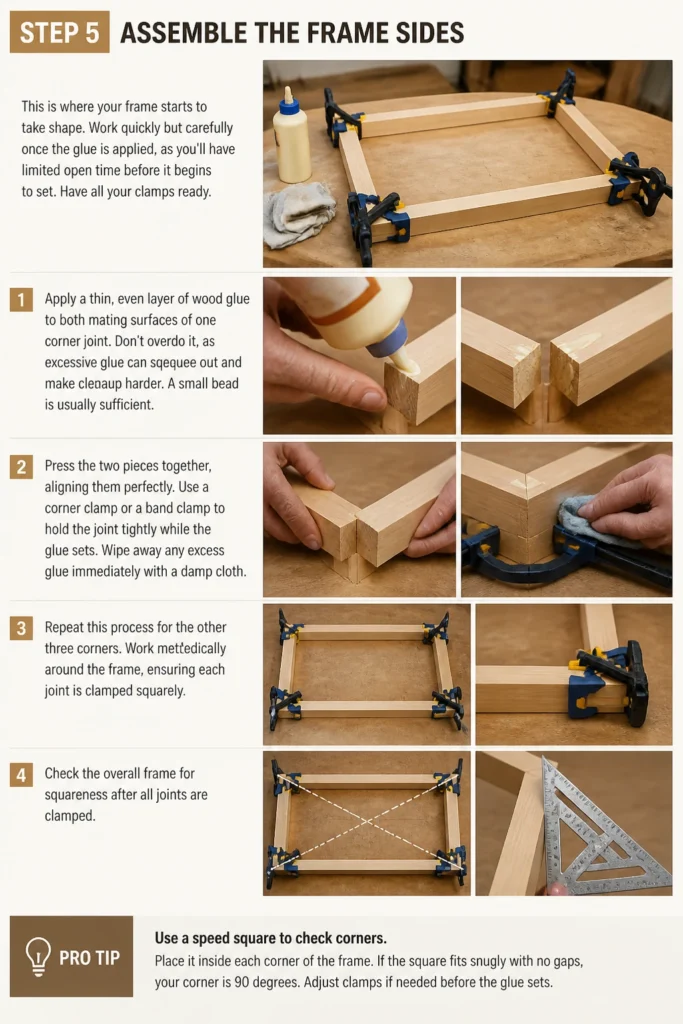
This is where your frame starts to take shape. Work quickly but carefully once the glue is applied, as you’ll have limited open time before it begins to set. Have all your clamps ready.
Apply a thin, even layer of wood glue to both mating surfaces of one corner joint. Don’t overdo it, as excessive glue can squeeze out and make cleanup harder. A small bead is usually sufficient.
Press the two pieces together, aligning them perfectly. Use a corner clamp or a band clamp to hold the joint tightly while the glue sets. Wipe away any excess glue immediately with a damp cloth.
Repeat this process for the other three corners. Work methodically around the frame, ensuring each joint is clamped squarely. Check the overall frame for squareness after all joints are clamped.
Pro Tip: Use a speed square to check each corner for squareness as you clamp it. Even slight deviations at this stage can compound into a noticeably crooked frame once fully assembled.
Step 6: Secure the Corners
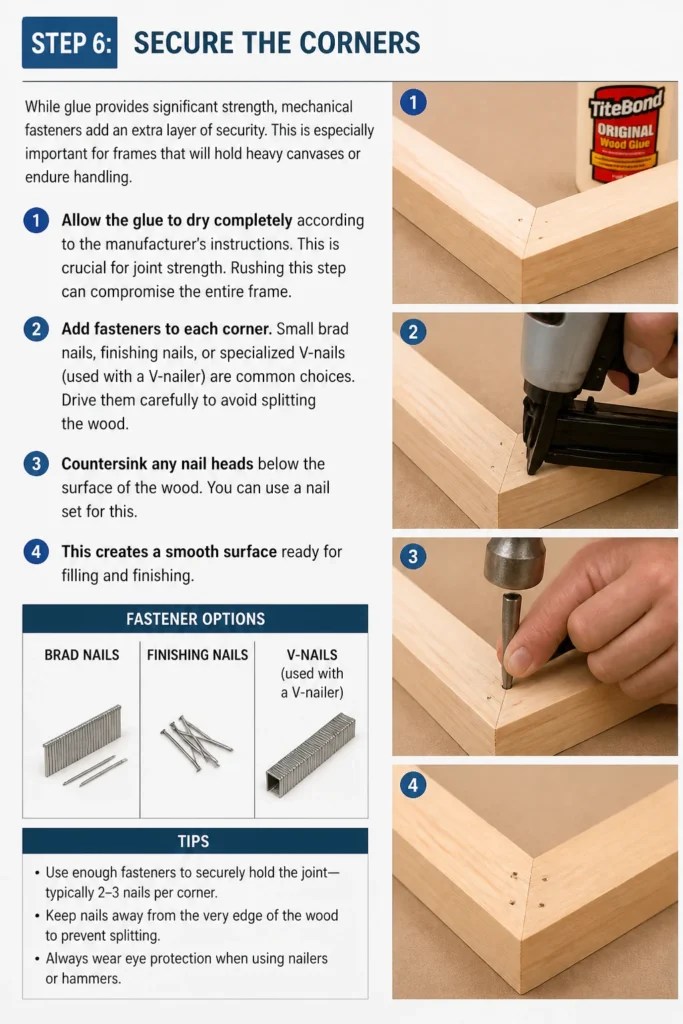
While glue provides significant strength, mechanical fasteners add an extra layer of security. This is especially important for frames that will hold heavy canvases or endure handling. Choose fasteners appropriate for your wood.
Allow the glue to dry completely according to the manufacturer’s instructions. This is crucial for joint strength. Rushing this step can compromise the entire frame.
Add fasteners to each corner. Small brad nails, finishing nails, or specialized V-nails (used with a V-nailer) are common choices. Drive them carefully to avoid splitting the wood.
Countersink any nail heads below the surface of the wood. You can use a nail set for this. This creates a smooth surface ready for filling and finishing.
Step 7: Attach the Canvas to the Frame
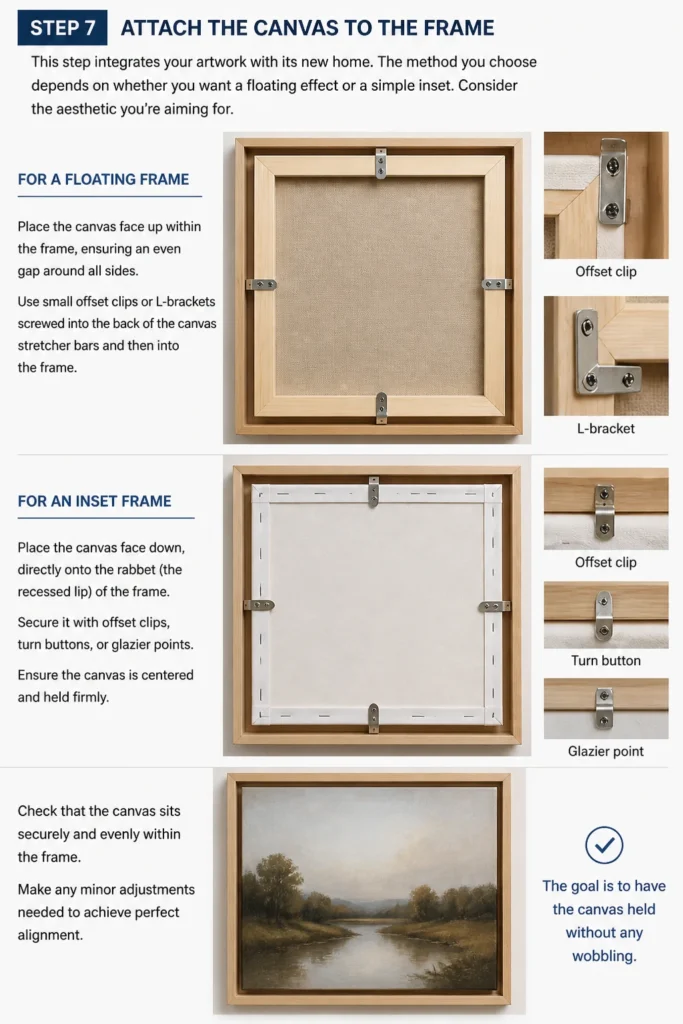
This step integrates your artwork with its new home. The method you choose depends on whether you want a floating effect or a simple inset. Consider the aesthetic you’re aiming for.
For a floating frame: Place the canvas face up within the frame, ensuring an even gap around all sides. Use small offset clips or L-brackets screwed into the back of the canvas stretcher bars and then into the frame.
For an inset frame: Place the canvas face down, directly onto the rabbet (the recessed lip) of the frame. Secure it with offset clips, turn buttons, or glazier points. Ensure the canvas is centered and held firmly.
Check that the canvas sits securely and evenly within the frame. Make any minor adjustments needed to achieve perfect alignment. The goal is to have the canvas held without any wobbling.
Step 8: Finish Your Frame
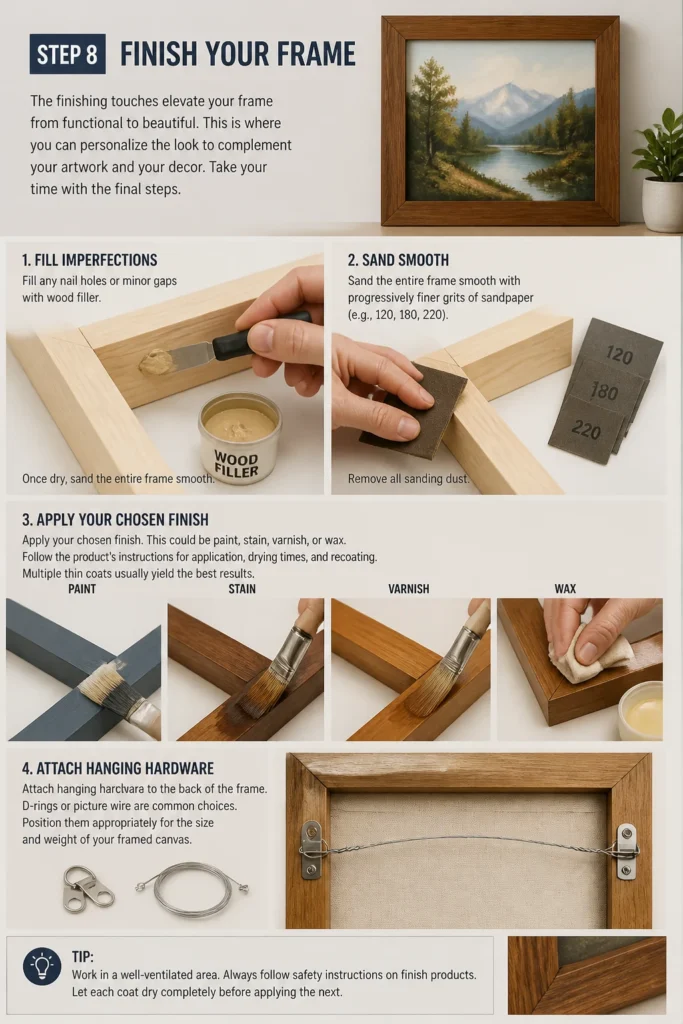
The finishing touches elevate your frame from functional to beautiful. This is where you can personalize the look to complement your artwork and your decor. Take your time with the final steps.
Fill any nail holes or minor gaps with wood filler. Once dry, sand the entire frame smooth with progressively finer grits of sandpaper (e.g., 120, 180, 220). Remove all sanding dust.
Apply your chosen finish. This could be paint, stain, varnish, or wax. Follow the product’s instructions for application, drying times, and recoating. Multiple thin coats usually yield the best results.
Attach hanging hardware to the back of the frame. D-rings or picture wire are common choices. Position them appropriately for the size and weight of your framed canvas.
Common Mistakes to Avoid
Inaccurate Measurements
One of the most frequent errors is not measuring the canvas precisely. A slight miscalculation means your frame will not fit correctly, leading to frustration and wasted materials. Always measure at least twice and double-check your calculations before cutting.
Poor Joint Alignment
Gaps in mitered corners or joints that aren’t perfectly flush are tell-tale signs of a rushed job. These not only look bad but also weaken the frame’s structural integrity. Use clamps, check for squareness, and allow glue to cure fully.
Rushing Glue Drying Time
Many beginners get impatient and remove clamps or add fasteners before the glue has fully set. This significantly compromises the strength of the joints. Always follow the glue manufacturer’s recommended drying times, often overnight, for maximum bond strength.
Not Protecting the Canvas
During assembly, sanding, or finishing, it’s easy to accidentally damage the canvas. Always cover your canvas with painter’s tape or a protective sheet if it’s already in place. Keep it away from dust and debris from sanding or painting.
Troubleshooting
Frame Not Square
If your assembled frame isn’t perfectly square, it often points to inaccurate cuts or improper clamping during glue-up. For minor issues, you can sometimes gently twist the frame while the glue is still slightly pliable. For dried frames, you might need to carefully recut one or two sides, or use a sanding block to shave off material from the long point of a miter joint.
Joints Gapping After Drying
Gaps typically indicate insufficient clamping pressure, improperly prepared surfaces, or too little glue. If the gaps are small, you can try filling them with wood filler or a mixture of sawdust and glue. For larger gaps, the joint might need to be broken apart, cleaned, recut, and re-glued with proper clamping.
Canvas Sagging in Frame
If your canvas sags or isn’t held taut within the frame, it means the securing method isn’t sufficient. Ensure your offset clips or turn buttons are firmly screwed into both the canvas stretcher bar and the frame. Add more clips if necessary, spacing them evenly around the perimeter.
Key Takeaways
- Precision in measuring and cutting is the foundation of a great frame.
- Always use sharp tools for clean, accurate cuts and safer operation.
- Proper clamping and adequate glue drying time are vital for strong joints.
- Check for squareness at every stage of the assembly process.
- Finishing touches protect the wood and enhance the frame’s aesthetic appeal.
- Don’t rush; patience results in a higher quality, more professional-looking frame.
Frequently Asked Questions
What type of wood is best for a canvas frame?
Pine, poplar, or clear fir are excellent choices for their affordability and ease of working. Hardwoods like oak or maple can also be used for a more premium feel, but they are harder to cut and more expensive. Choose wood that is straight and free of significant knots.
Can I use a pre-made frame and adapt it for a canvas?
Yes, you can often adapt a pre-made photo frame, especially if it has a deep enough rabbet to accommodate the canvas. You might need to remove the glass and backing, and potentially add offset clips or L-brackets to secure the canvas. Ensure the inner dimensions match your canvas.
How do I make a floating frame for my canvas?
A floating frame typically requires a frame with a deeper rabbet or a custom-built frame where the canvas sits slightly recessed from the front. The key is to leave a small, even gap (e.g., 1/8 inch) between the canvas edge and the inside edge of the frame, then secure the canvas from the back with offset clips.
What’s the best way to hang a framed canvas?
For smaller frames, a single D-ring or sawtooth hanger centered on the top rail is sufficient. For larger or heavier frames, use two D-rings attached to the side rails, approximately one-third of the way down from the top, and connect them with picture wire. This distributes weight and helps the frame hang level.
Our Top Recommended Finds
- Miter Saw: Essential for precise 45-degree cuts, ensuring tight, seamless corner joints.
- Wood Glue: Provides the primary bond for your frame joints; opt for a strong, fast-drying variety.
- Corner Clamps: Indispensable for holding mitered corners perfectly square while the glue dries, preventing shifting.
Crafting Your Vision: The Next Step
You’ve now got the knowledge and steps to create a beautiful, custom frame for your canvas. This skill opens up a world of possibilities for displaying your artwork exactly as you envision it. You can tailor frames to specific pieces, experiment with different finishes, and even create unique gifts.
Don’t let your art sit unframed. Take action today and bring your canvas to life with a frame you built yourself. Imagine the satisfaction of seeing your artwork professionally presented, knowing you crafted its elegant enclosure. Your next masterpiece deserves a frame made with care.
Beginner-friendly templates, step-by-step guides,
and weekly project ideas in your inbox.