🧵 How To Bind A Quilt Step By Step

Beginner-friendly templates, step-by-step guides,
and weekly project ideas in your inbox.
Finishing a quilt with a beautiful binding is incredibly satisfying. It’s the final touch that frames your hard work and makes your quilt truly complete. I remember the first time I bound a quilt, feeling a mix of excitement and apprehension.
This guide comes from countless hours at the sewing machine, perfecting this essential quilting skill. You’ll learn how to create a durable, neat edge that elevates your quilt from a project to a cherished heirloom. Let’s get started on giving your quilt the perfect finish.
Quick Overview
Binding a quilt secures all layers and provides a clean, finished edge. This process transforms your quilt from a layered fabric sandwich into a cohesive, ready-to-use piece. You’ll gain confidence in an essential quilting technique.
- Time needed: 4-8 hours (depending on quilt size and experience)
- Difficulty: Beginner
- What you’ll need: Fabric for binding, rotary cutter, cutting mat, ruler, sewing machine, thread, pins or clips, iron, ironing board, scissors, hand-sewing needle.
Step-by-Step Instructions
Step 1: Prepare Your Binding Strips
First, you need to cut your binding fabric. Determine the total perimeter of your quilt by measuring each side and adding them together. Add an extra 10-12 inches for joining and overlap.
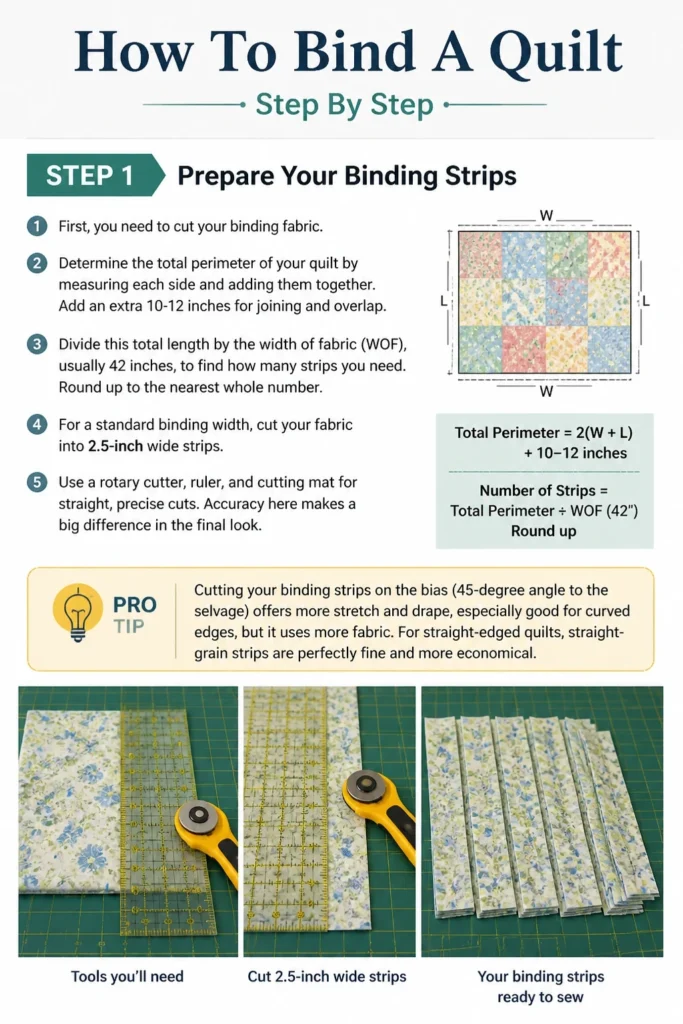
Divide this total length by the width of fabric (WOF), usually 42 inches, to find how many strips you need. Round up to the nearest whole number. For a standard binding width, cut your fabric into 2.5-inch wide strips.
Use a rotary cutter, ruler, and cutting mat for straight, precise cuts. Accuracy here makes a big difference in the final look.
Pro Tip: Cutting your binding strips on the bias (45-degree angle to the selvage) offers more stretch and drape, especially good for curved edges, but it uses more fabric. For straight-edged quilts, straight-grain strips are perfectly fine and more economical.
Step 2: Join Your Binding Strips
Lay two binding strips right sides together, perpendicular to each other, forming an “L” shape. Make sure the ends overlap where they would create a diagonal seam.
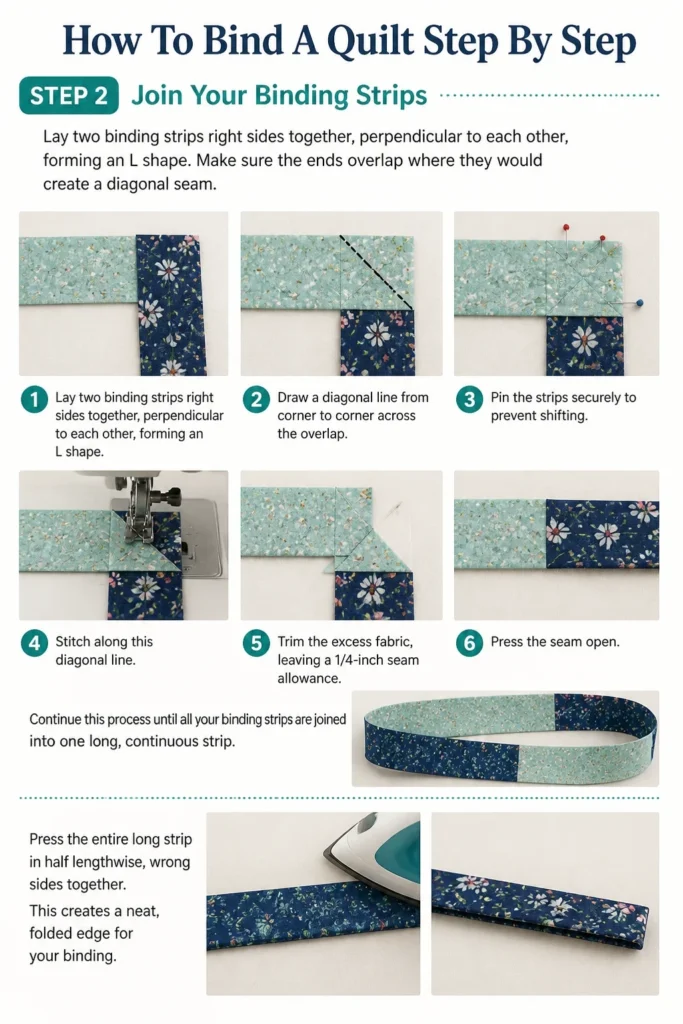
Draw a diagonal line from corner to corner across the overlap. Pin the strips securely to prevent shifting.
Stitch along this diagonal line. Trim the excess fabric, leaving a 1/4-inch seam allowance.
Press the seam open. Continue this process until all your binding strips are joined into one long, continuous strip.
Press the entire long strip in half lengthwise, wrong sides together. This creates a neat, folded edge for your binding.
Step 3: Attach Binding to the Quilt Front
Align the raw edges of your folded binding strip with the raw edge of the quilt top. Start in the middle of one side, leaving about a 10-inch tail of binding unstitched. This tail will be used for joining the ends later.
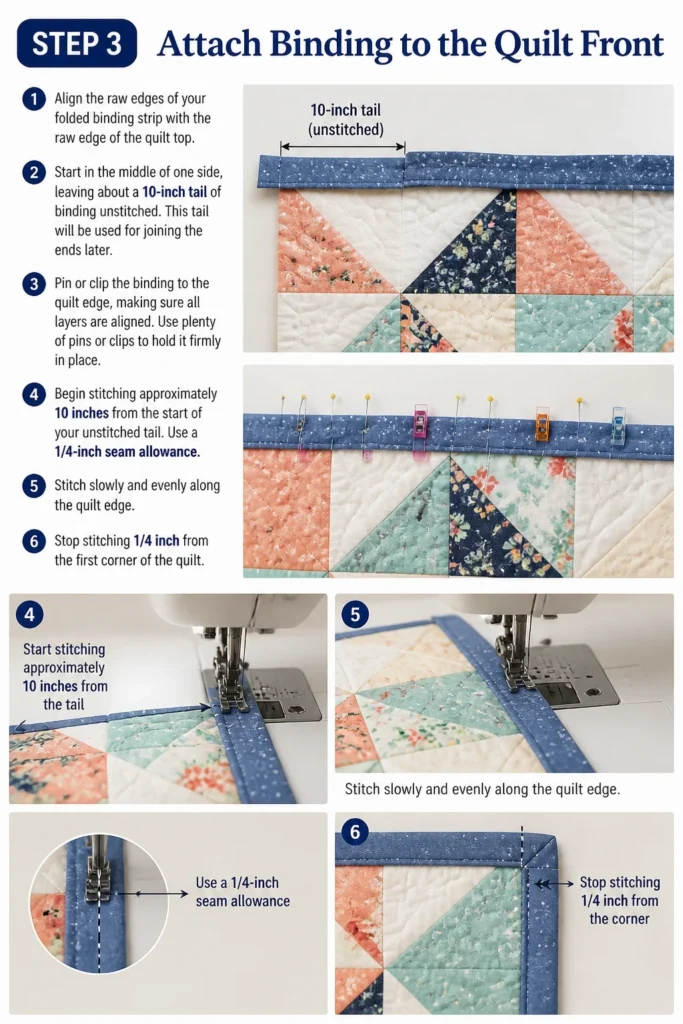
Pin or clip the binding to the quilt edge, making sure all layers are aligned. Use plenty of pins or clips to hold it firmly in place.
Begin stitching approximately 10 inches from the start of your unstitched tail. Use a 1/4-inch seam allowance.
Stitch slowly and evenly along the quilt edge. Stop stitching 1/4 inch from the first corner of the quilt.
Step 4: Miter the Corners on the Front
When you reach 1/4 inch from the corner, stop stitching and backstitch slightly. Remove the quilt from the machine.
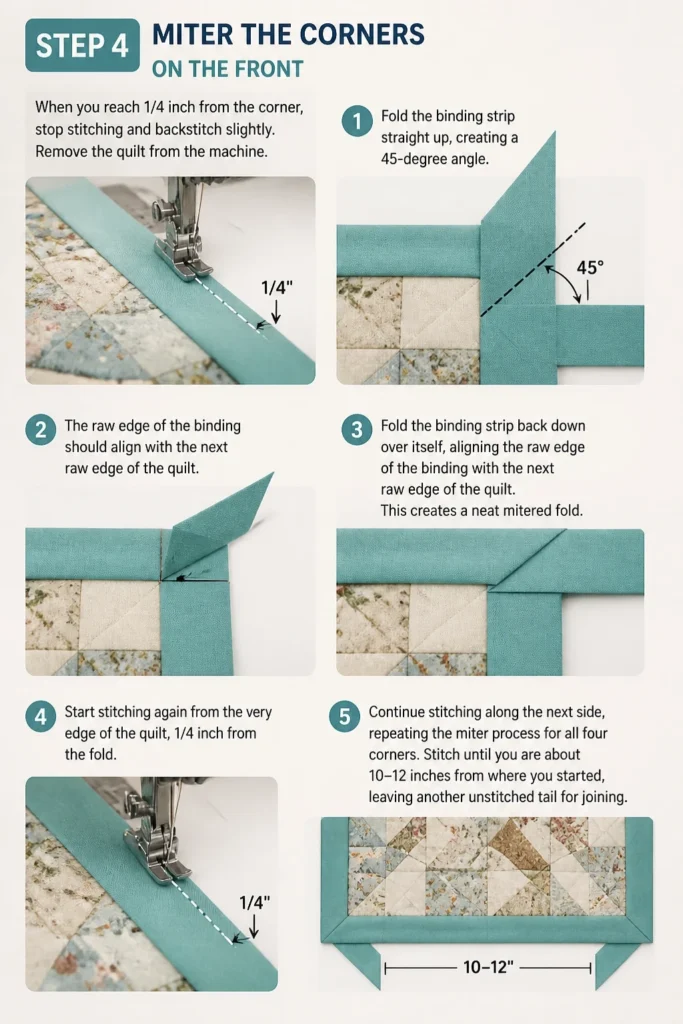
Fold the binding strip straight up, creating a 45-degree angle. The raw edge of the binding should align with the next raw edge of the quilt.
Fold the binding strip back down over itself, aligning the raw edge of the binding with the next raw edge of the quilt. This creates a neat mitered fold.
Start stitching again from the very edge of the quilt, 1/4 inch from the fold. Continue stitching along the next side, repeating the miter process for all four corners.
Stitch until you are about 10-12 inches from where you started, leaving another unstitched tail for joining.
Step 5: Join the Binding Ends
You now have two unstitched binding tails. Lay the quilt flat and bring the two tails together.
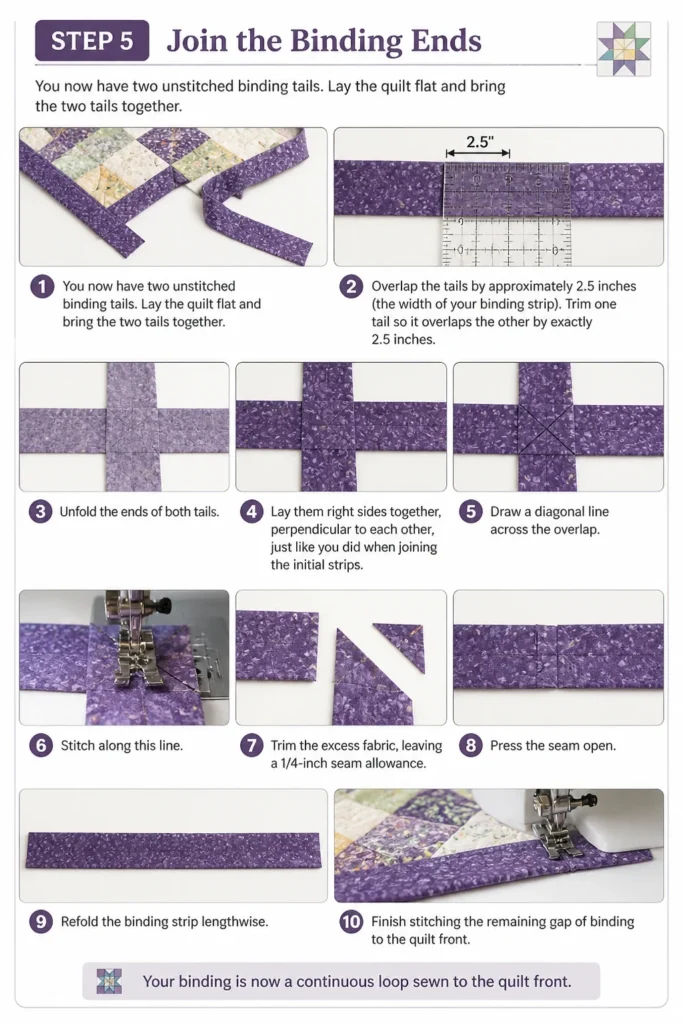
Overlap the tails by approximately 2.5 inches (the width of your binding strip). Trim one tail so it overlaps the other by exactly 2.5 inches.
Unfold the ends of both tails. Lay them right sides together, perpendicular to each other, just like you did when joining the initial strips.
Draw a diagonal line across the overlap. Stitch along this line.
Trim the excess fabric, leaving a 1/4-inch seam allowance. Press the seam open.
Refold the binding strip lengthwise. Finish stitching the remaining gap of binding to the quilt front. Your binding is now a continuous loop sewn to the quilt front.
Step 6: Trim and Press
Carefully trim any excess batting and backing fabric even with the quilt top. Use a sharp rotary cutter and a ruler for a clean edge.
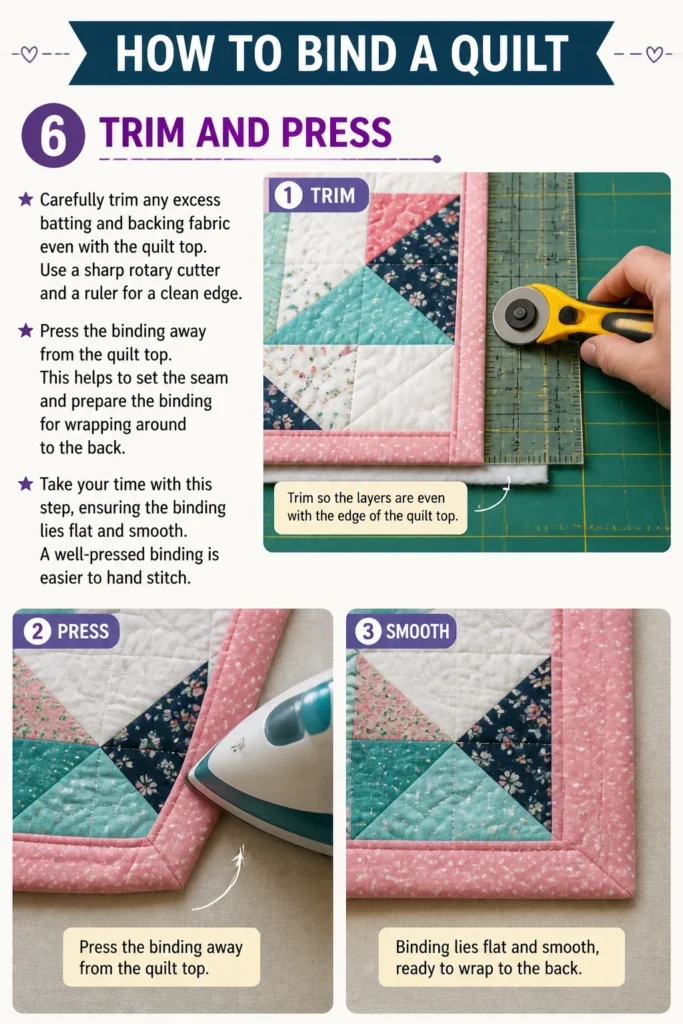
Press the binding away from the quilt top. This helps to set the seam and prepare the binding for wrapping around to the back.
Take your time with this step, ensuring the binding lies flat and smooth. A well-pressed binding is easier to hand stitch.
Step 7: Hand Stitch Binding to the Quilt Back
Flip your quilt over so the backing is facing up. Wrap the folded edge of the binding around to the back of the quilt.
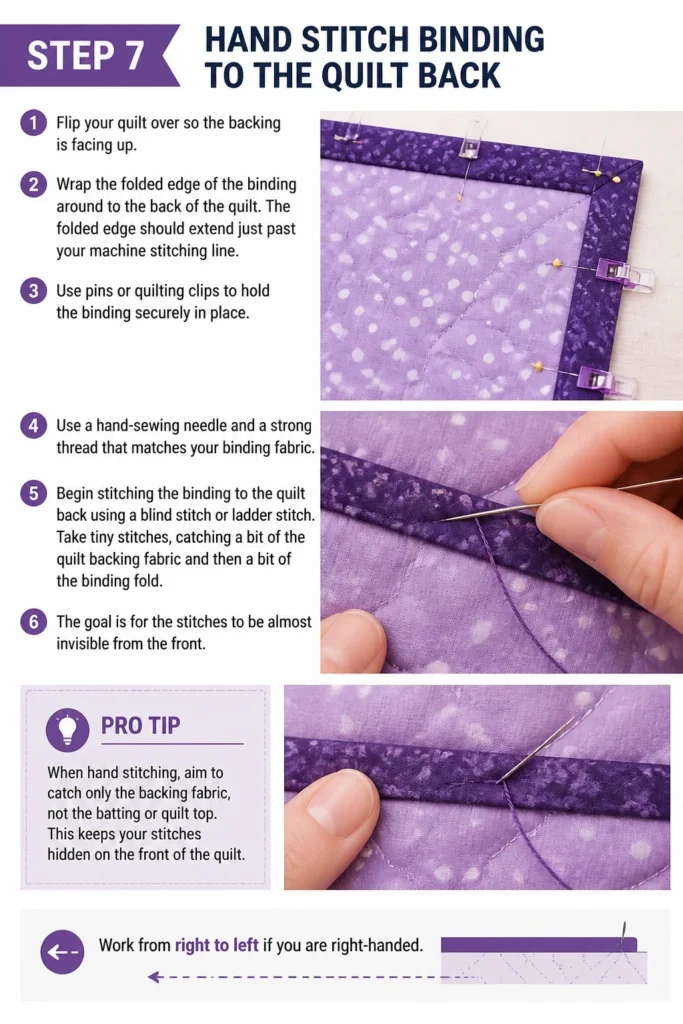
The folded edge should extend just past your machine stitching line. Use pins or quilting clips to hold the binding securely in place.
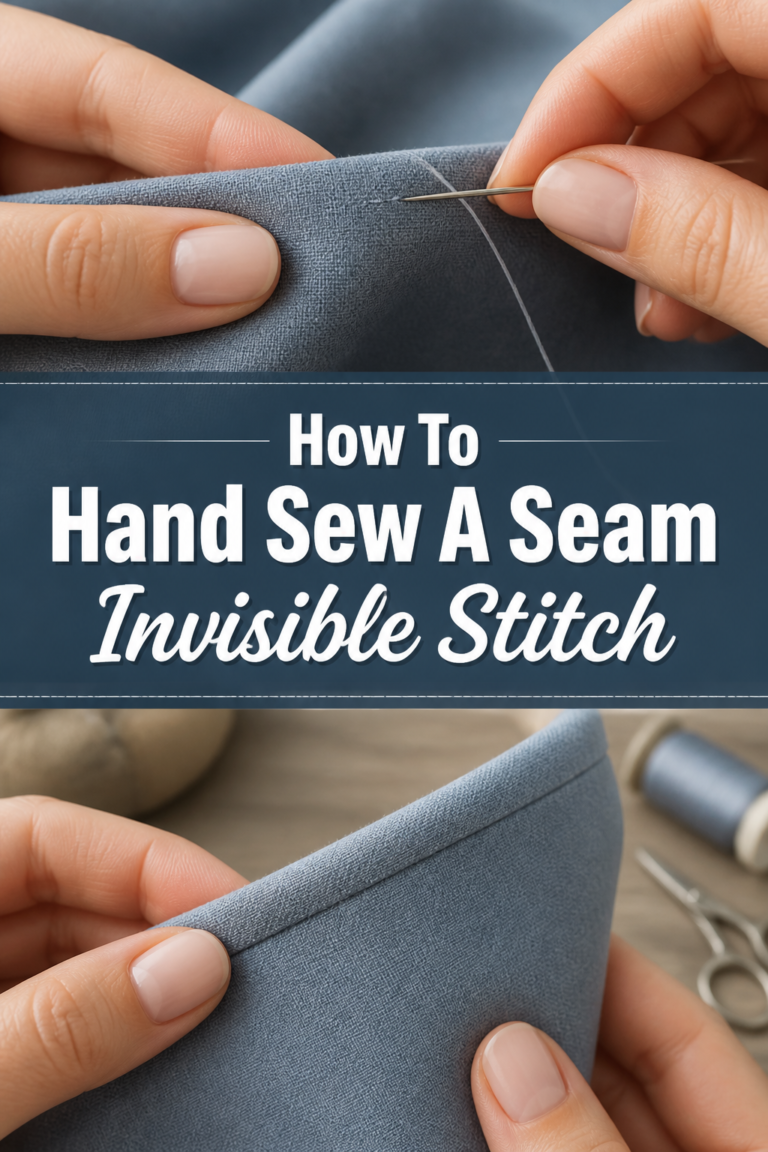
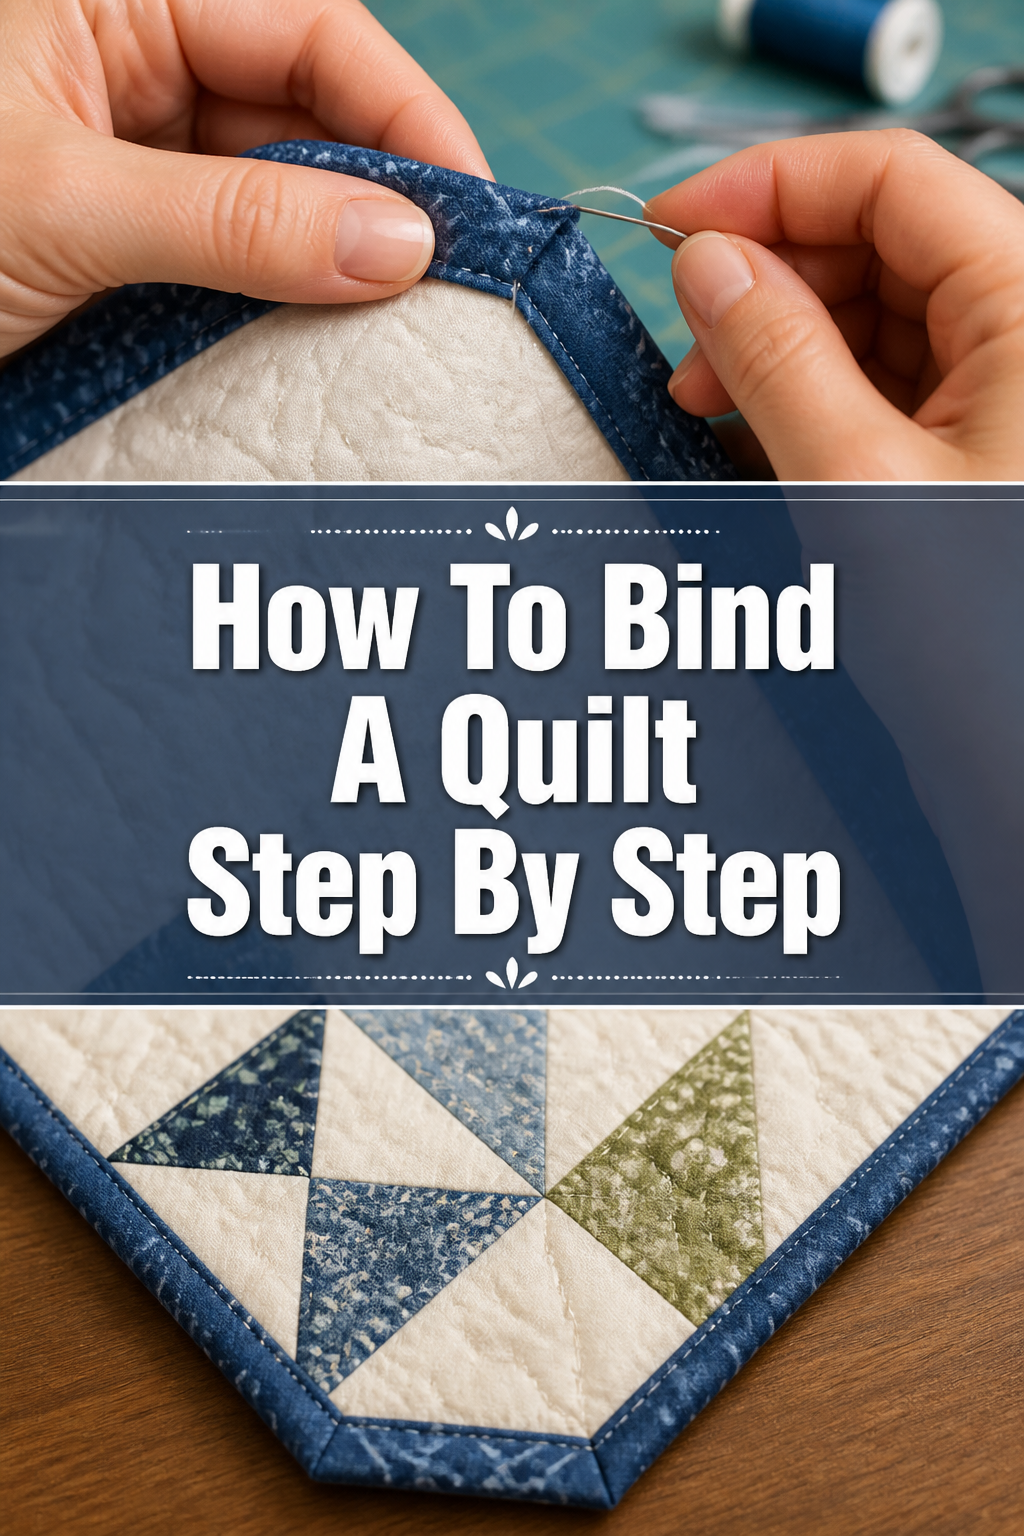
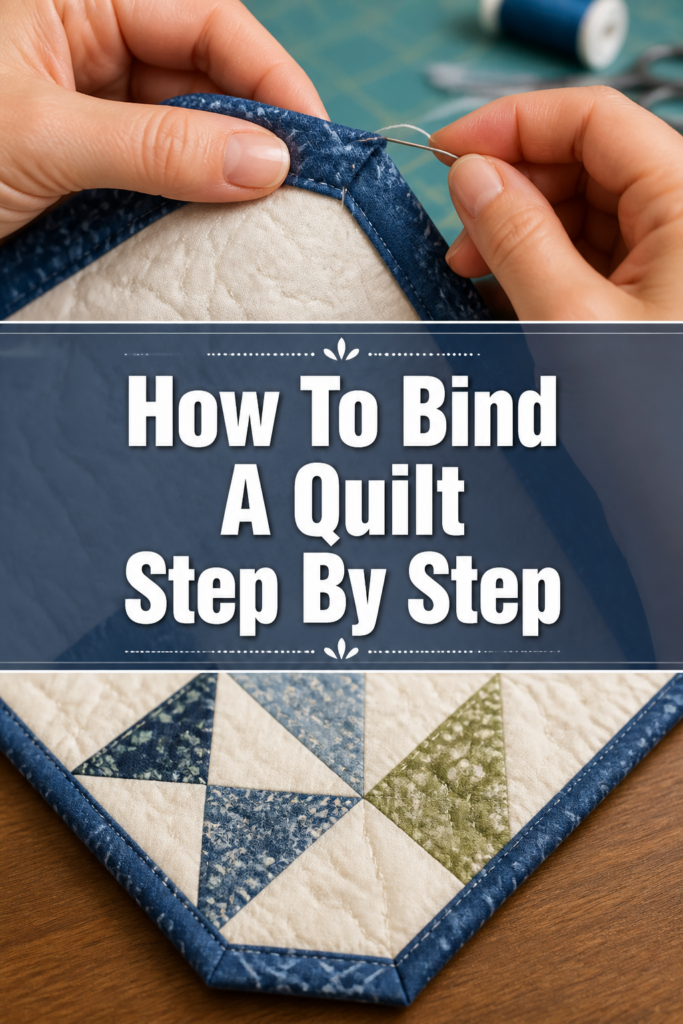
Use a hand-sewing needle and a strong thread that matches your binding fabric. Begin stitching the binding to the quilt back using a blind stitch or ladder stitch.
Take tiny stitches, catching a bit of the quilt backing fabric and then a bit of the binding fold. The goal is for the stitches to be almost invisible from the front.
Pro Tip: When hand stitching, aim to catch only the backing fabric, not the batting or quilt top. This keeps your stitches hidden on the front of the quilt. Work from right to left if you are right-handed.
Step 8: Finish the Corners
As you reach each corner on the back, you will see the mitered fold from the front. This creates a neat diagonal fold on the back as well.
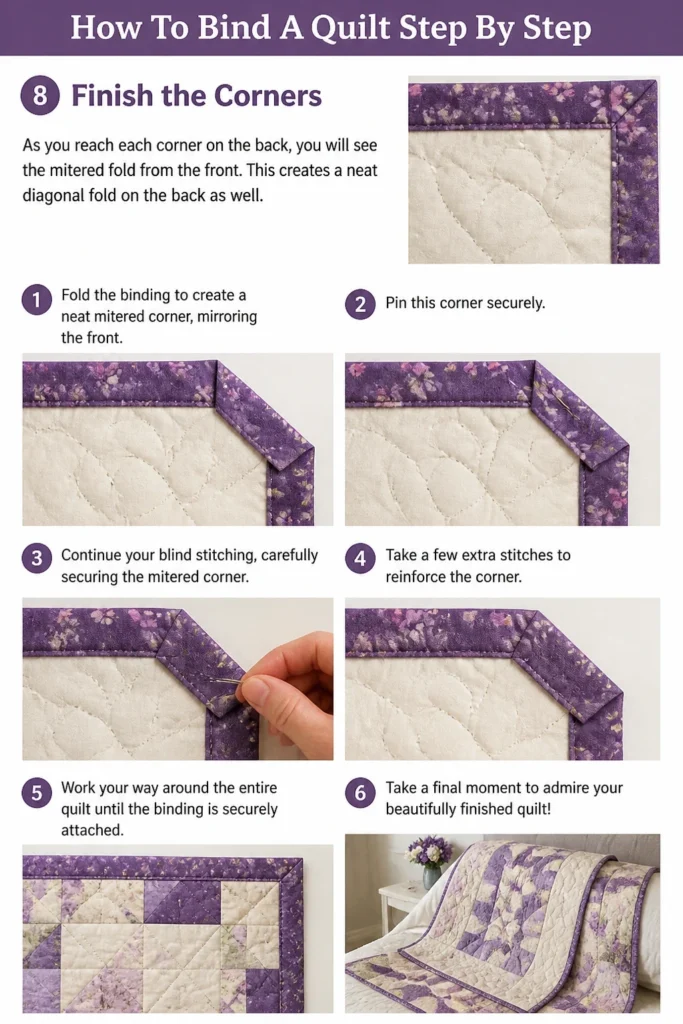
Fold the binding to create a neat mitered corner, mirroring the front. Pin this corner securely.
Continue your blind stitching, carefully securing the mitered corner. Take a few extra stitches to reinforce the corner.
Work your way around the entire quilt until the binding is securely attached. Take a final moment to admire your beautifully finished quilt!
Common Mistakes to Avoid
Inconsistent Seam Allowance
Using an uneven 1/4-inch seam allowance when attaching the binding to the quilt front can lead to problems. If your seam allowance is too wide, the binding will be too narrow on the back, making it difficult to catch with your needle. If it’s too narrow, the binding will be too wide and may sag. Always use a consistent 1/4-inch seam.
Not Pressing Binding Strips
Skipping the step of pressing your binding strips in half lengthwise, wrong sides together, can make the binding bulky and harder to manage. Pressing creates a crisp fold that guides your hand stitching and results in a much neater finish. Always press your binding before attaching it to the quilt.
Rushing Corner Miters
Mitered corners can feel tricky, and rushing them often results in messy, bulky folds. Take your time to precisely stop 1/4 inch from the edge, fold the binding up, then fold it down neatly. Practice this motion on scrap fabric if you’re unsure.
Not Trimming Batting and Backing
Leaving excess batting and backing beyond the quilt top edge creates bulk under the binding. This makes for a lumpy, uneven finish. Always trim these layers precisely even with the quilt top before wrapping the binding to the back.
Troubleshooting
Binding Doesn’t Meet Neatly
If your binding ends don’t align perfectly when joining them, it’s often due to inaccurate measuring or trimming of the overlap. Unpick the seam and re-measure. Ensure one tail overlaps the other by exactly the binding strip width (e.g., 2.5 inches) before drawing your diagonal line.
Bulky Corners
Bulky corners on the back are usually a result of not trimming enough excess fabric when creating the miter. Ensure your initial folds are sharp and that you’re not trapping too much fabric. Sometimes, a tiny snip into the bulk of the seam allowance before folding the binding can help reduce thickness, but be careful not to cut your stitches.
Visible Hand Stitches
If your hand stitches are too visible on the front or back, you might be catching too much fabric. Practice a true blind stitch. Take only a tiny thread or two from the quilt backing, then slide your needle inside the fold of the binding for a short distance before coming out. This makes the stitches disappear.
Key Takeaways
- Accurate cutting and consistent 1/4-inch seam allowances are vital for a professional-looking binding.
- Pressing your binding strips and seams at each stage helps create crisp, manageable edges.
- Mitered corners require precise stopping and folding to achieve a neat, flat finish.
- Joining binding ends diagonally creates a smooth, less noticeable seam in your continuous strip.
- Hand stitching with a blind stitch ensures your binding is securely attached and virtually invisible from the front.
- Take your time with each step; patience leads to a beautiful, durable quilt binding.
Frequently Asked Questions
Can I machine stitch the binding to the back instead of hand stitching?
Yes, machine stitching the binding to the back is a faster alternative. After attaching the binding to the front, press it to the back. From the front of the quilt, “stitch in the ditch” along the seam line where the binding meets the quilt top. This will catch the binding on the back. It’s quicker, but the stitches are visible on the front.
How do I calculate how much fabric I need for binding?
Measure the perimeter of your quilt (all four sides added together). Multiply this number by the width of your binding strip (e.g., 2.5 inches) to get the area. Then, add an extra 10-12 inches to the perimeter measurement for joining. Divide this total perimeter by the usable width of your fabric (usually 42 inches) to determine the number of strips needed.
What’s the best thread to use for binding?
For machine stitching, a good quality 50wt cotton thread is ideal. For hand stitching, you might prefer a stronger thread like a 40wt or even a specific binding thread that is slightly thicker and more durable. Matching the thread color to your binding fabric helps keep stitches invisible.
Our Top Recommended Finds
- Omnigrip Square Ruler: Essential for precise cutting and squaring up your quilt. A 6.5″ x 24″ ruler is versatile for binding strips.
- Clover Wonder Clips: These are fantastic for holding binding in place. They offer a strong grip without poking holes in your fabric like pins can.
- Roxanne Glue-Baste-It: A temporary fabric glue that can hold binding in place for hand stitching. It washes out easily and can be a great alternative or supplement to pins.
Your Quilt’s Grand Finale Awaits
You’ve put so much love and effort into creating your quilt top. Now, imagine holding it, feeling the smooth, finished edge you created yourself. Binding isn’t just a technical step; it’s the final embrace for your quilting journey.
Don’t let the last step intimidate you. Embrace the process, take it one small stitch at a time, and soon you’ll have a beautifully bound quilt ready for snuggles or display. Why not gather your supplies and start binding your next quilt today?
Beginner-friendly templates, step-by-step guides,
and weekly project ideas in your inbox.