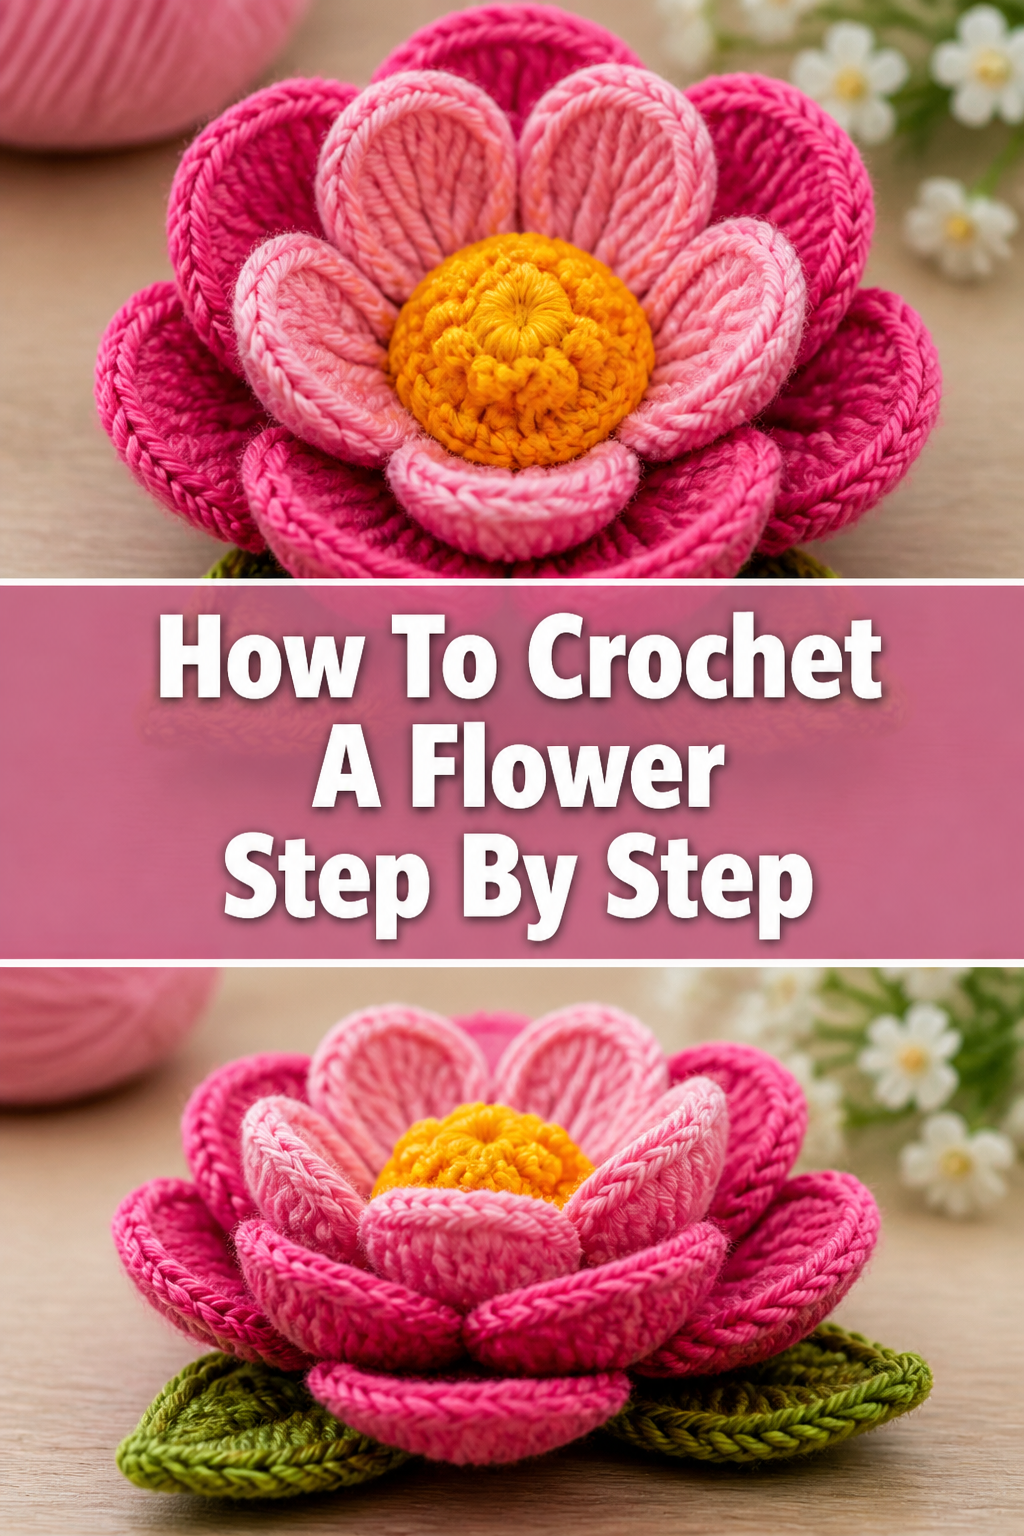
🌸 How To Crochet A Flower Step By Step

Beginner-friendly templates, step-by-step guides,
and weekly project ideas in your inbox.
I remember the first time I crocheted a flower; it felt like magic. Turning a simple strand of yarn into something beautiful is incredibly rewarding. This guide shares my tried-and-true method, making it easy for you to create your own lovely blooms.
Quick Overview
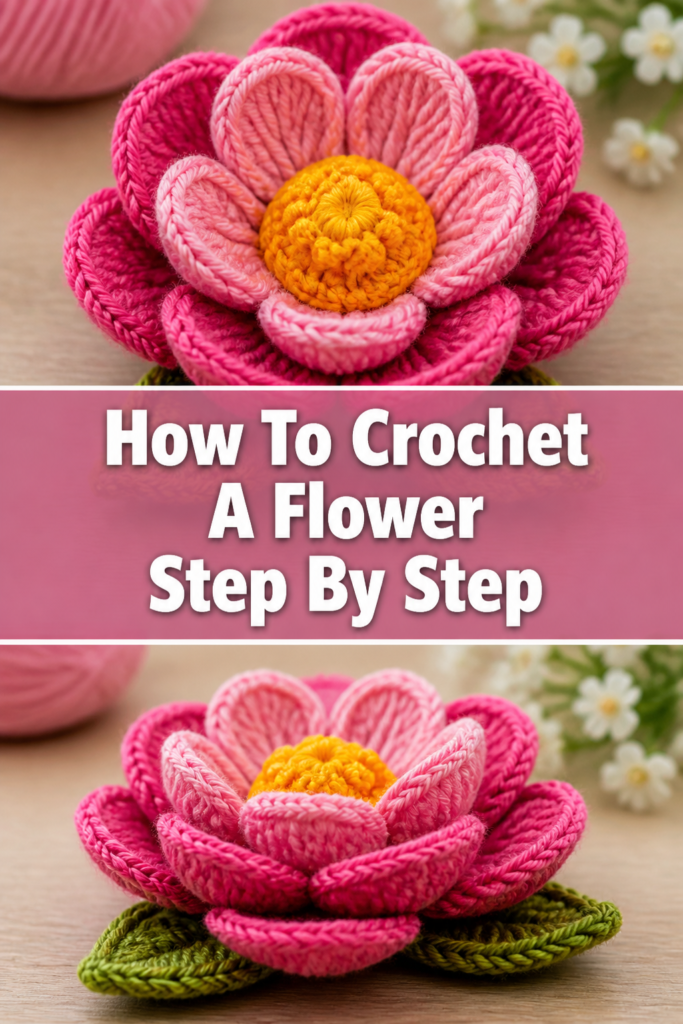
You’re about to learn how to crochet a charming, small flower, perfect for adding a handmade touch to almost anything. This project is a fantastic way to practice basic stitches and create something beautiful in a short amount of time.
- Time needed: 30-60 minutes
- Difficulty: Beginner
- What you’ll need: Yarn, crochet hook, scissors, tapestry needle
Step-by-Step Instructions
Step 1: Gather Your Materials
Choose a yarn color you love, perhaps a bright cotton or a soft acrylic. Small flowers look great in various fiber types.
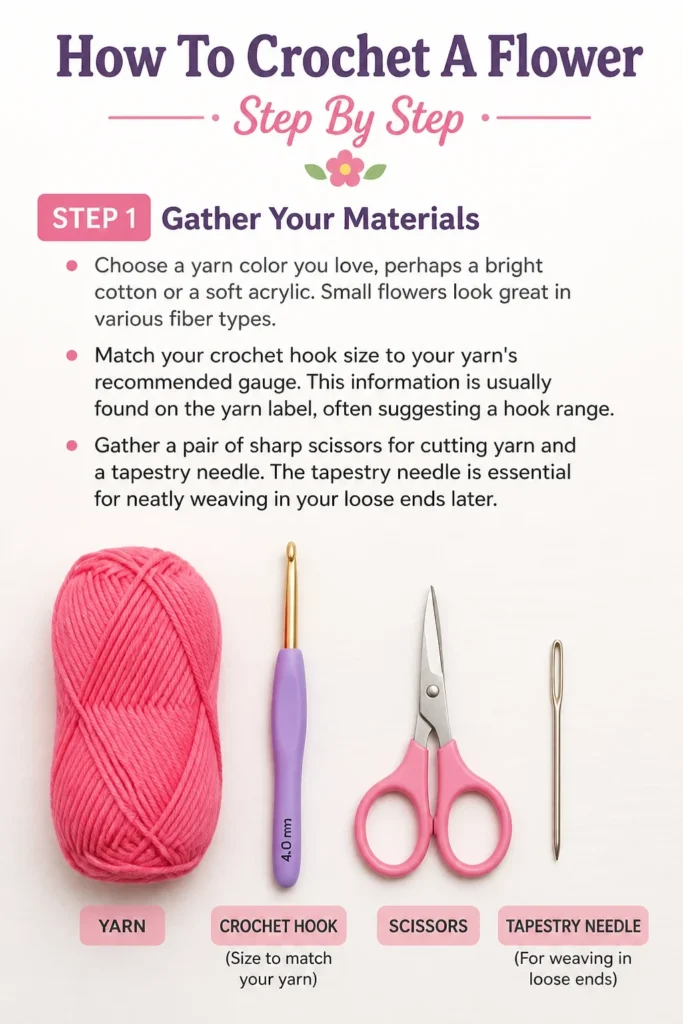
Match your crochet hook size to your yarn’s recommended gauge. This information is usually found on the yarn label, often suggesting a hook range.
Gather a pair of sharp scissors for cutting yarn and a tapestry needle. The tapestry needle is essential for neatly weaving in your loose ends later.
Step 2: Create Your Slip Knot
Hold the yarn tail in one hand, allowing a few inches to hang free. With your other hand, wrap the working yarn over your index and middle fingers, forming a loop.
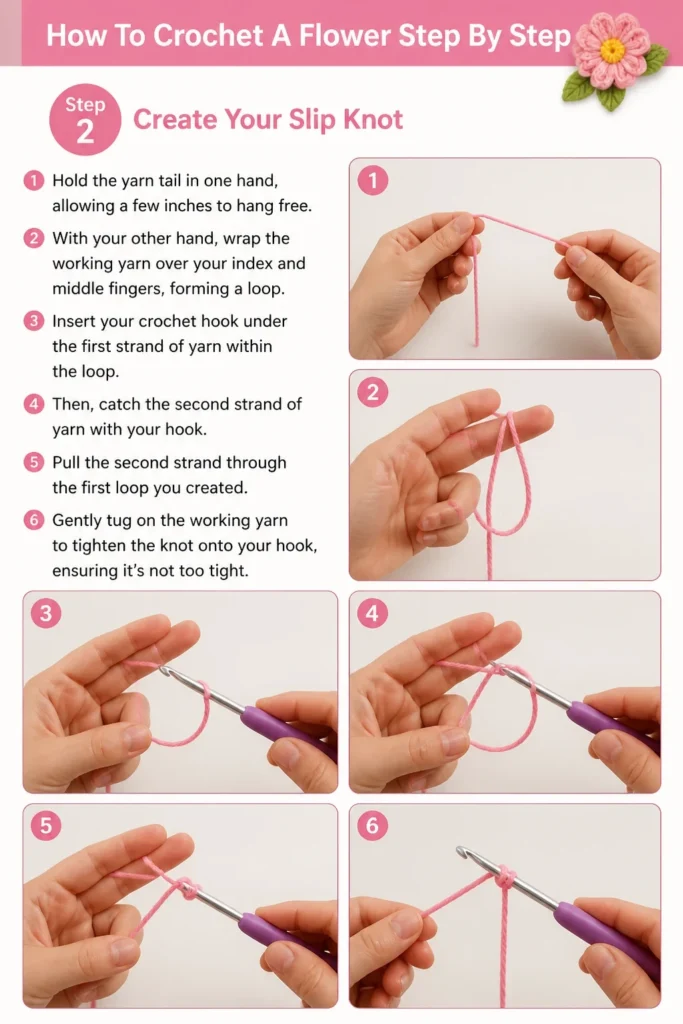
Insert your crochet hook under the first strand of yarn within the loop. Then, catch the second strand of yarn with your hook.
Pull the second strand through the first loop you created. Gently tug on the working yarn to tighten the knot onto your hook, ensuring it’s not too tight.
Step 3: Form the Magic Ring
Create a magic ring, which provides a tight, neat center for your flower. Hold the yarn tail against your palm and wrap the working yarn around two fingers of your non-dominant hand, forming a loop.
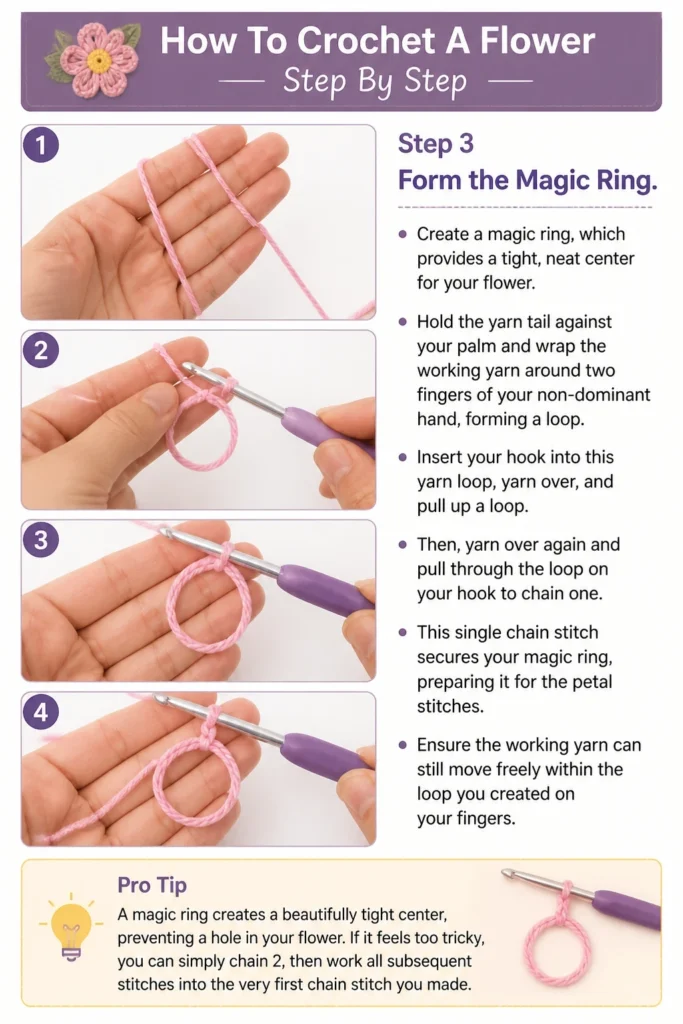
Insert your hook into this yarn loop, yarn over, and pull up a loop. Then, yarn over again and pull through the loop on your hook to chain one.
This single chain stitch secures your magic ring, preparing it for the petal stitches. Ensure the working yarn can still move freely within the loop you created on your fingers.
Pro Tip: A magic ring creates a beautifully tight center, preventing a hole in your flower. If it feels too tricky, you can simply chain 2, then work all subsequent stitches into the very first chain stitch you made.
Step 4: Construct the First Petal
Chain two stitches. These initial chains serve as the starting height for your first half double crochet (HDC) stitch and begin to form the curve of your petal.
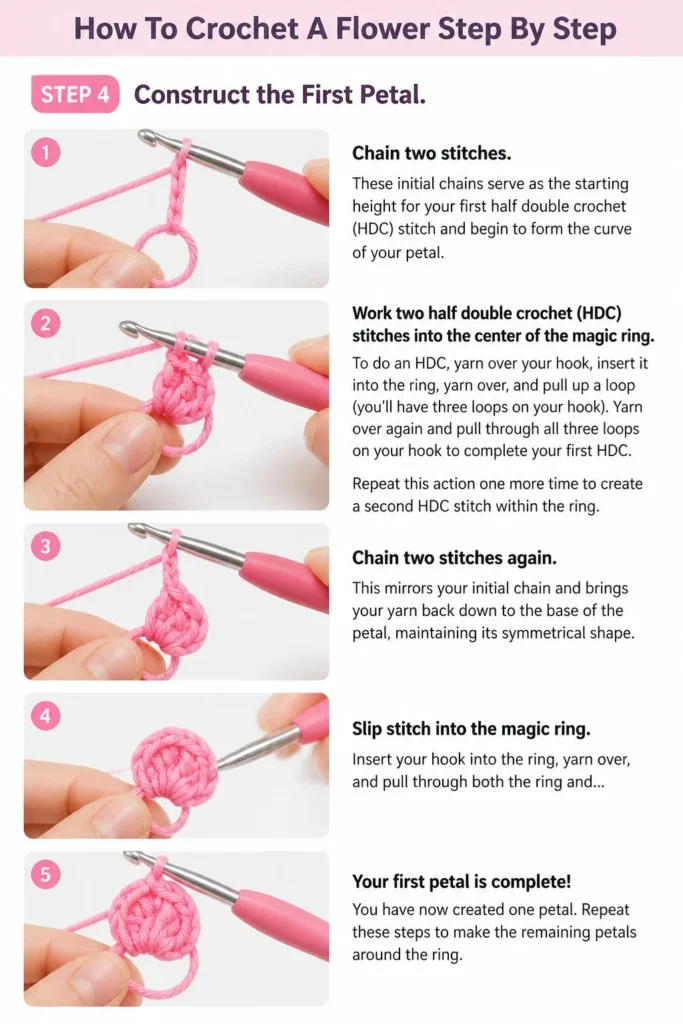
Work two half double crochet (HDC) stitches into the center of the magic ring. To do an HDC, yarn over your hook, insert it into the ring, yarn over, and pull up a loop (you’ll have three loops on your hook).
Yarn over again and pull through all three loops on your hook to complete your first HDC. Repeat this action one more time to create a second HDC stitch within the ring.
Chain two stitches again. This mirrors your initial chain and brings your yarn back down to the base of the petal, maintaining its symmetrical shape.
Slip stitch into the magic ring. Insert your hook into the ring, yarn over, and pull through both the ring and the loop on your hook. This action anchors your first petal firmly to the center, completing its distinct segment.
Step 5: Repeat for Additional Petals
Continue by repeating the sequence from Step 4 for each subsequent petal. You will make a total of five petals for a classic flower shape.
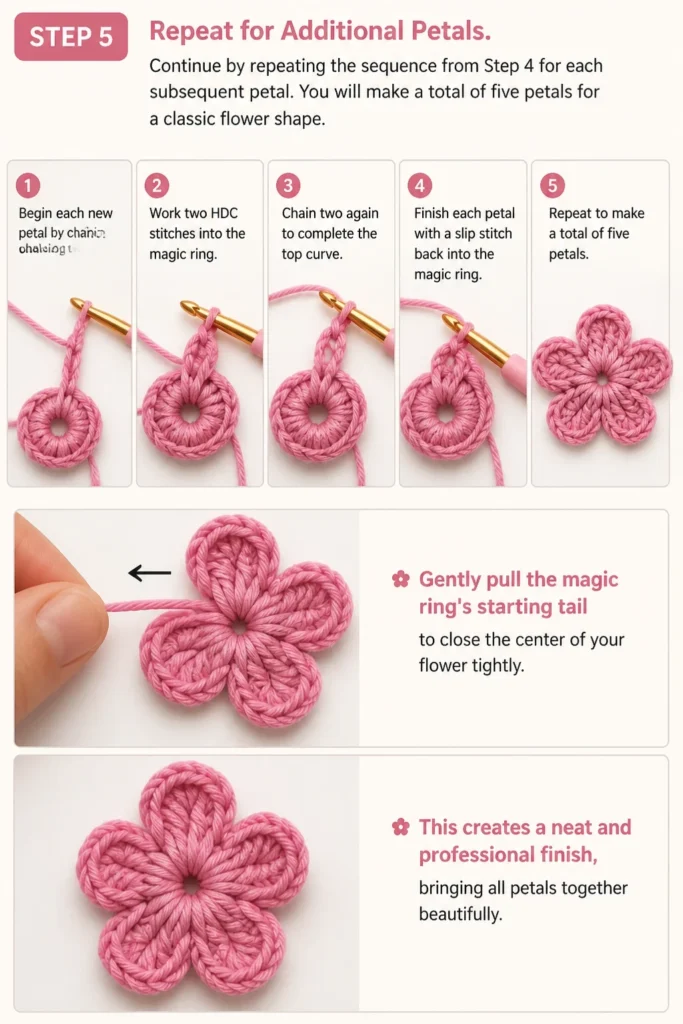
Begin each new petal by chaining two, followed by working two HDC stitches into the magic ring. Then, chain two again to complete the top curve.
Finish each petal with a slip stitch back into the magic ring, securing it in place. This ensures all petals originate from the same central point.
Gently pull the magic ring’s starting tail to close the center of your flower tightly. This creates a neat and professional finish, bringing all petals together beautifully.
Step 6: Join and Fasten Off
After completing your fifth petal, make one final slip stitch into the magic ring to join the round. This ensures your flower’s structure is complete and secure.
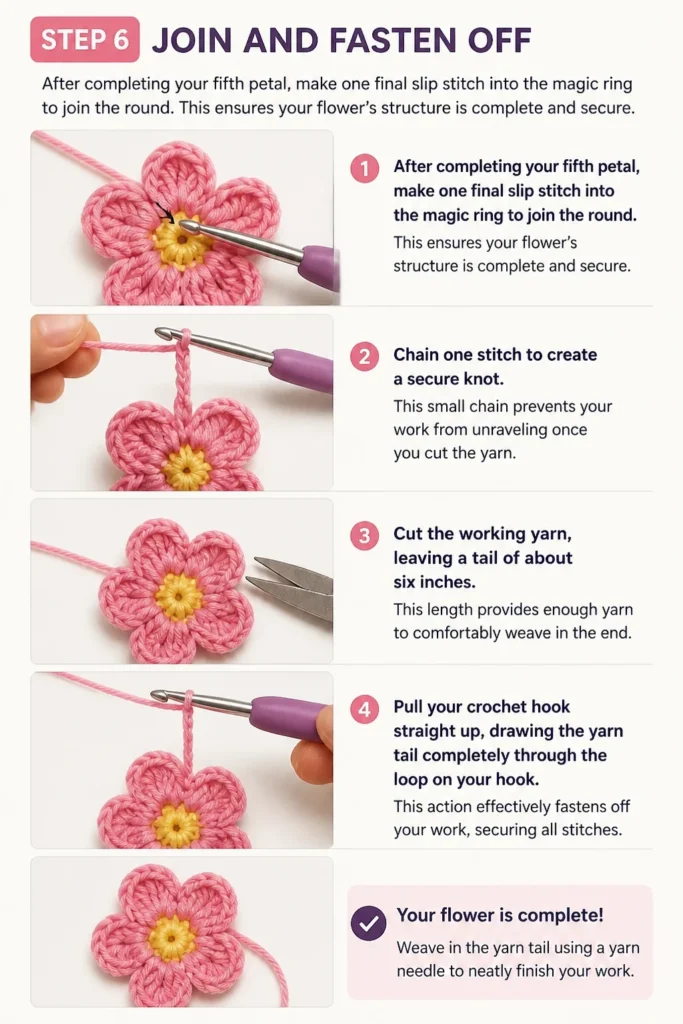
Chain one stitch to create a secure knot. This small chain prevents your work from unraveling once you cut the yarn.
Cut the working yarn, leaving a tail of about six inches. This length provides enough yarn to comfortably weave in the end.
Pull your crochet hook straight up, drawing the yarn tail completely through the loop on your hook. This action effectively fastens off your work, securing all stitches.
Step 7: Weave in the Ends
Thread your tapestry needle with the starting yarn tail from the magic ring. Carefully weave this tail through several stitches on the back of your flower.
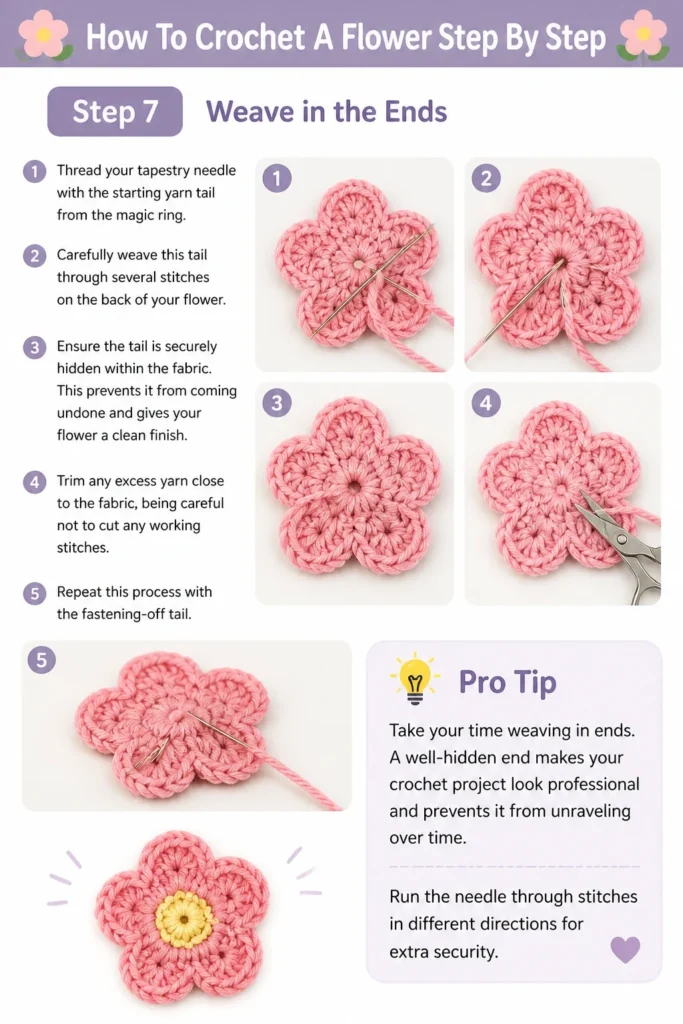
Ensure the tail is securely hidden within the fabric. This prevents it from coming undone and gives your flower a clean finish.
Trim any excess yarn close to the fabric, being careful not to cut any working stitches. Repeat this process with the fastening-off tail.
Pro Tip: Take your time weaving in ends. A well-hidden end makes your crochet project look professional and prevents it from unraveling over time. Run the needle through stitches in different directions for extra security.
Step 8: Admire Your Beautiful Bloom
Gently shape your petals with your fingers if they need a little adjustment. A slight tug or press can help them lie perfectly.
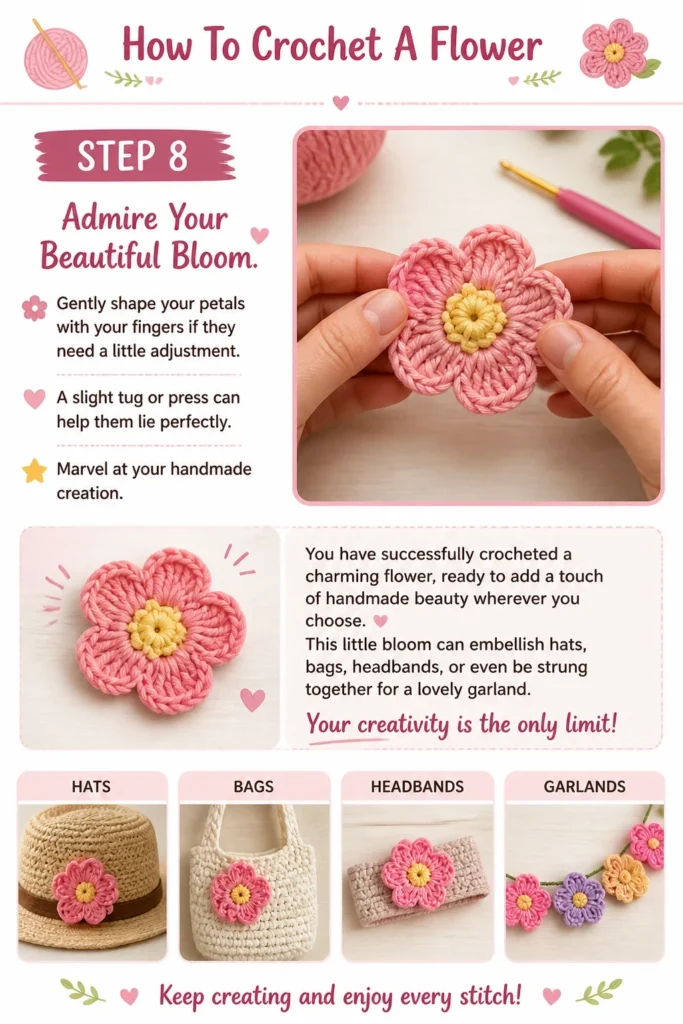
Marvel at your handmade creation. You have successfully crocheted a charming flower, ready to add a touch of handmade beauty wherever you choose.
This little bloom can embellish hats, bags, headbands, or even be strung together for a lovely garland. Your creativity is the only limit!
Common Mistakes to Avoid
Inconsistent Tension
Crocheting with uneven tension is a common beginner mistake. If your stitches are sometimes too tight and sometimes too loose, your flower will look lumpy and uneven.
To avoid this, try to maintain a consistent grip on your yarn and hook. Practice making your stitches with the same amount of tightness each time, which will lead to a more uniform fabric.
Forgetting to Count Stitches
It’s easy to get lost in the rhythm and forget to count. If you don’t have the correct number of stitches in each petal, they will end up looking different sizes, making your flower asymmetrical.
Make a habit of counting your chain stitches and HDC stitches for each petal. A stitch marker can also help you keep track of your first and last stitches in a round.
Skipping the Fasten Off Process
Sometimes, in eagerness to finish, crocheters might just cut the yarn without properly fastening off. This can lead to your entire project unraveling surprisingly quickly.
Always remember to chain one after your final stitch and then pull the tail completely through that loop. This creates a secure knot that locks your stitches in place.
Poorly Hidden Ends
While the front of your flower might look perfect, poorly woven-in ends can detract from its overall appeal. Tails that stick out or unravel quickly make the project look unfinished.
Use a tapestry needle to weave your ends through several stitches on the back of your work, changing direction a few times. This secures them invisibly and permanently.
Troubleshooting
My Flower Doesn’t Lie Flat
If your flower is curling up or not lying flat, it usually means you have too many stitches in your petals or your tension is too tight. The stitches are crowding each other.
Try using a slightly larger hook size for your next flower, or reduce the number of stitches in each petal. For example, use only one HDC instead of two, or fewer chains for the petal height.
The Center Hole is Too Big
A large hole in the center of your flower can happen if your magic ring wasn’t pulled tight enough, or if you used the chain-2 method and didn’t work into the correct chain.
For the magic ring, ensure you really tug that starting tail to cinch the center closed as much as possible. If using the chain-2 method, double-check that all stitches are worked into the first chain, not the second.
My Petals Look Uneven
Uneven petals are often a symptom of inconsistent stitch counts or varying tension. One petal might have more chains or HDCs than another, leading to a lopsided appearance.
Carefully count your stitches for each petal: ensure you have the same number of chains and HDC stitches every time. Practice maintaining even tension throughout your work for more uniform results.
Key Takeaways
- Consistent tension is vital for a beautiful, even flower.
- The magic ring creates a tight, professional-looking center.
- Carefully count your stitches for symmetrical petals.
- Always fasten off securely to prevent your work from unraveling.
- Weave in all ends neatly for a polished, finished look.
- Practice makes perfect; don’t be discouraged by your first attempt.
Frequently Asked Questions
Can I use any yarn weight for this flower?
Yes, you can use almost any yarn weight, but the size of your finished flower will vary. Thicker yarns will create a larger, chunkier flower, while thinner yarns will produce a delicate, smaller bloom.
Remember to adjust your crochet hook size to match the yarn weight you choose. Always refer to the yarn label for the recommended hook size to ensure comfortable crocheting and good stitch definition.
How can I make a bigger or smaller flower?
To make a bigger flower, use a thicker yarn and a larger hook. You can also add more stitches within each petal (e.g., more HDC or even double crochet stitches) or increase the number of chains for the petal height.
For a smaller flower, opt for a thinner yarn and a smaller hook. You might also reduce the number of stitches per petal, perhaps using only single crochet stitches or fewer chains for the petal height.
What if I don’t know the magic ring technique?
If the magic ring feels too challenging, don’t worry! You can easily substitute it with a chain-2 method. Simply chain two stitches, then work all your petal stitches into the very first chain you made.
This creates a small loop to work into, which can be easier for beginners. While it might leave a slightly larger hole than a magic ring, it’s a perfectly acceptable and common starting technique for flowers.
How do I attach the flower to something?
You have several options for attaching your crocheted flower. You can use the remaining yarn tail after fastening off to sew it onto a garment, hat, or bag using your tapestry needle.
Alternatively, you can hot glue the flower to a surface, especially if it won’t be washed frequently. For removable attachment, consider sewing a pin back or a hair clip onto the back of the flower.
Our Top Recommended Finds
- Ergonomic Crochet Hook Set: These hooks are designed for comfort, reducing hand fatigue during longer crafting sessions. They often feature soft grips that make crocheting a joy.
- Assorted Yarn Pack (Cotton): A variety pack gives you many color options for different flowers without buying full skeins. Cotton yarn is durable and holds its shape well for embellishments.
- Tapestry Needle Set with Various Sizes: Having a range of tapestry needles ensures you always have the right size for weaving in ends, regardless of your yarn weight. They are essential for a neat finish.
Your Petal-Perfect Journey Begins Now
Congratulations on crocheting your first flower! This simple project opens up a world of creative possibilities. Each bloom you create will build your skills and confidence.
Don’t hesitate to experiment with different yarn colors and hook sizes. Try making flowers with varying numbers of petals or different stitch combinations to see what unique designs you can invent.
Share your beautiful creations with friends and family, or use them to adorn your home. The joy of handmade items is truly special. So grab your hook and yarn, and let your creativity blossom today!
Beginner-friendly templates, step-by-step guides,
and weekly project ideas in your inbox.