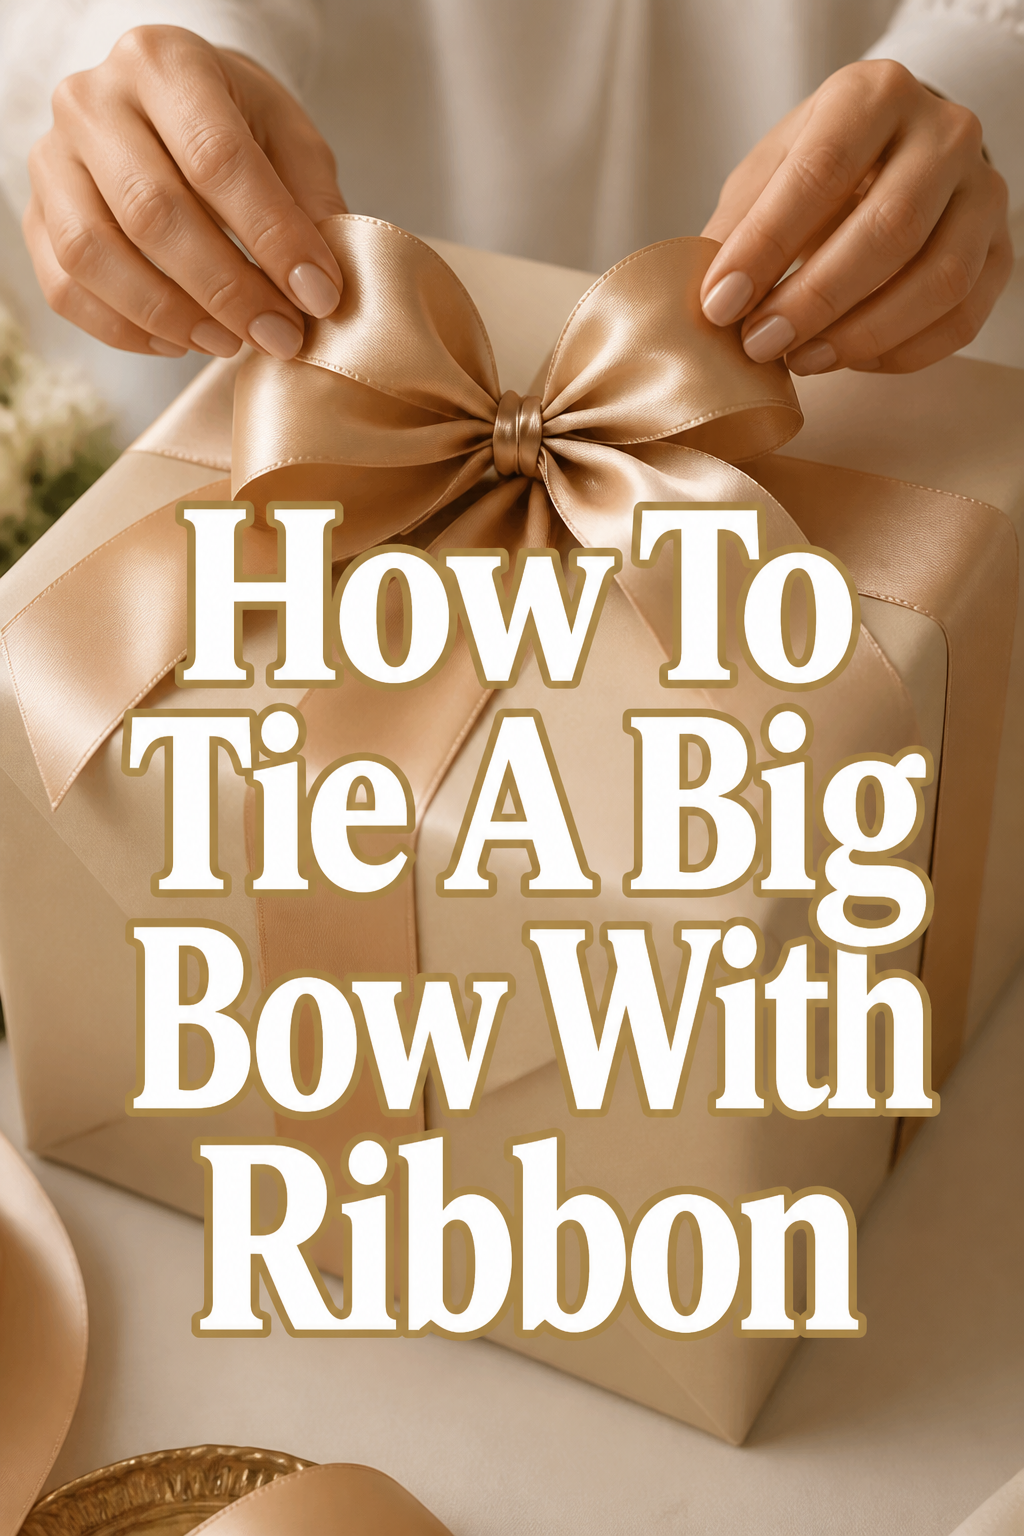
🎀 How To Tie A Big Bow With Ribbon

Beginner-friendly templates, step-by-step guides,
and weekly project ideas in your inbox.
There’s something truly magical about a perfectly tied, voluminous bow.
It adds a touch of elegance, celebration, and thoughtful detail to any gift, decoration, or even personal accessory.
I’ve spent countless hours perfecting bows for everything from wedding decor to holiday presents, and I’m excited to share my go-to method for creating show-stopping bows every time.
Quick Overview
This guide will walk you through the simple yet effective technique to create a beautiful, full bow that will impress.
You’ll learn the foundational steps, common pitfalls, and expert tips to ensure your bows are always picture-perfect.
- Time needed: 10-20 minutes (once you get the hang of it)
- Difficulty: Beginner
- What you’ll need: Ribbon, scissors, optional: floral wire or hot glue
Step-by-Step Instructions
Step 1: Choose Your Ribbon
Select a ribbon that suits your project’s scale and aesthetic.
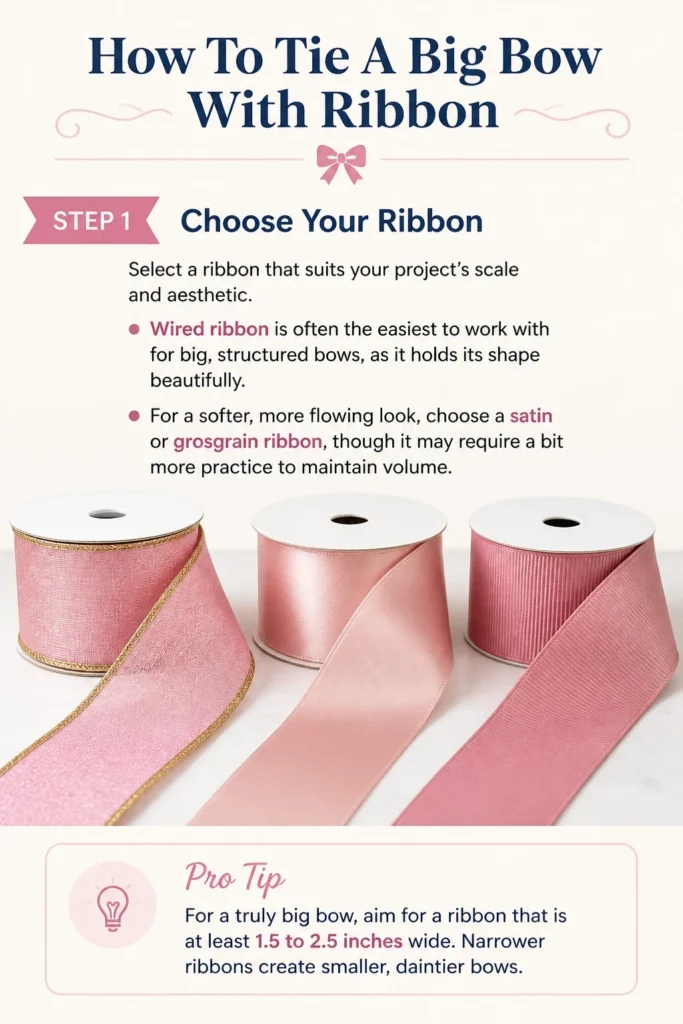
Wired ribbon is often the easiest to work with for big, structured bows, as it holds its shape beautifully.
For a softer, more flowing look, choose a satin or grosgrain ribbon, though it may require a bit more practice to maintain volume.
Pro Tip: For a truly big bow, aim for a ribbon that is at least 1.5 to 2.5 inches wide. Narrower ribbons create smaller, daintier bows.
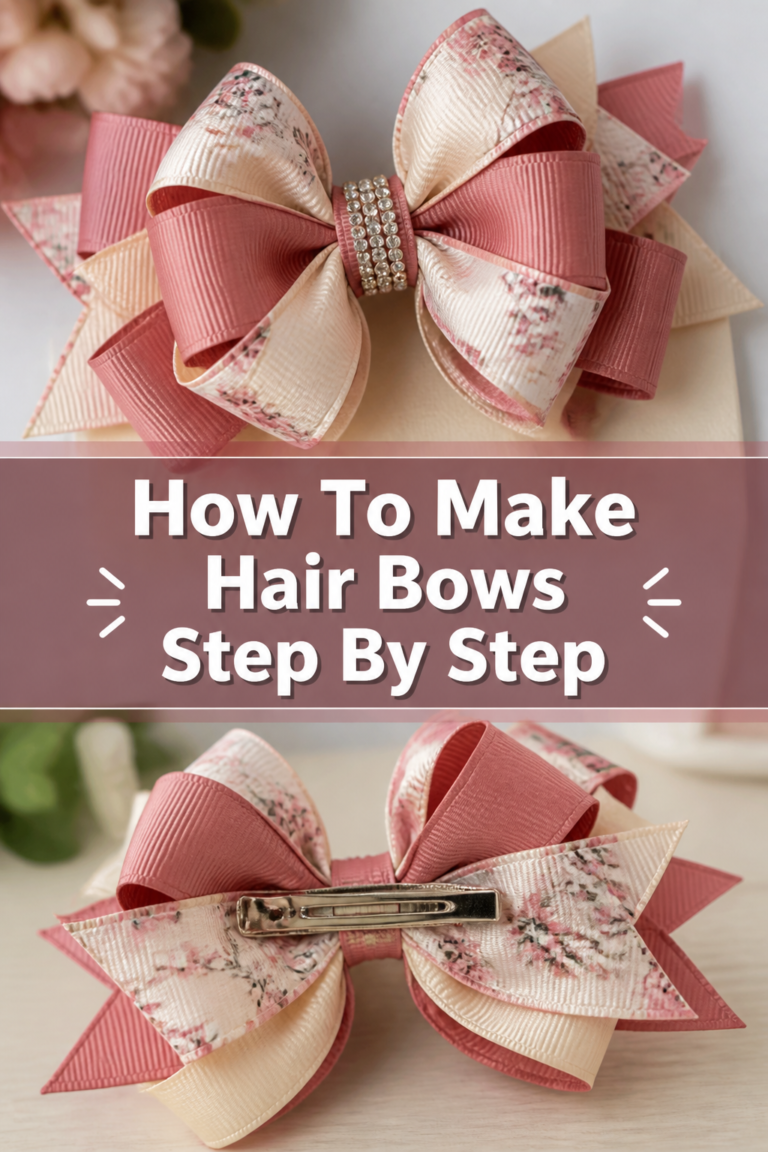
Step 2: Measure and Cut Your Ribbon
Unroll a generous amount of ribbon from the spool.
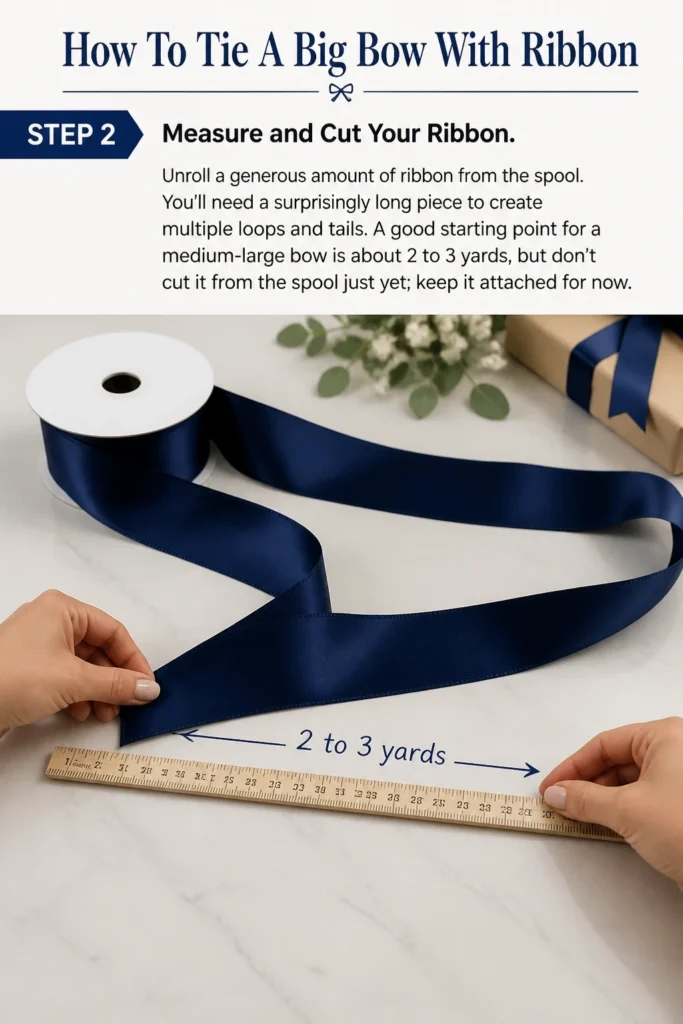
You’ll need a surprisingly long piece to create multiple loops and tails.
A good starting point for a medium-large bow is about 2 to 3 yards, but don’t cut it from the spool just yet; keep it attached for now.
Step 3: Create the First Loop (The “Tail”)
Leave a tail of about 6-12 inches hanging down, depending on how long you want your bow’s tails to be.
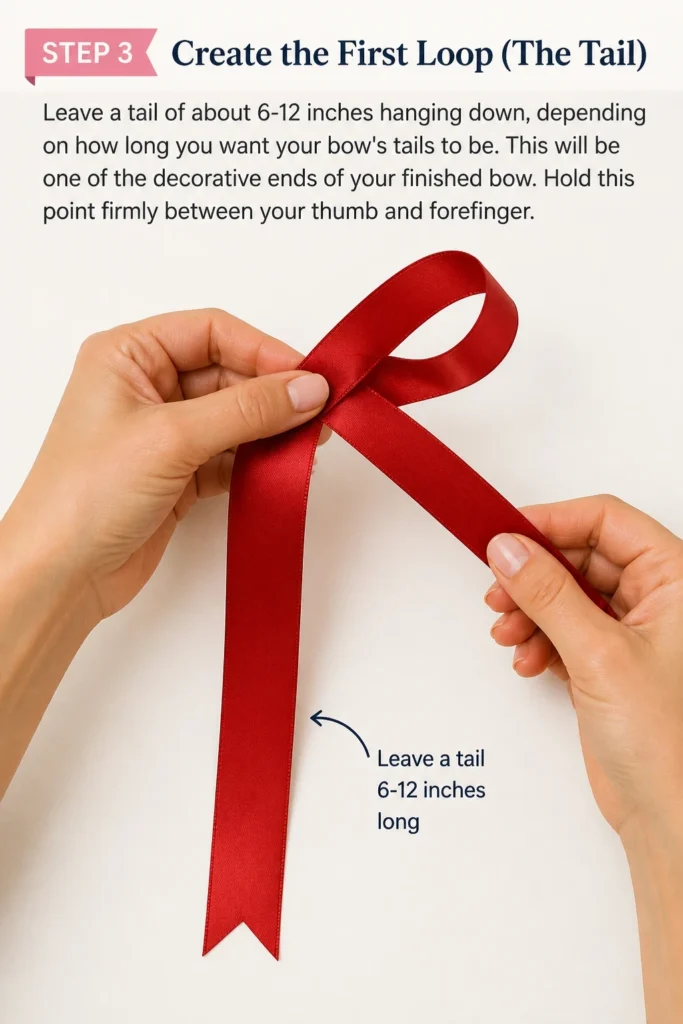
This will be one of the decorative ends of your finished bow.
Hold this point firmly between your thumb and forefinger.
Step 4: Form the Initial Loops
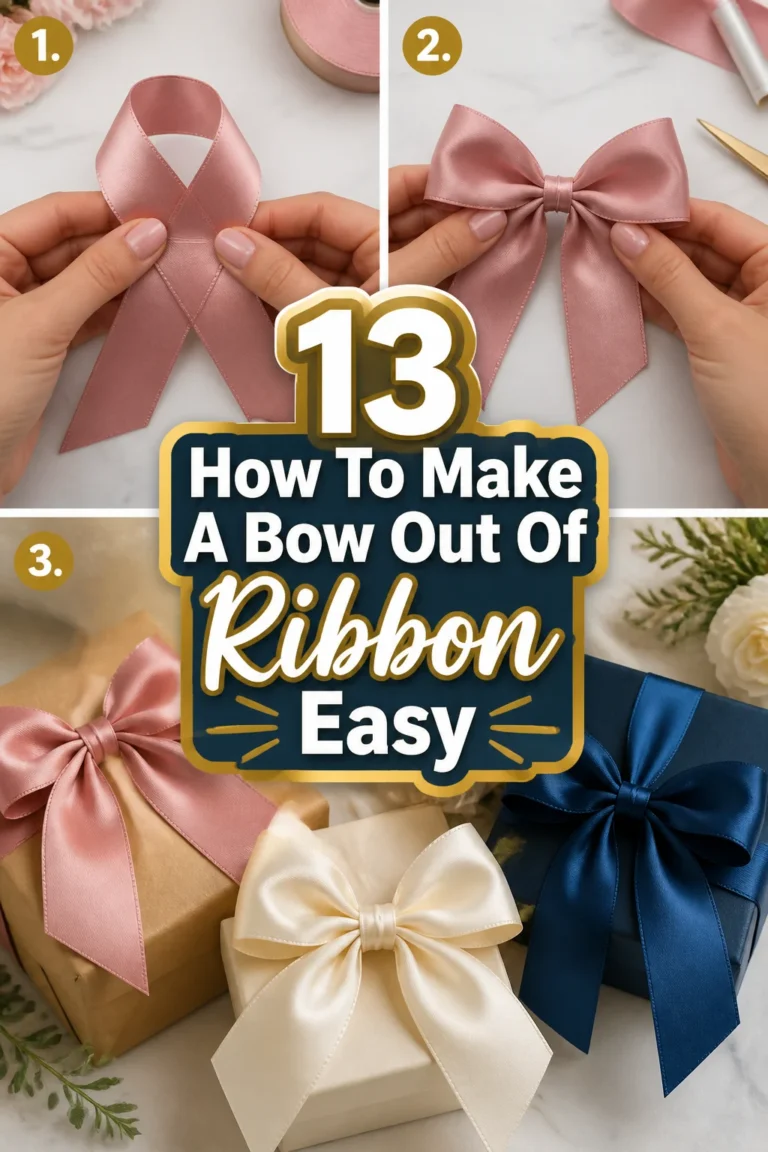
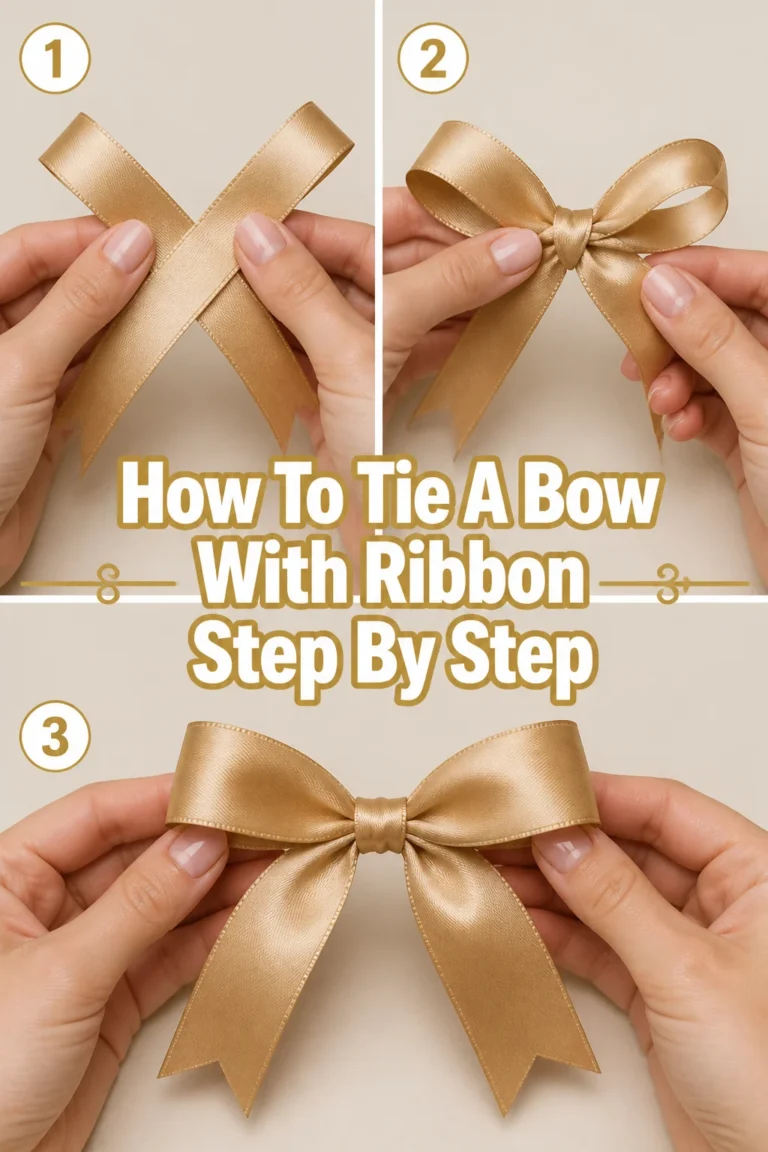
Bring the ribbon up and over, creating a loop on one side.
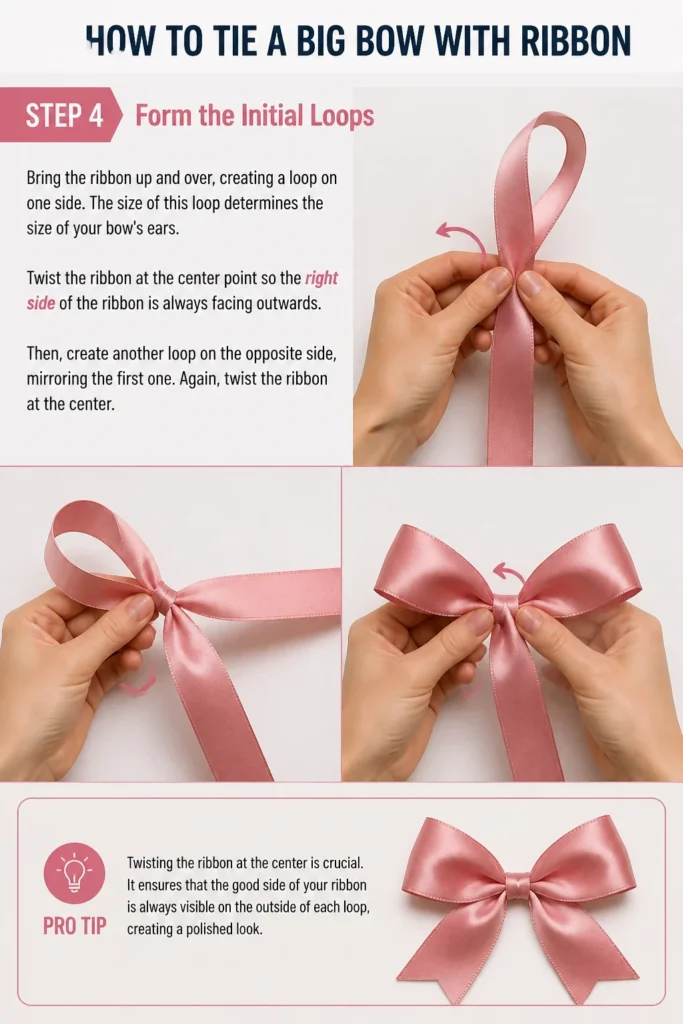
The size of this loop determines the size of your bow’s “ears.”
Twist the ribbon at the center point so the right side of the ribbon is always facing outwards.
Then, create another loop on the opposite side, mirroring the first one.
Again, twist the ribbon at the center.
Pro Tip: Twisting the ribbon at the center is crucial. It ensures that the “good” side of your ribbon is always visible on the outside of each loop, creating a polished look.
Step 5: Continue Adding Loops
Repeat the process of creating loops, alternating sides, and twisting at the center.
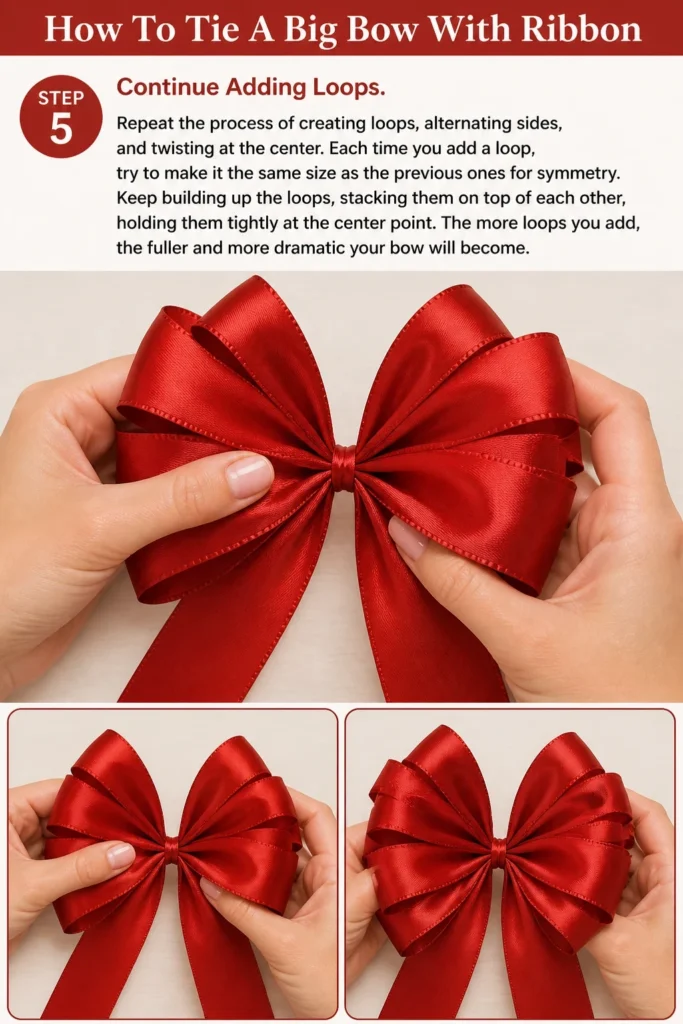
Each time you add a loop, try to make it the same size as the previous ones for symmetry.
Keep building up the loops, stacking them on top of each other, holding them tightly at the center point.
The more loops you add, the fuller and more dramatic your bow will become.
Step 6: Secure the Center
Once you’ve created enough loops for your desired fullness (typically 3-5 loops on each side for a big bow), cut the ribbon from the spool, leaving another tail of similar length to your first one.
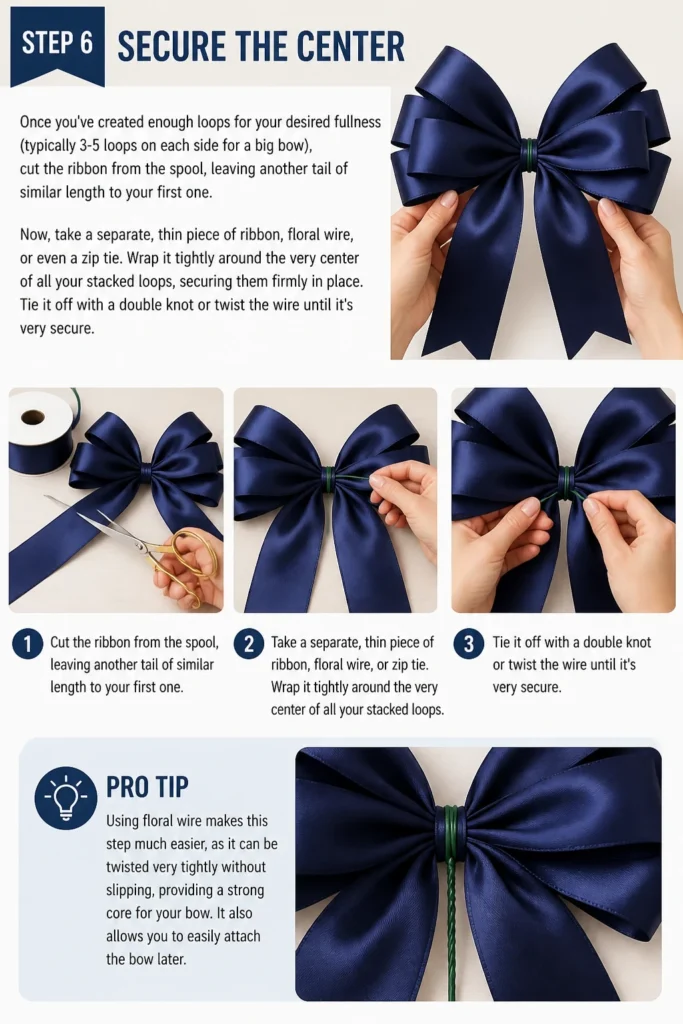
Now, take a separate, thin piece of ribbon, floral wire, or even a zip tie.
Wrap it tightly around the very center of all your stacked loops, securing them firmly in place.
Tie it off with a double knot or twist the wire until it’s very secure.
Pro Tip: Using floral wire makes this step much easier, as it can be twisted very tightly without slipping, providing a strong core for your bow. It also allows you to easily attach the bow later.
Step 7: Fluff and Shape Your Bow
This is where the magic happens! Gently pull and separate each loop, starting from the innermost ones and working your way outwards.
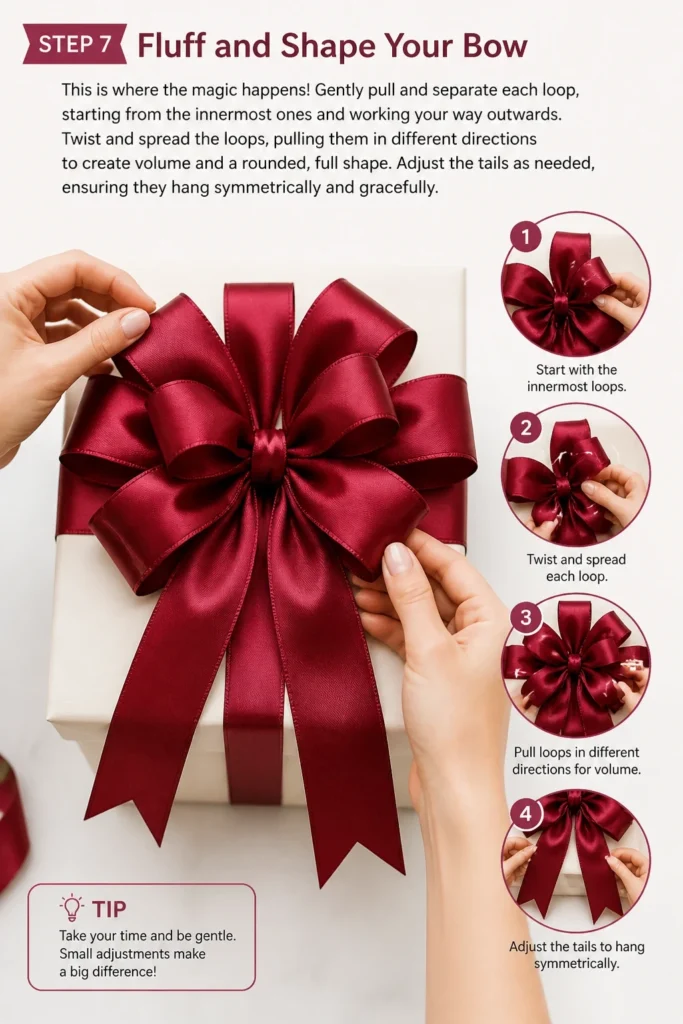
Twist and spread the loops, pulling them in different directions to create volume and a rounded, full shape.
Adjust the tails as needed, ensuring they hang symmetrically and gracefully.
Step 8: Trim the Tails
Trim the ends of your bow’s tails to your desired length and style.
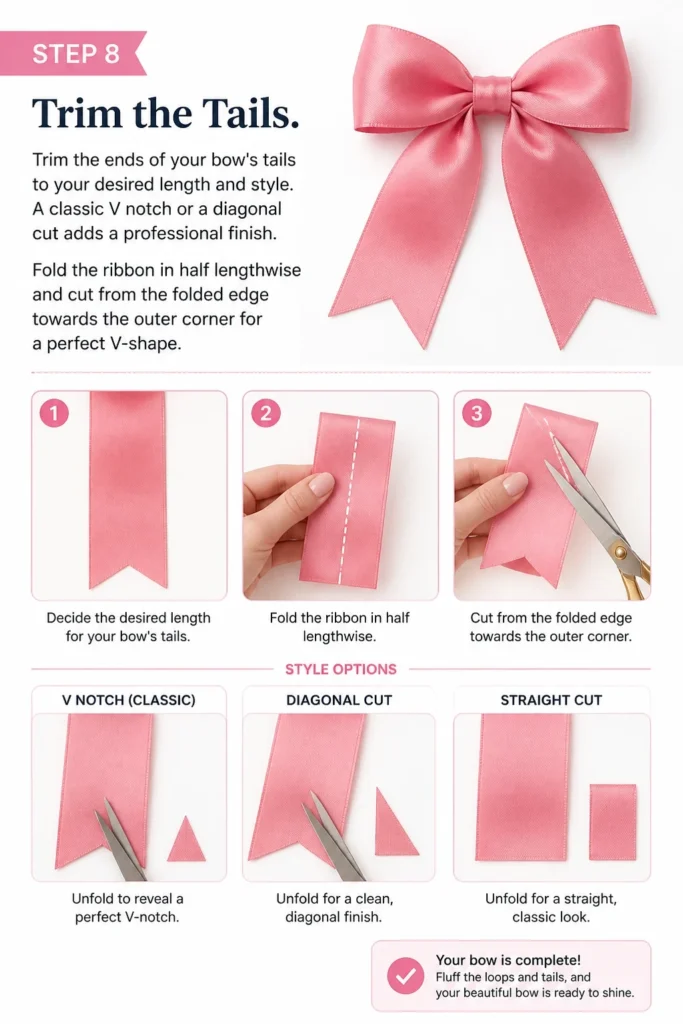
A classic “V” notch or a diagonal cut adds a professional finish.
Fold the ribbon in half lengthwise and cut from the folded edge towards the outer corner for a perfect V-shape.
Step 9: Attach Your Bow (Optional)
If you used floral wire to secure the center, you can now use the wire ends to easily attach your bow to a gift, wreath, or package.
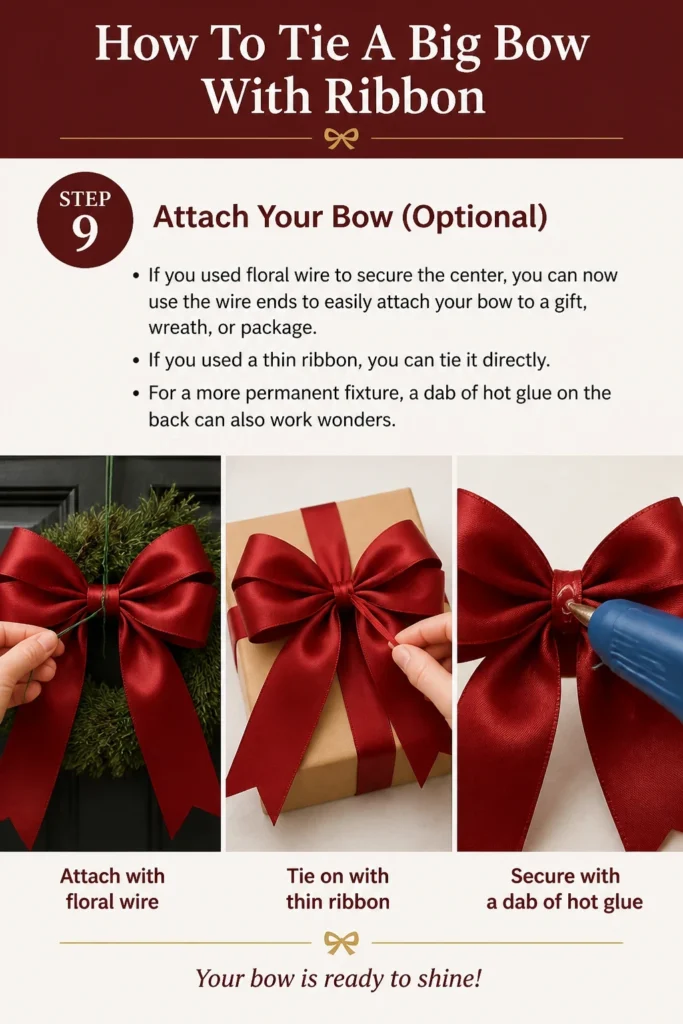
If you used a thin ribbon, you can tie it directly.
For a more permanent fixture, a dab of hot glue on the back can also work wonders.
Common Mistakes to Avoid
Not Twisting the Ribbon
Many beginners forget to twist the ribbon at the center after forming each loop.
This results in the “wrong” side of the ribbon showing on some of your loops, making the bow look messy and unprofessional.
Always ensure the decorative side of your ribbon is facing outwards as you create each loop by giving it a half-twist at the central pinch point.
Using Too Little Ribbon
A common pitfall is underestimating the amount of ribbon needed for a truly big, full bow.
Skimping on length will result in a sparse, flat bow with too few loops.
Always start with more ribbon than you think you’ll need; you can always trim excess, but you can’t add more once you’ve started.
Not Securing the Center Tightly Enough
If the center of your bow isn’t cinched very tightly, the loops will slip and lose their shape.
This leads to a floppy, unkempt bow that won’t hold its volume.
Use strong floral wire or a thin, durable piece of ribbon and pull it as tight as you possibly can around the gathered loops to create a firm anchor.
Uneven Loop Sizes
When loops are inconsistent in size, the bow appears lopsided and unbalanced.
Take your time as you create each loop, ensuring it matches the previous one in length and fullness.
Practice helps develop a good eye for symmetry, making your bows look perfectly balanced.
Troubleshooting
My Bow Looks Flat and Lifeless
This usually happens if you haven’t created enough loops or haven’t fluffed them properly.
Go back to Step 7. Gently pull and separate each loop, twisting them slightly to open them up and create airiness.
Ensure you have at least 3-4 loops on each side for a substantial look. If not, you might need to restart with more ribbon.
The Ribbon Keeps Slipping at the Center
The central pinch point needs to be held very firmly, and the securing material must be tight.
Try using a stronger grip with your non-dominant hand while you create the loops.
When securing, use floral wire which offers superior grip and can be twisted tightly without stretching or loosening.
My Bow Isn’t Symmetrical
Symmetry comes with practice and careful attention to loop size.
As you form each loop, hold it up against the previous one to compare their lengths.
Don’t be afraid to adjust a loop slightly before moving on to the next one to maintain evenness.
Key Takeaways
- Always twist the ribbon at the center of each loop to keep the “good” side facing out.
- Use a generous amount of ribbon; more loops equal a fuller, more impressive bow.
- Secure the center of your bow very tightly, ideally with floral wire, for lasting shape.
- Fluff and separate each loop carefully to achieve maximum volume and a beautiful, round form.
- Practice makes perfect; don’t get discouraged if your first few bows aren’t flawless.
- Trim tails with a V-notch or diagonal cut for a polished, professional finish.
Frequently Asked Questions
What type of ribbon is best for big bows?
Wired ribbon is generally considered the best for big bows because the wire edges allow the loops to be shaped and hold their volume beautifully.
Satin and grosgrain ribbons can also work, but they require more loops and careful fluffing to maintain their shape.
How much ribbon do I need for a large bow?
The exact amount varies based on the desired size and fullness, but a good starting estimate for a large bow is between 2 to 4 yards (6 to 12 feet) of ribbon.
It’s always better to have too much than too little, so consider keeping the ribbon attached to the spool until the very end.
Can I make a bow with multiple colors or types of ribbon?
Absolutely! Layering different ribbons can create stunning, multi-textured bows.
Simply hold two or more ribbons together as if they were one, and follow the same steps for forming loops and securing the center.
This technique adds depth and visual interest.
How do I make my bow look extra puffy?
To achieve an extra puffy bow, focus on two main things: increasing the number of loops and meticulous fluffing.
Add more loops (e.g., 5-7 on each side) and then take your time to pull, twist, and spread each individual loop, ensuring they are all separated and facing slightly different directions to fill out the space.
Our Top Recommended Finds
- Wired Edge Ribbon Assortment: A good collection of wired ribbons in various widths and colors is essential for versatile bow making. The wire makes shaping effortless.
- Sharp Fabric Scissors: Clean, precise cuts prevent frayed edges and give your bows a professional look. Invest in a pair dedicated just for ribbon and fabric.
- Floral Wire (22-26 Gauge): This thin, flexible wire is perfect for securely cinching the center of your bow. It’s strong, discreet, and easy to manipulate for attachment.
Craft Your Signature Bow
Learning to tie a big bow with ribbon is a skill that will serve you well in countless creative endeavors.
From embellishing gifts to decorating for special occasions, a beautiful bow elevates everything it touches.
Don’t wait to add this delightful touch to your next project; gather your ribbon today and start crafting your own signature bows!
The satisfaction of creating something so elegant with your own hands is truly rewarding.
Beginner-friendly templates, step-by-step guides,
and weekly project ideas in your inbox.