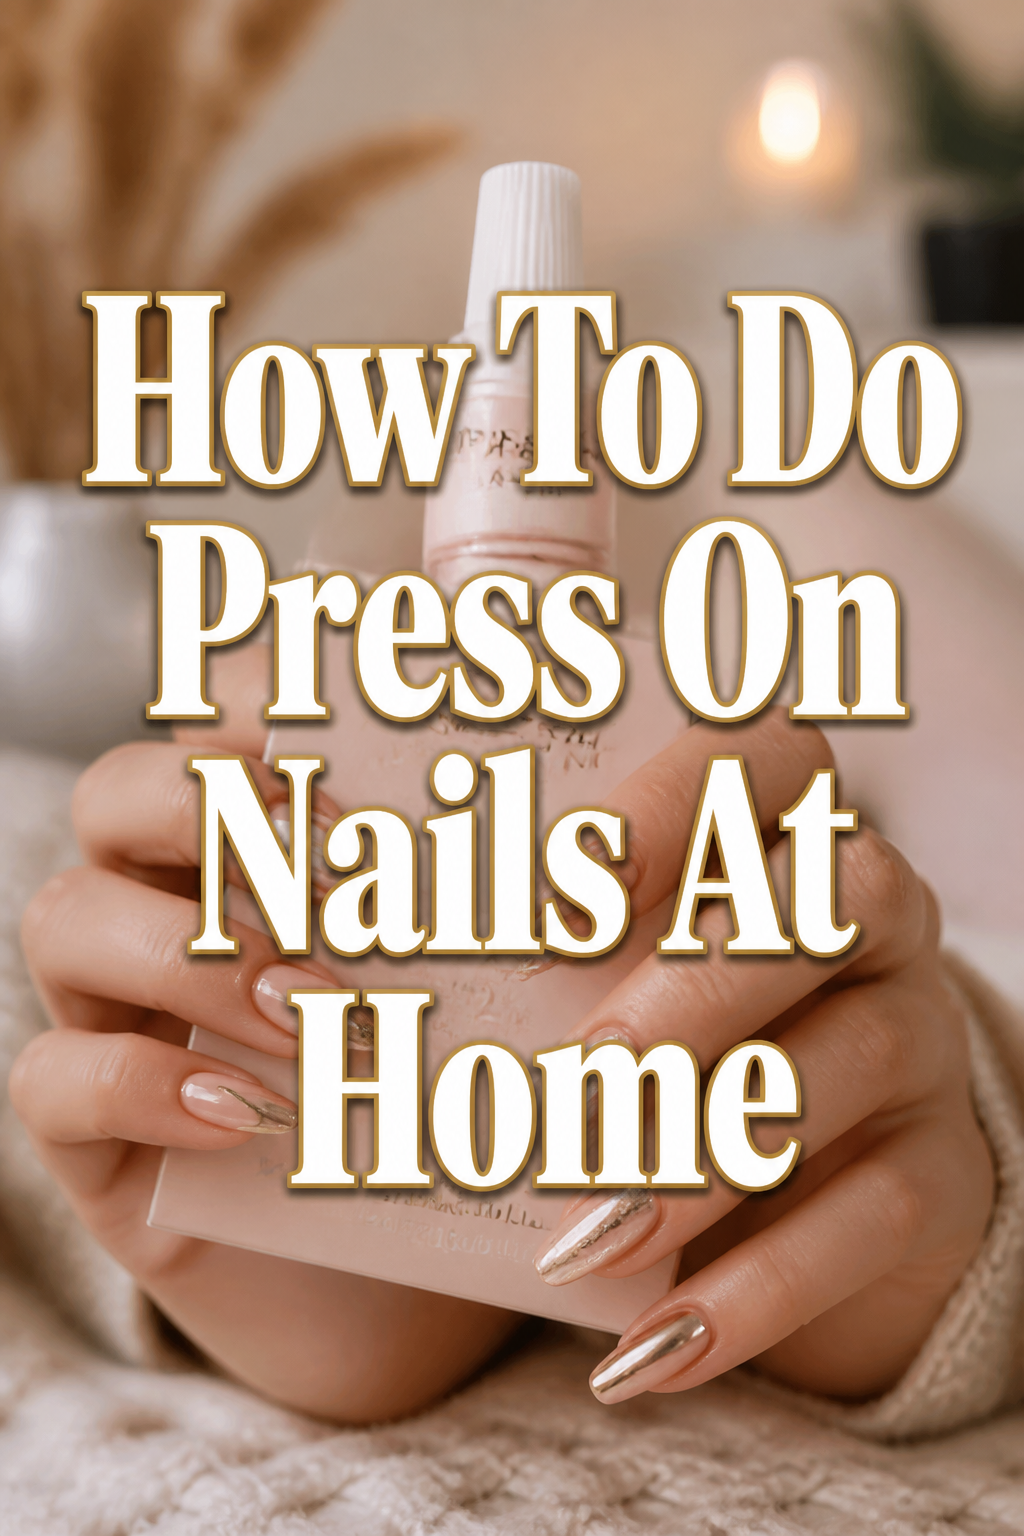
💅 How To Do Press On Nails At Home

Beginner-friendly templates, step-by-step guides,
and weekly project ideas in your inbox.
Tired of expensive salon visits but still crave beautifully manicured nails?
Press-on nails are a game-changer, offering a stunning, temporary manicure right from your living room.
I’ve personally perfected my press-on technique over countless applications, and this guide shares all the secrets to a long-lasting, professional-looking finish.
Quick Overview
This guide will walk you through everything needed to apply press-on nails flawlessly, ensuring they look great and stay put.
You’ll learn preparation, application, and aftercare for a salon-quality result at home.
- Time needed: 20-45 minutes (depending on prep and design)
- Difficulty: Beginner
- What you’ll need: Press-on nail kit, nail file/buffer, cuticle pusher, rubbing alcohol, nail glue (or adhesive tabs)
Step-by-Step Instructions
Step 1: Gather Your Supplies
Start by laying out everything you’ll need. This prevents interruptions during the application process.
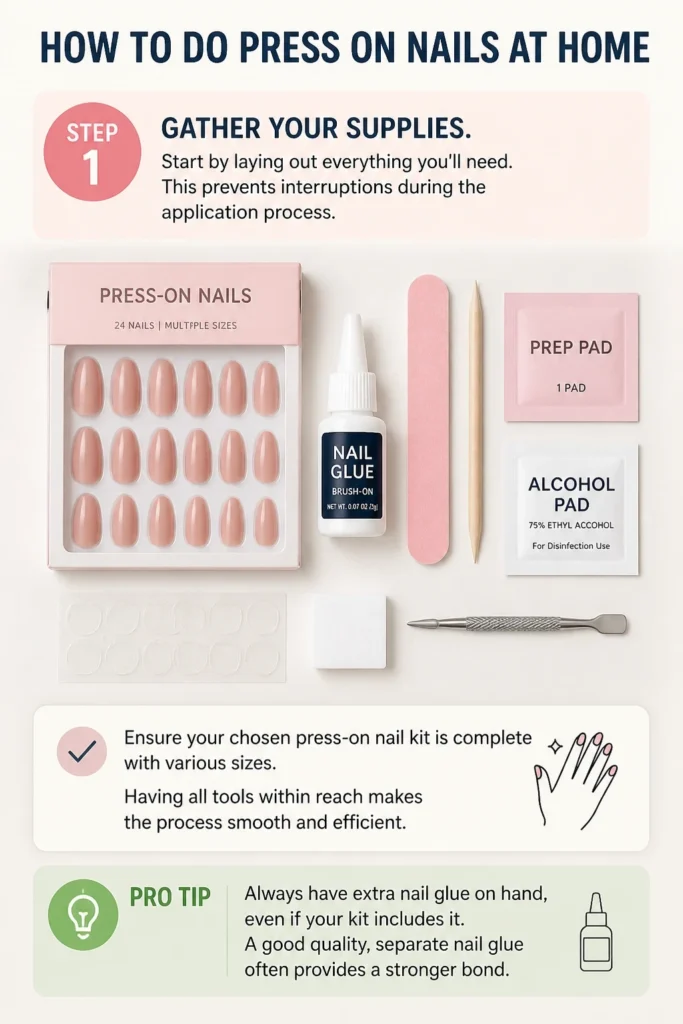
Ensure your chosen press-on nail kit is complete with various sizes.
Having all tools within reach makes the process smooth and efficient.
Pro Tip: Always have extra nail glue on hand, even if your kit includes it. A good quality, separate nail glue often provides a stronger bond.
Step 2: Prepare Your Natural Nails
Proper preparation is the most crucial step for a long-lasting press-on manicure.
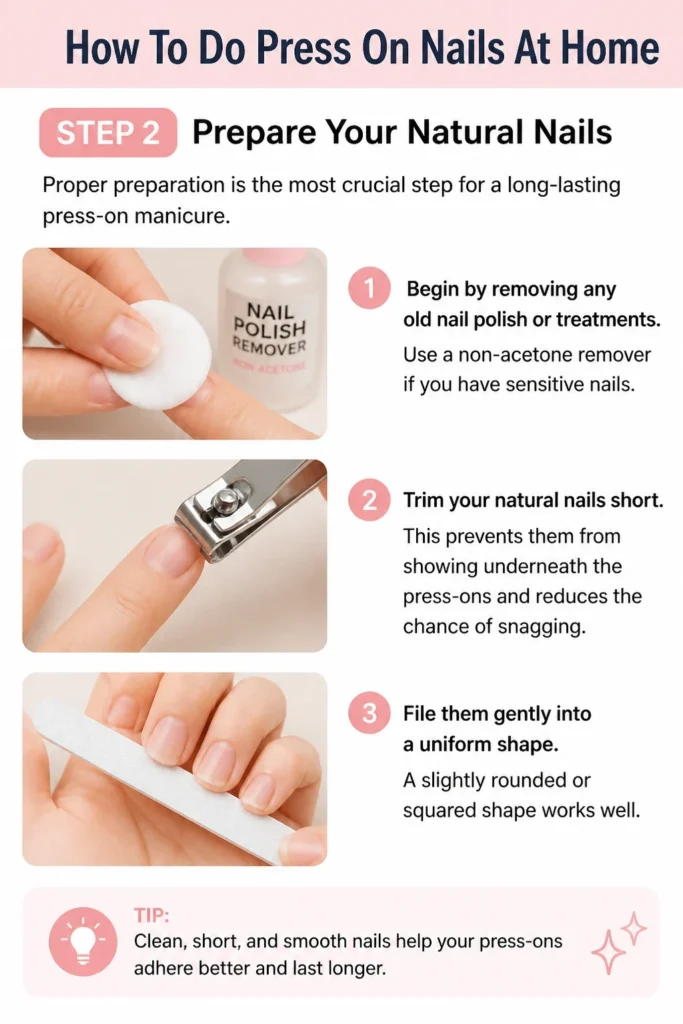
Begin by removing any old nail polish or treatments. Use a non-acetone remover if you have sensitive nails.
Trim your natural nails short. This prevents them from showing underneath the press-ons and reduces the chance of snagging.
File them gently into a uniform shape. A slightly rounded or squared shape works well.
Step 3: Push Back and Trim Cuticles
Gently push back your cuticles using a wooden or metal cuticle pusher.
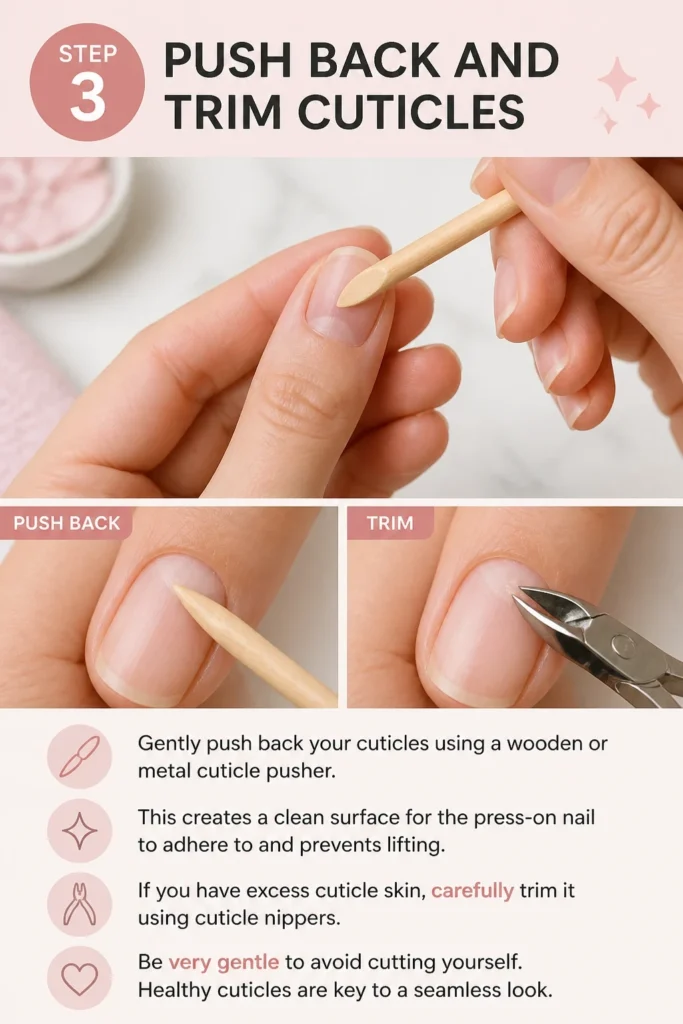
This creates a clean surface for the press-on nail to adhere to and prevents lifting.
If you have excess cuticle skin, carefully trim it using cuticle nippers. Be very gentle to avoid cutting yourself.
Healthy cuticles are key to a seamless look.
Step 4: Buff Your Nail Surface
Lightly buff the surface of each natural nail with a fine-grit buffer.
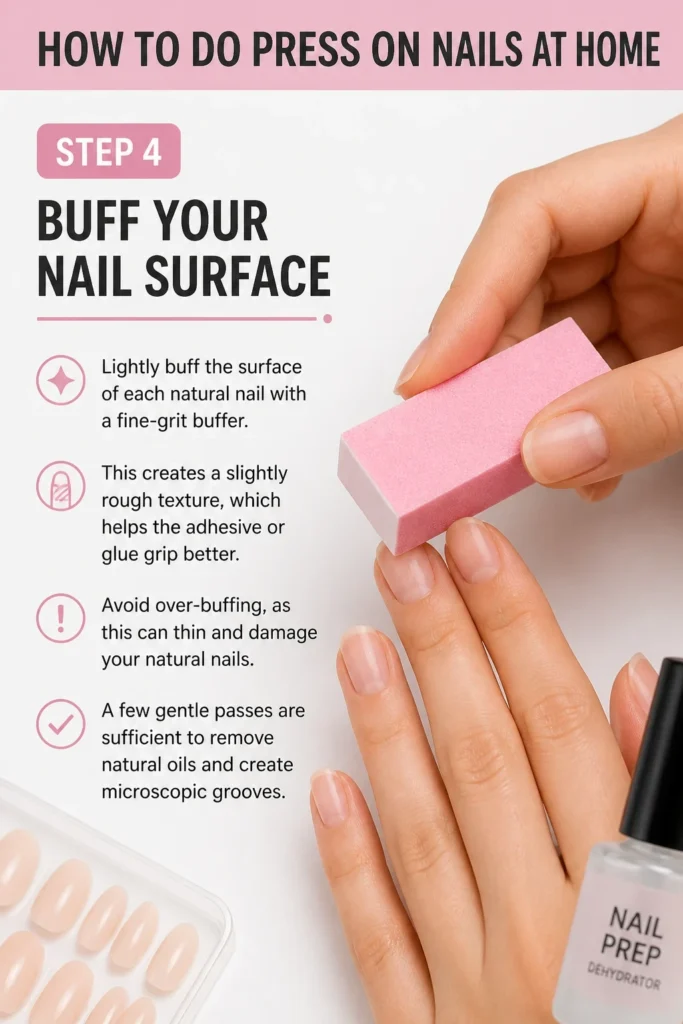
This creates a slightly rough texture, which helps the adhesive or glue grip better.
Avoid over-buffing, as this can thin and damage your natural nails.
A few gentle passes are sufficient to remove natural oils and create microscopic grooves.
Step 5: Dehydrate Your Nails
Cleanse each nail thoroughly with a cotton pad soaked in rubbing alcohol or a specialized nail dehydrator.
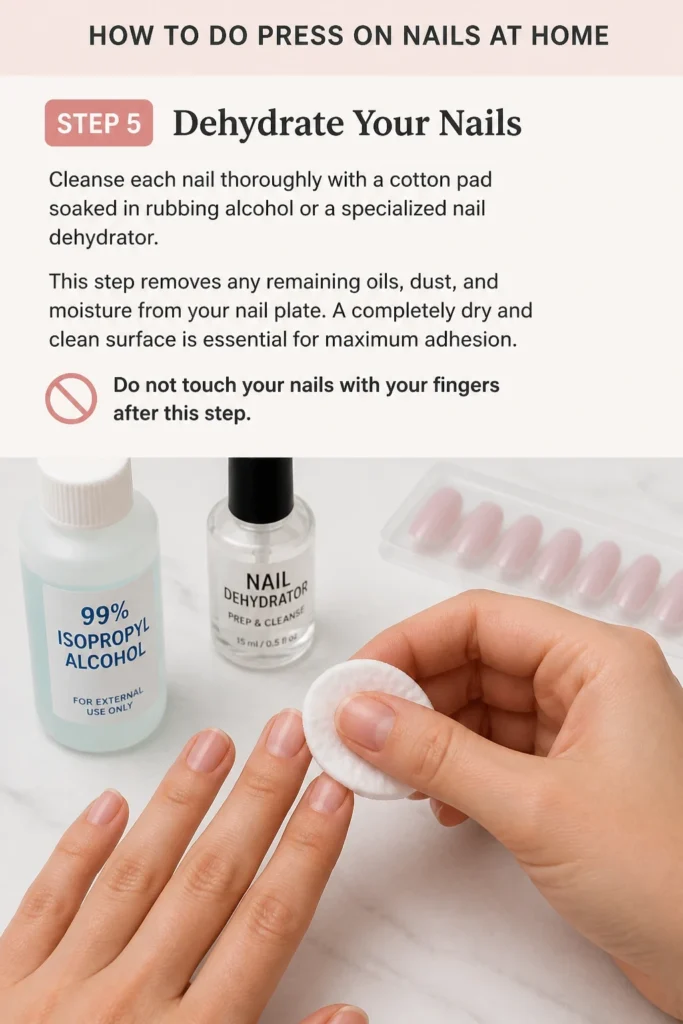
This step removes any remaining oils, dust, and moisture from your nail plate.
A completely dry and clean surface is essential for maximum adhesion.
Do not touch your nails with your fingers after this step.
Step 6: Size and Organize Your Press-On Nails
Before applying any glue, carefully size each press-on nail to your natural nails.
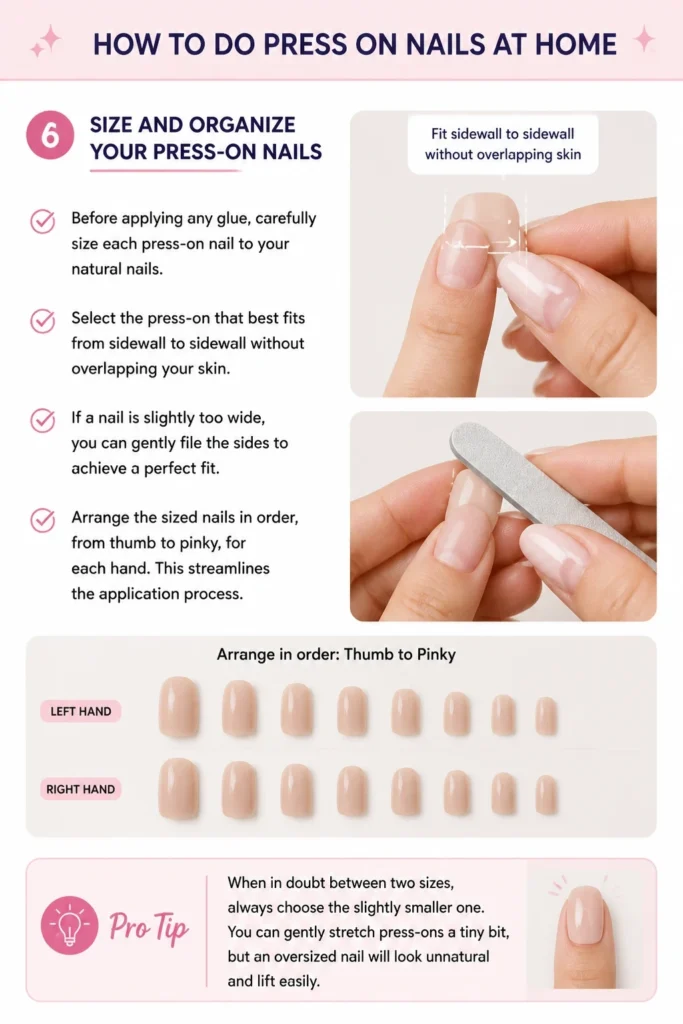
Select the press-on that best fits from sidewall to sidewall without overlapping your skin.
If a nail is slightly too wide, you can gently file the sides to achieve a perfect fit.
Arrange the sized nails in order, from thumb to pinky, for each hand. This streamlines the application process.
Pro Tip: When in doubt between two sizes, always choose the slightly smaller one. You can gently stretch press-ons a tiny bit, but an oversized nail will look unnatural and lift easily.
Step 7: Apply Adhesive (Glue or Tabs)
Decide whether you’re using nail glue or adhesive tabs. Glue offers a longer wear time, while tabs are better for short-term wear or easy removal.
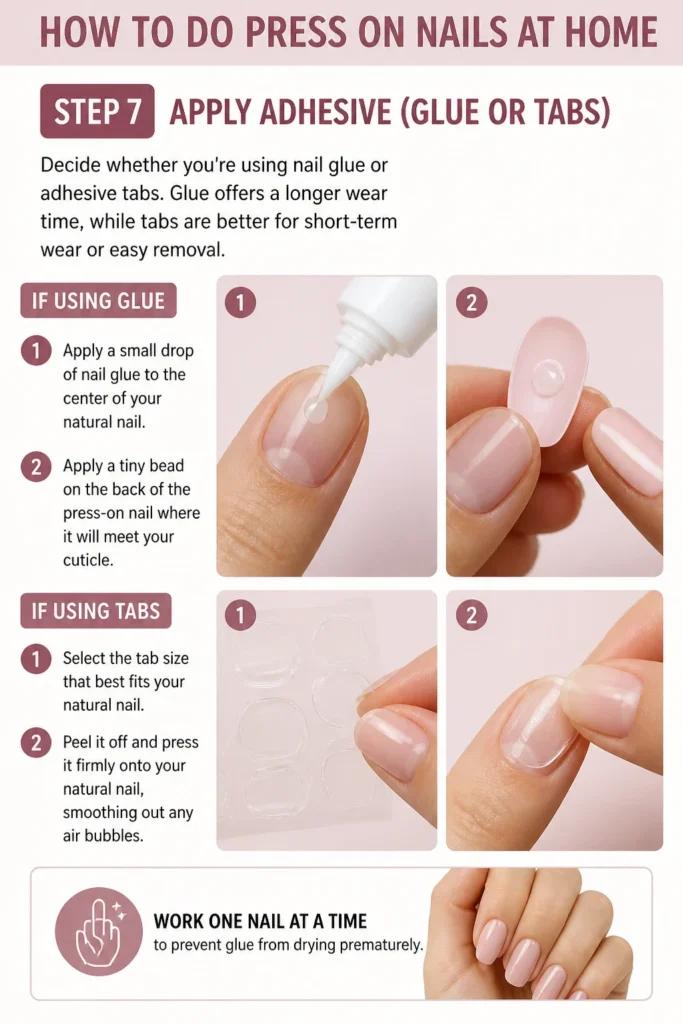
If using glue: Apply a small drop of nail glue to the center of your natural nail and a tiny bead on the back of the press-on nail where it will meet your cuticle.
If using tabs: Select the tab size that best fits your natural nail. Peel it off and press it firmly onto your natural nail, smoothing out any air bubbles.
Work one nail at a time to prevent glue from drying prematurely.
Step 8: Apply the Press-On Nail
Starting with your pinky finger (or thumb, depending on your preference for ease of handling), carefully align the press-on nail with your cuticle line.
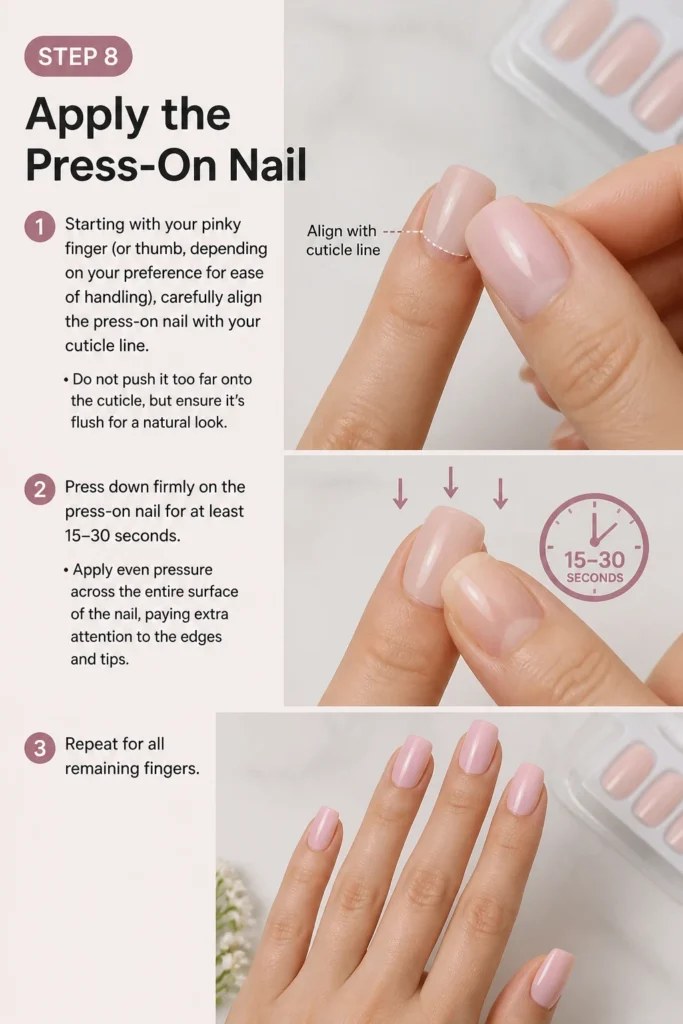
Do not push it too far onto the cuticle, but ensure it’s flush for a natural look.
Press down firmly on the press-on nail for at least 15-30 seconds.
Apply even pressure across the entire surface of the nail, paying extra attention to the edges and tips.
Repeat for all remaining fingers.
Step 9: Refine and Finish
Once all press-ons are applied, inspect them for any excess glue around the edges.
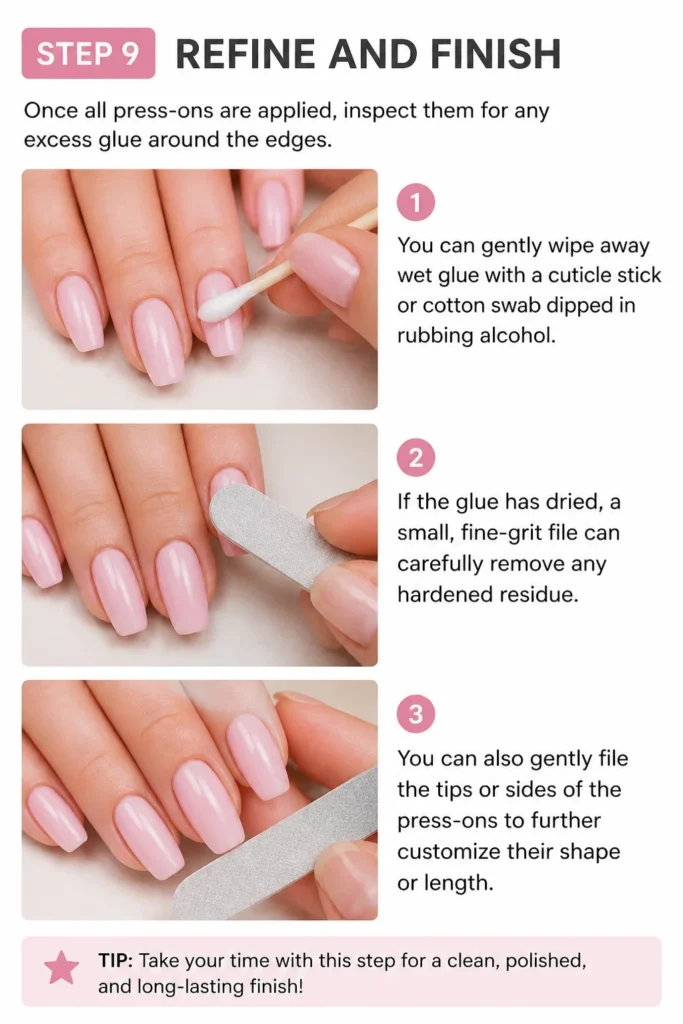
You can gently wipe away wet glue with a cuticle stick or cotton swab dipped in rubbing alcohol.
If the glue has dried, a small, fine-grit file can carefully remove any hardened residue.
You can also gently file the tips or sides of the press-ons to further customize their shape or length.
Step 10: Aftercare and Sealing (Optional)
Avoid exposing your freshly applied press-ons to excessive water for at least an hour.
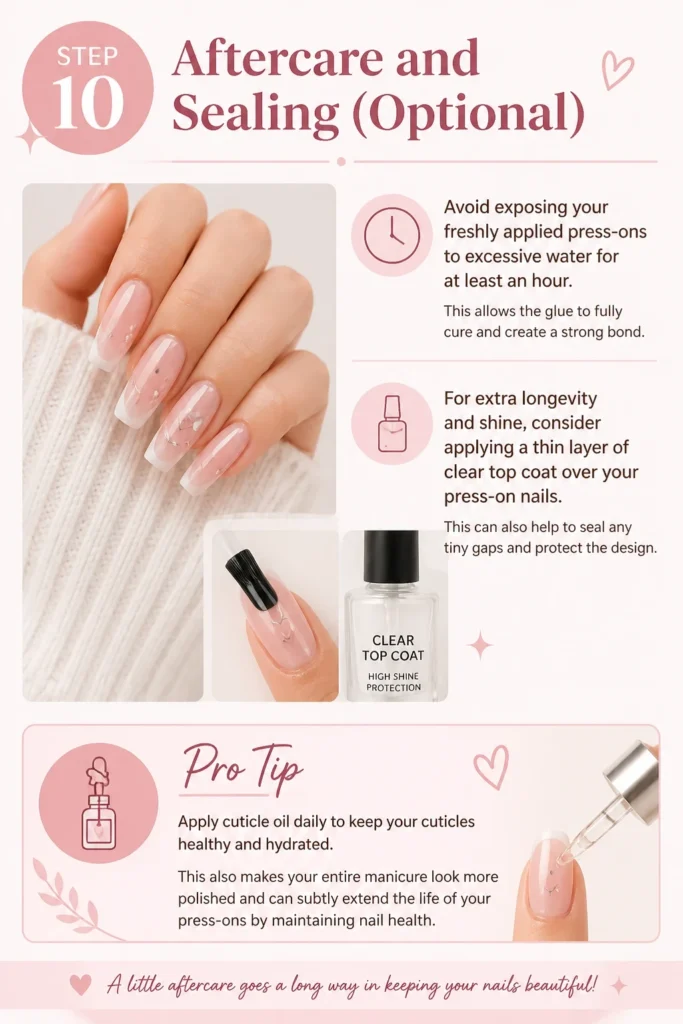
This allows the glue to fully cure and create a strong bond.
For extra longevity and shine, consider applying a thin layer of clear top coat over your press-on nails.
This can also help to seal any tiny gaps and protect the design.
Pro Tip: Apply cuticle oil daily to keep your cuticles healthy and hydrated. This also makes your entire manicure look more polished and can subtly extend the life of your press-ons by maintaining nail health.
Common Mistakes to Avoid
Skipping Nail Preparation
Many people rush straight to applying the nails without proper prep. This is the biggest reason press-ons lift or fall off quickly.
Failing to clean, buff, and dehydrate your natural nails means the glue has nothing solid to adhere to.
Always dedicate time to thorough nail prep; it’s the foundation of a lasting manicure.
Using Too Much or Too Little Glue
Applying too much glue can lead to messy overflow, which then hardens and looks unprofessional.
It can also make removal more difficult and potentially damage your natural nails.
Conversely, too little glue won’t create a strong enough bond, causing the press-on to pop off easily.
Aim for a pea-sized drop in the center of your natural nail and a small bead on the back of the press-on.
Incorrect Sizing of Press-Ons
Choosing press-on nails that are too wide will overlap your skin, making them prone to lifting and looking unnatural.
If they are too narrow, they can leave gaps at the sides, allowing water and debris underneath, which weakens the bond.
Always take the time to accurately size each nail to ensure a perfect, seamless fit from sidewall to sidewall.
Touching Nails After Dehydration
After you’ve cleaned and dehydrated your nails with alcohol, resist the urge to touch them with your fingers.
Even clean fingers can transfer natural oils back onto the nail plate.
This reintroduces barriers that prevent the glue from forming a strong bond, leading to premature lifting.
Troubleshooting
Press-On Lifts at the Edges
If your press-on nails start lifting at the sides or cuticle area, it’s often due to insufficient glue application in that specific spot or improper sizing.
To fix this, gently lift the loose edge further and apply a tiny drop of nail glue underneath.
Press down firmly for 30 seconds, ensuring the glue spreads to re-adhere the lifted section.
Nail Falls Off Completely
When a press-on nail completely detaches, it usually points to inadequate nail preparation or not enough glue.
First, clean any residual glue from both your natural nail and the back of the fallen press-on.
Re-prep your natural nail by gently buffing and dehydrating it again.
Then, reapply the press-on with a fresh, appropriate amount of glue, pressing firmly for an extended period.
Bubbles Underneath the Nail
Bubbles can form if the glue isn’t spread evenly or if too much air is trapped during application.
If the bubble is small and near the edge, you might be able to gently press it out while the glue is still wet.
For larger or dried bubbles, the best approach is to carefully remove the press-on, clean your nail, and reapply with more even glue distribution.
Key Takeaways
- Thorough nail preparation is the absolute foundation for long-lasting press-ons.
- Always size your press-on nails carefully for a natural and secure fit.
- Use the right amount of nail glue – a small, even application is key.
- Apply firm, sustained pressure when attaching each press-on nail.
- Avoid water exposure for at least an hour after application to allow glue to cure.
- Don’t skip the dehydration step; it removes oils that prevent adhesion.
Frequently Asked Questions
How long do press-on nails typically last?
With proper preparation and application, press-on nails can last anywhere from 1 to 3 weeks using nail glue.
Adhesive tabs typically provide a shorter wear time, usually a few days to a week, making them ideal for temporary looks.
Longevity also depends on your daily activities and how well you care for them.
Can I reuse press-on nails?
Yes, many press-on nails can be reused if removed carefully and if they are still in good condition.
Gently file away any dried glue residue from the back of the press-on nail.
Store them safely until your next application to protect their shape and design.
How do I remove press-on nails without damaging my natural nails?
To remove, soak your hands in warm, soapy water with a few drops of cuticle oil for 10-15 minutes.
Then, gently pry under the edges of the press-on with a wooden cuticle stick.
If they don’t lift easily, soak for a bit longer. Never force them off, as this can damage your natural nail plate.
Can I shower or wash dishes with press-on nails?
Yes, once the glue has fully cured (usually after an hour or so), you can shower and wash dishes.
However, prolonged exposure to hot water or harsh chemicals can weaken the adhesive over time.
Wearing gloves for extended water exposure, like dishwashing, can help extend their wear.
Our Top Recommended Finds
- Professional Nail Glue: A strong, quick-drying glue designed for nail applications provides superior hold. Look for brands known for salon-quality adhesion.
- Glass Nail File: A gentle alternative to traditional emery boards, a glass file creates a smooth edge and helps prevent splitting of natural nails during prep.
- Rubbing Alcohol Wipes: Convenient pre-soaked pads make the dehydration step quick and mess-free, ensuring a clean nail surface every time.
Embrace Your Inner Nail Artist Today
You now have all the knowledge and steps to achieve a beautiful, durable press-on manicure at home.
No more waiting for appointments or spending a fortune at the salon.
Experiment with different styles, colors, and lengths to express your unique personality.
Take the plunge and give your nails the stunning transformation they deserve, all from the comfort of your home!
Beginner-friendly templates, step-by-step guides,
and weekly project ideas in your inbox.