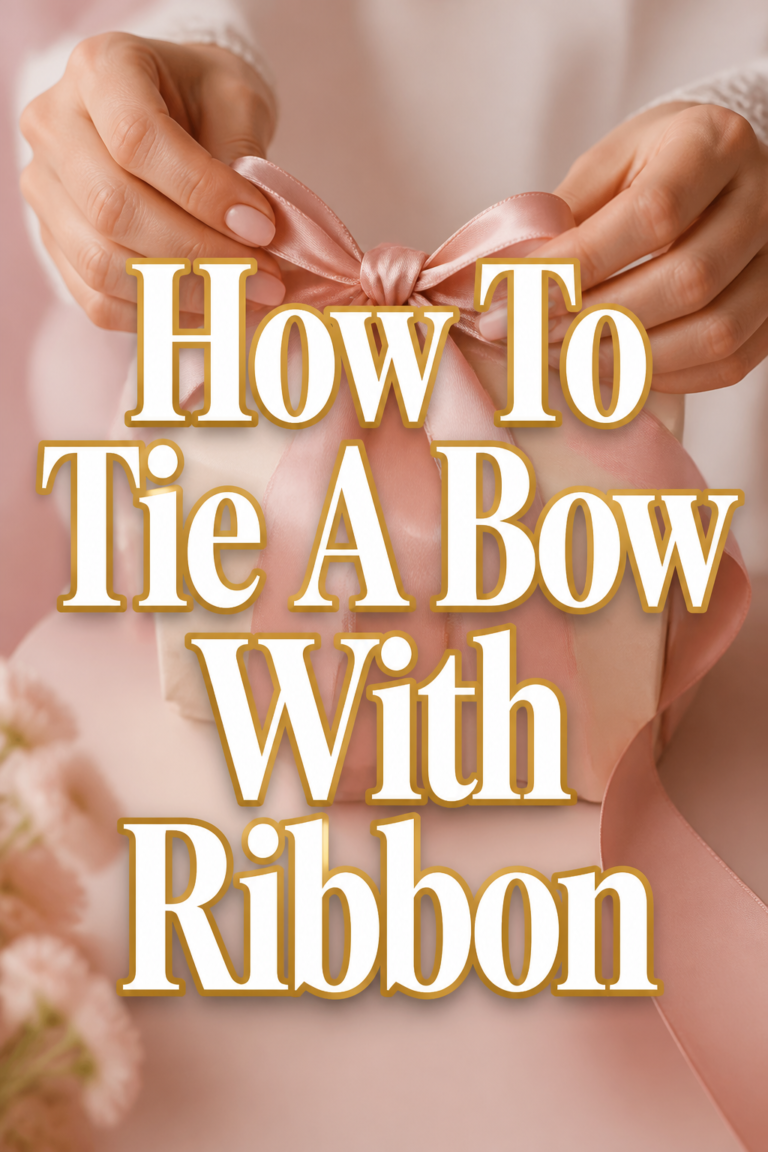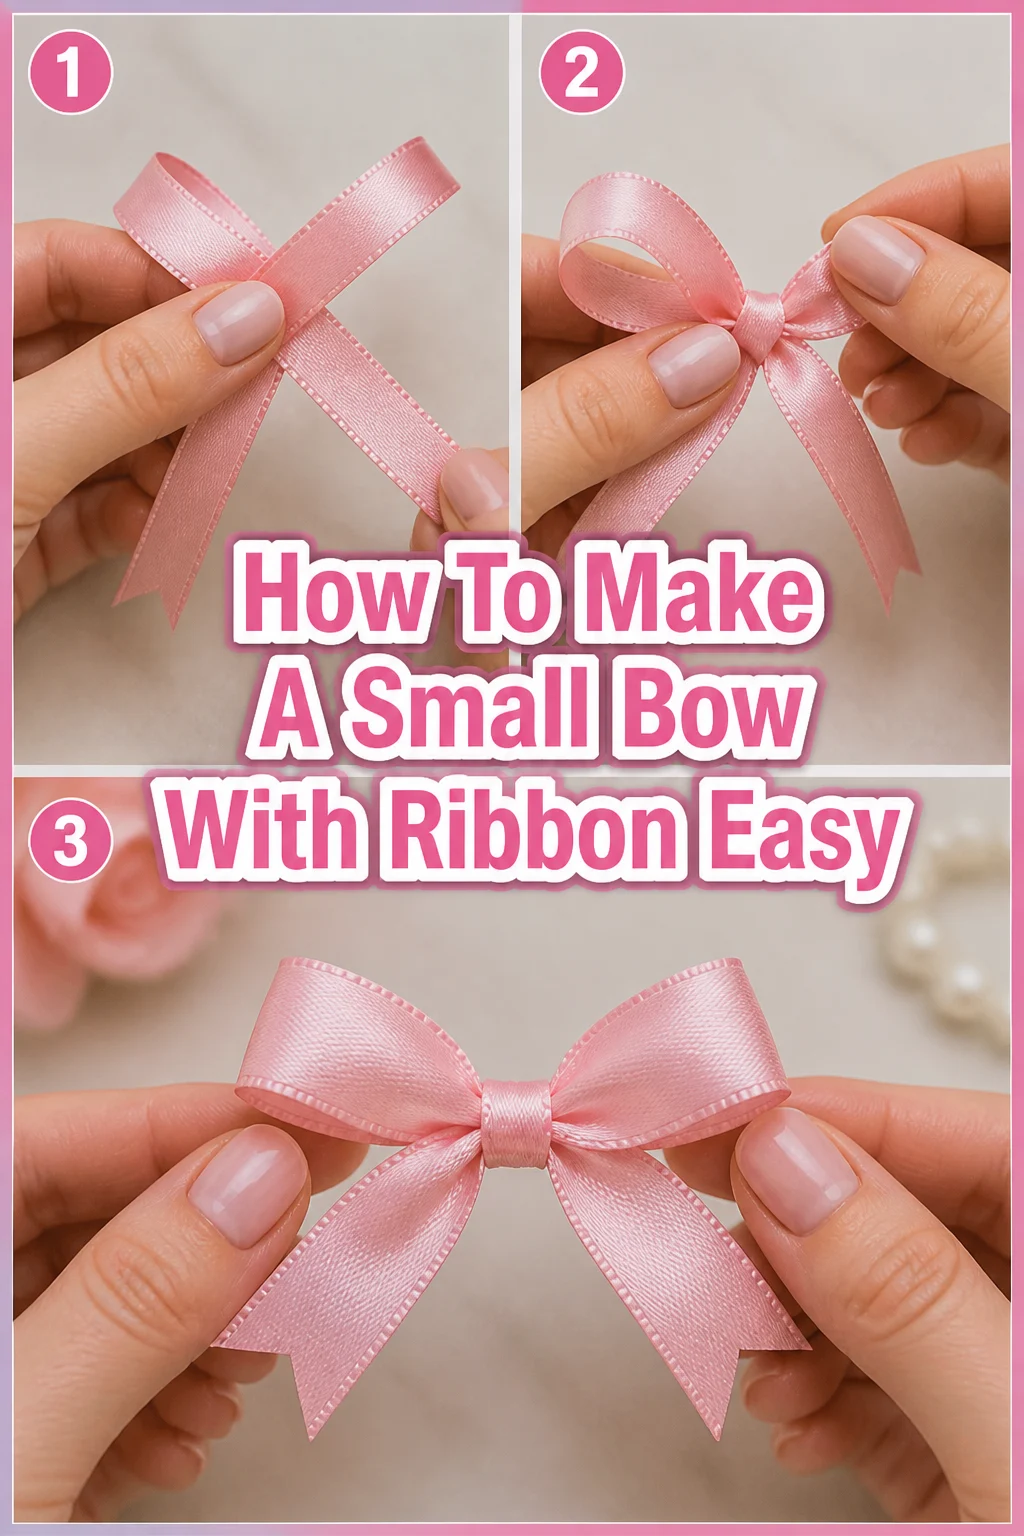
🎀 How To Make A Small Bow With Ribbon Easy

Beginner-friendly templates, step-by-step guides,
and weekly project ideas in your inbox.
Learning to tie a small ribbon bow can transform any gift or craft project. I used to struggle with lopsided loops and flimsy knots, but a few simple tricks changed everything. This guide shares the exact method I use to create perfect, perky bows every time. You’ll master this elegant little touch with ease.

Quick Overview
This guide will walk you through creating a beautiful, small ribbon bow, perfect for gifts, hair accessories, or craft embellishments. You’ll learn a reliable technique that yields consistent results.
- Time needed: 5-10 minutes
- Difficulty: Beginner
- What you’ll need: Ribbon, scissors, optional: floral wire or hot glue.
Step-by-Step Instructions
Step 1: Choose Your Ribbon and Cut to Length
Select a ribbon that suits your project. Thinner ribbons (1/4 to 1/2 inch wide) work best for small bows, but you can adjust for a slightly larger bow if needed. Consider the texture and material, as some ribbons hold shape better.
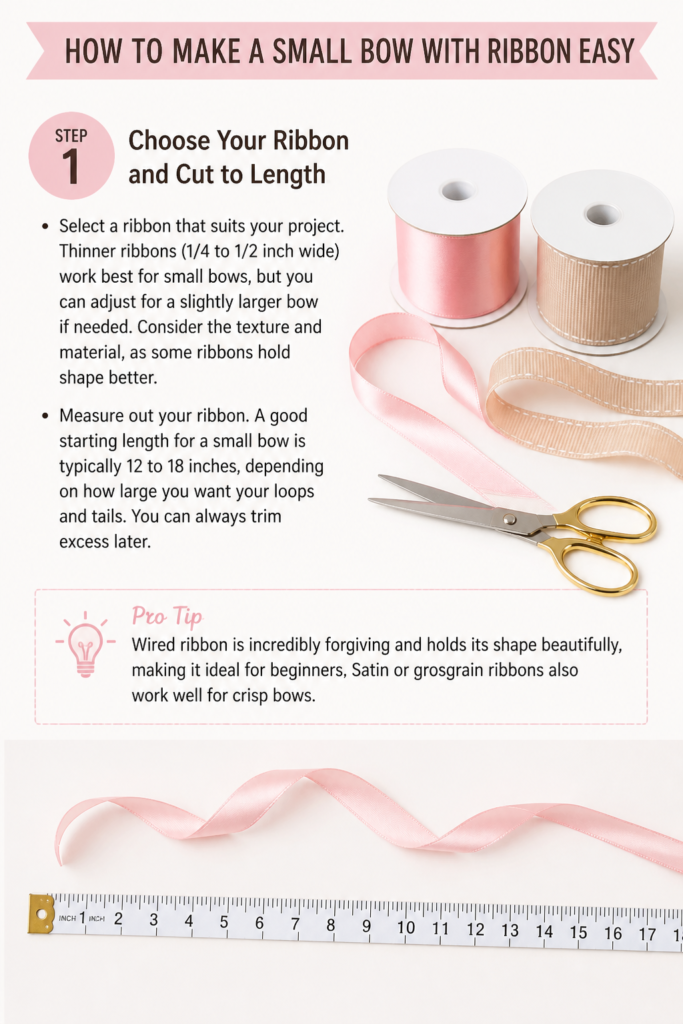
Measure out your ribbon. A good starting length for a small bow is typically 12 to 18 inches, depending on how large you want your loops and tails. You can always trim excess later.
Pro Tip: Wired ribbon is incredibly forgiving and holds its shape beautifully, making it ideal for beginners. Satin or grosgrain ribbons also work well for crisp bows.
Step 2: Create the First Loop
Hold one end of your ribbon in your non-dominant hand. Bring the ribbon up and over, forming a loop that points towards the ceiling. This will be the first “ear” of your bow.
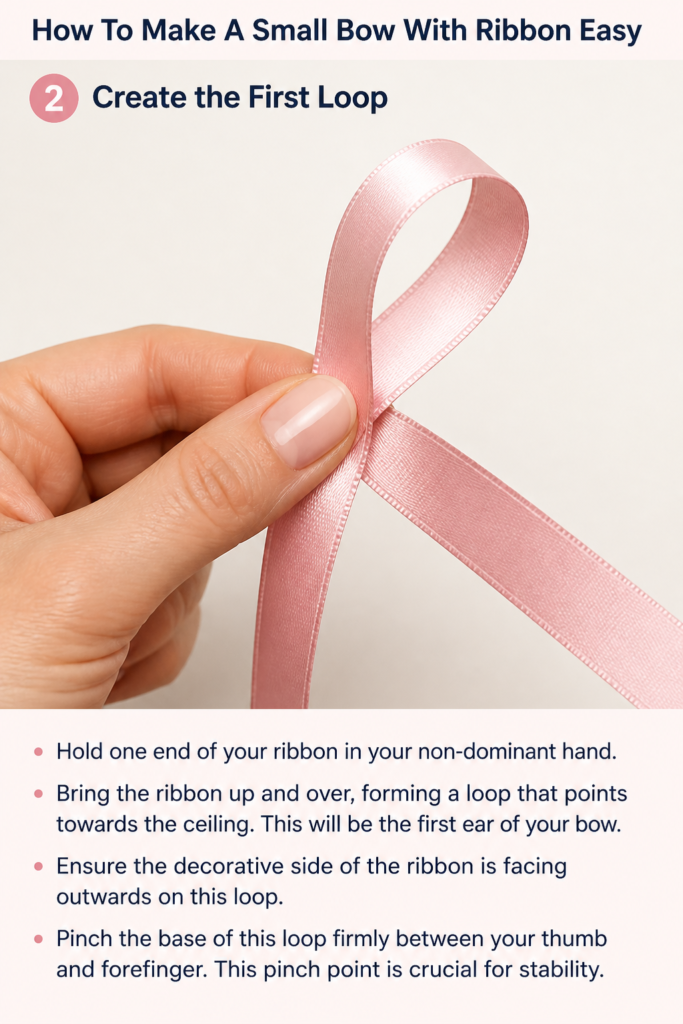
Ensure the decorative side of the ribbon is facing outwards on this loop. Pinch the base of this loop firmly between your thumb and forefinger. This pinch point is crucial for stability.
Step 3: Form the Second Loop
Now, take the long working end of your ribbon. Bring it around and over your first thumb, creating a second loop on the opposite side. This loop should mirror the size of your first one.
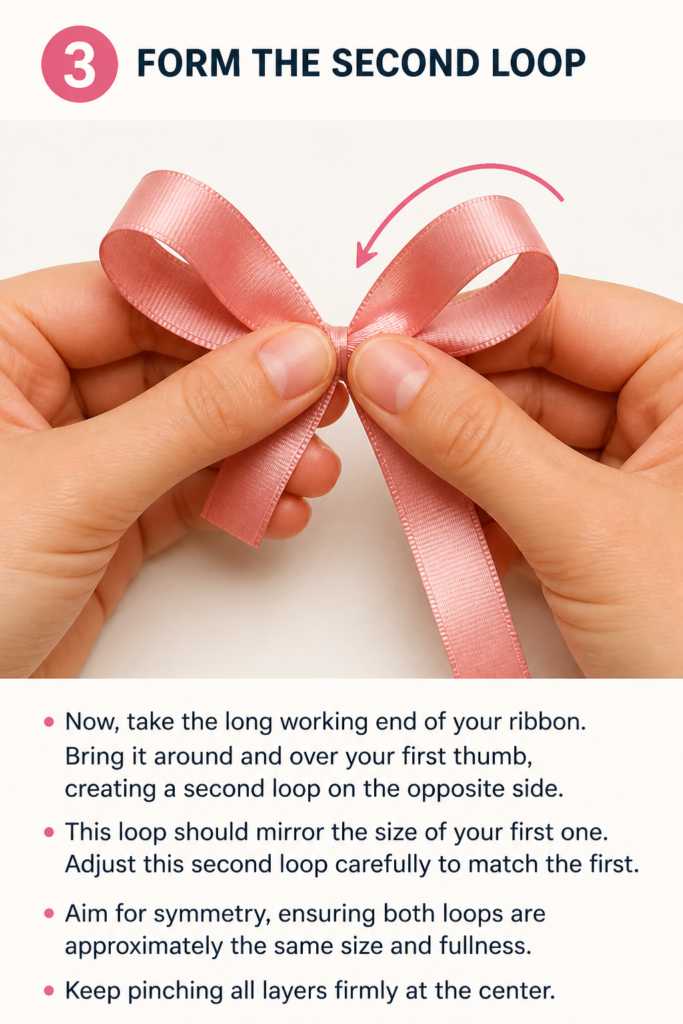
Adjust this second loop carefully to match the first. Aim for symmetry, ensuring both loops are approximately the same size and fullness. Keep pinching all layers firmly at the center.
Step 4: Cross the Ribbon Tails
You now have two loops and two ribbon tails hanging down. Take the long working tail and cross it over the top of the pinched center, going towards the back. This secures the two loops you just formed.
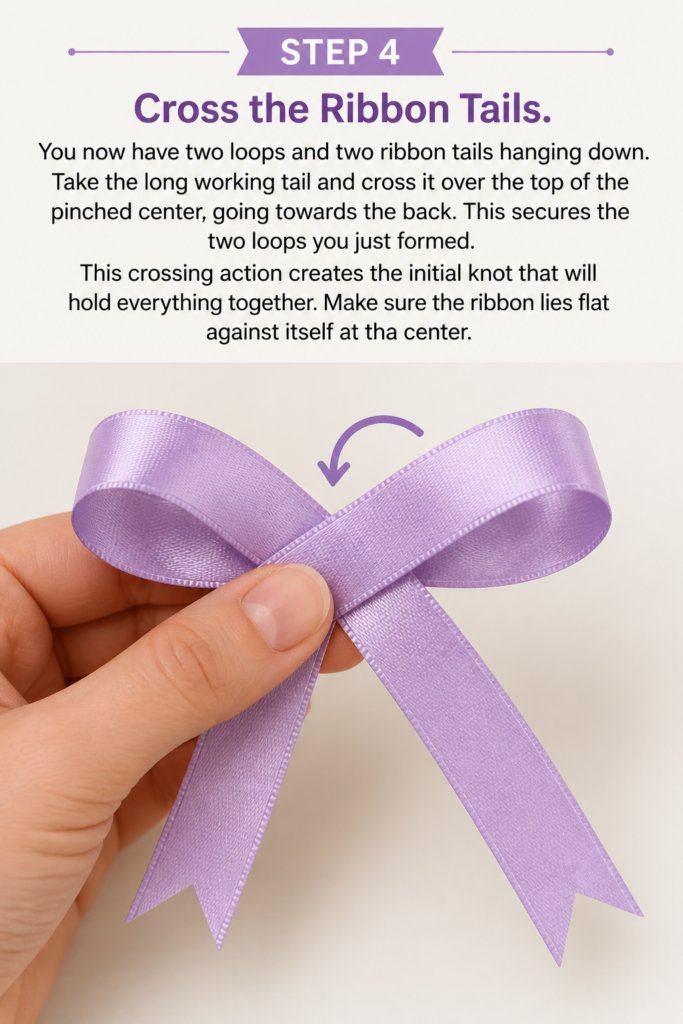
This crossing action creates the initial knot that will hold everything together. Make sure the ribbon lies flat against itself at the center.
Step 5: Thread Through the Back Loop
Push the working tail up through the small opening you created at the back of the bow, behind the two loops. It should emerge from the center, between your thumb and forefinger. This is similar to starting a shoelace knot.
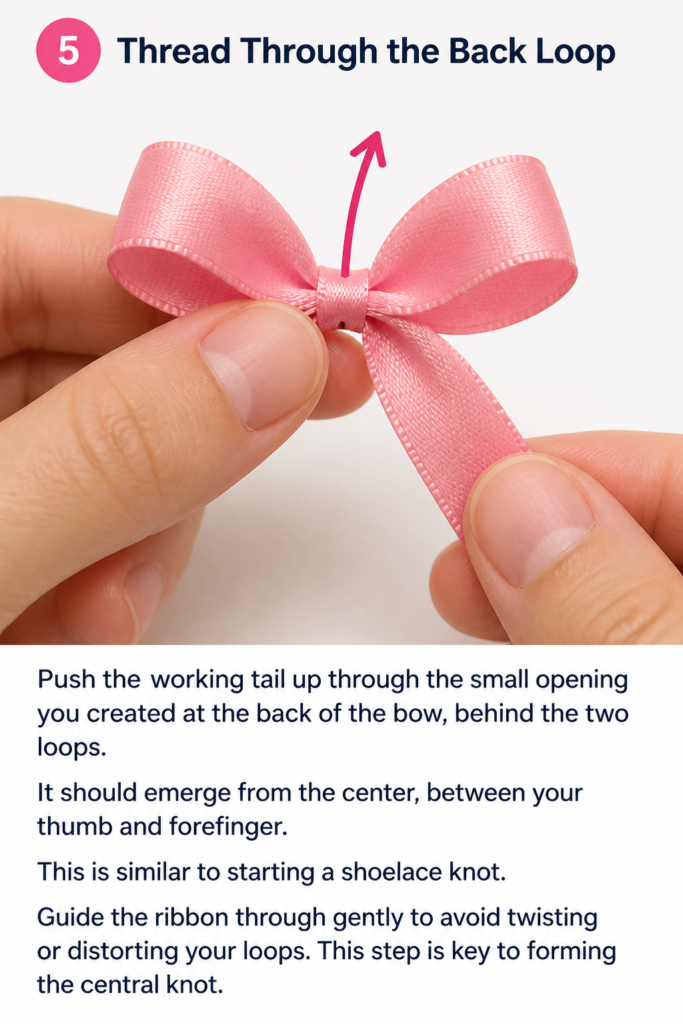
Guide the ribbon through gently to avoid twisting or distorting your loops. This step is key to forming the central knot.
Step 6: Tighten the Knot Slowly
Once the working tail is through, begin to pull both tails away from the loops. Do this slowly and deliberately, tightening the knot at the center of your bow. As you pull, the loops will become more defined.
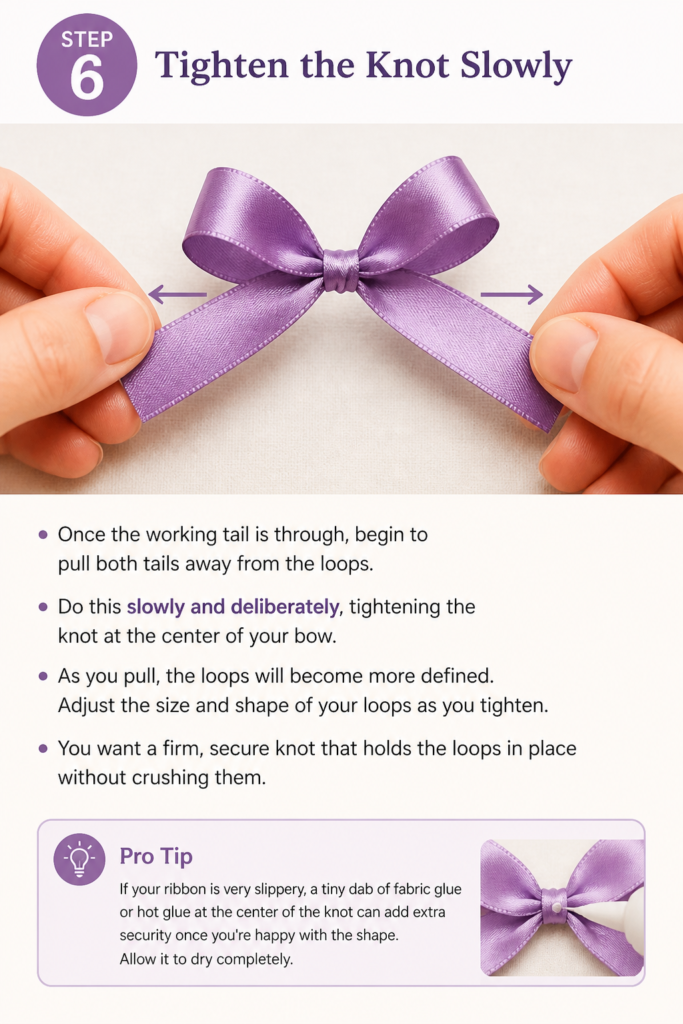
Adjust the size and shape of your loops as you tighten. You want a firm, secure knot that holds the loops in place without crushing them.
Pro Tip: If your ribbon is very slippery, a tiny dab of fabric glue or hot glue at the center of the knot can add extra security once you’re happy with the shape. Allow it to dry completely.
Step 7: Adjust and Fluff Your Loops
With the knot tightened, it’s time to perfect your bow’s appearance. Gently tug on each loop, pulling them outwards and upwards to make them full and even. Work any creases out of the ribbon.
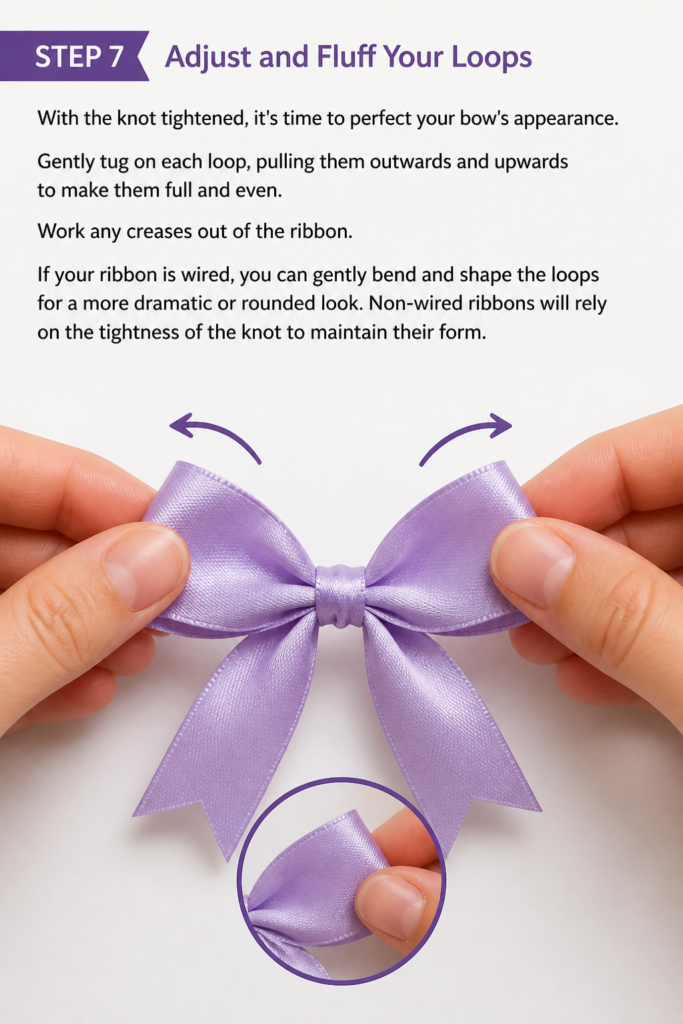
If your ribbon is wired, you can gently bend and shape the loops for a more dramatic or rounded look. Non-wired ribbons will rely on the tightness of the knot to maintain their form.
Step 8: Trim the Tails
Finally, assess the length of your bow tails. For a classic look, trim them at an angle or cut a “V” shape into the ends. This prevents fraying and adds a professional finish.
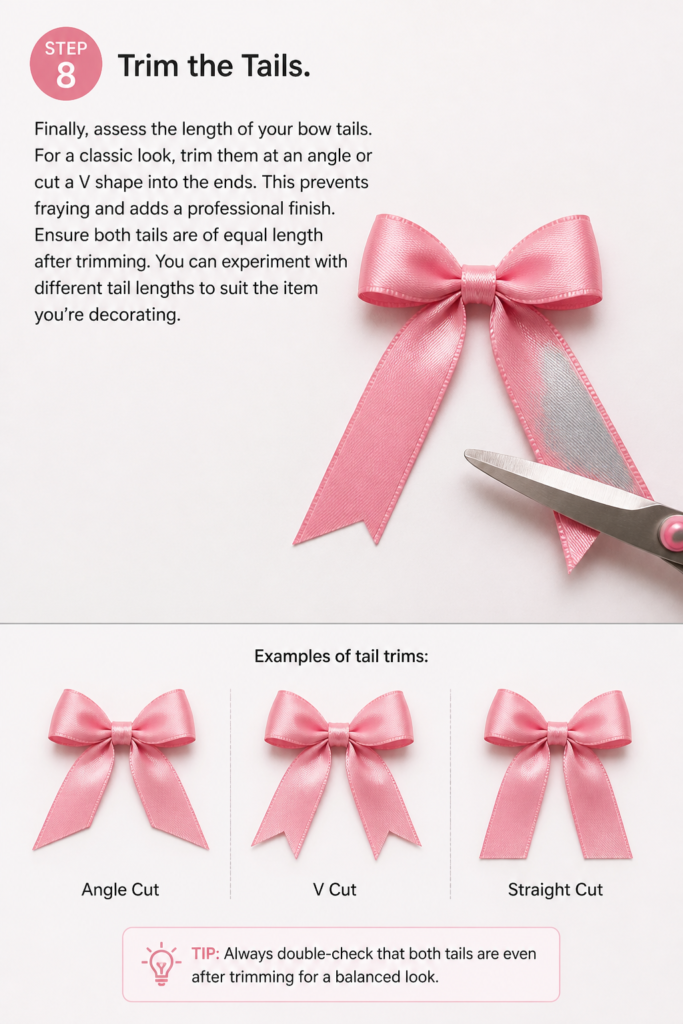
Ensure both tails are of equal length after trimming. You can experiment with different tail lengths to suit the item you’re decorating.
Common Mistakes to Avoid
Uneven Loops
Many beginners rush and end up with one loop significantly larger or smaller than the other. This creates an unbalanced and often lopsided bow. Always take time to carefully match the size of your loops during formation. Adjust them slowly before you fully tighten the knot.
Twisted Ribbon
It is easy for the ribbon to twist, especially if it has a distinct right and wrong side. A twisted ribbon can make your bow look messy and unprofessional. Pay close attention to keeping the decorative side of the ribbon facing outwards on all loops and tails as you work. Unfurl and smooth the ribbon frequently.
Loose Knot
A knot that isn’t tight enough will result in a floppy bow that quickly loses its shape. The loops might sag or come undone. Ensure you pull the tails firmly and evenly when securing the knot. The center should feel snug and hold the loops securely in place.
Cutting Tails Too Short Too Soon
Enthusiasm can lead to trimming the tails before the bow is fully shaped and adjusted. This leaves no room for error or further refinement. Always leave extra length on your tails until you are completely satisfied with the bow’s form. Then, trim them to your desired length for a clean finish.
Troubleshooting
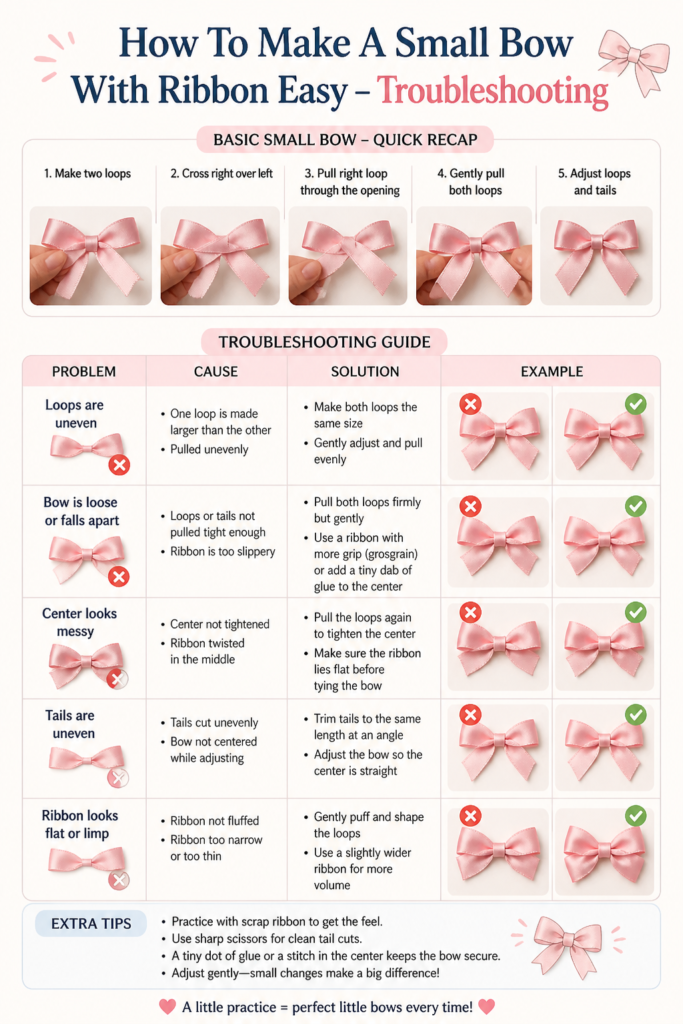
My Loops Are Floppy and Won’t Stand Up
If your loops are looking limp, it’s often due to a loose knot or the type of ribbon. First, try gently but firmly tightening the central knot further. If the knot is tight and the loops still sag, consider using a stiffer ribbon, like wired ribbon or grosgrain, next time. For an existing bow, a tiny bit of clear fabric stiffener spray can help, or you can carefully secure the back of the loops to your project with a small dot of hot glue.
The Ribbon Keeps Slipping While I’m Tying
Slippery ribbons like satin can be tricky to work with. The key is to maintain a very firm pinch at the center of the bow throughout the process. Practice holding the ribbon firmly between your thumb and forefinger. You might also find it easier to tie the bow directly onto the item you’re decorating, using it as an anchor, or using a small piece of floral wire to temporarily secure the center before tying the final knot.
My Bow Looks Uneven Even After Adjusting
An uneven bow usually stems from the initial loop formation. Make sure you are consciously creating two loops of exactly the same size before you start crossing the tails for the knot. Sometimes, one side of the ribbon might be pulled tighter than the other during the knotting process. Try loosening the knot slightly, readjusting both loops to be symmetrical, and then re-tightening very slowly and evenly, pulling both tails at the same pace.
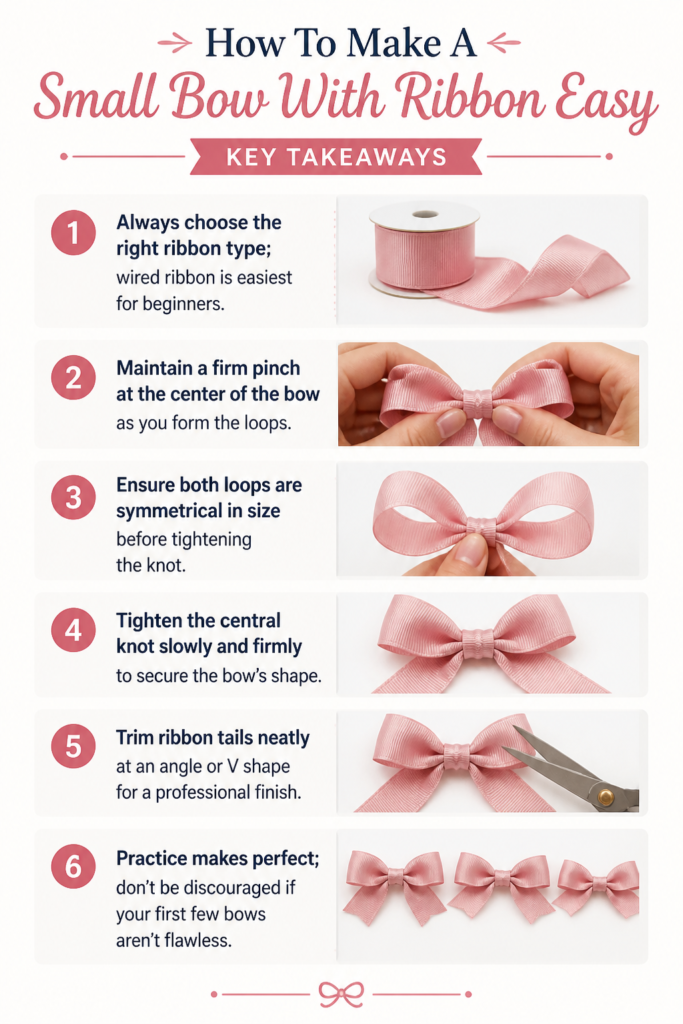
Key Takeaways
- Always choose the right ribbon type; wired ribbon is easiest for beginners.
- Maintain a firm pinch at the center of the bow as you form the loops.
- Ensure both loops are symmetrical in size before tightening the knot.
- Tighten the central knot slowly and firmly to secure the bow’s shape.
- Trim ribbon tails neatly at an angle or “V” shape for a professional finish.
- Practice makes perfect; don’t be discouraged if your first few bows aren’t flawless.
Frequently Asked Questions
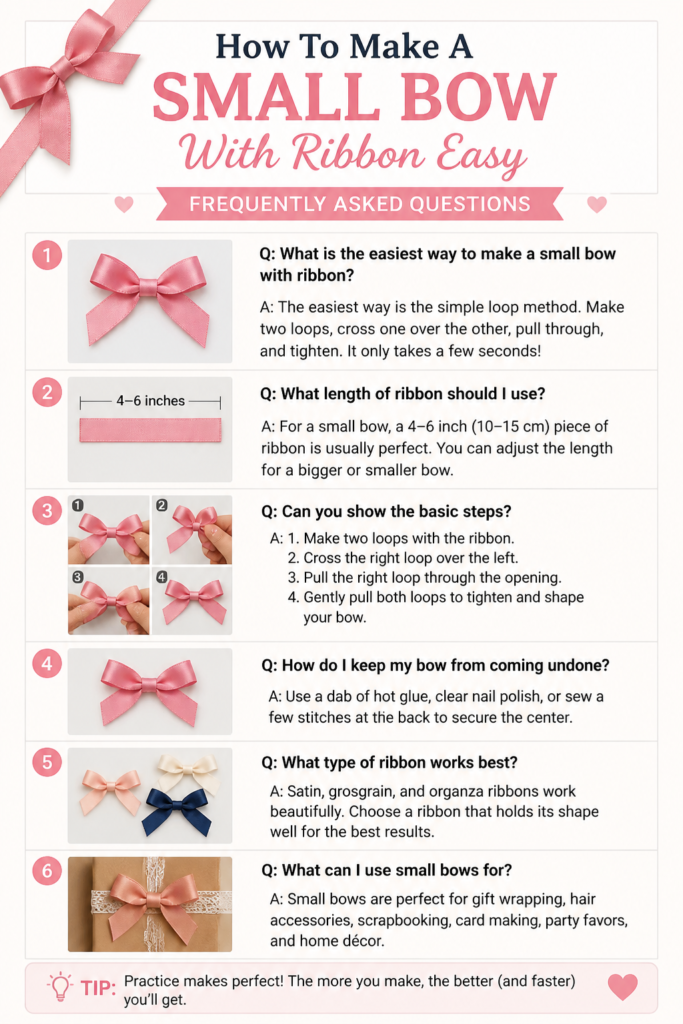
What type of ribbon is best for small bows?
For small bows, thinner ribbons work best. Grosgrain, satin, or velvet ribbons in widths from 1/4 inch to 1/2 inch are excellent choices. Wired ribbon is particularly good as it holds its shape beautifully.
How much ribbon do I need for a small bow?
A good starting point for a small bow is typically 12 to 18 inches of ribbon. This allows enough length for two modest loops and two short tails. You can always adjust based on your desired bow size.
Can I make multiple bows quickly using this method?
Yes, once you master the technique, you can create bows quite efficiently. For mass production, some people pre-cut all their ribbon lengths. Consistent practice will significantly increase your speed and precision.
How do I attach the finished bow to a gift or craft?
You can use a small dot of hot glue on the back of the bow to attach it securely. Alternatively, if the bow has longer tails, you can use those to tie it around an item. For hair clips, you might glue it directly onto a blank clip.
Our Top Recommended Finds
- Assorted Grosgrain Ribbon Pack: Great for beginners, offering a variety of colors and widths to practice with. Grosgrain holds its shape well.
- Sharp Fabric Scissors: Essential for clean, crisp cuts that prevent fraying. A dedicated pair for ribbon ensures precision.
- Thin Floral Wire (26-gauge): Useful for temporarily securing bows during intricate shaping or for attaching them to projects where glue isn’t ideal.
Your Next Creative Project Awaits
You’ve just learned a fantastic skill that opens up a world of possibilities for your creative endeavors. Imagine all the gifts you’ll elevate, the crafts you’ll embellish, and the personal touches you’ll add. Don’t let this newfound knowledge sit idle.
Grab some ribbon today and start practicing. Try different colors, textures, and widths to see how they change the final look. Soon, you’ll be tying perfect little bows effortlessly, adding charm and elegance to everything you touch. Embrace your creativity and make something beautiful.
Beginner-friendly templates, step-by-step guides,
and weekly project ideas in your inbox.