📦 How To Fold A Box Out Of Paper

Beginner-friendly templates, step-by-step guides,
and weekly project ideas in your inbox.
Ever needed a tiny container for a small gift or just a neat way to organize desk clutter? Learning to fold a paper box is a surprisingly rewarding skill.
I’ve crafted countless of these simple boxes for everything from party favors to holding paper clips. This guide shares my tried-and-true method, ensuring your first folded box is a success.
You’ll create a sturdy, functional paper box with just a single sheet of paper and your own two hands.
Quick Overview
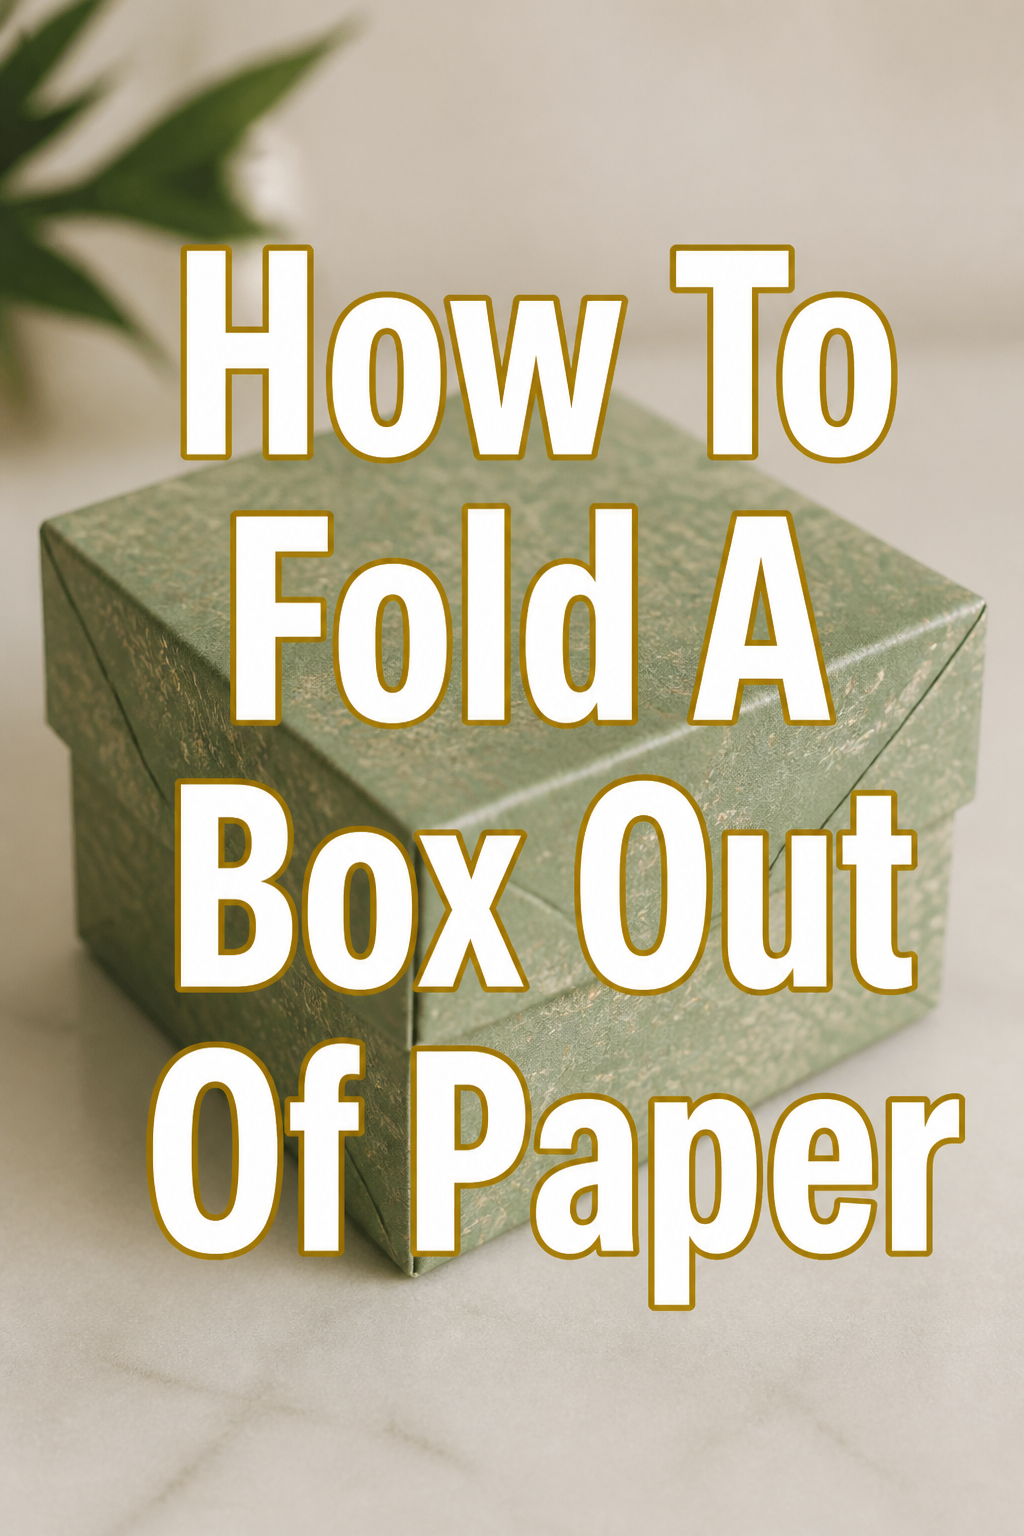
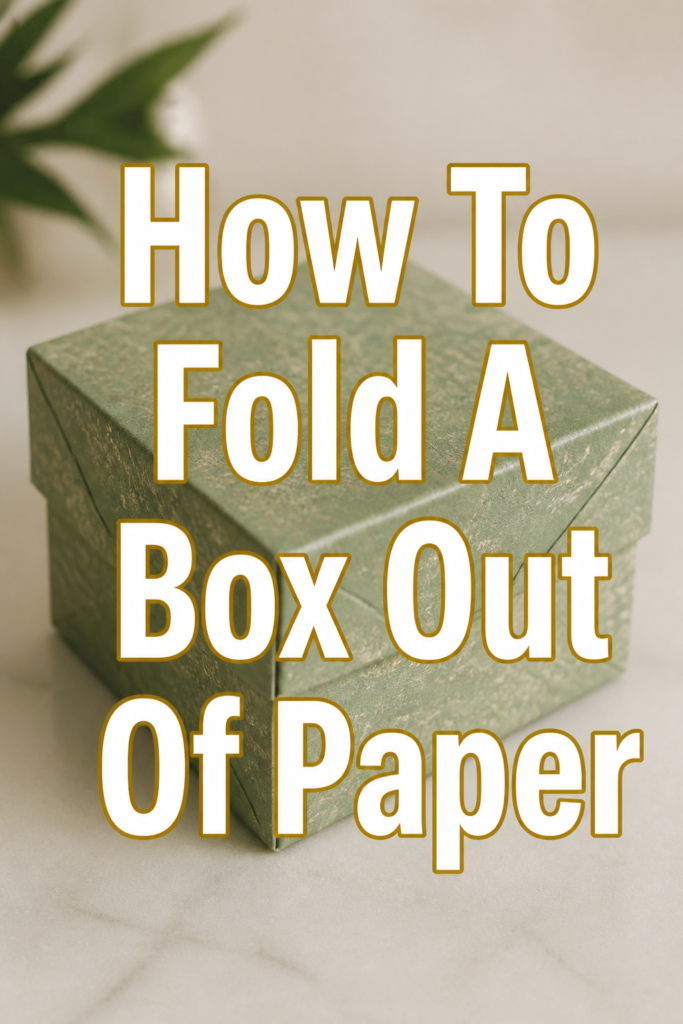
You’re about to embark on a fun, creative project that results in a useful paper box. This particular design, often called a Masu box, is a classic for its simplicity and elegance.
It’s perfect for holding small trinkets, sweets, or notes. Get ready to transform a flat sheet into a three-dimensional container.
- Time needed: 10-15 minutes
- Difficulty: Beginner
- What you’ll need: A square piece of paper (8.5×8.5 inches or larger works well)
Step-by-Step Instructions
Folding a paper box is all about precision and patience. Follow these steps carefully, making sharp creases as you go.
Step 1: Prepare Your Paper
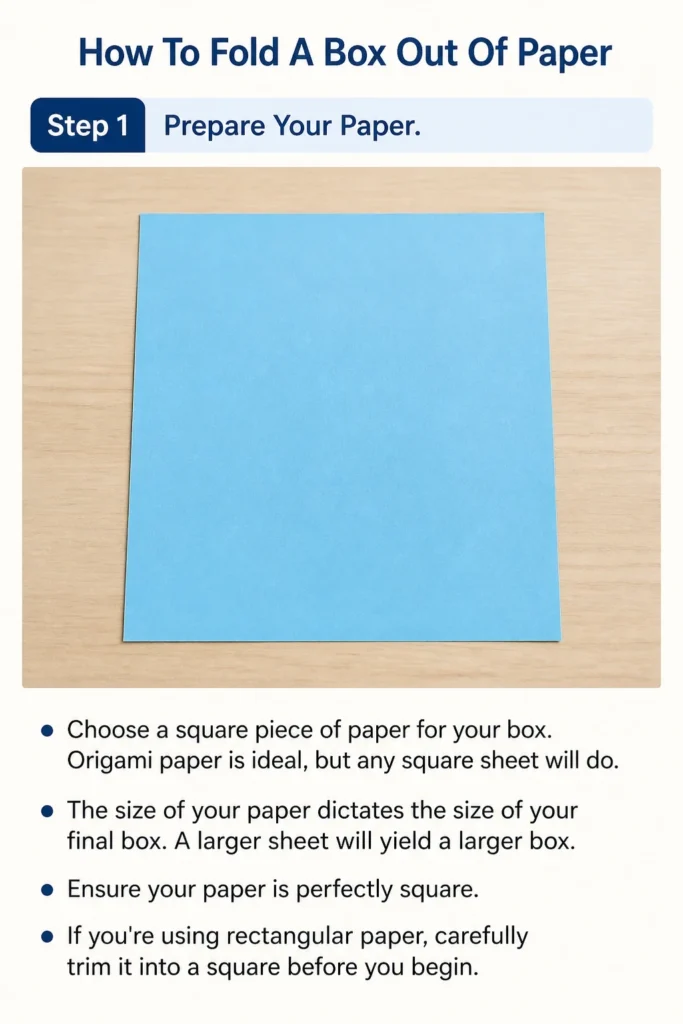
Choose a square piece of paper for your box. Origami paper is ideal, but any square sheet will do.
The size of your paper dictates the size of your final box. A larger sheet will yield a larger box.
Ensure your paper is perfectly square. If you’re using rectangular paper, carefully trim it into a square before you begin.
Step 2: Create Initial Creases
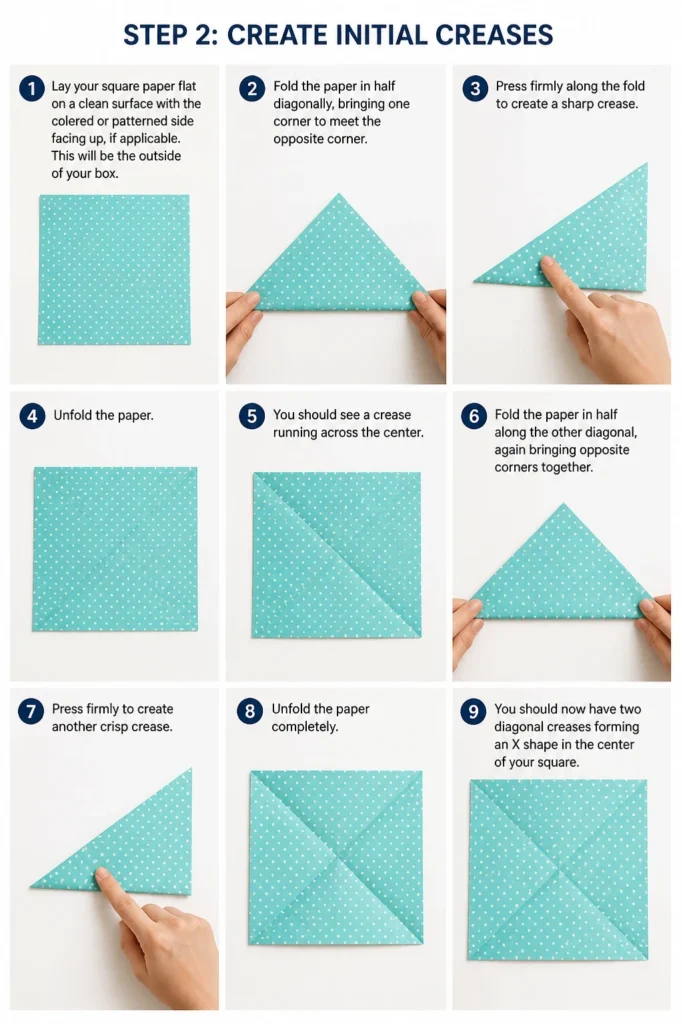
Lay your square paper flat on a clean surface with the colored or patterned side facing up, if applicable. This will be the outside of your box.
Fold the paper in half diagonally, bringing one corner to meet the opposite corner. Press firmly along the fold to create a sharp crease.
Unfold the paper. You should see a crease running across the center.
Fold the paper in half along the other diagonal, again bringing opposite corners together. Press firmly to create another crisp crease.
Unfold the paper completely. You should now have two diagonal creases forming an “X” shape in the center of your square.
Step 3: Fold Corners to Center
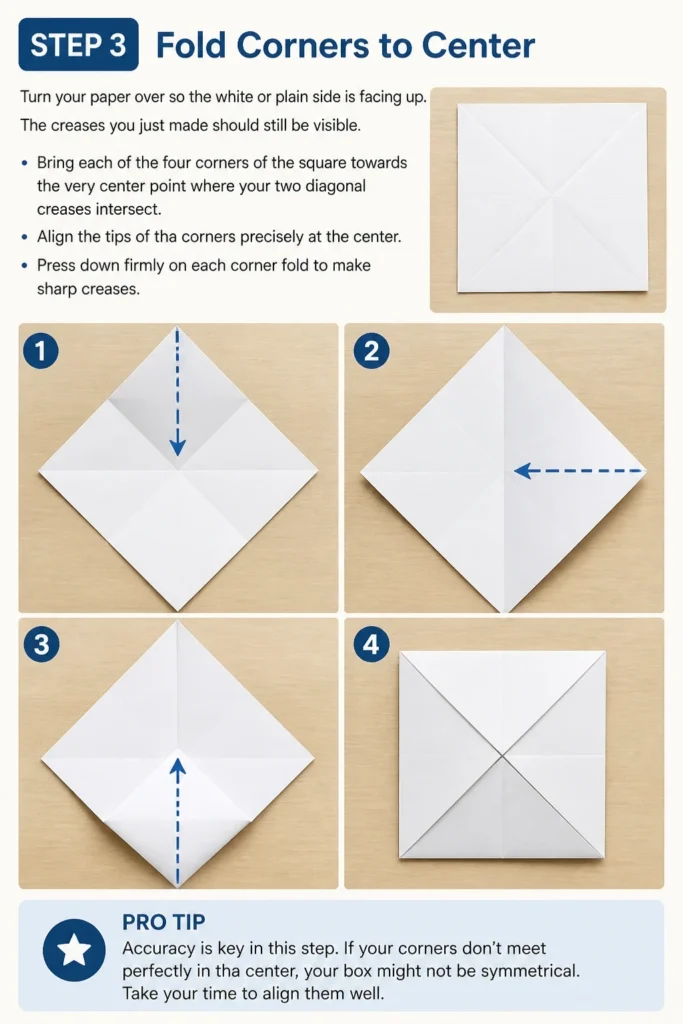
Turn your paper over so the white or plain side is facing up. The creases you just made should still be visible.
Bring each of the four corners of the square towards the very center point where your two diagonal creases intersect. Align the tips of the corners precisely at the center.
Press down firmly on each corner fold to make sharp creases. This creates a smaller square in the center of your paper.
Pro Tip: Accuracy is key in this step. If your corners don’t meet perfectly in the center, your box might not be symmetrical. Take your time to align them well.
Step 4: Fold Sides to Center
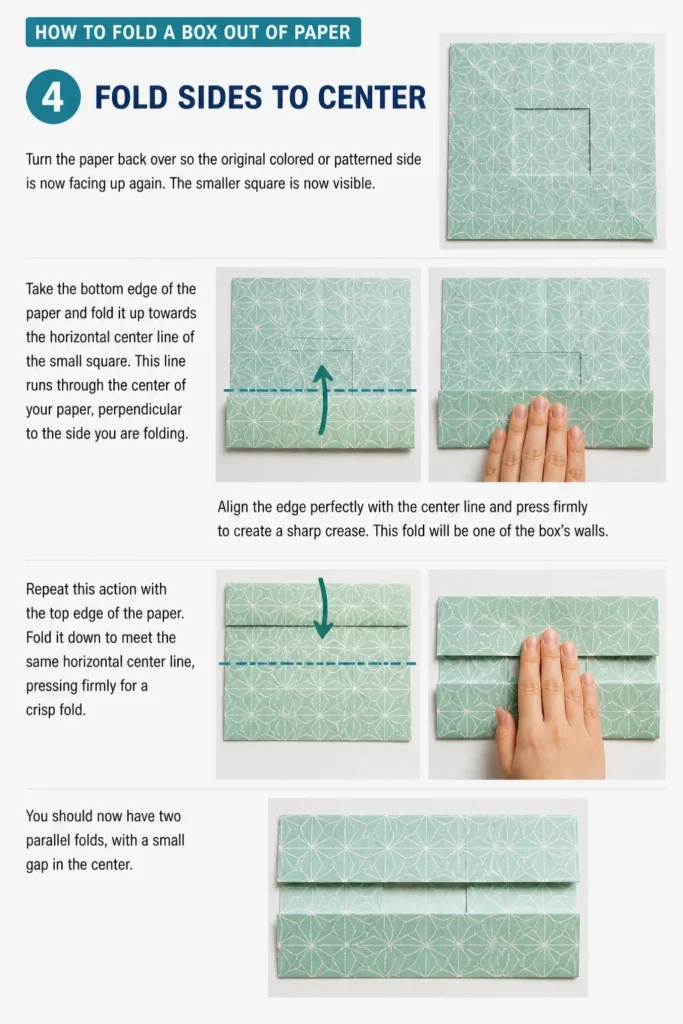
Turn the paper back over so the original colored or patterned side is now facing up again. The smaller square is now visible.
Take the bottom edge of the paper and fold it up towards the horizontal center line of the small square. This line runs through the center of your paper, perpendicular to the side you are folding.
Align the edge perfectly with the center line and press firmly to create a sharp crease. This fold will be one of the box’s walls.
Repeat this action with the top edge of the paper. Fold it down to meet the same horizontal center line, pressing firmly for a crisp fold.
You should now have two parallel folds, with a small gap in the center.
Step 5: Unfold Top and Bottom Sides
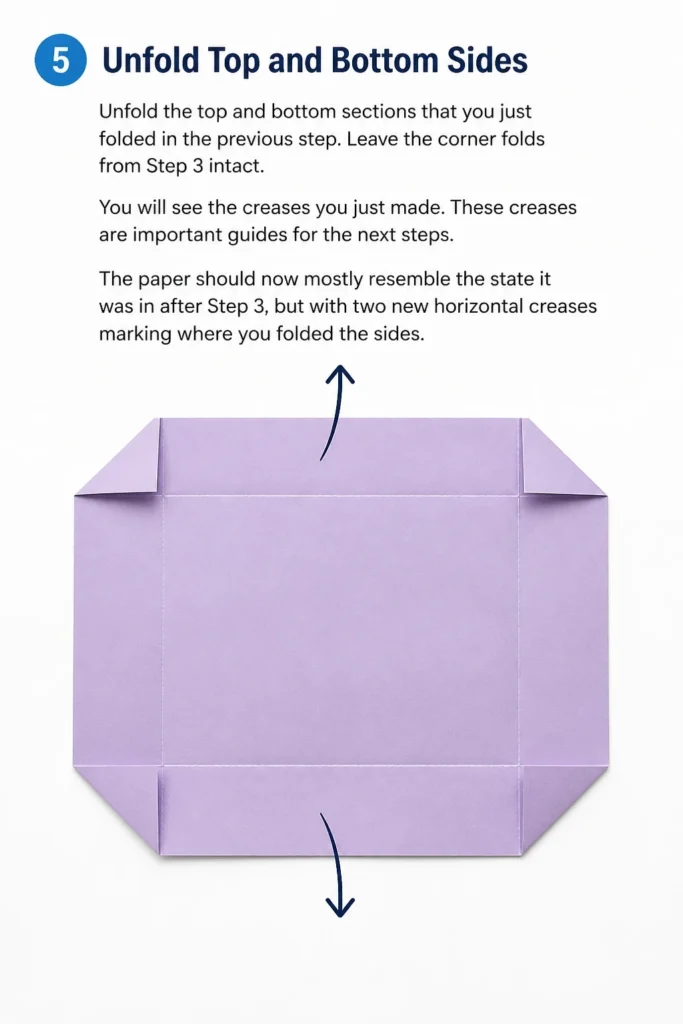
Unfold the top and bottom sections that you just folded in the previous step. Leave the corner folds from Step 3 intact.
You will see the creases you just made. These creases are important guides for the next steps.
The paper should now mostly resemble the state it was in after Step 3, but with two new horizontal creases marking where you folded the sides.
Step 6: Make Side Folds and Stand Up Flaps
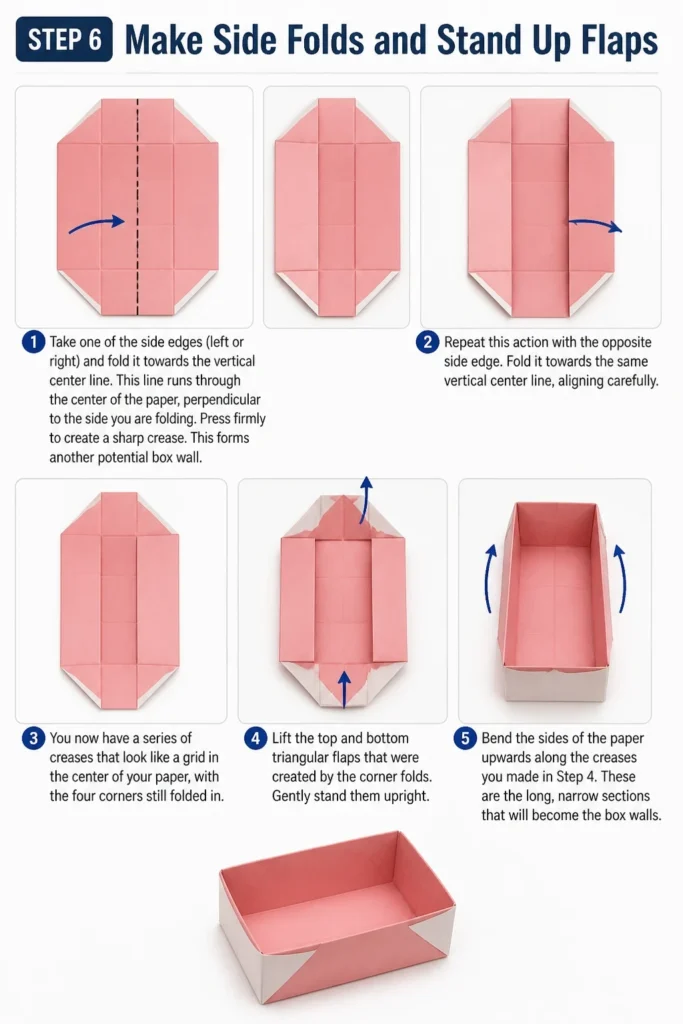
Take one of the side edges (left or right) and fold it towards the vertical center line. This line runs through the center of the paper, perpendicular to the side you are folding.
Press firmly to create a sharp crease. This forms another potential box wall.
Repeat this action with the opposite side edge. Fold it towards the same vertical center line, aligning carefully.
You now have a series of creases that look like a grid in the center of your paper, with the four corners still folded in.
Lift the top and bottom triangular flaps that were created by the corner folds. Gently stand them upright.
Bend the sides of the paper upwards along the creases you made in Step 4. These are the long, narrow sections that will become the box walls.
Step 7: Tuck and Secure
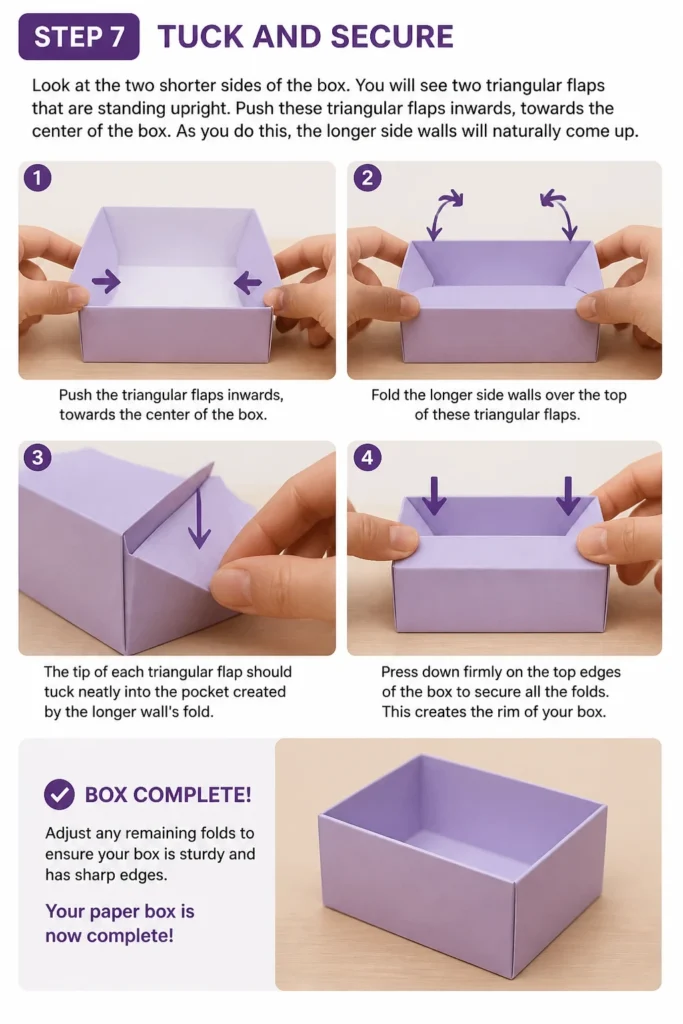
Look at the two shorter sides of the box. You will see two triangular flaps that are standing upright.
Push these triangular flaps inwards, towards the center of the box. As you do this, the longer side walls will naturally come up.
Fold the longer side walls over the top of these triangular flaps. The tip of each triangular flap should tuck neatly into the pocket created by the longer wall’s fold.
Press down firmly on the top edges of the box to secure all the folds. This creates the rim of your box.
Adjust any remaining folds to ensure your box is sturdy and has sharp edges. Your paper box is now complete!
Common Mistakes to Avoid
Folding a paper box is simple, but small errors can impact the final result. Be aware of these common pitfalls.
Not Using a Perfect Square
Starting with a rectangular piece of paper without trimming it properly will result in an uneven, lopsided box. The geometry of a square is fundamental to the symmetry of this fold. Always ensure your starting paper is a perfect square for the best outcome.
Inaccurate Creases
Failing to make precise folds, especially when bringing corners or edges to the center, leads to a wonky box. Each crease acts as a guide for subsequent folds, so even a millimeter off can compound errors. Take your time to align edges and corners perfectly before pressing down.
Weak or Rounded Creases
Not pressing firmly enough on your folds can make the box less stable and give it a soft, rounded appearance instead of sharp, defined edges. Use your fingernail, a ruler, or a bone folder to create crisp, strong creases. This adds structural integrity to your finished box.
Rushing the Process
Trying to complete the box too quickly often results in misaligned folds and a less polished finish. Origami and paper crafting benefit from a methodical approach. Enjoy each step and focus on accuracy rather than speed, especially if you’re a beginner.
Troubleshooting
Even with careful folding, you might encounter a few issues. Here are solutions to common problems.
My Box is Lopsided
If your box is noticeably uneven, the most likely culprit is imprecise initial folds. Go back to Step 3 and Step 4. Ensure all corners met exactly in the center and that your side folds were perfectly aligned with the central creases. Sometimes, starting over with a fresh sheet of paper after understanding the alignment points can be the quickest fix.
The Walls Don’t Stand Up Straight
This usually happens if your creases aren’t strong enough or if the final tucking isn’t secure. Go back and re-crease all the folds, especially the ones that form the bottom and sides of the box. When tucking the triangular flaps in Step 7, make sure they are fully inserted into the pockets created by the longer walls, and then press down firmly along the new rim.
The Paper Tears at the Corners
Tearing can occur if the paper is too thick or if you press too hard on a fold where multiple layers of paper meet. Try using a slightly thinner paper if this is a recurring issue. When folding, apply firm but gentle pressure, and avoid dragging your nail across the paper too aggressively, particularly at points where many folds converge.
Key Takeaways
- Always start with a perfectly square piece of paper for a symmetrical box.
- Precision in every fold is crucial; align edges and corners carefully.
- Make all your creases sharp and firm to give the box stability.
- The Masu box design involves folding corners to the center, then sides, and finally forming the walls.
- Don’t be afraid to unfold gently and re-adjust if a fold isn’t quite right.
- Practice improves your skill and the neatness of your finished boxes.
Frequently Asked Questions
Can I use any type of paper?
While you can use almost any paper, thinner paper like origami paper or printer paper works best for beginners as it’s easier to crease sharply. Thicker cardstock can be used, but it requires more effort to make crisp folds and might tear if not scored first.
How do I make a bigger or smaller box?
The size of your finished box is directly proportional to the size of your starting square paper. To make a bigger box, use a larger square piece of paper. For a smaller box, start with a smaller square. The folding steps remain exactly the same regardless of the paper size.
Can I decorate the box?
Absolutely! You can use patterned paper to begin with, or decorate your plain paper box after it’s folded. Consider drawing, painting, stamping, or gluing embellishments to the outside. Just be mindful not to add too much weight or bulk that might compromise the box’s structure.
Is this box waterproof?
No, a standard paper box is not waterproof. It’s designed for dry items. If you need a degree of water resistance, you could use specially coated paper or line the inside with a plastic film, but this changes the nature of a simple paper box.
Our Top Recommended Finds
- Origami Paper Packs: These come in perfect squares and a variety of colors and patterns, making your boxes visually appealing and easy to fold.
- Bone Folder: A simple tool that helps create incredibly sharp, crisp creases without damaging the paper, essential for a professional-looking finish.
- Craft Ruler and Cutting Mat: Great for precisely cutting square paper from larger sheets and ensuring straight edges for your initial setup.
Unfold Your Creativity: What Will You Make Next?
You’ve successfully folded a functional paper box – a testament to the power of simple paper and precise folds. This skill opens up a world of possibilities for small storage, unique gift packaging, or even just a fun craft project.
Now that you’ve mastered the basic box, consider exploring variations like boxes with lids, or even more complex origami designs. The principles of careful creasing and alignment you learned today will serve you well in all your future paper crafts. Take a moment to admire your creation, then grab another sheet of paper and start folding!
Beginner-friendly templates, step-by-step guides,
and weekly project ideas in your inbox.