❄️ How To Cut A Snowflake Out Of Paper

Beginner-friendly templates, step-by-step guides,
and weekly project ideas in your inbox.
There’s something truly magical about transforming a simple sheet of paper into a delicate, intricate snowflake.
I remember my first attempts as a child, often ending in lopsided messes, but the joy of unfolding a beautiful design was unmatched.
This guide shares the techniques I’ve refined over years of crafting, ensuring you create stunning paper snowflakes every time.

Quick Overview
You’re about to learn how to fold and cut paper to reveal symmetrical, unique snowflake designs. This process is both relaxing and incredibly rewarding.
By the end, you’ll have several beautiful paper snowflakes ready to decorate your home or give as thoughtful, handmade gifts.
- Time needed: 15-30 minutes per snowflake (depending on intricacy)
- Difficulty: Beginner
- What you’ll need: Paper, scissors, a flat surface
Step-by-Step Instructions
Step 1: Choose Your Paper
Select your paper. Standard printer paper (8.5×11 inches or A4) works perfectly for beginners. You can also use construction paper or even thin cardstock for sturdier snowflakes.
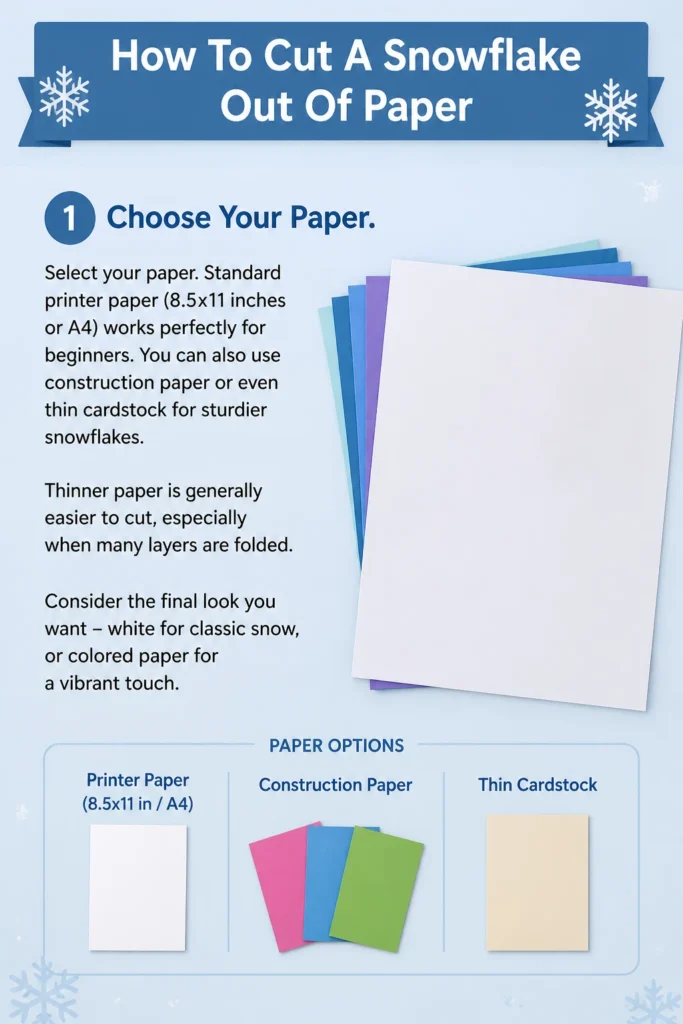
Thinner paper is generally easier to cut, especially when many layers are folded. Consider the final look you want – white for classic snow, or colored paper for a vibrant touch.
Step 2: Create a Perfect Square
Most snowflakes start with a square piece of paper. If you’re using rectangular paper, you’ll need to make it square first.
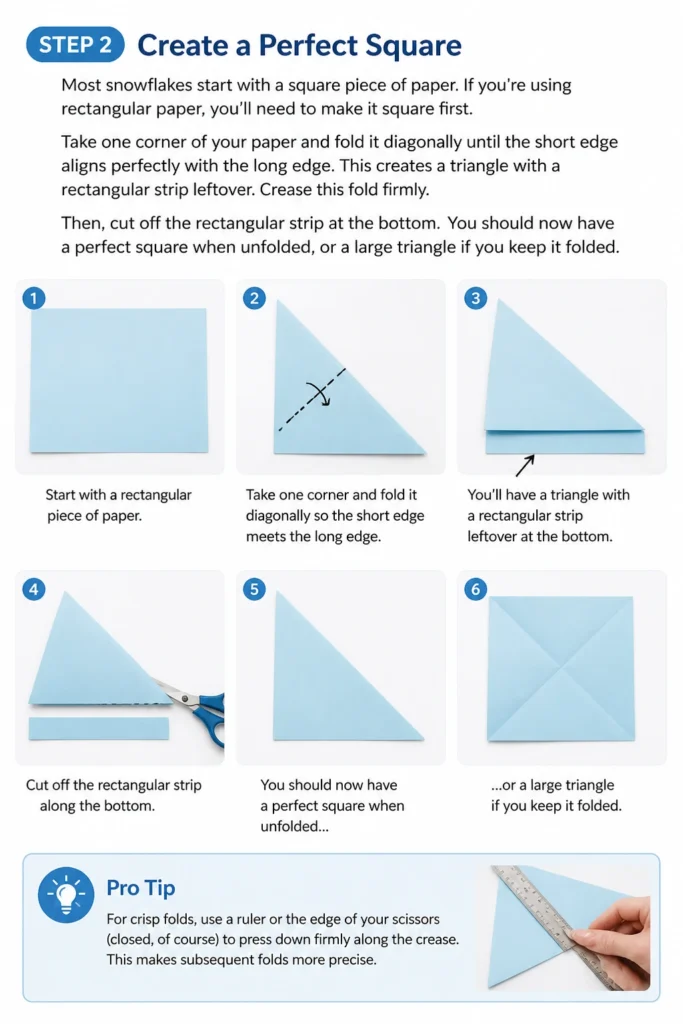
Take one corner of your paper and fold it diagonally until the short edge aligns perfectly with the long edge. This creates a triangle with a rectangular strip leftover.
Crease this fold firmly. Then, cut off the rectangular strip at the bottom. You should now have a perfect square when unfolded, or a large triangle if you keep it folded.
Pro Tip: For crisp folds, use a ruler or the edge of your scissors (closed, of course) to press down firmly along the crease. This makes subsequent folds more precise.
Step 3: First Fold – The Triangle Base
With your square paper, fold it in half diagonally to form a large triangle. Ensure the corners meet precisely and the edges align.
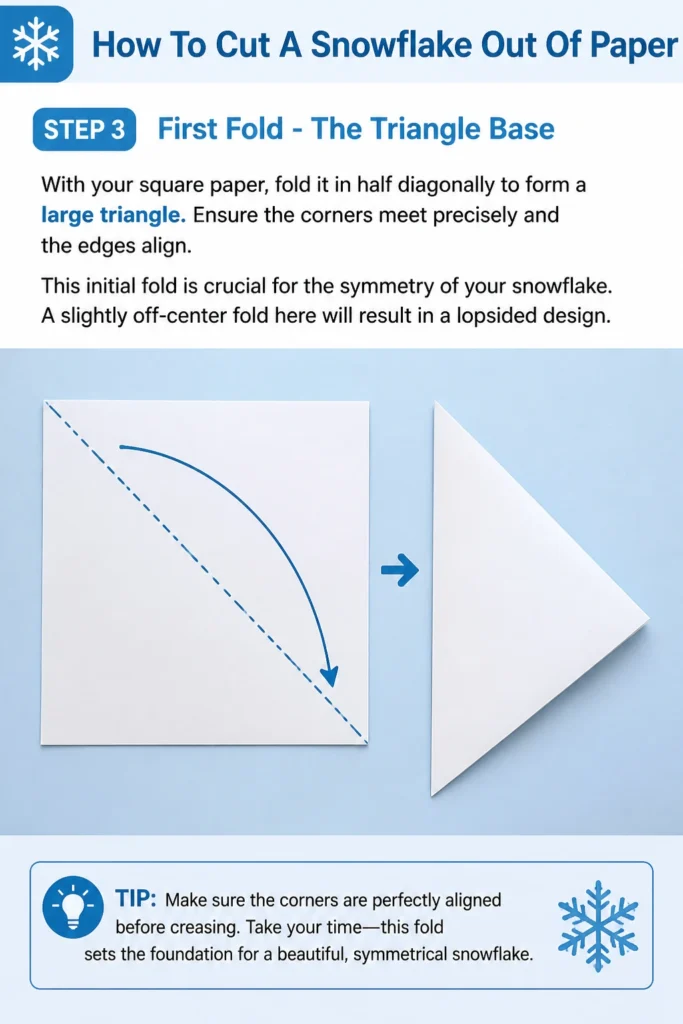
This initial fold is crucial for the symmetry of your snowflake. A slightly off-center fold here will result in a lopsided design.
Step 4: Second Fold – Halve the Triangle
Now, take your large triangle and fold it in half again. Bring the two acute (sharp) angles of the triangle together.
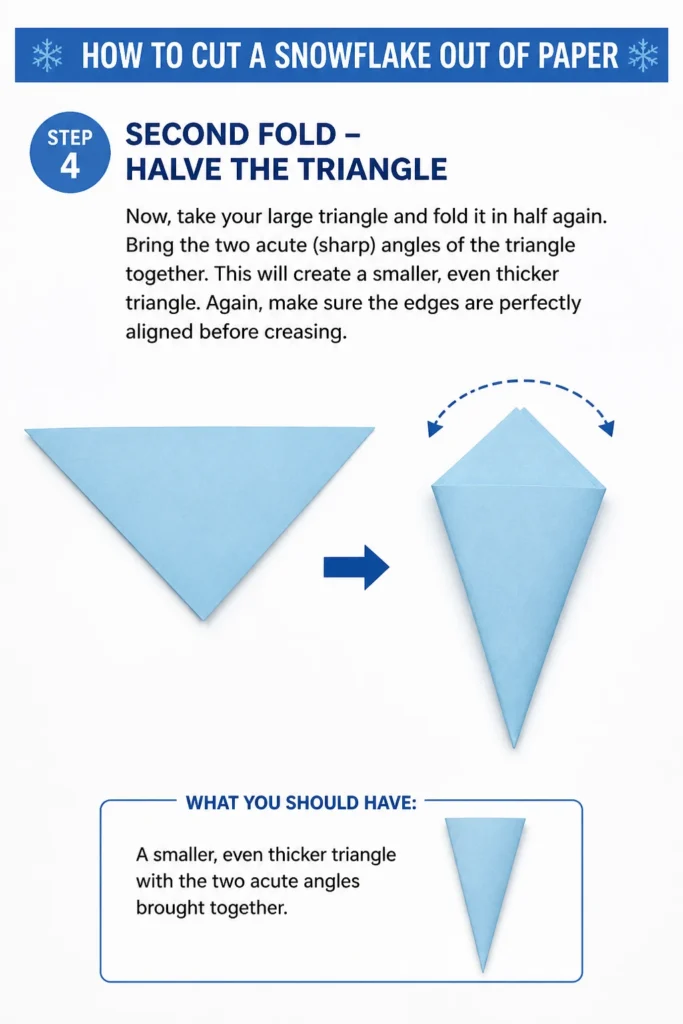
This will create a smaller, even thicker triangle. Again, make sure the edges are perfectly aligned before creasing.
Step 5: Third Fold – The “Pie Slice”
This is where the folding gets a little more specific for the classic six-pointed snowflake. You need to divide your current triangle into three equal sections, like slicing a pie.
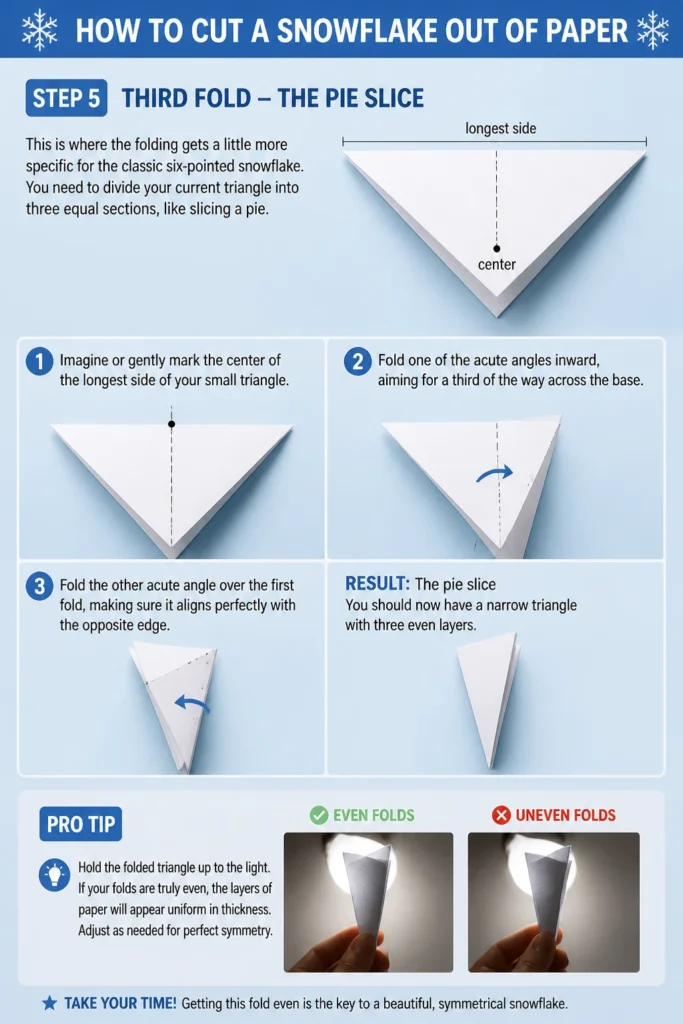
Imagine or gently mark the center of the longest side of your small triangle. Fold one of the acute angles inward, aiming for a third of the way across the base.
Then, fold the other acute angle over the first fold, making sure it aligns perfectly with the opposite edge. This step can be tricky, so take your time to get the angles right.
Pro Tip: Hold the folded triangle up to the light. If your folds are truly even, the layers of paper will appear uniform in thickness. Adjust as needed for perfect symmetry.
Step 6: Trim the Top Edge
You’ll notice that the top edge of your folded paper isn’t straight; it likely has two points or an uneven line. Cut this top edge straight across.
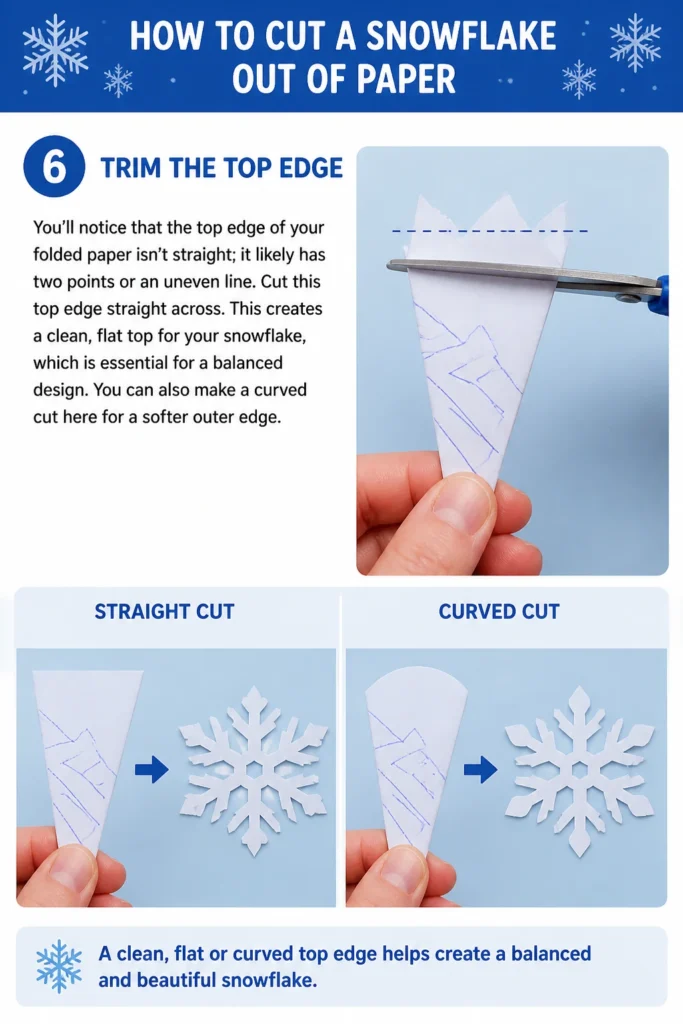
This creates a clean, flat top for your snowflake, which is essential for a balanced design. You can also make a curved cut here for a softer outer edge.
Step 7: Start Cutting Your Design
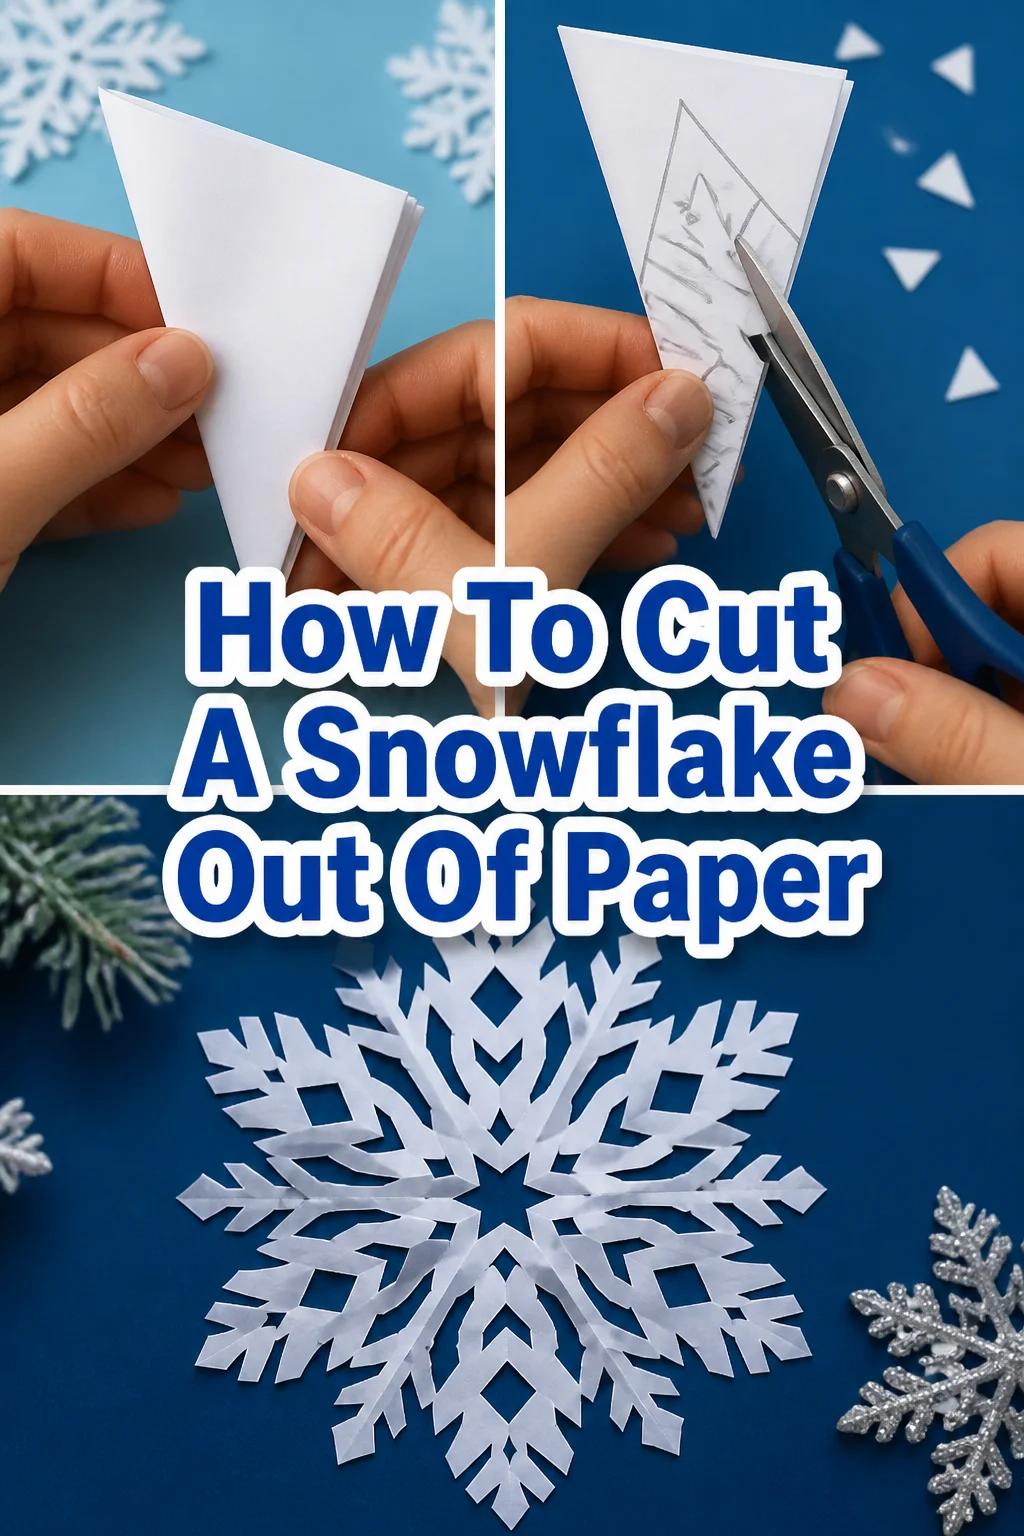
Now for the fun part! Hold your folded paper with the pointed tip (the center of your future snowflake) facing away from you.
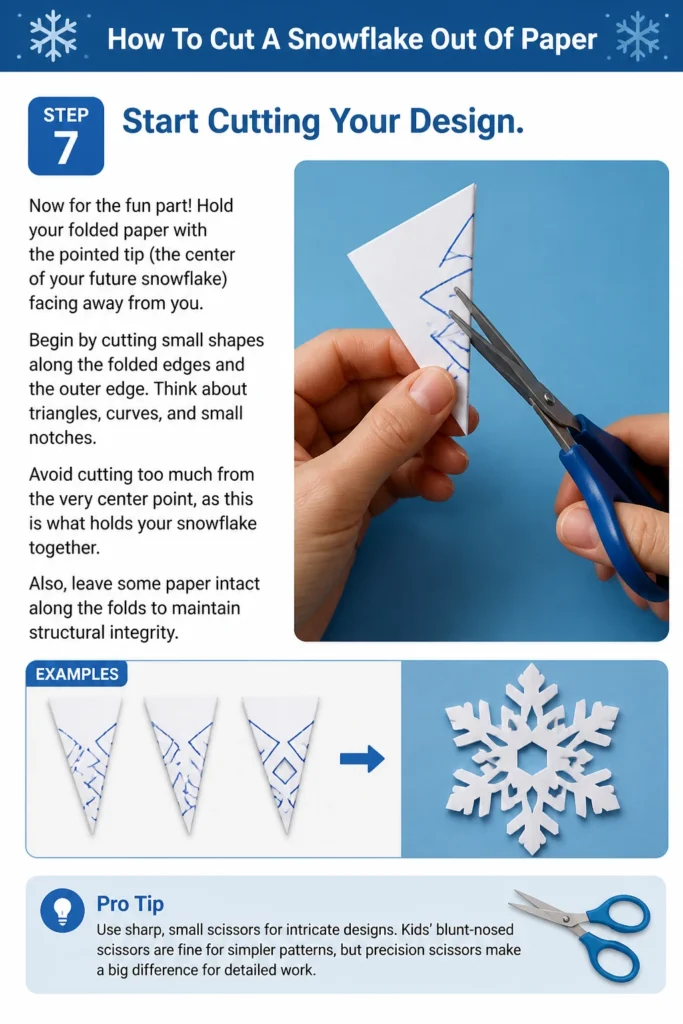
Begin by cutting small shapes along the folded edges and the outer edge. Think about triangles, curves, and small notches.
Avoid cutting too much from the very center point, as this is what holds your snowflake together. Also, leave some paper intact along the folds to maintain structural integrity.
Pro Tip: Use sharp, small scissors for intricate designs. Kids’ blunt-nosed scissors are fine for simpler patterns, but precision scissors make a big difference for detailed work.
Step 8: Experiment with Shapes
Don’t be afraid to experiment. Cut scallops, zigzags, tiny holes, or long, thin slits. Each cut will create a mirrored pattern when unfolded.
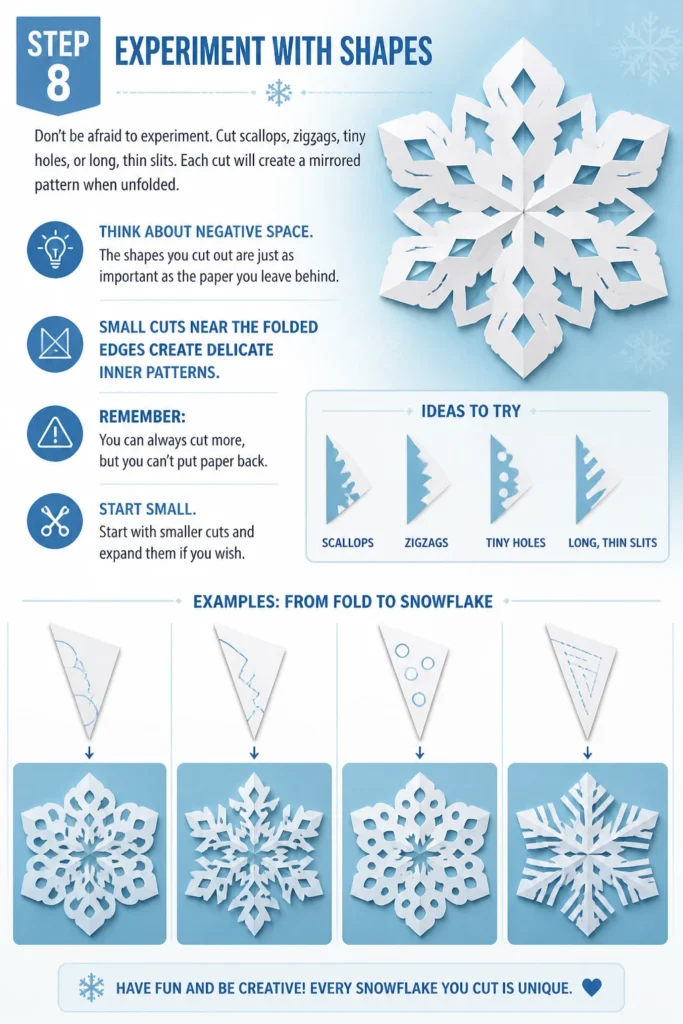
Think about negative space. The shapes you cut out are just as important as the paper you leave behind. Small cuts near the folded edges create delicate inner patterns.
Remember, you can always cut more, but you can’t put paper back. Start with smaller cuts and expand them if you wish.
Step 9: Unfold Your Masterpiece
Carefully unfold your paper. This is the moment of truth! Gently open each fold, one by one, to reveal your unique snowflake.
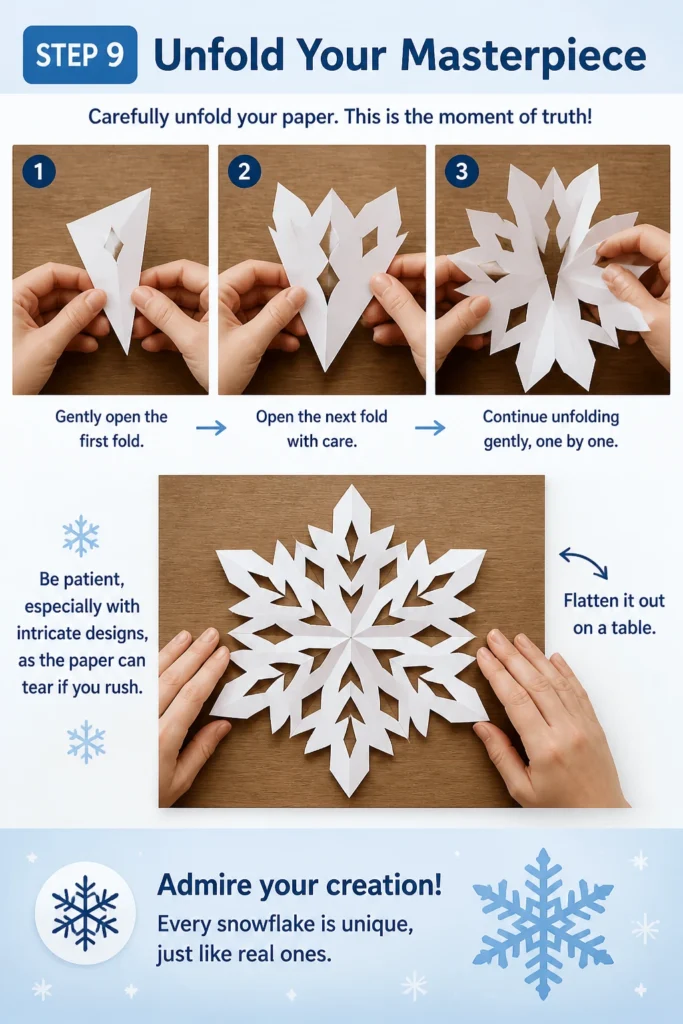
Be patient, especially with intricate designs, as the paper can tear if you rush. Flatten it out on a table.
Admire your creation! Every snowflake is unique, just like real ones.
Common Mistakes to Avoid
Cutting Too Much from the Center
A common pitfall is cutting too close to or directly through the very tip of the folded paper. This tip is the center of your snowflake, and if you remove too much, the snowflake won’t hold together or will have a large hole.
Always leave a small amount of paper intact at the tip to ensure your snowflake has a strong, central structure. Focus your intricate cuts along the edges, not right at the heart.
Uneven Folds
If your initial folds aren’t precise and symmetrical, your snowflake will appear lopsided or uneven when unfolded. This is particularly noticeable with the “pie slice” fold.
Take your time with each fold, ensuring edges and corners meet perfectly. A little extra attention in the folding stage saves disappointment later when you unfold your creation.
Rushing the Cutting Process
Impatience often leads to mistakes. If you cut too quickly or with blunt scissors, you might tear the paper or make inaccurate cuts. This can ruin the delicate patterns you’re trying to achieve.
Slow down, use sharp scissors, and make deliberate cuts. Think about each snip before you make it. The process should be enjoyable and meditative, not a race.
Not Varying Your Cuts
Sticking to only one type of cut (e.g., only triangles) can result in a less interesting snowflake. While simple designs are lovely, varying your shapes adds depth and complexity.
Experiment with curves, zigzags, tiny squares, and long slits. Combine different shapes on the same snowflake to create more dynamic and intricate patterns that catch the eye.
Troubleshooting
My Snowflake Tears When Unfolding
This often happens if the paper is too thin for the intricacy of the cuts, or if you’ve cut too many small, connecting pieces. It can also occur if you rush the unfolding.
Try using slightly thicker paper, like basic printer paper, if you’re making very detailed cuts. When unfolding, be extremely gentle and slowly separate each layer. If a design is very intricate, you might even consider using tweezers for the first few layers.
My Snowflake Isn’t Symmetrical
Lack of symmetry almost always traces back to uneven folding. If your initial square wasn’t perfect, or if your subsequent triangles weren’t folded precisely in half or into even thirds, the design won’t be symmetrical.
Go back to the folding steps. Ensure your initial square is exact. When folding the triangle into thirds, hold it up to the light to check for evenness before creasing firmly. Practice makes perfect in achieving those symmetrical folds.
The Design Looks Plain or Undetailed
If your snowflake feels a bit simple, you might not be cutting enough variety or depth into your design. Sometimes, people are too cautious, leaving too much paper intact.
Don’t be afraid to make more cuts! Try making smaller, more intricate cuts along the folded edges. Experiment with different shapes and sizes of cuts. Remember, the negative space creates the pattern, so removing more paper often leads to a more detailed look.
Key Takeaways
- Always start with a perfect square for balanced symmetry.
- Precise, firm folds are essential for a beautiful, even snowflake.
- Cut small and gradually, remembering you can always remove more paper.
- Experiment with various shapes and sizes of cuts for unique designs.
- Leave enough paper at the center point to maintain structural integrity.
- Unfold your finished snowflake slowly and gently to prevent tearing.
Frequently Asked Questions
Can I use any type of paper?
While you can technically use many types of paper, standard printer paper is ideal for beginners due to its balance of thickness and ease of cutting. Thinner paper (like tissue paper) is harder to handle, and thicker paper (like cardstock) can be difficult to cut through multiple layers.
How do I make a four-pointed snowflake?
To make a four-pointed snowflake, you’ll fold your square paper into a triangle, then fold that triangle in half twice more. This creates a smaller triangle with four layers of paper on each side, resulting in a four-pointed design when cut and unfolded.
How can I make my snowflakes look more complex?
To add complexity, focus on making smaller, more numerous cuts. Cut tiny triangles, thin slits, and small curves along all edges of your folded paper. Vary the sizes and positions of your cuts. Cutting closer to the folded edges also creates intricate inner patterns.
What’s the best way to display paper snowflakes?
Paper snowflakes look lovely taped to windows, hung from ceilings with thread, or strung together to create a garland. You can also use them as gift toppers, placemats, or simply lay them flat on a table as decorative accents. A little bit of painter’s tape works well for temporary window display.
Our Top Recommended Finds
- Precision Craft Scissors: Small, sharp-tipped scissors allow for intricate, clean cuts, making detailed designs much easier to achieve.
- Assorted Craft Paper Pack: A variety of colors and weights lets you experiment with different looks and find what works best for your projects.
- Self-Healing Cutting Mat: Protects your surfaces and provides a stable base if you ever move on to using craft knives for even more precise details.
Unfold Your Creativity
Crafting paper snowflakes is more than just a simple activity; it’s a delightful blend of geometry, artistry, and a touch of magic.
Each snip of the scissors holds the promise of a unique design, a tiny masterpiece waiting to be revealed. The satisfaction of unfolding that final, delicate pattern is truly rewarding.
Don’t hesitate to gather your materials and start creating. Embrace the process, let your imagination guide your cuts, and soon you’ll have a flurry of beautiful snowflakes to brighten any space.
Consider exploring different paper types or even adding glitter for an extra sparkle. The possibilities are as endless as the unique patterns of real snowflakes.
Beginner-friendly templates, step-by-step guides,
and weekly project ideas in your inbox.