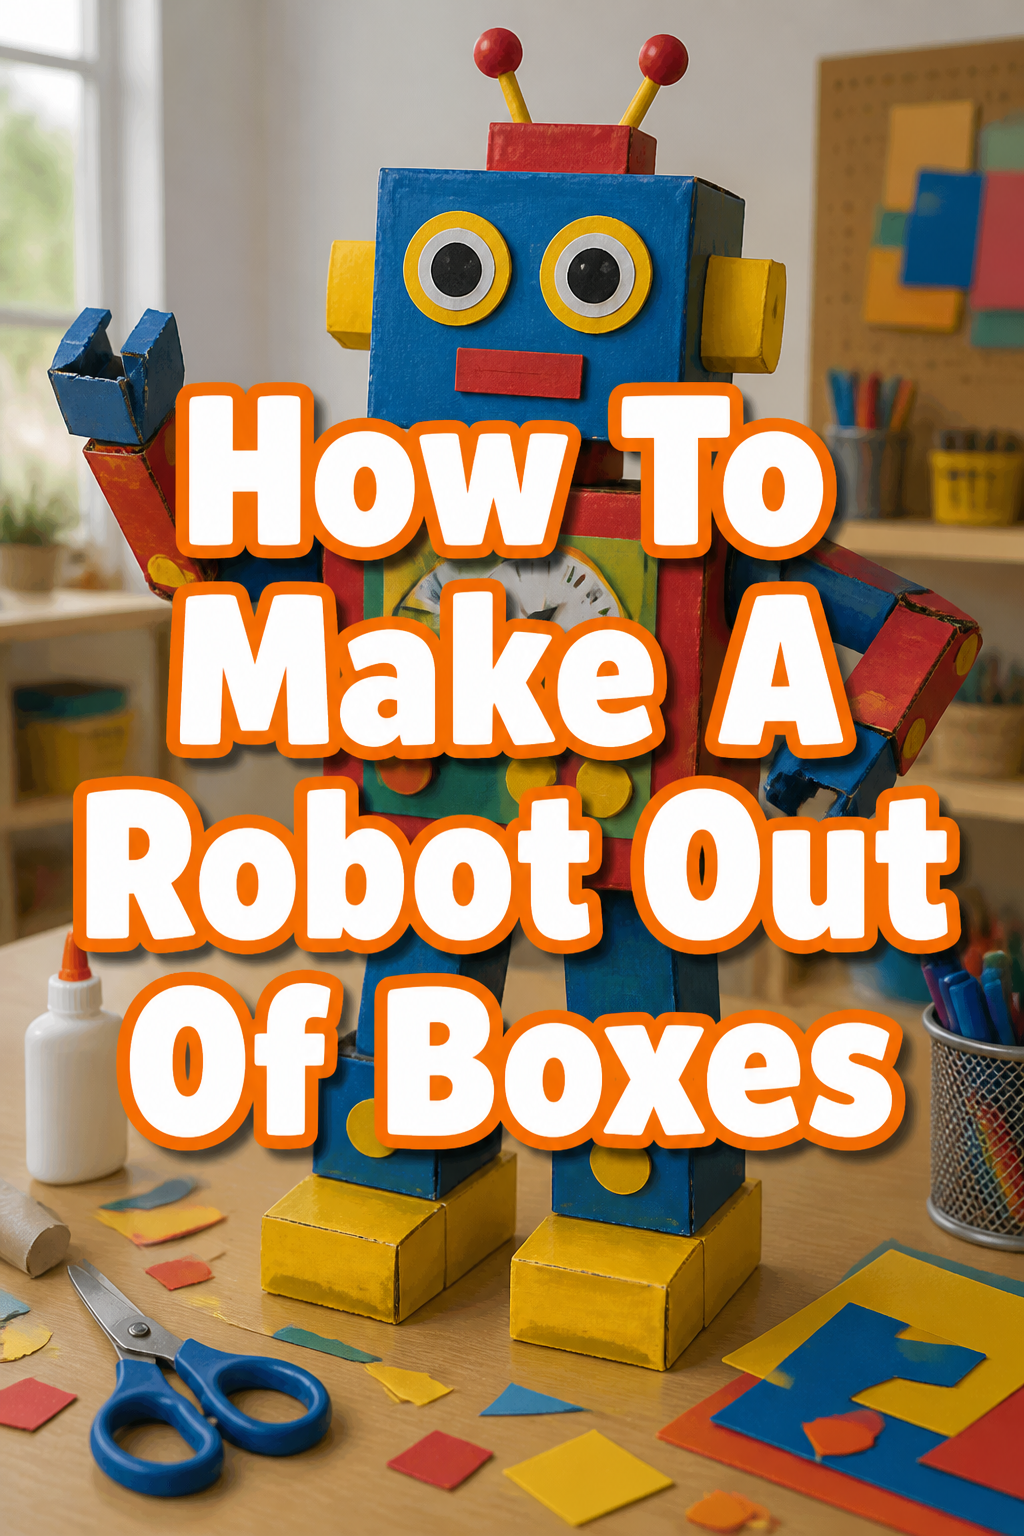
🤖 How To Make A Robot Out Of Boxes

Beginner-friendly templates, step-by-step guides,
and weekly project ideas in your inbox.
I remember the sheer excitement of building my first robot, not with circuit boards, but with cardboard and tape. It wasn’t about complex mechanics, but about bringing an idea to life with my own hands. This guide shares the practical wisdom from countless craft sessions, helping you create your very own box robot with confidence and joy.
Quick Overview
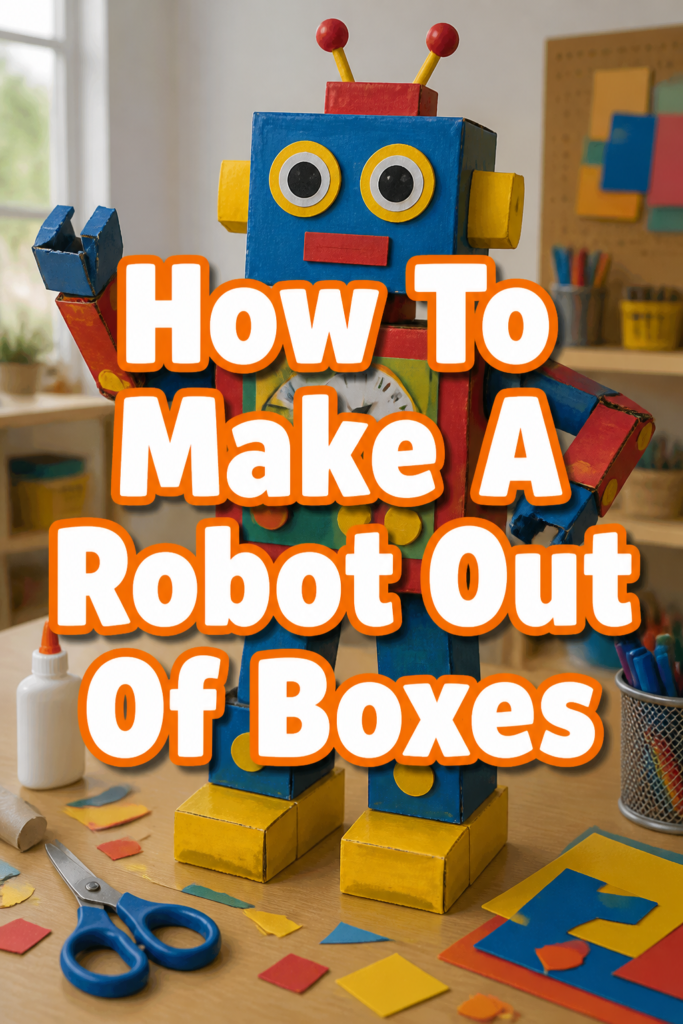
Get ready to transform simple cardboard into an imaginative robot friend. This project is a fantastic way to spark creativity and develop basic crafting skills. You’ll finish with a unique, custom-made robot.
- Time needed: 1-3 hours (depending on complexity and drying time)
- Difficulty: Beginner
- What you’ll need: Assorted cardboard boxes, strong tape, scissors or craft knife, glue, and various decorations.
Step-by-Step Instructions
Step 1: Gather Your Materials
The first step is to collect a variety of cardboard boxes. Think about different sizes and shapes that could form a robot’s body, head, arms, and legs. Cereal boxes, shipping boxes, and tissue boxes all work wonderfully.
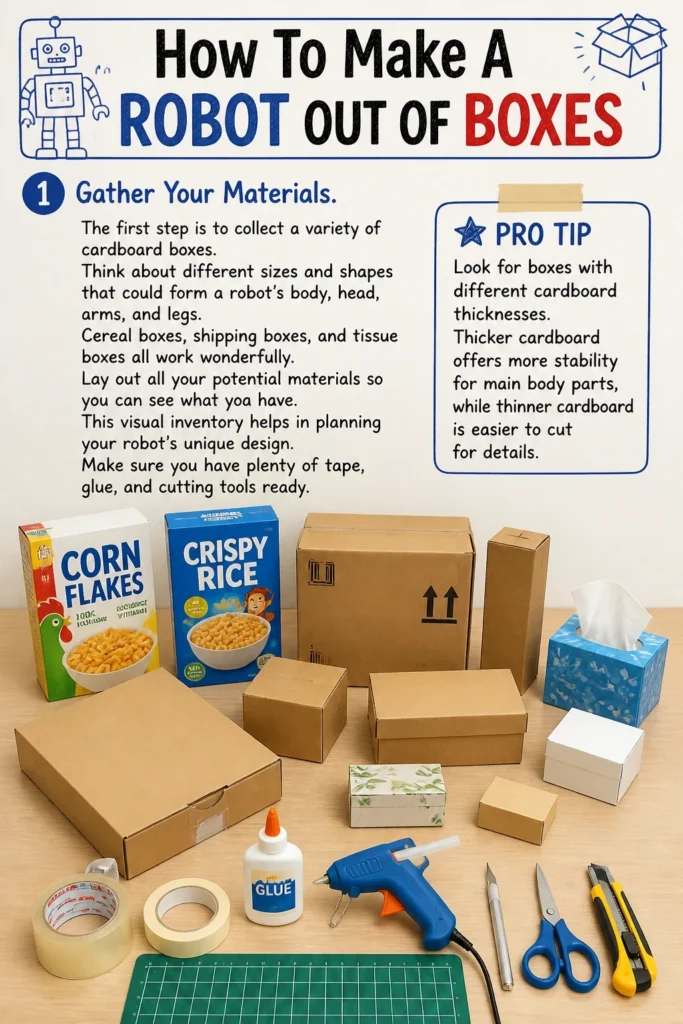
Lay out all your potential materials so you can see what you have. This visual inventory helps in planning your robot’s unique design. Make sure you have plenty of tape, glue, and cutting tools ready.
Pro Tip: Look for boxes with different cardboard thicknesses. Thicker cardboard offers more stability for main body parts, while thinner cardboard is easier to cut for details.
Step 2: Plan Your Robot’s Design
Before you start cutting and taping, take a moment to sketch out your robot. Decide on its general shape and how the different box sizes will fit together. Will it be tall and slender, or short and stout?
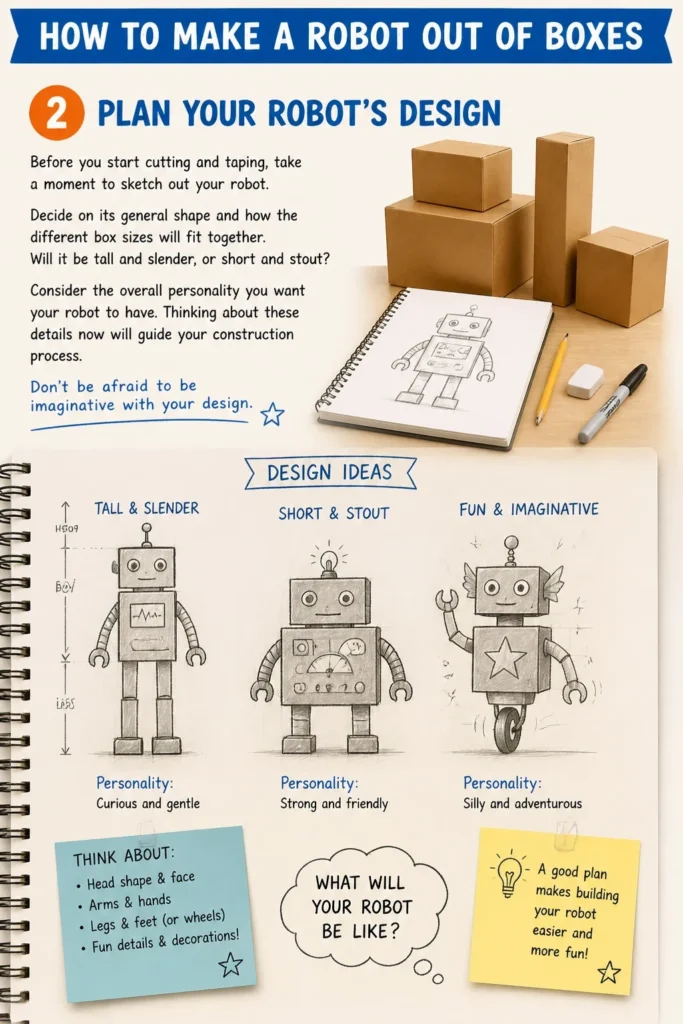
Consider the overall personality you want your robot to have. Thinking about these details now will guide your construction process. Don’t be afraid to be imaginative with your design.
Step 3: Construct the Body (Torso)
Select the largest or most central box for your robot’s main body. This will be the foundation of your entire creation. Securely close any open flaps on this box using strong packing tape.
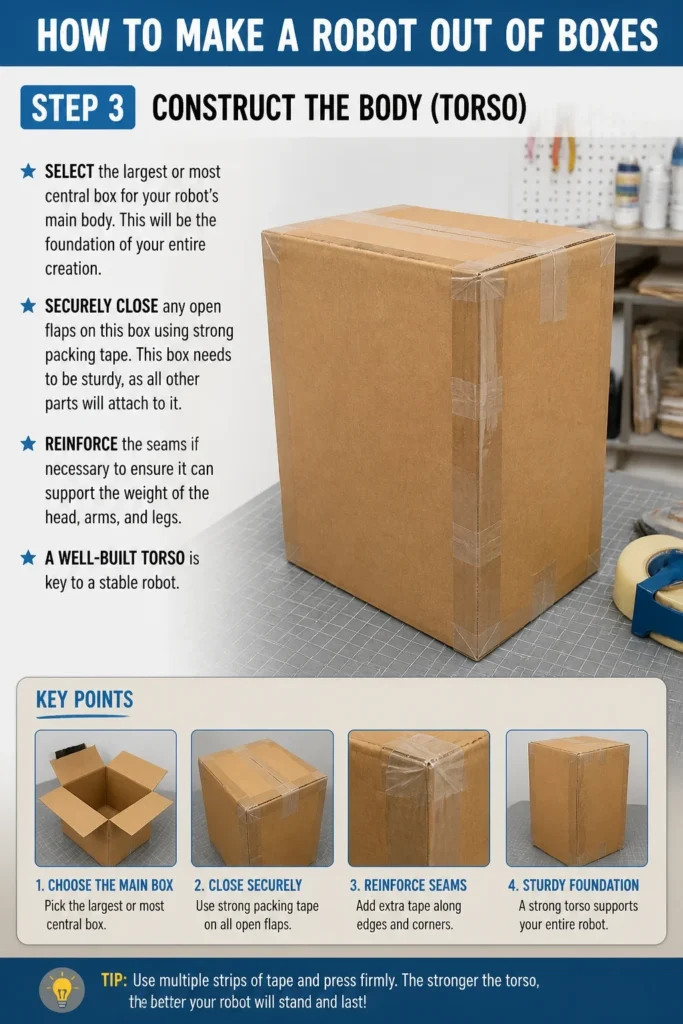
This box needs to be sturdy, as all other parts will attach to it. Reinforce the seams if necessary to ensure it can support the weight of the head, arms, and legs. A well-built torso is key to a stable robot.
Step 4: Attach the Head
Choose a smaller box for the robot’s head. This box should be proportionate to the body you just built. Carefully center the head box on top of the body box.
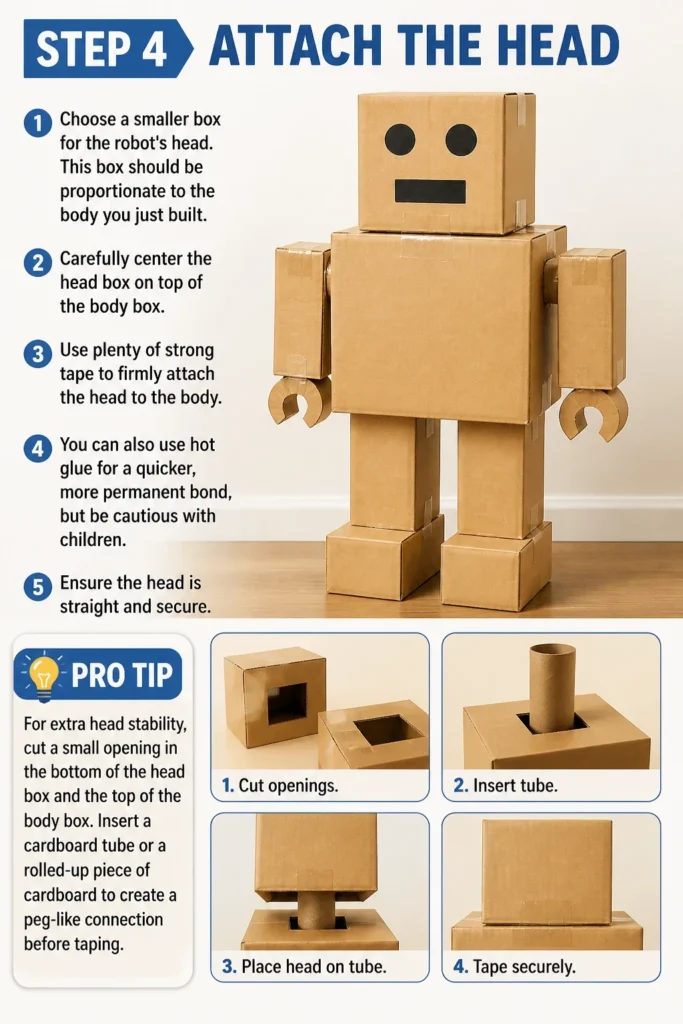
Use plenty of strong tape to firmly attach the head to the body. You can also use hot glue for a quicker, more permanent bond, but be cautious with children. Ensure the head is straight and secure.
Pro Tip: For extra head stability, cut a small opening in the bottom of the head box and the top of the body box. Insert a cardboard tube or a rolled-up piece of cardboard to create a peg-like connection before taping.
Step 5: Build and Connect the Arms
Find two identical or similar-sized boxes or cardboard tubes for the arms. You can create elbows by cutting and bending cardboard pieces, or by using smaller boxes for the forearms. Think about how you want the arms to articulate.
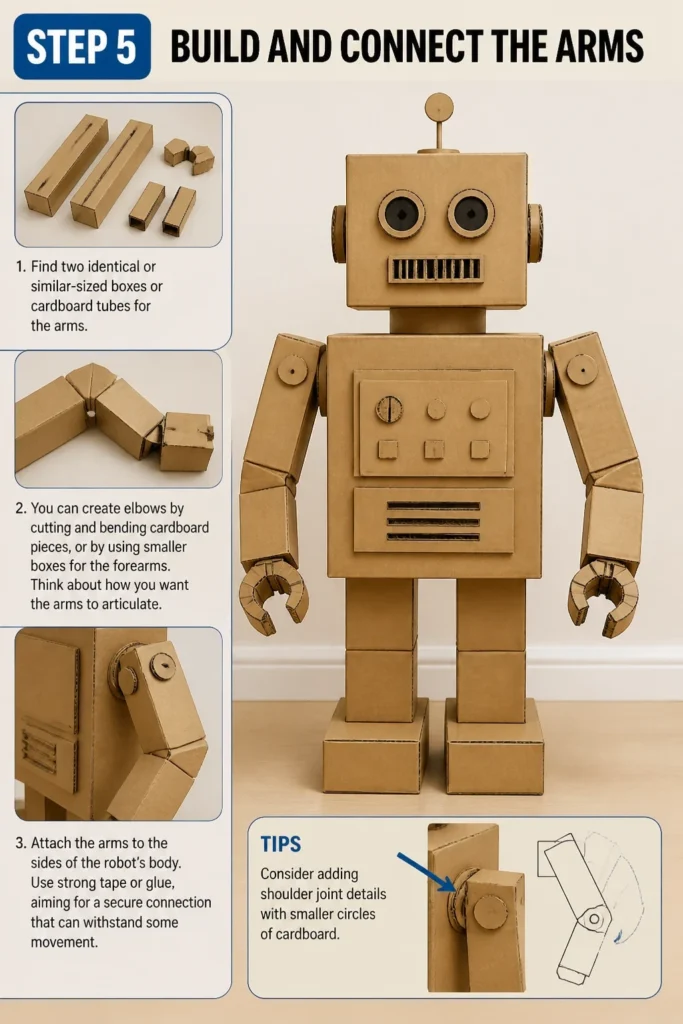
Attach the arms to the sides of the robot’s body. Use strong tape or glue, aiming for a secure connection that can withstand some movement. Consider adding shoulder joint details with smaller circles of cardboard.
Step 6: Fashion the Legs and Feet
Select two boxes or cardboard tubes for the robot’s legs. These should be strong enough to support the robot’s weight. You might want to make them slightly wider at the bottom for stability.
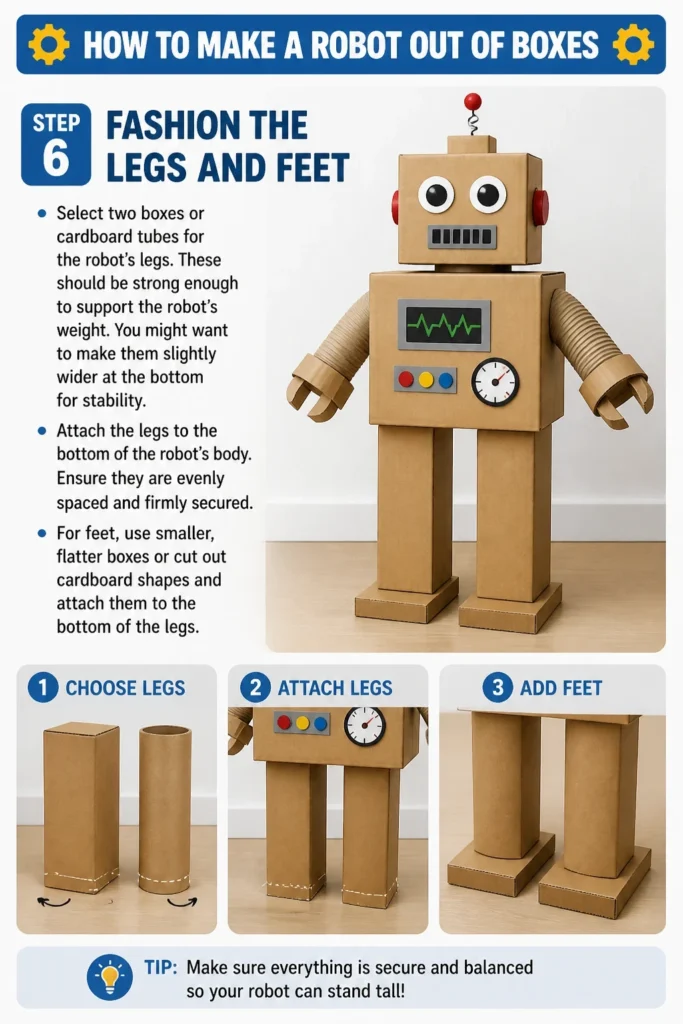
Attach the legs to the bottom of the robot’s body. Ensure they are evenly spaced and firmly secured. For feet, use smaller, flatter boxes or cut out cardboard shapes and attach them to the bottom of the legs.
Step 7: Add Details and Features
This is where your robot truly comes to life. Cut out smaller cardboard pieces to create features like eyes, a mouth, ears, or antennas. Use bottle caps, plastic containers, or other recycled items for buttons and dials.
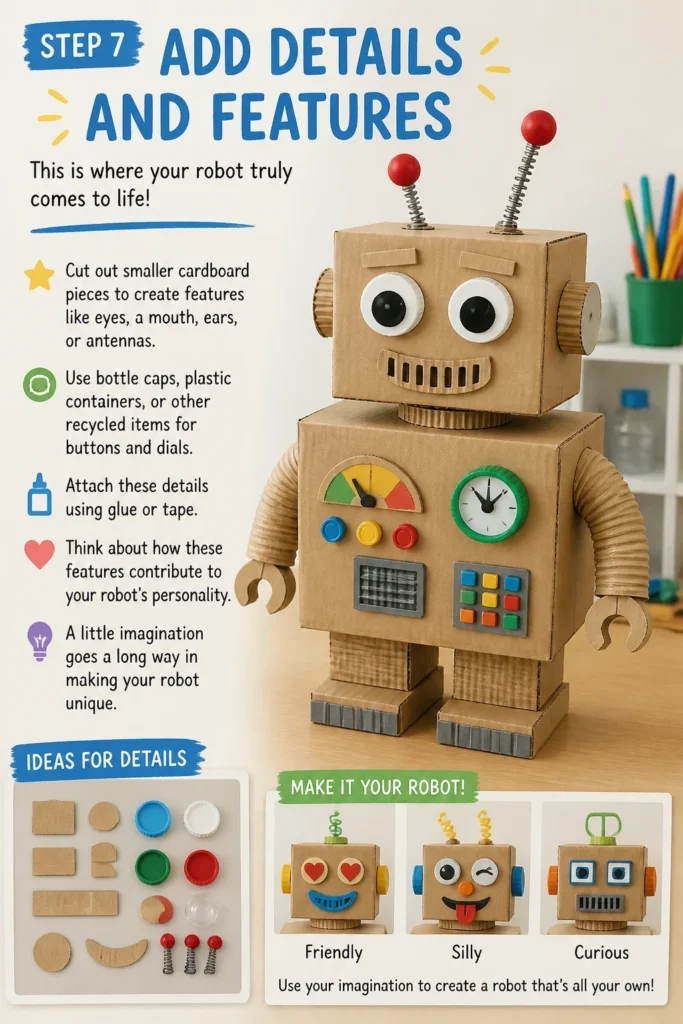
Attach these details using glue or tape. Think about how these features contribute to your robot’s personality. A little imagination goes a long way in making your robot unique.
Step 8: Decorate Your Robot
Now it’s time to add color and flair. Paint your robot with acrylic paints, spray paint, or use markers and crayons. Consider a metallic look for a classic robot feel, or bright, playful colors.
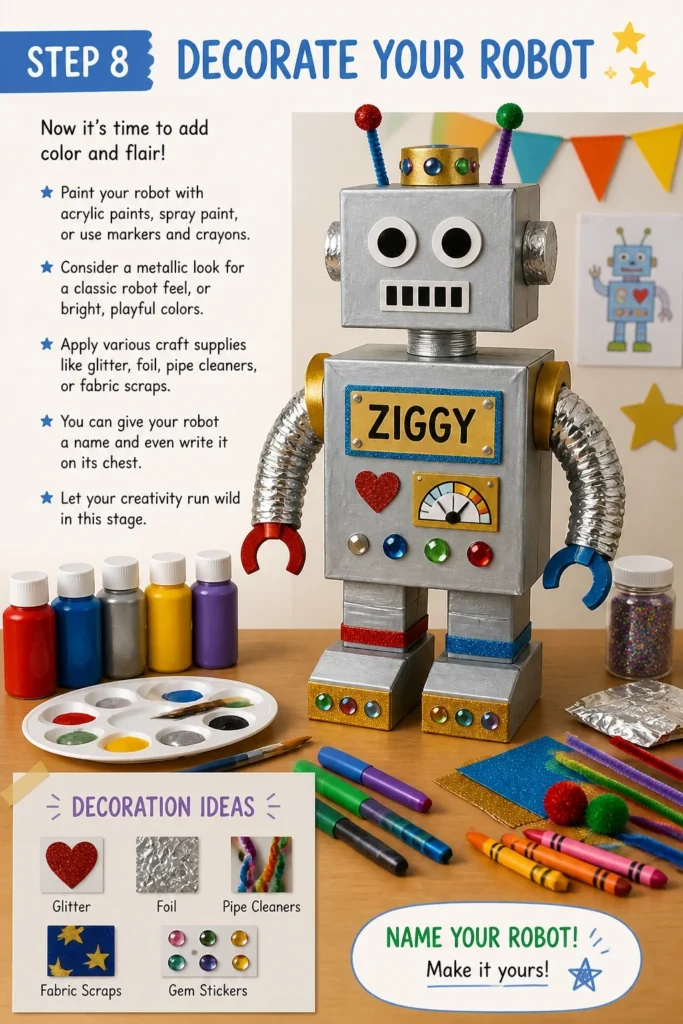
Apply various craft supplies like glitter, foil, pipe cleaners, or fabric scraps. You can give your robot a name and even write it on its chest. Let your creativity run wild in this stage.
Step 9: Reinforce and Stabilize
Once all the parts are assembled and decorated, take a final look at your robot. Check for any wobbly parts or weak connections. Add extra tape or glue where needed to reinforce the structure.
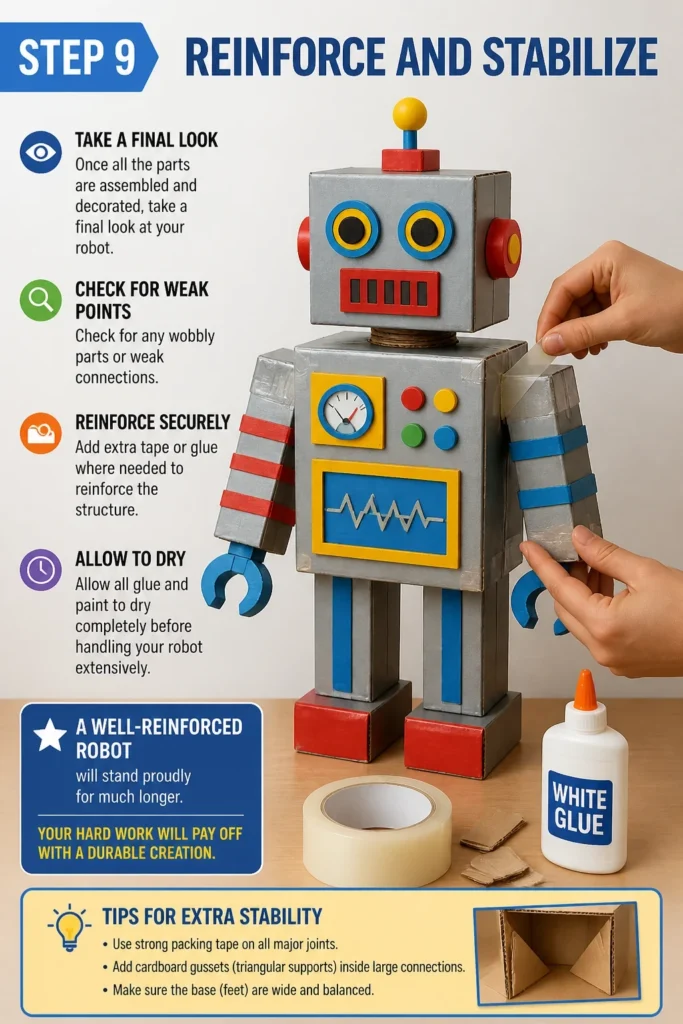
Allow all glue and paint to dry completely before handling your robot extensively. A well-reinforced robot will stand proudly for much longer. Your hard work will pay off with a durable creation.
Common Mistakes to Avoid
Using Weak Adhesive
Relying on weak tape or glue is a common pitfall. Parts will inevitably detach, leading to frustration and a flimsy robot. Always opt for strong packing tape, duct tape, or a reliable craft glue like tacky glue or hot glue (with adult supervision). Reinforce all major joints generously.
Ignoring Stability
Building a top-heavy robot or one with uneven legs will cause it to fall over easily. Always consider weight distribution as you build. Make sure the base is wide and stable, and that the head is not disproportionately large compared to the body. Adding weight to the feet can help.
Overcomplicating the Design
While ambition is great, trying to make a robot with too many intricate moving parts or overly complex shapes can quickly become overwhelming. Start with a simpler, more robust design. You can always add more detail and complexity to future projects once you’ve mastered the basics.
Rushing the Decoration
Skipping the planning phase for decoration can lead to a messy or uncoordinated look. Take a moment to consider your color scheme and where you want to place details. Rushing can also mean smudged paint or decorations falling off. Allow ample drying time for all glues and paints.
Troubleshooting
Robot Feels Wobbly
If your robot feels unstable, the primary issue is likely in the joints or the base. Carefully inspect where the head connects to the body, and where the arms and legs attach. Add more tape, especially on all four sides of each joint, pressing firmly.
For legs, ensure they are spaced evenly and that the feet provide a broad, flat base. You can cut larger cardboard squares for the feet and tape them securely to the bottom of the legs for increased stability. Sometimes, adding a small weight inside the body or feet (like a few rocks or sand in a bag) can help lower the center of gravity.
Parts Aren’t Sticking
When parts refuse to stick, the problem is usually insufficient adhesive or a surface that’s too smooth. Ensure you are using a strong tape or glue suitable for cardboard. For tape, overlap edges generously and press down firmly.
If using glue, apply a good, even layer to both surfaces and hold them together until they begin to set. Sometimes, roughing up a glossy cardboard surface with sandpaper can help glue adhere better. Give glue ample time to dry completely before handling the joint.
Decorations Look Messy
If your paint is smudged or decorations aren’t neat, it often comes down to patience and technique. For painting, apply thin, even coats and allow each layer to dry fully before adding the next. This prevents drips and uneven textures.
When attaching smaller decorations, use a precise amount of glue. For things like glitter, apply glue to a specific area, sprinkle, and then gently tap off the excess once dry. Using stencils or drawing guides with a pencil first can help keep lines clean and designs symmetrical.
Key Takeaways
- Planning your robot’s design before starting saves time and ensures a cohesive look.
- Using strong adhesives like packing tape or hot glue is crucial for a durable robot.
- Focus on a stable base and secure joints to prevent your robot from toppling.
- Don’t be afraid to experiment with different box shapes and sizes for unique results.
- Decoration is where your robot’s personality shines, so take your time and be creative.
- Reinforce all connections at the end to ensure your cardboard creation lasts.
Frequently Asked Questions
What kind of boxes work best?
Any clean cardboard box can work, but a variety of sizes is ideal. Sturdy shipping boxes are great for the body and limbs, while cereal boxes, tissue boxes, or even shoeboxes are perfect for heads, feet, and smaller details. Flat cardboard sheets are also useful for cutting out custom shapes.
Can I use hot glue?
Yes, hot glue is excellent for quickly assembling cardboard robots because it dries fast and creates a strong bond. However, always use hot glue with adult supervision, especially with children, as it can cause burns. Ensure proper ventilation if you’re working with a large amount.
How can I make it look more like a “real” robot?
To give your robot a more realistic look, focus on details. Use metallic spray paint or silver foil for a sleek, industrial finish. Add “buttons” with bottle caps, “wires” with pipe cleaners, or “screens” with reflective paper. Think about specific robot features you admire and try to replicate them simply.
Is this safe for small children?
Making a robot out of boxes is generally very safe for children, but supervision is important depending on their age. Ensure sharp tools like scissors or craft knives are used by adults or older children under direct supervision. Choose non-toxic paints and glues, and avoid small parts that could be choking hazards for very young children.
Our Top Recommended Finds
- Heavy-Duty Packing Tape: Essential for strong, lasting connections that hold your robot together.
- Craft Knife Set with Cutting Mat: Allows for precise, clean cuts on cardboard, making detailed work much easier.
- Assorted Acrylic Paint Set: Offers a wide range of colors to bring your robot’s personality to life with vibrant finishes.
Your Cardboard Creation Awaits!
You now have all the tools and knowledge to embark on your box robot adventure. This isn’t just a craft project; it’s an opportunity to build, imagine, and create something truly unique. Every snip, fold, and tape brings your vision closer to reality.
Why wait? Gather your boxes, clear your workspace, and start building your very own robot today. Once you’ve mastered the basics, consider building a robot pet or even a whole family of cardboard characters. The only limit is your imagination!
Beginner-friendly templates, step-by-step guides,
and weekly project ideas in your inbox.