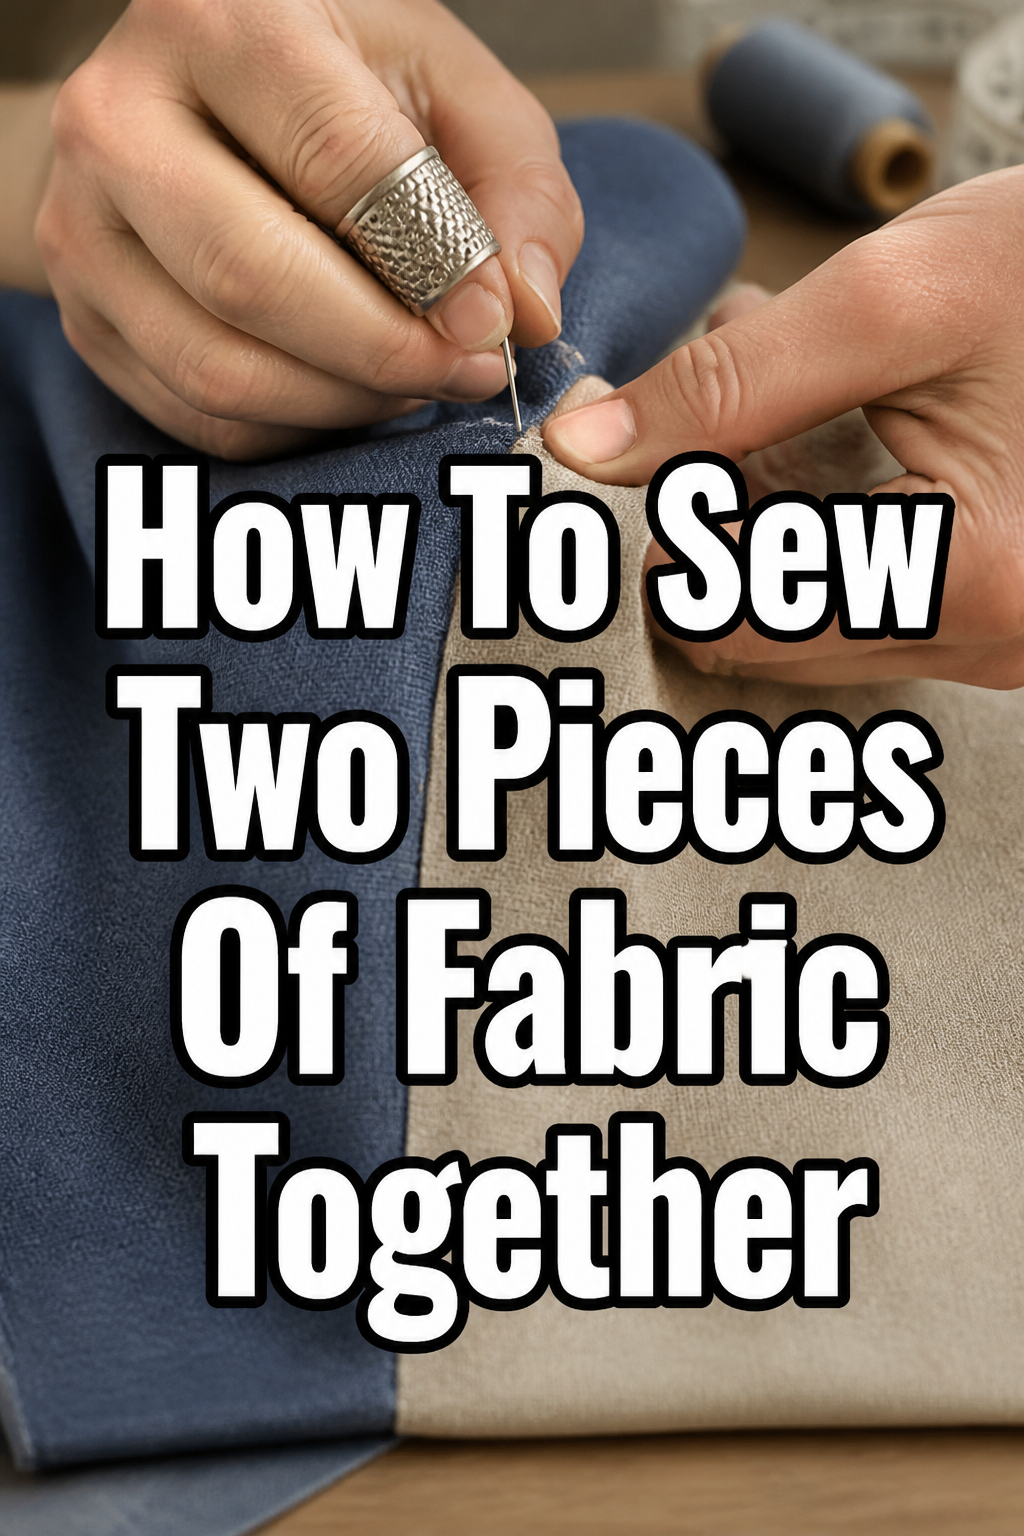
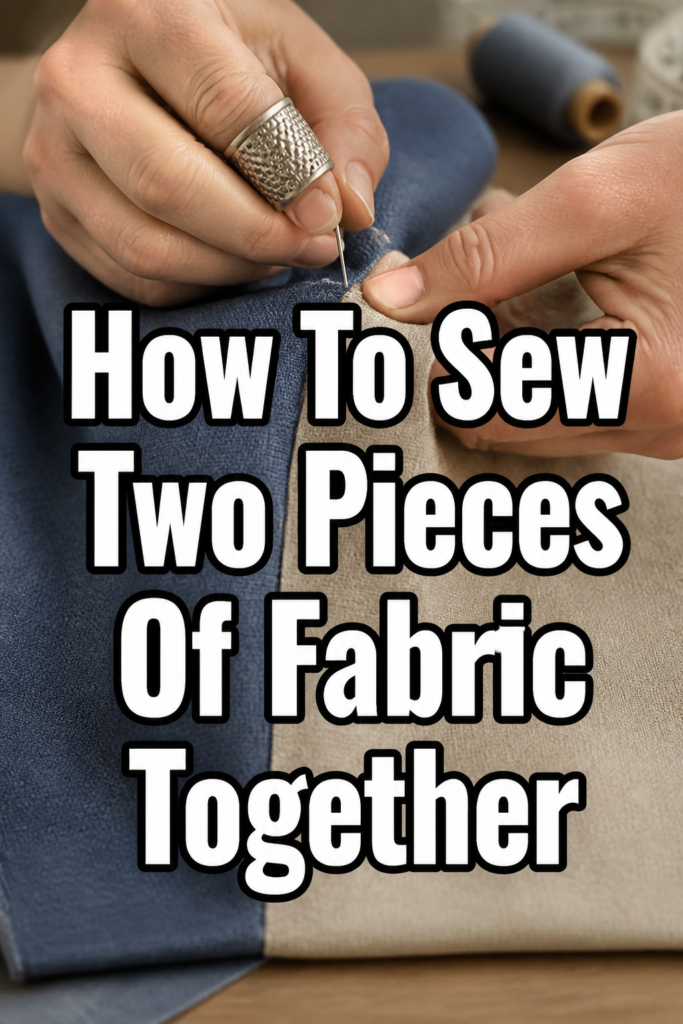
🧵 How To Sew Two Pieces Of Fabric Together

Beginner-friendly templates, step-by-step guides,
and weekly project ideas in your inbox.
Learning to sew two pieces of fabric together is the foundational skill for almost any sewing project. It’s where your creative journey truly begins.
I still remember the thrill of my very first straight seam, even if it was a little wobbly. This guide will walk you through each step, helping you build confidence and create neat, strong seams. You’ll be connecting fabric like a pro in no time.
Quick Overview
This guide will teach you the essential steps to join two pieces of fabric securely and neatly, forming a basic seam. You’ll learn about preparation, proper technique, and finishing touches.
- Time needed: 30-60 minutes (for your first attempt, less with practice)
- Difficulty: Beginner
- What you’ll need: Fabric, sharp scissors, pins, matching thread, sewing machine (or hand sewing needle), iron, measuring tape or ruler.
Step-by-Step Instructions
Step 1: Gather Your Tools and Materials
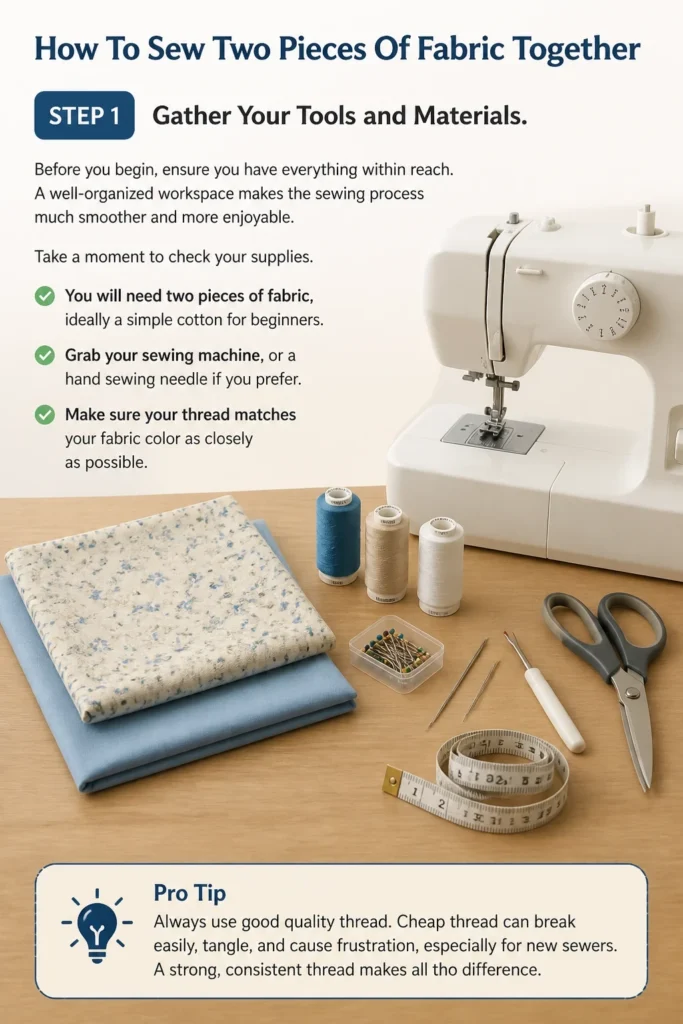
Before you begin, ensure you have everything within reach. A well-organized workspace makes the sewing process much smoother and more enjoyable. Take a moment to check your supplies.
You will need two pieces of fabric, ideally a simple cotton for beginners. Grab your sewing machine, or a hand sewing needle if you prefer. Make sure your thread matches your fabric color as closely as possible.
Pro Tip: Always use good quality thread. Cheap thread can break easily, tangle, and cause frustration, especially for new sewers. A strong, consistent thread makes all the difference.
Step 2: Prepare Your Fabric
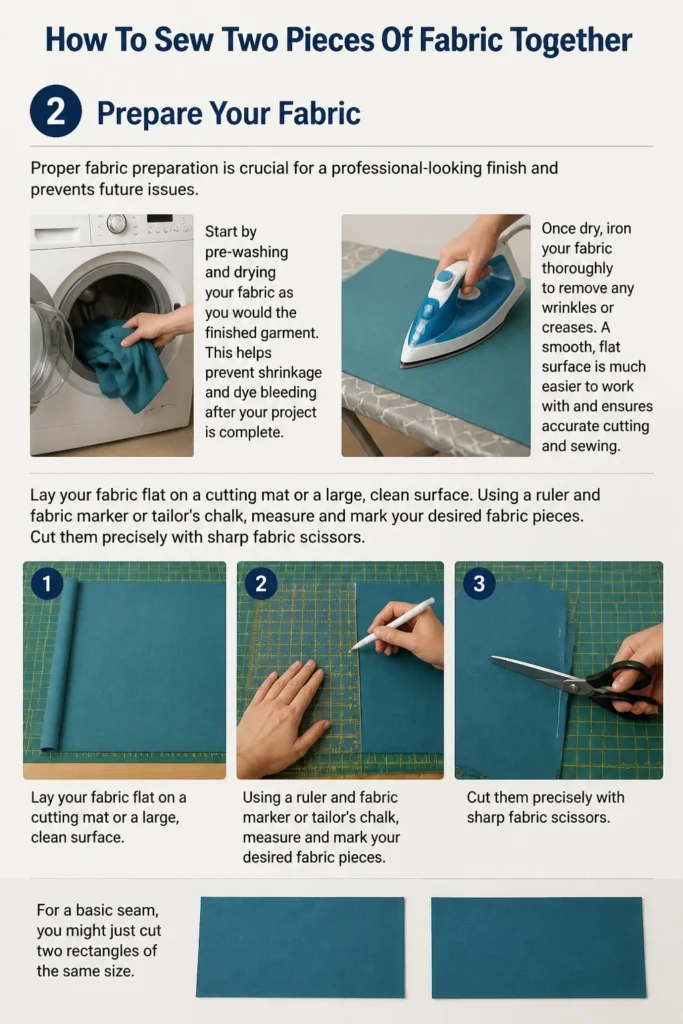
Proper fabric preparation is crucial for a professional-looking finish and prevents future issues. Start by pre-washing and drying your fabric as you would the finished garment. This helps prevent shrinkage and dye bleeding after your project is complete.
Once dry, iron your fabric thoroughly to remove any wrinkles or creases. A smooth, flat surface is much easier to work with and ensures accurate cutting and sewing. Lay your fabric flat on a cutting mat or a large, clean surface.
Using a ruler and fabric marker or tailor’s chalk, measure and mark your desired fabric pieces. Cut them precisely with sharp fabric scissors. For a basic seam, you might just cut two rectangles of the same size.
Step 3: Pin Fabric Pieces Together
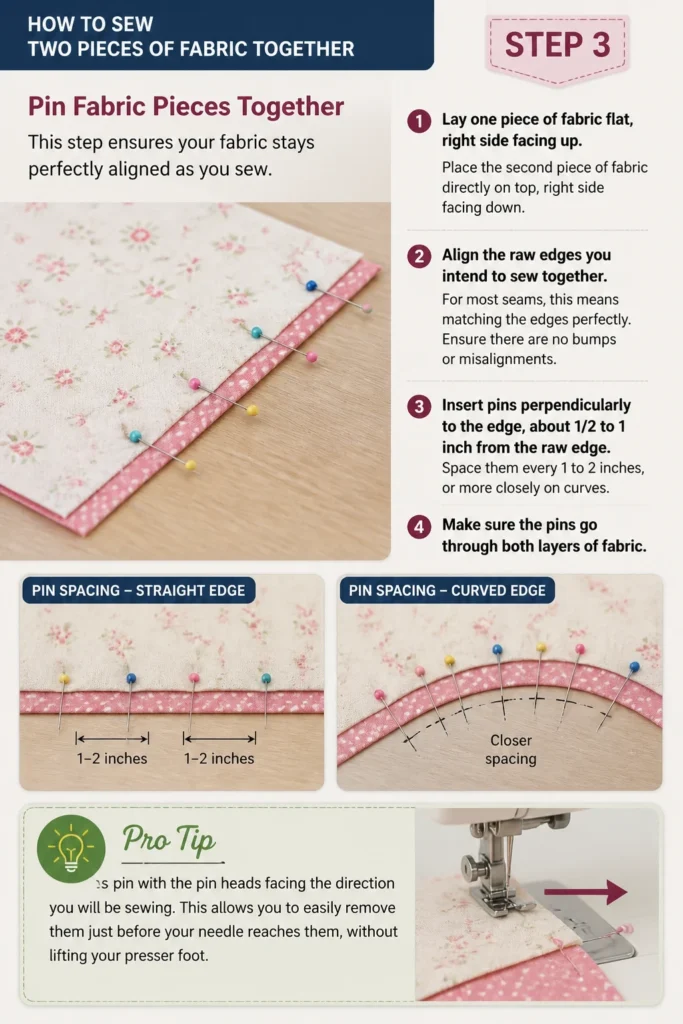
This step ensures your fabric stays perfectly aligned as you sew. Lay one piece of fabric flat, right side facing up. Place the second piece of fabric directly on top, right side facing down.
Align the raw edges you intend to sew together. For most seams, this means matching the edges perfectly. Ensure there are no bumps or misalignments.
Insert pins perpendicularly to the edge, about 1/2 to 1 inch from the raw edge. Space them every 1 to 2 inches, or more closely on curves. Make sure the pins go through both layers of fabric.
Pro Tip: Always pin with the pin heads facing the direction you will be sewing. This allows you to easily remove them just before your needle reaches them, without lifting your presser foot.
Step 4: Set Up Your Sewing Machine (or Thread Needle)
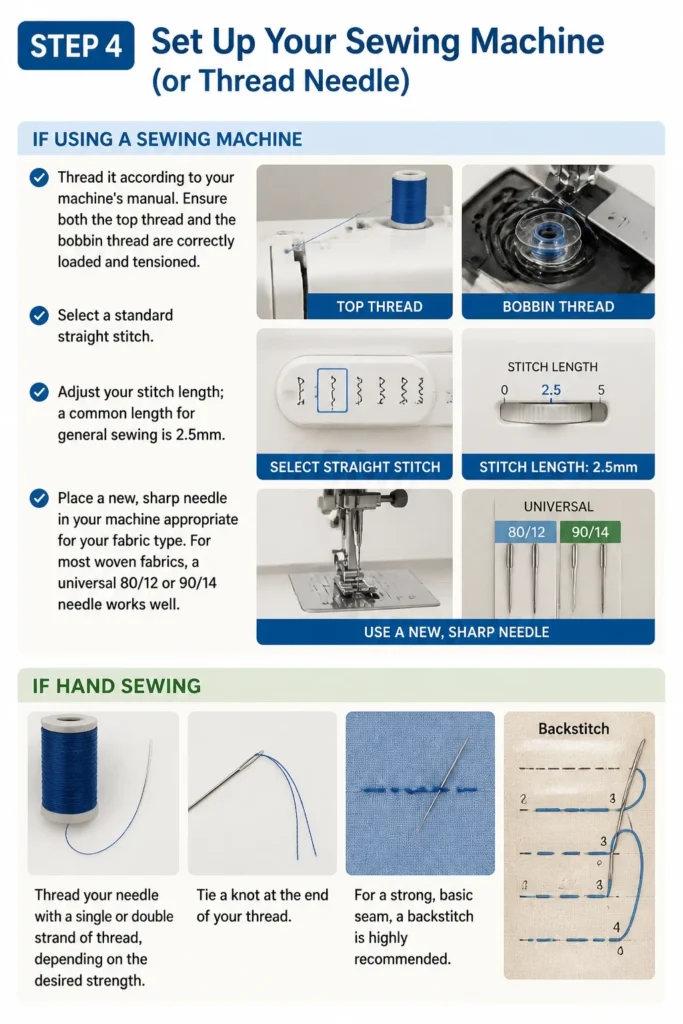
If using a sewing machine, thread it according to your machine’s manual. Ensure both the top thread and the bobbin thread are correctly loaded and tensioned. Select a standard straight stitch.
Adjust your stitch length; a common length for general sewing is 2.5mm. Place a new, sharp needle in your machine appropriate for your fabric type. For most woven fabrics, a universal 80/12 or 90/14 needle works well.
If hand sewing, thread your needle with a single or double strand of thread, depending on the desired strength. Tie a knot at the end of your thread. For a strong, basic seam, a backstitch is highly recommended.
Step 5: Sew Your Seam
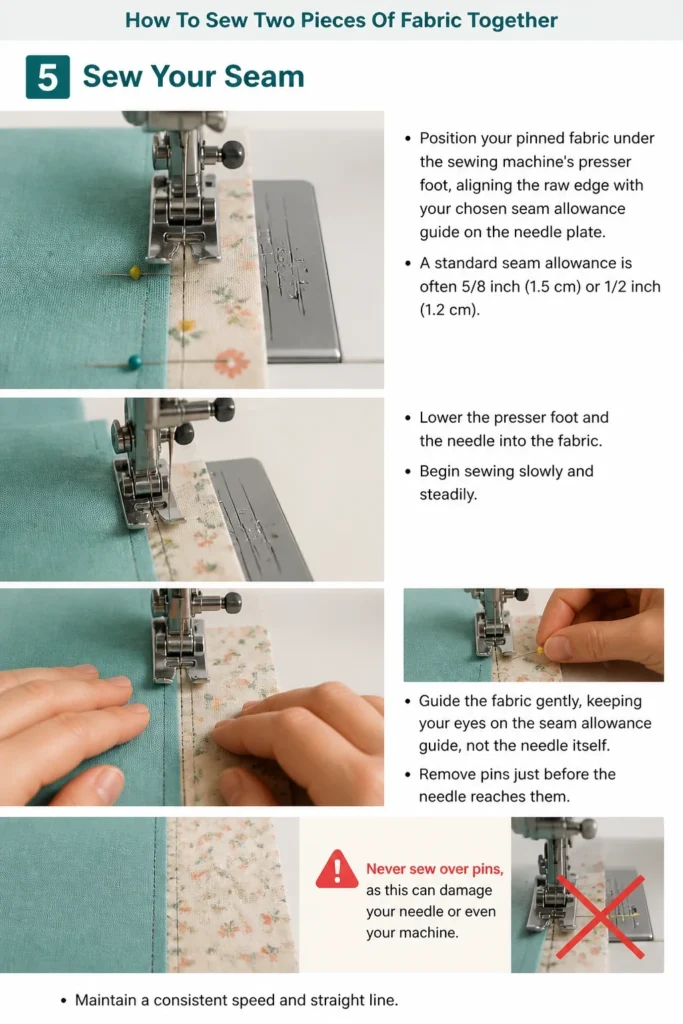
Position your pinned fabric under the sewing machine’s presser foot, aligning the raw edge with your chosen seam allowance guide on the needle plate. A standard seam allowance is often 5/8 inch (1.5 cm) or 1/2 inch (1.2 cm).
Lower the presser foot and the needle into the fabric. Begin sewing slowly and steadily. Guide the fabric gently, keeping your eyes on the seam allowance guide, not the needle itself.
Remove pins just before the needle reaches them. Never sew over pins, as this can damage your needle or even your machine. Maintain a consistent speed and straight line.
Step 6: Reinforce Your Stitches
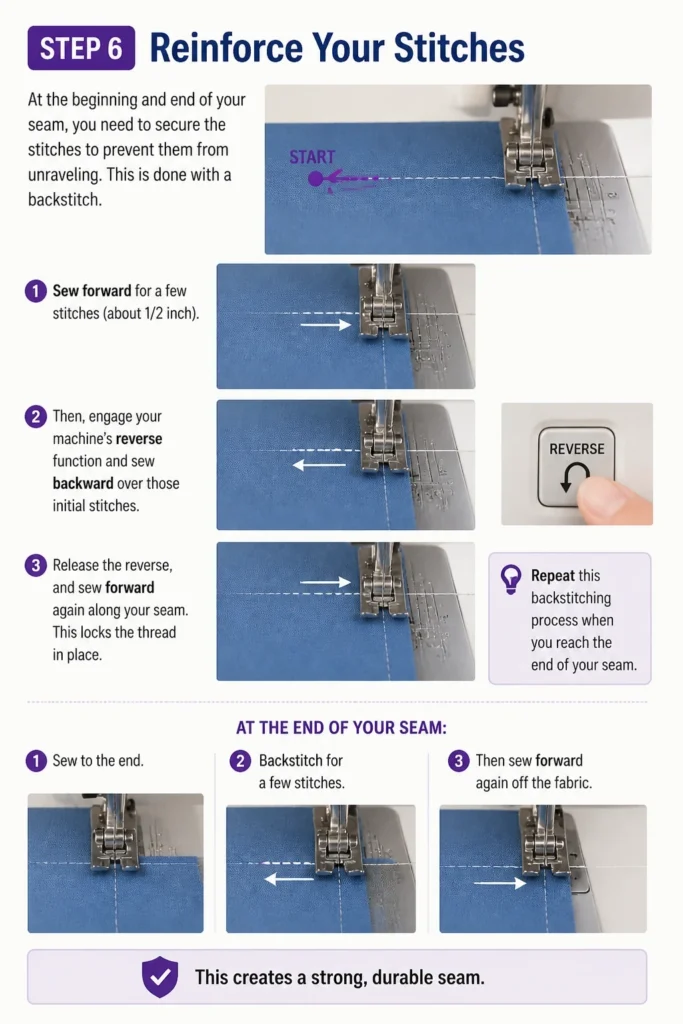
At the beginning and end of your seam, you need to secure the stitches to prevent them from unraveling. This is done with a backstitch. Sew forward for a few stitches (about 1/2 inch).
Then, engage your machine’s reverse function and sew backward over those initial stitches. Release the reverse, and sew forward again along your seam. This locks the thread in place.
Repeat this backstitching process when you reach the end of your seam. Sew to the end, backstitch for a few stitches, then sew forward again off the fabric. This creates a strong, durable seam.
Step 7: Press Your Seam
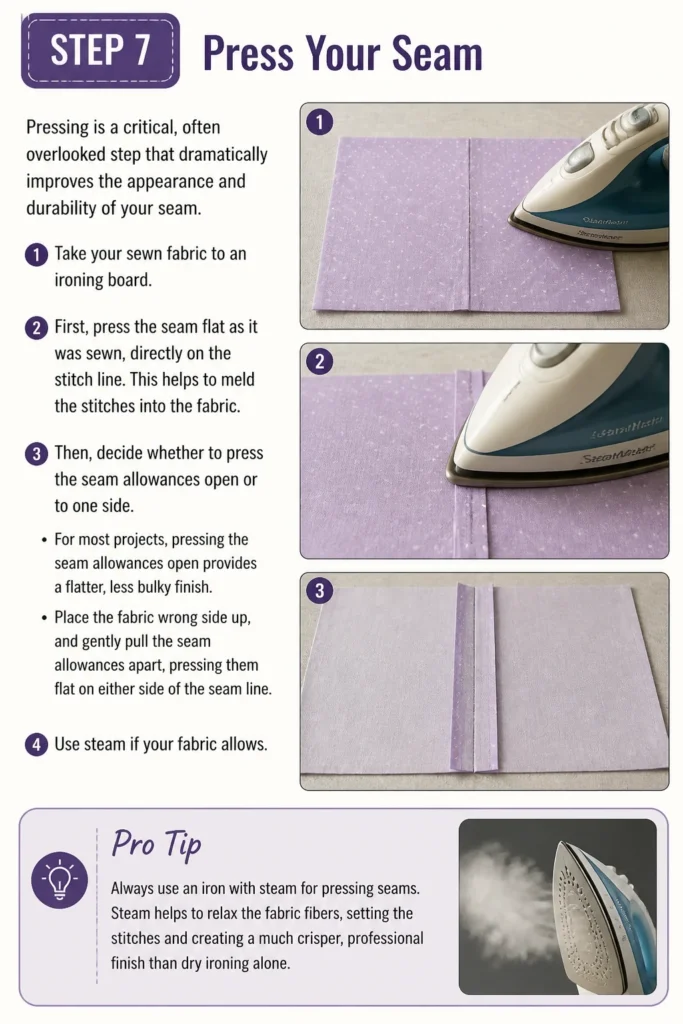
Pressing is a critical, often overlooked step that dramatically improves the appearance and durability of your seam. Take your sewn fabric to an ironing board.
First, press the seam flat as it was sewn, directly on the stitch line. This helps to meld the stitches into the fabric. Then, decide whether to press the seam allowances open or to one side.
For most projects, pressing the seam allowances open provides a flatter, less bulky finish. Place the fabric wrong side up, and gently pull the seam allowances apart, pressing them flat on either side of the seam line. Use steam if your fabric allows.
Pro Tip: Always use an iron with steam for pressing seams. Steam helps to relax the fabric fibers, setting the stitches and creating a much crisper, professional finish than dry ironing alone.
Step 8: Trim and Finish Your Seam
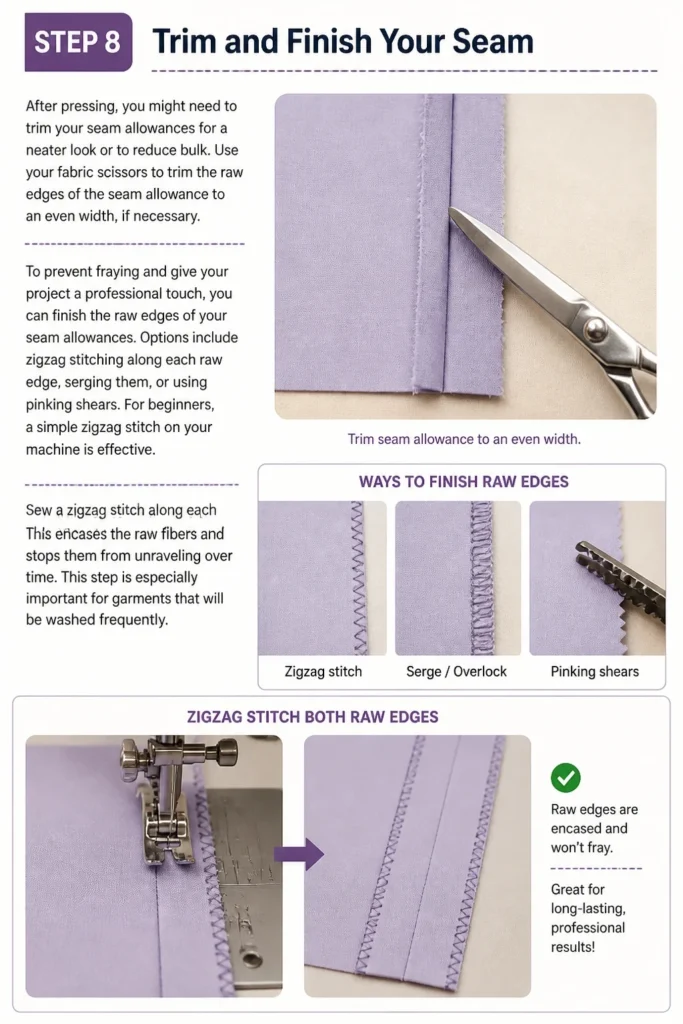
After pressing, you might need to trim your seam allowances for a neater look or to reduce bulk. Use your fabric scissors to trim the raw edges of the seam allowance to an even width, if necessary.
To prevent fraying and give your project a professional touch, you can finish the raw edges of your seam allowances. Options include zigzag stitching along each raw edge, serging them, or using pinking shears. For beginners, a simple zigzag stitch on your machine is effective.
Sew a zigzag stitch along each raw edge of the seam allowance. This encases the raw fibers and stops them from unraveling over time. This step is especially important for garments that will be washed frequently.
Common Mistakes to Avoid
Not Pinning Properly
Many beginners rush the pinning process or use too few pins. This results in fabric shifting during sewing, leading to uneven seams and misaligned edges. Always use plenty of pins, placing them perpendicularly and aligning edges carefully.
Take your time with pinning; it’s an investment in a straight, neat seam. Proper pinning is the foundation for accurate stitching.
Incorrect Thread Tension
If your stitches look loose, loopy, or puckered, your thread tension might be off. Incorrect tension can cause stitches to break or fabric to gather unattractively. Always test your tension on a scrap piece of your project fabric before sewing.
Refer to your sewing machine manual for specific tension adjustments. A balanced tension will show identical stitches on both sides of your fabric.
Skipping the Pressing Step
It’s tempting to skip pressing, but it’s a vital part of creating a professional finish. Unpressed seams often look bulky, uneven, and less polished. Pressing sets the stitches, flattens the seam, and shapes the fabric.
Think of pressing as part of the sewing process, not an optional extra. It truly transforms the look of your work.
Rushing the Process
Sewing requires patience and precision. Rushing can lead to crooked seams, skipped stitches, and frustration. Slow down, especially when you’re learning. Focus on guiding the fabric smoothly and consistently.
Enjoy the process, not just the finished product. A steady pace will yield far better results than a hurried one.
Troubleshooting
Uneven Stitches
If your stitches are inconsistent in length or look sloppy, check your sewing speed. Jerky movements can cause uneven stitching. Try to maintain a steady, moderate pace.
Also, ensure your needle is sharp and appropriate for your fabric. A dull or bent needle can skip stitches or create irregular ones. Check your thread tension as well; imbalance can lead to unevenness.
Fabric Puckering
Puckering often occurs when the fabric is being stretched or pulled as you sew, or if the thread tension is too tight. Avoid pulling the fabric through the machine; let the feed dogs do the work.
Loosen your top thread tension slightly and test on a scrap. Using a walking foot can also help with tricky fabrics that tend to pucker.
Thread Breaking
Frequent thread breakage is a common frustration. First, check that your machine is threaded correctly, both the top thread and the bobbin. Even a small misstep can cause issues.
Ensure your needle is new, sharp, and the correct size for your thread and fabric. A dull or too-small needle can fray and break thread. Also, check your tension; excessively tight tension can snap the thread.
Key Takeaways
- Preparation is Key: Always pre-wash, iron, and cut your fabric accurately for the best results.
- Pin Meticulously: Proper pinning prevents fabric shifting and ensures straight, even seams.
- Master Your Machine: Understand your machine’s threading, tension, and stitch settings.
- Backstitch for Strength: Always backstitch at the beginning and end of seams to secure them.
- Pressing is Non-Negotiable: Ironing seams flat and then open creates a professional, crisp finish.
- Practice Makes Perfect: Start with simple fabrics and projects, and gradually challenge yourself.
Frequently Asked Questions
What is a seam allowance?
A seam allowance is the area between the raw edge of the fabric and the stitch line. It’s the fabric that extends beyond your stitches. Standard seam allowances vary, but common ones are 1/2 inch (1.2 cm) or 5/8 inch (1.5 cm). Consistency in your seam allowance is crucial for accurate garment construction.
Can I sew different types of fabric together?
Yes, you can sew different types of fabric together, but it requires careful consideration. Fabrics with similar weights and drapes are generally easier to combine. If you’re mixing, say, a heavy denim with a delicate silk, you’ll need to adjust your needle, thread, stitch length, and even your presser foot pressure to accommodate both. Always test on scraps first.
Is hand sewing or machine sewing better for seams?
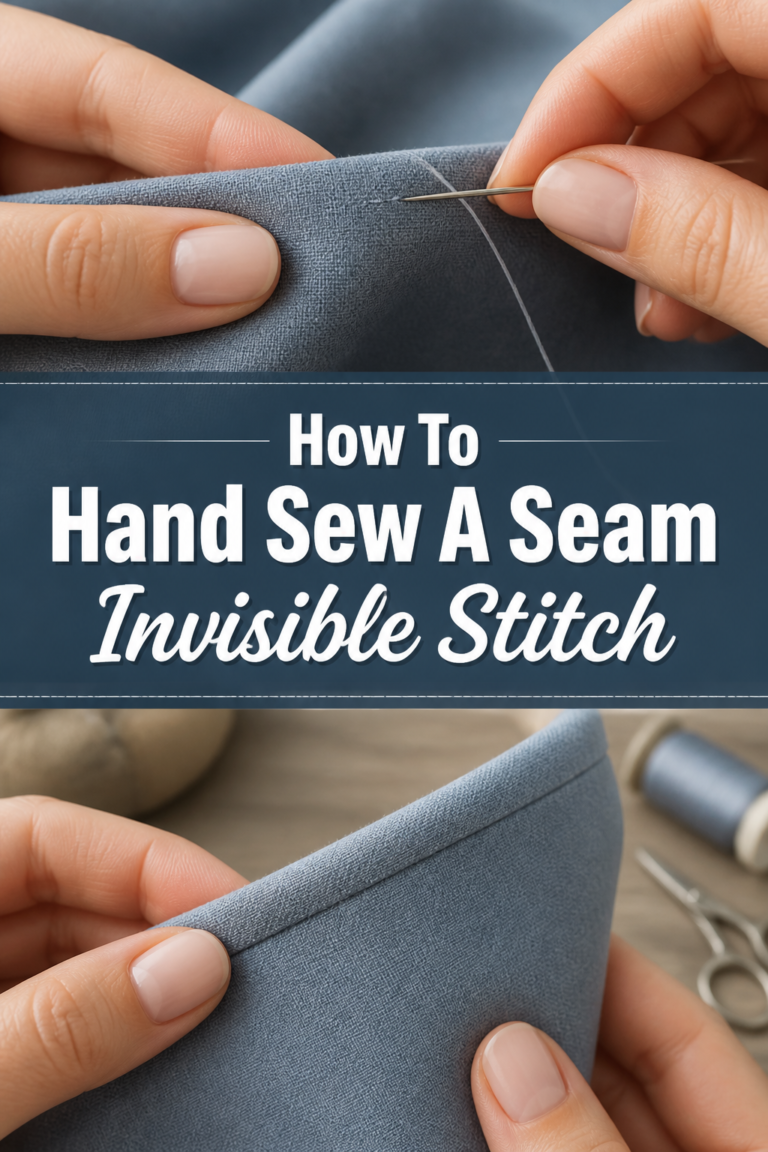
Neither is inherently “better”; they simply serve different purposes. Machine sewing is much faster, creates stronger, more consistent seams, and is ideal for constructing garments and larger projects. Hand sewing is excellent for delicate fabrics, intricate details, repairs, or when you need a completely invisible stitch. For foundational seams, the machine is usually preferred for efficiency and durability.
Our Top Recommended Finds
- Fiskars Amplify Fabric Shears: These scissors cut through multiple layers of fabric with ease, reducing hand fatigue. A good pair of sharp fabric shears is a game-changer.
- Gutermann All-Purpose Polyester Thread: This thread is strong, durable, and comes in a vast array of colors. It’s suitable for most fabrics and sewing machine types, offering consistent quality.
- Magnetic Pin Cushion with Pins: A magnetic pin cushion keeps your pins organized and easily accessible. It’s also great for quickly picking up dropped pins, saving you time and preventing accidents.
Your Next Stitch Awaits
You’ve just learned the fundamental skill of sewing two pieces of fabric together. This seemingly simple action is the gateway to countless creative projects, from practical repairs to elaborate garments. Each straight seam you sew builds confidence and hones your craft.
Now that you’ve mastered this essential technique, why not try a simple project? A basic tote bag, a pillow cover, or even a simple apron are excellent ways to practice your new skills. Keep practicing, keep creating, and watch your sewing abilities flourish.
Beginner-friendly templates, step-by-step guides,
and weekly project ideas in your inbox.