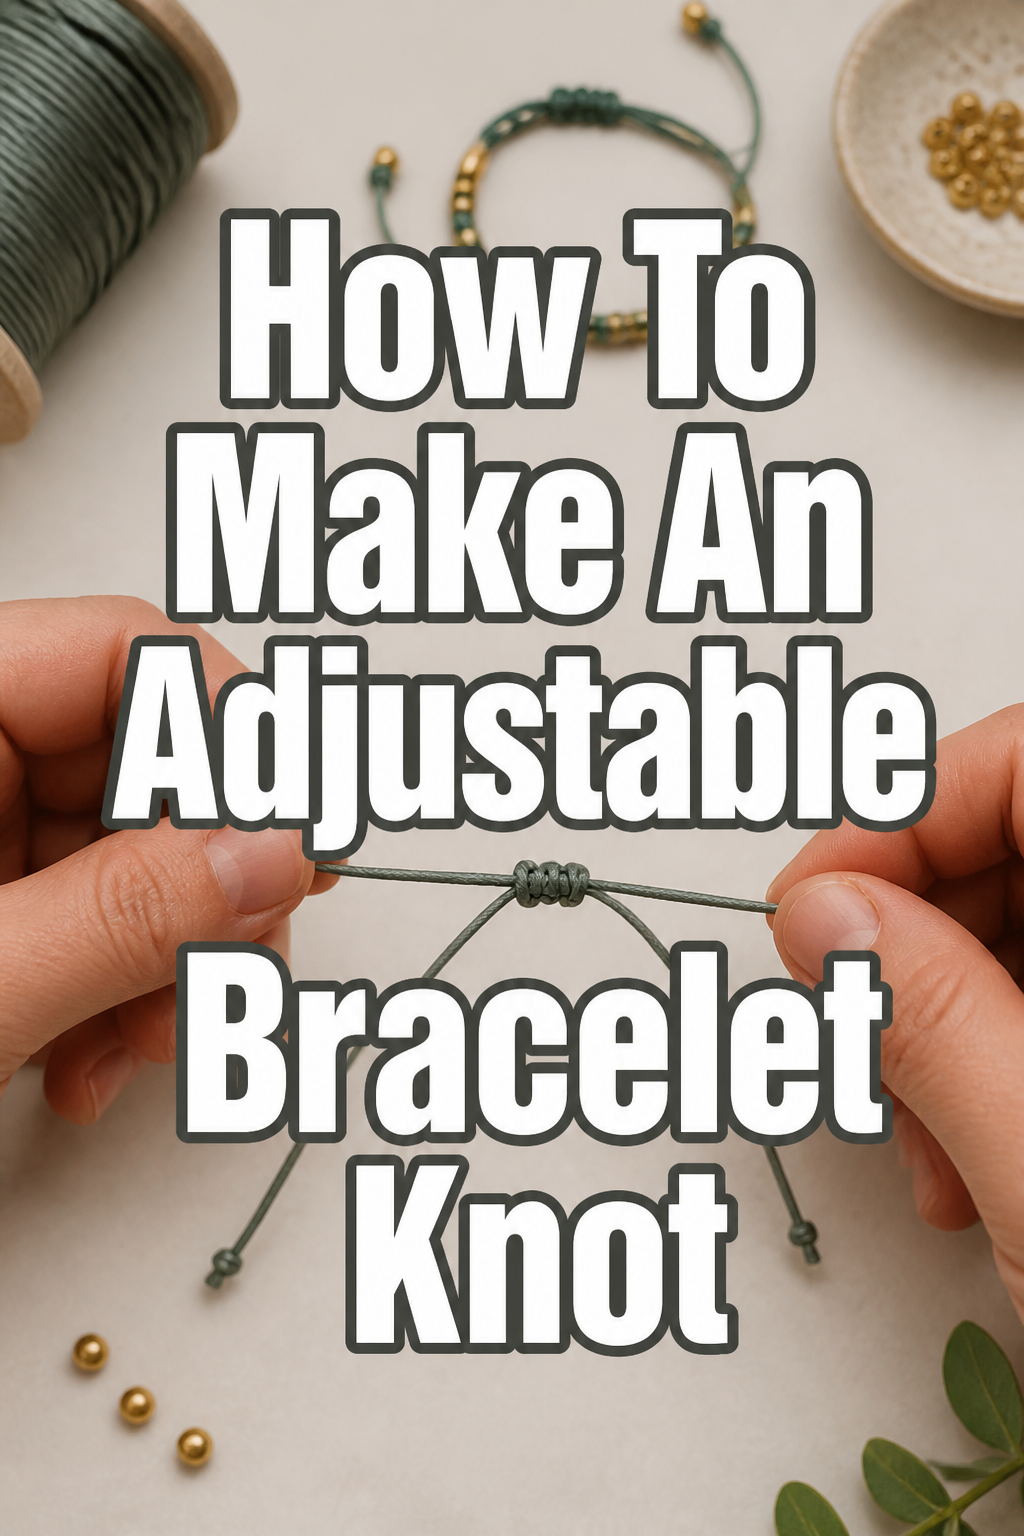
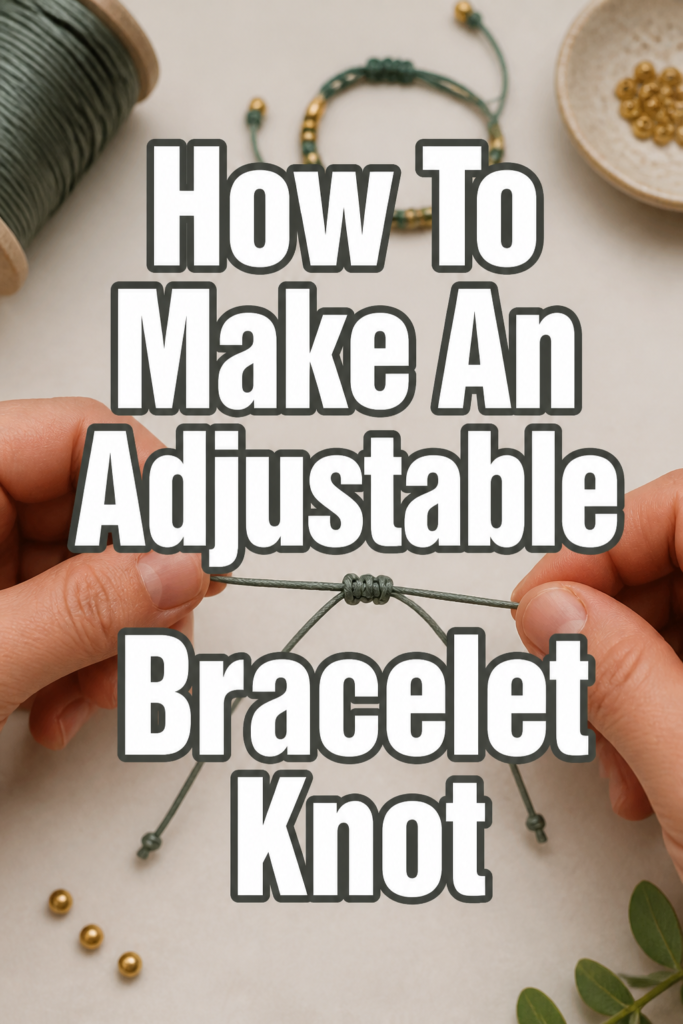
✨ How To Make An Adjustable Bracelet Knot

Beginner-friendly templates, step-by-step guides,
and weekly project ideas in your inbox.
Crafting bracelets offers a wonderful creative outlet, allowing for unique expressions of style.
I remember the frustration of making a beautiful bracelet, only for it to be too loose or too tight on the wrist.
Learning to tie an adjustable knot transforms your creations, ensuring a perfect, comfortable fit for anyone who wears them.
Quick Overview
This guide will walk you through creating a secure, sliding knot system, making your bracelets versatile and perfectly fitted every time.
- Time needed: 15-30 minutes
- Difficulty: Beginner
- What you’ll need: Cord/string, sharp scissors, a ruler, and a lighter (optional, for synthetic cords).
Step-by-Step Instructions
Step 1: Gather Your Materials
Before you begin, collect all necessary tools and cords. Having everything within reach makes the process smoother and more efficient.
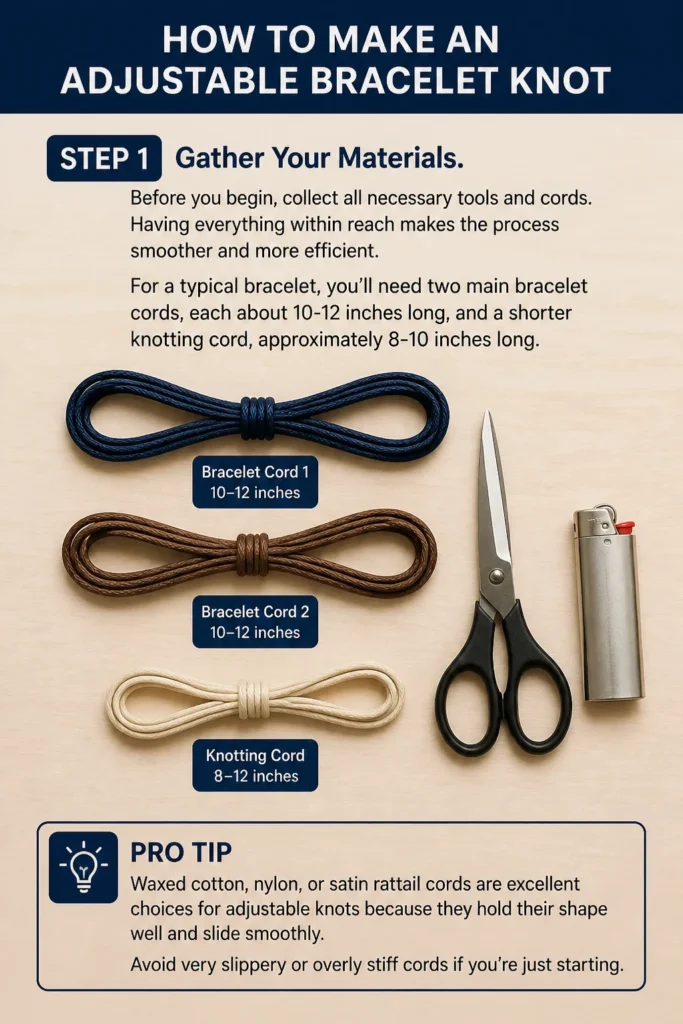
For a typical bracelet, you’ll need two main bracelet cords, each about 10-12 inches long, and a shorter knotting cord, approximately 8-10 inches long.
Pro Tip: Waxed cotton, nylon, or satin rattail cords are excellent choices for adjustable knots because they hold their shape well and slide smoothly. Avoid very slippery or overly stiff cords if you’re just starting.
Step 2: Position the Bracelet Ends
Lay your two main bracelet cords parallel to each other on a flat surface. These are the cords that will form the body of your bracelet.
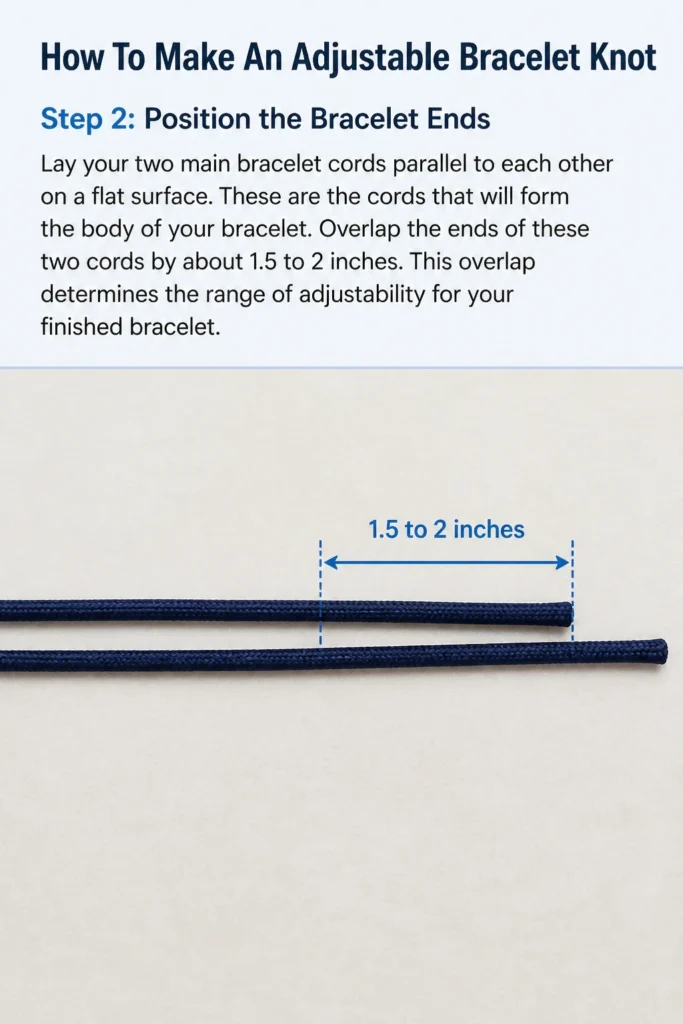
Overlap the ends of these two cords by about 1.5 to 2 inches. This overlap determines the range of adjustability for your finished bracelet.
Step 3: Begin the Knotting Cord Setup
Take your shorter knotting cord and slide it underneath both of the parallel bracelet cords. Position its center roughly in the middle of the overlapping section you created in the previous step.
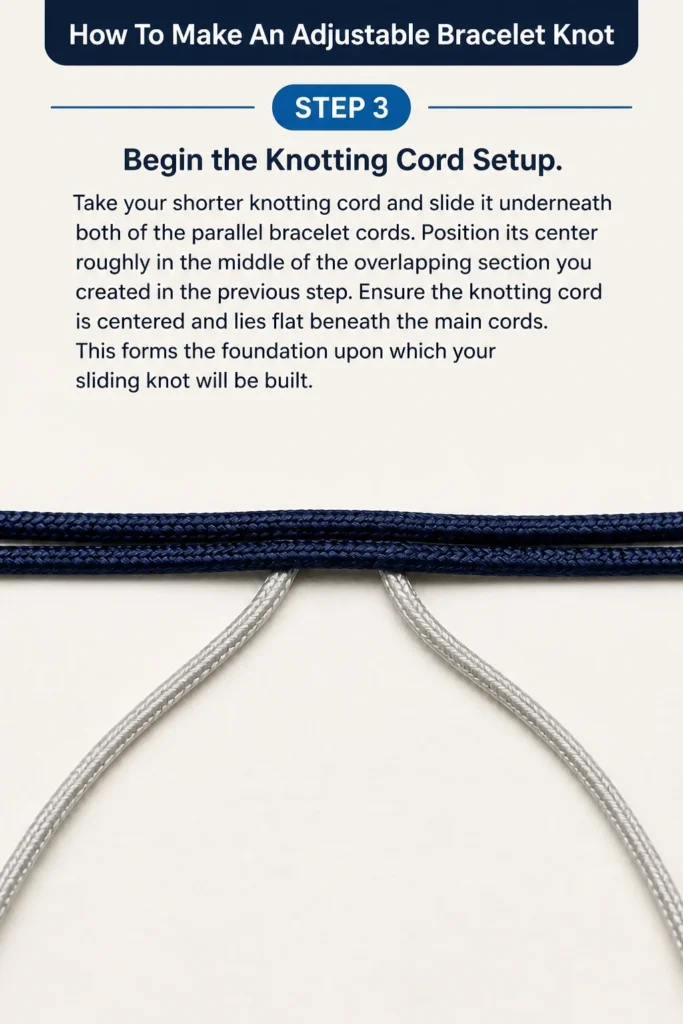
Ensure the knotting cord is centered and lies flat beneath the main cords. This forms the foundation upon which your sliding knot will be built.
Step 4: Form the First Half of the Square Knot
Now, take the right end of your knotting cord. Loop it over the right main bracelet cord, then under both main bracelet cords, and finally over the left main bracelet cord.
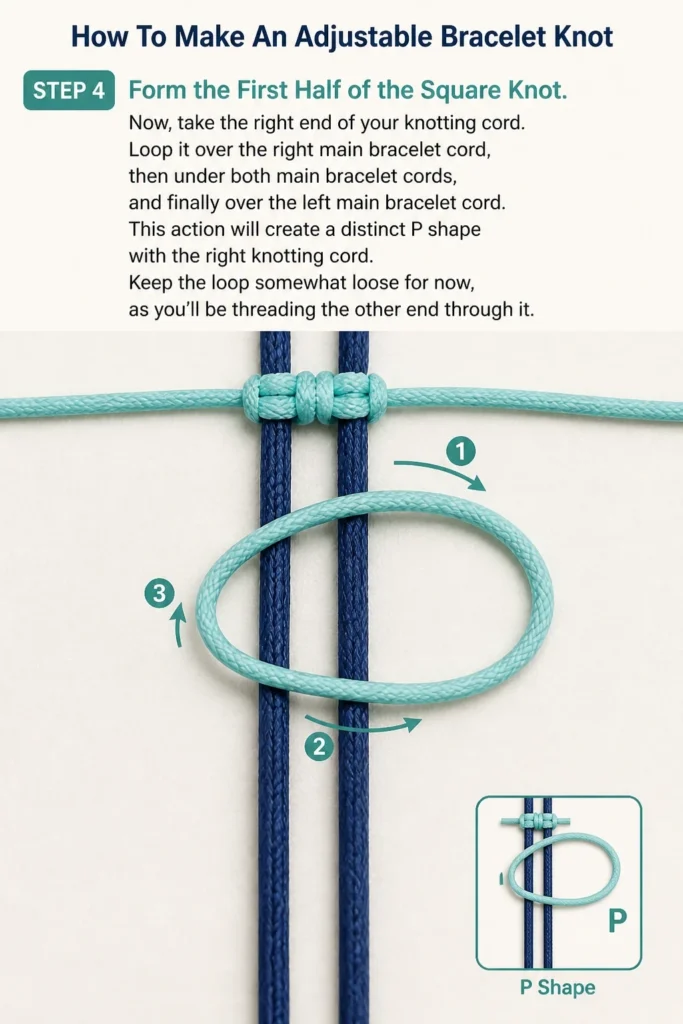
This action will create a distinct “P” shape with the right knotting cord. Keep the loop somewhat loose for now, as you’ll be threading the other end through it.
Step 5: Complete the First Half
Take the left end of the knotting cord. Bring it under the left main bracelet cord, then over both main bracelet cords, and finally through the loop you just formed with the right cord (the “P” shape).
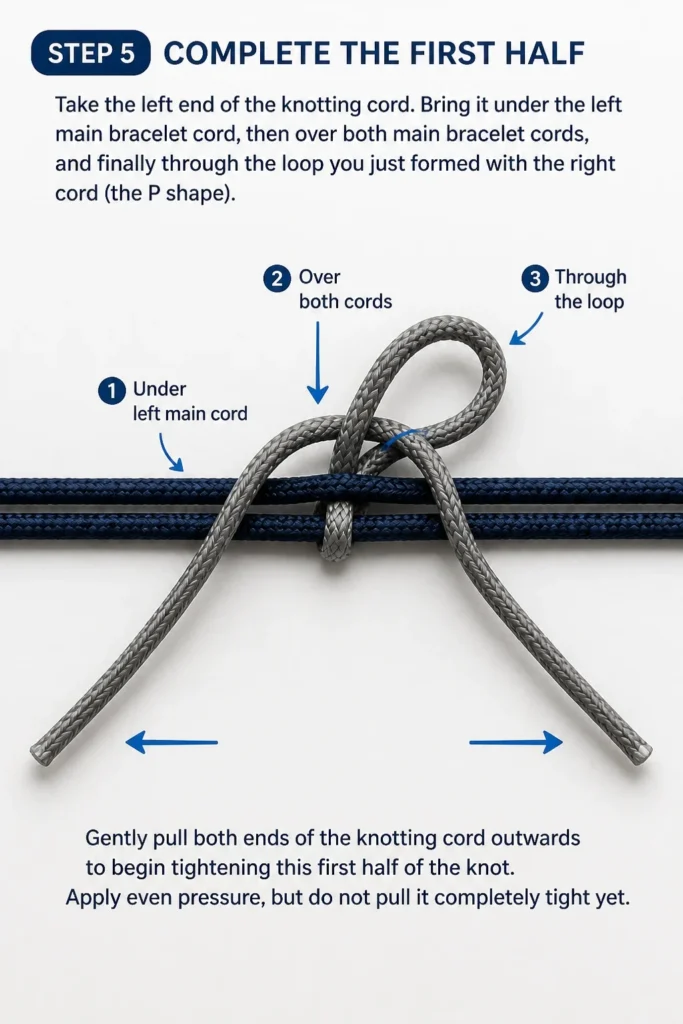
Gently pull both ends of the knotting cord outwards to begin tightening this first half of the knot. Apply even pressure, but do not pull it completely tight yet.
Step 6: Form the Second Half of the Square Knot
Now, you will reverse the process to create the second half of the square knot. Take the left end of the knotting cord.
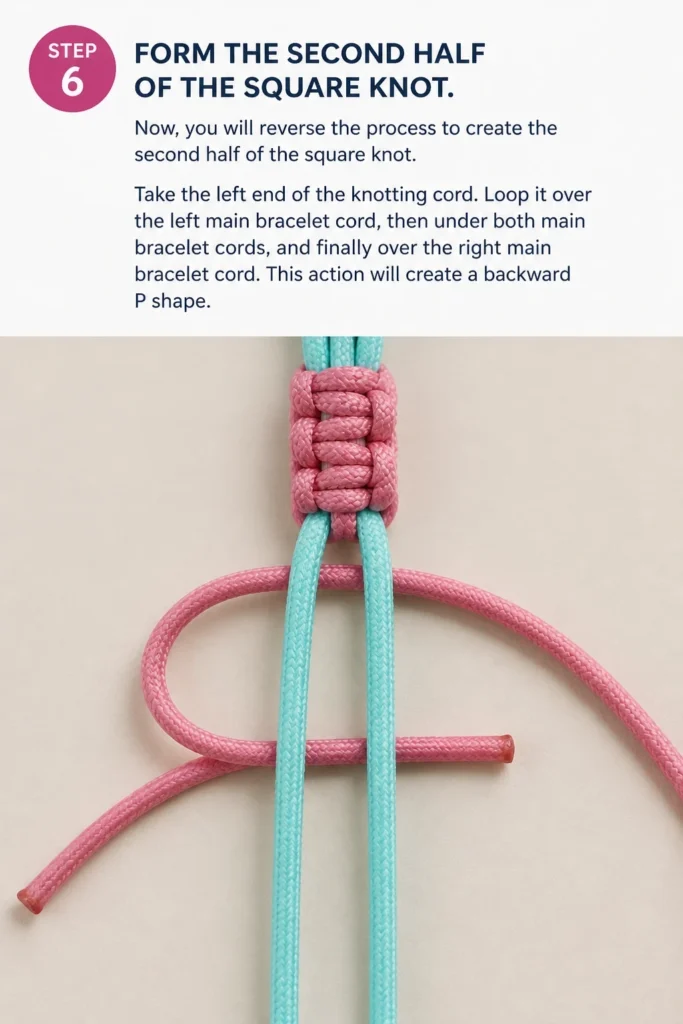
Loop it over the left main bracelet cord, then under both main bracelet cords, and finally over the right main bracelet cord. This action will create a backward “P” shape.
Step 7: Complete the Second Half
Take the right end of the knotting cord. Bring it under the right main bracelet cord, then over both main bracelet cords, and finally through the loop you just formed with the left cord (the backward “P” shape).
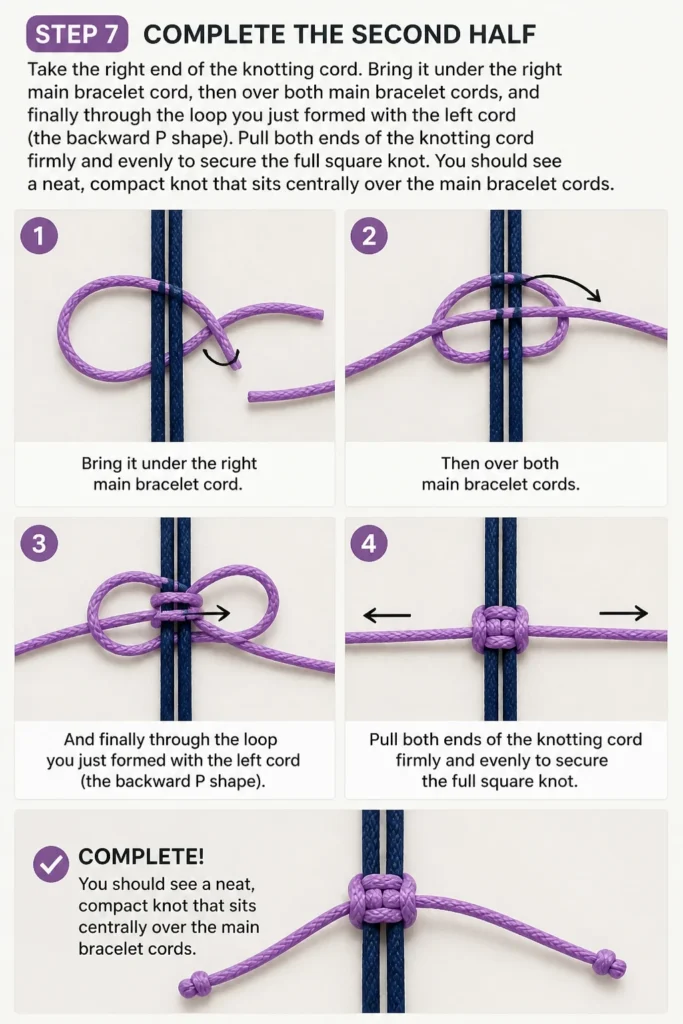
Pull both ends of the knotting cord firmly and evenly to secure the full square knot. You should see a neat, compact knot that sits centrally over the main bracelet cords.
Step 8: Test and Repeat (Optional)
Gently try to slide the newly formed knot along the main bracelet cords. It should move freely but offer some resistance, holding its position when not actively adjusted.
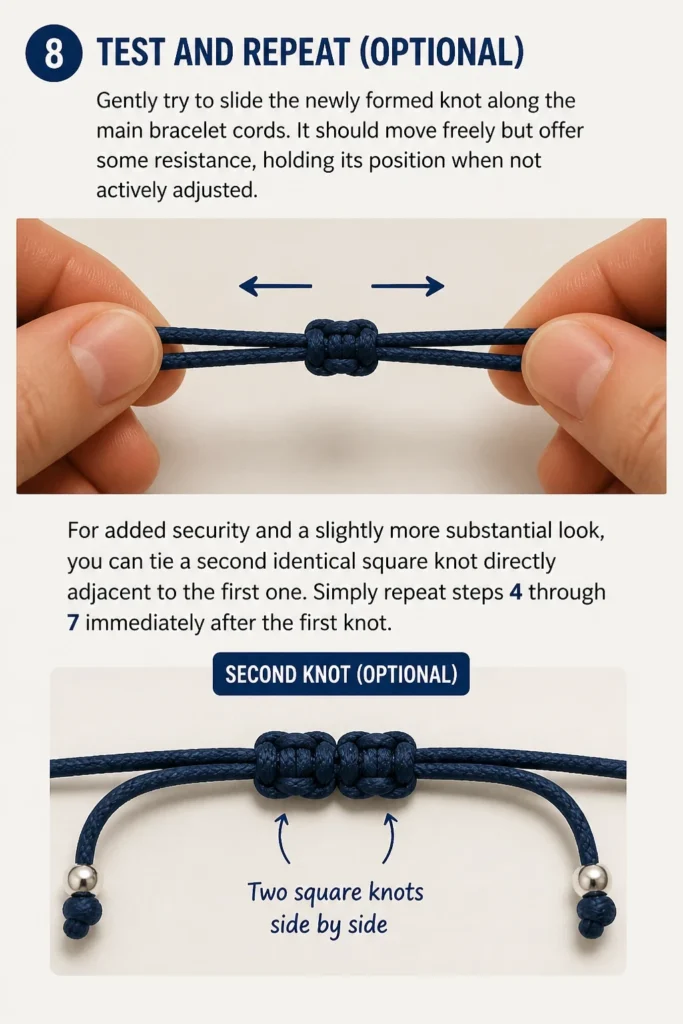
For added security and a slightly more substantial look, you can tie a second identical square knot directly adjacent to the first one. Simply repeat steps 4 through 7 immediately after the first knot.
Step 9: Trim and Finish the Knotting Cord
Carefully trim the excess ends of your knotting cord. Leave a small tail of about 2-3 millimeters on each side of the knot; trimming too close can cause the knot to unravel.
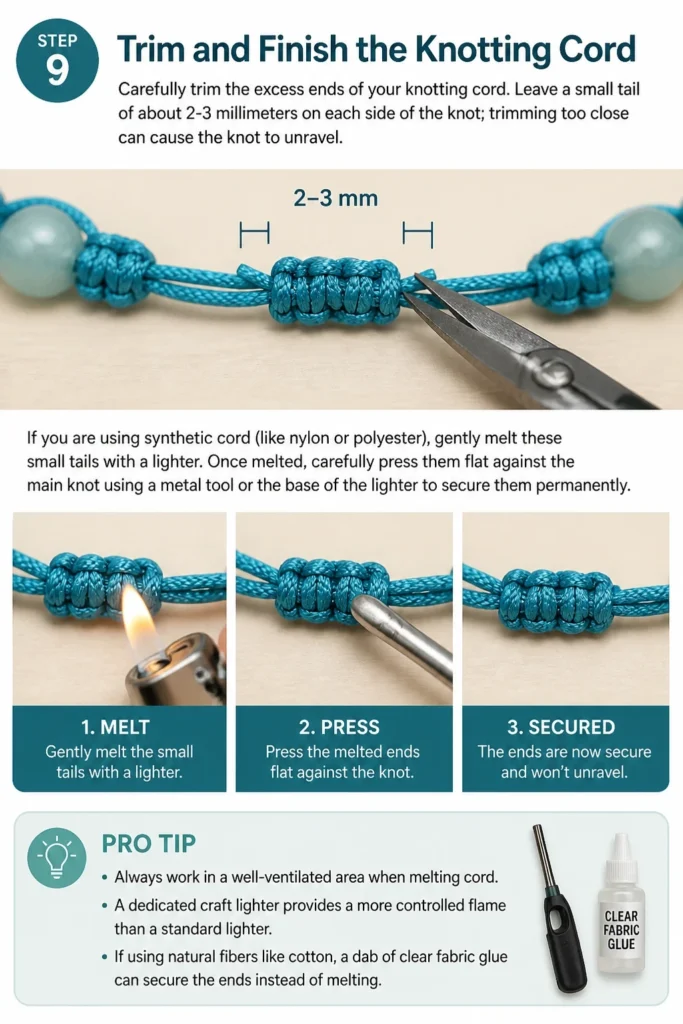
If you are using synthetic cord (like nylon or polyester), gently melt these small tails with a lighter. Once melted, carefully press them flat against the main knot using a metal tool or the base of the lighter to secure them permanently.
Pro Tip: Always work in a well-ventilated area when melting cord. A dedicated craft lighter provides a more controlled flame than a standard lighter. If using natural fibers like cotton, a dab of clear fabric glue can secure the ends instead of melting.
Step 10: Final Adjustments and Enjoyment
Once the knot is finished and secured, perform one last check of the bracelet’s adjustability. The main cords should glide smoothly through the knot, allowing for easy resizing.
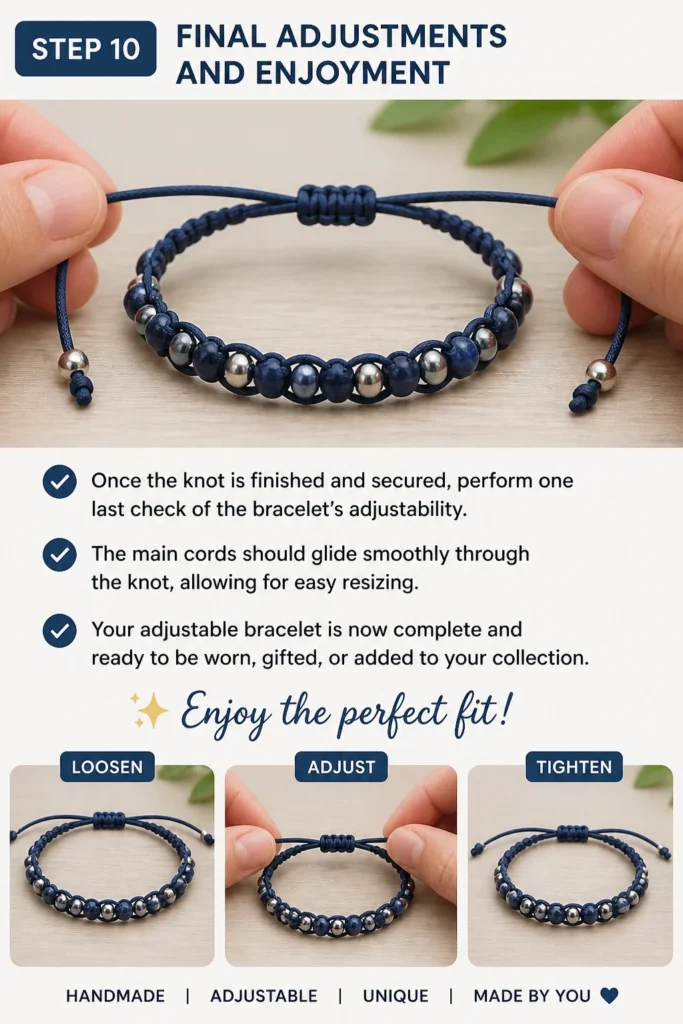
Your adjustable bracelet is now complete and ready to be worn, gifted, or added to your collection. Enjoy the perfect fit!
Common Mistakes to Avoid
Uneven Cord Tension
Pulling one side of the knotting cord tighter than the other results in a lopsided or weak knot. This can make the knot difficult to slide or cause it to come undone over time.
Always pull both ends of the knotting cord with equal pressure when tightening each half of the square knot. This ensures a balanced, strong, and smooth-sliding mechanism.
Incorrect Knot Direction
Failing to alternate the starting side (right then left, or vice versa) for each half of the square knot will prevent it from forming correctly. You’ll end up with a series of half-hitch knots that don’t lock together.
Be mindful to start one half of the knot from the right side and the subsequent half from the left side. This alternating pattern is crucial for creating a secure and functional square knot.
Trimming Too Close
Cutting the knotting cord tails too short, especially without proper melting or gluing, leaves insufficient material to secure the knot. The ends can easily slip out, causing the entire knot to unravel.
Always leave a small tail of 2-3 millimeters when trimming. This provides enough material to melt and press securely or to apply a small amount of glue, ensuring the knot’s longevity.
Using the Wrong Cord Type
Attempting to use cords that are either too stiff, too slippery, or too thick for the desired knot can lead to frustration. Stiff cords are hard to manipulate, while slippery ones don’t hold knots well.
Opt for cords specifically designed for jewelry making, such as waxed cotton, nylon, or satin rattail. These materials offer the right balance of flexibility, grip, and durability for adjustable knots.
Troubleshooting
Knot Won’t Slide Smoothly
If your adjustable knot feels stiff or refuses to slide easily along the main cords, several factors could be at play. The tension might be too tight, or the cords themselves could be binding.
Try gently loosening the knot slightly by wiggling it; sometimes, the knotting cords are pulled with excessive force. Ensure the main cords are not twisted and that you’re using a relatively smooth cord type that allows for easy movement.
Knot Comes Undone
A knot that unravels indicates a fundamental issue with its construction or finishing. This usually happens if the square knot wasn’t tied correctly or if the ends weren’t secured.
Carefully review the steps for tying the square knot, paying close attention to the alternating sides. If using synthetic cord, ensure the melted ends are properly fused and pressed flat against the main knot for maximum security.
Bracelet is Too Loose/Tight
If, after making the knot, the overall bracelet is still too loose or too tight, the initial overlap of your main cords might be incorrect. The adjustable knot allows for a range, but the base size needs to be close.
Before tying the adjustable knot, measure the circumference of the wrist and ensure your main bracelet cords, when overlapped, create a starting size that’s comfortable. Adjust the overlap to achieve a larger or smaller initial fit.
Key Takeaways
- Mastering the adjustable knot adds immense versatility and customizability to your jewelry creations.
- Consistent and even tension throughout the knot-tying process is crucial for a strong, smooth-sliding mechanism.
- The square knot, with its alternating pattern, is the ideal choice for creating a secure and functional adjustable bracelet knot.
- Always test the knot’s ability to slide and its overall security before trimming and permanently finishing the ends.
- The type of cord you select significantly impacts the knot’s performance, durability, and how you finish the ends.
- Practice is key; the more you tie adjustable knots, the more professional and effortless your results will become.
Frequently Asked Questions
What types of cord work best for adjustable knots?
For beginners, waxed cotton, nylon, or satin rattail cords are highly recommended. These materials offer good grip, resist fraying, and can often be melted for a clean finish, making them ideal for adjustable knotting.
Can I use this adjustable knot for other jewelry projects?
Absolutely! This versatile sliding knot, typically a square knot, is perfect for necklaces, anklets, and even some macrame projects where adjustability is desired. Its simplicity and effectiveness make it a go-to technique.
How do I make the knot itself smaller or larger?
The size of the adjustable knot is primarily determined by the thickness of the knotting cord you use. Using a thinner cord will result in a smaller, more delicate knot, while a thicker cord creates a more prominent one.
Is melting the cord ends safe?
Melting synthetic cord ends can be safe if done with proper precautions. Always use a dedicated craft lighter, work in a well-ventilated area, and keep a cup of water nearby. Exercise extreme caution to avoid burns.
Our Top Recommended Finds
- Waxed Cotton Cord Assortment: This provides a variety of colors and thicknesses, perfect for experimenting and finding your preferred style. It’s durable and holds knots exceptionally well.
- Precision Craft Scissors: Sharp, small scissors are invaluable for making clean, precise cuts close to your knots, ensuring a professional finish. Dull scissors can fray cord ends.
- Mini Butane Torch or Craft Lighter: Far more controlled than a standard lighter, these tools allow for precise melting of synthetic cord ends, creating a neat and secure seal without excess charring.
Elevate Your Craft: The Power of Perfect Fit
You’ve now mastered a fundamental skill in jewelry making: the adjustable bracelet knot. This simple technique opens up a world of possibilities for your creative projects.
Experiment with different cord colors, textures, and added beads to personalize your designs even further. Consider making a matching set or crafting a thoughtful, perfectly fitting gift for someone special.
Embrace the satisfaction of creating beautiful, functional jewelry that fits everyone perfectly. Your next amazing adjustable bracelet is just a few knots away!
Beginner-friendly templates, step-by-step guides,
and weekly project ideas in your inbox.