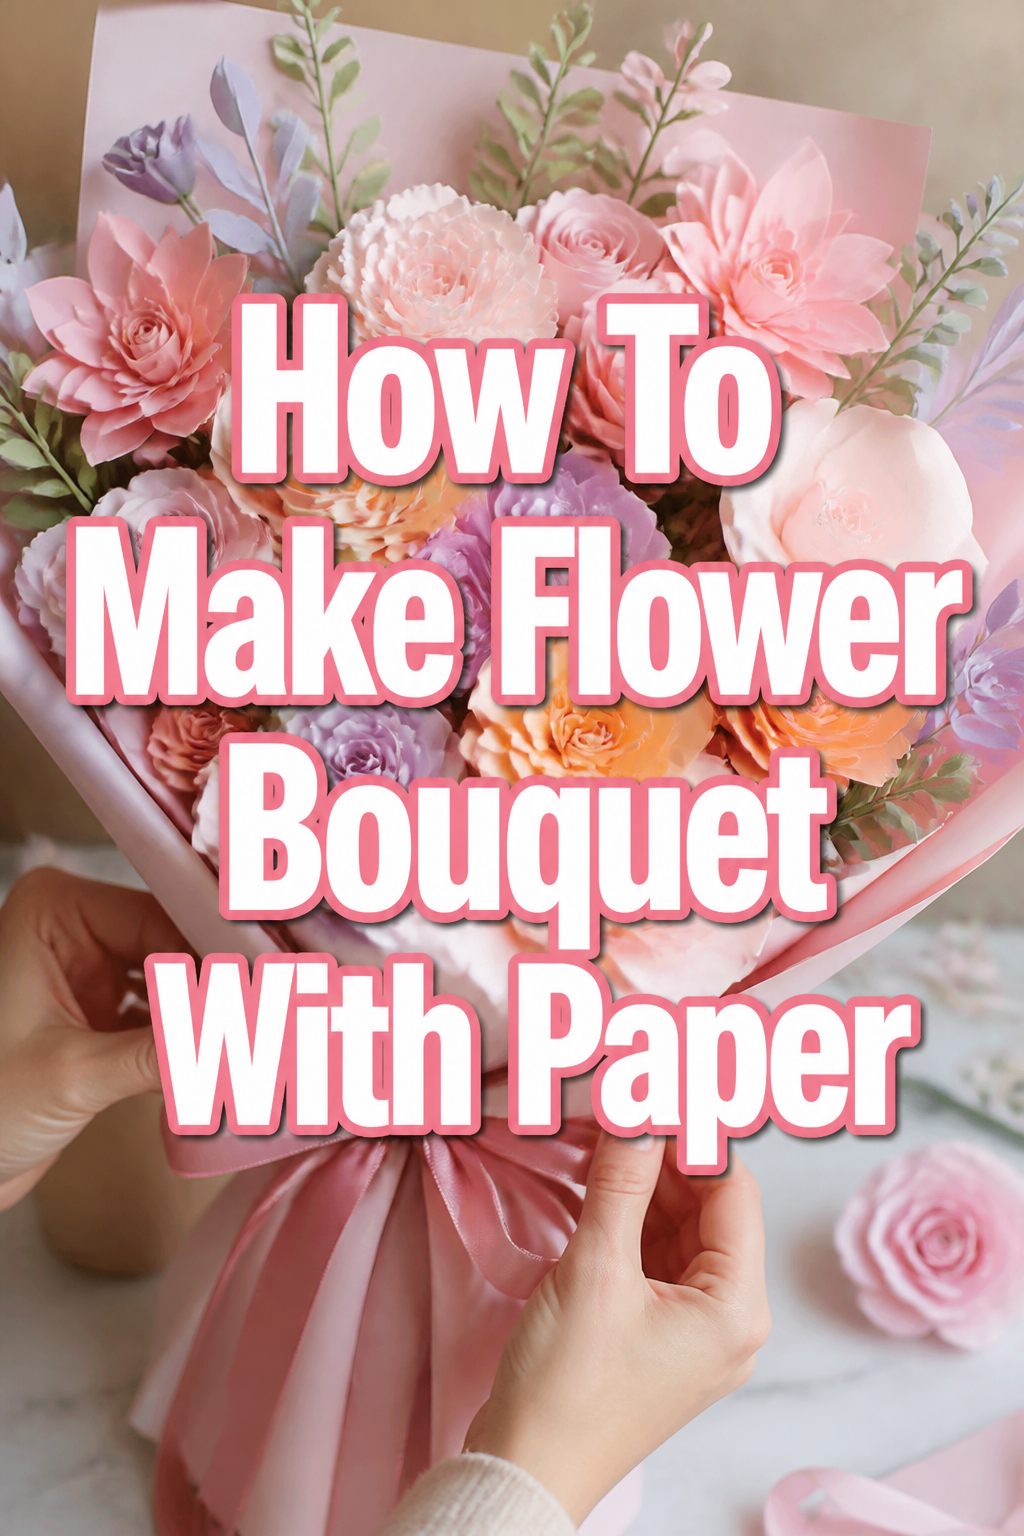
🌸 How To Make Flower Bouquet With Paper

Beginner-friendly templates, step-by-step guides,
and weekly project ideas in your inbox.
I remember the first time I held a paper flower bouquet I’d made myself. The feeling of creating something so beautiful and lasting, just from sheets of paper, was truly magical. This guide comes from years of experimenting with different papers and techniques, aiming to make that same joy accessible to you.
You’re about to discover how simple it is to craft stunning paper blooms that never wilt. Let’s transform ordinary paper into an extraordinary work of art you’ll be proud to display or gift.
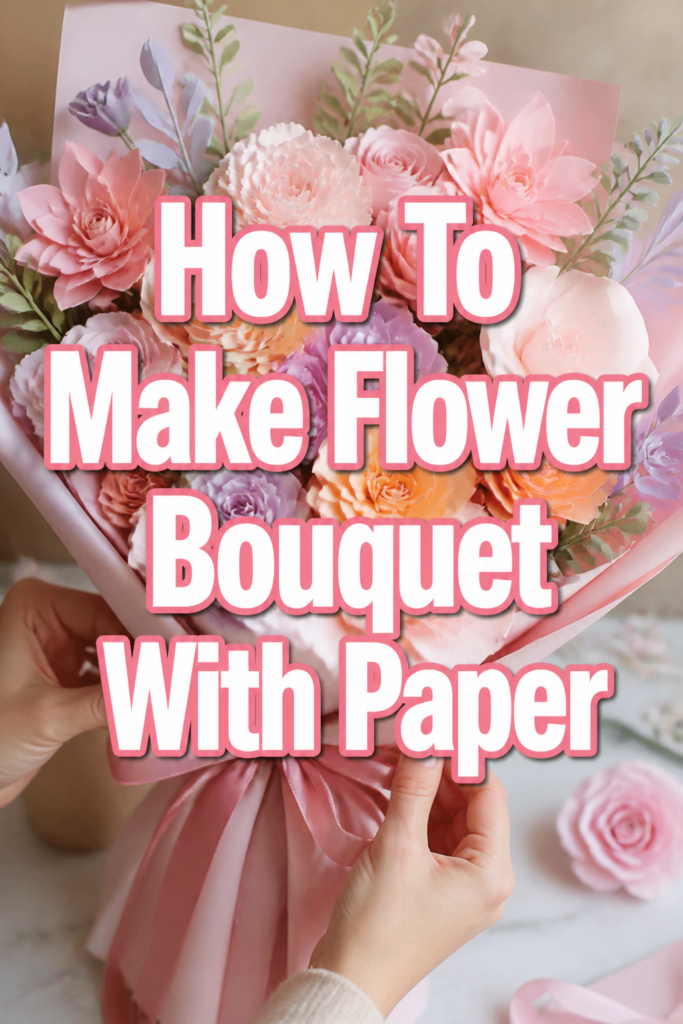
Quick Overview
This guide will walk you through creating a beautiful, lasting paper flower bouquet from start to finish. You’ll learn essential techniques for cutting, shaping, and assembling paper into realistic floral arrangements. By the end, you’ll have a gorgeous, handmade bouquet perfect for any occasion or decoration.
- Time needed: 2-4 hours (depending on bouquet size and complexity)
- Difficulty: Intermediate
- What you’ll need: Cardstock, scissors, glue, floral wire, floral tape, ruler, pencil
Step-by-Step Instructions
Step 1: Gather Your Materials
Before you begin crafting, gather all your necessary supplies. Having everything within reach will make the process smoother and more enjoyable. A well-prepared workspace helps maintain focus and efficiency.
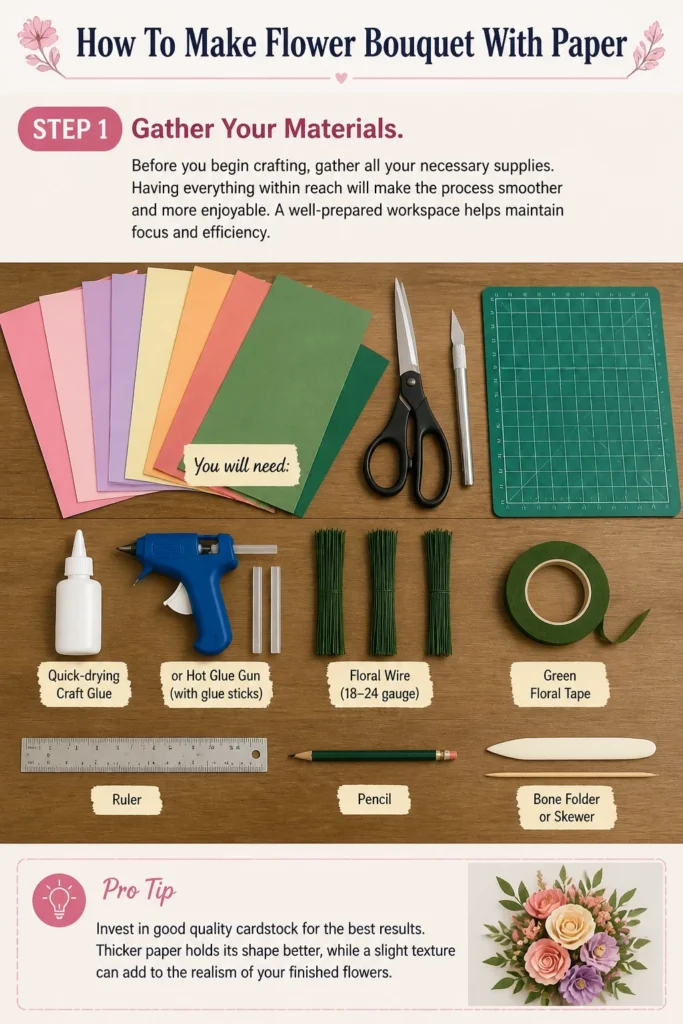
You will need a variety of colored cardstock, ideally 65-100lb weight, for your petals and leaves. Prepare sharp scissors, a craft knife for intricate cuts, and a cutting mat to protect your surfaces. Gather quick-drying craft glue or a hot glue gun with glue sticks, along with floral wire in various gauges (18-24 gauge) and green floral tape. Don’t forget a ruler, pencil, and a bone folder or skewer for shaping.
Pro Tip: Invest in good quality cardstock for the best results. Thicker paper holds its shape better, while a slight texture can add to the realism of your finished flowers.
Step 2: Choose Your Flowers and Templates
Decide which types of flowers you want to include in your bouquet. Roses, peonies, daisies, and hydrangeas are popular choices and offer varied textures. Consider the overall look you want to achieve, whether it’s a uniform theme or a mix of different blooms.
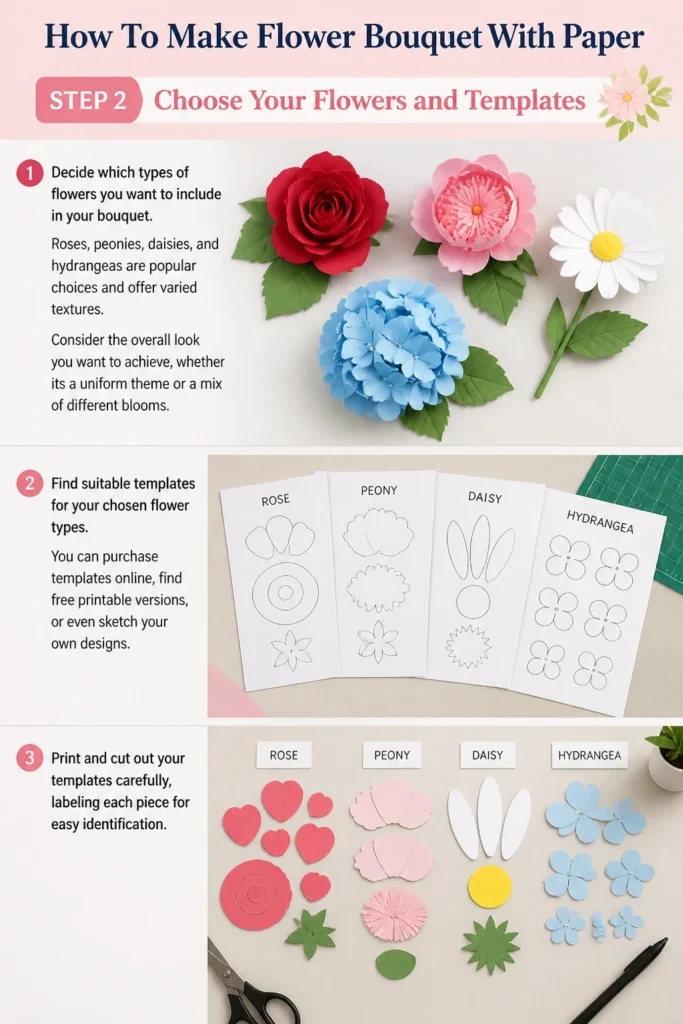
Find suitable templates for your chosen flower types. You can purchase templates online, find free printable versions, or even sketch your own designs. Print and cut out your templates carefully, labeling each piece for easy identification.
Step 3: Cut Your Petals and Leaves
Carefully trace your chosen templates onto the appropriate colored cardstock. Use a pencil with a light touch to avoid leaving deep indentations. For precise cuts, utilize sharp scissors or a craft knife, especially for smaller, more intricate shapes.
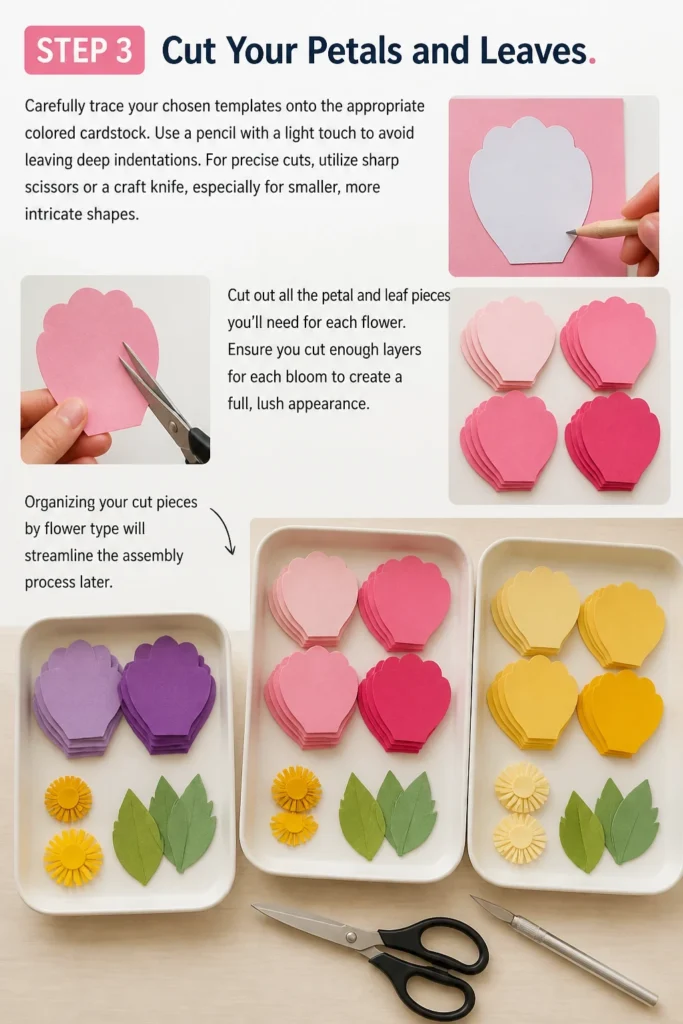
Cut out all the petal and leaf pieces you’ll need for each flower. Ensure you cut enough layers for each bloom to create a full, lush appearance. Organizing your cut pieces by flower type will streamline the assembly process later.
Step 4: Shape Your Petals
This step is crucial for adding dimension and realism to your paper flowers. Gently curl the edges of your petals using a bone folder, skewer, or the edge of your scissors. Experiment with different curling techniques—some petals might need a gentle outward curl, while others benefit from an inward curve or a slight fold at the base.
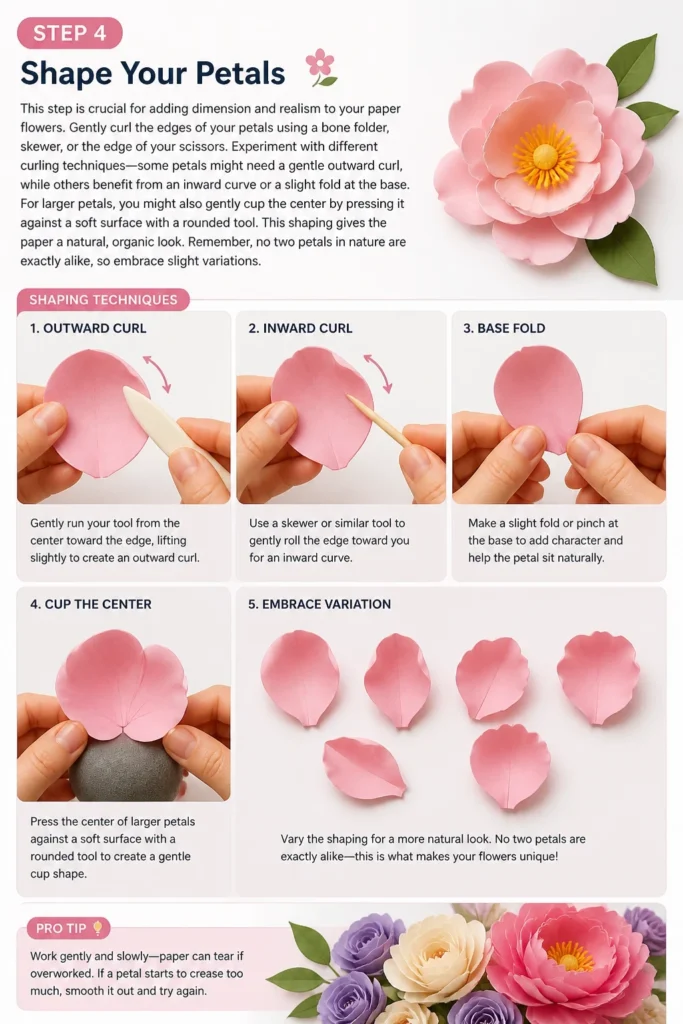
For larger petals, you might also gently cup the center by pressing it against a soft surface with a rounded tool. This shaping gives the paper a natural, organic look. Remember, no two petals in nature are exactly alike, so embrace slight variations.
Step 5: Assemble Individual Flowers
Begin by creating the center of your first flower. This often involves rolling a small strip of paper or layering the smallest petals tightly. Gradually attach subsequent layers of petals around this center, working from smallest to largest.
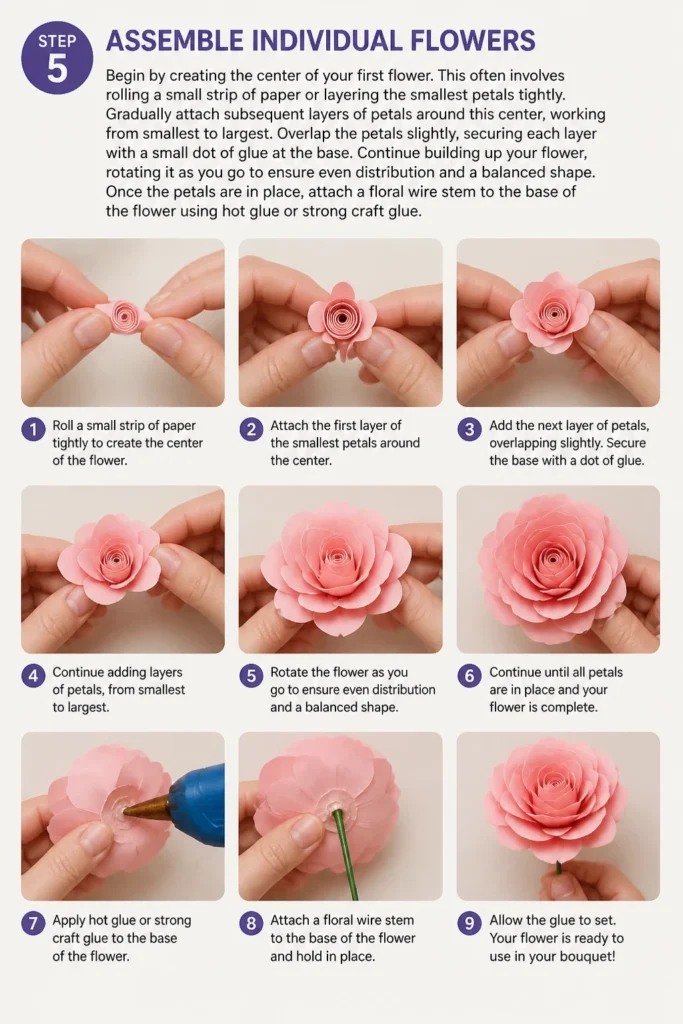
Overlap the petals slightly, securing each layer with a small dot of glue at the base. Continue building up your flower, rotating it as you go to ensure even distribution and a balanced shape. Once the petals are in place, attach a floral wire stem to the base of the flower using hot glue or strong craft glue.
Step 6: Create Your Foliage
Leaves and filler elements add essential greenery and depth to your bouquet. Trace and cut out various leaf shapes from green cardstock. Consider different shades of green for a more natural look.
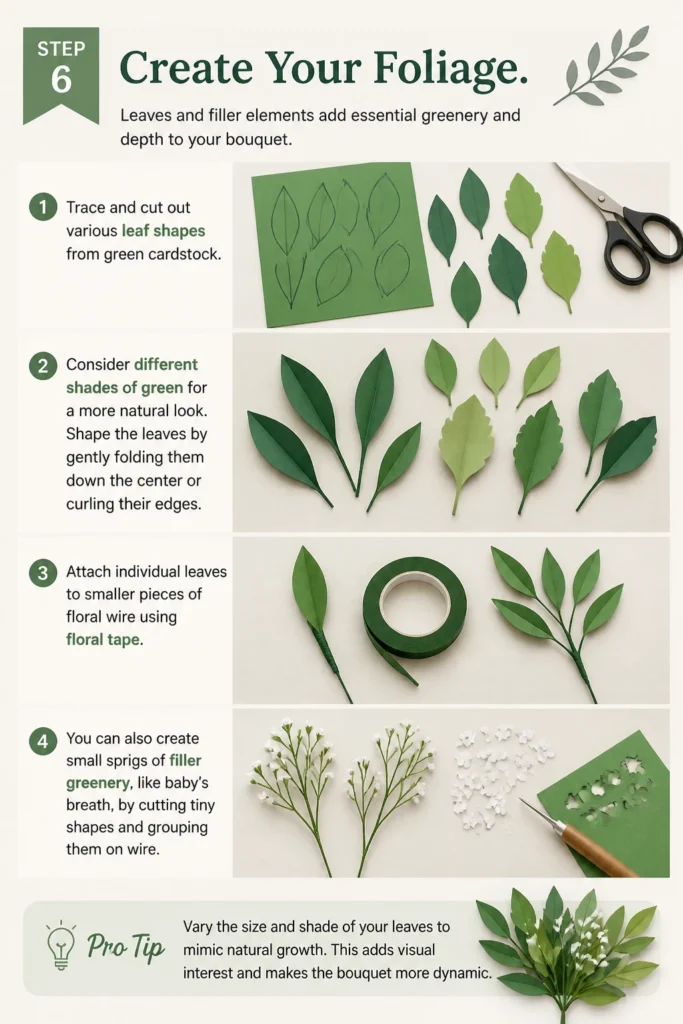
Shape the leaves by gently folding them down the center or curling their edges. Attach individual leaves to smaller pieces of floral wire using floral tape. You can also create small sprigs of filler greenery, like baby’s breath, by cutting tiny shapes and grouping them on wire.
Pro Tip: Vary the size and shade of your leaves to mimic natural growth. This adds visual interest and makes the bouquet more dynamic.
Step 7: Arrange Your Bouquet
Now it’s time to bring your individual flowers and foliage together. Start by selecting your focal flowers, typically the largest and most prominent blooms. Hold them together and begin adding smaller flowers and filler greens around them.
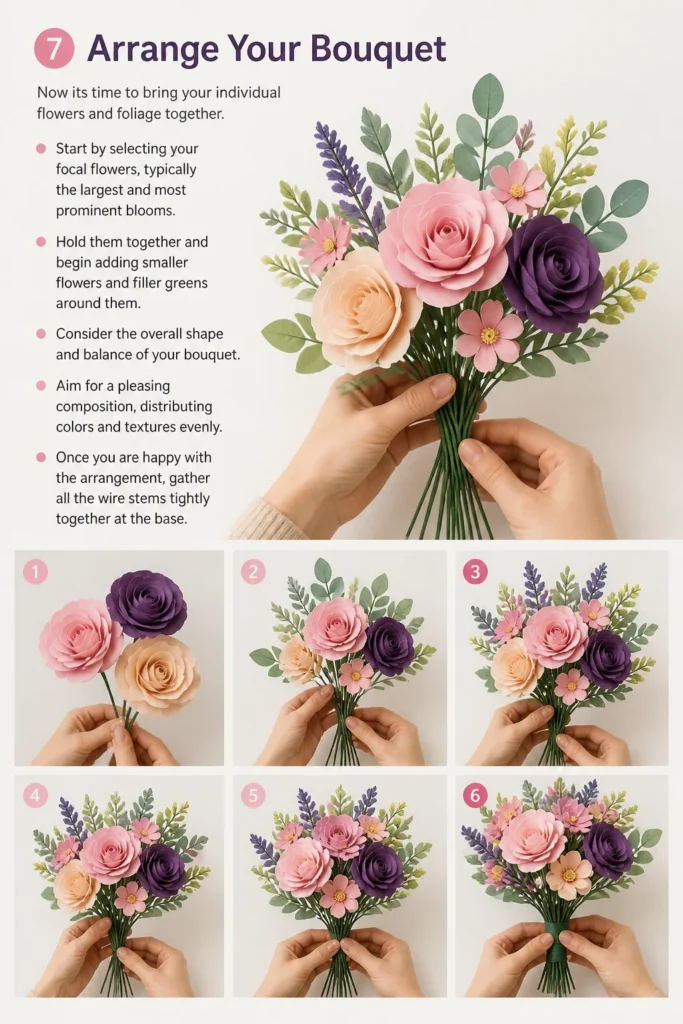
Consider the overall shape and balance of your bouquet. Aim for a pleasing composition, distributing colors and textures evenly. Once you are happy with the arrangement, gather all the wire stems tightly together at the base.
Step 8: Wrap and Finish
Secure the gathered stems firmly with floral tape, wrapping tightly from just below the flower heads down to the end of the wires. This creates a sturdy, unified stem for your bouquet. You can add extra layers of floral tape for a thicker, more comfortable handle.
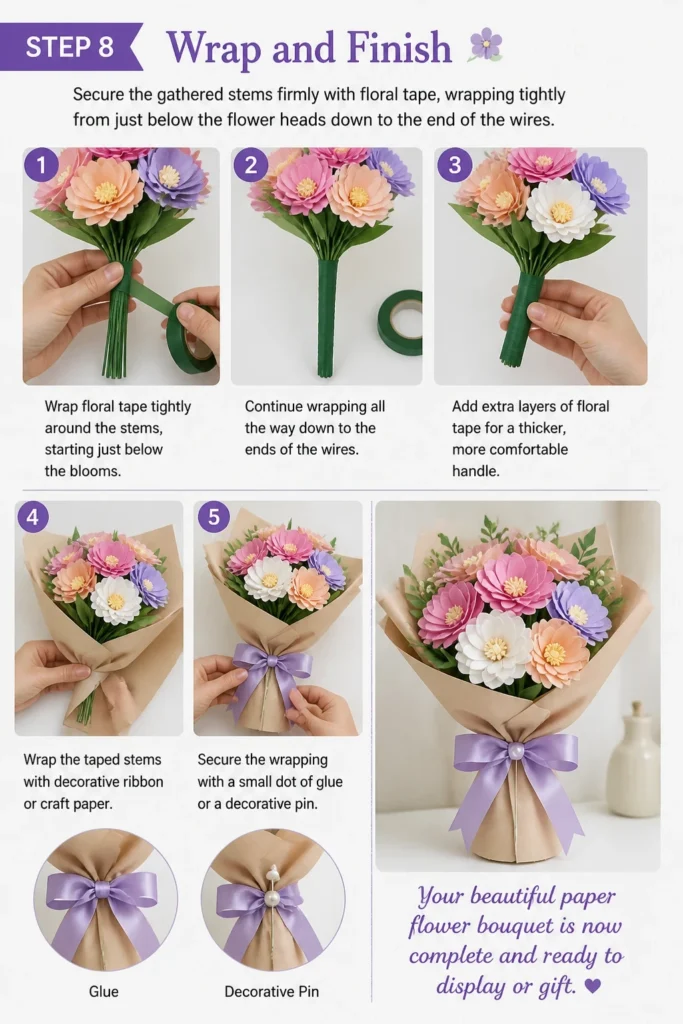
Finally, wrap the taped stems with decorative ribbon or craft paper. Secure the wrapping with a small dot of glue or a decorative pin. Your beautiful paper flower bouquet is now complete and ready to display or gift.
Common Mistakes to Avoid
Rushing the Cutting
Attempting to cut petals and leaves too quickly often leads to jagged edges and uneven shapes. These imperfections can detract significantly from the realism and overall beauty of your finished flowers. Take your time with each cut, ensuring smooth, precise lines. Patience here pays off by making the subsequent shaping and assembly much easier and more effective.
Using the Wrong Paper Weight
Selecting paper that is too thin (like printer paper) will result in flimsy petals that struggle to hold their shape, making your flowers look limp. Conversely, paper that is too thick (like heavy cardstock) can be difficult to cut and shape, often cracking when curled. Aim for a medium-weight cardstock, typically 65-100lb, which offers a good balance of pliability and durability. This weight allows for elegant shaping while maintaining structural integrity.
Over-gluing
Applying too much glue can create visible, messy residue that hardens and warps the delicate paper. Excess glue also adds unnecessary weight and can seep through, staining the paper’s surface. Use small, precise dots of glue, just enough to secure the pieces together. A hot glue gun is excellent for quick, strong bonds, but be mindful of the amount applied.
Ignoring Stem Support
Failing to use appropriate floral wire or not securing the stems properly will cause your flowers to droop or break off over time. A flimsy stem undermines the entire bouquet’s structure and appearance. Always choose a floral wire gauge that matches the size and weight of your flower, and ensure it’s firmly attached to the flower’s base. Reinforce with floral tape for added strength and a neat finish.
Troubleshooting
Flowers look flat or lifeless
If your finished flowers lack dimension, it’s often due to insufficient shaping of the petals. The paper might have been cut well, but not given enough curves and folds. Revisit your shaping techniques. Use a bone folder or the edge of a ruler to gently curl and cup individual petals, adding more depth.
You can also try adding more layers of petals to create a fuller, more voluminous bloom. Sometimes, simply adjusting the angle of the petals during assembly can make a significant difference. Don’t be afraid to gently reshape even after the flower is assembled.
Bouquet feels flimsy or unstable
A wobbly bouquet usually indicates that the individual flower stems are not strong enough or not properly secured together. Check the gauge of your floral wire; thinner wires might need to be doubled up for larger flowers. Ensure each flower is firmly attached to its wire stem.
When assembling the bouquet, wrap the floral tape very tightly around all the gathered stems. Start just below the flower heads and wrap all the way down. You can add an extra layer of floral tape or even a piece of thicker wire along the main stem for added rigidity.
Glue is visible or messy
Visible glue can detract from the elegance of your paper flowers. This often happens from applying too much glue or using a type that doesn’t dry clear. If using liquid craft glue, always apply very sparingly, using a toothpick or fine applicator.
If you’re using a hot glue gun, practice using small, quick dabs to avoid stringing and excess. Choose clear-drying craft glue whenever possible. For existing visible glue, you might be able to carefully scrape away excess dried glue with a craft knife or strategically place a small petal or leaf to cover it.
Key Takeaways
- Patience and precision in cutting are fundamental for creating realistic paper flowers.
- Selecting the correct paper weight and type significantly impacts the final look and durability.
- Effective petal shaping is crucial for adding dimension, texture, and a natural appearance to each bloom.
- Properly securing floral wire stems ensures your flowers are sturdy and maintain their position in the bouquet.
- Thoughtful arrangement of flowers and foliage creates a balanced, aesthetically pleasing composition.
- Experimentation with colors, styles, and techniques allows for unique and personalized paper bouquets.
Frequently Asked Questions
What is the best type of paper for making paper flowers?
The best paper for paper flowers is typically cardstock, ranging from 65lb to 100lb. This weight offers a good balance of durability and flexibility, allowing the paper to hold its shape after being cut and curled. Different textures and finishes, like metallic or textured cardstock, can also add unique effects to your blooms.
Can I make these paper bouquets waterproof or water-resistant?
Unfortunately, paper flowers are not inherently waterproof. While you can apply sealants or varnishes to make them somewhat water-resistant, they will not withstand direct contact with water and can still be damaged by humidity. It’s best to keep paper bouquets away from moisture and direct sunlight to ensure their longevity.
How long do paper flower bouquets last?
When properly cared for, paper flower bouquets can last indefinitely. Unlike fresh flowers, they won’t wilt or fade over time. Keep them out of direct sunlight to prevent color fading and away from excessive humidity. A light dusting now and then is usually all they need to stay beautiful for years.
Can I use a cutting machine, like a Cricut or Silhouette, for this project?
Absolutely! Using a cutting machine can significantly speed up the cutting process and achieve incredibly precise, intricate petal shapes. Many templates for paper flowers are available in SVG or other digital formats, making them perfect for machine cutting. This is a great option if you plan to make many flowers or complex designs.
Our Top Recommended Finds
- Precision Craft Knife Set: Essential for intricate cuts and delicate shapes, offering more control than scissors for fine details.
- High-Quality Glue Gun (with fine tip): Provides quick, strong bonds for assembling flowers and attaching stems, with a fine tip for precise application.
- Floral Wire Assortment (18, 20, 22, 24 gauge): A variety of gauges ensures you have the right strength of wire for different flower sizes and stem support.
Your Paper Bouquet Journey Awaits!
You now have all the knowledge and steps to create your very own stunning paper flower bouquet. Imagine the joy of gifting a handmade creation or adorning your home with everlasting blooms. This craft is not just about making flowers; it’s about mindful creation, patience, and the satisfaction of seeing your vision come to life.
Don’t hesitate to start your first paper flower project today. Experiment with different paper types, colors, and flower designs. Perhaps your next step is to explore creating a single, oversized bloom or a tiny miniature arrangement. The world of paper floristry is vast and beautiful, ready for your creative touch.
Beginner-friendly templates, step-by-step guides,
and weekly project ideas in your inbox.