👙 How To Make A Push Up Bra DIY

Beginner-friendly templates, step-by-step guides,
and weekly project ideas in your inbox.
Have you ever wished for a little extra lift or a more customized fit from your existing bras? Many of us have felt that desire.
I’ve personally experimented with various methods to enhance my lingerie, seeking both comfort and the perfect silhouette. This guide shares practical, tested techniques to achieve that push-up effect at home.
You can create a custom solution that fits your unique needs and style. Let’s get started on transforming your everyday bra into something special.
Quick Overview
This guide will walk you through the process of adding a push-up effect to an existing bra or creating custom inserts. You will learn practical techniques using accessible materials.
- Time needed: 1-3 hours (depending on method and experience)
- Difficulty: Beginner to Intermediate
- What you’ll need: An existing bra, fabric scraps or old t-shirts, foam padding or silicone inserts, scissors, needle and thread or fabric glue, pins, measuring tape.
Step-by-Step Instructions
Step 1: Gather Your Materials and Plan Your Approach
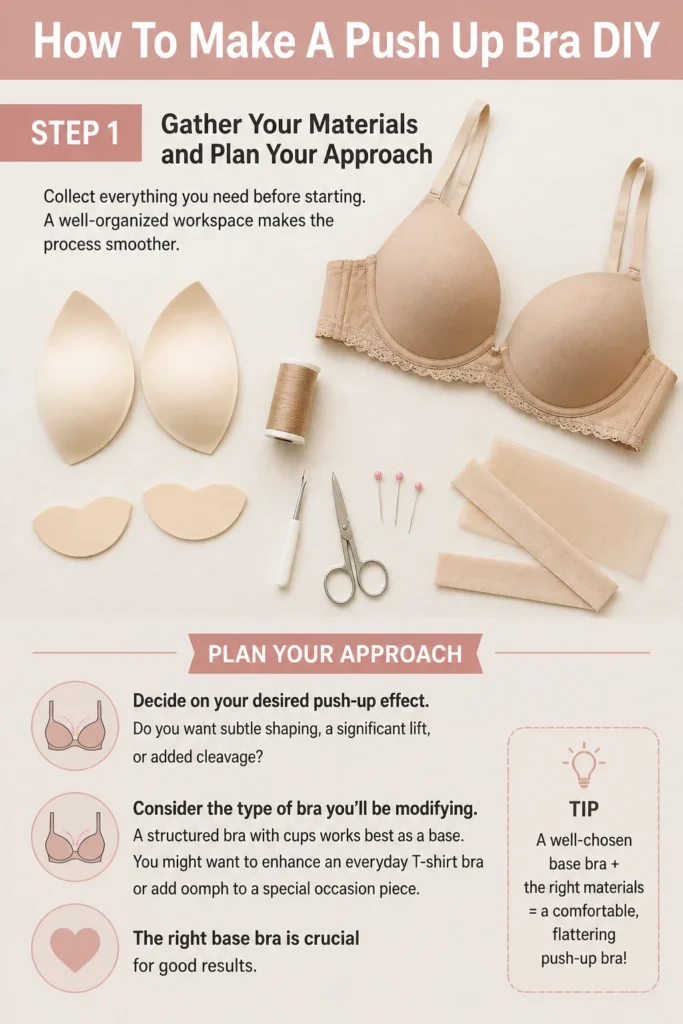
Collect everything you need before starting. A well-organized workspace makes the process smoother.
Decide on your desired push-up effect. Do you want subtle shaping, a significant lift, or added cleavage?
Consider the type of bra you’ll be modifying. A structured bra with cups works best as a base.
You might want to enhance an everyday T-shirt bra or add oomph to a special occasion piece. The right base bra is crucial for good results.
Step 2: Choose Your Base Bra
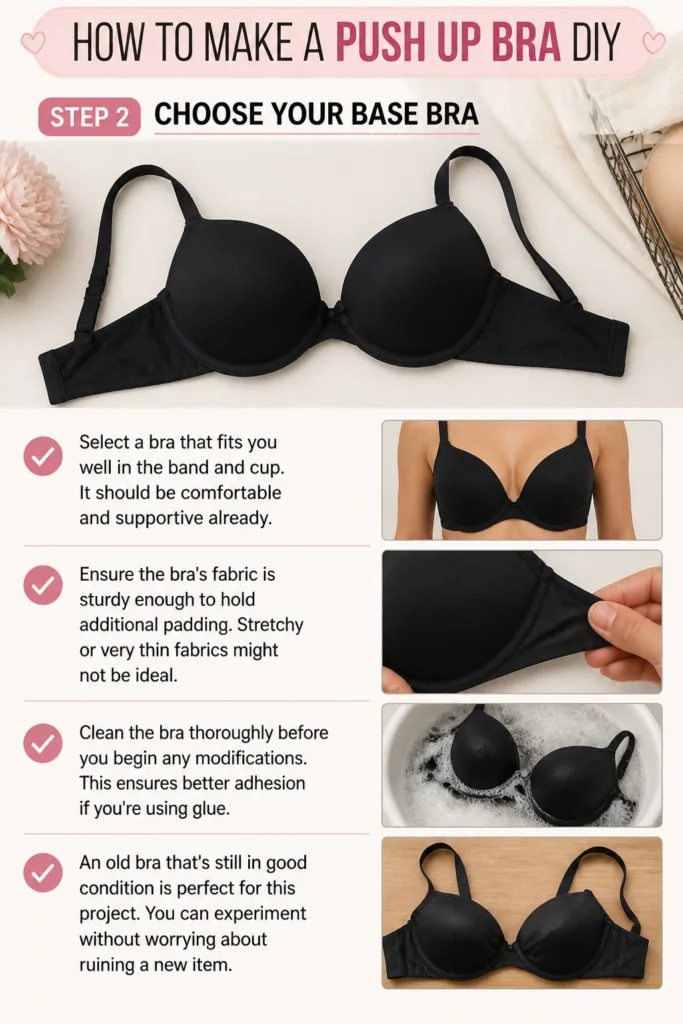
Select a bra that fits you well in the band and cup. It should be comfortable and supportive already.
Ensure the bra’s fabric is sturdy enough to hold additional padding. Stretchy or very thin fabrics might not be ideal.
Clean the bra thoroughly before you begin any modifications. This ensures better adhesion if you’re using glue.
An old bra that’s still in good condition is perfect for this project. You can experiment without worrying about ruining a new item.
Step 3: Create or Select Your Padding Material
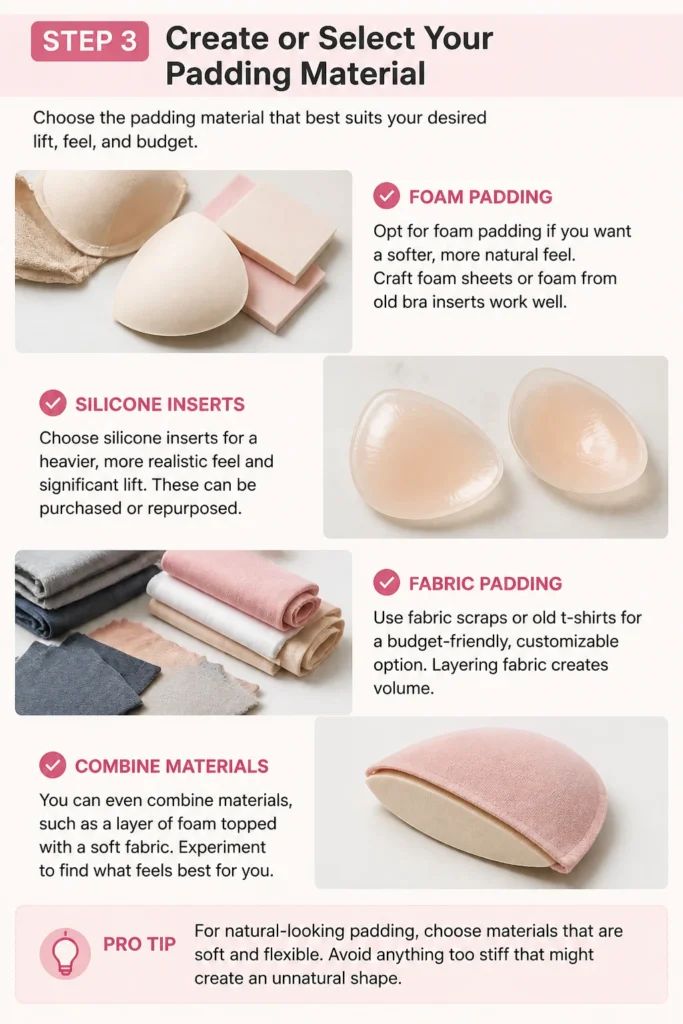
Opt for foam padding if you want a softer, more natural feel. Craft foam sheets or foam from old bra inserts work well.
Choose silicone inserts for a heavier, more realistic feel and significant lift. These can be purchased or repurposed.
Use fabric scraps or old t-shirts for a budget-friendly, customizable option. Layering fabric creates volume.
You can even combine materials, such as a layer of foam topped with a soft fabric. Experiment to find what feels best for you.
Pro Tip: For natural-looking padding, choose materials that are soft and flexible. Avoid anything too stiff that might create an unnatural shape.
Step 4: Shape and Size the Padding
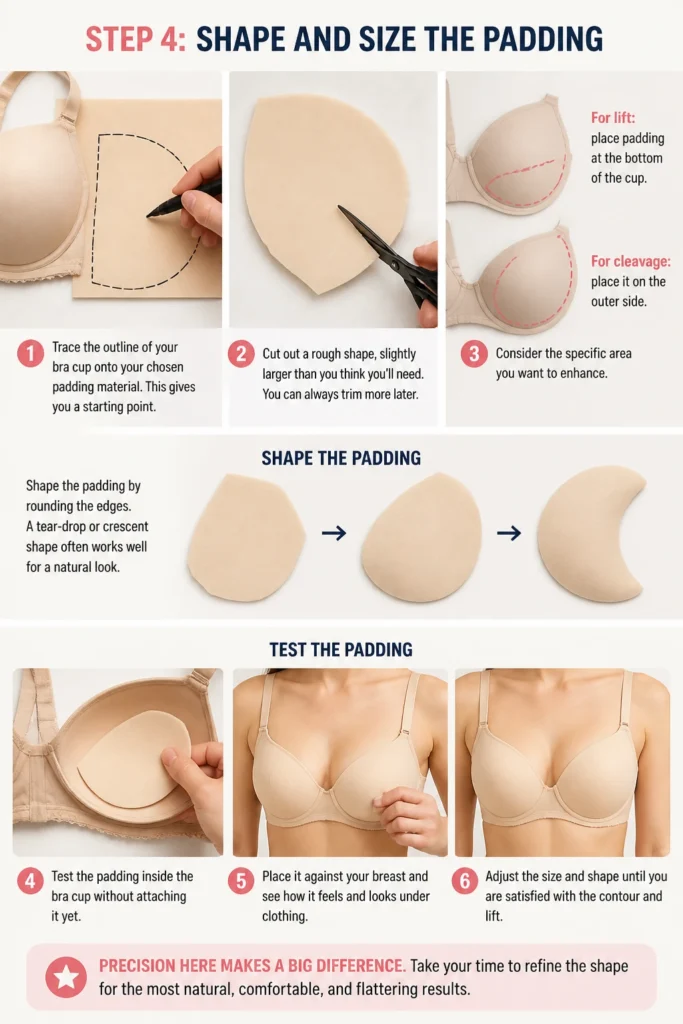
Trace the outline of your bra cup onto your chosen padding material. This gives you a starting point.
Cut out a rough shape, slightly larger than you think you’ll need. You can always trim more later.
Consider the specific area you want to enhance. For lift, place padding at the bottom of the cup. For cleavage, place it on the outer side.
Shape the padding by rounding the edges. A tear-drop or crescent shape often works well for a natural look.
Test the padding inside the bra cup without attaching it yet. Place it against your breast and see how it feels and looks under clothing.
Adjust the size and shape until you are satisfied with the contour and lift. Precision here makes a big difference.
Step 5: Insert or Attach the Padding
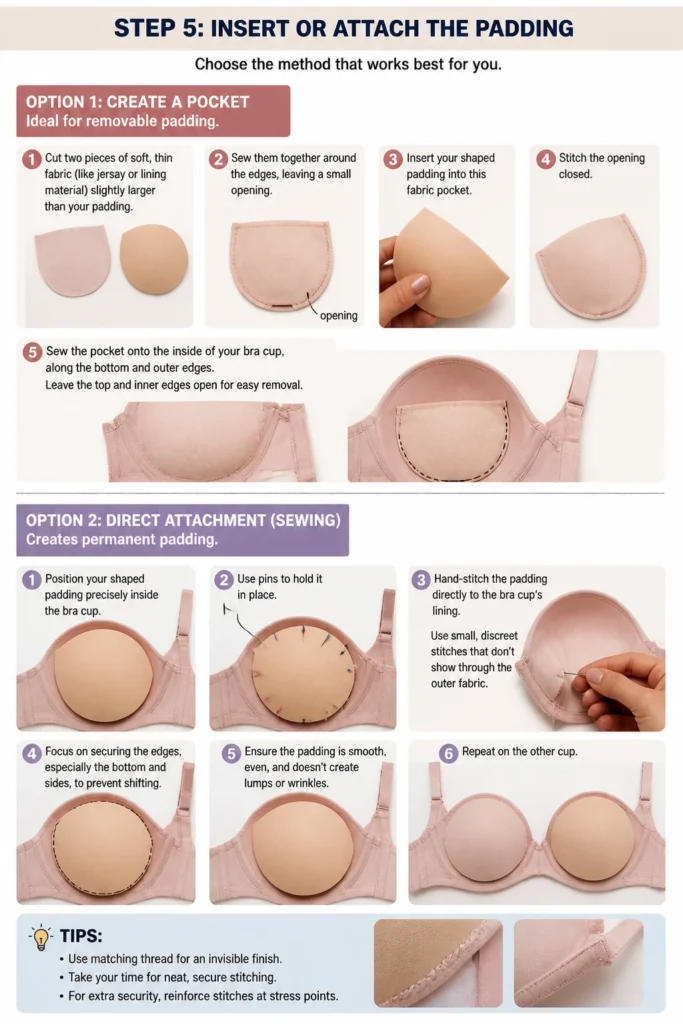
Option 1: Create a Pocket. This method is ideal for removable padding.
- Cut two pieces of soft, thin fabric (like jersey or lining material) slightly larger than your padding.
- Sew them together around the edges, leaving a small opening.
- Insert your shaped padding into this fabric pocket.
- Stitch the opening closed.
- Sew the pocket onto the inside of your bra cup, along the bottom and outer edges. Leave the top and inner edges open for easy removal.
Option 2: Direct Attachment (Sewing). This creates permanent padding.
- Position your shaped padding precisely inside the bra cup. Use pins to hold it in place.
- Hand-stitch the padding directly to the bra cup’s lining. Use small, discreet stitches that don’t show through the outer fabric.
- Focus on securing the edges, especially the bottom and sides, to prevent shifting.
Option 3: Direct Attachment (Fabric Glue). A quicker, permanent alternative.
- Apply a thin, even layer of fabric glue to one side of your padding.
- Carefully position the padding inside the bra cup.
- Press down firmly and hold for a few moments.
- Allow the glue to dry completely according to the manufacturer’s instructions. This usually takes several hours.
Pro Tip: If using fabric glue, choose one specifically designed for fabrics that will withstand washing. Test a small, inconspicuous area first to ensure it doesn’t stain or damage the bra material.
Step 6: Refine and Test Fit
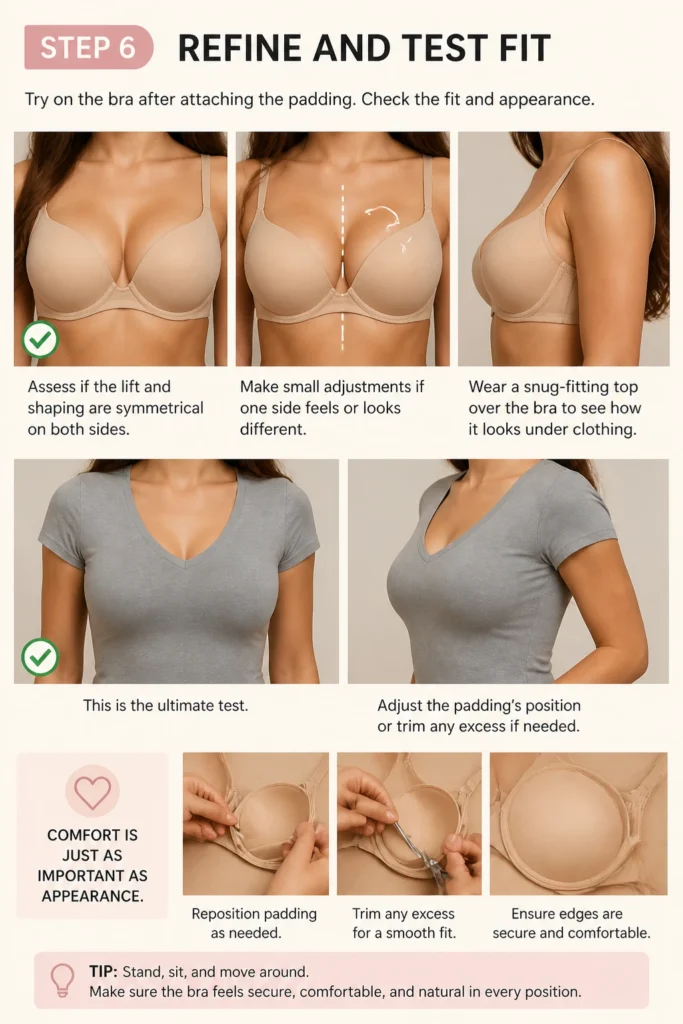
Try on the bra after attaching the padding. Check the fit and appearance.
Assess if the lift and shaping are symmetrical on both sides. Make small adjustments if one side feels or looks different.
Wear a snug-fitting top over the bra to see how it looks under clothing. This is the ultimate test.
Adjust the padding’s position or trim any excess if needed. Comfort is just as important as appearance.
Step 7: Finish Edges and Details
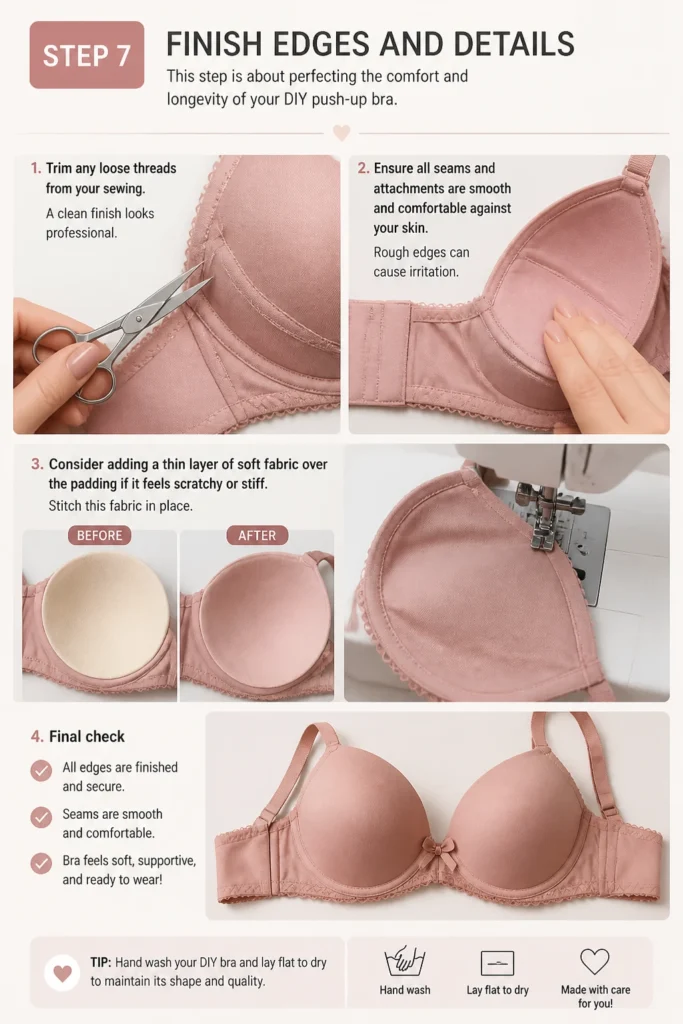
Trim any loose threads from your sewing. A clean finish looks professional.
Ensure all seams and attachments are smooth and comfortable against your skin. Rough edges can cause irritation.
Consider adding a thin layer of soft fabric over the padding if it feels scratchy or stiff. Stitch this fabric in place.
This step is about perfecting the comfort and longevity of your DIY push-up bra.
Step 8: Care for Your Modified Bra
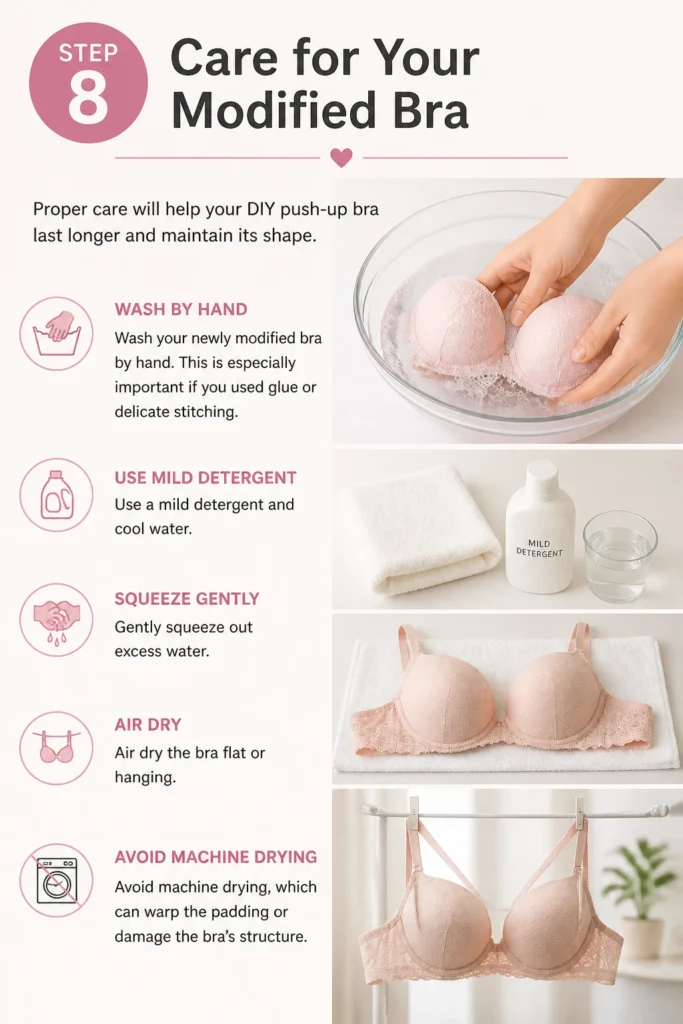
Wash your newly modified bra by hand. This is especially important if you used glue or delicate stitching.
Use a mild detergent and cool water. Gently squeeze out excess water.
Air dry the bra flat or hanging. Avoid machine drying, which can warp the padding or damage the bra’s structure.
Proper care will help your DIY push-up bra last longer and maintain its shape.
Common Mistakes to Avoid
Using Too Much Padding
Adding excessive padding can create an unnatural, bulky appearance. It might also make the bra uncomfortable and cause it to gape or distort its shape. Start with less padding than you think you need and gradually add more if desired.
Incorrect Padding Placement
Placing padding in the wrong spot won’t achieve the desired push-up effect and can look awkward. For lift, focus on the bottom of the cup. For cleavage enhancement, place padding towards the outer side of the cup, pushing inward. Experiment with placement before securing it permanently.
Choosing the Wrong Base Bra
A bra that is too small, too large, or lacks proper structure will not be a good candidate for modification. Adding padding to an ill-fitting bra will only amplify its existing problems, leading to discomfort and an unflattering silhouette. Always start with a well-fitting, supportive bra.
Rushing the Drying Process for Glue
If you use fabric glue, not allowing it to fully cure can lead to the padding detaching prematurely. It might also leave a sticky residue or weaken the bond over time. Always follow the glue manufacturer’s instructions for drying times, even if it means waiting overnight.
Troubleshooting
Padding Feels Uncomfortable or Bulky
This usually means the padding is too thick, too stiff, or incorrectly shaped. Try reducing the thickness of your padding by removing a layer or trimming it down. Reshape the edges to be smoother and more tapered. If using foam, ensure it’s a soft, flexible type.
Push-Up Effect Isn’t Noticeable
The padding might be too thin or placed incorrectly. If your padding is fabric-based, add more layers for increased volume. If using foam, try a slightly thicker piece. Experiment with moving the padding lower in the cup for more lift or further to the outer side for more cleavage.
Padding Shifts or Bunches
This indicates the padding isn’t securely attached. If you created a pocket, ensure the opening is small enough to hold the padding snugly. If sewn, reinforce your stitches, particularly around the edges that experience the most movement. For glued padding, reapply glue to loose areas and ensure proper drying.
Key Takeaways
- Start with a comfortable, well-fitting base bra for the best results.
- Choose padding materials that are soft, flexible, and appropriate for your desired effect.
- Shape and size your padding carefully, testing it for comfort and appearance before permanent attachment.
- Consider creating a fabric pocket for removable padding, offering versatility and easier washing.
- Attach padding securely, whether by sewing or using high-quality fabric glue.
- Always test the modified bra under clothing to ensure a smooth, natural look.
- Hand-wash your DIY push-up bra to preserve its shape and the integrity of your modifications.
Frequently Asked Questions
Can I make my push-up bra reversible?
Making a push-up bra truly reversible with padding is challenging due to the need for the padding to sit correctly against the breast. However, you can create removable padded inserts that can be placed in different bras, offering versatility. Focus on creating well-made, unattached pockets for the inserts.
What kind of fabric is best for covering the padding?
Soft, thin, and breathable fabrics are ideal for covering padding. Jersey knit, bra lining material, or even a soft t-shirt fabric works well. These materials prevent irritation and maintain a smooth silhouette under clothing. Avoid anything bulky or scratchy.
How do I make sure the padding is symmetrical?
To ensure symmetry, always cut both pieces of padding at the same time, using the first piece as a template for the second. When positioning, use a measuring tape to ensure they are at the same height and distance from the center of the bra. Try on the bra and adjust in front of a mirror.
Is it possible to add push-up padding to a bralette?
Adding push-up padding to a bralette is possible, but it depends on the bralette’s structure. If it has defined cups or a lining, you can follow similar steps. For very unstructured bralettes, the padding might not hold its shape or provide sufficient lift. Creating removable inserts is often the best approach for bralettes.
Our Top Recommended Finds
- High-Density Craft Foam Sheets: These provide a good balance of softness and structure for custom padding, easily cut and shaped.
- Fabric Fusion Permanent Fabric Adhesive: A reliable fabric glue that creates a strong, durable bond and withstands washing, perfect for no-sew options.
- Bra Extender Set: Useful for adjusting the band fit if your modifications make the bra feel slightly tighter around the chest.
Embrace Your Inner Designer
You now have the tools and knowledge to customize your bras and achieve the perfect lift. This project is more than just crafting; it’s about personalizing your comfort and confidence.
Don’t hesitate to experiment with different materials and techniques. Each attempt refines your skills and brings you closer to your ideal bra. Go ahead and start transforming your lingerie drawer today!
Beginner-friendly templates, step-by-step guides,
and weekly project ideas in your inbox.