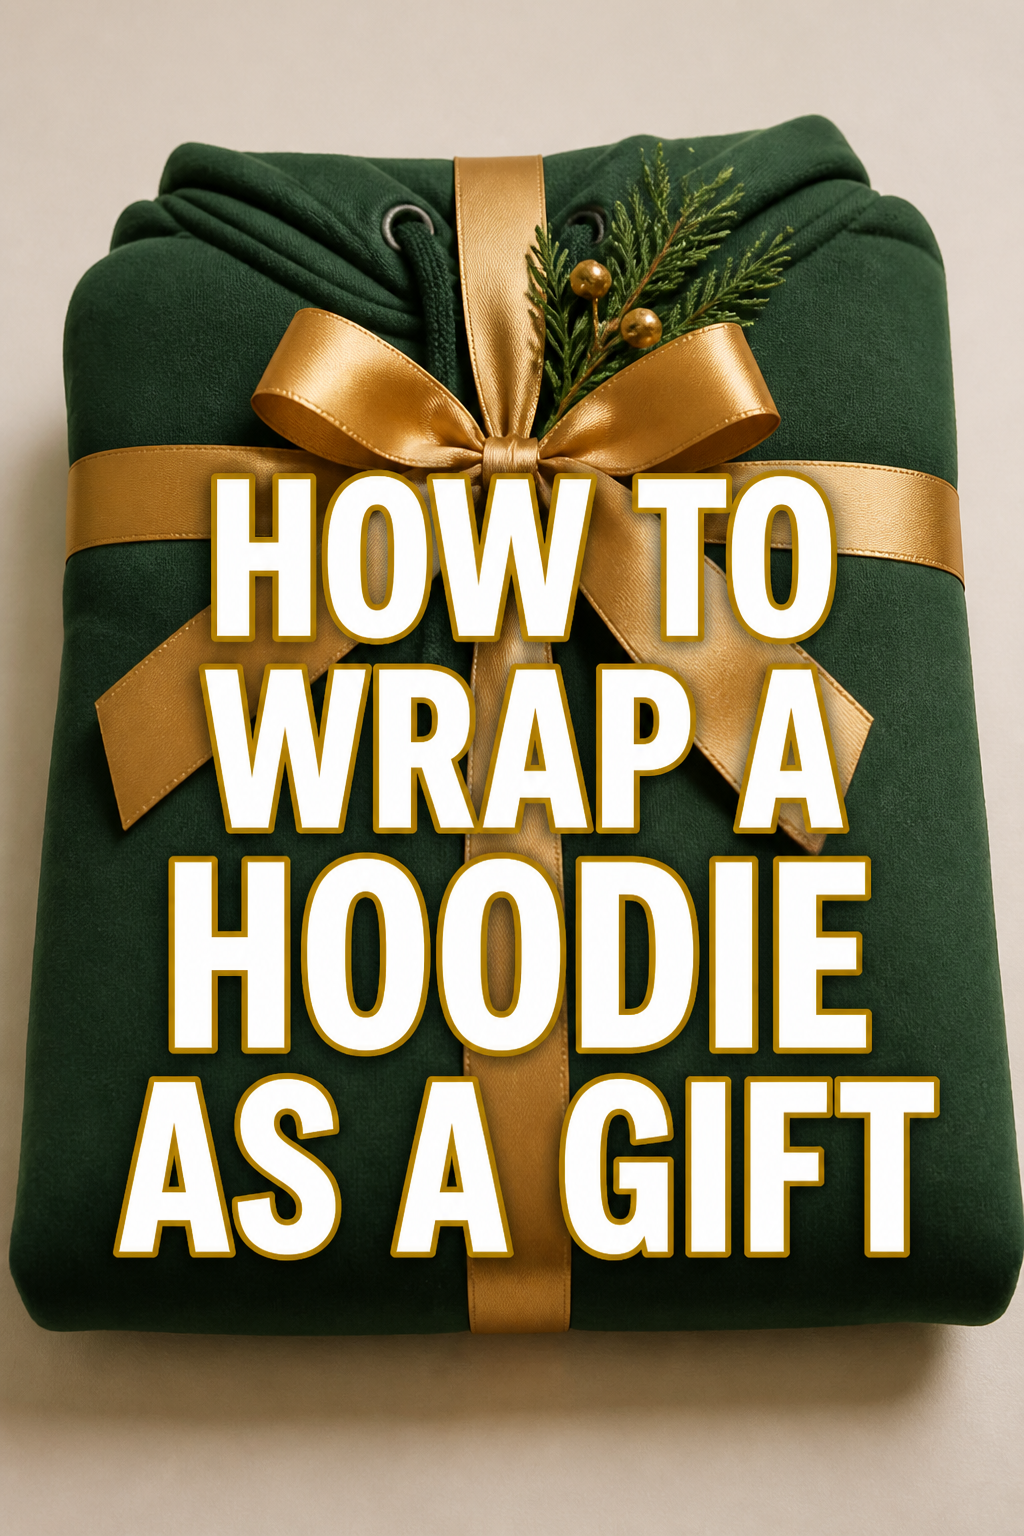
🎁 How To Wrap A Hoodie As A Gift

Beginner-friendly templates, step-by-step guides,
and weekly project ideas in your inbox.
There’s a special joy in giving a beautifully wrapped present.
It shows care, thought, and adds an extra layer of excitement before the reveal.
Having wrapped countless gifts, from the most awkward shapes to the softest fabrics, I’ve learned the tricks to make even a bulky hoodie look elegant and professional.
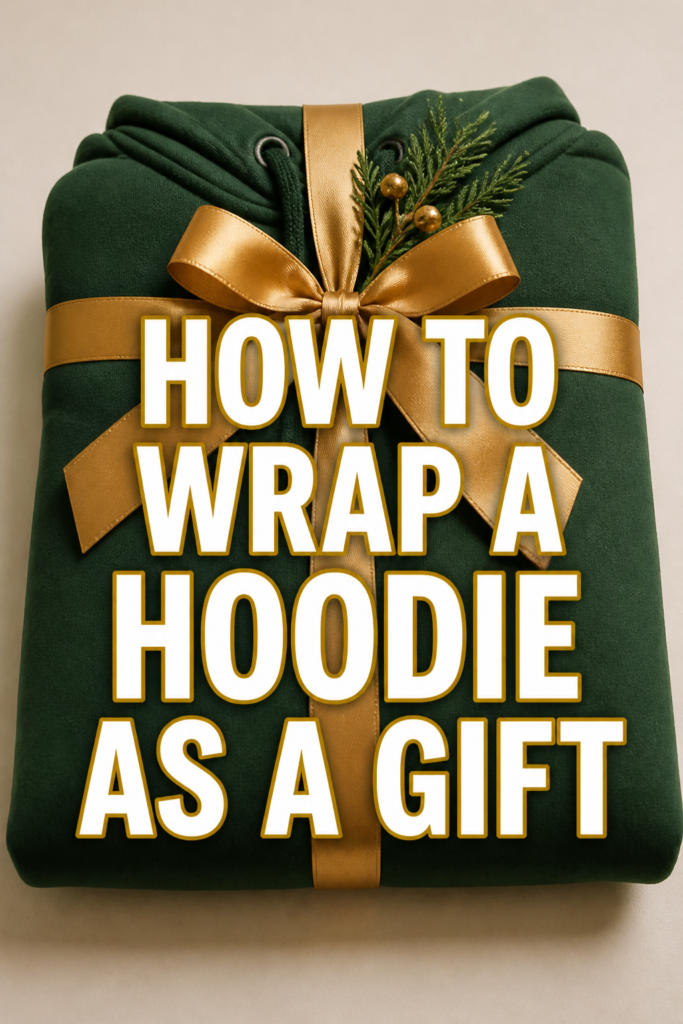
Quick Overview
This guide will transform your hoodie gift from a lumpy package into a perfectly presented surprise. You’ll master the art of neat folds, precise cuts, and elegant embellishments, ensuring your gift makes a memorable first impression.
- Time needed: 20-40 minutes (depending on experience)
- Difficulty: Beginner
- What you’ll need: Hoodie, wrapping paper, scissors, tape, ribbon, gift tag (optional)
Step-by-Step Instructions
Step 1: Gather Your Essential Supplies
Before you begin, lay out everything you’ll need. This prevents interruptions and makes the process smooth.
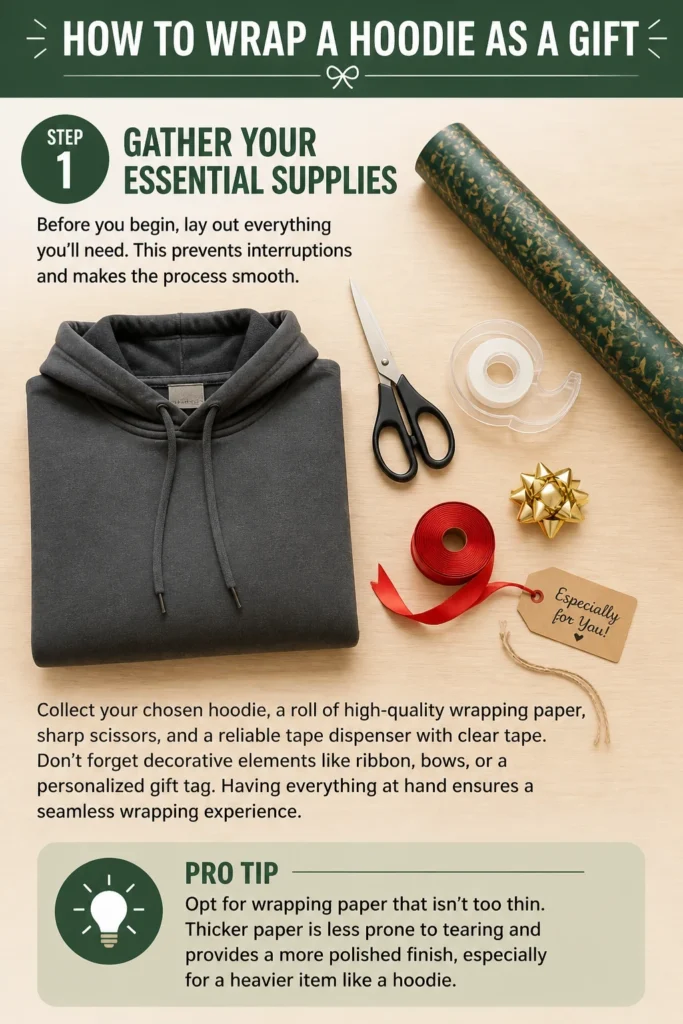
Collect your chosen hoodie, a roll of high-quality wrapping paper, sharp scissors, and a reliable tape dispenser with clear tape.
Don’t forget decorative elements like ribbon, bows, or a personalized gift tag. Having everything at hand ensures a seamless wrapping experience.
Pro Tip: Opt for wrapping paper that isn’t too thin. Thicker paper is less prone to tearing and provides a more polished finish, especially for a heavier item like a hoodie.
Step 2: Prepare the Hoodie for Wrapping
The key to a neat gift is a neatly folded item inside. This step is crucial for achieving crisp edges.
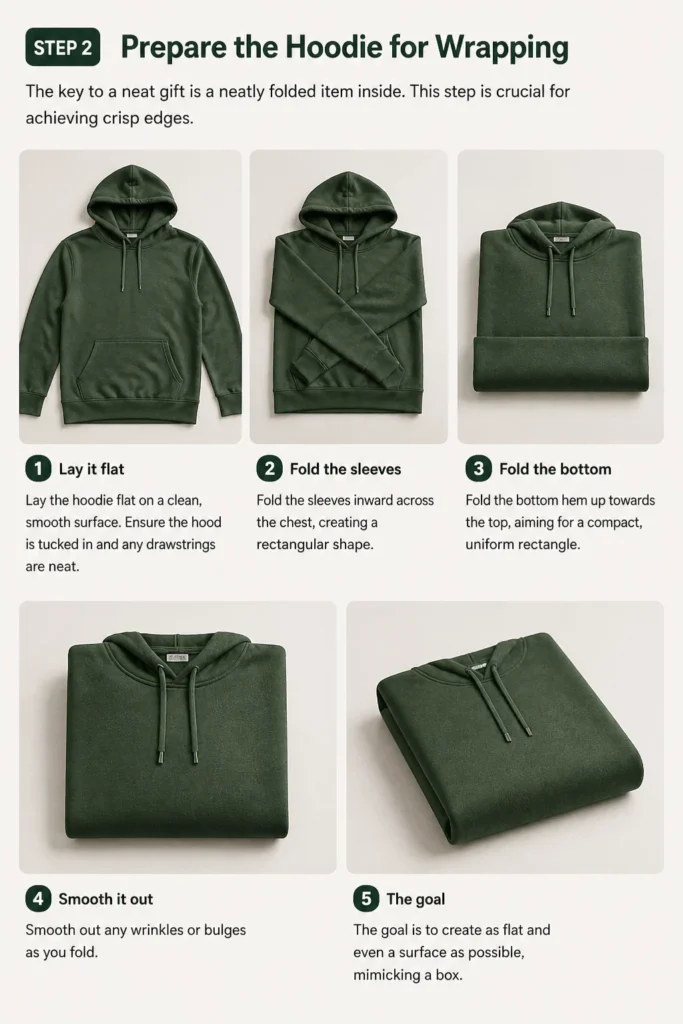
Lay the hoodie flat on a clean, smooth surface. Ensure the hood is tucked in and any drawstrings are neat.
Fold the sleeves inward across the chest, creating a rectangular shape. Then, fold the bottom hem up towards the top, aiming for a compact, uniform rectangle.
Smooth out any wrinkles or bulges as you fold. The goal is to create as flat and even a surface as possible, mimicking a box.
Step 3: Measure and Cut the Wrapping Paper
Accurate measurement prevents waste and ensures the paper fits perfectly without excessive bulk.
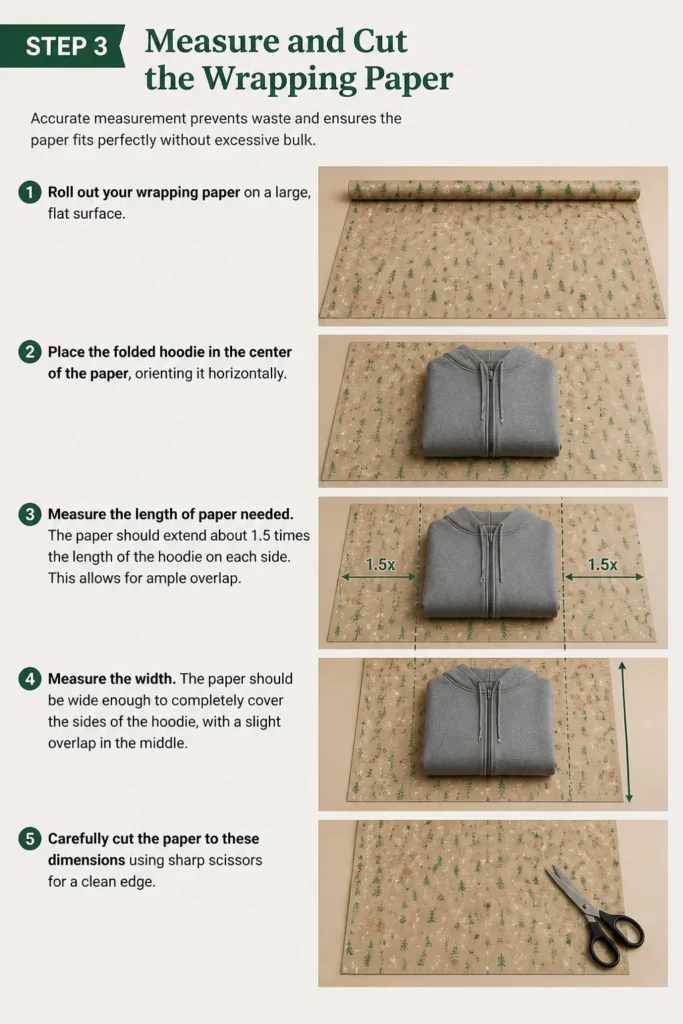
Roll out your wrapping paper on a large, flat surface. Place the folded hoodie in the center of the paper, orienting it horizontally.
Measure the length of paper needed. The paper should extend about 1.5 times the length of the hoodie on each side. This allows for ample overlap.
Measure the width. The paper should be wide enough to completely cover the sides of the hoodie, with a slight overlap in the middle. Carefully cut the paper to these dimensions using sharp scissors for a clean edge.
Step 4: Position the Hoodie and Make the First Fold
Proper positioning is vital for symmetrical wrapping.
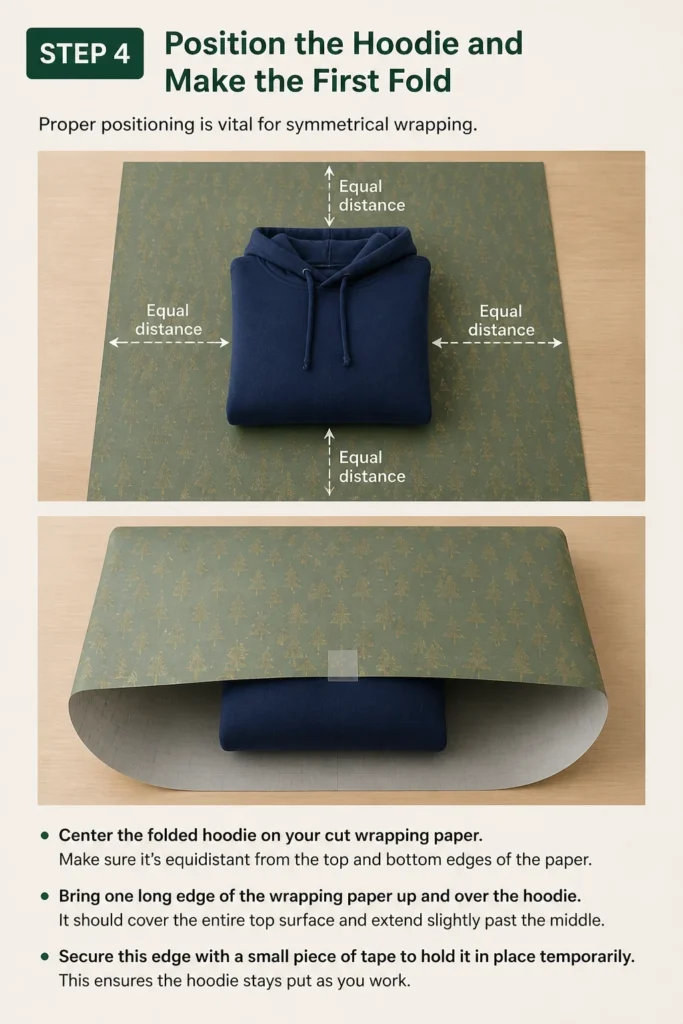
Center the folded hoodie on your cut wrapping paper. Make sure it’s equidistant from the top and bottom edges of the paper.
Bring one long edge of the wrapping paper up and over the hoodie. It should cover the entire top surface and extend slightly past the middle.
Secure this edge with a small piece of tape to hold it in place temporarily. This ensures the hoodie stays put as you work.
Step 5: Secure the Main Body of the Gift
This step creates the primary seam of your wrapped gift.
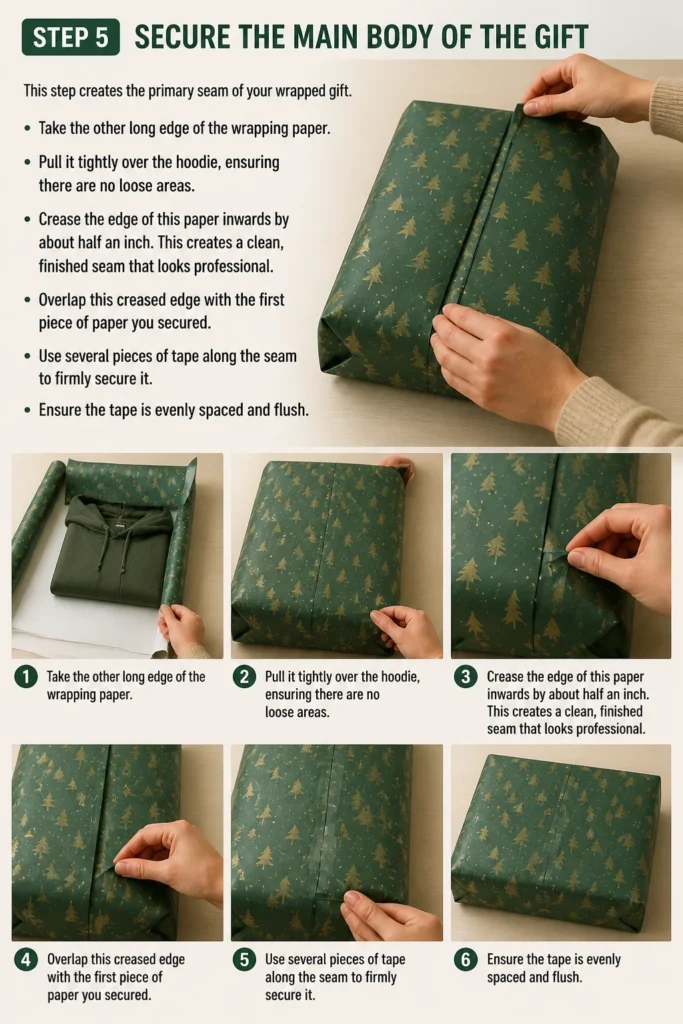
Take the other long edge of the wrapping paper. Pull it tightly over the hoodie, ensuring there are no loose areas.
Crease the edge of this paper inwards by about half an inch. This creates a clean, finished seam that looks professional.
Overlap this creased edge with the first piece of paper you secured. Use several pieces of tape along the seam to firmly secure it. Ensure the tape is evenly spaced and flush.
Step 6: Tackle the Ends: The “Envelope” Fold
Wrapping the ends neatly is where many people struggle, but the envelope fold makes it simple and elegant.
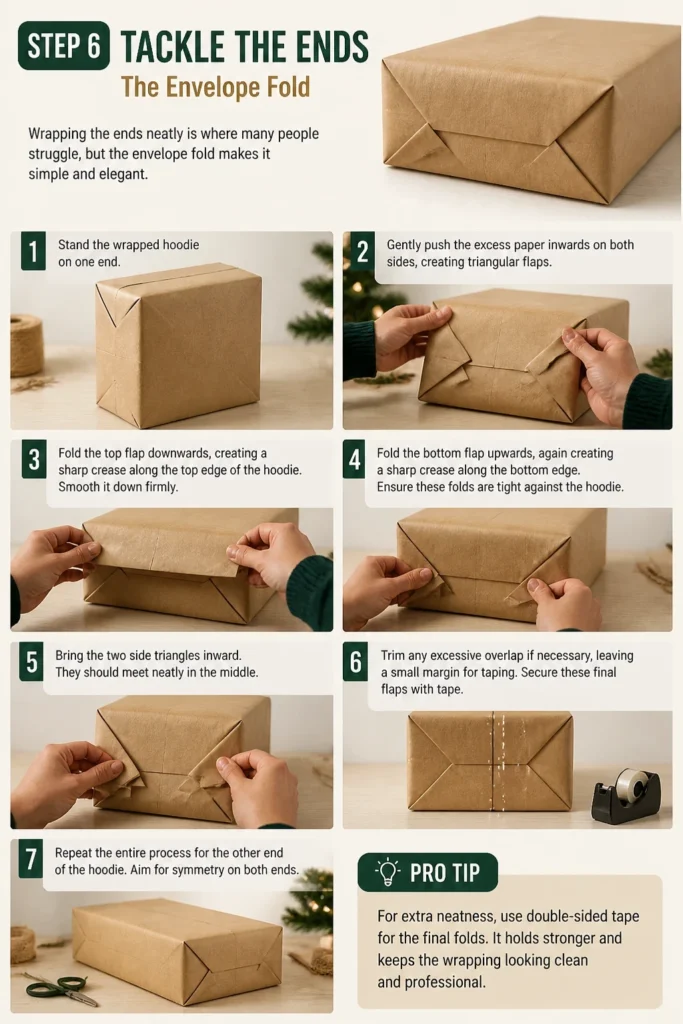
Stand the wrapped hoodie on one end. Gently push the excess paper inwards on both sides, creating triangular flaps.
Fold the top flap downwards, creating a sharp crease along the top edge of the hoodie. Smooth it down firmly.
Fold the bottom flap upwards, again creating a sharp crease along the bottom edge. Ensure these folds are tight against the hoodie.
Bring the two side triangles inward. They should meet neatly in the middle. Trim any excessive overlap if necessary, leaving a small margin for taping.
Secure these final flaps with tape. Repeat the entire process for the other end of the hoodie. Aim for symmetry on both ends.
Pro Tip: For extra neatness, use double-sided tape for the final flap on the ends. It creates an invisible seam, elevating the professional look of your gift.
Step 7: Add Ribbons and Embellishments
Now it’s time to add the finishing touches that make your gift truly special.
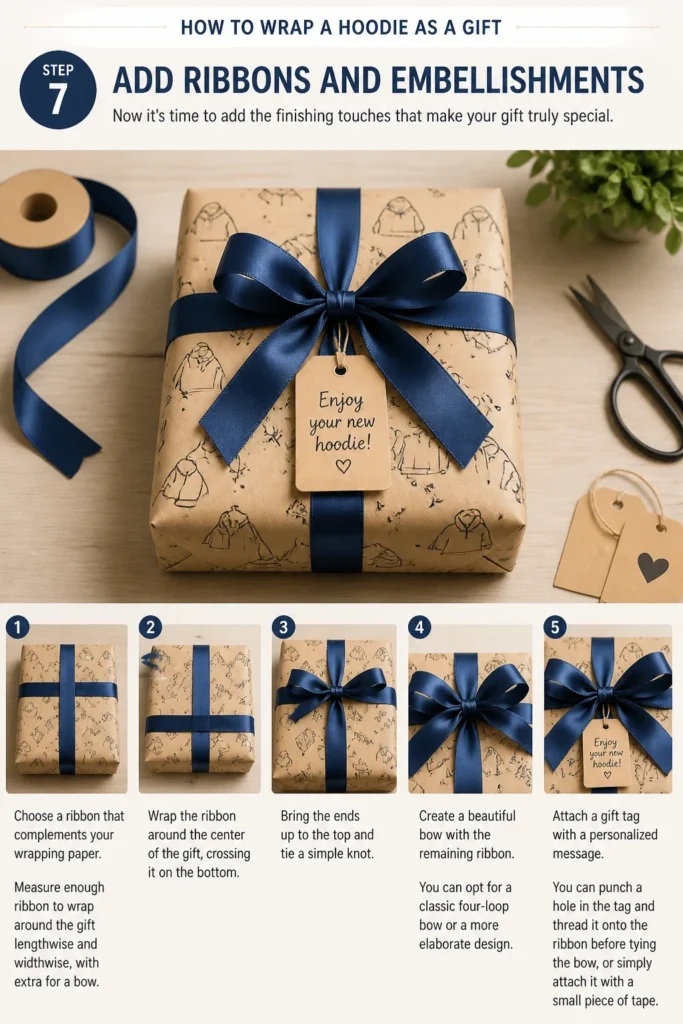
Choose a ribbon that complements your wrapping paper. Measure enough ribbon to wrap around the gift lengthwise and widthwise, with extra for a bow.
Wrap the ribbon around the center of the gift, crossing it on the bottom. Bring the ends up to the top and tie a simple knot.
Create a beautiful bow with the remaining ribbon. You can opt for a classic four-loop bow or a more elaborate design.
Attach a gift tag with a personalized message. You can punch a hole in the tag and thread it onto the ribbon before tying the bow, or simply attach it with a small piece of tape.
Step 8: Personalize with Thoughtful Details
Small additions can make a big impact, showing you put extra thought into the presentation.
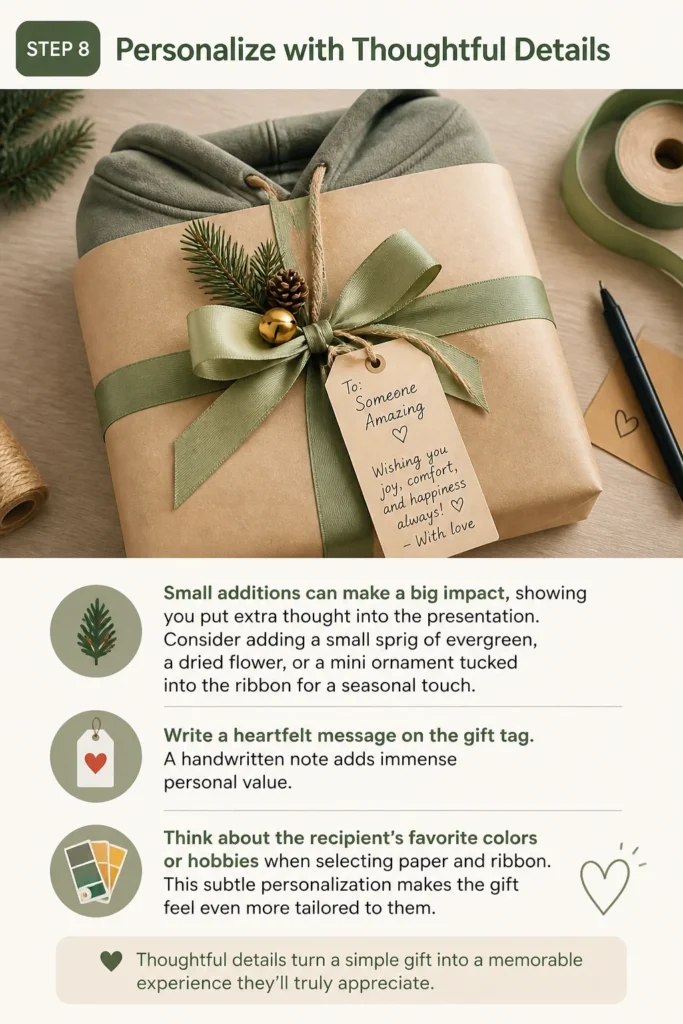
Consider adding a small sprig of evergreen, a dried flower, or a mini ornament tucked into the ribbon for a seasonal touch.
Write a heartfelt message on the gift tag. A handwritten note adds immense personal value.
Think about the recipient’s favorite colors or hobbies when selecting paper and ribbon. This subtle personalization makes the gift feel even more tailored to them.
Common Mistakes to Avoid
Using Wrinkled or Creased Paper
Starting with wrinkled paper makes it impossible to achieve a smooth, professional finish. The creases will show through and detract from the overall presentation.
Always store your wrapping paper carefully, ideally rolled in a tube or lying flat. If your paper is slightly creased, gently iron it on a low setting (without steam) from the non-printed side before you start.
Cutting Too Much or Too Little Paper
Too much paper leads to bulky, messy folds and excessive tape, making the gift look amateurish. Too little paper means seams won’t meet, forcing you to use unsightly patches.
Always measure carefully as described in Step 3. It’s better to have a slight excess that can be neatly trimmed than to be short. Remember the 1.5 times length and full width rule.
Ignoring the Hoodie’s Shape
Trying to wrap a hoodie as if it’s a rigid box will result in a lumpy, uneven package. The soft nature of the fabric requires a different approach to folding.
Always take the time to fold the hoodie into a tight, compact rectangle first (Step 2). This creates a more stable “inner box” that the paper can conform to, leading to much cleaner lines.
Skipping the Finishing Touches
A perfectly wrapped gift without a ribbon or tag can feel incomplete. These small details elevate the gift from merely wrapped to beautifully presented.
Always allocate time for ribbons, bows, and a personalized tag. These elements add visual appeal and convey the extra effort you put into the gift’s presentation.
Troubleshooting
Paper Tears While Wrapping
This often happens when pulling the paper too tight, especially with thinner varieties, or if the paper snags on something.
If it’s a small tear on a seam, you can often patch it discreetly with a piece of clear tape, trying to align the edges as best as possible. For larger tears, you might need to re-cut and re-wrap, or consider using a decorative sticker or ribbon to cover the damaged area.
Ends Don’t Meet Neatly
If your paper doesn’t meet cleanly at the ends, it’s usually due to inaccurate initial cutting or uneven folding of the side flaps.
Carefully unfold the end, trim any excess paper that’s causing bulk, or adjust the angle of your side folds. If there’s a small gap, a strategically placed piece of tape or a decorative sticker can often conceal it effectively.
Ribbon Slips Off the Package
This usually happens if the ribbon isn’t taut enough or if the package itself is very slippery.
Ensure the ribbon is pulled snugly around the package before tying the knot. For very smooth paper, a tiny piece of double-sided tape placed on the underside of the package where the ribbon crosses can help anchor it securely.
Key Takeaways
- Preparation is paramount: gather all supplies and fold the hoodie neatly first.
- Accurate measuring of wrapping paper prevents waste and ensures a clean fit.
- The “envelope” fold technique is essential for achieving professional-looking ends.
- Use high-quality wrapping paper and sharp scissors for the best results.
- Don’t underestimate the impact of ribbons, bows, and a personalized gift tag.
- Practice makes perfect; your wrapping skills will improve with each gift you prepare.
Frequently Asked Questions
Can I wrap a hoodie without a box?
Absolutely! This guide specifically focuses on wrapping a hoodie without a box. By folding the hoodie into a compact, rectangular shape, you create a stable form that is easy to wrap directly with paper, saving you the need for an extra box.
What if the hoodie is very bulky or oversized?
For very bulky hoodies, focus even more on tight, compact folding. You might need slightly larger dimensions for your wrapping paper. Consider using a heavier-duty wrapping paper that can withstand the weight and shape better. You can also press the folded hoodie down gently to compress it slightly before wrapping.
How can I make the wrapped hoodie look more elegant?
Elegance comes from neatness and thoughtful details. Use high-quality, perhaps textured or metallic, wrapping paper. Incorporate luxurious fabric ribbons like satin or velvet. Add a small, tasteful embellishment such as a dried flower, a decorative branch, or a wax seal on the gift tag for an elevated touch.
Is it better to fold or roll a hoodie for wrapping?
For wrapping, folding a hoodie into a neat, rectangular block is almost always better than rolling it. A folded hoodie provides a flatter, more uniform surface for the wrapping paper, resulting in cleaner lines and sharper edges. A rolled hoodie tends to be more cylindrical and can be challenging to wrap smoothly.
Our Top Recommended Finds
- High-Quality Reversible Wrapping Paper: Offers two design options in one roll, providing versatility and often a thicker, more durable feel.
- Fabric Ribbon Assortment: A collection of satin, grosgrain, or velvet ribbons in various colors adds a luxurious touch to any gift.
- Double-Sided Tape Dispenser: Creates invisible seams and holds embellishments securely, giving your gift a truly professional finish.
The Art of Thoughtful Presentation
Wrapping a gift is more than just covering an item; it’s an extension of the gift itself, a prelude to the joy it brings.
With these practical steps, you now have the confidence to transform a simple hoodie into a beautifully presented present, ready to delight your recipient.
Go ahead, gather your supplies, and start wrapping. The next gift you give will be a testament to your newfound skill and thoughtfulness.
Beginner-friendly templates, step-by-step guides,
and weekly project ideas in your inbox.