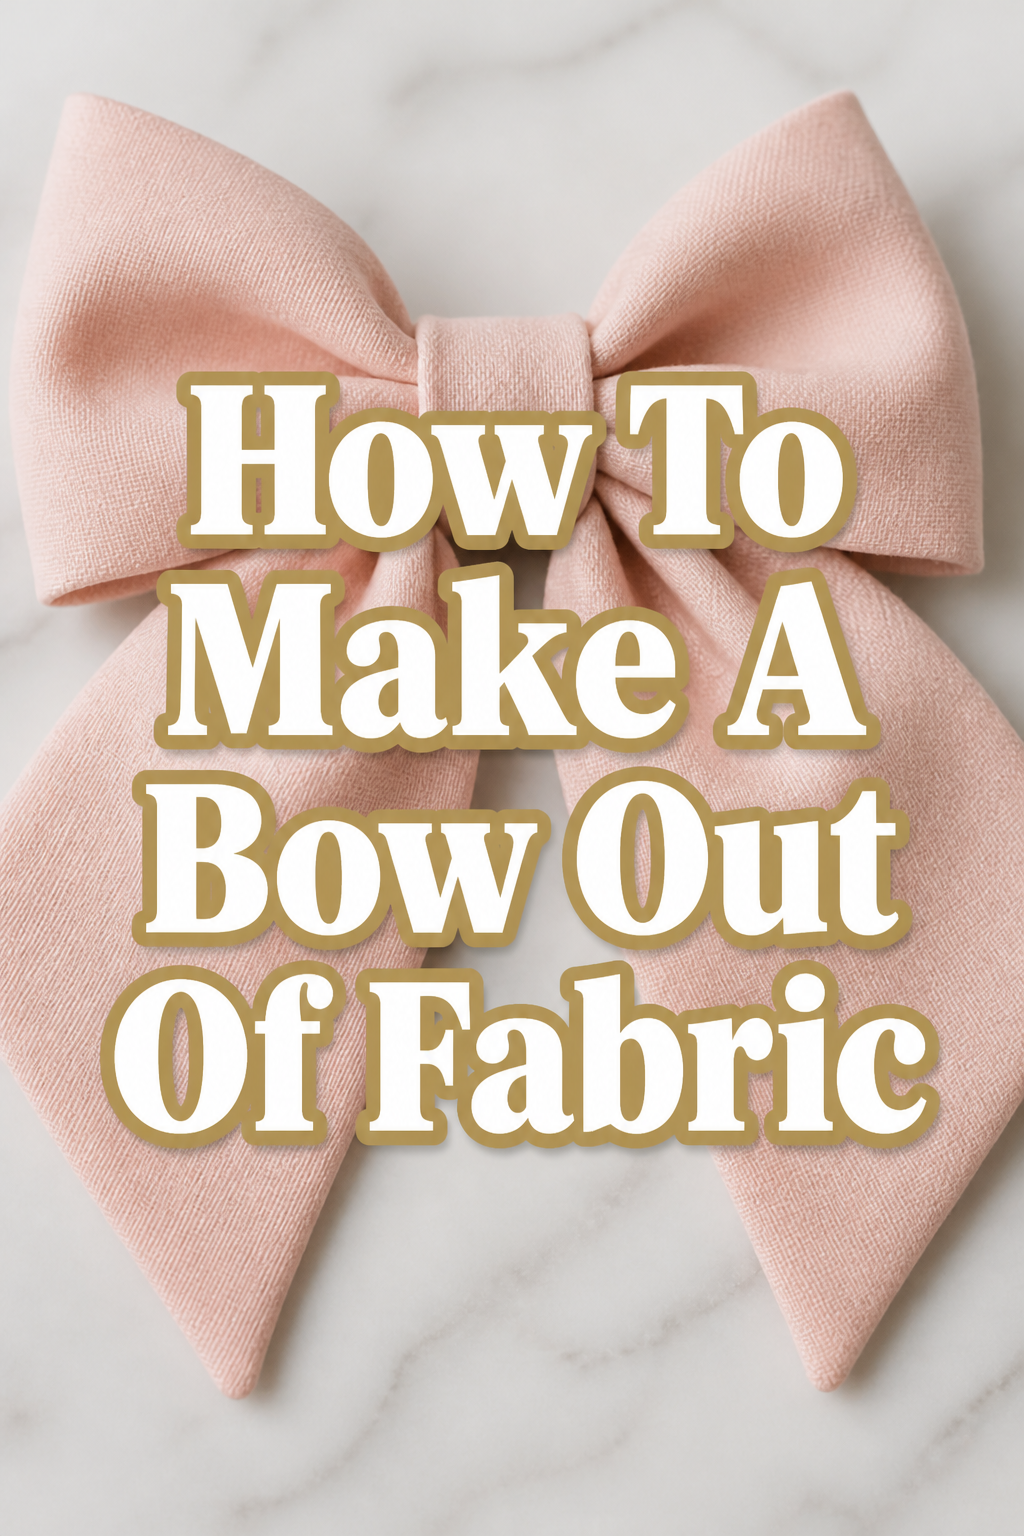
🎀 How To Make A Bow Out Of Fabric

Beginner-friendly templates, step-by-step guides,
and weekly project ideas in your inbox.
There’s a special joy in creating something beautiful with your own hands. I remember the first fabric bow I ever made; it felt like a tiny victory, transforming a simple piece of cloth into a charming accessory.
This guide shares that satisfaction, walking you through each step. You’ll learn the practical skills to craft your own perfect fabric bows, ready for any occasion.
Quick Overview
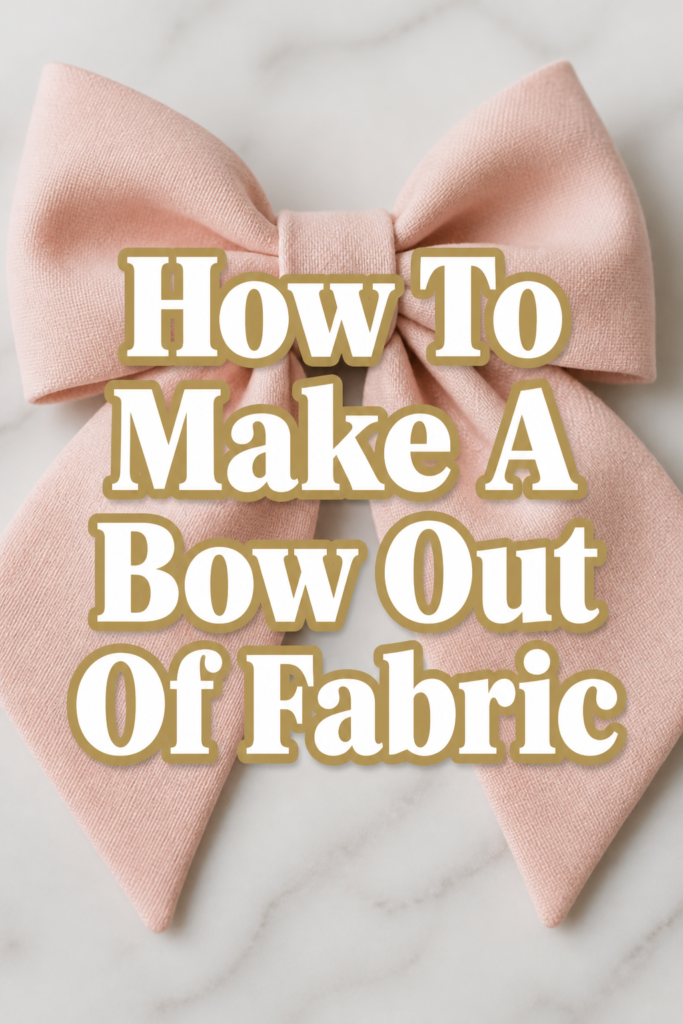
This guide will empower you to create elegant and versatile fabric bows from scratch. You’ll transform simple fabric into a charming accessory, perfect for gifts, hairpieces, or home decor.
It’s a rewarding project that builds fundamental crafting skills.
- Time needed: 30-60 minutes
- Difficulty: Beginner
- What you’ll need: Fabric, sharp scissors, ruler, needle and thread (or fabric glue), an iron, and a sewing machine (optional).
Step-by-Step Instructions
Step 1: Gather Your Materials
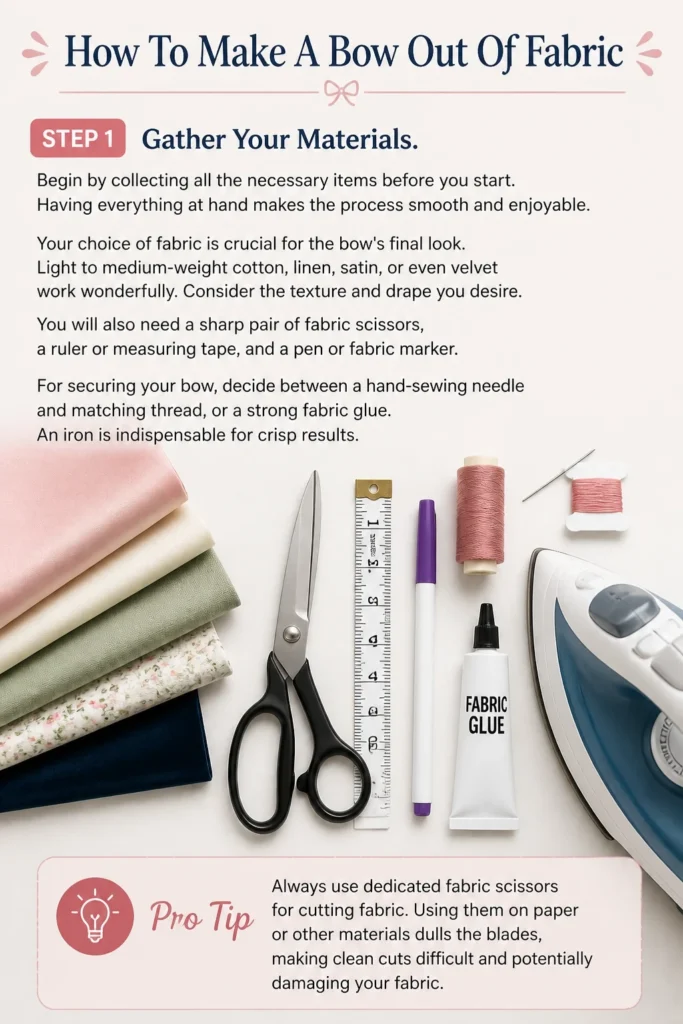
Begin by collecting all the necessary items before you start. Having everything at hand makes the process smooth and enjoyable.
Your choice of fabric is crucial for the bow’s final look. Light to medium-weight cotton, linen, satin, or even velvet work wonderfully. Consider the texture and drape you desire.
You will also need a sharp pair of fabric scissors, a ruler or measuring tape, and a pen or fabric marker. For securing your bow, decide between a hand-sewing needle and matching thread, or a strong fabric glue. An iron is indispensable for crisp results.
Pro Tip: Always use dedicated fabric scissors for cutting fabric. Using them on paper or other materials dulls the blades, making clean cuts difficult and potentially damaging your fabric.
Step 2: Measure and Cut Your Fabric
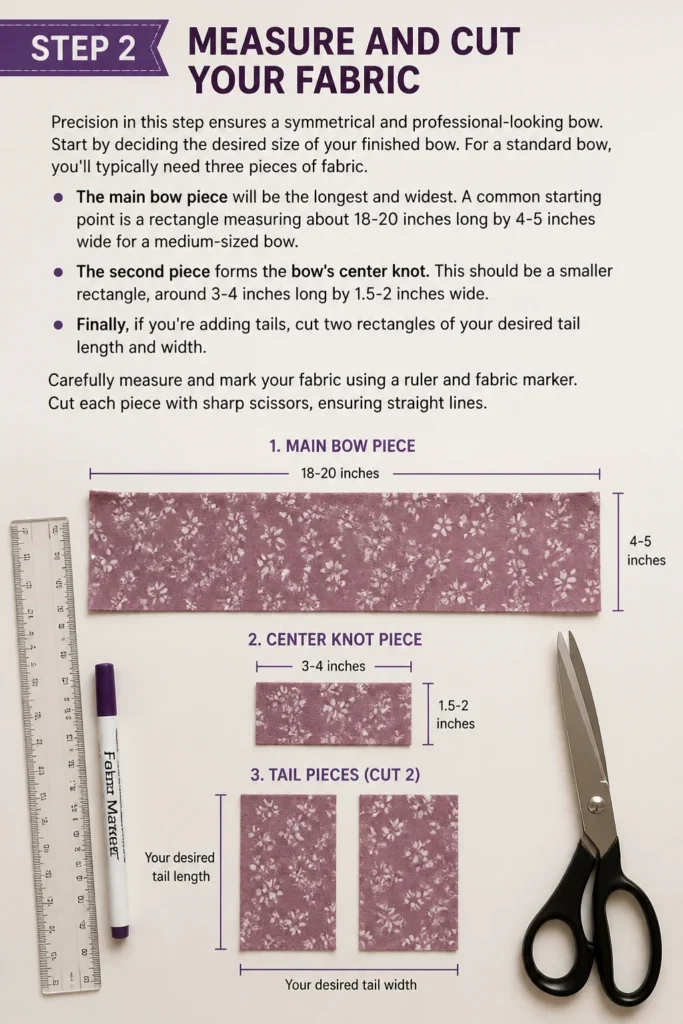
Precision in this step ensures a symmetrical and professional-looking bow. Start by deciding the desired size of your finished bow.
For a standard bow, you’ll typically need three pieces of fabric. The main bow piece will be the longest and widest. A common starting point is a rectangle measuring about 18-20 inches long by 4-5 inches wide for a medium-sized bow.
The second piece forms the bow’s center knot. This should be a smaller rectangle, around 3-4 inches long by 1.5-2 inches wide. Finally, if you’re adding tails, cut two rectangles of your desired tail length and width.
Carefully measure and mark your fabric using a ruler and fabric marker. Cut each piece with sharp scissors, ensuring straight lines.
Step 3: Prepare the Fabric Pieces
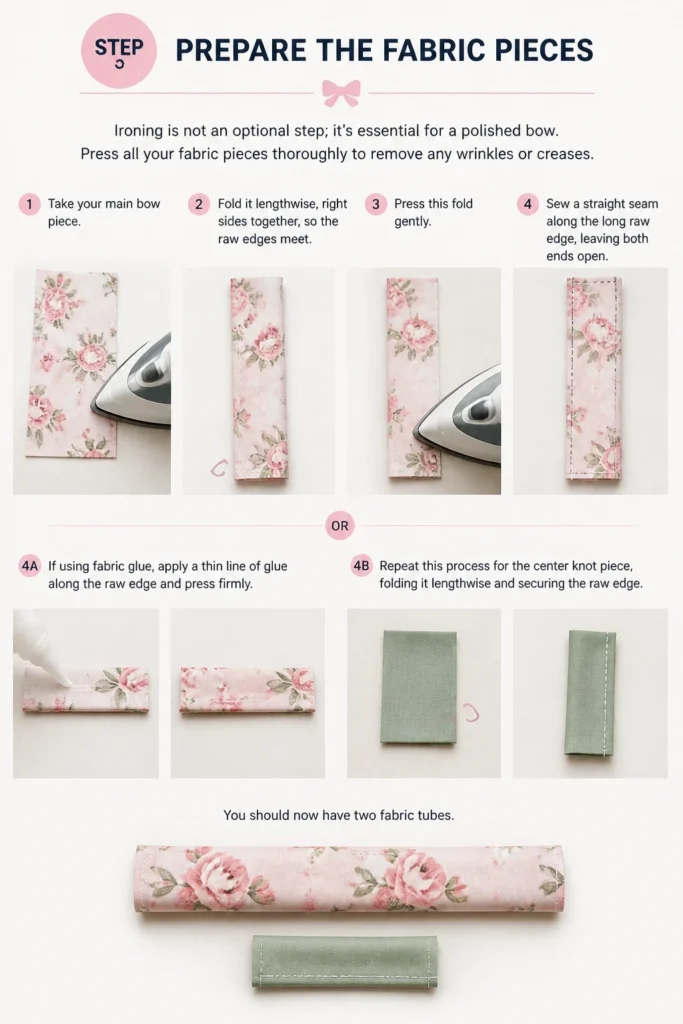
Ironing is not an optional step; it’s essential for a polished bow. Press all your fabric pieces thoroughly to remove any wrinkles or creases.
Take your main bow piece. Fold it lengthwise, right sides together, so the raw edges meet. Press this fold gently.
Now, sew a straight seam along the long raw edge, leaving both ends open. If using fabric glue, apply a thin line of glue along the raw edge and press firmly.
Repeat this process for the center knot piece, folding it lengthwise and securing the raw edge. You should now have two fabric tubes.
Step 4: Form the Bow Loops
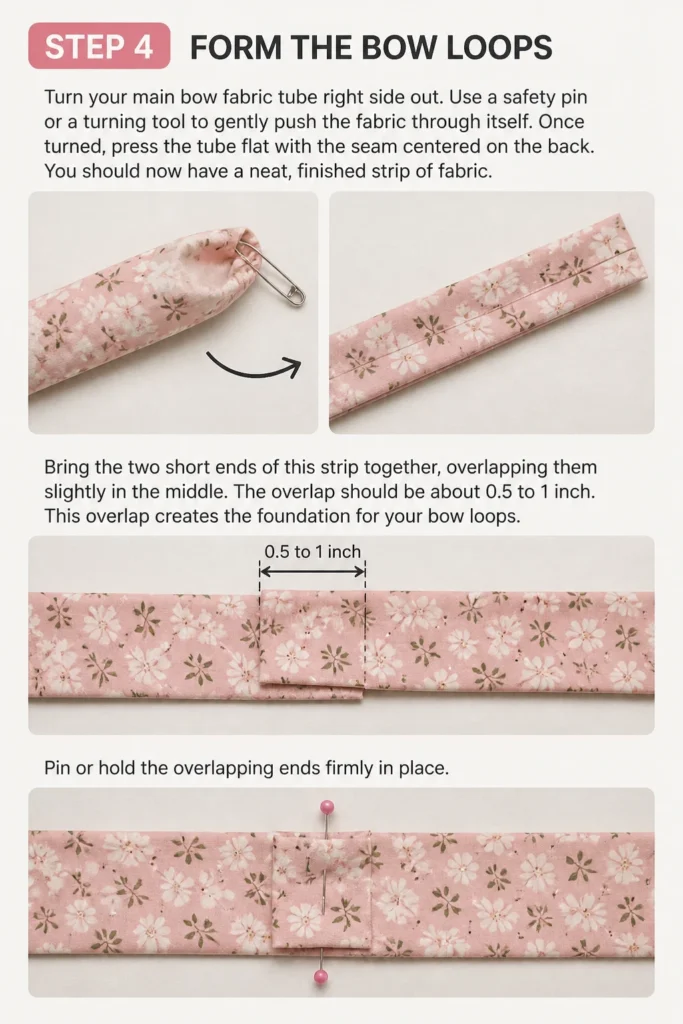
Turn your main bow fabric tube right side out. Use a safety pin or a turning tool to gently push the fabric through itself.
Once turned, press the tube flat with the seam centered on the back. You should now have a neat, finished strip of fabric.
Bring the two short ends of this strip together, overlapping them slightly in the middle. The overlap should be about 0.5 to 1 inch.
This overlap creates the foundation for your bow loops. Pin or hold the overlapping ends firmly in place.
Step 5: Create the Center Knot/Wrap
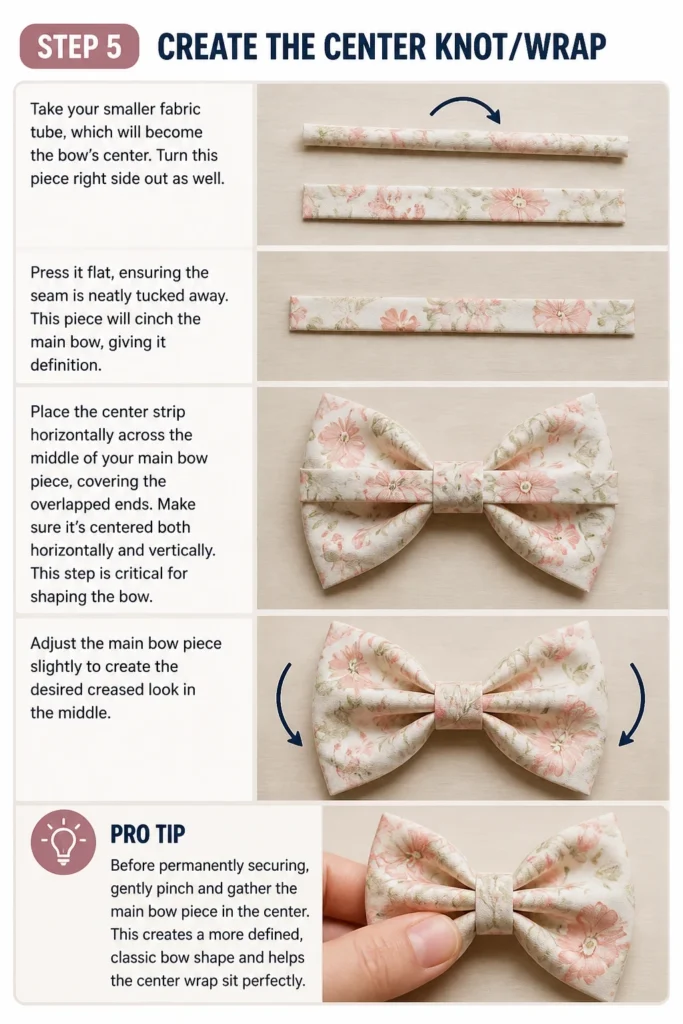
Take your smaller fabric tube, which will become the bow’s center. Turn this piece right side out as well.
Press it flat, ensuring the seam is neatly tucked away. This piece will cinch the main bow, giving it definition.
Place the center strip horizontally across the middle of your main bow piece, covering the overlapped ends. Make sure it’s centered both horizontally and vertically.
This step is critical for shaping the bow. Adjust the main bow piece slightly to create the desired “creased” look in the middle.
Pro Tip: Before permanently securing, gently pinch and gather the main bow piece in the center. This creates a more defined, classic bow shape and helps the center wrap sit perfectly.
Step 6: Secure the Center
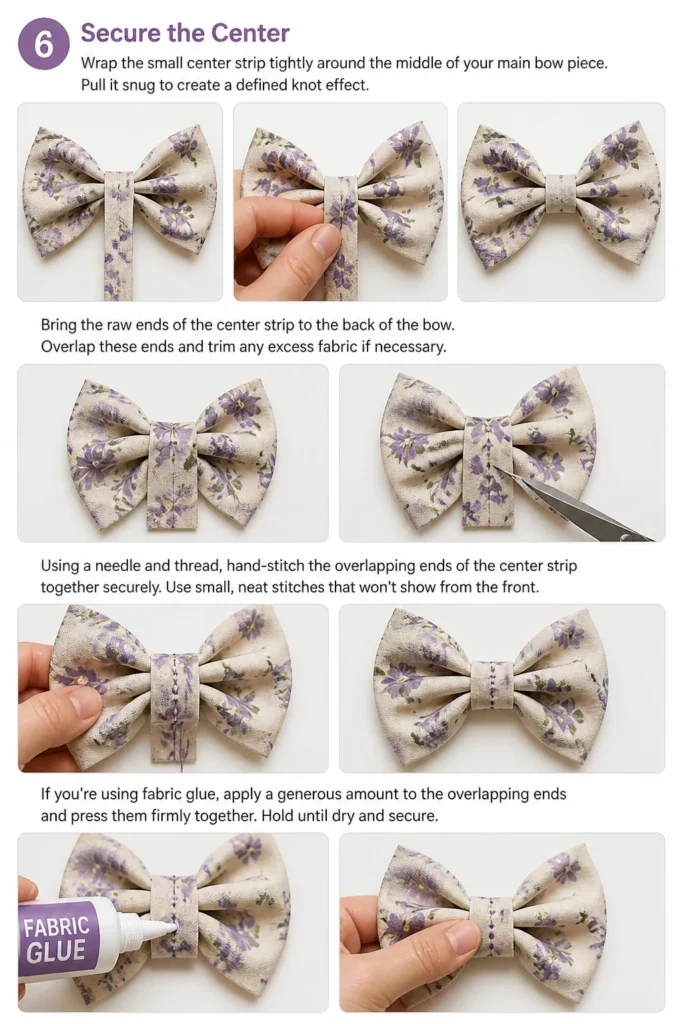
Wrap the small center strip tightly around the middle of your main bow piece. Pull it snug to create a defined “knot” effect.
Bring the raw ends of the center strip to the back of the bow. Overlap these ends and trim any excess fabric if necessary.
Using a needle and thread, hand-stitch the overlapping ends of the center strip together securely. Use small, neat stitches that won’t show from the front.
If you’re using fabric glue, apply a generous amount to the overlapping ends and press them firmly together. Hold until dry and secure.
Step 7: Add Finishing Touches
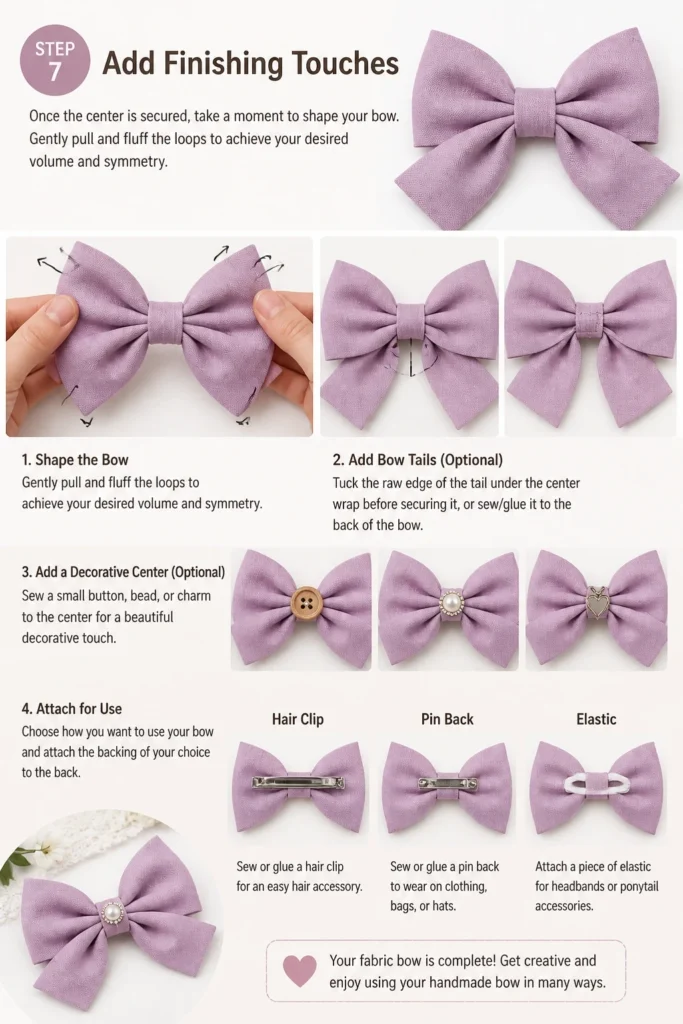
Once the center is secured, take a moment to shape your bow. Gently pull and fluff the loops to achieve your desired volume and symmetry.
If you opted for bow tails, now is the time to attach them. You can either tuck the raw edge of the tail under the center wrap before securing it, or sew/glue it to the back of the bow.
Consider adding a decorative element to your bow. You might sew a small button, a bead, or a charm to the center.
Finally, think about how you want to use your bow. Sew or glue a hair clip, a pin back, or a piece of elastic to the back for versatile attachment.
Step 8: Admire Your Creation
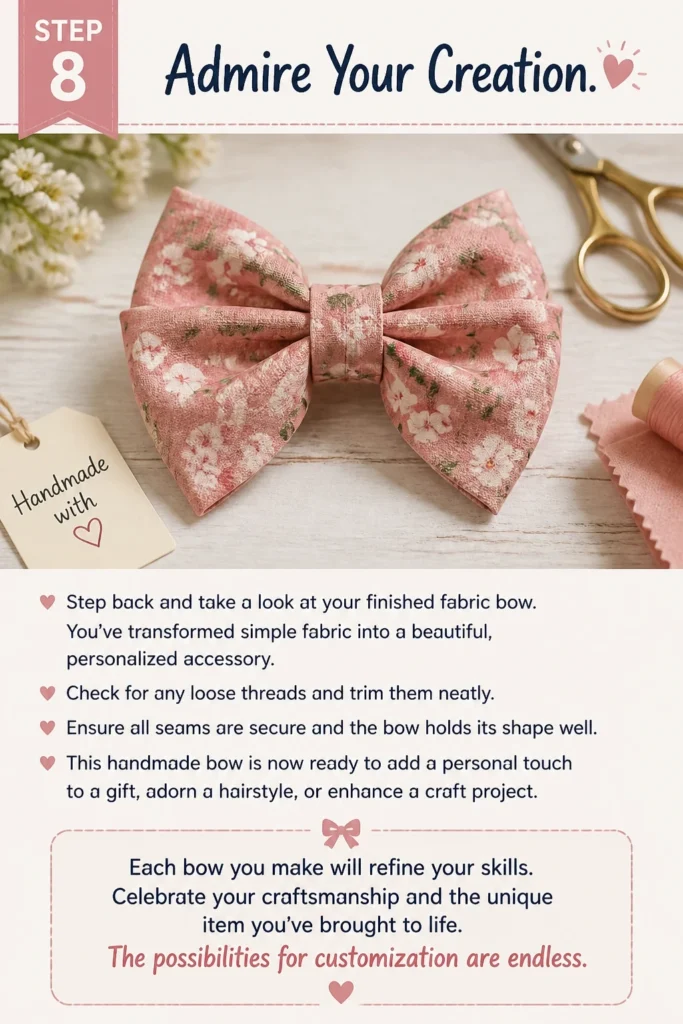
Step back and take a look at your finished fabric bow. You’ve transformed simple fabric into a beautiful, personalized accessory.
Check for any loose threads and trim them neatly. Ensure all seams are secure and the bow holds its shape well.
This handmade bow is now ready to add a personal touch to a gift, adorn a hairstyle, or enhance a craft project. Each bow you make will refine your skills.
Celebrate your craftsmanship and the unique item you’ve brought to life. The possibilities for customization are endless.
Common Mistakes to Avoid
Using the Wrong Fabric
Choosing fabric that is too stiff or too flimsy can drastically alter your bow’s appearance. Very stiff fabric might result in a rigid, less graceful bow, while overly thin fabric can make your bow look limp and lack structure. Always consider the drape and weight of the fabric in relation to the bow’s intended use.
Inaccurate Measurements
Skipping careful measurement or making uneven cuts leads to lopsided and unprofessional bows. Even a slight difference in length or width between the two sides of your main bow piece will be noticeable. Take your time with measuring and cutting for a symmetrical finish.
Rushing the Center Wrap
The center wrap is what gives your bow its defined shape and polished look. If you rush this step, the wrap might be loose, uneven, or prone to unraveling. Ensure the center strip is pulled snug and secured firmly, whether by stitching or glue, for a crisp and durable finish.
Skipping Ironing
Ironing might seem like a small step, but it makes a huge difference. Skipping it can leave your fabric wrinkled and your bow looking messy and homemade in a less desirable way. Pressing your fabric at each stage creates crisp edges and a professional, store-bought appearance.
Troubleshooting
Bow Looks Lopsided
If your bow appears uneven, it’s often due to slight inconsistencies in cutting or how the loops were formed. Gently pull and adjust the fabric on both sides of the bow. You can also carefully re-pinch the center of the main bow piece before the final securing of the center wrap to redistribute the fabric more evenly.
Center Wrap Comes Undone
A loose or detached center wrap is usually a sign that it wasn’t secured tightly enough. If sewn, reinforce the stitches with smaller, stronger knots. If glued, ensure you used enough adhesive and held it firmly until completely dry. For added security, you can apply a tiny dot of fabric glue to the inside of the wrap once it’s already sewn.
Fabric Fraying
Fraying edges can be a nuisance, especially with certain fabric types. If your fabric is prone to fraying, consider using a zigzag stitch along the raw edges of your main bow piece before turning it right side out. Alternatively, a product called “Fray Check” can be applied to raw edges to prevent them from unraveling, offering a neat finish.
Key Takeaways
- Fabric selection significantly impacts your bow’s final look and drape.
- Precise measuring and cutting are essential for a symmetrical and professional outcome.
- Ironing your fabric at each stage creates crisp folds and a polished appearance.
- The center wrap must be secured tightly to give the bow its defined shape and durability.
- Practice improves your technique and allows for more creative variations in bow design.
- Hand-sewing offers durability, while fabric glue provides a quick, no-sew alternative.
Frequently Asked Questions
What fabric is best for bows?
Medium-weight cotton is an excellent choice for beginners due to its ease of handling and crisp finish. Satin, silk, or velvet are perfect for more elegant bows, offering a beautiful drape and sheen. Avoid overly stretchy or very thick upholstery fabrics.
Can I use fabric glue instead of sewing?
Yes, you absolutely can! Fabric glue is a fantastic no-sew alternative for creating bows, especially for those new to crafting or looking for a quicker method. Ensure you use a high-quality fabric glue and allow ample drying time for a strong bond.
How do I attach the bow to a hair clip?
The easiest way to attach a bow to a hair clip is with hot glue. Apply a line of hot glue along the flat top surface of the hair clip, then firmly press the back of your finished bow onto it. For a more secure attachment, you can hand-stitch the bow to a ribbon-wrapped clip.
How can I make a bigger/smaller bow?
To alter the size of your bow, simply adjust the dimensions of your fabric pieces. For a larger bow, increase the length and width of the main bow piece and the center wrap proportionally. For a smaller bow, reduce these measurements. Experimentation is key to finding your ideal sizes.
Our Top Recommended Finds
- Rotary Cutter and Mat: For incredibly precise and straight cuts, a rotary cutter paired with a self-healing mat is a game-changer, especially for repetitive projects like bows.
- Dedicated Fabric Scissors: A sharp pair of fabric scissors makes all the difference in achieving clean, crisp edges without fraying. Keep them separate from paper scissors!
- Fabric Glue (No-Sew Option): For those who prefer not to sew, a strong, quick-drying fabric glue offers a reliable and convenient way to assemble your bows with a professional finish.
Your Crafting Journey Begins Here
You’ve now mastered the art of creating a beautiful fabric bow. This simple skill opens up a world of creative possibilities, allowing you to personalize gifts, enhance your wardrobe, or adorn your home with handmade charm.
Don’t stop here. Experiment with different fabrics, explore various bow sizes, and try adding embellishments like beads or lace. Each bow you craft will build your confidence and refine your technique.
Take the first step today. Gather your materials, choose a favorite fabric, and transform it into a unique piece that reflects your personal style. Embrace the joy of making something truly special with your own hands.
Beginner-friendly templates, step-by-step guides,
and weekly project ideas in your inbox.