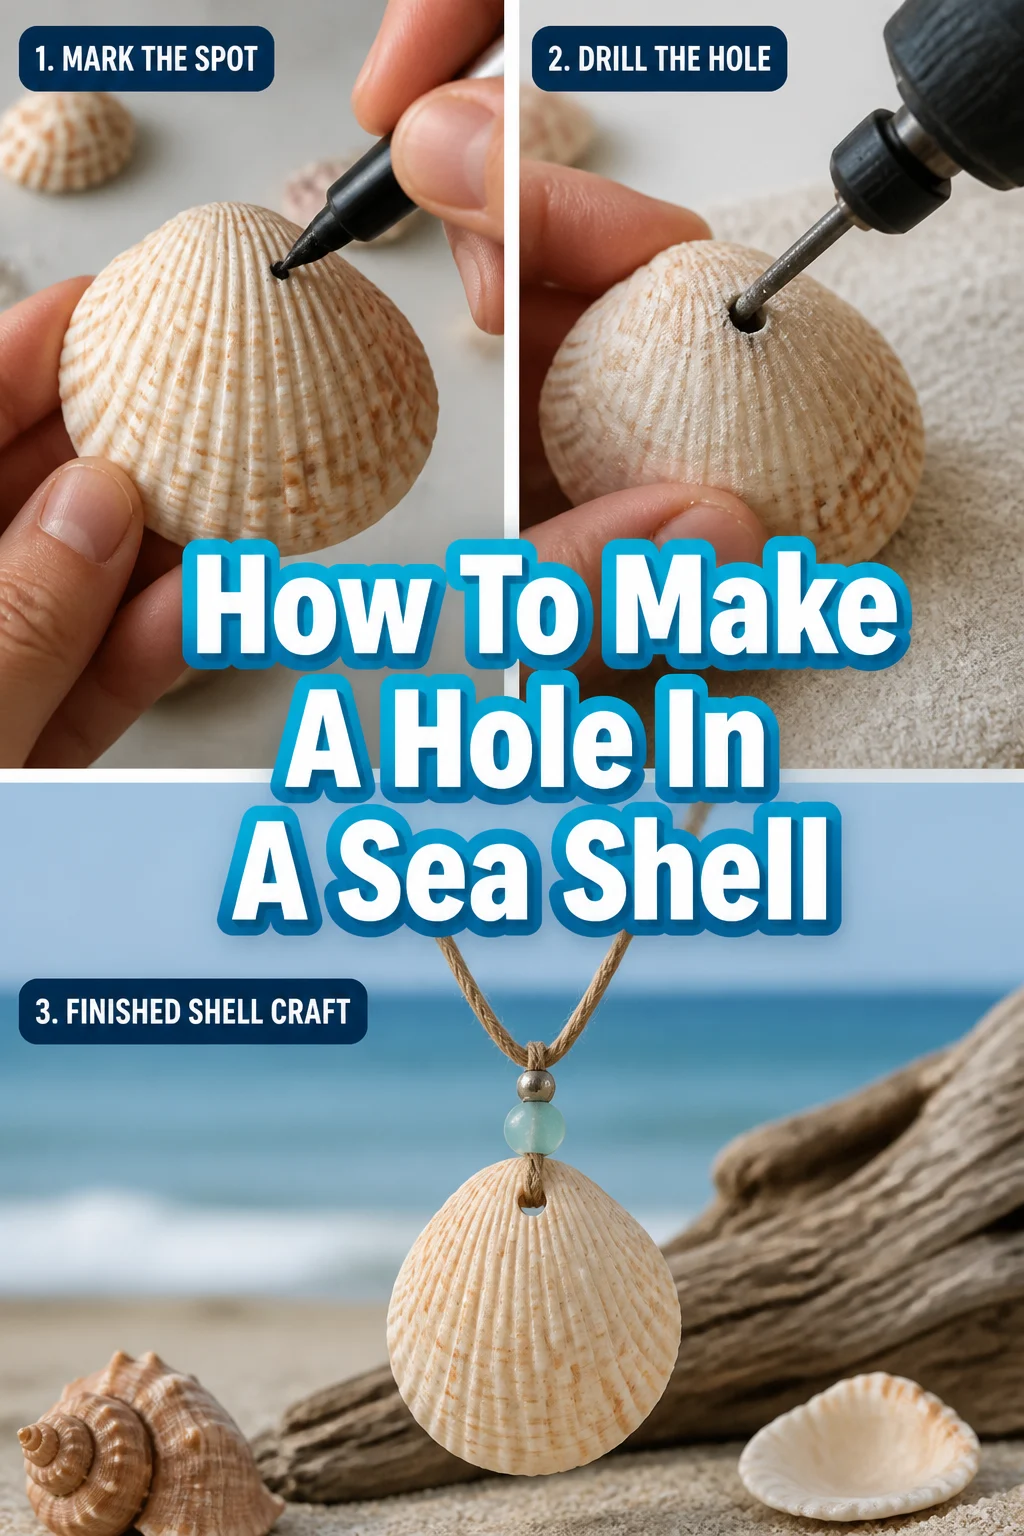
🐚 How To Make A Hole In A Sea Shell

Beginner-friendly templates, step-by-step guides,
and weekly project ideas in your inbox.
Creating a perfect hole in a sea shell opens up a world of crafting possibilities.
From delicate jewelry to charming home decor, this skill transforms natural treasures into personalized art.
I’ve personally drilled countless shells for necklaces and wind chimes, and I’m excited to share the precise techniques that ensure success every time.

Quick Overview
This guide will walk you through the process of drilling clean, precise holes in sea shells, ensuring your projects look professional and last. You’ll learn how to select the right tools, prepare your shells, and execute the drilling process safely and effectively.
- Time needed: 30-60 minutes (including preparation and cleanup)
- Difficulty: Beginner
- What you’ll need: Rotary tool (Dremel) or electric drill, diamond-tipped drill bits, safety glasses, water, towel, marker, selected shells.
Step-by-Step Instructions
Step 1: Gather Your Tools and Materials
Before you begin, ensure you have everything within reach. A well-organized workspace makes the process smoother and safer.
Collect your chosen sea shells. Inspect them for any cracks or weaknesses that might cause them to break during drilling.
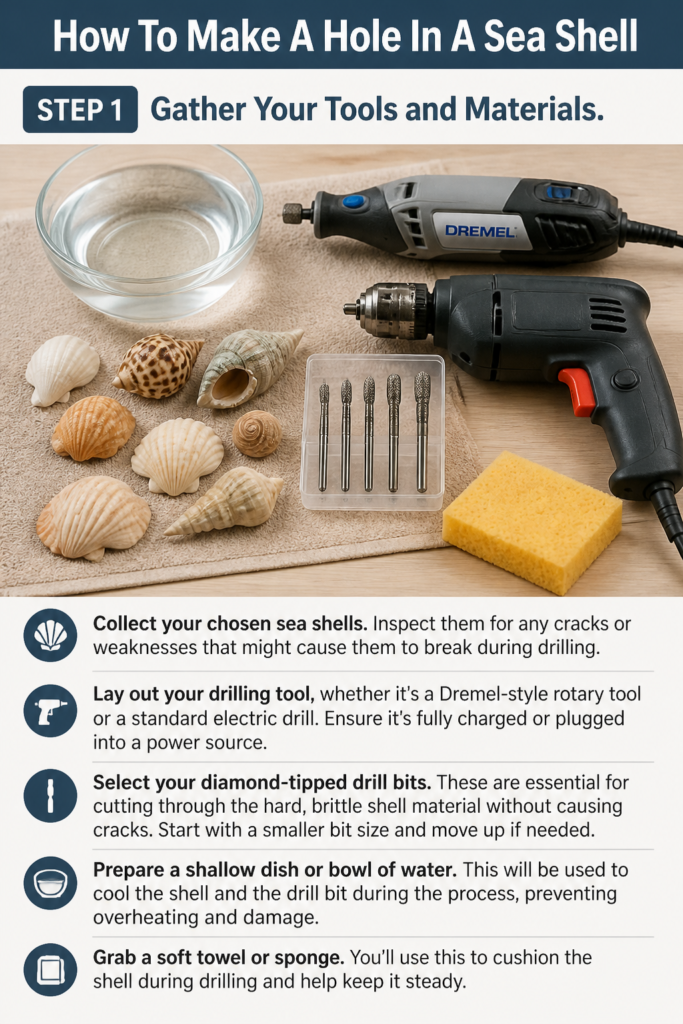
Lay out your drilling tool, whether it’s a Dremel-style rotary tool or a standard electric drill. Ensure it’s fully charged or plugged into a power source.
Select your diamond-tipped drill bits. These are essential for cutting through the hard, brittle shell material without causing cracks. Start with a smaller bit size and move up if needed.
Prepare a shallow dish or bowl of water. This will be used to cool the shell and the drill bit during the process, preventing overheating and damage.
Grab a soft towel or sponge. You’ll use this to cushion the shell and absorb any water spray.
Don’t forget your safety glasses. Shell dust and small fragments can fly, and eye protection is non-negotiable for this task.
Pro Tip: Diamond-tipped bits are superior for shells. Regular metal bits will dull quickly and can cause the shell to chip or shatter due to friction and heat.
Step 2: Select and Prepare Your Shells
Choosing the right shell and preparing it properly is crucial for a successful drilling experience. Not all shells are equally suited for drilling.
Examine your sea shells carefully. Look for shells that are sturdy and free of existing cracks or weak spots. Thicker shells are generally easier to drill without breaking.
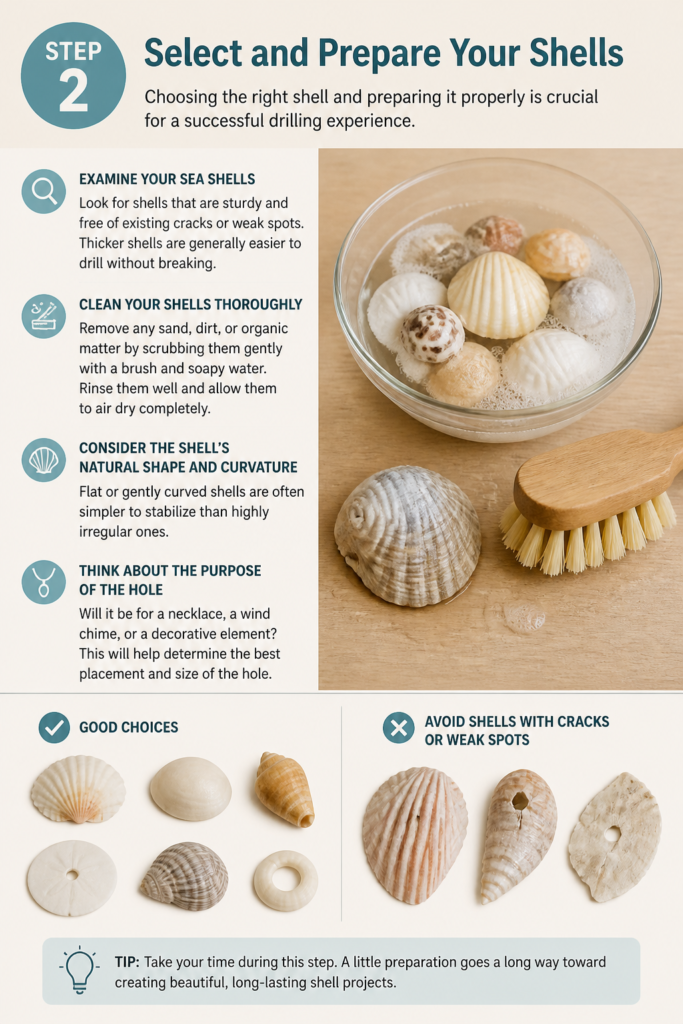
Clean your shells thoroughly. Remove any sand, dirt, or organic matter by scrubbing them gently with a brush and soapy water. Rinse them well and allow them to air dry completely.
Consider the shell’s natural shape and curvature. Flat or gently curved shells are often simpler to stabilize than highly irregular ones.
Think about the purpose of the hole. Will it be for a necklace, a wind chime, or a decorative element? This will help determine the best placement and size of the hole.
Step 3: Set Up Your Workspace
A stable and safe workspace is paramount for precise drilling and to prevent accidents. Take a few moments to arrange your area.
Choose a flat, sturdy surface for drilling. A workbench or a solid table works best.
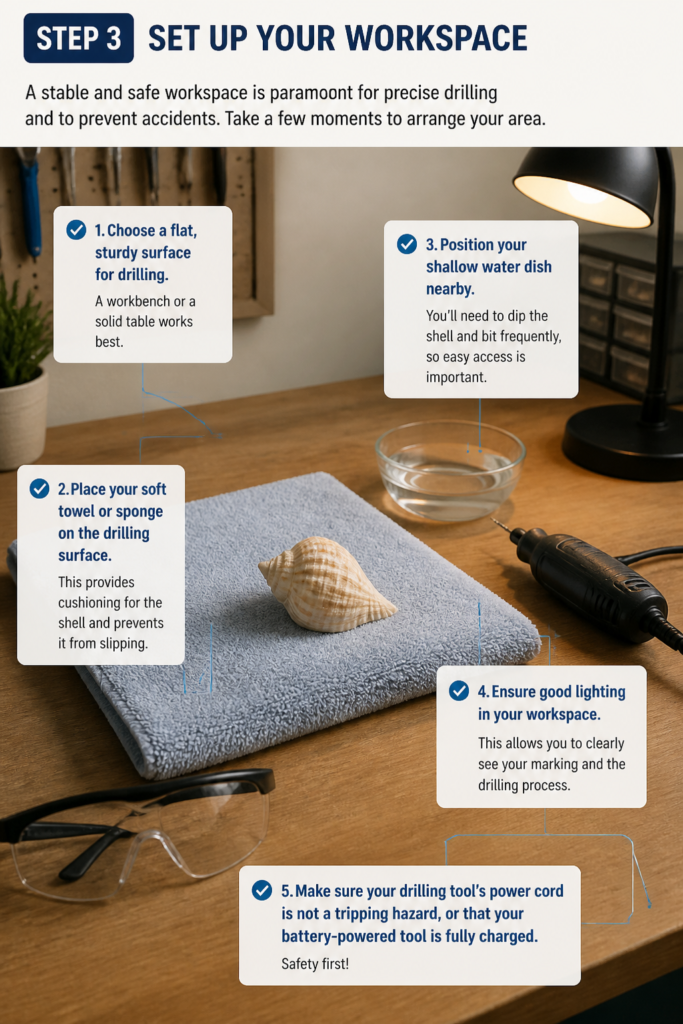
Place your soft towel or sponge on the drilling surface. This provides cushioning for the shell and prevents it from slipping.
Position your shallow water dish nearby. You’ll need to dip the shell and bit frequently, so easy access is important.
Ensure good lighting in your workspace. This allows you to clearly see your marking and the drilling process.
Make sure your drilling tool’s power cord is not a tripping hazard, or that your battery-powered tool is fully charged.
Step 4: Mark the Drilling Spot
Accurate marking ensures your hole is exactly where you want it and helps guide your drill bit.
Use a fine-tipped permanent marker to mark the precise spot where you want to drill the hole. A small dot is usually sufficient.
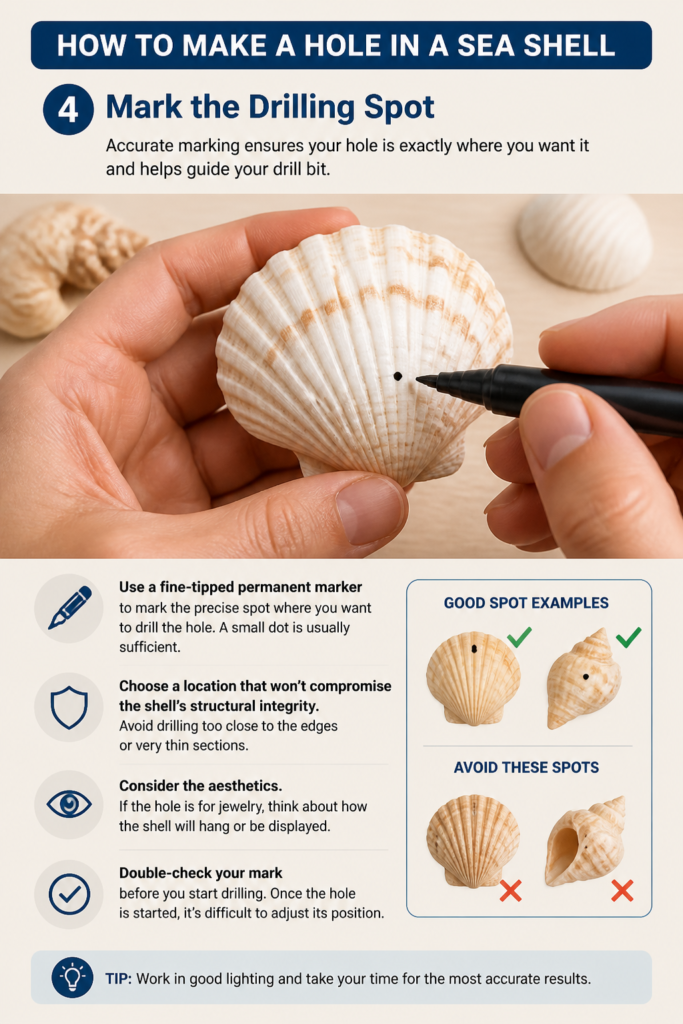
Choose a location that won’t compromise the shell’s structural integrity. Avoid drilling too close to the edges or very thin sections.
Consider the aesthetics. If the hole is for jewelry, think about how the shell will hang or be displayed.
Double-check your mark before you start drilling. Once the hole is started, it’s difficult to adjust its position.
Step 5: Begin Drilling Slowly and Steadily
This is the most critical step. Patience and a gentle touch will yield the best results.
Don your safety glasses before picking up your drill. This is a non-negotiable safety measure.
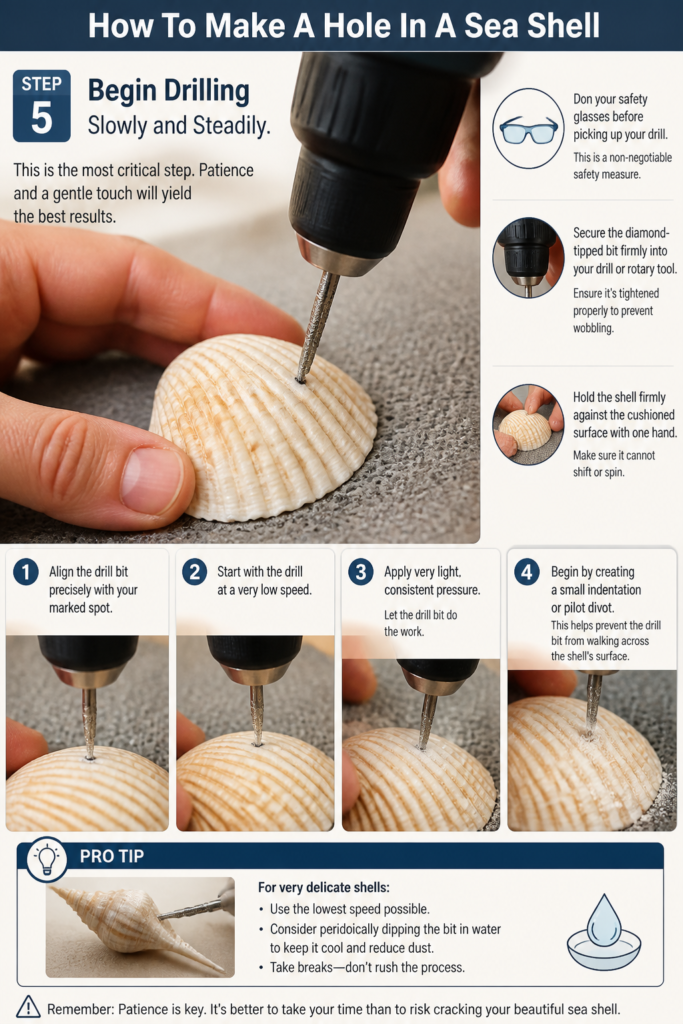
Secure the diamond-tipped bit firmly into your drill or rotary tool. Ensure it’s tightened properly to prevent wobbling.
Hold the shell firmly against the cushioned surface with one hand. Make sure it cannot shift or spin.
Align the drill bit precisely with your marked spot. Start with the drill at a very low speed.
Apply very light, consistent pressure. Let the drill bit do the work. Pressing too hard will generate excessive heat and can crack the shell.
Begin by creating a small indentation or pilot divot. This helps prevent the drill bit from “walking” across the shell’s surface.
Pro Tip: For very delicate shells, you can create a small “dam” of modeling clay around your mark. Fill it with a tiny amount of water to keep the drilling area constantly wet.
Step 6: Keep the Shell and Bit Cool
Heat is the enemy of shell drilling. Managing temperature is key to preventing cracks and preserving your drill bit.
Continuously dip the shell and the drill bit into your shallow water dish every few seconds. This cools both components down.
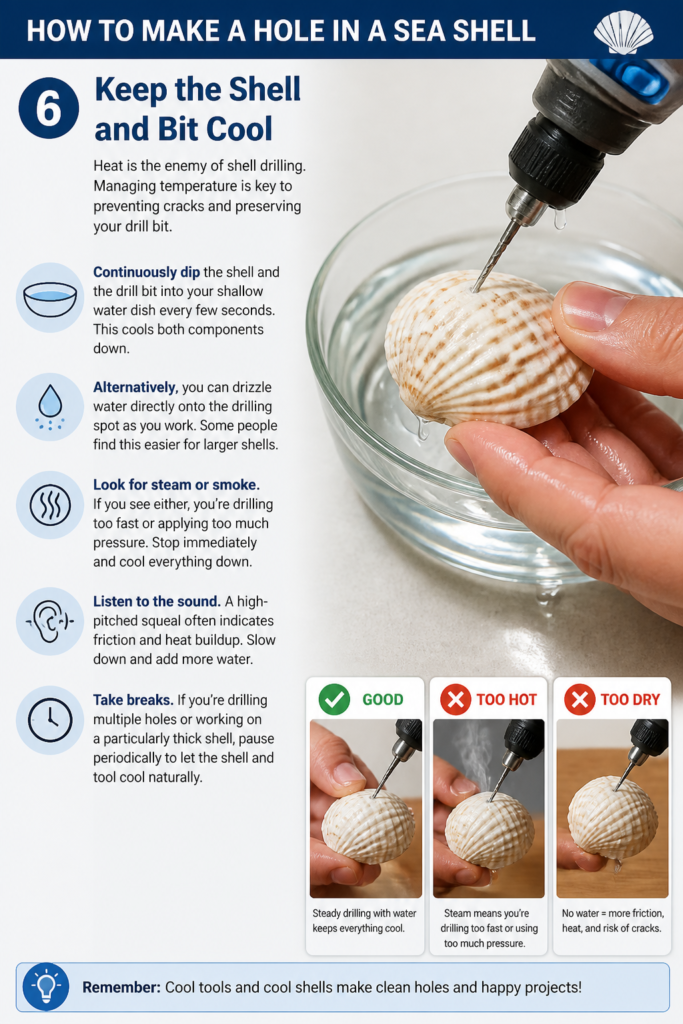
Alternatively, you can drizzle water directly onto the drilling spot as you work. Some people find this easier for larger shells.
Look for steam or smoke. If you see either, you’re drilling too fast or applying too much pressure. Stop immediately and cool everything down.
Listen to the sound. A high-pitched squeal often indicates friction and heat buildup. Slow down and add more water.
Take breaks. If you’re drilling multiple holes or working on a particularly thick shell, pause periodically to let the shell and tool cool naturally.
Step 7: Drill Through and Clean the Hole
Once you’ve broken through the shell, a little refinement ensures a clean, smooth finish.
Continue drilling with light pressure, maintaining the cooling process, until the drill bit breaks through the shell.
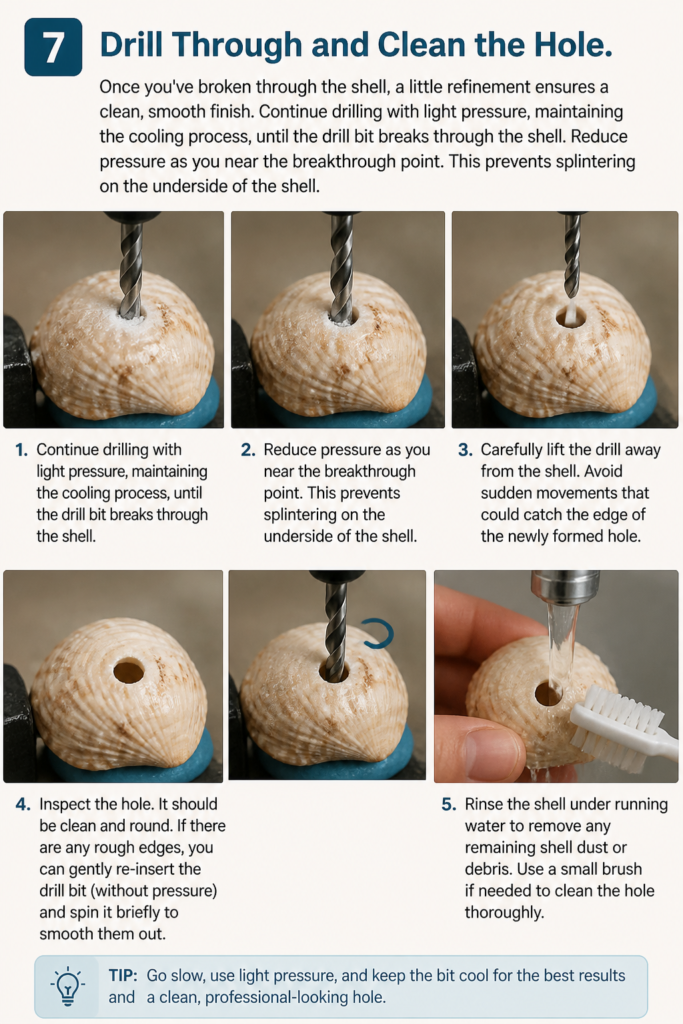
Reduce pressure as you near the breakthrough point. This prevents splintering on the underside of the shell.
Carefully lift the drill away from the shell. Avoid sudden movements that could catch the edge of the newly formed hole.
Inspect the hole. It should be clean and round. If there are any rough edges, you can gently re-insert the drill bit (without pressure) and spin it briefly to smooth them out.
Rinse the shell under running water to remove any remaining shell dust or debris. Use a small brush if needed to clean the hole thoroughly.
Step 8: Final Inspection and Finishing
A final check ensures your shell is ready for its intended purpose.
Examine the entire shell for any hairline cracks that might have developed during drilling. Most well-drilled shells won’t have any issues.
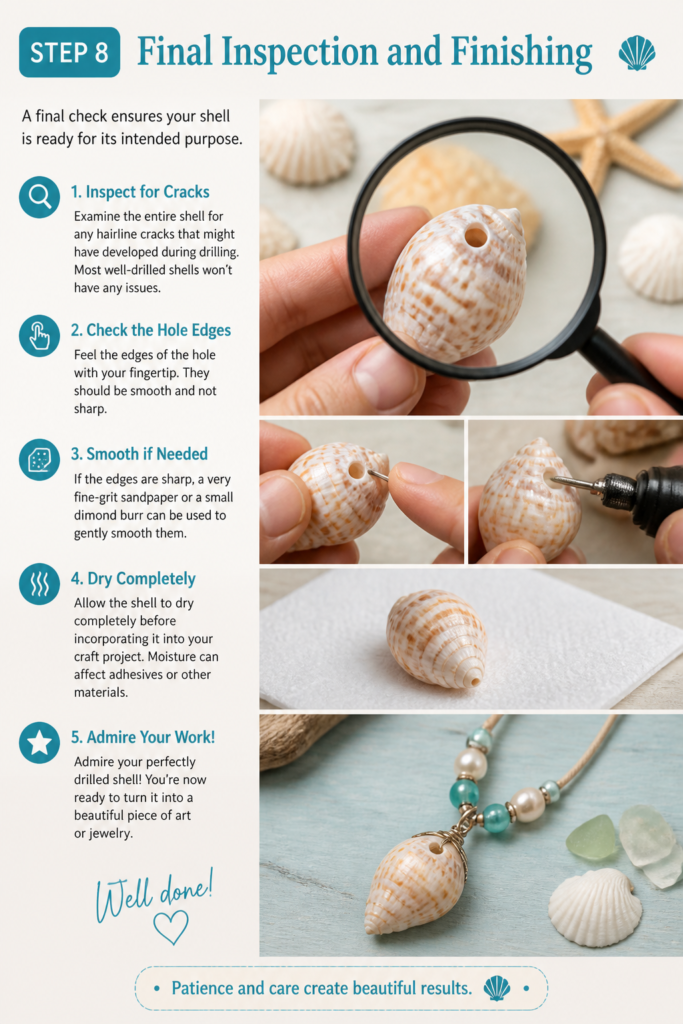
Feel the edges of the hole with your fingertip. They should be smooth and not sharp. If they are, a very fine-grit sandpaper or a small diamond burr can be used to gently smooth them.
Allow the shell to dry completely before incorporating it into your craft project. Moisture can affect adhesives or other materials.
Admire your perfectly drilled shell! You’re now ready to turn it into a beautiful piece of art or jewelry.
Common Mistakes to Avoid
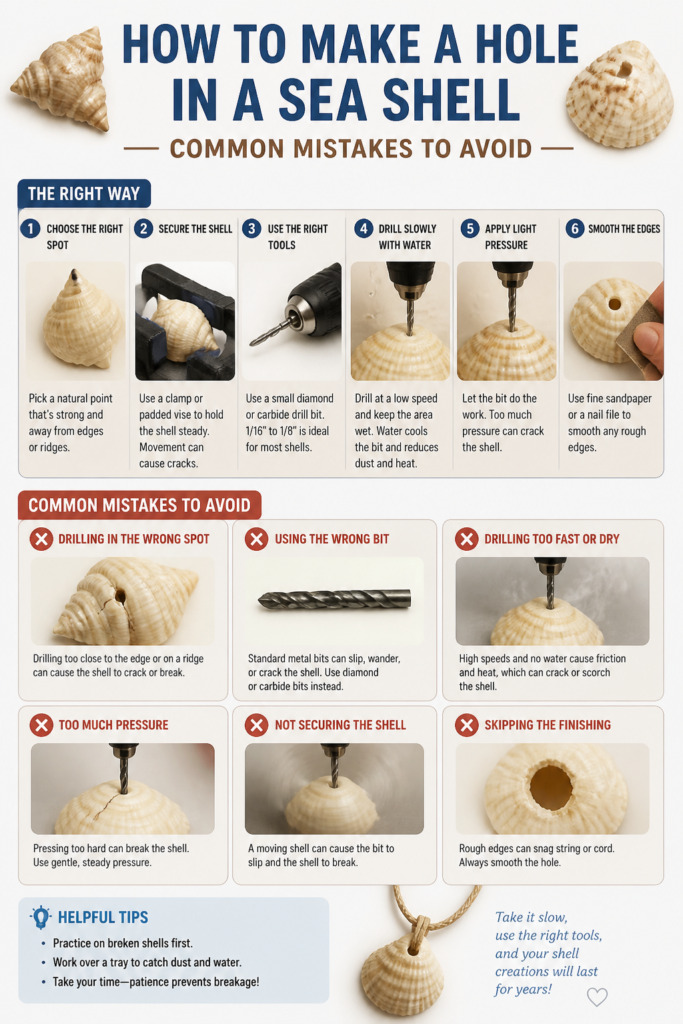
Rushing the Process
Many beginners try to drill too quickly. This is a common pitfall that often leads to cracked shells. The shell material is brittle, and quick, forceful drilling generates excessive heat and stress, causing it to shatter. Always take your time, letting the diamond bit gently abrade the shell.
Using the Wrong Drill Bit
Attempting to drill shells with standard metal or wood drill bits is a recipe for disaster. These bits will quickly dull, generate immense heat, and are more likely to chip or crack the shell. Only use diamond-tipped drill bits, which are designed to grind through hard materials effectively.
Not Cooling the Shell and Bit
Heat is a major enemy when drilling shells. Friction from drilling rapidly heats both the shell and the bit. Without adequate cooling, the shell can crack, and the drill bit’s lifespan will be significantly shortened. Always keep water handy and use it frequently to cool the drilling area.
Applying Too Much Pressure
It’s tempting to press down hard, thinking it will speed up the drilling. However, excessive pressure is counterproductive. It creates more friction, more heat, and puts undue stress on the shell, increasing the risk of cracking. Use only light, consistent pressure, allowing the bit to do the work.
Troubleshooting
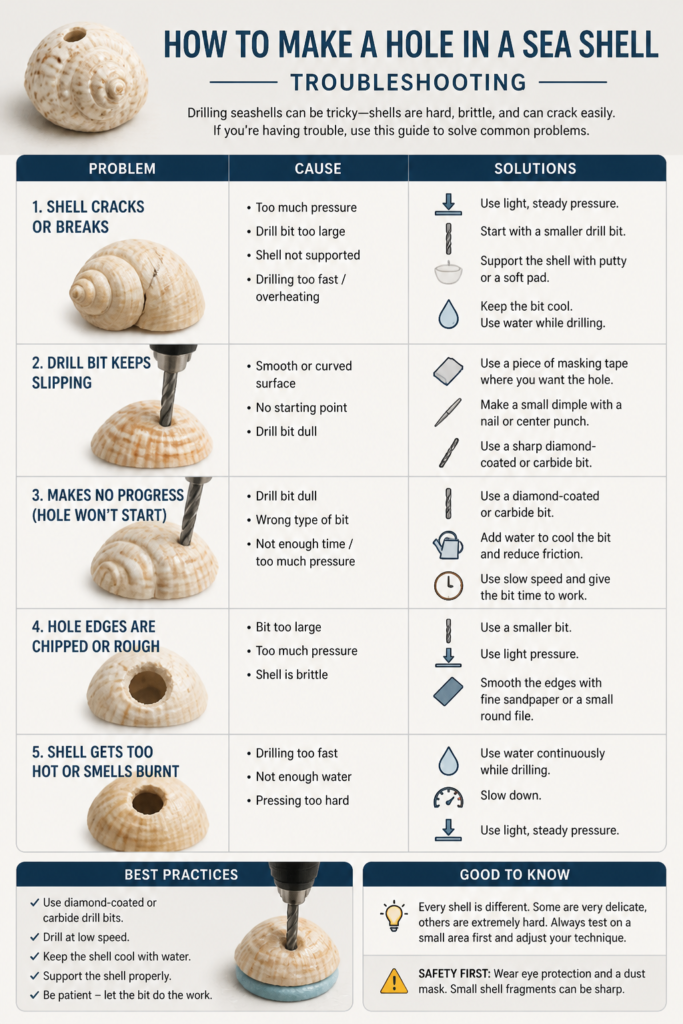
Shell Cracks During Drilling
If your shell starts to crack, it’s likely due to too much pressure, insufficient cooling, or drilling too close to a weak spot. Stop immediately. Next time, try reducing your drilling speed, applying less pressure, and increasing the frequency of cooling dips. Also, re-evaluate your shell selection for sturdiness.
Drill Bit Slips on the Surface
A common issue at the start of drilling is the bit “walking” across the smooth shell surface instead of biting in. This happens if you don’t create an initial divot. To prevent this, ensure you start the drill at a very slow speed, apply minimal pressure, and allow the bit to create a tiny indentation before increasing speed slightly. Marking your spot clearly also helps guide the bit.
Hole is Not Clean or Has Rough Edges
Sometimes, the breakthrough point can cause splintering or leave rough edges. This usually occurs if you apply too much pressure as the bit exits the shell. To fix this, gently re-insert the drill bit into the hole from both sides (without applying drilling pressure) and spin it briefly to smooth the edges. Using a very fine-grit sandpaper or a small diamond burr can also refine the hole’s perimeter.
Key Takeaways
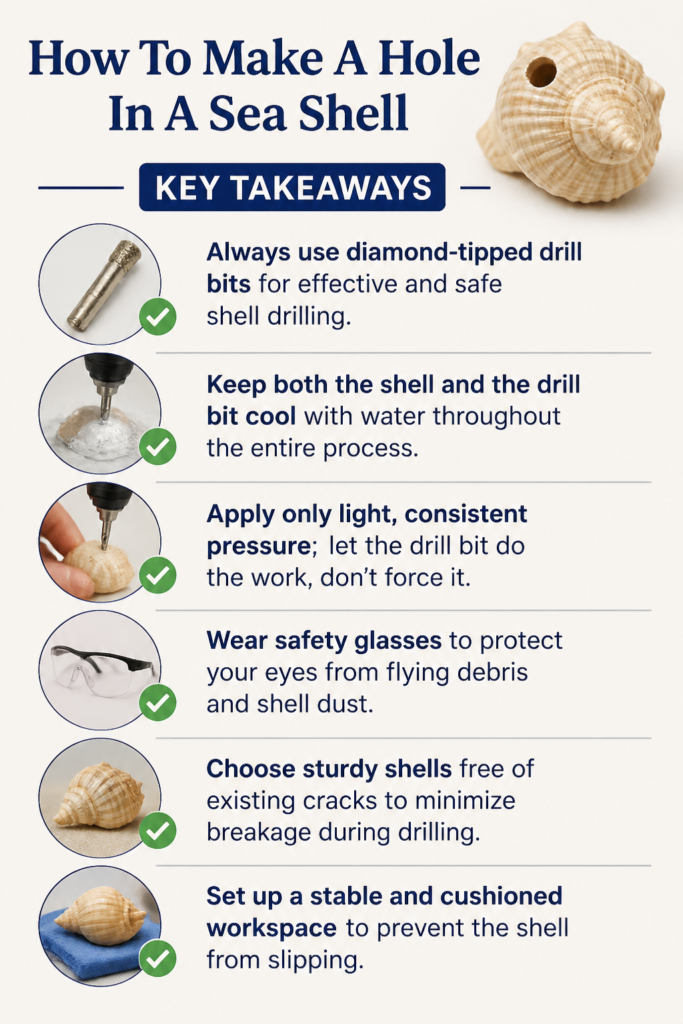
- Always use diamond-tipped drill bits for effective and safe shell drilling.
- Keep both the shell and the drill bit cool with water throughout the entire process.
- Apply only light, consistent pressure; let the drill bit do the work, don’t force it.
- Wear safety glasses to protect your eyes from flying debris and shell dust.
- Choose sturdy shells free of existing cracks to minimize breakage during drilling.
- Set up a stable and cushioned workspace to prevent the shell from slipping.
Frequently Asked Questions
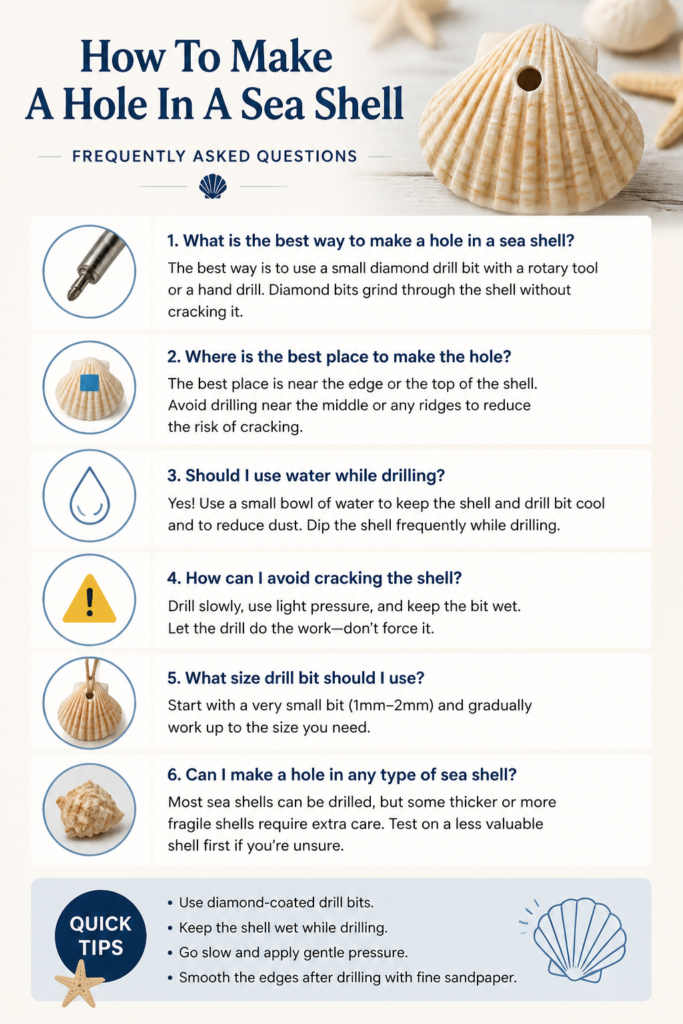
What size drill bit should I use for sea shells?
The ideal drill bit size depends on your project. For delicate jewelry like earrings or small pendants, a 1mm to 2mm bit is often sufficient. For larger pieces or thicker cordage, you might use a 3mm or 4mm bit. It’s always a good idea to start with a smaller bit and widen the hole if necessary.
Can I use a regular hand drill instead of a Dremel?
Yes, you can use a regular electric hand drill, but a Dremel or rotary tool offers more control and typically higher RPMs, which can be beneficial for diamond bits. If using a hand drill, ensure it has a variable speed setting so you can start very slowly. You’ll also need to be extra careful with stability as hand drills are often heavier.
How do I prevent the shell from cracking while drilling?
Prevent cracking by using diamond-tipped bits, drilling slowly with light pressure, and consistently cooling the shell and bit with water. Avoid drilling too close to thin edges or existing weak spots in the shell. A stable, cushioned surface for the shell also helps absorb vibrations.
Do I need to clean the shell before drilling?
Yes, thoroughly cleaning your shells before drilling is highly recommended. Remove any sand, dirt, or organic matter. Clean shells allow for a clear view of your marking point and prevent debris from interfering with the drilling process or dulling your bit prematurely.
Our Top Recommended Finds
- Dremel 4000 Rotary Tool Kit: This versatile tool offers variable speed control, making it perfect for delicate tasks like shell drilling. Its compact size provides excellent maneuverability.
- Diamond-Tipped Drill Bit Set: A good quality set with various sizes (e.g., 1mm-4mm) ensures you have the right bit for any shell project. Look for bits specifically designed for glass, stone, or ceramics.
- Safety Glasses: Essential for protecting your eyes from fine shell dust and small fragments. Choose a comfortable pair that offers full wrap-around protection.
Unleash Your Inner Shell Artist
Now that you have the knowledge and confidence, it’s time to transform those beautiful sea shells into something extraordinary. This simple skill unlocks a world of creative possibilities, from personalized gifts to unique home decorations.
Don’t let your treasured beach finds sit unused. Grab your tools, follow these steps, and start crafting today. Imagine the joy of wearing a necklace made from a shell you found yourself, or adorning your home with truly unique, handmade pieces.
Beginner-friendly templates, step-by-step guides,
and weekly project ideas in your inbox.