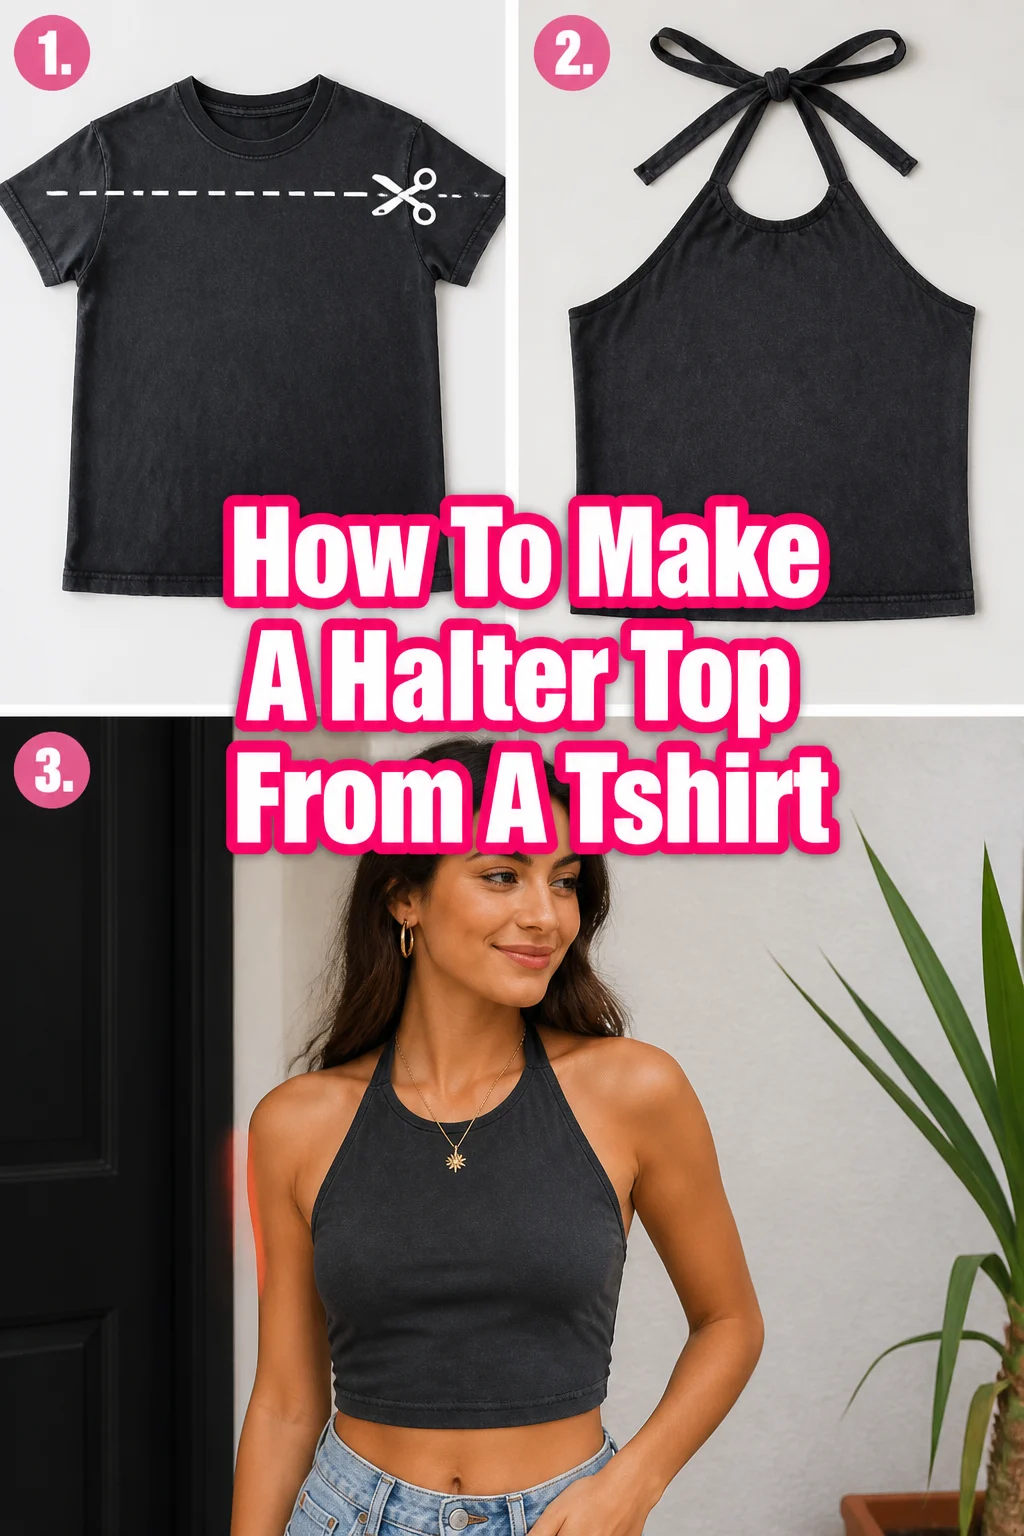
How To Make A Halter Top From A Tshirt

Beginner-friendly templates, step-by-step guides,
and weekly project ideas in your inbox.
✂️ How To Make A Halter Top From A Tshirt
Transforming an old, oversized t-shirt into a stylish halter top is one of the most rewarding DIY projects you can tackle in an afternoon.
I have spent years repurposing vintage band tees and thrift store finds, and I have learned that the secret to a professional look lies in the prep work rather than the sewing.
This guide will walk you through the entire process of creating a custom-fit top that looks like it came straight from a high-end boutique.

Quick Overview
Before you start cutting into your favorite fabric, here is a snapshot of what this project entails.
- Time needed: 30 to 45 minutes
- Difficulty: Beginner
- What you’ll need: An old t-shirt, fabric scissors, tailor’s chalk, a ruler, and safety pins.
Step-by-Step Instructions
Step 1: Select and Prepare Your Fabric
Choose a t-shirt that is slightly larger than your usual size if you want a flowy look, or a standard fit for a snugger finish.
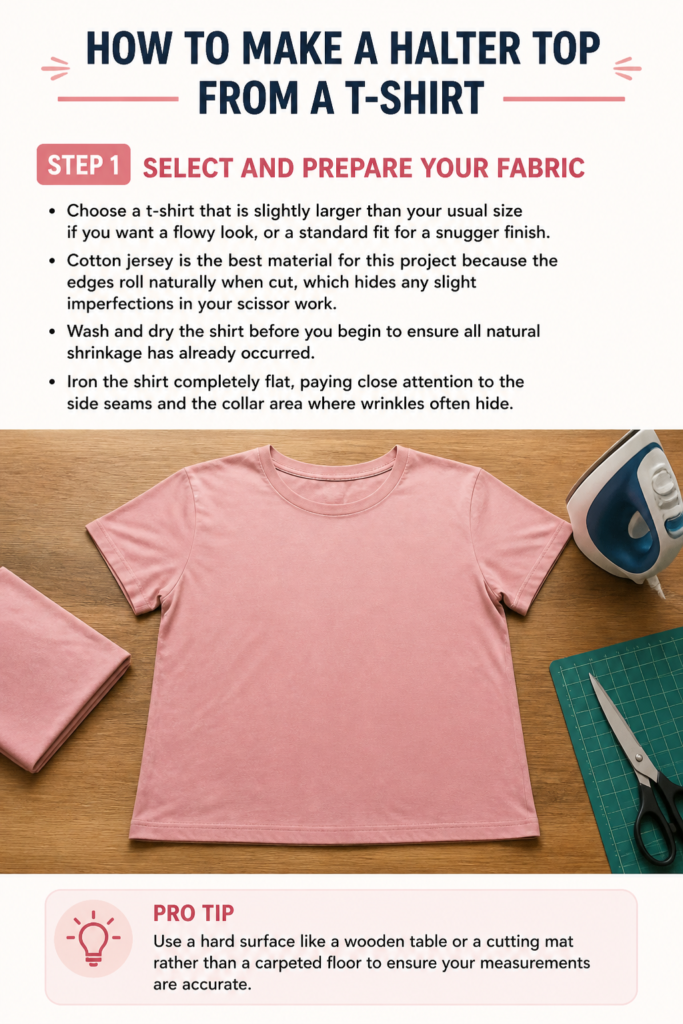
Cotton jersey is the best material for this project because the edges roll naturally when cut, which hides any slight imperfections in your scissor work.
Wash and dry the shirt before you begin to ensure all natural shrinkage has already occurred.
Iron the shirt completely flat, paying close attention to the side seams and the collar area where wrinkles often hide.
Pro Tip: Use a hard surface like a wooden table or a cutting mat rather than a carpeted floor to ensure your measurements are accurate.
Step 2: Map Out the New Neckline
Lay the shirt perfectly flat on your workspace with the front facing upward.
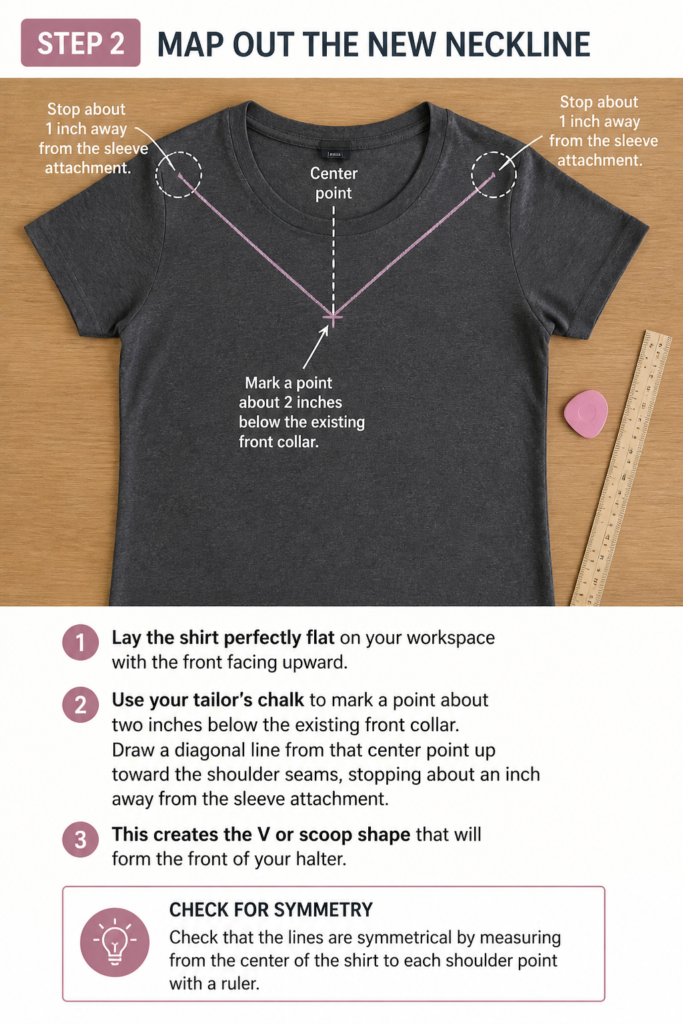
Use your tailor’s chalk to mark a point about two inches below the existing front collar.
Draw a diagonal line from that center point up toward the shoulder seams, stopping about an inch away from the sleeve attachment.
This creates the “V” or “scoop” shape that will form the front of your halter.
Check that the lines are symmetrical by measuring from the center of the shirt to each shoulder point with a ruler.
Step 3: Define the Armholes
Locate the point where the sleeve meets the body of the shirt under the armpit.
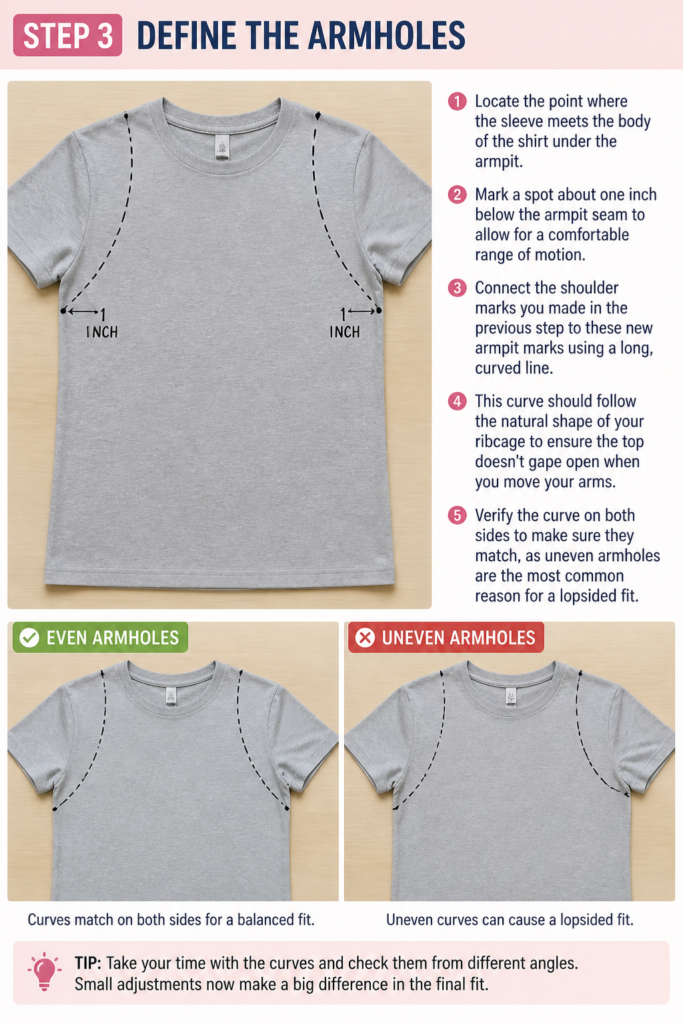
Mark a spot about one inch below the armpit seam to allow for a comfortable range of motion.
Connect the shoulder marks you made in the previous step to these new armpit marks using a long, curved line.
This curve should follow the natural shape of your ribcage to ensure the top doesn’t gape open when you move your arms.
Verify the curve on both sides to make sure they match, as uneven armholes are the most common reason for a lopsided fit.
Step 4: Shape the Back of the Top
Flip the shirt over so the back is facing you, making sure the front layers stay aligned underneath.
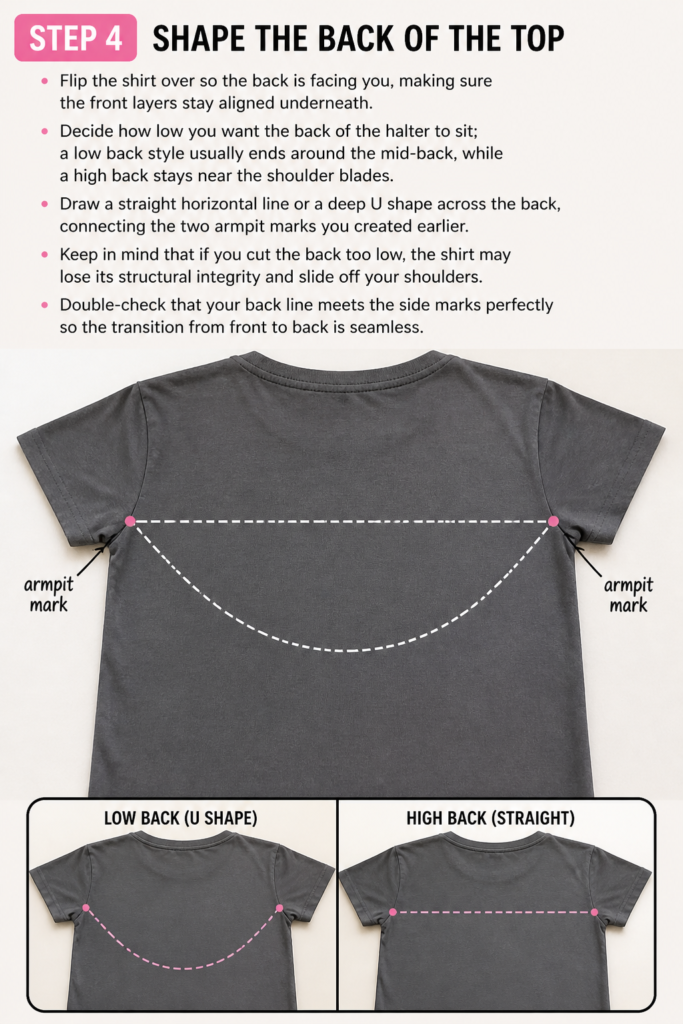
Decide how low you want the back of the halter to sit; a “low back” style usually ends around the mid-back, while a “high back” stays near the shoulder blades.
Draw a straight horizontal line or a deep “U” shape across the back, connecting the two armpit marks you created earlier.
Keep in mind that if you cut the back too low, the shirt may lose its structural integrity and slide off your shoulders.
Double-check that your back line meets the side marks perfectly so the transition from front to back is seamless.
Step 5: Execute the Primary Cuts
Insert your fabric shears into the bottom of the sleeve and cut upward toward the shoulder, following your chalk lines.
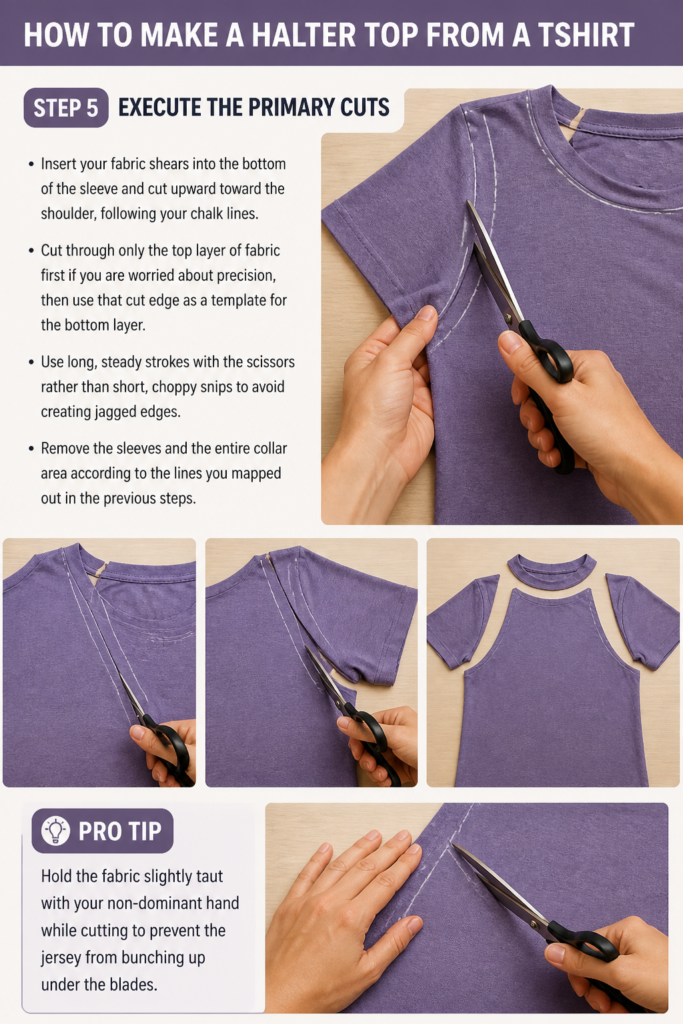
Cut through only the top layer of fabric first if you are worried about precision, then use that cut edge as a template for the bottom layer.
Use long, steady strokes with the scissors rather than short, choppy snips to avoid creating jagged edges.
Remove the sleeves and the entire collar area according to the lines you mapped out in the previous steps.
Pro Tip: Hold the fabric slightly taut with your non-dominant hand while cutting to prevent the jersey from bunching up under the blades.
Step 6: Create the Neck Ties
Take the excess fabric from the sleeves or the discarded back portion of the shirt.
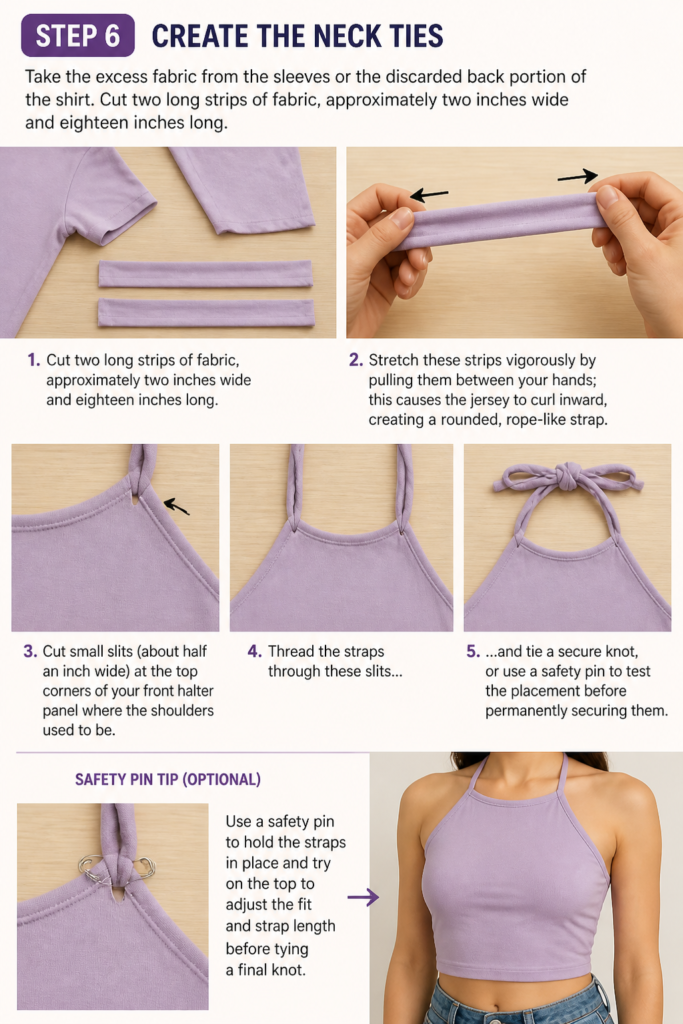
Cut two long strips of fabric, approximately two inches wide and eighteen inches long.
Stretch these strips vigorously by pulling them between your hands; this causes the jersey to curl inward, creating a rounded, rope-like strap.
Cut small slits (about half an inch wide) at the top corners of your front halter panel where the shoulders used to be.
Thread the straps through these slits and tie a secure knot, or use a safety pin to test the placement before permanently securing them.
Step 7: Refine the Edges and Length
Try the top on carefully to see where the hem falls on your waist or hips.
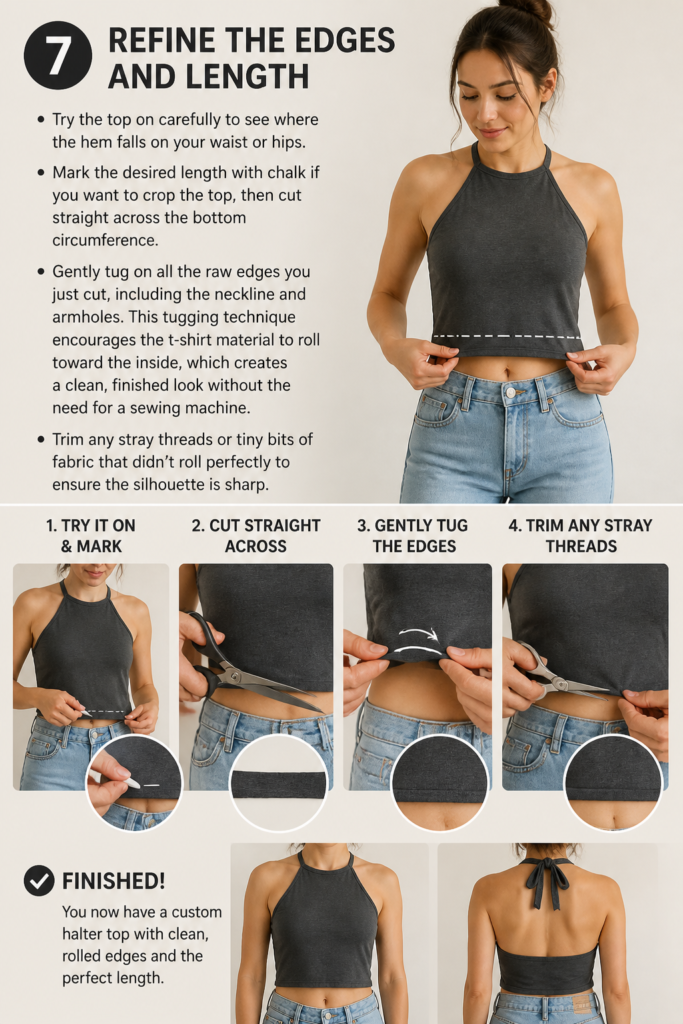
Mark the desired length with chalk if you want to crop the top, then cut straight across the bottom circumference.
Gently tug on all the raw edges you just cut, including the neckline and armholes.
This “tugging” technique encourages the t-shirt material to roll toward the inside, which creates a clean, finished look without the need for a sewing machine.
Trim any stray threads or tiny bits of fabric that didn’t roll perfectly to ensure the silhouette is sharp.
Common Mistakes to Avoid
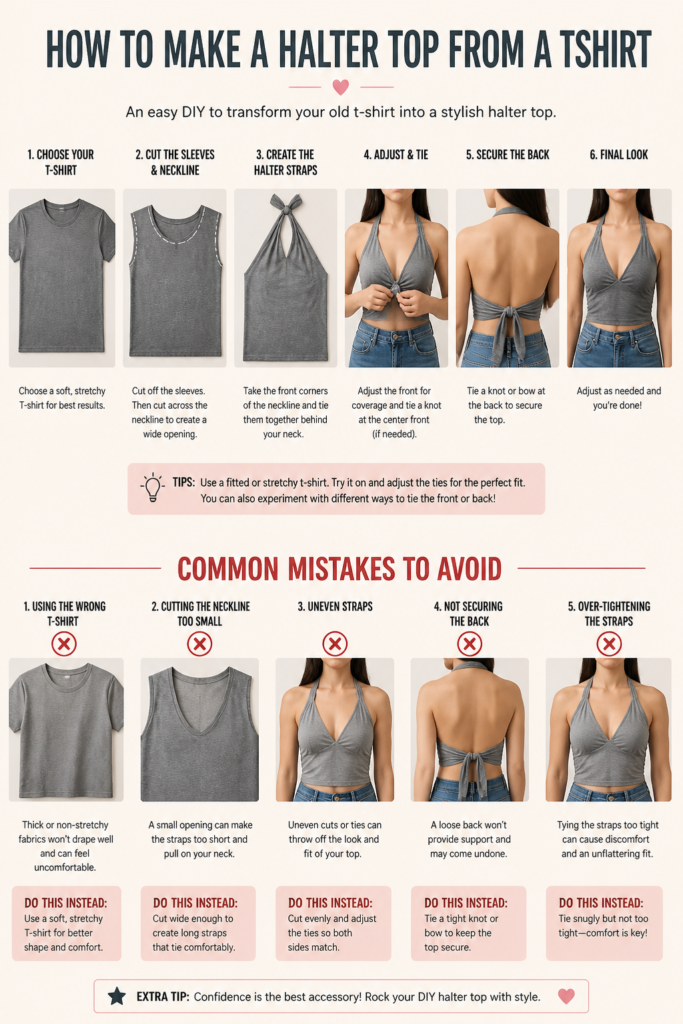
Using Dull Household Scissors
One of the biggest errors people make is using standard kitchen or paper scissors for this project. These blades tend to chew through fabric rather than slicing it, leading to frayed edges that look messy and cheap. Always invest in a pair of dedicated fabric shears that are kept sharp and used only for textiles.
Cutting the Neckline Too Deep Initially
It is very tempting to go for a dramatic plunging neckline right away, but this can lead to disaster. Once you cut the fabric, you cannot put it back, and jersey tends to stretch out further once it is worn. Start with a modest cut, try the shirt on, and then trim away more fabric in small increments until you reach the perfect depth.
Forgetting the Seam Allowance
Even though this is a “no-sew” project for many, you still need to account for how the fabric will behave. When you pull the edges to make them roll, you lose about a quarter-inch of fabric on all sides. If you cut the shirt to your exact measurements without leaving a little extra room, the final result might be tighter than you intended.
Troubleshooting
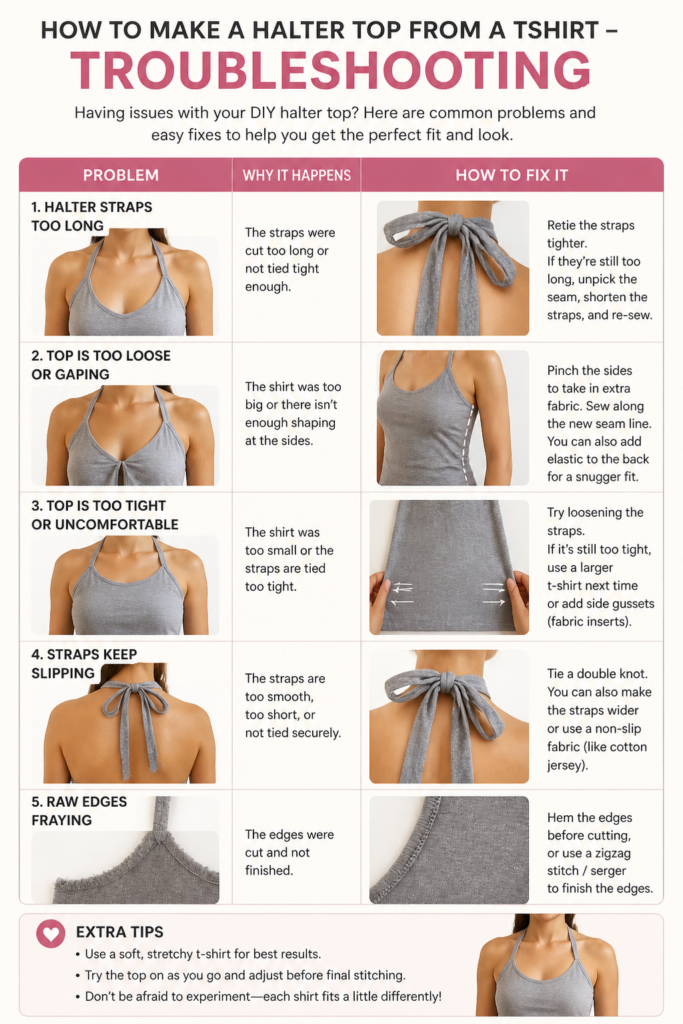
The Straps Feel Flimsy or Dig Into the Shoulders
If your straps feel like they might snap or are causing discomfort, they are likely too thin. You can solve this by cutting a wider strip of fabric from the leftover scraps and braiding three thin strips together. This creates a much stronger, thicker strap that distributes the weight of the shirt more evenly across your neck.
The Fabric Is Rolling Outward Instead of Inward
Sometimes the way a t-shirt is knit causes the raw edges to curl toward the front, showing the “wrong” side of the fabric. To fix this, dampen the edges slightly with water and manually roll them toward the inside. Pin them in place and run a warm iron over them to “set” the curl in the correct direction.
The Sides Are Gaping Open
If the fabric under your arms is sticking out or showing too much of your side, the armhole curve was likely cut too straight. You can fix this by creating a small “dart” or fold in the fabric under the arm and securing it with a few hand stitches or a small safety pin hidden on the inside. This pulls the fabric closer to the body for a more tailored fit.
Key Takeaways
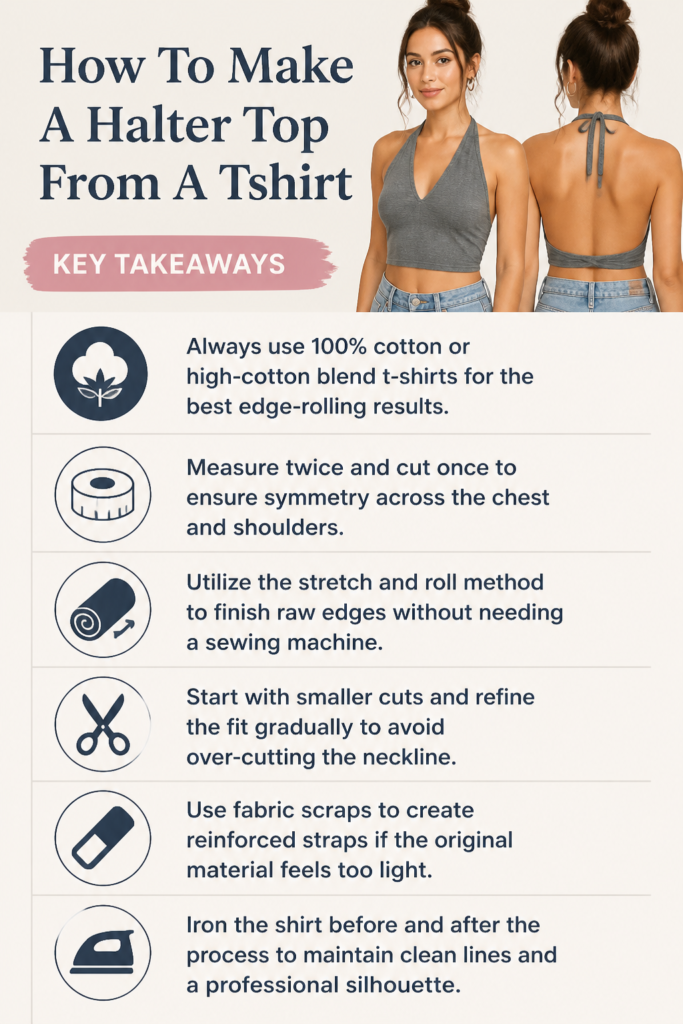
- Always use 100% cotton or high-cotton blend t-shirts for the best edge-rolling results.
- Measure twice and cut once to ensure symmetry across the chest and shoulders.
- Utilize the “stretch and roll” method to finish raw edges without needing a sewing machine.
- Start with smaller cuts and refine the fit gradually to avoid over-cutting the neckline.
- Use fabric scraps to create reinforced straps if the original material feels too light.
- Iron the shirt before and after the process to maintain clean lines and a professional silhouette.
Frequently Asked Questions
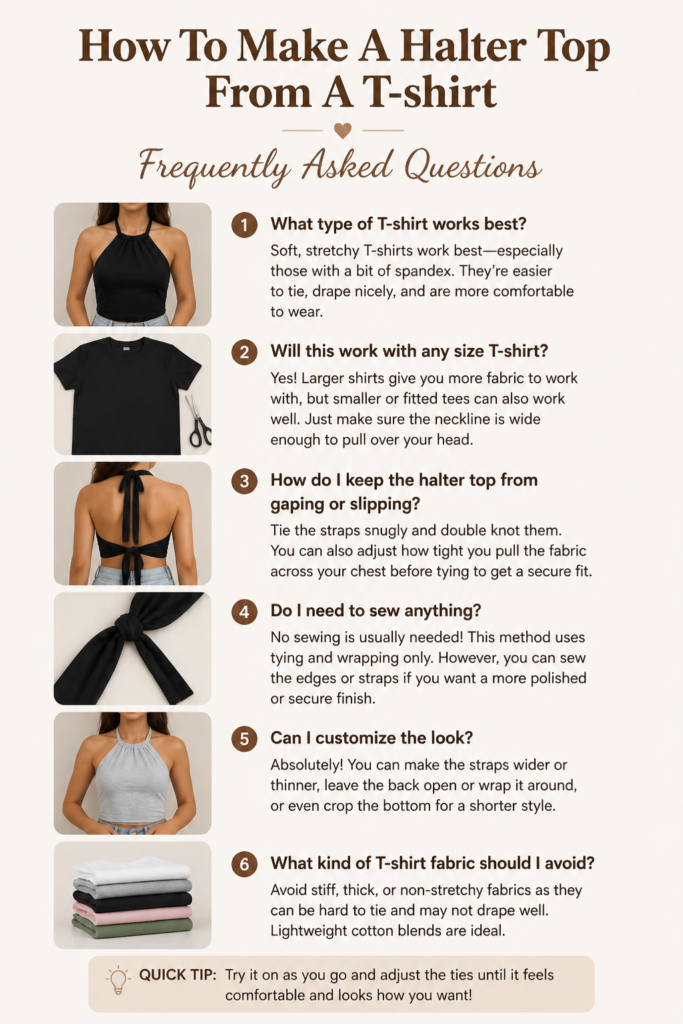
Can I make this with a ribbed t-shirt?
You can use ribbed fabric, but be aware that it does not roll at the edges the same way standard jersey does. Ribbed material tends to fray or stretch out horizontally when cut. If you use a ribbed shirt, you might need to use fabric glue or a simple hem to keep the edges from looking unfinished over time.
How do I wash my new halter top without it falling apart?
Since the edges are raw, it is best to wash your DIY halter top in a mesh laundry bag on a delicate cycle. This prevents the straps from getting tangled around the agitator or other clothes, which could tear the fabric. Air drying is also highly recommended to preserve the shape and prevent the rolled edges from flattening out.
What if the shirt I want to use has a large graphic on the front?
Graphics can actually make the top look even better, but you must plan your cuts around the design. Make sure the “V” of the neckline doesn’t cut through the middle of a face or an important word in the print. You may need to adjust the depth of your neckline higher or lower to frame the graphic perfectly on your chest.
Does this method work on oversized sweatshirts?
The basic logic applies to sweatshirts, but the execution is different because the fabric is much thicker. You will likely need heavy-duty shears to get through the fleece. Additionally, sweatshirt material does not roll as tightly as t-shirt jersey, so the “tugging” technique will result in a more rugged, raw-edge aesthetic rather than a clean curl.
Our Top Recommended Finds
- Gingher Fabric Shears: These are the gold standard for DIY enthusiasts because they stay sharp for years and provide a buttery-smooth cut.
- Madam Sew Tailor’s Chalk Set: Having multiple colors of chalk allows you to mark dark and light shirts with equal visibility.
- Dritz Retractable Measuring Tape: A flexible tape is essential for measuring the curves of your body and the fabric accurately.
Customize Your New Summer Wardrobe
Now that you have mastered the basic halter top, you can experiment with different variations to expand your collection.
Try adding beads to the straps for a bohemian look or using a bleach-splatter technique on a dark shirt before you cut it.
Once you see how easy it is to breathe new life into an old garment, you will never look at a plain t-shirt the same way again.
Grab those scissors and start your first transformation today.
Beginner-friendly templates, step-by-step guides,
and weekly project ideas in your inbox.