🛏️ How To Make A Pillow Out Of A Blanket

Beginner-friendly templates, step-by-step guides,
and weekly project ideas in your inbox.
There’s something incredibly satisfying about creating something useful from what you already have. I remember a chilly camping trip where I forgot my pillow, and a spare fleece blanket saved the day, transforming into a surprisingly comfortable headrest. This guide shares the practical steps I learned that day, ensuring you can craft a cozy pillow whenever the need arises. You’ll gain the skills to repurpose an old blanket, adding comfort to your home or adventure kit without buying new.

Quick Overview
Crafting a pillow from a blanket is a simple, resourceful project. You’ll transform a piece of fabric into a soft, functional pillow using basic folding and securing techniques.
- Time needed: 30-60 minutes (depending on chosen securing method)
- Difficulty: Beginner
- What you’ll need: A blanket, scissors, measuring tape or ruler, pins or safety pins, and optionally needle/thread or fabric glue.
Step-by-Step Instructions
Step 1: Choose Your Blanket Wisely
The type of blanket you select significantly impacts your pillow’s comfort and durability. Opt for a blanket that is soft, clean, and in good condition. Thicker materials like fleece, wool, or quilted blankets provide more loft and structure.
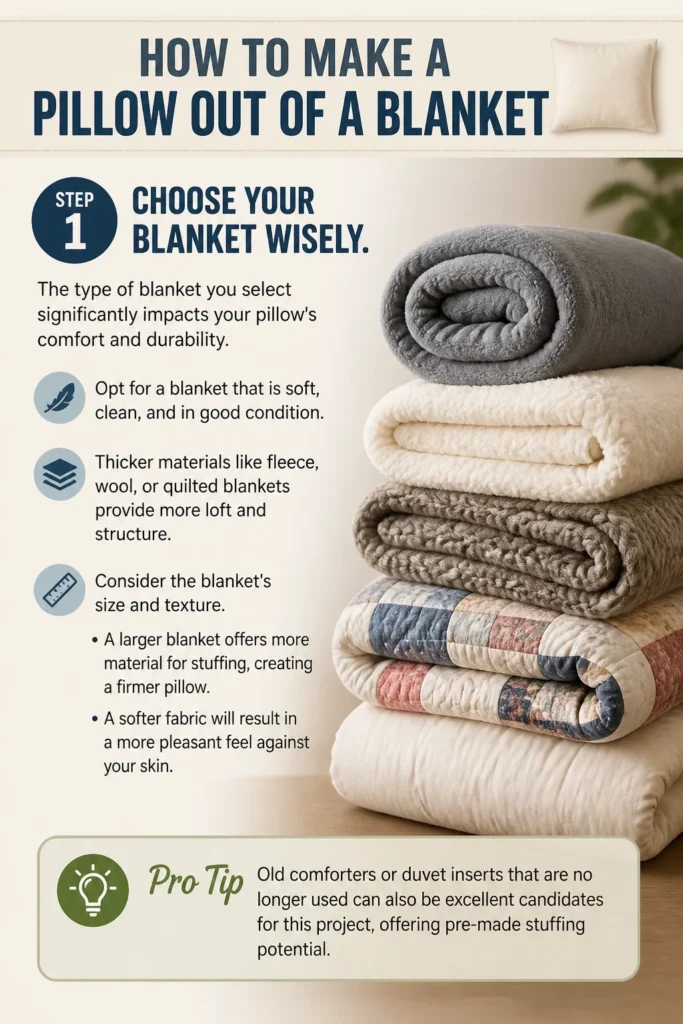
Consider the blanket’s size and texture. A larger blanket offers more material for stuffing, creating a firmer pillow. A softer fabric will result in a more pleasant feel against your skin.
Pro Tip: Old comforters or duvet inserts that are no longer used can also be excellent candidates for this project, offering pre-made stuffing potential.
Step 2: Prepare Your Workspace and Blanket
Find a large, clean, flat surface to work on, such as a floor or a spacious table. This allows you to spread out the blanket completely without wrinkles or bunching. Smooth out your chosen blanket thoroughly, removing any creases.
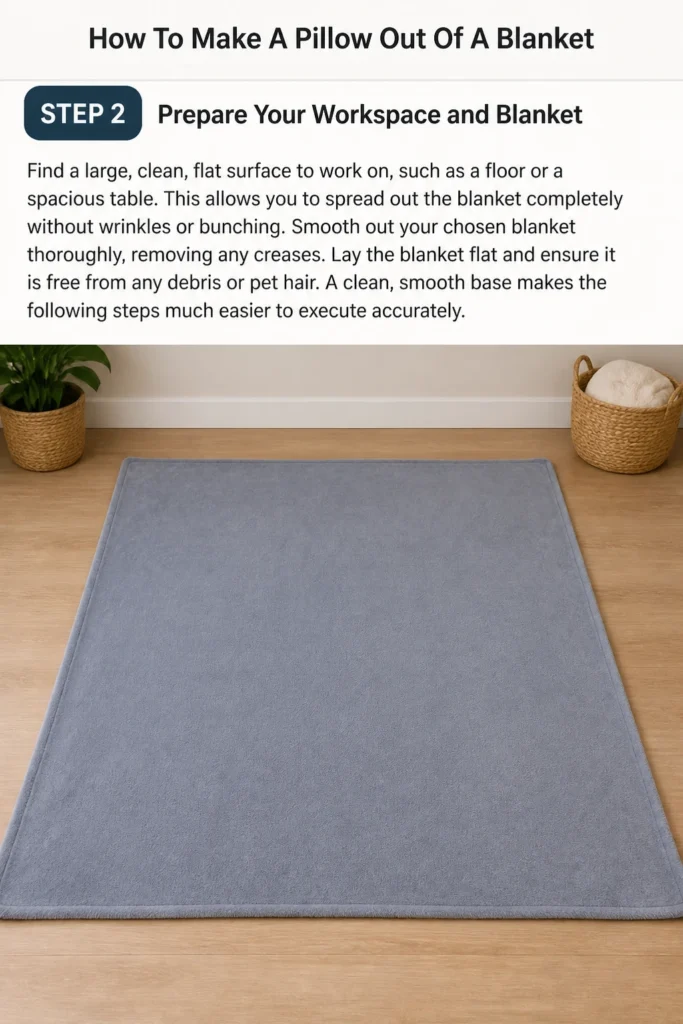
Lay the blanket flat and ensure it is free from any debris or pet hair. A clean, smooth base makes the following steps much easier to execute accurately.
Step 3: Determine Your Desired Pillow Size
Decide on the dimensions for your finished pillow. A standard sleeping pillow is often around 20×26 inches, but you can customize this based on your needs. For a decorative throw pillow, you might aim for 18×18 inches.
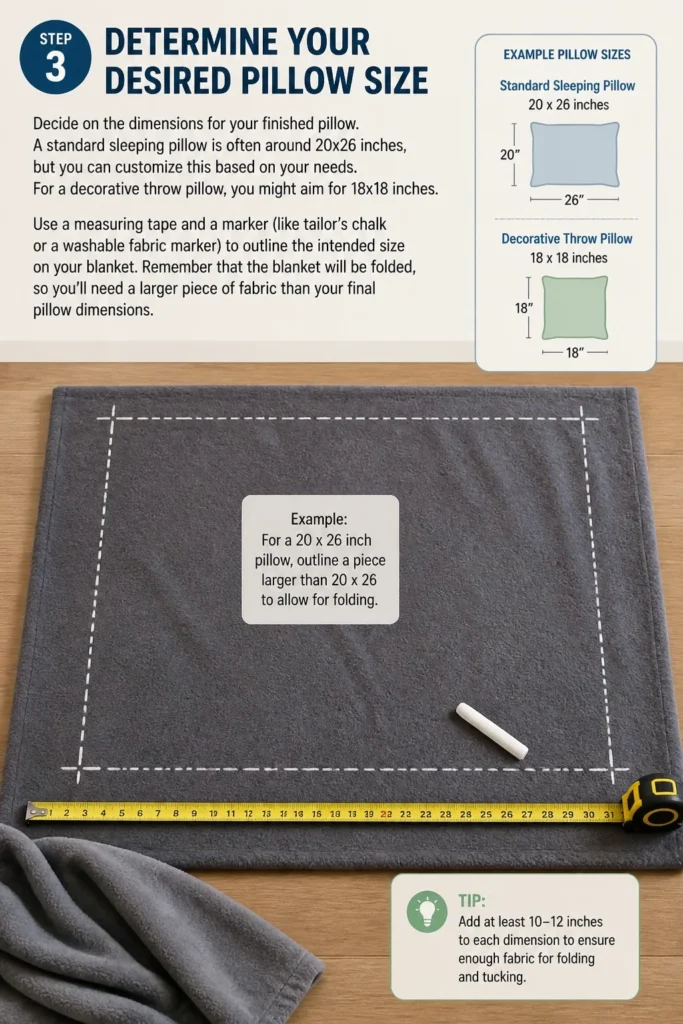
Use a measuring tape and a marker (like tailor’s chalk or a washable fabric marker) to outline the intended size on your blanket. Remember that the blanket will be folded, so you’ll need a larger piece of fabric than your final pillow dimensions.
Step 4: Cut the Blanket to Size (If Necessary)
If your blanket is very large or you’re making multiple pillows, you might need to cut it. For a rectangular pillow, you generally want a piece of fabric that is at least twice the length and twice the width of your desired finished pillow, plus seam allowances if you plan to sew. For a no-sew method, you’ll need extra fabric for folding and tucking.
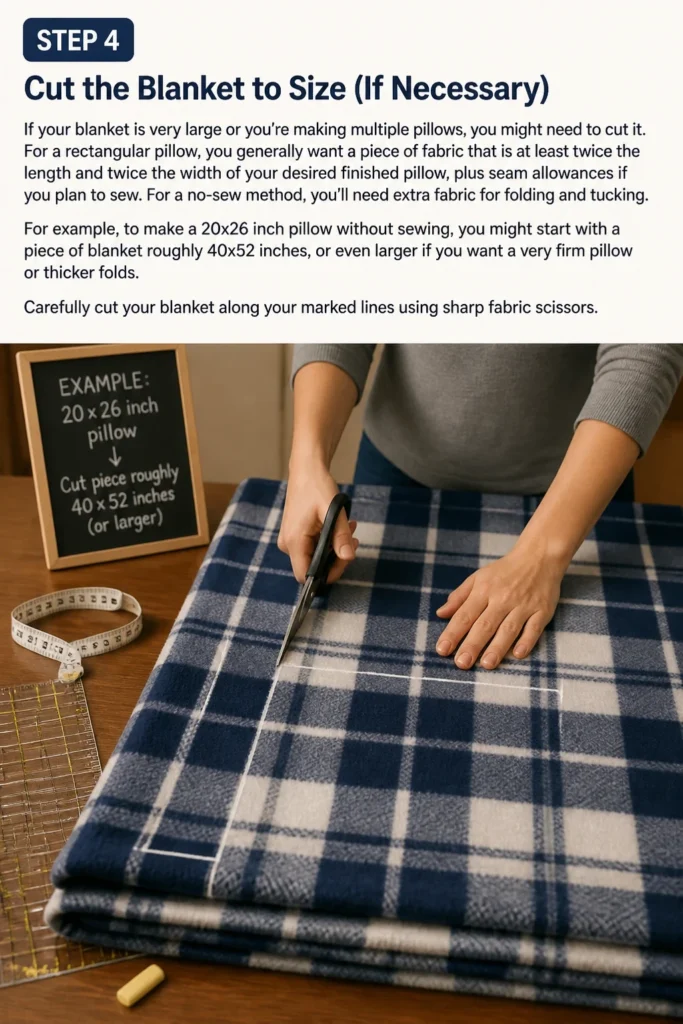
For example, to make a 20×26 inch pillow without sewing, you might start with a piece of blanket roughly 40×52 inches, or even larger if you want a very firm pillow or thicker folds. Carefully cut your blanket along your marked lines using sharp fabric scissors.
Step 5: Begin Folding for Stuffing
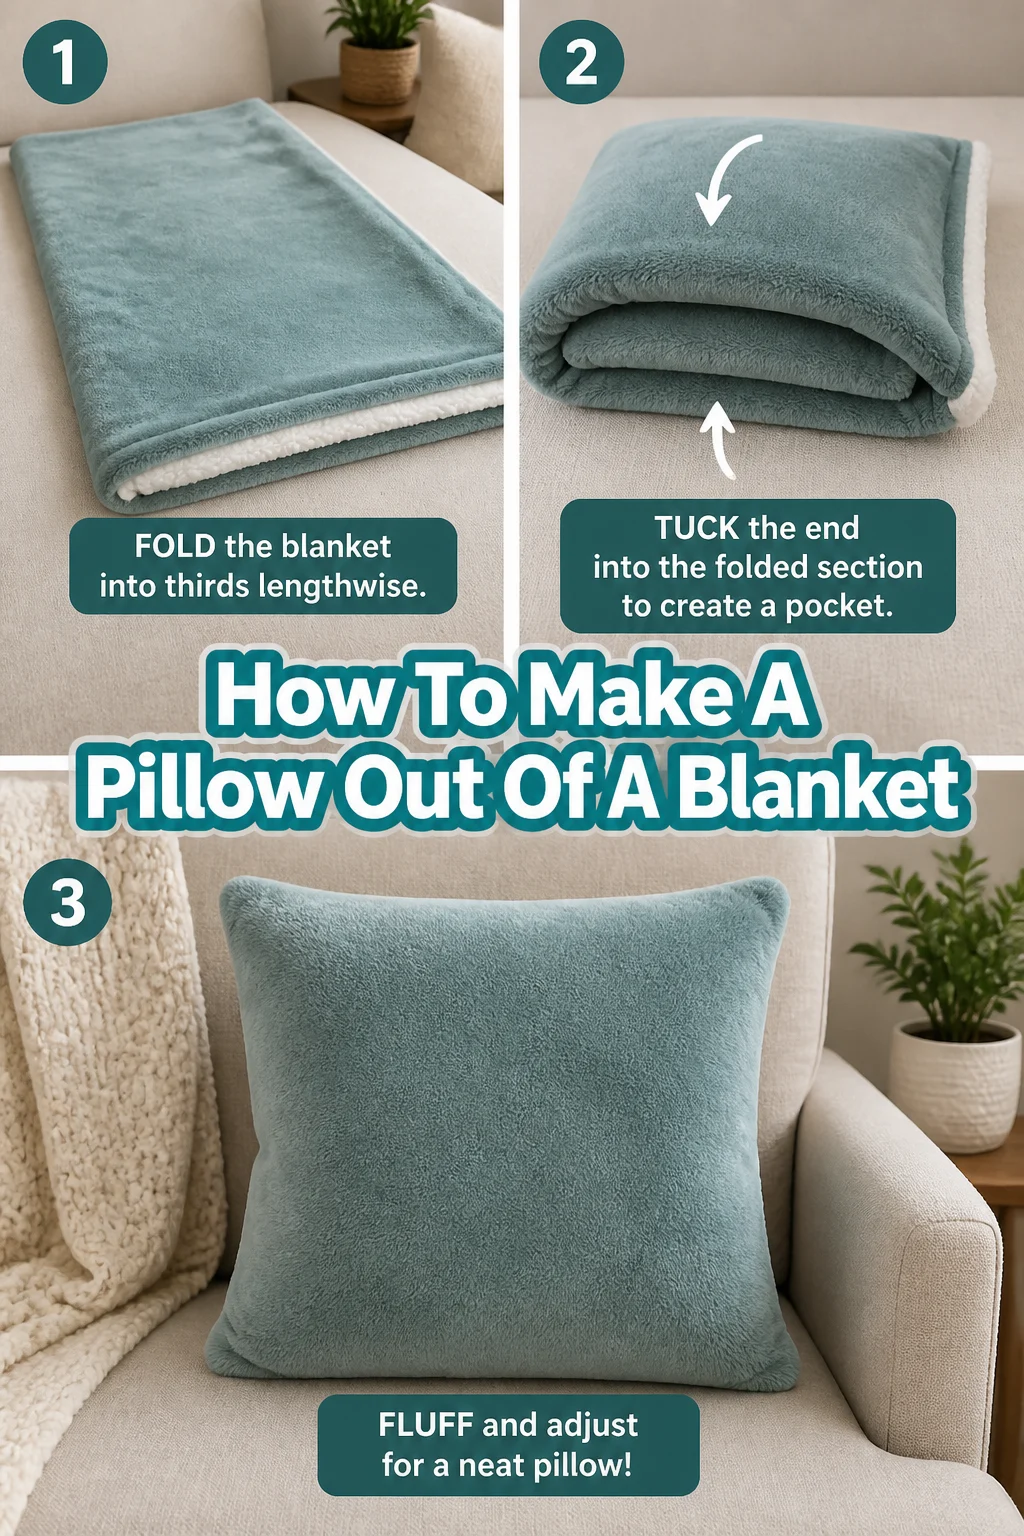
This step creates the core of your pillow. Take one edge of your cut blanket piece and fold it inward towards the center. The amount you fold determines the thickness of your pillow. Aim for a fold that is roughly the width of your desired pillow.
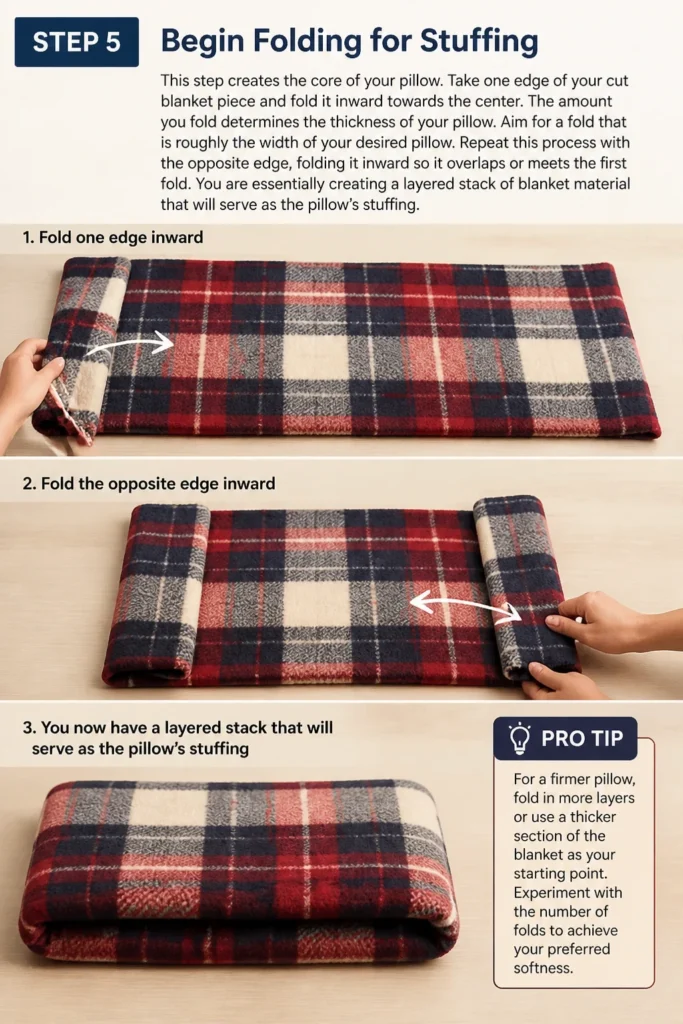
Repeat this process with the opposite edge, folding it inward so it overlaps or meets the first fold. You are essentially creating a layered stack of blanket material that will serve as the pillow’s stuffing.
Pro Tip: For a firmer pillow, fold in more layers or use a thicker section of the blanket as your starting point. Experiment with the number of folds to achieve your preferred softness.
Step 6: Shape and Compress the Core
Once you have your initial folds, gently pat and smooth the layers. Ensure the blanket material is evenly distributed within the folded section. This prevents lumps and creates a consistent feel for your pillow.
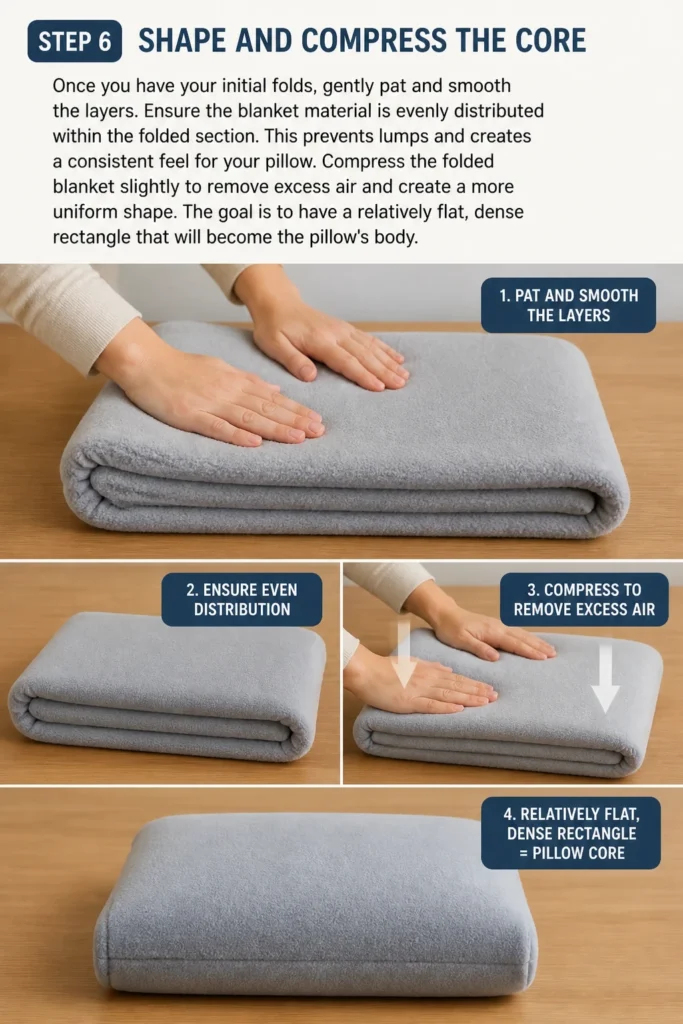
Compress the folded blanket slightly to remove excess air and create a more uniform shape. The goal is to have a relatively flat, dense rectangle that will become the pillow’s body.
Step 7: Fold the Sides to Enclose the Stuffing
Now, it’s time to enclose the layered core. Take one of the longer, unfolded sides of your blanket. Fold it inward over the layered stuffing, bringing it towards the center. This fold should cover the edge of your layered core.
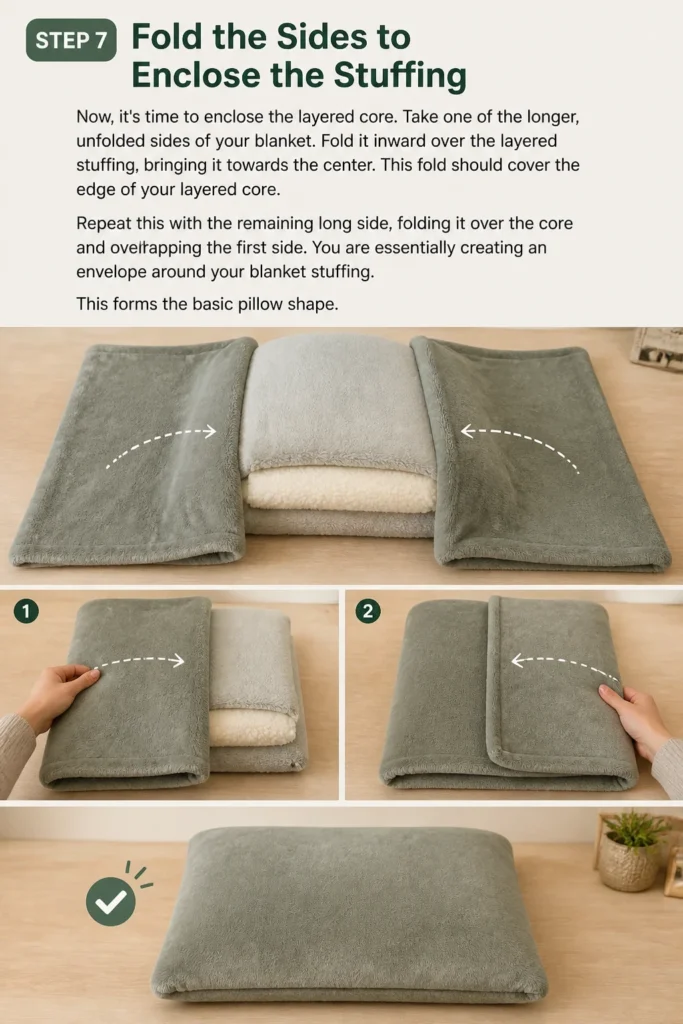
Repeat this with the remaining long side, folding it over the core and overlapping the first side. You are essentially creating an envelope around your blanket stuffing. This forms the basic pillow shape.
Step 8: Secure the Edges
This is where you make your pillow permanent. You have several options for securing the edges:
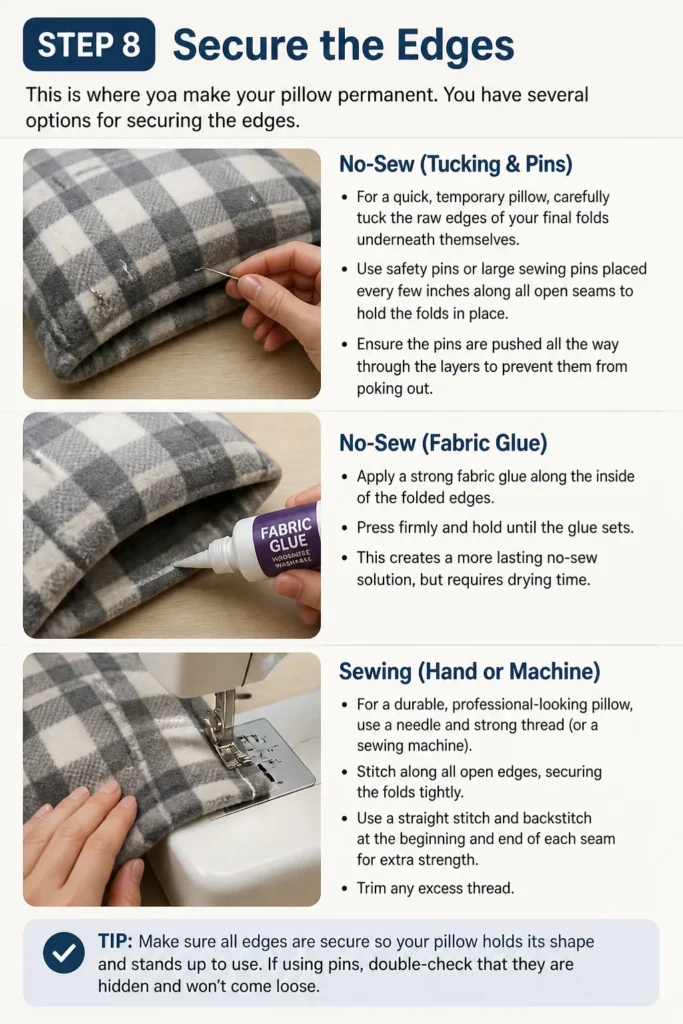
No-Sew (Tucking & Pins): For a quick, temporary pillow, carefully tuck the raw edges of your final folds underneath themselves. Use safety pins or large sewing pins placed every few inches along all open seams to hold the folds in place. Ensure the pins are pushed all the way through the layers to prevent them from poking out.
No-Sew (Fabric Glue): Apply a strong fabric glue along the inside of the folded edges. Press firmly and hold until the glue sets. This creates a more lasting no-sew solution, but requires drying time.
* Sewing (Hand or Machine): For a durable, professional-looking pillow, use a needle and strong thread (or a sewing machine). Stitch along all open edges, securing the folds together. A simple running stitch or a whipstitch works well for hand-sewing.
Pro Tip: If using pins, place them on the underside or less visible seams of the pillow. This hides them and prevents snags.
Step 9: Refine and Adjust
Once your pillow is secured, take a moment to fluff and shape it. Gently push and pull at the sides to distribute the blanket material evenly. Check for any lumps or unevenness and smooth them out.
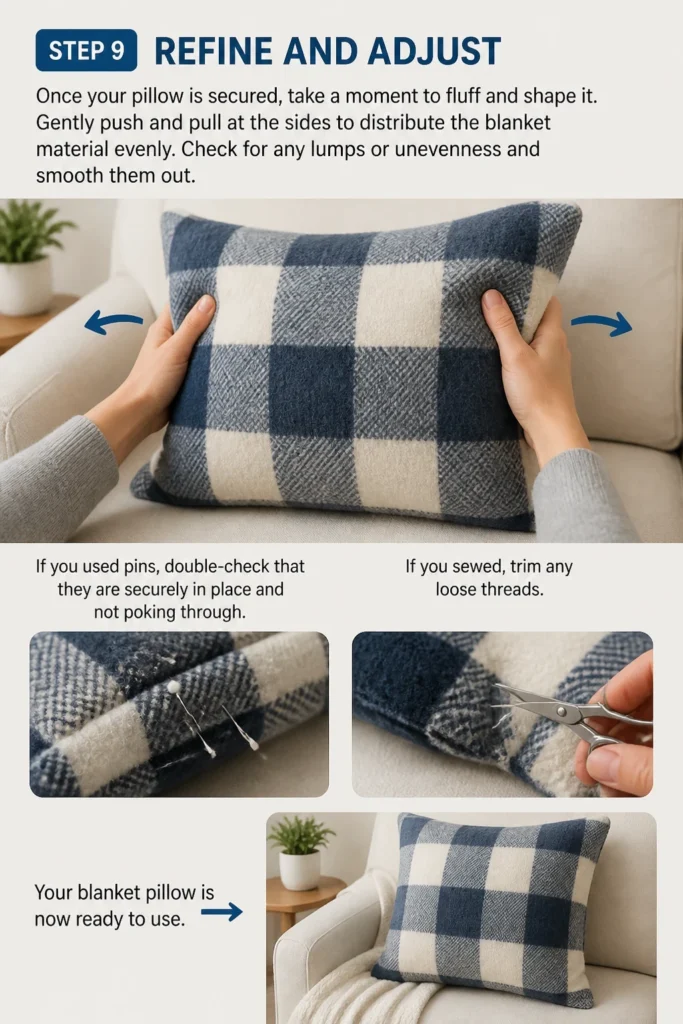
If you used pins, double-check that they are securely in place and not poking through. If you sewed, trim any loose threads. Your blanket pillow is now ready to use.
Step 10: Consider an Outer Cover (Optional)
While your blanket pillow is functional as is, adding an outer cover can enhance its longevity and hygiene. A pillowcase or a decorative pillow sham protects the blanket material from dirt and wear. It also allows for easier washing.
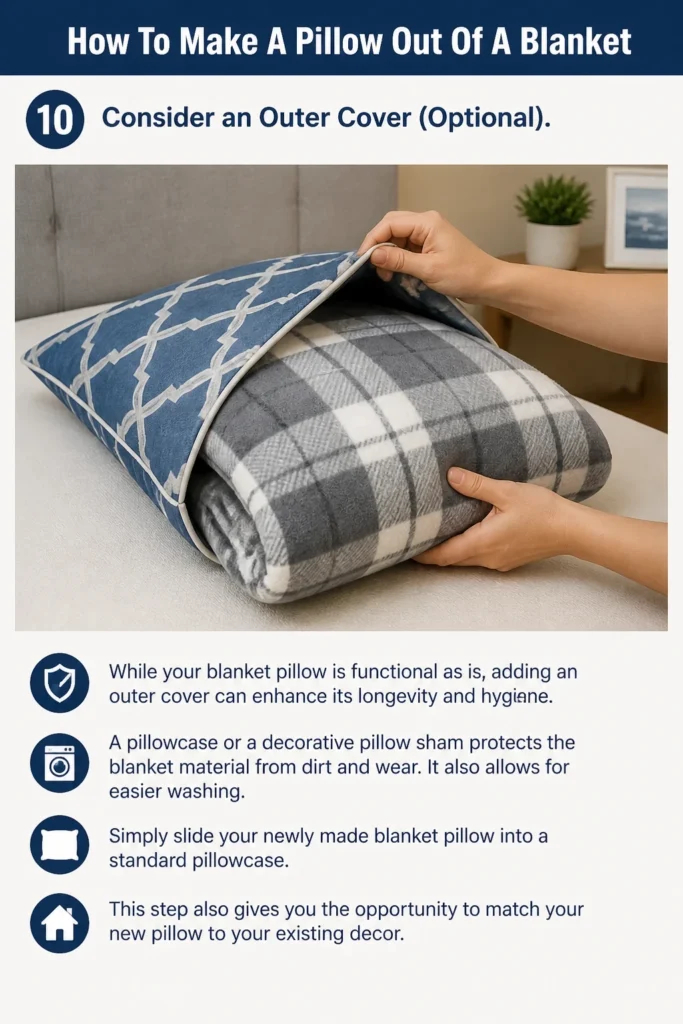
Simply slide your newly made blanket pillow into a standard pillowcase. This step also gives you the opportunity to match your new pillow to your existing decor.
Common Mistakes to Avoid
Choosing a Too-Thin Blanket
Selecting a blanket that is too thin will result in a flimsy, unsupportive pillow. It won’t hold its shape well and will compress easily, offering little comfort. Always opt for a thicker blanket or be prepared to use multiple layers for adequate density.
Not Smoothing Layers Properly
Failing to smooth out the blanket layers during folding leads to a lumpy and uneven pillow. This makes it uncomfortable to rest on and compromises the overall aesthetic. Take your time to flatten each layer thoroughly before moving to the next.
Inadequate Securing of Edges
If the edges are not secured tightly enough, the pillow will unravel with use. Pins might come loose, or glue might not hold, causing the blanket to unfold. Use enough pins, apply sufficient glue, or stitch thoroughly to ensure a lasting hold.
Making it Too Small or Too Large
Incorrectly estimating the final pillow size can lead to disappointment. A pillow that’s too small might not offer enough support, while one that’s too large could be unwieldy. Measure carefully and visualize the final dimensions before cutting and folding.
Troubleshooting
Pillow Feels Lumpy
If your finished pillow feels lumpy, it’s likely due to uneven distribution of the blanket material inside. Open up the secured edges slightly (if possible), and gently work the blanket layers with your hands. Try to flatten and spread out any bunched-up sections. If you used pins, remove them, re-fluff, and then re-pin.
Pillow Unravels or Comes Apart
This usually indicates that the securing method wasn’t strong enough. If using pins, add more pins, ensuring they go through all layers of fabric. For fabric glue, apply a more generous amount and allow ample drying time. If sewing, reinforce your stitches with a second pass or use a stronger stitch type.
Pillow Isn’t Firm Enough
If your pillow lacks the desired firmness, you probably didn’t use enough blanket material or didn’t fold enough layers. You can try to carefully open one end of the pillow and insert additional blanket scraps or other soft fabric to increase its density. Alternatively, start over with a thicker blanket or more substantial folding.
Key Takeaways
- Choosing a thick, soft blanket is crucial for a comfortable and durable pillow.
- Careful and even folding of the blanket layers prevents lumps and ensures consistent support.
- Accurately determining your desired pillow size before you start will save you frustration.
- Securing the edges thoroughly, whether with pins, glue, or stitching, ensures your pillow stays intact.
- This project is highly customizable, allowing you to create pillows of various sizes and firmness levels.
- Adding an outer pillowcase protects your creation and makes it easier to keep clean.
Frequently Asked Questions
Can I wash a pillow made from a blanket?
Yes, you generally can, but it depends on how you secured it. If you sewed the pillow, you can wash it according to the blanket’s care instructions. If you used fabric glue, check if the glue is washable. For pinned pillows, it’s best to remove the pins, unfold the blanket, wash it, and then reassemble the pillow to prevent pins from damaging your washing machine.
How long will a blanket pillow last?
The lifespan of your blanket pillow depends on the quality of the blanket, how well it’s secured, and how often it’s used. A well-made, sewn pillow from a durable blanket can last for years. A pinned pillow is more temporary but can still hold up for several weeks or months with gentle use.
What if I don’t have a sewing machine?
No problem at all! You can easily make a sturdy blanket pillow without a sewing machine. Hand-sewing with a simple running stitch or whipstitch is very effective. Alternatively, using safety pins or strong fabric glue provides excellent no-sew options for securing the edges.
Can I use different types of blankets together?
Absolutely! Combining different blankets can create unique textures and firmness levels. You might use a thin blanket for the outer layer for softness and a thicker, denser blanket for the inner stuffing. Just ensure the materials are compatible and won’t create too much bulk or an uneven feel.
Our Top Recommended Finds
- Sharp Fabric Scissors: Essential for clean, straight cuts, preventing frayed edges and making the process much smoother.
- Large Safety Pins: Ideal for a quick, secure, no-sew solution, especially for temporary pillows or if you plan to wash the blanket frequently.
- Fabric Glue (Washable): A great option for a more permanent no-sew pillow, offering a clean finish without the need for needles and thread.
Craft Your Comfort Today
Making a pillow from a blanket is a simple, rewarding project that offers both practicality and a sense of accomplishment. You’re not just making a pillow; you’re transforming an everyday item into a source of comfort and resourcefulness. It’s an opportunity to embrace sustainability and add a personalized touch to your living space. Why wait? Gather your materials and start crafting your custom comfort today.
Beginner-friendly templates, step-by-step guides,
and weekly project ideas in your inbox.