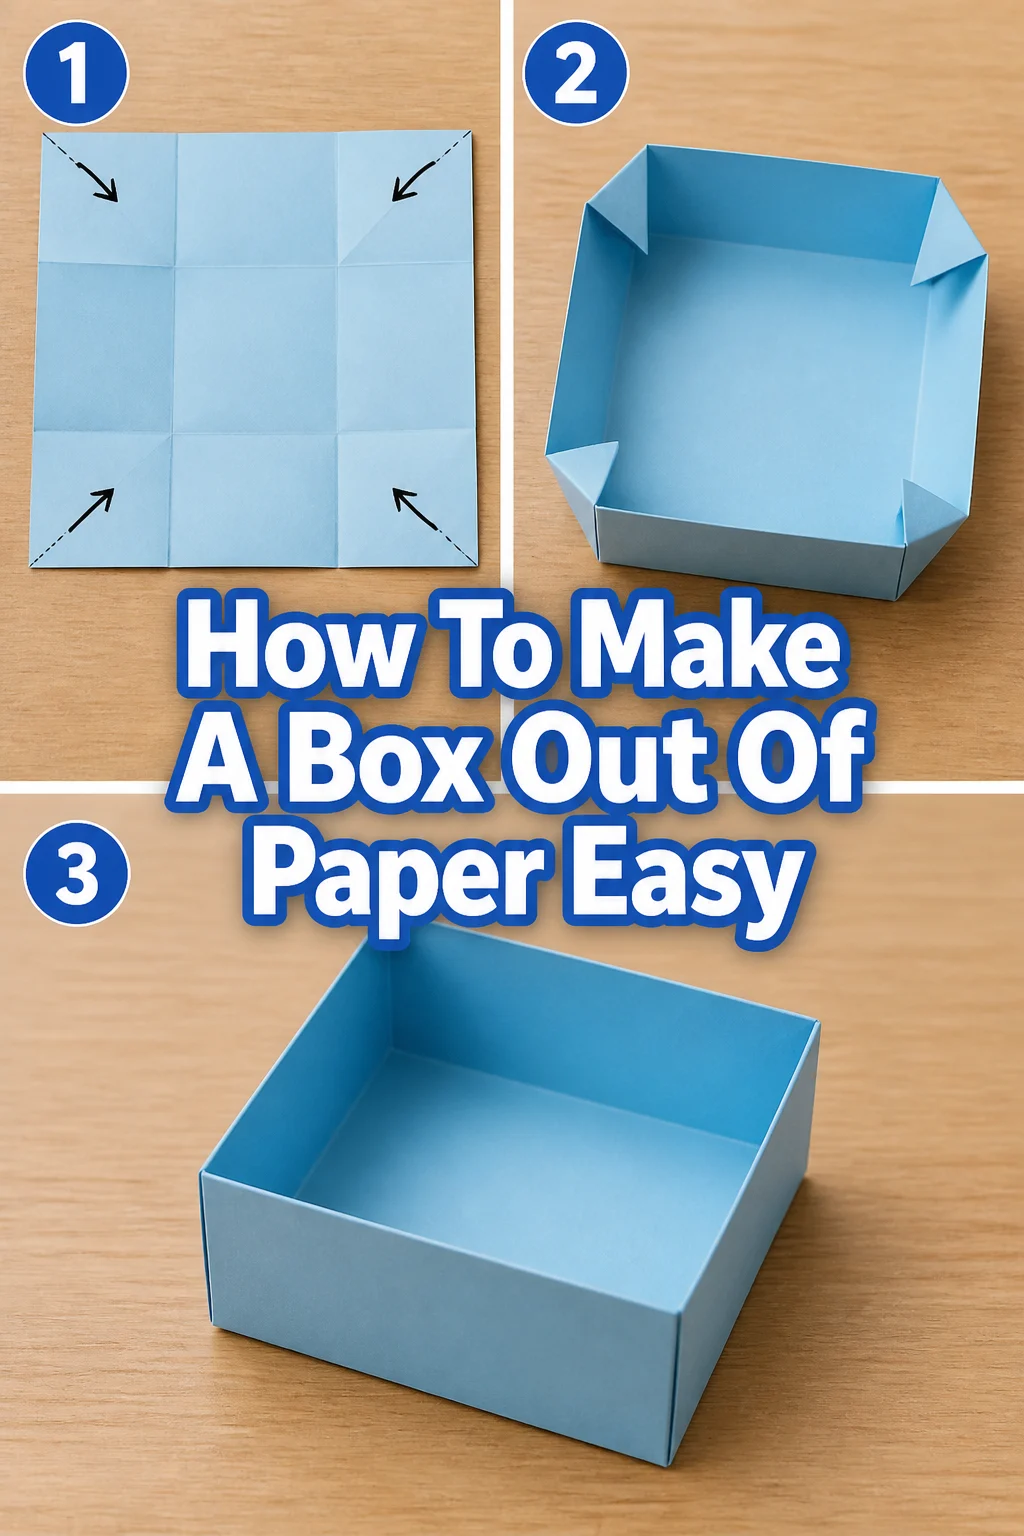
📦 How To Make A Box Out Of Paper Easy

Beginner-friendly templates, step-by-step guides,
and weekly project ideas in your inbox.
Ever found yourself needing a small container for trinkets, a thoughtful gift, or just a fun craft project? Making a simple paper box is a surprisingly rewarding skill.
I’ve personally folded countless boxes for everything from organizing tiny beads to presenting homemade cookies. It’s a fantastic way to add a personal touch to your everyday.
This guide will walk you through creating a sturdy, elegant paper box using just a single sheet of paper and your hands. You’ll be amazed at how quickly you can master this craft.

Quick Overview
You’re about to create a functional and attractive paper box, perfect for small gifts or organizing. This classic folding technique requires no glue or tape, relying purely on precise folds.
- Time needed: 10-15 minutes (first attempt), 5-7 minutes (once you get the hang of it)
- Difficulty: Beginner
- What you’ll need: One square sheet of paper (origami paper or any square paper), a flat surface, your hands
Step-by-Step Instructions
Step 1: Prepare Your Paper
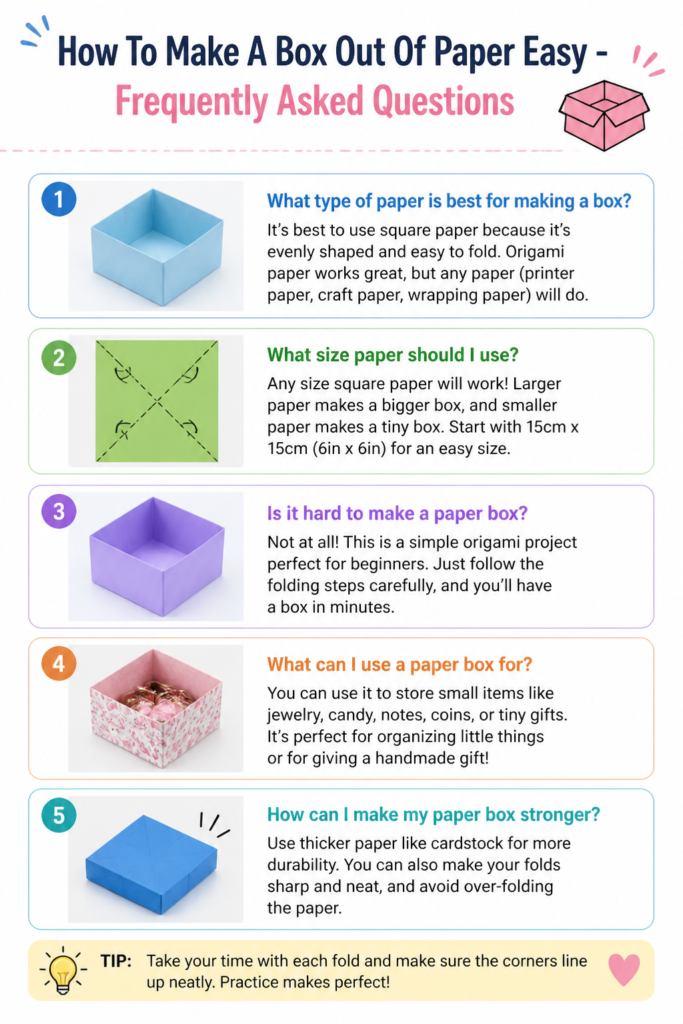
Begin with a perfectly square sheet of paper. The size of your finished box will depend directly on the size of your starting paper. A 6×6 inch (15×15 cm) sheet is ideal for practice.
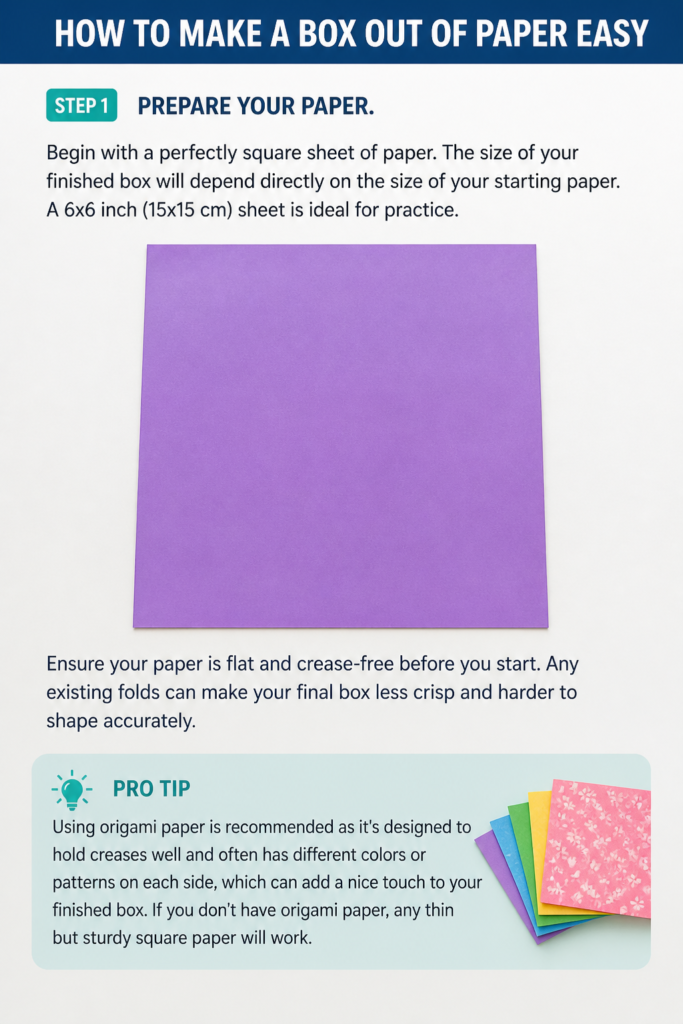
Ensure your paper is flat and crease-free before you start. Any existing folds can make your final box less crisp and harder to shape accurately.
Pro Tip: Using origami paper is recommended as it’s designed to hold creases well and often has different colors or patterns on each side, which can add a nice touch to your finished box. If you don’t have origami paper, any thin but sturdy square paper will work.
Step 2: Fold into Halves and Quarters
Lay your square paper flat on your work surface, patterned side down if you want the pattern on the outside of your box.
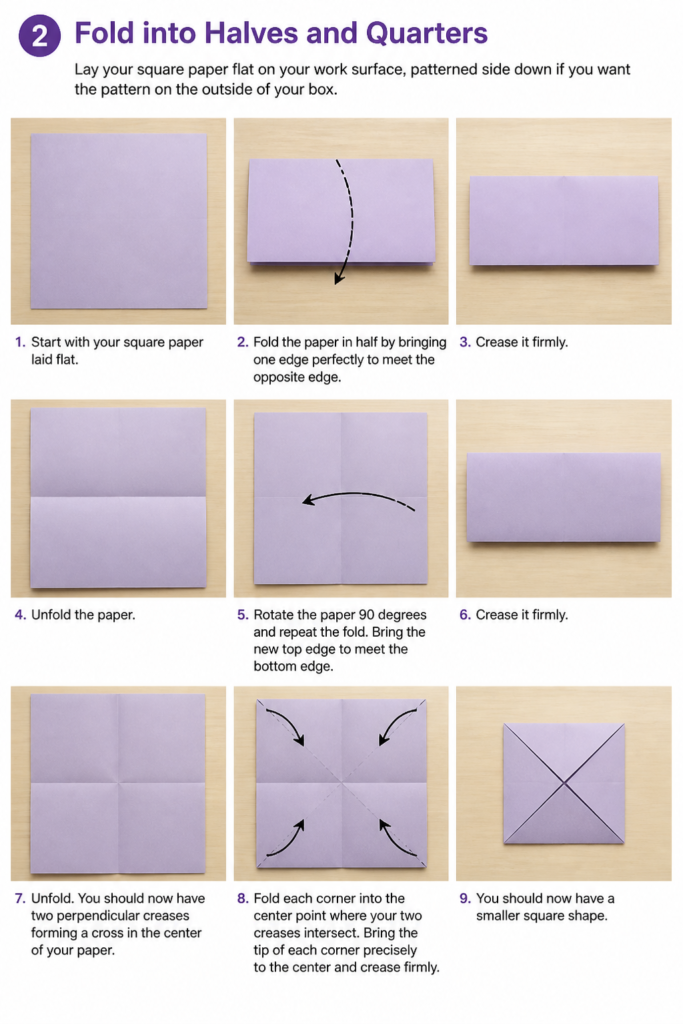
Fold the paper in half by bringing one edge perfectly to meet the opposite edge. Crease it firmly. Then, unfold the paper.
Rotate the paper 90 degrees and repeat the fold. Bring the new top edge to meet the bottom edge, crease firmly, and unfold. You should now have two perpendicular creases forming a cross in the center of your paper.
Next, fold each corner into the center point where your two creases intersect. Bring the tip of each corner precisely to the center and crease firmly. You should now have a smaller square shape.
Step 3: Fold Edges to the Center
With your paper now a smaller square with all four corners folded to the center, turn the paper over. The side that was facing down in the previous step should now be facing up.
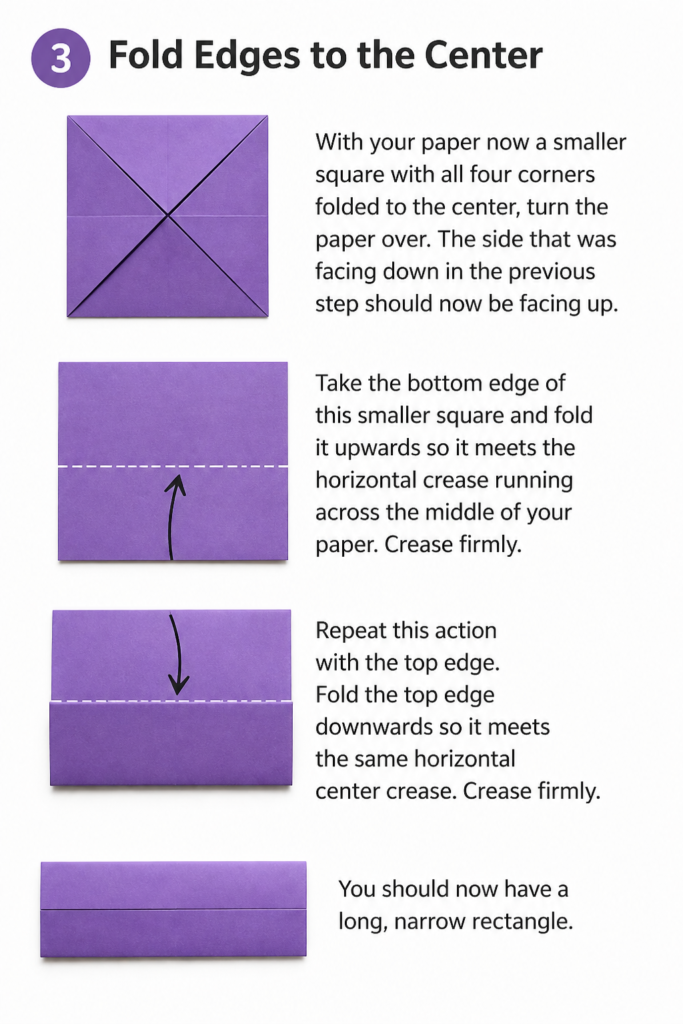
Take the bottom edge of this smaller square and fold it upwards so it meets the horizontal crease running across the middle of your paper. Crease firmly.
Repeat this action with the top edge. Fold the top edge downwards so it meets the same horizontal center crease. Crease firmly. You should now have a long, narrow rectangle.
Step 4: Create More Creases
Unfold the last two folds you made. Your paper will return to the smaller square shape with the corners folded in, but now you’ll have two new horizontal creases running across the middle section.
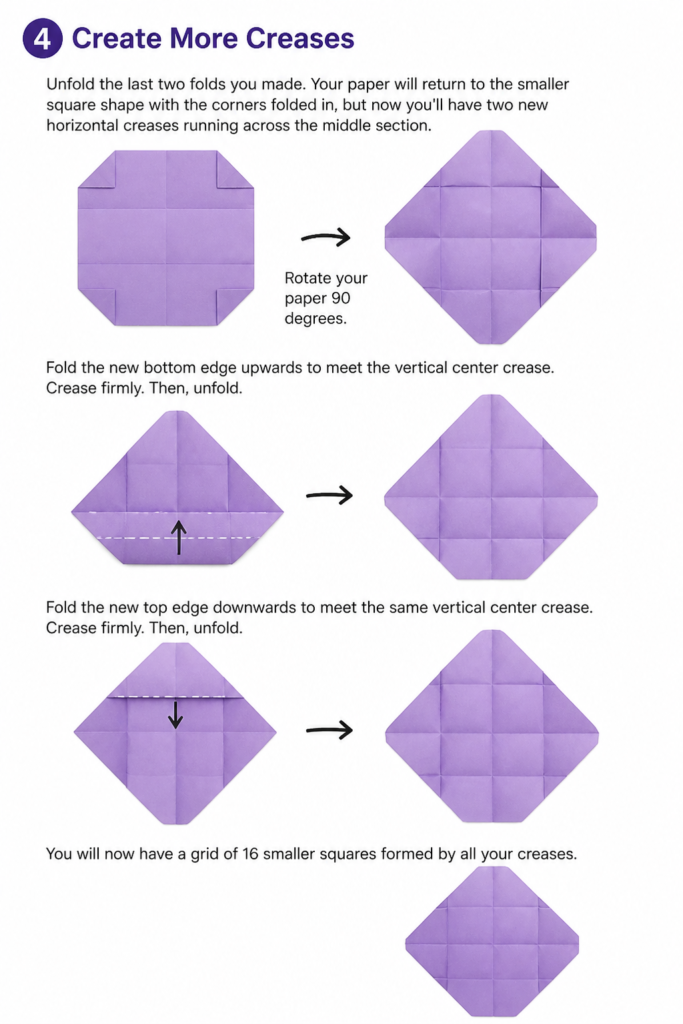
Rotate your paper 90 degrees. You should now have the vertical creases from your initial step visible, and the two new horizontal creases from the previous step.
Fold the new bottom edge upwards to meet the vertical center crease. Crease firmly. Then, unfold.
Fold the new top edge downwards to meet the same vertical center crease. Crease firmly. Then, unfold. You will now have a grid of 16 smaller squares formed by all your creases.
Step 5: Prepare for Shaping
Unfold the entire paper back to its original large square. You should see a clear grid of 16 smaller squares, with the very center forming a 2×2 square.
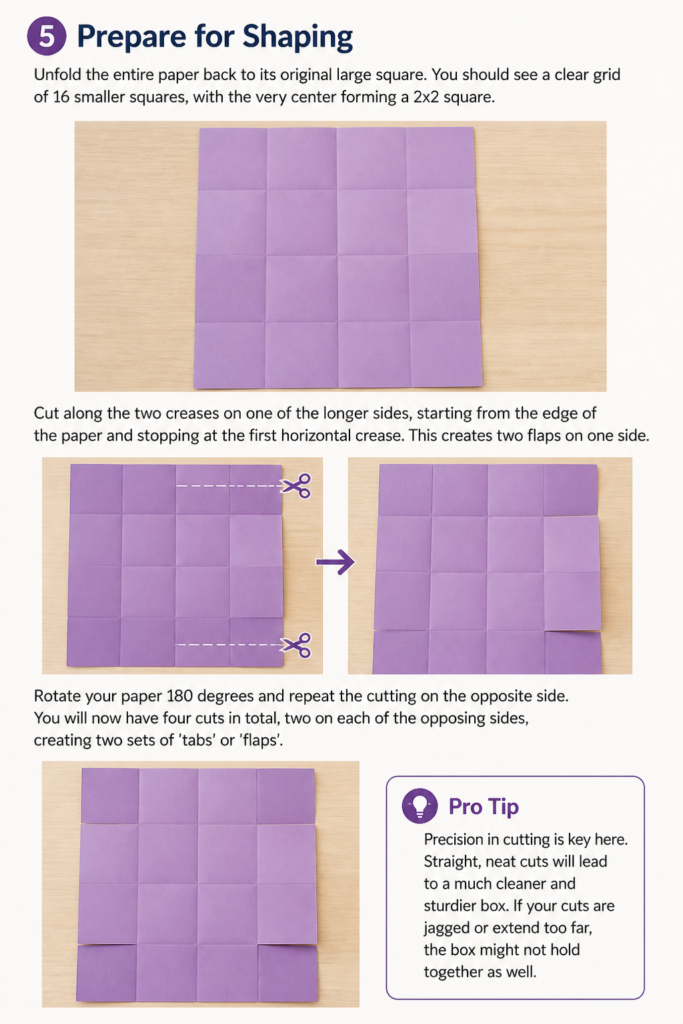
Cut along the two creases on one of the longer sides, starting from the edge of the paper and stopping at the first horizontal crease. This creates two flaps on one side.
Rotate your paper 180 degrees and repeat the cutting on the opposite side. You will now have four cuts in total, two on each of the opposing sides, creating two sets of ‘tabs’ or ‘flaps’.
Pro Tip: Precision in cutting is key here. Straight, neat cuts will lead to a much cleaner and sturdier box. If your cuts are jagged or extend too far, the box might not hold together as well.
Step 6: Form the Sides of the Box
Fold the two uncut sides of your paper inwards along the first vertical creases. These will become the main sides of your box.
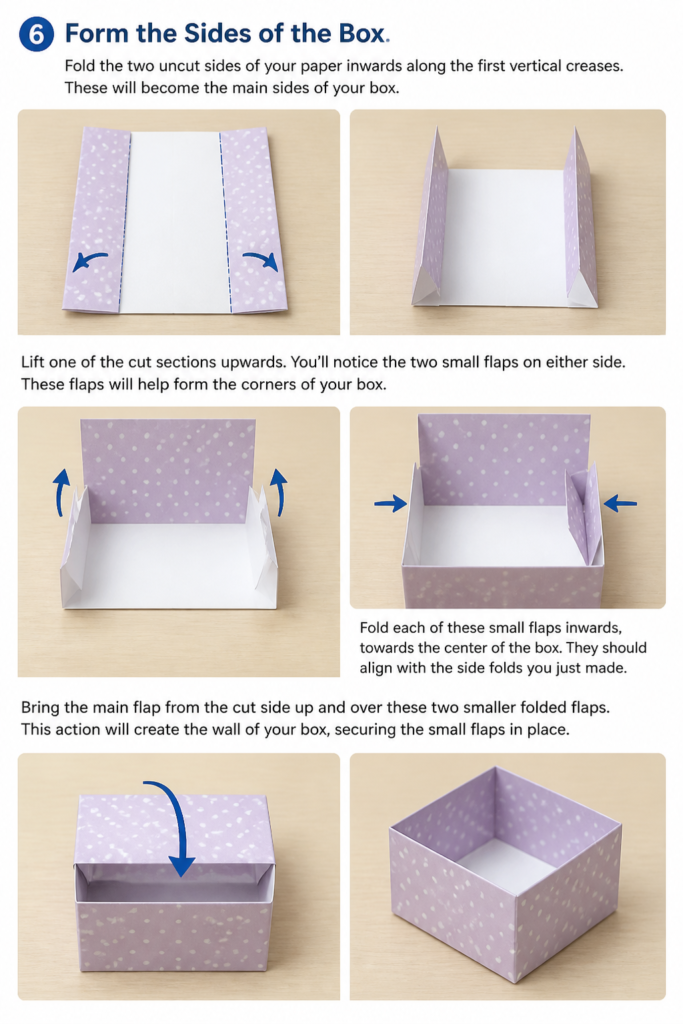
Lift one of the cut sections upwards. You’ll notice the two small flaps on either side. These flaps will help form the corners of your box.
Fold each of these small flaps inwards, towards the center of the box. They should align with the side folds you just made.
Bring the main flap from the cut side up and over these two smaller folded flaps. This action will create the wall of your box, securing the small flaps in place.
Step 7: Complete the Box Shape
With one side of your box formed, repeat the process on the opposite side.
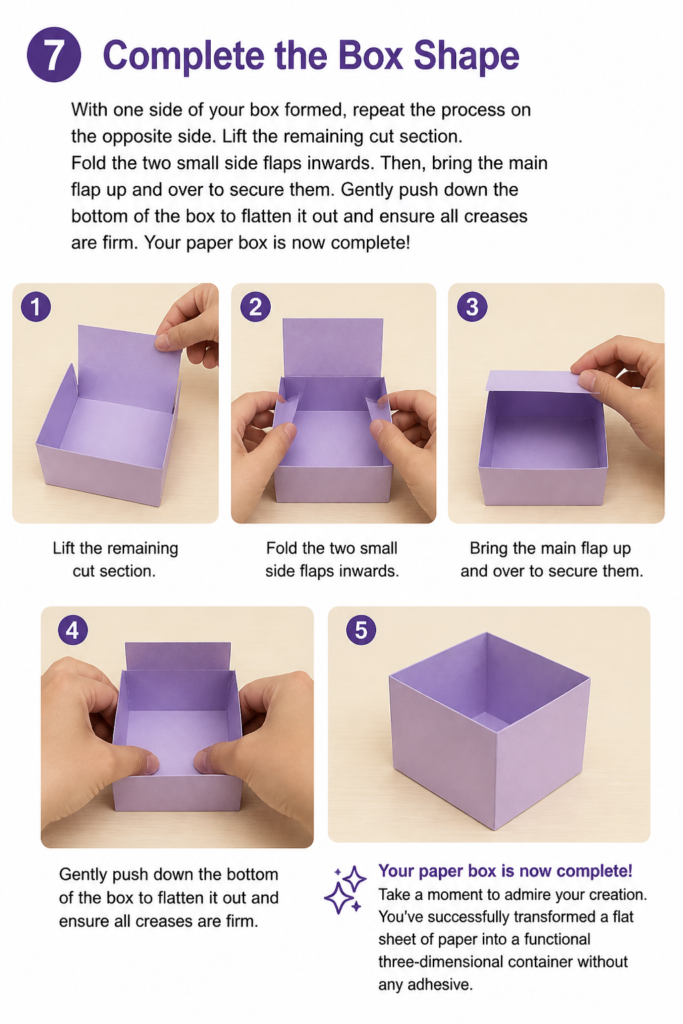
Lift the remaining cut section. Fold the two small side flaps inwards. Then, bring the main flap up and over to secure them.
Gently push down the bottom of the box to flatten it out and ensure all creases are firm. Your paper box is now complete!
Take a moment to admire your creation. You’ve successfully transformed a flat sheet of paper into a functional three-dimensional container without any adhesive.
Common Mistakes to Avoid
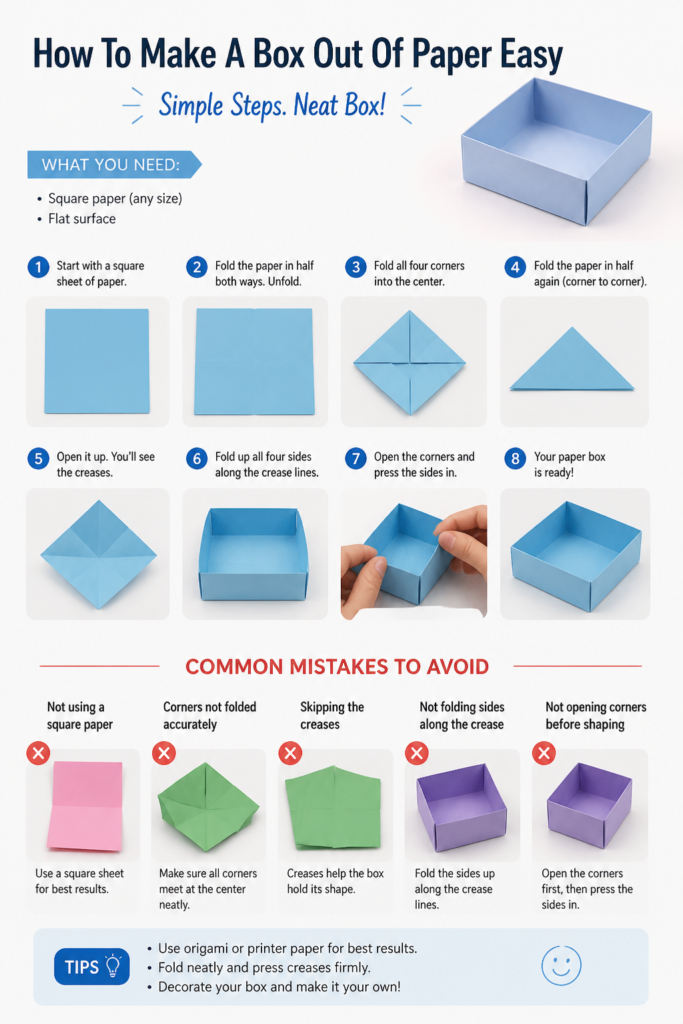
Inaccurate Creases
One of the most common pitfalls is not making precise folds. If your creases aren’t sharp and aligned perfectly, your box will appear lopsided or won’t hold its shape correctly.
Always take your time to align edges and corners meticulously before pressing down to create a crease. Use a ruler or a bone folder if you want extra sharp lines, especially for the initial folds.
Rushing the Process
Paper crafting, especially origami-style folding, benefits greatly from patience. Rushing through the steps often leads to errors that are difficult to correct without re-starting.
Slow down and ensure each fold is correctly executed before moving to the next. It’s better to spend a few extra minutes being precise than to have to begin again.
Using the Wrong Paper
While most paper types can be folded, not all are ideal for box making. Paper that is too thick will be difficult to crease sharply and may crack at the folds. Paper that is too thin might tear easily or not hold its shape.
Opt for paper with a medium weight, like standard origami paper or cardstock that isn’t excessively thick. This will give you the best balance of flexibility and sturdiness for your box.
Incorrect Cutting
The cutting step, though minimal, is crucial. Cutting too far or not far enough will compromise the box’s structure.
Double-check the instructions for exactly where to stop your cuts. If you cut past the designated crease, your box’s sides won’t interlock properly, and you might need tape to hold it together, defeating the no-glue purpose.
Troubleshooting
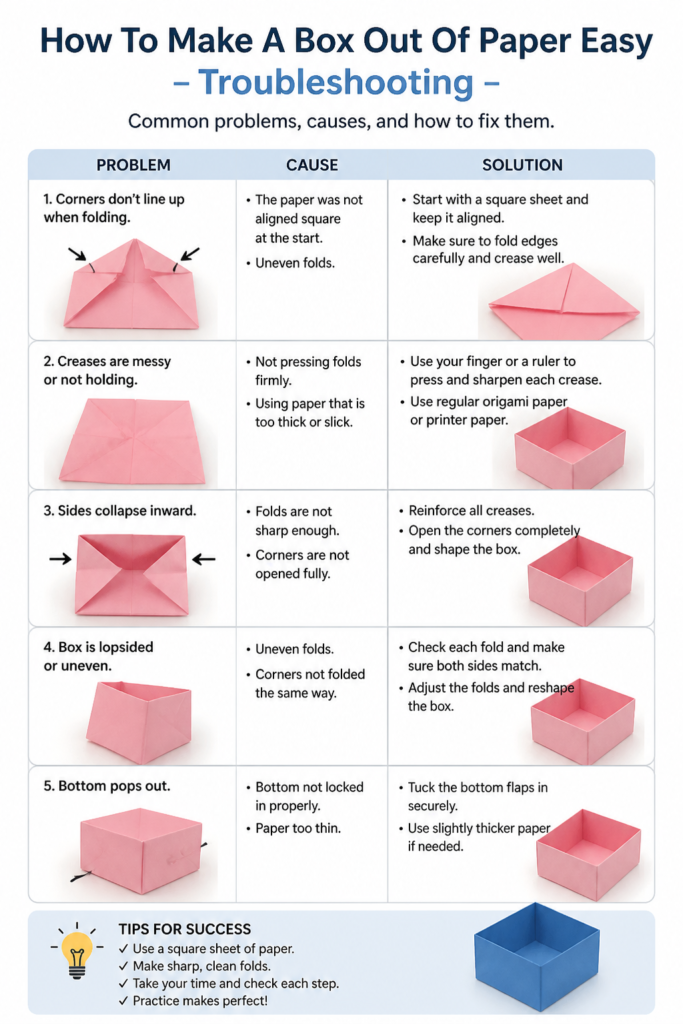
Box Sides Don’t Stand Up Straight
If your box walls seem flimsy or refuse to stay upright, it’s often due to insufficient creasing or misaligned folds in the initial stages.
Go back and re-crease all your folds firmly, paying special attention to the base and the points where the side flaps secure. Ensure your initial cross folds were perfectly centered and square.
Flaps Keep Popping Out
When the small inner flaps don’t stay securely tucked, it usually means the final fold over them wasn’t tight enough, or the initial cuts were slightly off.
Gently press the main side flap down more firmly over the tucked-in smaller flaps. You can also try to slightly adjust the angle of the smaller flaps to create a tighter fit before the final fold.
Box Looks Lopsided or Uneven
An uneven box is almost always a result of inconsistent folding. If one side is higher or wider than another, it points to inaccuracies in your initial folds.
Start by ensuring your paper is a perfect square. Then, make sure each fold is aligned edge-to-edge or corner-to-center precisely. Even a millimeter off can compound into a noticeable difference in the final product.
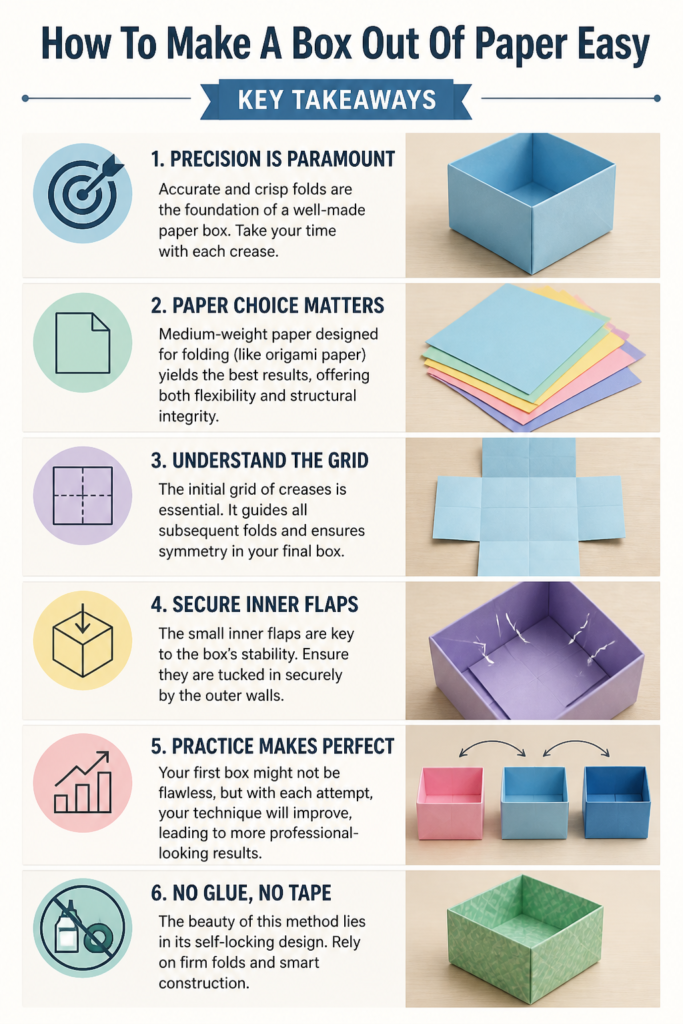
Key Takeaways
- Precision is Paramount: Accurate and crisp folds are the foundation of a well-made paper box. Take your time with each crease.
- Paper Choice Matters: Medium-weight paper designed for folding (like origami paper) yields the best results, offering both flexibility and structural integrity.
- Understand the Grid: The initial grid of creases is essential. It guides all subsequent folds and ensures symmetry in your final box.
- Secure Inner Flaps: The small inner flaps are key to the box’s stability. Ensure they are tucked in securely by the outer walls.
- Practice Makes Perfect: Your first box might not be flawless, but with each attempt, your technique will improve, leading to more professional-looking results.
- No Glue, No Tape: The beauty of this method lies in its self-locking design. Rely on firm folds rather than adhesives for stability.
Frequently Asked Questions
Can I make this box without cutting?
The specific box shown in this guide, a variation of a Masu box, typically requires two small cuts to create the side flaps that interlock. There are other origami box designs that do not require cutting, but they often involve more complex folding steps.
What if my paper isn’t square?
If your paper isn’t square, you’ll need to trim it. The easiest way is to fold one corner to the opposite edge, forming a triangle, and then cut off the excess strip of paper. This will leave you with a perfect square.
How can I make a bigger box?
To make a bigger box, simply start with a larger square sheet of paper. The proportions of the box are directly related to the starting paper size. A larger sheet will yield a proportionally larger box using the exact same folding steps.
Can I decorate my paper box?
Absolutely! You can use patterned paper from the start, or decorate a plain box with markers, stamps, stickers, or even glitter after it’s completed. Just be mindful not to add too much bulk that might prevent the flaps from closing properly.
Our Top Recommended Finds
- Origami Paper Set: A multi-color pack of 6×6 inch (15×15 cm) origami paper is perfect for beginners and offers a variety of decorative options.
- Bone Folder: This simple tool helps create incredibly crisp, sharp creases and can make your paper boxes look much more professional.
- Craft Ruler and Craft Knife: For perfectly straight cuts when preparing your square paper or making the required snips, these tools provide superior precision over scissors.
Your Next Creative Adventure Awaits
You’ve just mastered the art of creating a functional, elegant paper box. This simple skill opens up a world of possibilities for gifting, organizing, and creative expression.
Why stop here? Now that you understand the principles of paper folding, you might explore other origami designs, like different box styles, envelopes, or even decorative figures.
Grab another sheet of paper right now and make a second box. See how much faster and more precise you are this time. The satisfaction of creating something beautiful with your own hands is truly unmatched.
Beginner-friendly templates, step-by-step guides,
and weekly project ideas in your inbox.