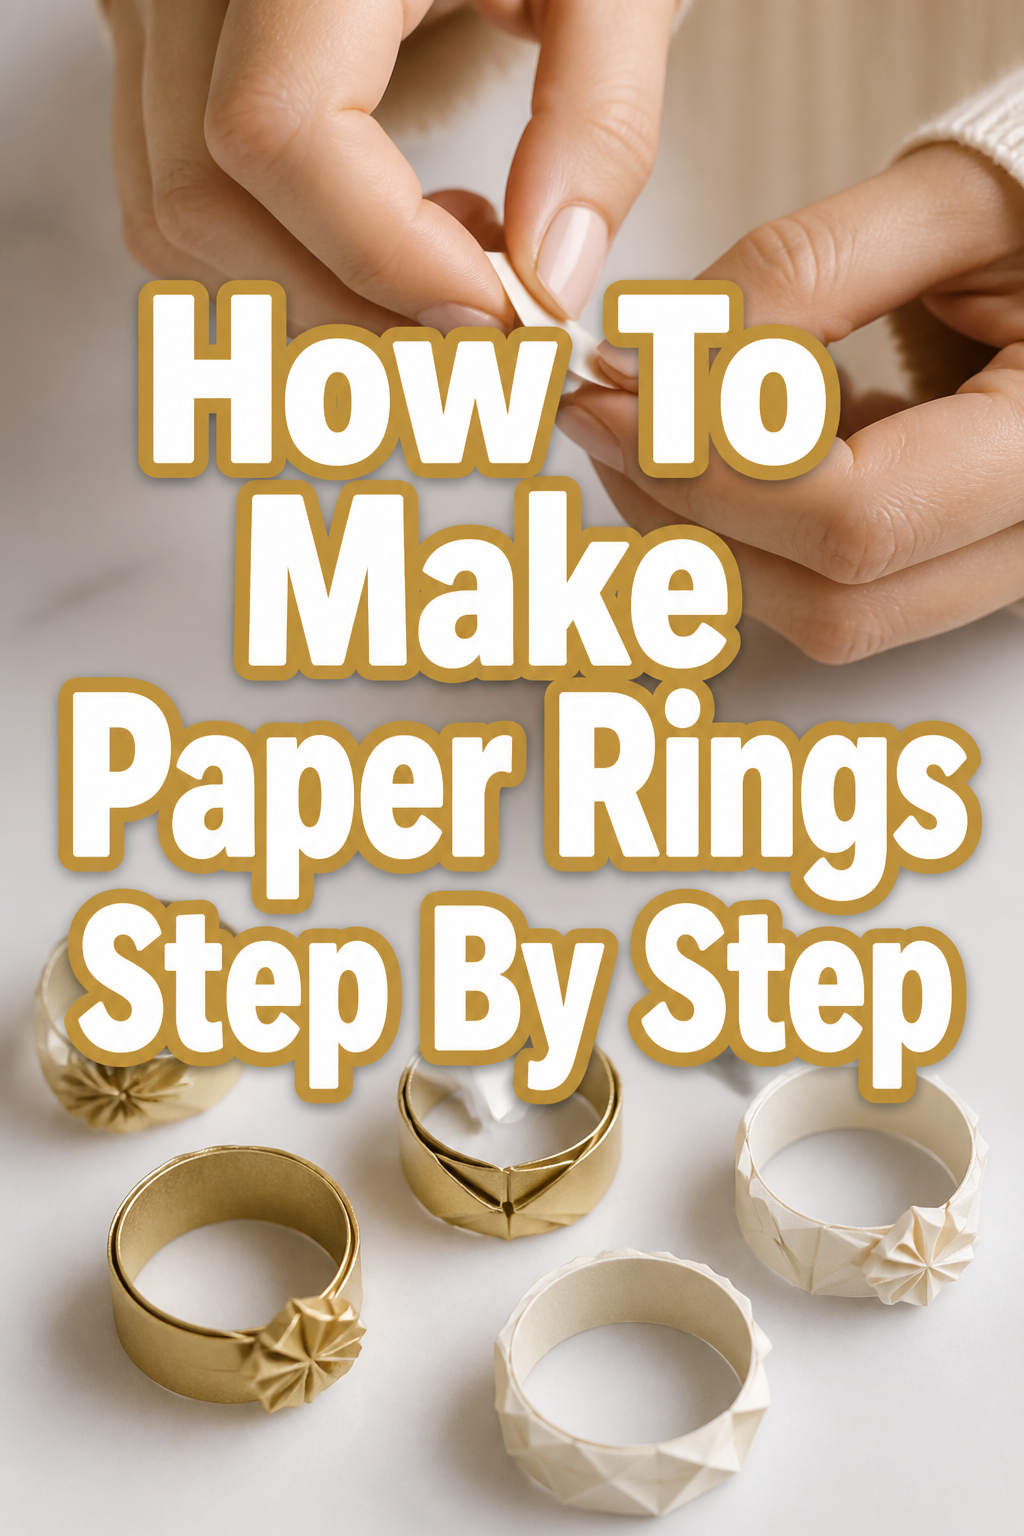
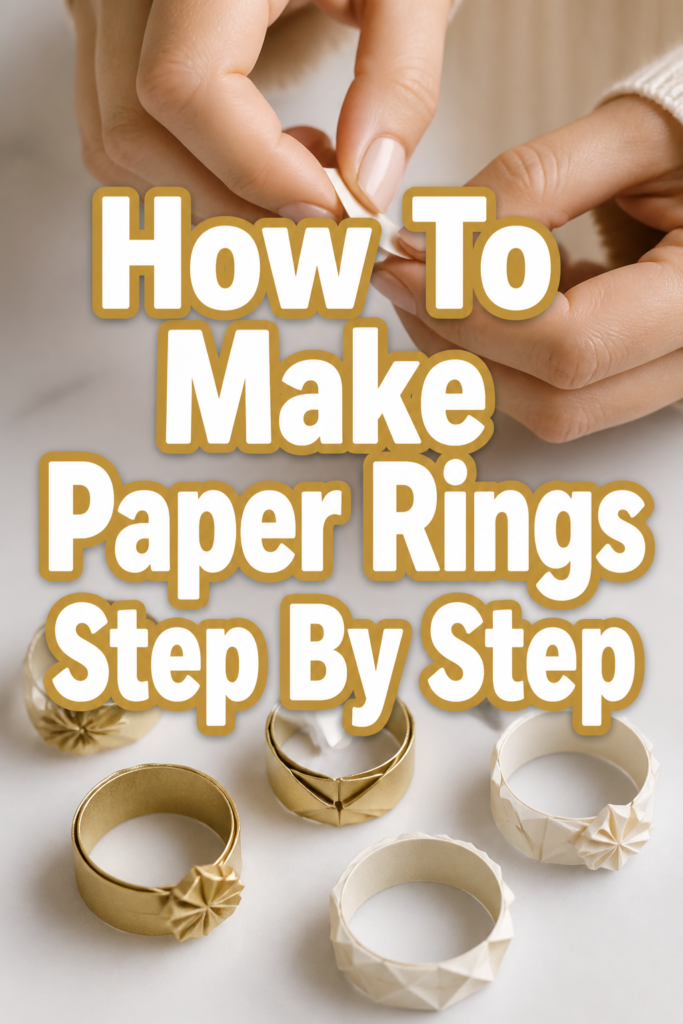
💍 How To Make Paper Rings Step By Step

Beginner-friendly templates, step-by-step guides,
and weekly project ideas in your inbox.
Making paper rings is a wonderfully simple and satisfying craft that anyone can enjoy.
I remember crafting my first paper ring in elementary school, a tiny folded band that felt like a treasure. That memory stuck with me, inspiring countless other paper creations.
This guide shares my experience and provides clear instructions, so you can easily create your own beautiful paper rings today.
Quick Overview
In this guide, you will learn the art of transforming a simple strip of paper into a charming, wearable ring. We’ll cover everything from precise cutting to secure finishing, ensuring your paper ring is both pretty and durable.
- Time needed: 10-20 minutes per ring
- Difficulty: Beginner
- What you’ll need: Paper, ruler, pencil, scissors, glue stick (optional)
Step-by-Step Instructions
Step 1: Choose Your Paper
The foundation of any great paper ring is the right paper. You want something sturdy enough to hold its shape but flexible enough to fold neatly.
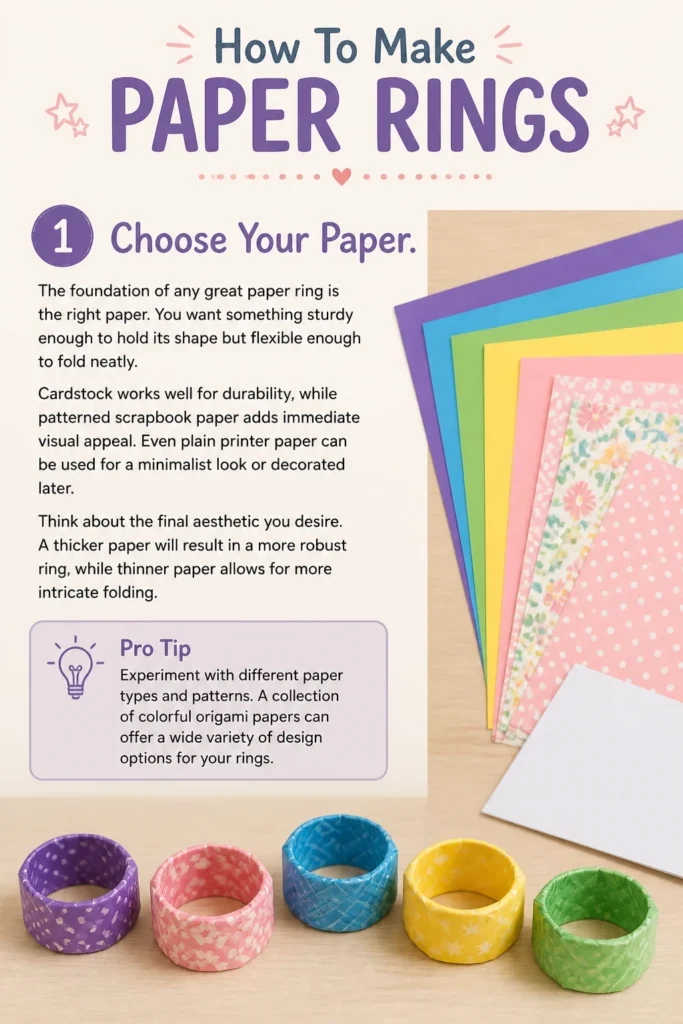
Cardstock works well for durability, while patterned scrapbook paper adds immediate visual appeal. Even plain printer paper can be used for a minimalist look or decorated later.
Think about the final aesthetic you desire. A thicker paper will result in a more robust ring, while thinner paper allows for more intricate folding.
Pro Tip: Experiment with different paper types and patterns. A collection of colorful origami papers can offer a wide variety of design options for your rings.
Step 2: Measure and Mark Your Paper Strip
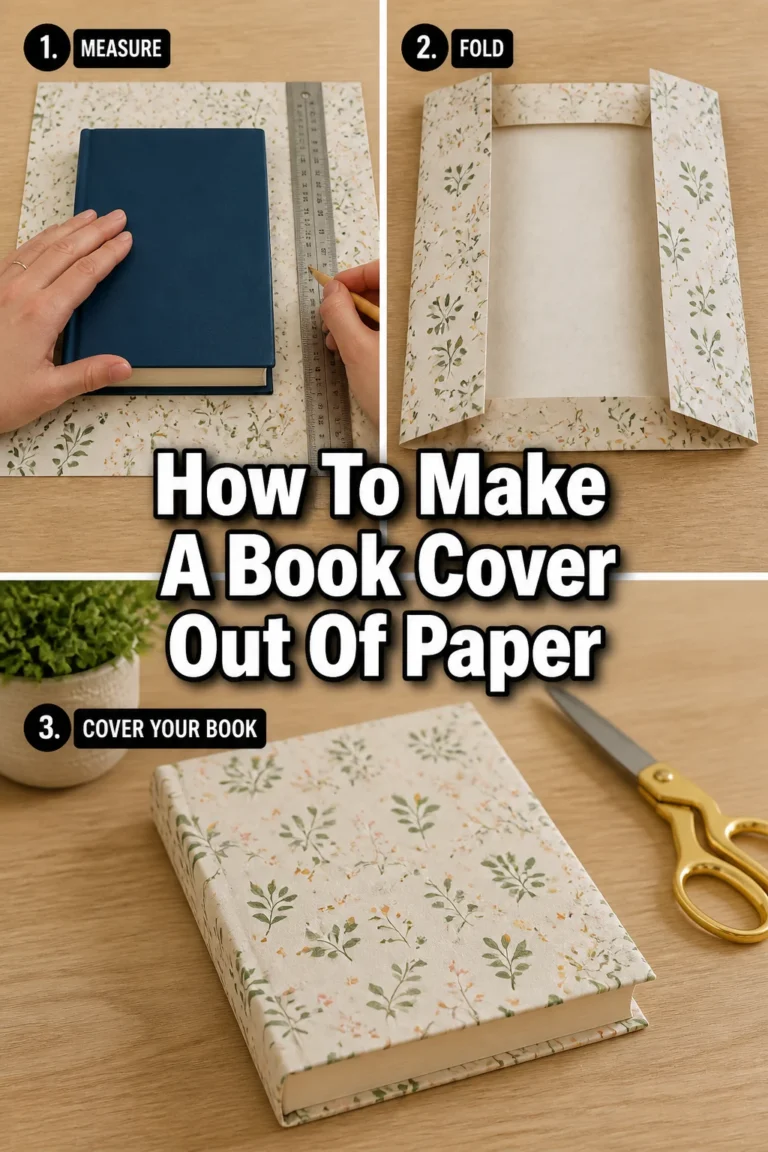
Accuracy here is key for a well-fitting ring. Lay your chosen paper flat on a clean surface.
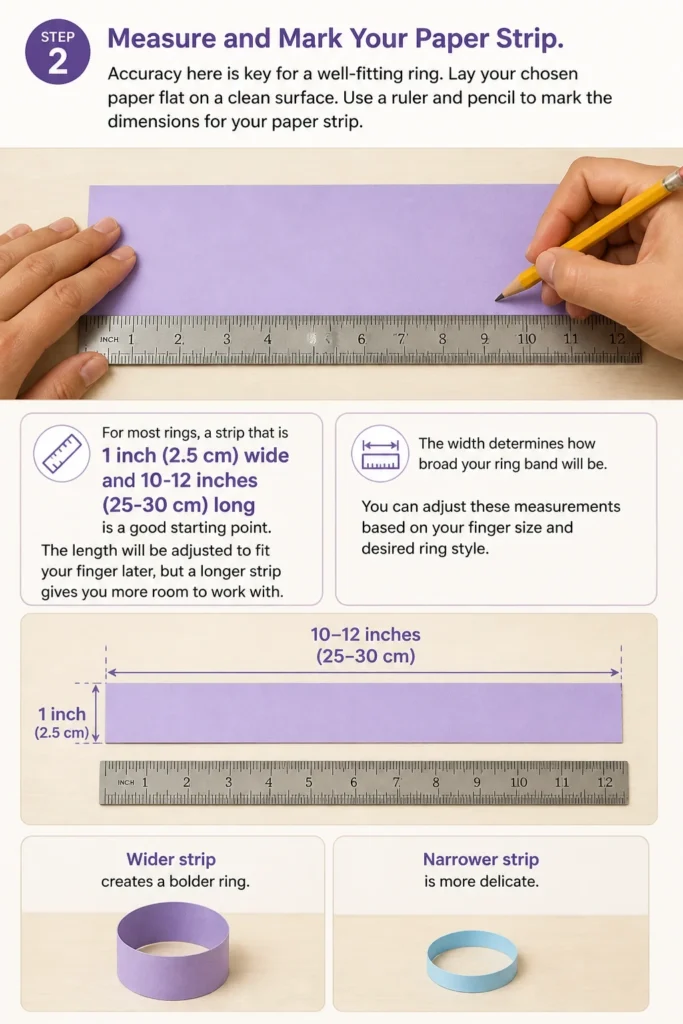
Use a ruler and pencil to mark the dimensions for your paper strip. For most rings, a strip that is 1 inch (2.5 cm) wide and 10-12 inches (25-30 cm) long is a good starting point.
The length will be adjusted to fit your finger later, but a longer strip gives you more room to work with. The width determines how broad your ring band will be.
You can adjust these measurements based on your finger size and desired ring style. A wider strip creates a bolder ring, while a narrower one is more delicate.
Step 3: Cut Your Paper Strip
Carefully cut along the lines you marked in the previous step. Use sharp scissors for a clean, straight edge.
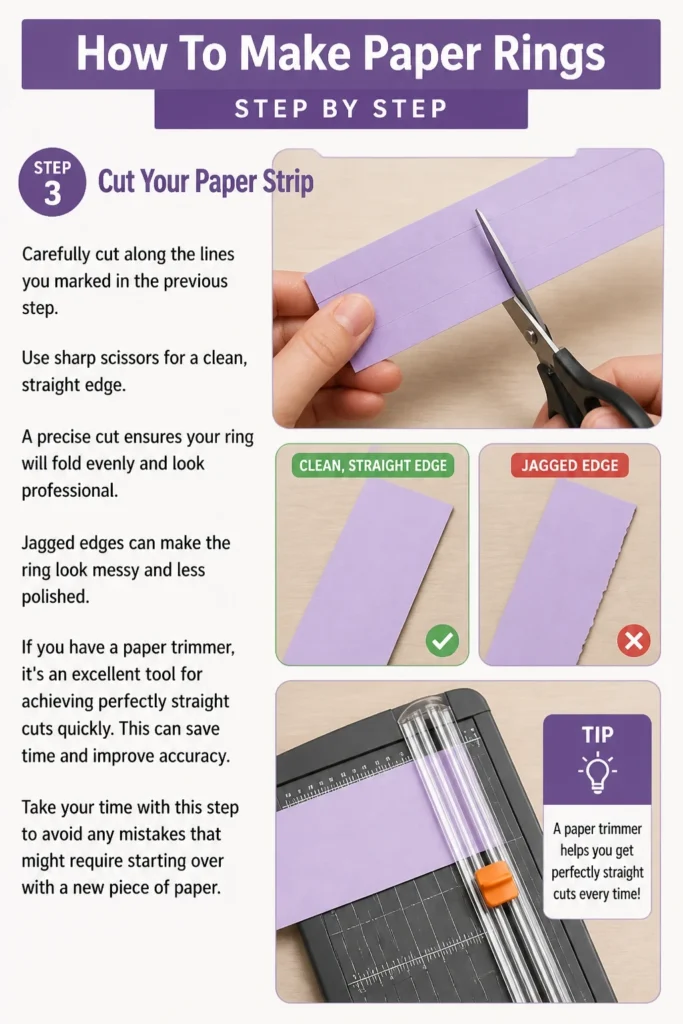
A precise cut ensures your ring will fold evenly and look professional. Jagged edges can make the ring look messy and less polished.
If you have a paper trimmer, it’s an excellent tool for achieving perfectly straight cuts quickly. This can save time and improve accuracy.
Take your time with this step to avoid any mistakes that might require starting over with a new piece of paper.
Step 4: Create the Initial Fold (V-Shape)
Now, let’s begin folding. Take one end of your paper strip and fold it diagonally to form a precise point.
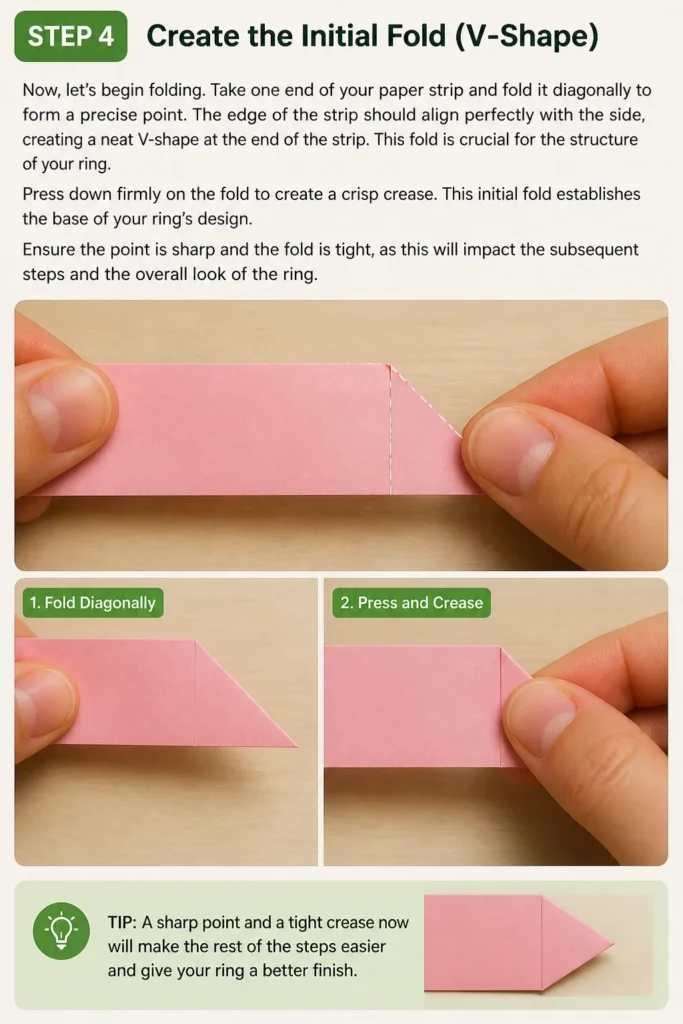
The edge of the strip should align perfectly with the side, creating a neat V-shape at the end of the strip. This fold is crucial for the structure of your ring.
Press down firmly on the fold to create a crisp crease. This initial fold establishes the base of your ring’s design.
Ensure the point is sharp and the fold is tight, as this will impact the subsequent steps and the overall look of the ring.
Step 5: Fold the Paper into a Pentagon
This is where the magic begins. Take the V-shaped end you just created and fold it over again, aligning its edge with the long side of the strip.
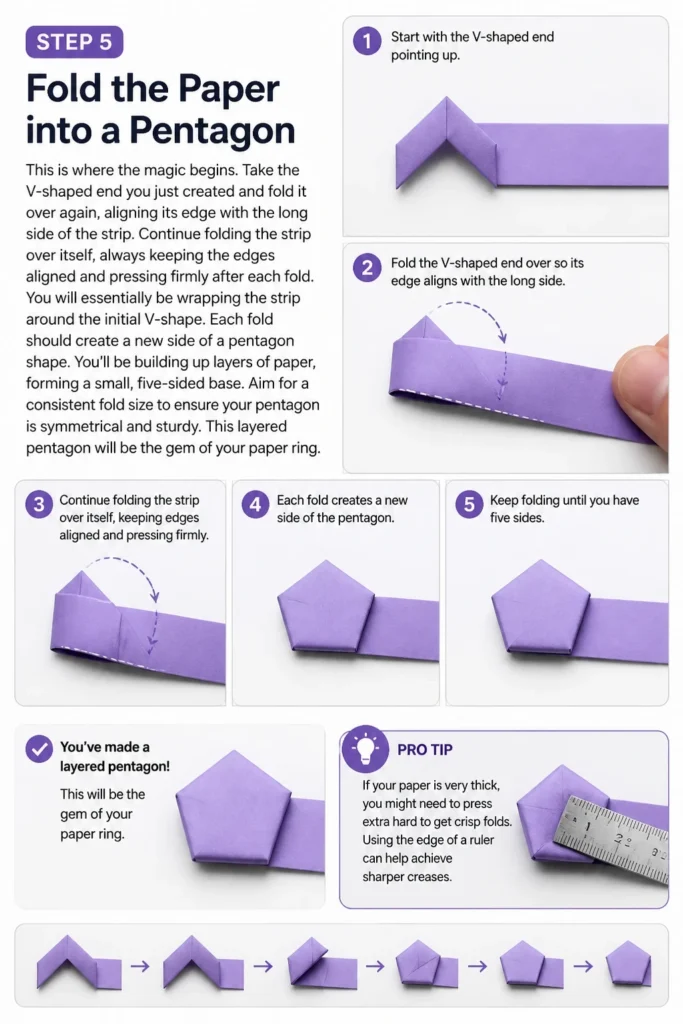
Continue folding the strip over itself, always keeping the edges aligned and pressing firmly after each fold. You will essentially be wrapping the strip around the initial V-shape.
Each fold should create a new side of a pentagon shape. You’ll be building up layers of paper, forming a small, five-sided base.
Aim for a consistent fold size to ensure your pentagon is symmetrical and sturdy. This layered pentagon will be the “gem” of your paper ring.
Pro Tip: If your paper is very thick, you might need to press extra hard to get crisp folds. Using the edge of a ruler can help achieve sharper creases.
Step 6: Form the Ring Band
Once you have a solid pentagon shape, you’ll have a long tail of paper strip remaining. This tail will become the band of your ring.
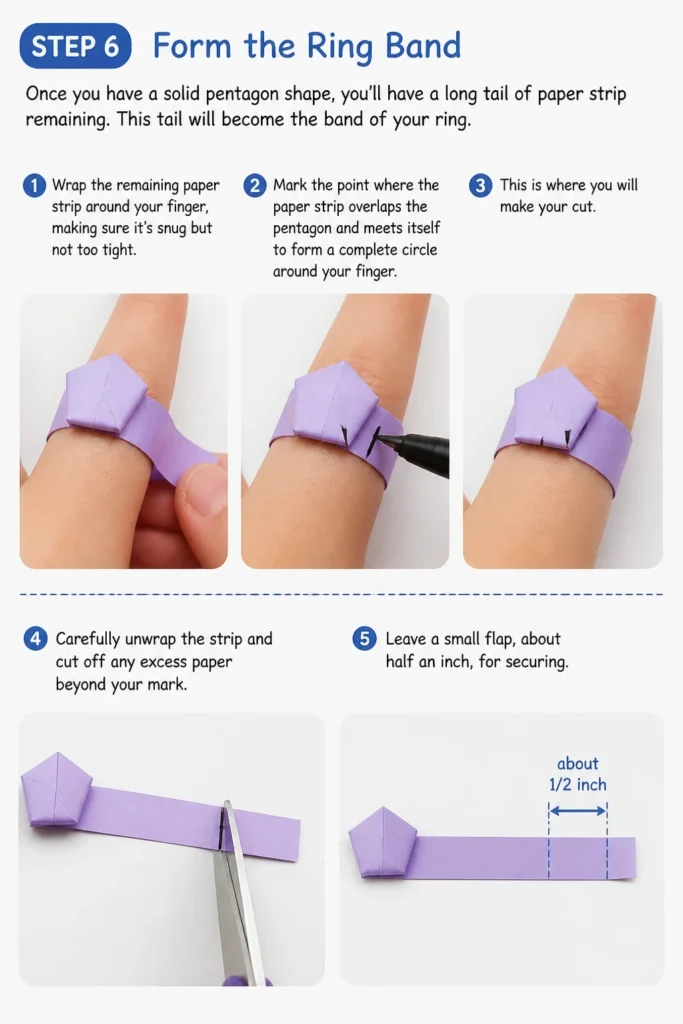
Wrap the remaining paper strip around your finger, making sure it’s snug but not too tight. You want the ring to be comfortable to wear.
Mark the point where the paper strip overlaps the pentagon and meets itself to form a complete circle around your finger. This is where you will make your cut.
Carefully unwrap the strip and cut off any excess paper beyond your mark. Leave a small flap, about half an inch, for securing.
Step 7: Secure the Ring Band
To finish your ring, you need to securely attach the band to the pentagon shape. Apply a small amount of glue stick to the inside of the small flap you left.
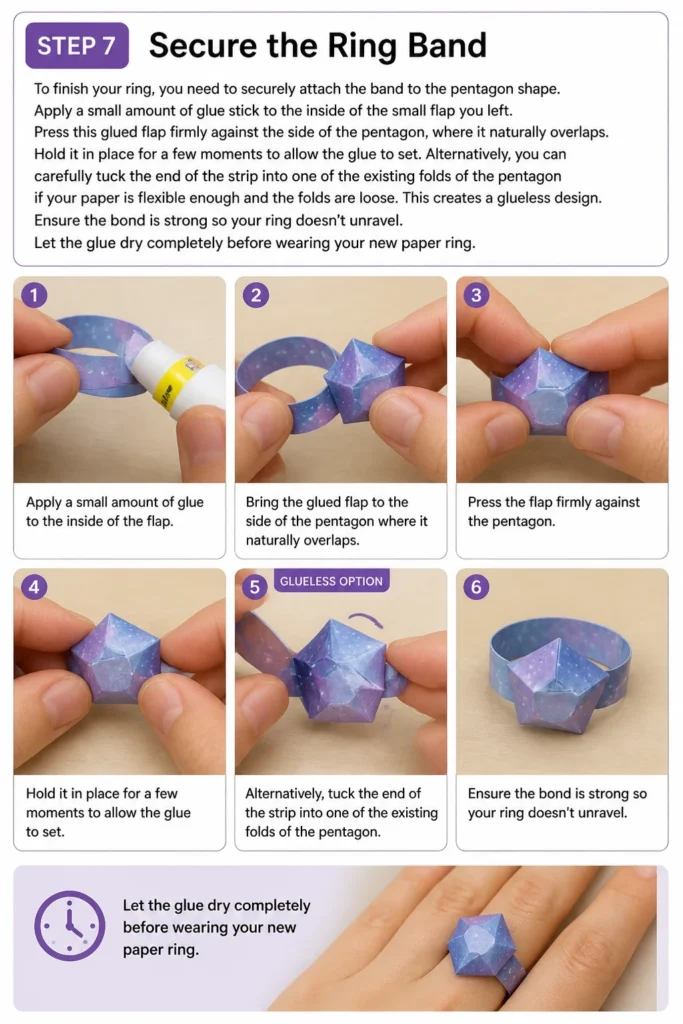
Press this glued flap firmly against the side of the pentagon, where it naturally overlaps. Hold it in place for a few moments to allow the glue to set.
Alternatively, you can carefully tuck the end of the strip into one of the existing folds of the pentagon if your paper is flexible enough and the folds are loose. This creates a glueless design.
Ensure the bond is strong so your ring doesn’t unravel. Let the glue dry completely before wearing your new paper ring.
Common Mistakes to Avoid
Using a Dull Pair of Scissors
Cutting your paper strip with dull scissors can lead to jagged, uneven edges. These rough edges make it harder to achieve clean folds and a polished final product.
Always use sharp scissors or a paper trimmer for precise, straight cuts. Clean edges contribute significantly to the overall neatness and durability of your paper ring.
Not Creasing Folds Firmly Enough
Weak creases result in a flimsy ring that won’t hold its shape well. The structural integrity of your paper ring relies on crisp, firm folds.
After each fold, press down firmly with your fingers or the back of a ruler. This compression helps the paper remember its folded position, making the ring more robust.
Making the Ring Too Tight or Too Loose
An ill-fitting ring is uncomfortable and prone to slipping off or cutting off circulation. Measuring the band correctly is essential for wearability.
When wrapping the strip around your finger, ensure it’s snug but allows for a little movement. Double-check the fit before applying glue to make any necessary adjustments.
Using Too Much Glue
Excessive glue can make your paper ring sticky, messy, and even cause the paper to warp or buckle. It can also seep out and be visible.
Apply only a thin, even layer of glue stick to the joining flap. A little goes a long way to create a secure bond without compromising the ring’s appearance.
Troubleshooting
Ring Band Keeps Unraveling
If your ring band isn’t staying together, the glue might not have been strong enough or applied properly. It’s crucial for the adhesive to create a firm bond.
Reapply a fresh, thin layer of glue stick to the overlapping flap, ensuring good coverage. Press firmly for at least 30 seconds and allow ample drying time before handling the ring.
Pentagon Shape Looks Uneven
An uneven pentagon usually means the initial folds weren’t perfectly aligned or pressed consistently. This can happen if you rush the folding process.
Carefully unfold the pentagon section and try refolding it, paying close attention to aligning the edges precisely with each turn. Take your time to make each crease sharp and even.
Ring Feels Too Flimsy
A flimsy ring often results from using thin paper or not pressing the folds firmly enough. The layers need to be compressed to provide structural support.
If you’re using thin paper, consider starting over with a slightly thicker cardstock or origami paper. For existing rings, try pressing all the folds again with more pressure to enhance their rigidity.
Key Takeaways
- Choose the right paper: sturdy yet flexible, with attractive patterns.
- Measure and cut accurately for clean edges and a well-proportioned ring.
- Crease all folds firmly to ensure the ring maintains its shape and durability.
- Form a neat, symmetrical pentagon as the decorative centerpiece of your ring.
- Measure the band precisely around your finger for a comfortable fit.
- Use a minimal amount of glue to secure the band without making it messy.
Frequently Asked Questions
Can I make these rings waterproof?
While paper rings aren’t truly waterproof, you can make them more water-resistant. Applying a thin coat of clear sealant, like Mod Podge or clear nail polish, can protect them from minor splashes and humidity. Allow it to dry completely.
How can I make the ring more durable?
For a more durable ring, use thicker paper like cardstock or heavy scrapbook paper. You can also reinforce the entire ring with a layer of clear packing tape or a sealant after it’s completed. This adds a protective layer.
What if I don’t have a glue stick?
If you don’t have a glue stick, you can use a tiny piece of double-sided tape to secure the band. For a glueless option, carefully tuck the end of the paper strip into one of the existing folds of the pentagon, ensuring it’s held tightly.
Can children make these paper rings?
Absolutely! This craft is excellent for children, fostering fine motor skills and creativity. Adult supervision is recommended for cutting, especially with sharp scissors. Simpler designs might be easier for very young children.
Our Top Recommended Finds
- Origami Paper Packs: These provide a wide array of colors and patterns, perfect for making diverse and vibrant rings.
- Precision Craft Scissors: Sharp, small scissors allow for very accurate cuts, essential for neat paper crafting.
- Acid-Free Glue Stick: A good quality glue stick ensures a strong, clean bond that won’t yellow your paper over time.
Your Next Paper Crafting Adventure Awaits
You’ve now mastered the art of creating beautiful paper rings, transforming a simple strip into a wearable piece of art.
This skill opens up a world of paper crafting possibilities. Consider experimenting with different paper textures, adding embellishments, or even trying more complex origami folds.
Why not gather your supplies and start crafting a personalized collection of rings today? Share your creations with friends and family, or wear them as unique accessories.
Beginner-friendly templates, step-by-step guides,
and weekly project ideas in your inbox.