📚 How To Make A Book Cover Out Of Paper

Beginner-friendly templates, step-by-step guides,
and weekly project ideas in your inbox.
I remember sitting at the kitchen table every August, surrounded by brown grocery bags and a stack of new textbooks.
My father showed me how to turn a simple piece of paper into a custom shield that kept my books pristine for years.
This guide combines those traditional methods with modern creative twists to help you protect your own collection.

Quick Overview
Making a paper book cover is a practical skill that preserves the life of your books while allowing for total creative freedom.
You can use anything from heavy-duty Kraft paper to decorative gift wrap, depending on the level of protection you need.
- Time needed: 10 to 15 minutes per book
- Difficulty: Beginner
- What you’ll need: Large sheet of paper, scissors, a ruler, and a pencil.
Step-by-Step Instructions
Step 1: Select the Right Paper
Choose a paper that balances durability with flexibility for the best results.
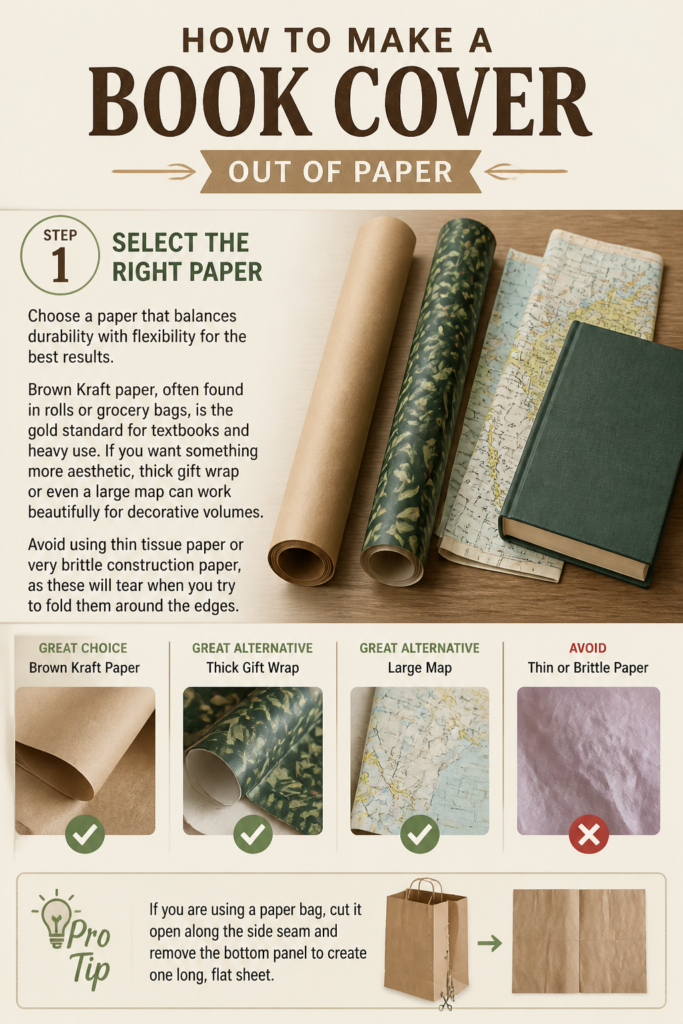
Brown Kraft paper, often found in rolls or grocery bags, is the gold standard for textbooks and heavy use.
If you want something more aesthetic, thick gift wrap or even a large map can work beautifully for decorative volumes.
Avoid using thin tissue paper or very brittle construction paper, as these will tear when you try to fold them around the edges.
Pro Tip: If you are using a paper bag, cut it open along the side seam and remove the bottom panel to create one long, flat sheet.
Step 2: Measure and Cut
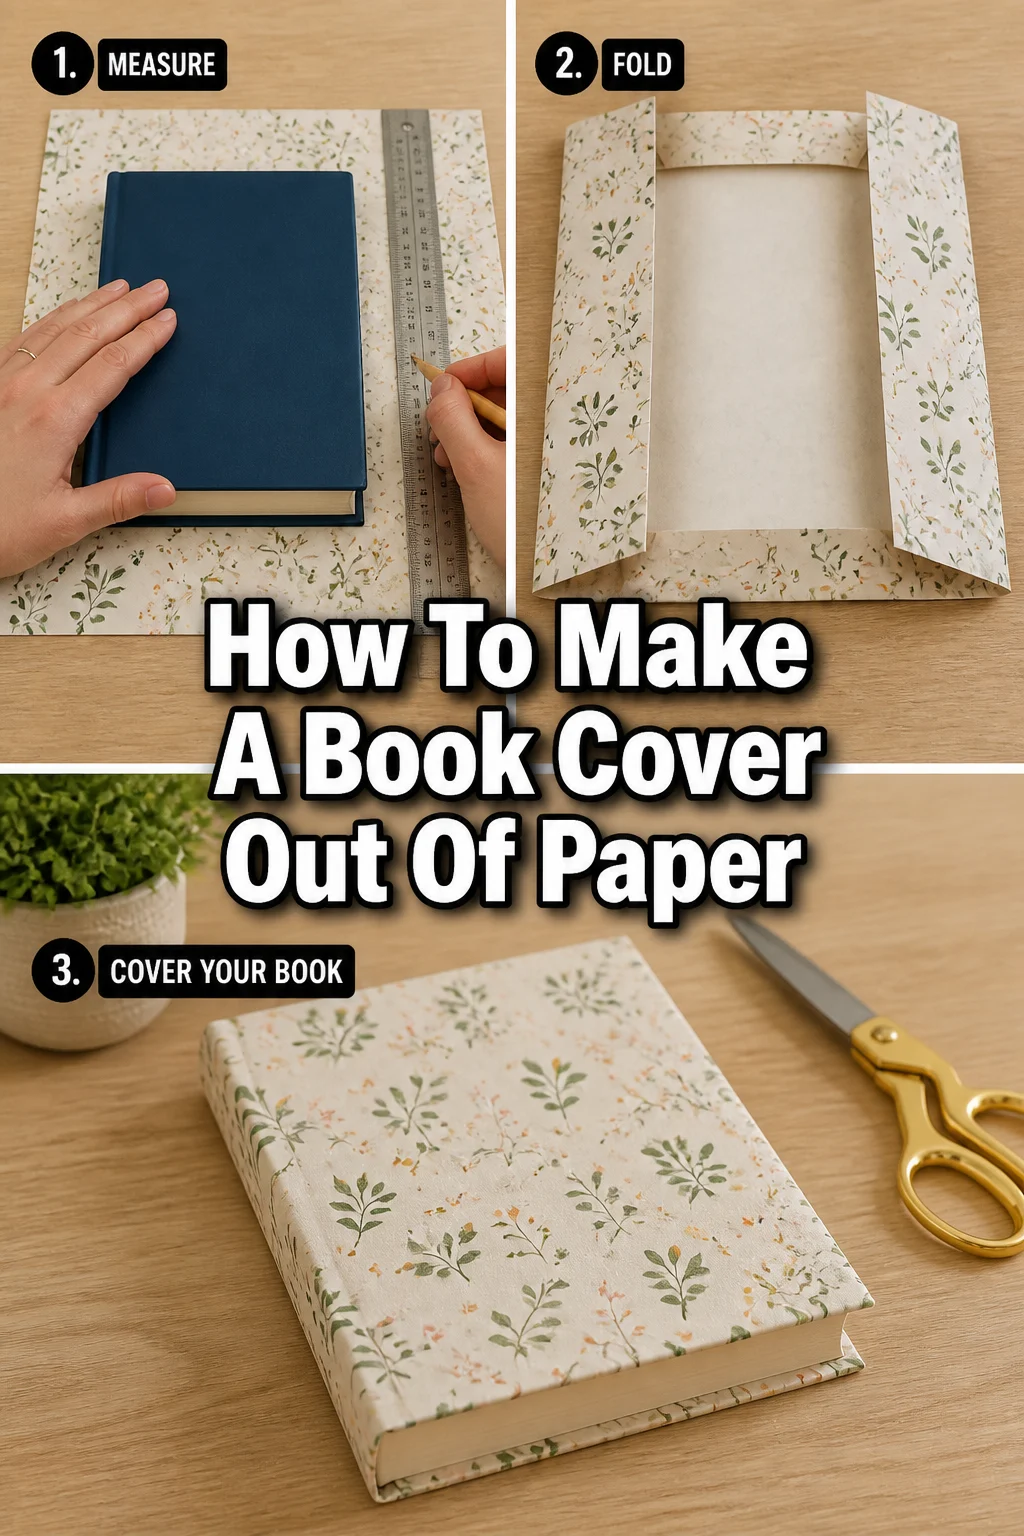
Lay your paper flat on a hard surface and place the closed book in the center.
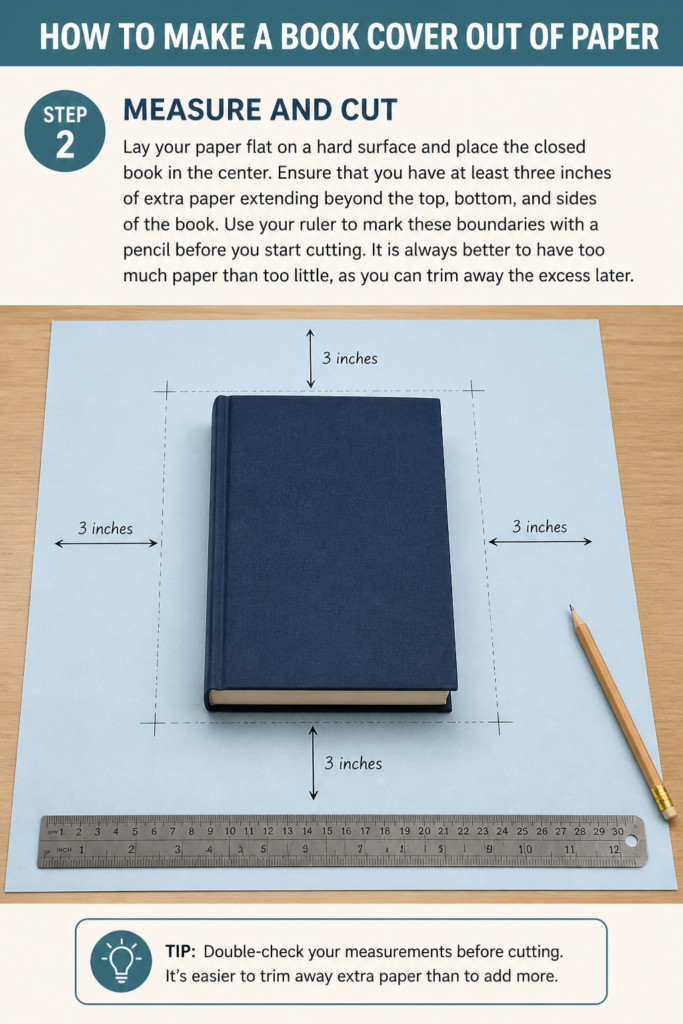
Ensure that you have at least three inches of extra paper extending beyond the top, bottom, and sides of the book.
Use your ruler to mark these boundaries with a pencil before you start cutting.
It is always better to have too much paper than too little, as you can trim away the excess later.
Step 3: Establish the Height
Align the top and bottom edges of the paper by folding them inward toward the center.
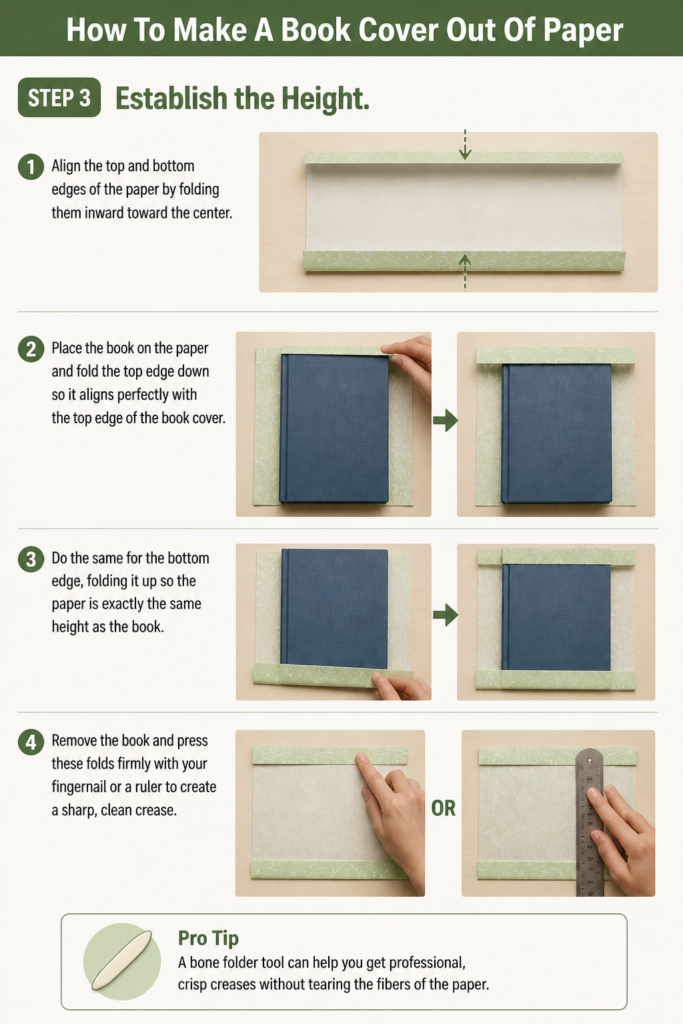
Place the book on the paper and fold the top edge down so it aligns perfectly with the top edge of the book cover.
Do the same for the bottom edge, folding it up so the paper is exactly the same height as the book.
Remove the book and press these folds firmly with your fingernail or a ruler to create a sharp, clean crease.
Pro Tip: A bone folder tool can help you get professional, crisp creases without tearing the fibers of the paper.
Step 4: Position the Book Spine
Center the book horizontally on your folded strip of paper.
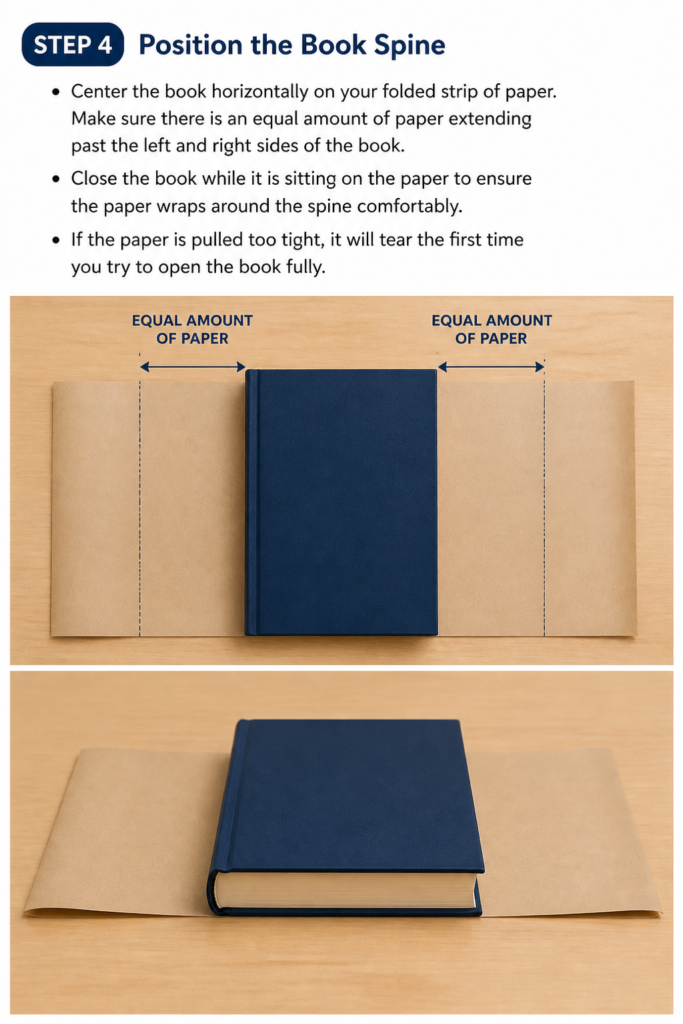
Make sure there is an equal amount of paper extending past the left and right sides of the book.
Close the book while it is sitting on the paper to ensure the paper wraps around the spine comfortably.
If the paper is pulled too tight, it will tear the first time you try to open the book fully.
Step 5: Fold the Side Flaps
Wrap the right side of the paper over the front cover of the book while it is closed.
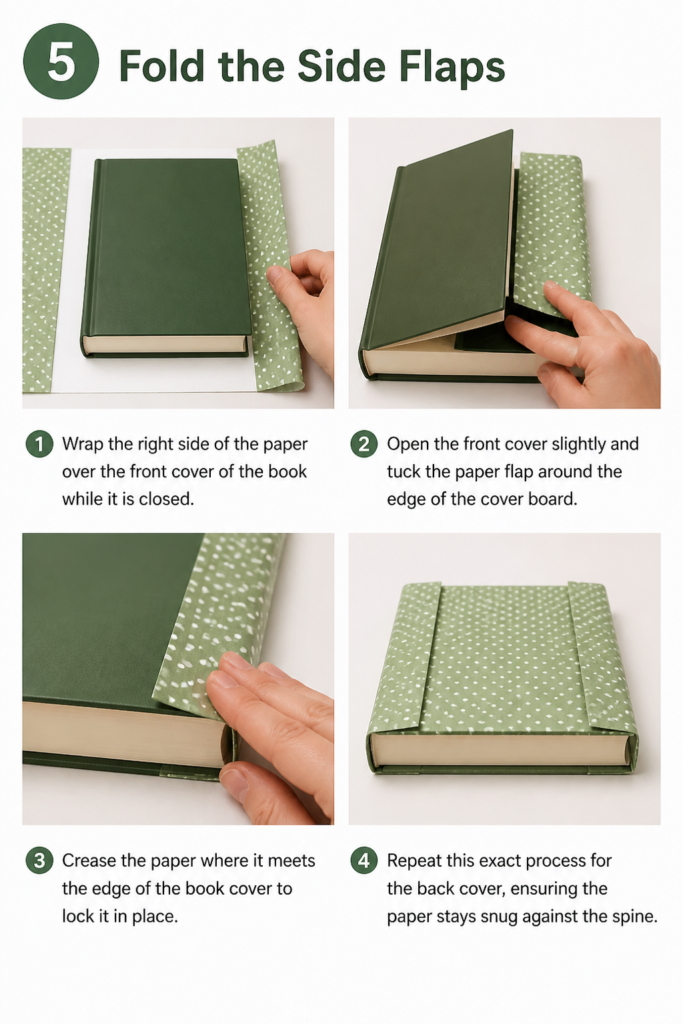
Open the front cover slightly and tuck the paper flap around the edge of the cover board.
Crease the paper where it meets the edge of the book cover to lock it in place.
Repeat this exact process for the back cover, ensuring the paper stays snug against the spine.
Step 6: Create the Pockets
Slide the front cover of the book into the “pocket” created by your top and bottom folds on the side flap.
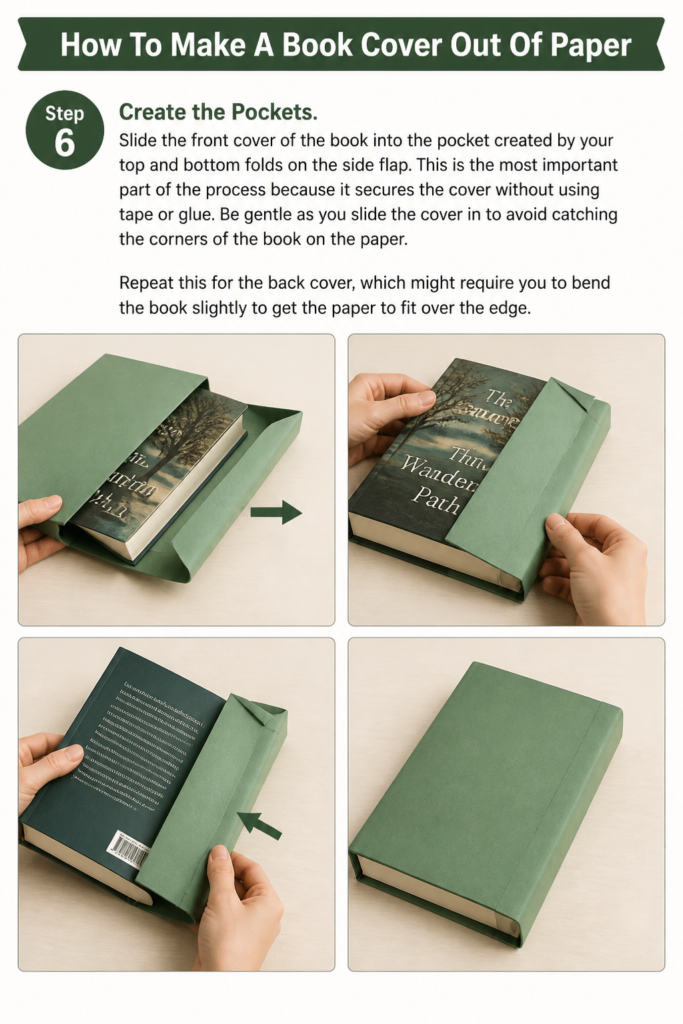
This is the most important part of the process because it secures the cover without using tape or glue.
Be gentle as you slide the cover in to avoid catching the corners of the book on the paper.
Repeat this for the back cover, which might require you to bend the book slightly to get the paper to fit over the edge.
Step 7: Final Adjustments
Check the fit of the cover by opening and closing the book several times.
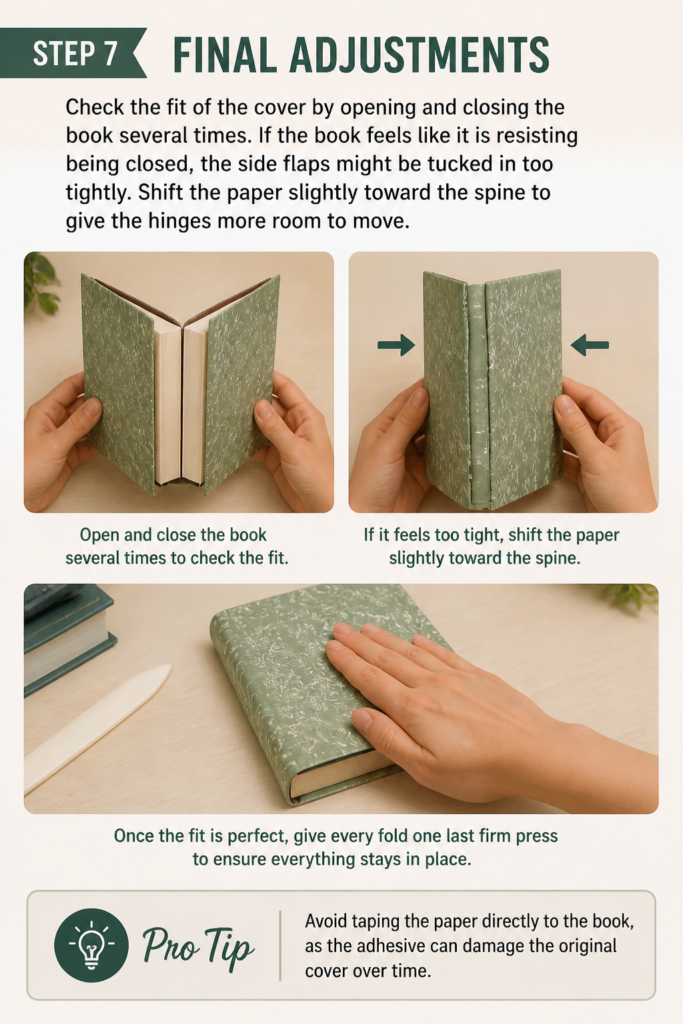
If the book feels like it is resisting being closed, the side flaps might be tucked in too tightly.
Shift the paper slightly toward the spine to give the hinges more room to move.
Once the fit is perfect, give every fold one last firm press to ensure everything stays in place.
Pro Tip: Avoid taping the paper directly to the book, as the adhesive can damage the original cover over time.
Common Mistakes to Avoid
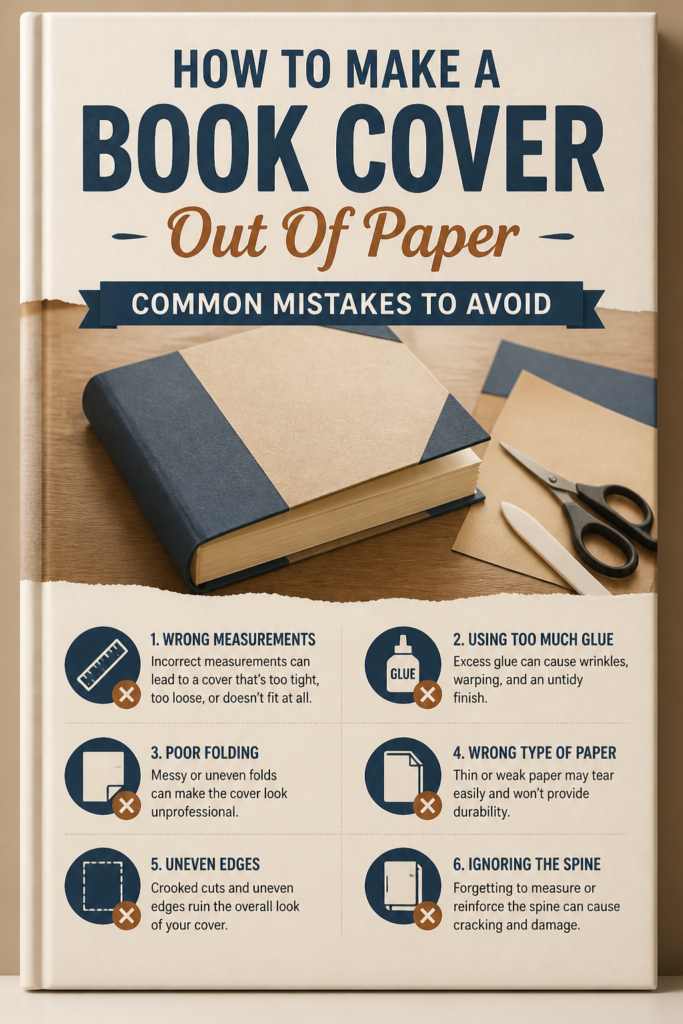
Using Tape on the Book
Many people try to secure the paper cover by taping it directly to the inside of the book.
This is a major mistake because tape chemicals can bleed into the book’s binding or tear the endpapers when removed.
The folding method described above is designed to be self-securing, using the tension of the paper to stay in place.
Folding Too Tightly
If you fold the paper too snugly against the edges of the book, you will create too much tension.
When you try to close the book, the paper will likely rip at the corners or the spine will buckle.
Always leave a tiny bit of “wiggle room” so the book can move freely within its new jacket.
Ignoring Grain Direction
Paper actually has a grain, much like wood, and it folds much more easily in one direction than the other.
If you find that your paper is cracking or looking messy at the folds, you might be folding against the grain.
Try rotating your paper 90 degrees before cutting to see if the folds become smoother and more resilient.
Troubleshooting
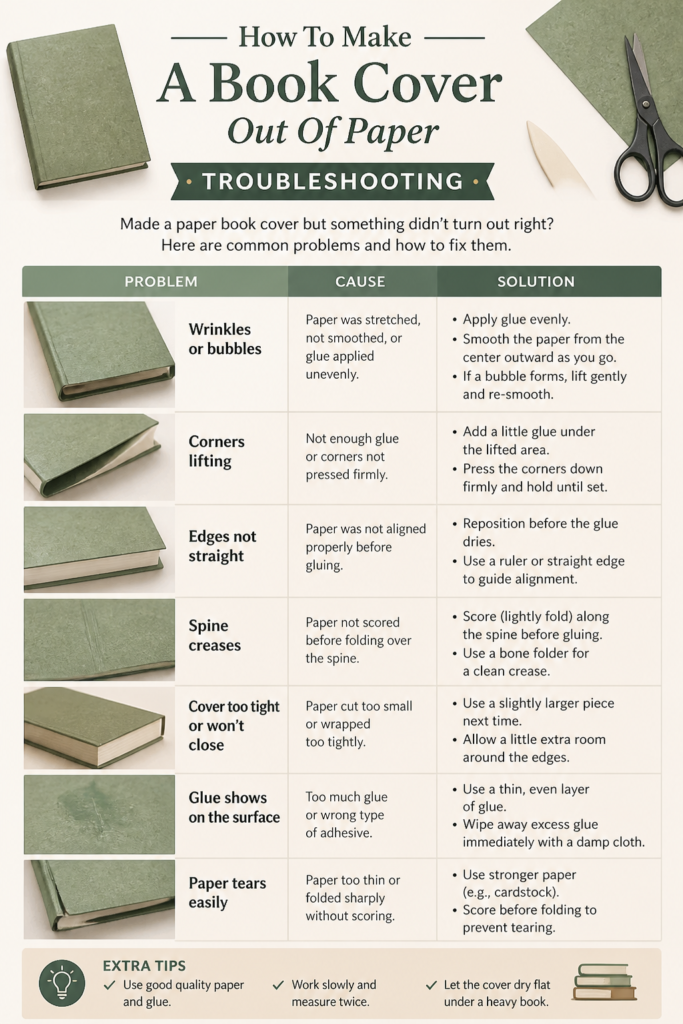
The Paper Keeps Sliding Off
This usually happens if the top and bottom folds are too loose or if the side flaps are too short.
Make sure your top and bottom folds are exactly the height of the book with no extra gap.
If the side flaps are shorter than two inches, they won’t have enough surface area to stay tucked in.
The Book Won’t Close Properly
If the book stays partially open, the paper is likely too tight across the spine area.
Remove the cover and re-fold the side flaps, giving the book about an extra eighth of an inch of slack.
This extra space allows the paper to stretch over the spine as the book hinges open and shut.
Corners Are Tearing Quickly
The corners of a book take the most abuse, and paper can wear through quickly in these spots.
You can reinforce the corners by placing a small piece of clear packing tape on the paper cover before you fold it over the book.
This adds a layer of plastic protection to the high-friction areas without the tape ever touching the book itself.
Key Takeaways
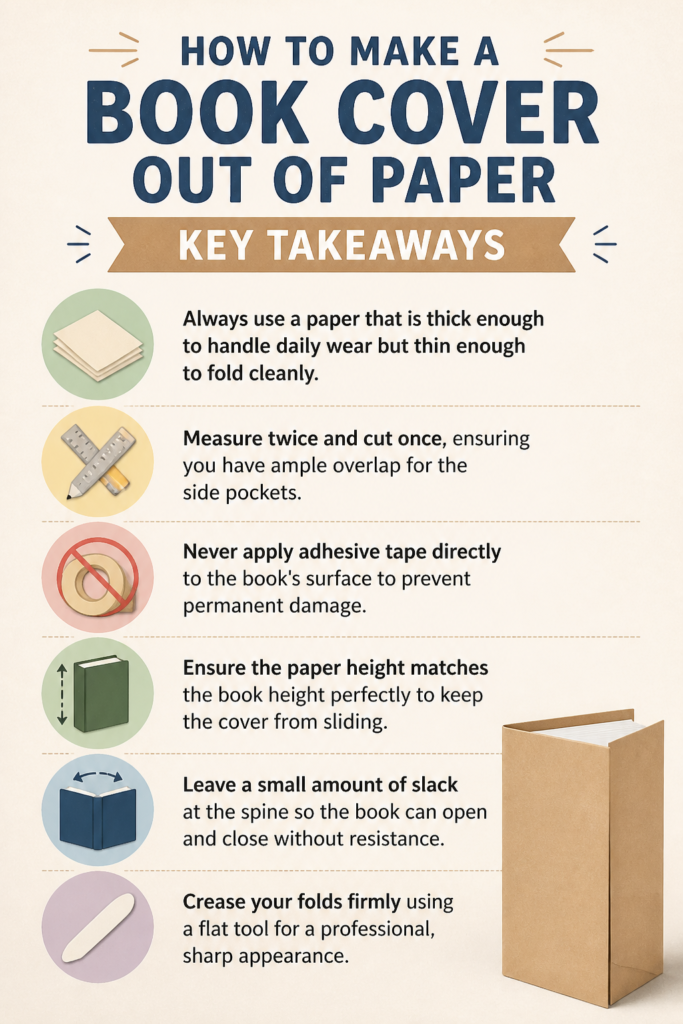
- Always use a paper that is thick enough to handle daily wear but thin enough to fold cleanly.
- Measure twice and cut once, ensuring you have ample overlap for the side pockets.
- Never apply adhesive tape directly to the book’s surface to prevent permanent damage.
- Ensure the paper height matches the book height perfectly to keep the cover from sliding.
- Leave a small amount of slack at the spine so the book can open and close without resistance.
- Crease your folds firmly using a flat tool for a professional, sharp appearance.
Frequently Asked Questions
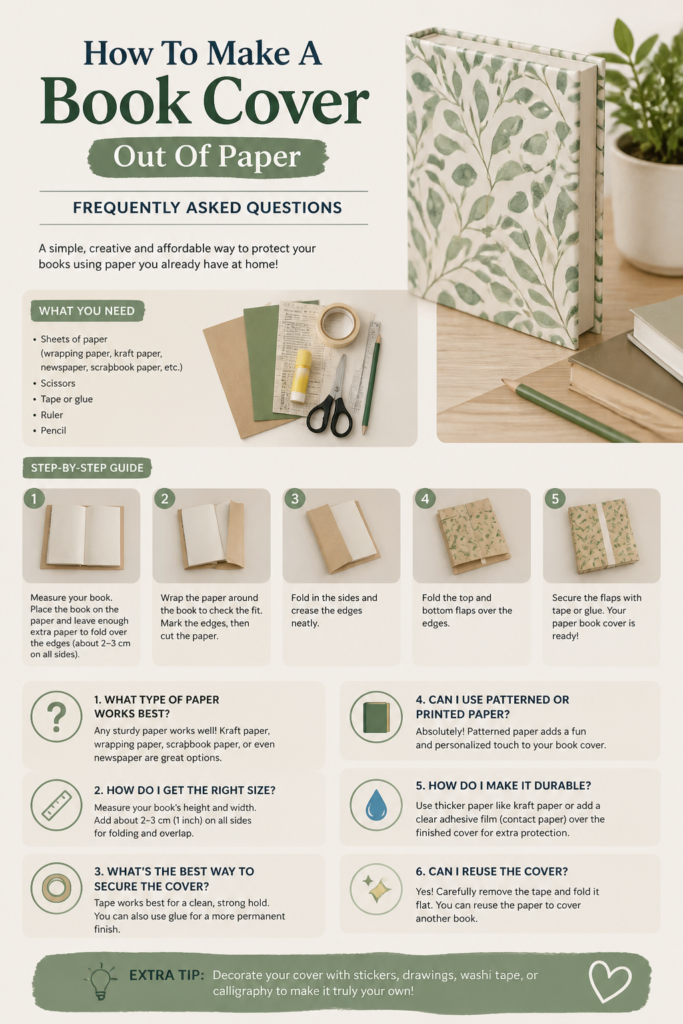
Can I use wrapping paper for book covers?
Yes, wrapping paper is an excellent choice because it comes in many designs and is usually easy to fold.
However, some cheap wrapping papers are very thin and may tear at the corners after only a few uses.
Look for “heavyweight” wrapping paper or reinforced varieties for the best longevity.
Is it possible to make a cover for a paperback book?
You can definitely cover paperbacks, but you must be much more careful with the tension of your folds.
Since paperback covers are flexible, a tight paper cover can cause the entire book to curl or warp.
Use a lighter weight paper for paperbacks to ensure the cover doesn’t overpower the book’s natural shape.
How do I make the paper cover waterproof?
While paper is naturally vulnerable to moisture, you can add a layer of protection using clear contact paper.
Apply the contact paper to your sheet of paper before you start the folding process.
This creates a laminated effect that resists spills and can be wiped clean with a damp cloth.
What is the best way to label my new covers?
Since you are using paper, you can write directly on the spine or front cover with markers or pens.
For a more professional look, you can print labels on a computer and glue them onto the paper cover.
Just make sure the ink is completely dry before you put the book back on the shelf to avoid smudging.
Our Top Recommended Finds
- Heavy Duty Kraft Paper Roll: This provides a neutral, classic look and is incredibly durable for school books or journals.
- Teflon Bone Folder: This tool is essential for creating those crisp, professional creases without leaving shiny marks on your paper.
- Self-Healing Cutting Mat: Using a mat with a grid helps you make perfectly straight cuts and protects your table from blade marks.
Taking Your Book Protection To The Next Level
Now that you have mastered the basic paper cover, you can start experimenting with different textures and styles.
Consider using old maps for travel journals or sheet music for your favorite songbooks to give your library a thematic look.
You might also want to explore adding ribbon bookmarks or washi tape accents to further personalize your collection.
Grab a roll of paper and a few books today to practice these folds and give your library the protection it deserves.
Beginner-friendly templates, step-by-step guides,
and weekly project ideas in your inbox.