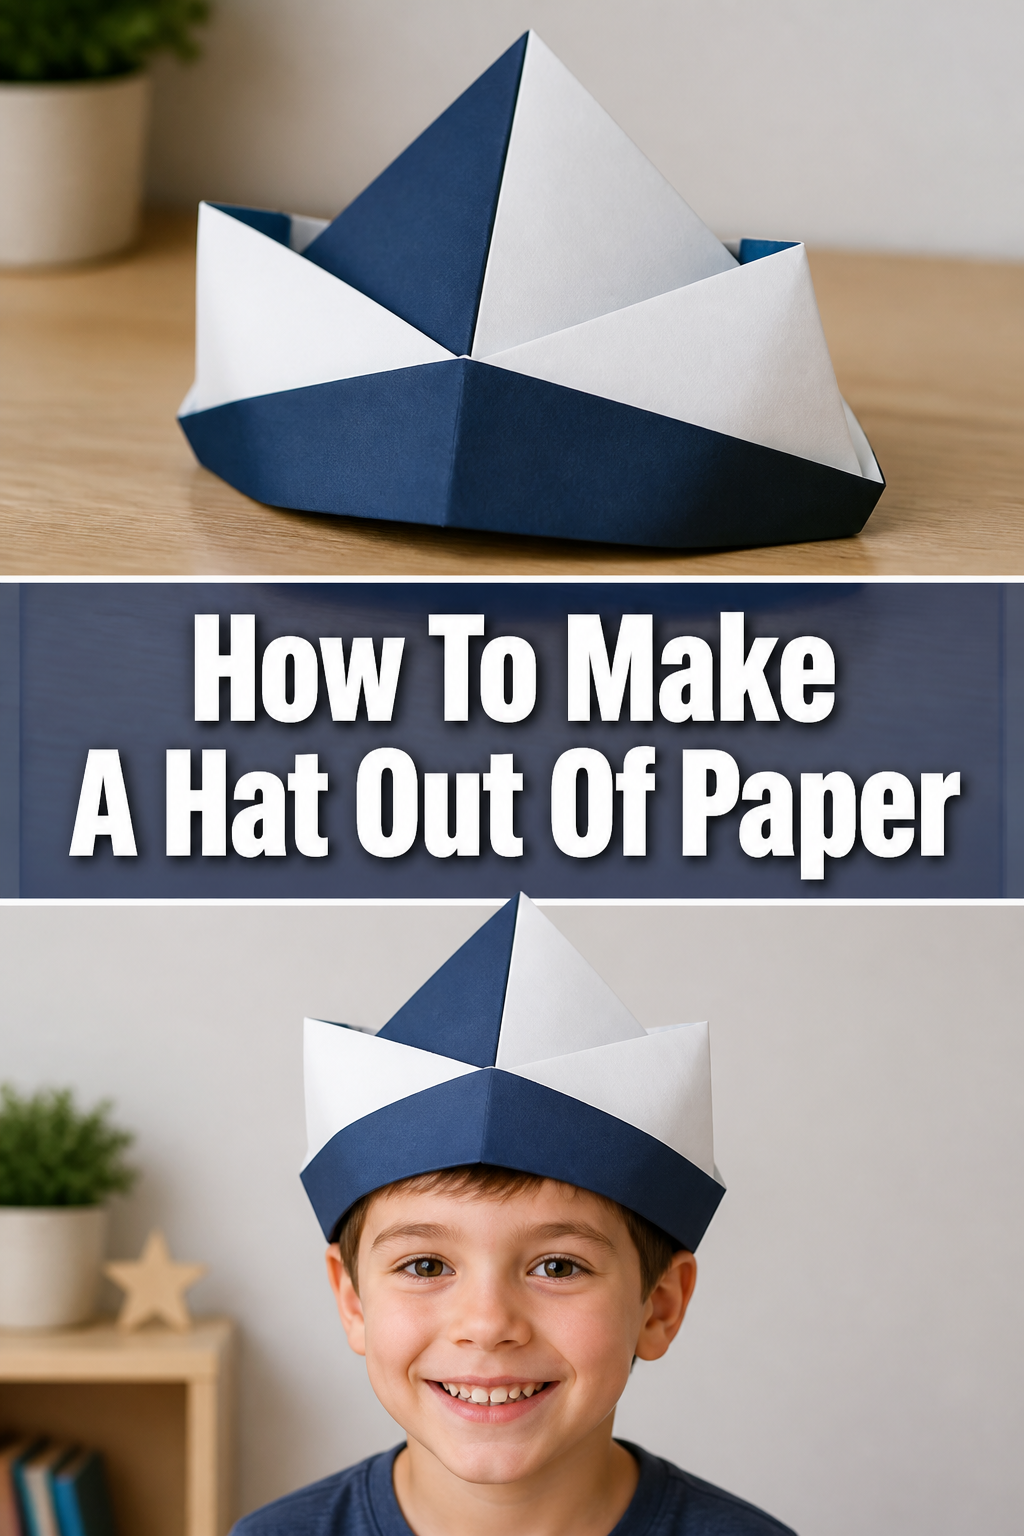
🎩 How To Make A Hat Out Of Paper

Beginner-friendly templates, step-by-step guides,
and weekly project ideas in your inbox.
Growing up, there was a simple joy in transforming a plain sheet of paper into something new. I remember countless afternoons spent folding, cutting, and taping, bringing paper creations to life. Making a paper hat was always a favorite, a quick costume for imaginative play.
This guide shares that simple magic, making it easy for anyone to craft a fun, wearable paper hat. We’ll walk through each fold and crease, ensuring your hat comes out perfectly. You’ll gain the confidence to create not just a hat, but a sense of accomplishment.
Quick Overview
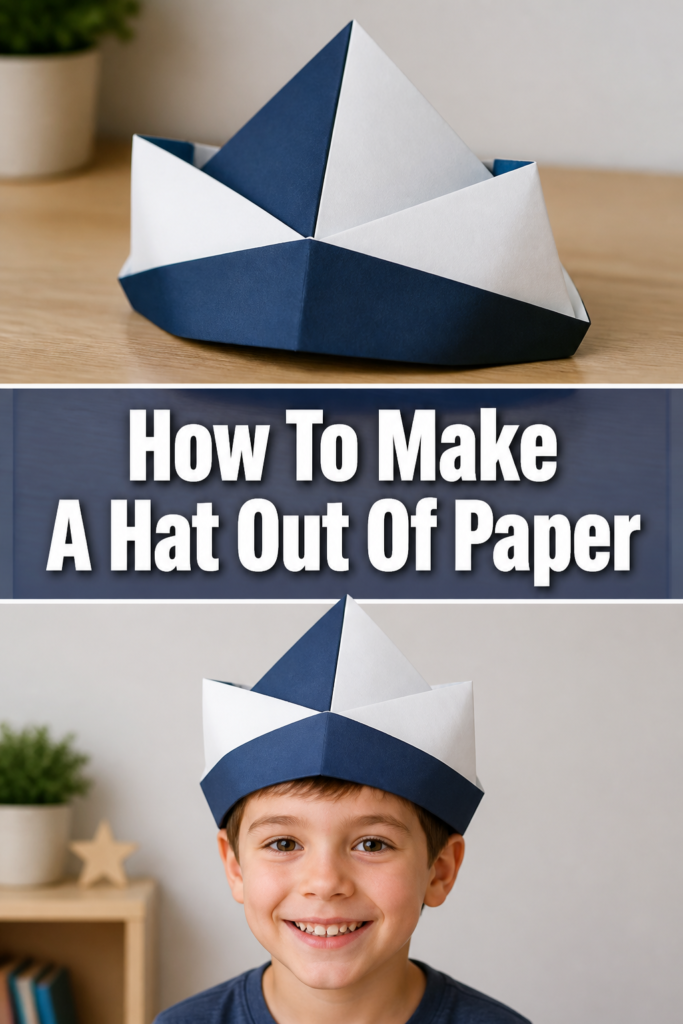
This guide will show you how to construct a classic paper hat, perfect for a party, a play, or just a bit of fun. You’ll learn the fundamental folds and techniques to create a sturdy, wearable headpiece. It’s a surprisingly straightforward craft that yields satisfying results.
- Time needed: 15-30 minutes
- Difficulty: Beginner
- What you’ll need: A large sheet of paper, scissors, a ruler, a pencil, and tape or glue.
Step-by-Step Instructions
Step 1: Gather Your Materials
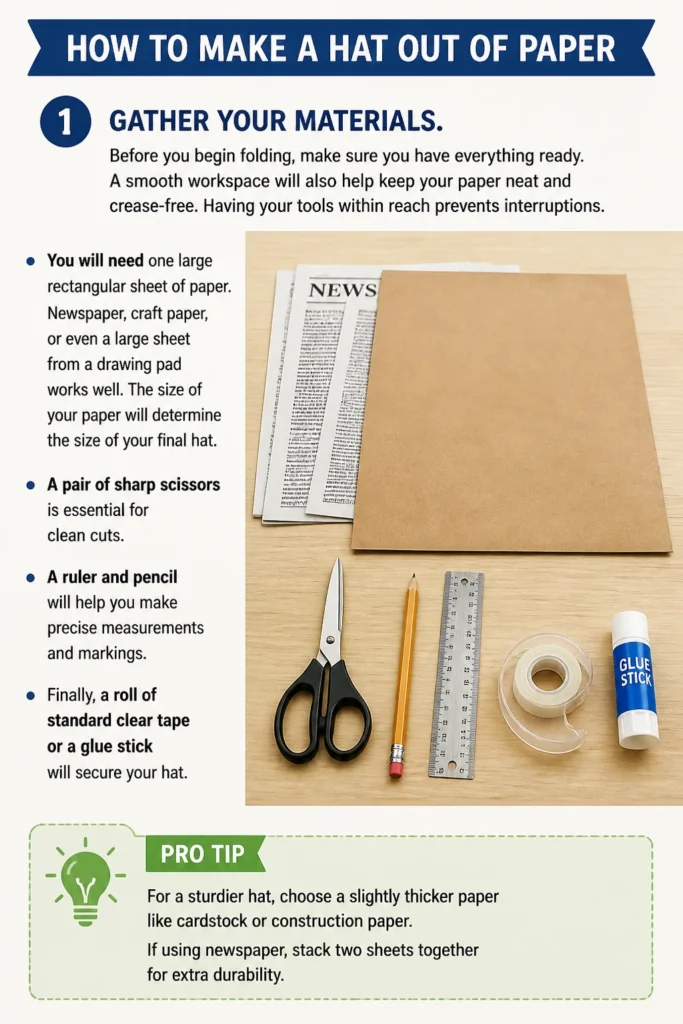
Before you begin folding, make sure you have everything ready. A smooth workspace will also help keep your paper neat and crease-free. Having your tools within reach prevents interruptions.
You will need one large rectangular sheet of paper. Newspaper, craft paper, or even a large sheet from a drawing pad works well. The size of your paper will determine the size of your final hat.
A pair of sharp scissors is essential for clean cuts. A ruler and pencil will help you make precise measurements and markings. Finally, a roll of standard clear tape or a glue stick will secure your hat.
Pro Tip: For a sturdier hat, choose a slightly thicker paper like cardstock or construction paper. If using newspaper, stack two sheets together for extra durability.
Step 2: Prepare Your Paper
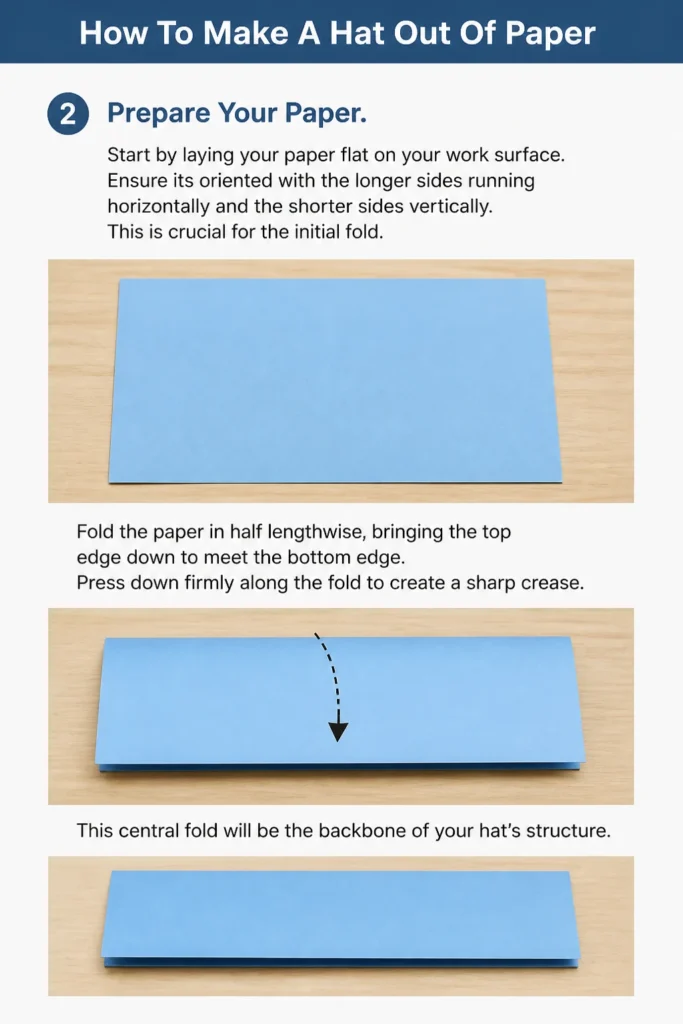
Start by laying your paper flat on your work surface. Ensure it’s oriented with the longer sides running horizontally and the shorter sides vertically. This is crucial for the initial fold.
Fold the paper in half lengthwise, bringing the top edge down to meet the bottom edge. Press down firmly along the fold to create a sharp crease. This central fold will be the backbone of your hat’s structure.
Step 3: Create the Top Triangles
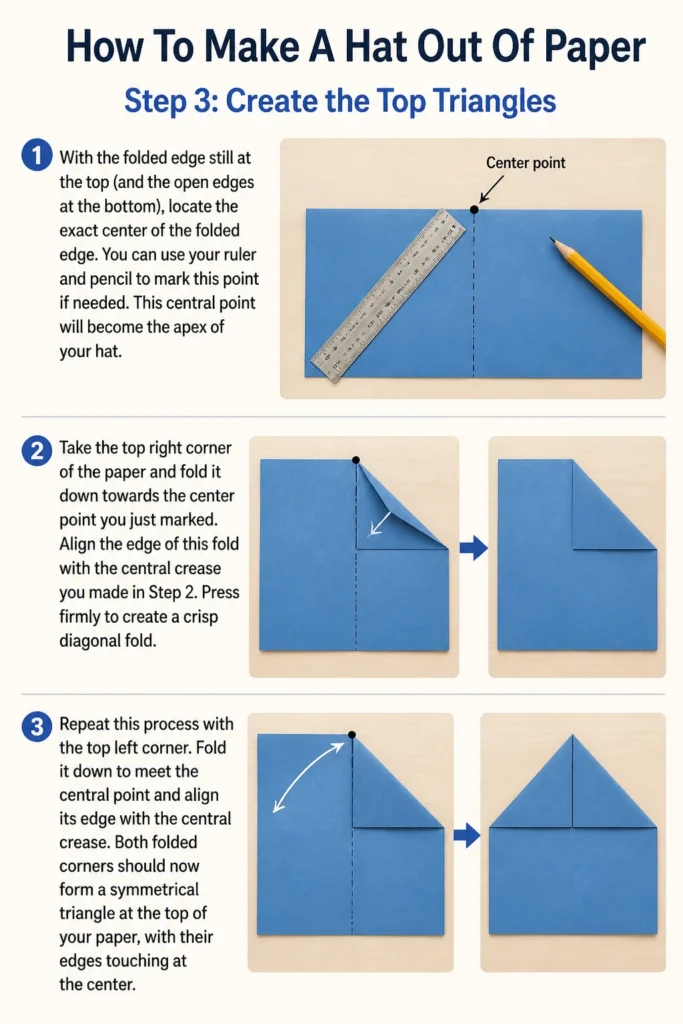
With the folded edge still at the top (and the open edges at the bottom), locate the exact center of the folded edge. You can use your ruler and pencil to mark this point if needed. This central point will become the apex of your hat.
Take the top right corner of the paper and fold it down towards the center point you just marked. Align the edge of this fold with the central crease you made in Step 2. Press firmly to create a crisp diagonal fold.
Repeat this process with the top left corner. Fold it down to meet the central point and align its edge with the central crease. Both folded corners should now form a symmetrical triangle at the top of your paper, with their edges touching at the center.
Step 4: Form the Brim Base
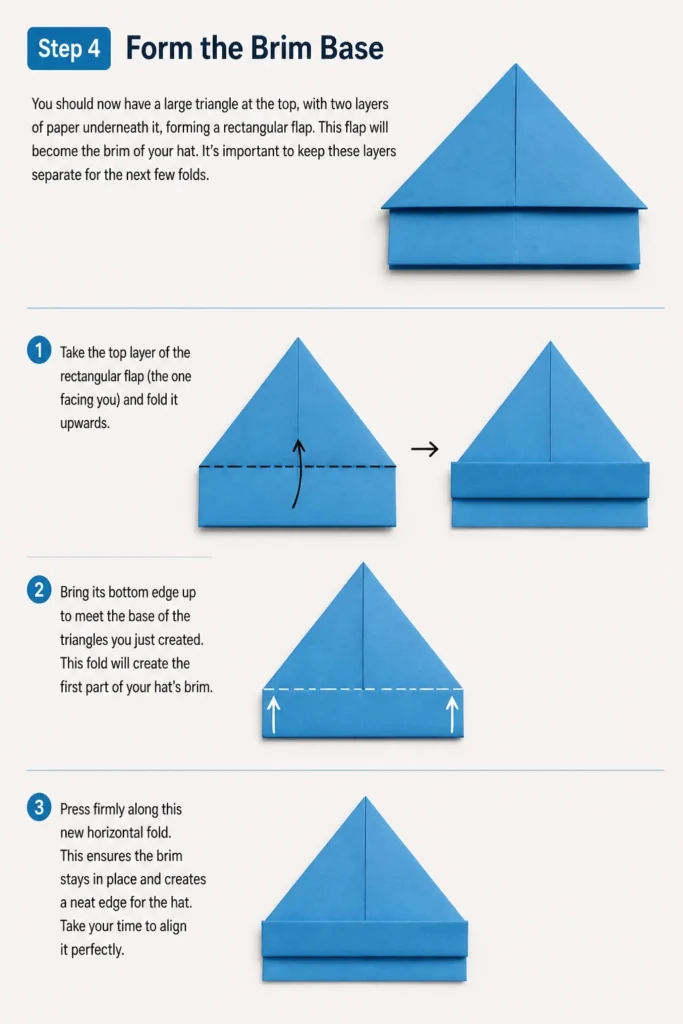
You should now have a large triangle at the top, with two layers of paper underneath it, forming a rectangular flap. This flap will become the brim of your hat. It’s important to keep these layers separate for the next few folds.
Take the top layer of the rectangular flap (the one facing you) and fold it upwards. Bring its bottom edge up to meet the base of the triangles you just created. This fold will create the first part of your hat’s brim.
Press firmly along this new horizontal fold. This ensures the brim stays in place and creates a neat edge for the hat. Take your time to align it perfectly.
Step 5: Secure the Brim
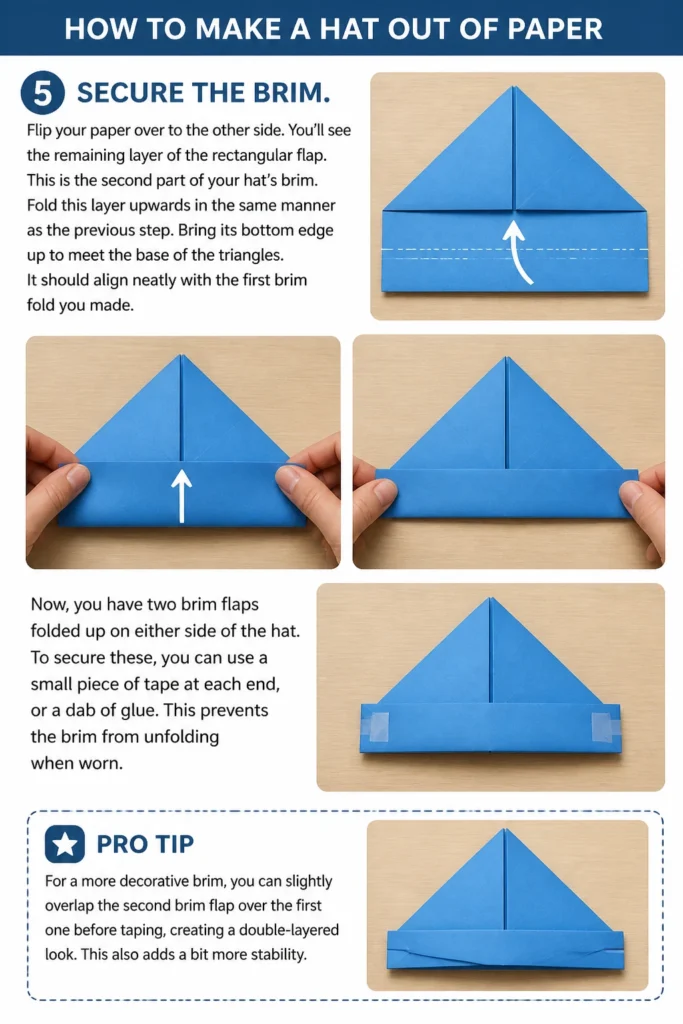
Flip your paper over to the other side. You’ll see the remaining layer of the rectangular flap. This is the second part of your hat’s brim.
Fold this layer upwards in the same manner as the previous step. Bring its bottom edge up to meet the base of the triangles. It should align neatly with the first brim fold you made.
Now, you have two brim flaps folded up on either side of the hat. To secure these, you can use a small piece of tape at each end, or a dab of glue. This prevents the brim from unfolding when worn.
Pro Tip: For a more decorative brim, you can slightly overlap the second brim flap over the first one before taping, creating a double-layered look. This also adds a bit more stability.
Step 6: Shape the Hat and Finalize
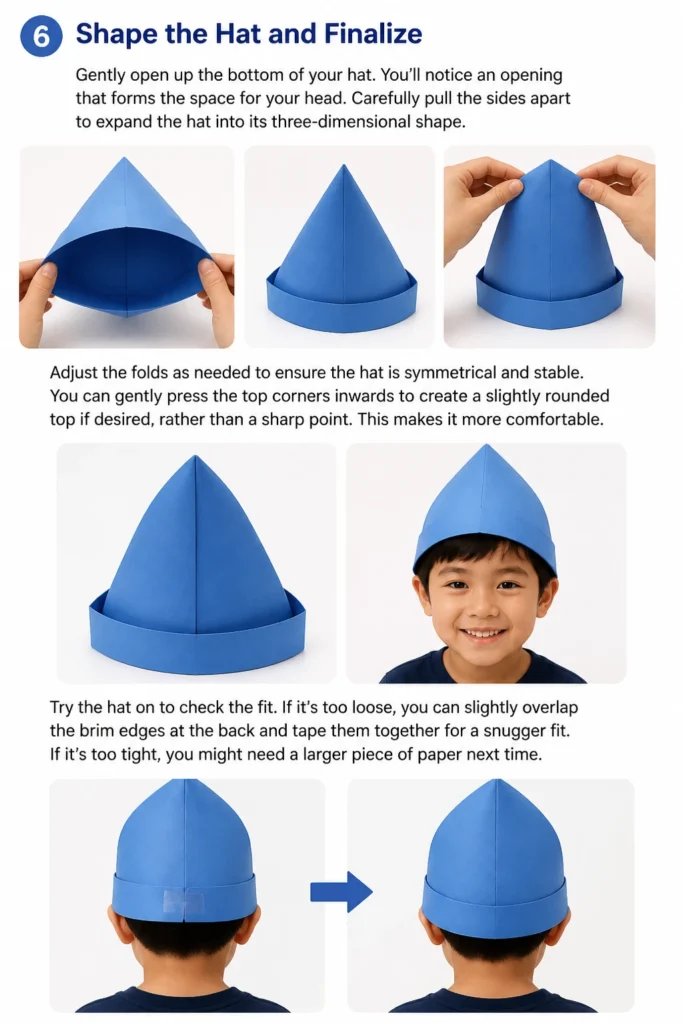
Gently open up the bottom of your hat. You’ll notice an opening that forms the space for your head. Carefully pull the sides apart to expand the hat into its three-dimensional shape.
Adjust the folds as needed to ensure the hat is symmetrical and stable. You can gently press the top corners inwards to create a slightly rounded top if desired, rather than a sharp point. This makes it more comfortable.
Try the hat on to check the fit. If it’s too loose, you can slightly overlap the brim edges at the back and tape them together for a snugger fit. If it’s too tight, you might need a larger piece of paper next time.
Step 7: Customize Your Hat
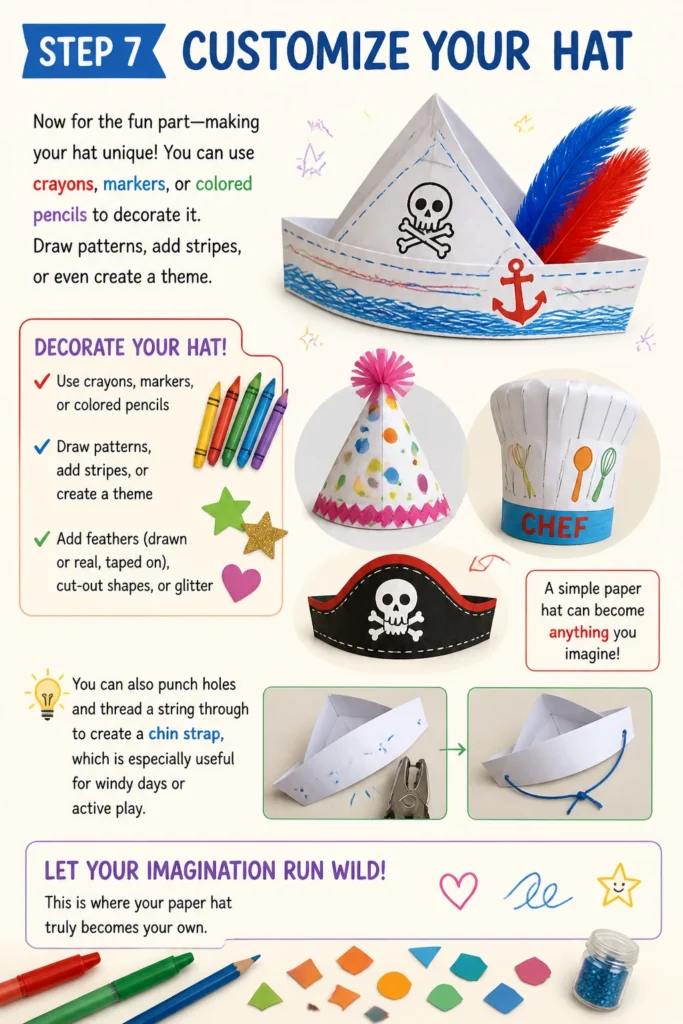
Now for the fun part: making your hat unique! You can use crayons, markers, or colored pencils to decorate it. Draw patterns, add stripes, or even create a theme.
Consider adding elements like feathers (drawn or real, taped on), cut-out shapes, or glitter. You can also punch holes and thread a string through to create a chin strap, which is especially useful for windy days or active play.
Let your imagination run wild. This is where your paper hat truly becomes your own. A simple paper hat can be transformed into a pirate hat, a party hat, or even a chef’s toque with a few creative touches.
Common Mistakes to Avoid
Using Too Small or Too Thin Paper
One common pitfall is starting with paper that isn’t appropriately sized or sturdy enough. A small sheet will result in a hat that doesn’t fit or looks disproportionate. Thin paper, like single-ply newspaper, tends to tear easily and won’t hold its shape well, especially with repeated handling. Always opt for a larger sheet than you think you need, and consider using slightly thicker paper for better longevity.
Inaccurate Folds and Creases
Precision is key in paper crafts. Rushing through the folding process or not pressing down firmly on creases can lead to a lopsided or flimsy hat. If your initial folds are uneven, subsequent steps will also be off, resulting in a hat that doesn’t sit straight. Take your time with each fold, aligning edges carefully, and use your fingernail or a ruler to create sharp, defined creases.
Not Securing the Brim Properly
The brim is what gives the hat its structure and helps it stay on your head. Forgetting to tape or glue the brim flaps down, or only using a tiny piece of adhesive, will cause the brim to unfold. This makes the hat less stable and prone to collapse. Ensure both brim flaps are securely fastened to the main body of the hat with sufficient tape or glue, especially at the corners.
Troubleshooting
Hat Keeps Falling Off
If your paper hat feels too loose and constantly slips off, it’s likely that the base of the hat is too wide for your head. The easiest fix is to adjust the fit by slightly overlapping the back edges of the brim. Gently pull the two ends of the brim together at the back of the hat until it feels snug, then secure them with a piece of tape. This creates a smaller opening, custom-fitting it to your head.
Folds Are Uneven or Crooked
When your hat looks lopsided, it’s usually due to uneven folds, especially in the initial triangle steps. To fix this, carefully unfold the hat back to the step where the error occurred. Take extra care to align the edges and corners perfectly before pressing down on the crease. Using a ruler to guide your folds can significantly improve accuracy. Remember, a little patience goes a long way in achieving symmetrical results.
Paper Tears While Folding
Tearing often happens when the paper is too thin or when you’re creasing it too aggressively. If your paper starts to tear, try to reinforce the area with a small piece of tape on both sides. For future projects, consider using a sturdier type of paper, such as construction paper or cardstock. When folding, apply firm but gentle pressure, smoothing out the crease rather than sharply creasing it with excessive force.
Key Takeaways
- Always start with a large, rectangular sheet of paper for the best results.
- Precise folds and sharp creases are crucial for a sturdy and well-shaped hat.
- Folding the paper lengthwise first establishes the central line for symmetrical triangles.
- Secure the brim flaps with tape or glue to prevent the hat from losing its shape.
- Gentle expansion of the hat’s base creates the head opening without tearing.
- Personalize your hat with decorations to make it uniquely yours.
Frequently Asked Questions
Can I make a paper hat without tape or glue?
Yes, you can make a basic paper hat using only folds, similar to traditional origami. However, tape or glue significantly increases the hat’s stability and durability, especially for the brim. Without adhesive, the brim might unfold easily, making the hat less practical for wearing. For a truly no-adhesive hat, you’d need to learn more advanced folding techniques that interlock the paper.
What kind of paper is best for a paper hat?
Newspaper is a classic choice due to its large size and availability. However, for a more durable and vibrant hat, opt for craft paper, construction paper, or even lightweight cardstock. These papers hold their shape better and are less prone to tearing. The key is a paper that is large enough and has a bit of stiffness.
How can I make the hat fit different head sizes?
The size of your initial paper sheet directly impacts the final hat size. For larger heads, use a bigger sheet of paper. For smaller heads, you can start with a slightly smaller sheet, or you can adjust the fit of the finished hat by overlapping the brim edges at the back and taping them together to reduce the head opening. Experiment with paper sizes to find what works best.
Can this method be adapted for other hat styles?
This basic folding method creates a classic pointed hat. While the core technique is specific, you can adapt it to create different styles with additional steps. For example, rounding the top points or adding extra brim layers can change the look. For completely different styles like a top hat or a fedora, you would need different construction methods, often involving more cutting and assembly.
Our Top Recommended Finds
- Large Craft Paper Rolls: Ideal for making multiple hats or larger sizes, offering sturdiness and a smooth surface for decorating.
- Craft Scissors: A good pair of sharp scissors ensures clean cuts, which are essential for precise paper crafts.
- Double-Sided Tape: Offers a cleaner finish than visible tape, securing folds discreetly and effectively.
Unleash Your Inner Paper Crafter
Crafting a paper hat is more than just a simple activity; it’s an invitation to engage your creativity and fine-tune your motor skills. You’ve now mastered the art of transforming a flat sheet into a wearable accessory. This fundamental skill can open doors to countless other paper-based projects.
Why not try making a fleet of paper boats next, or perhaps some intricate paper airplanes? The principles of folding, creasing, and securing remain wonderfully consistent across many paper crafts. Take this newfound confidence and let it inspire your next creative endeavor. Grab another sheet of paper today and see what new wonders you can fold into existence.
Beginner-friendly templates, step-by-step guides,
and weekly project ideas in your inbox.