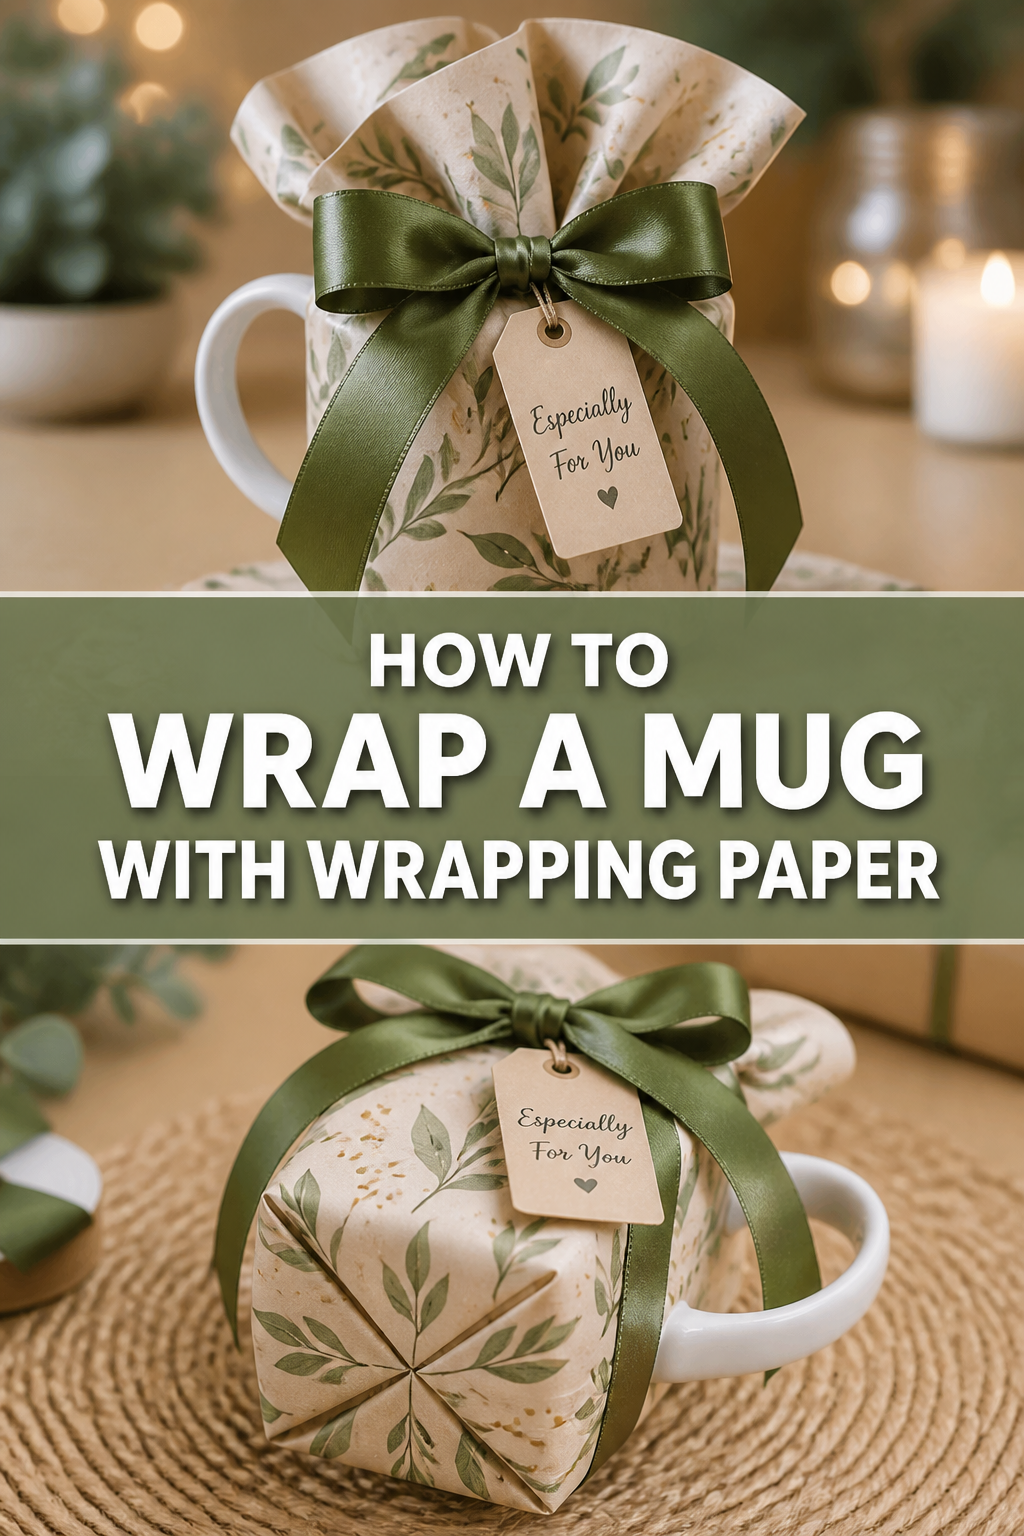
🎁 How To Wrap A Mug With Wrapping Paper

Beginner-friendly templates, step-by-step guides,
and weekly project ideas in your inbox.
Gift-giving is a joy, and presenting a beautifully wrapped present makes the experience even more special.
A mug, while a fantastic and popular gift, can be tricky to wrap due to its unique shape and handle.
Having wrapped countless mugs for friends and family over the years, I’ve perfected a method that ensures a neat, professional finish every time, and I’m excited to share it with you.
Quick Overview
This guide will walk you through the process of wrapping a mug, transforming an ordinary item into an elegantly presented gift.
You’ll learn how to measure, cut, and fold with precision, ensuring a polished look that will impress any recipient.
- Time needed: 10-15 minutes
- Difficulty: Beginner
- What you’ll need: Wrapping paper, scissors, tape, mug, optional embellishments
Step-by-Step Instructions
Step 1: Gather Your Materials
Before you begin, lay out all the necessary items on a clean, flat surface.
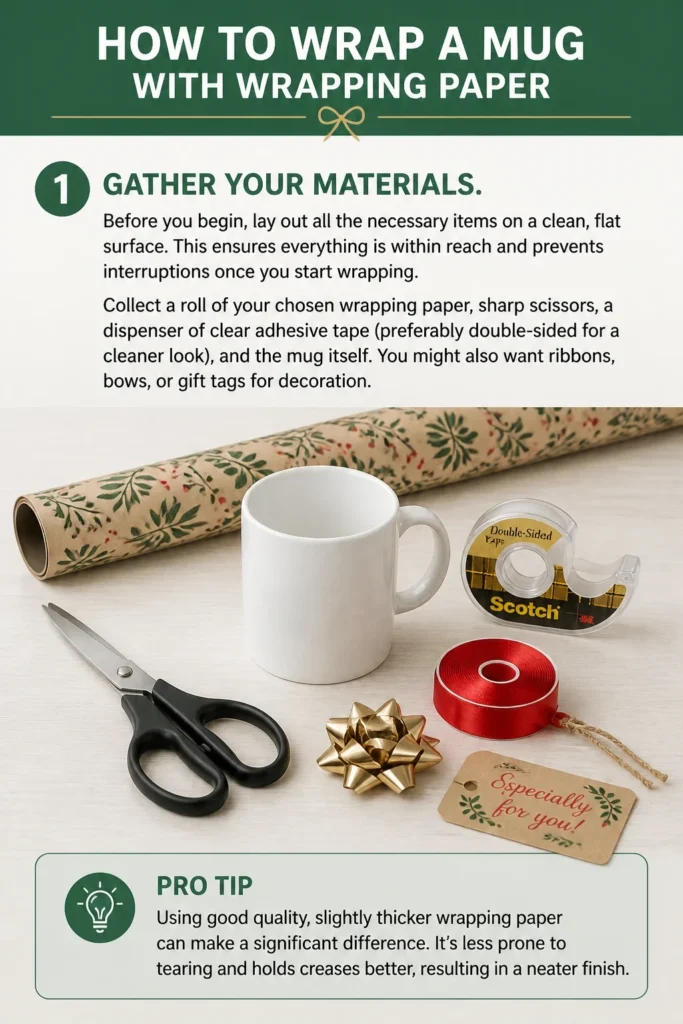
This ensures everything is within reach and prevents interruptions once you start wrapping.
Collect a roll of your chosen wrapping paper, sharp scissors, a dispenser of clear adhesive tape (preferably double-sided for a cleaner look), and the mug itself.
You might also want ribbons, bows, or gift tags for decoration.
Pro Tip: Using good quality, slightly thicker wrapping paper can make a significant difference. It’s less prone to tearing and holds creases better, resulting in a neater finish.
Step 2: Measure and Cut the Wrapping Paper
The right amount of paper is crucial for a clean wrap.
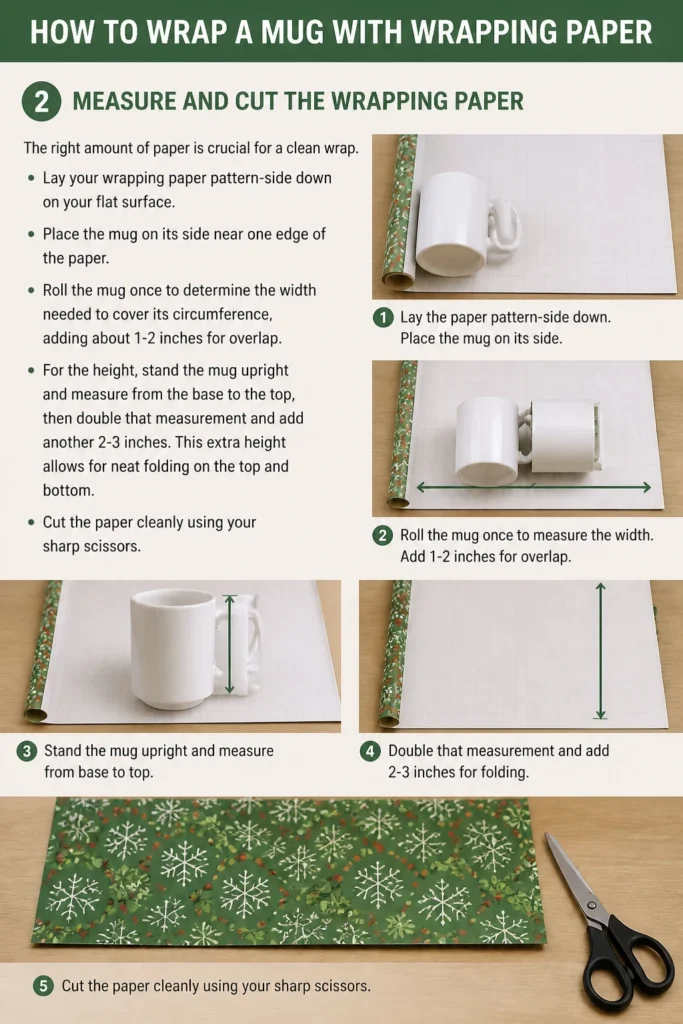
Lay your wrapping paper pattern-side down on your flat surface.
Place the mug on its side near one edge of the paper.
Roll the mug once to determine the width needed to cover its circumference, adding about 1-2 inches for overlap.
For the height, stand the mug upright and measure from the base to the top, then double that measurement and add another 2-3 inches.
This extra height allows for neat folding on the top and bottom.
Cut the paper cleanly using your sharp scissors.
Step 3: Position the Mug Correctly
Proper placement is key to managing the mug’s handle.
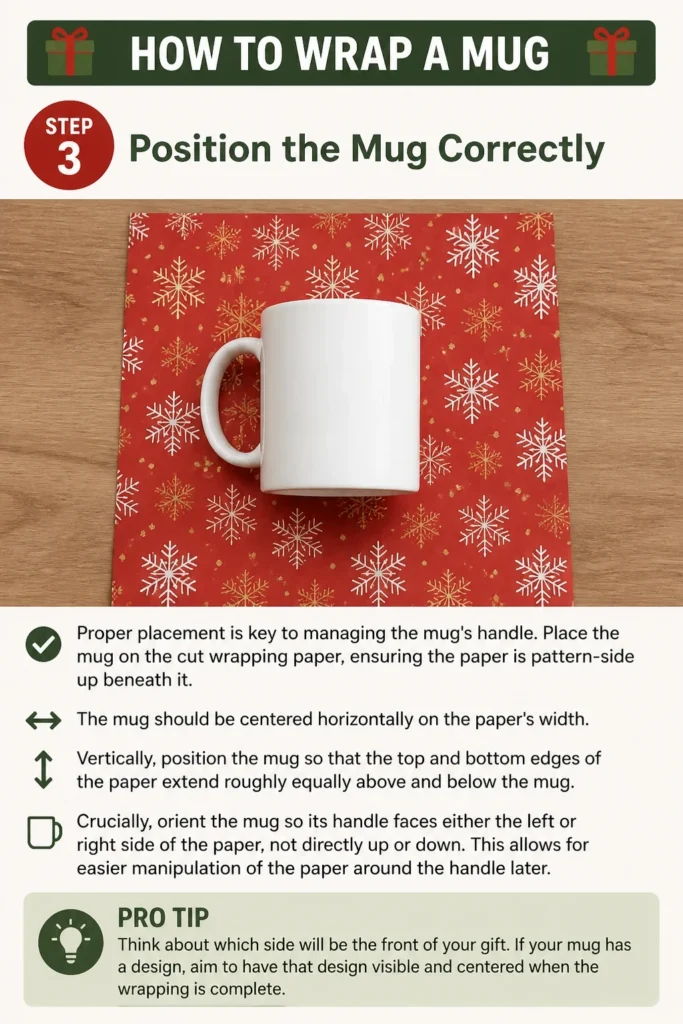
Place the mug on the cut wrapping paper, ensuring the paper is pattern-side up beneath it.
The mug should be centered horizontally on the paper’s width.
Vertically, position the mug so that the top and bottom edges of the paper extend roughly equally above and below the mug.
Crucially, orient the mug so its handle faces either the left or right side of the paper, not directly up or down.
This allows for easier manipulation of the paper around the handle later.
Pro Tip: Think about which side will be the “front” of your gift. If your mug has a design, aim to have that design visible and centered when the wrapping is complete.
Step 4: Wrap the Body of the Mug
This step covers the main cylindrical part of the mug.
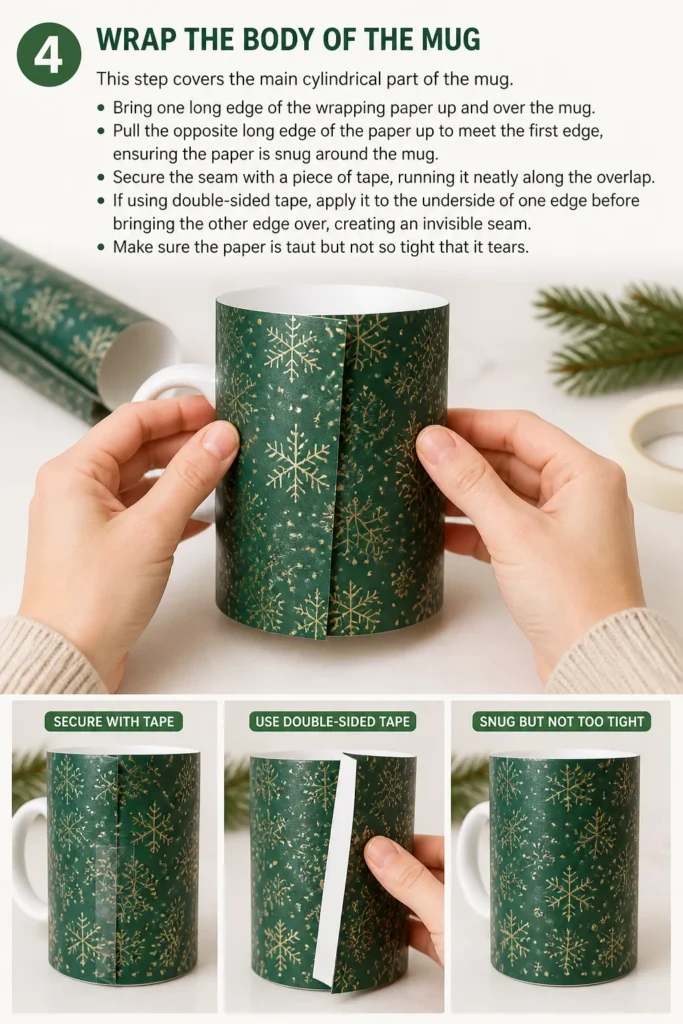
Bring one long edge of the wrapping paper up and over the mug.
Pull the opposite long edge of the paper up to meet the first edge, ensuring the paper is snug around the mug.
Secure the seam with a piece of tape, running it neatly along the overlap.
If using double-sided tape, apply it to the underside of one edge before bringing the other edge over, creating an invisible seam.
Make sure the paper is taut but not so tight that it tears.
Step 5: Fold the Sides (Top and Bottom)
Now, address the open ends of the wrapped mug.
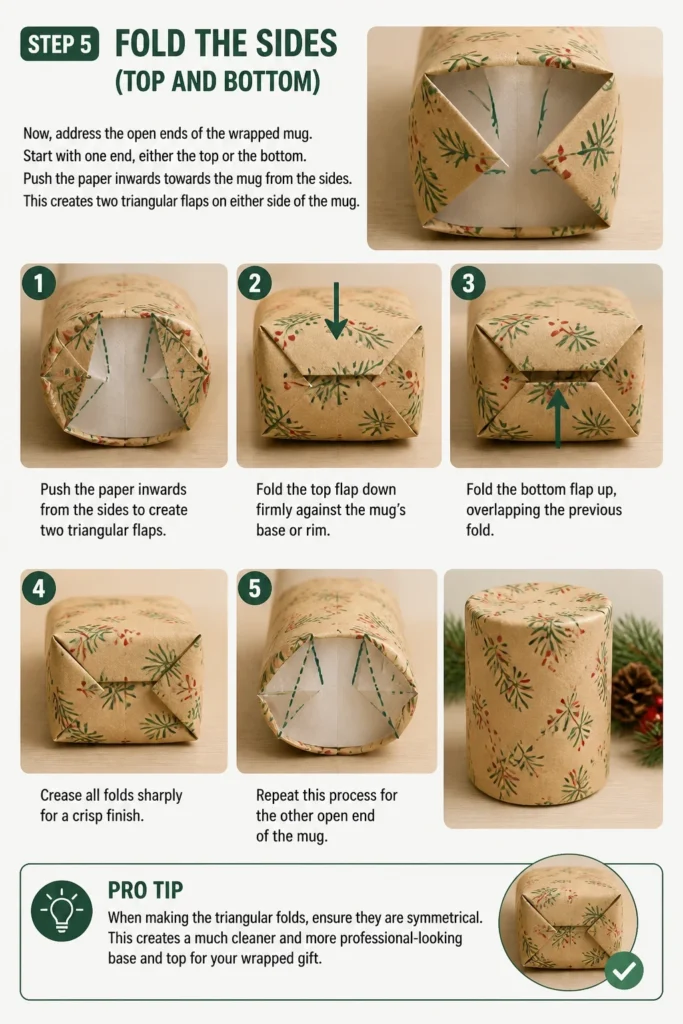
Start with one end, either the top or the bottom. Push the paper inwards towards the mug from the sides.
This creates two triangular flaps on either side of the mug.
Fold the top flap down firmly against the mug’s base or rim.
Then, fold the bottom flap up, overlapping the previous fold.
Crease all folds sharply for a crisp finish.
Repeat this process for the other open end of the mug.
Pro Tip: When making the triangular folds, ensure they are symmetrical. This creates a much cleaner and more professional-looking base and top for your wrapped gift.
Step 6: Secure the Ends Neatly
With the folds in place, it’s time to tape them down.
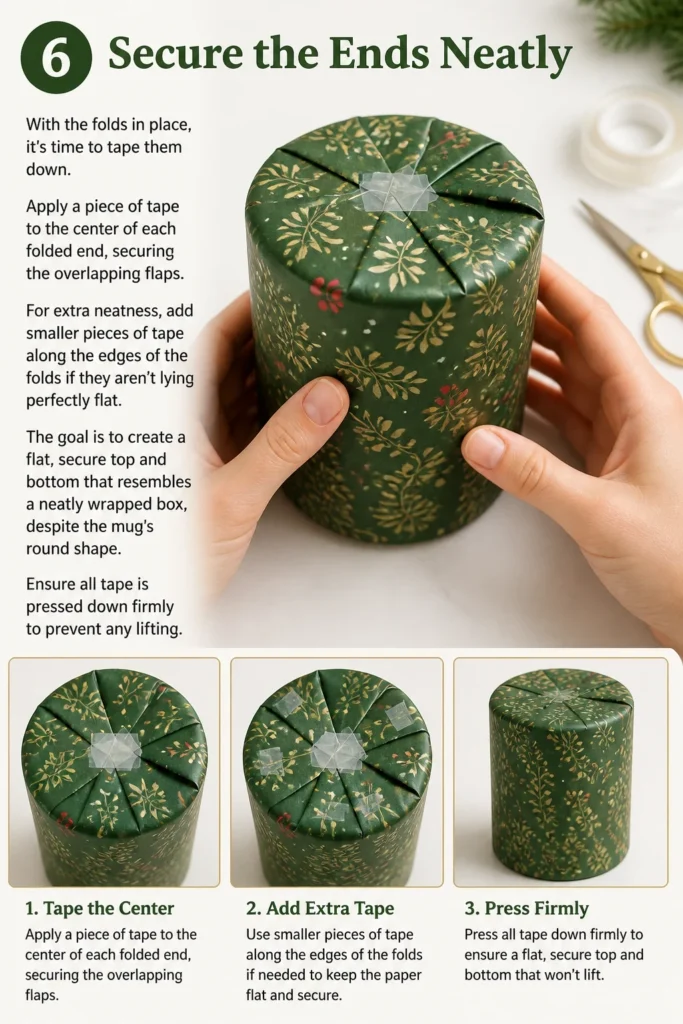
Apply a piece of tape to the center of each folded end, securing the overlapping flaps.
For extra neatness, add smaller pieces of tape along the edges of the folds if they aren’t lying perfectly flat.
The goal is to create a flat, secure top and bottom that resembles a neatly wrapped box, despite the mug’s round shape.
Ensure all tape is pressed down firmly to prevent any lifting.
Step 7: Address the Handle Area
This is where the mug’s unique shape requires special attention.
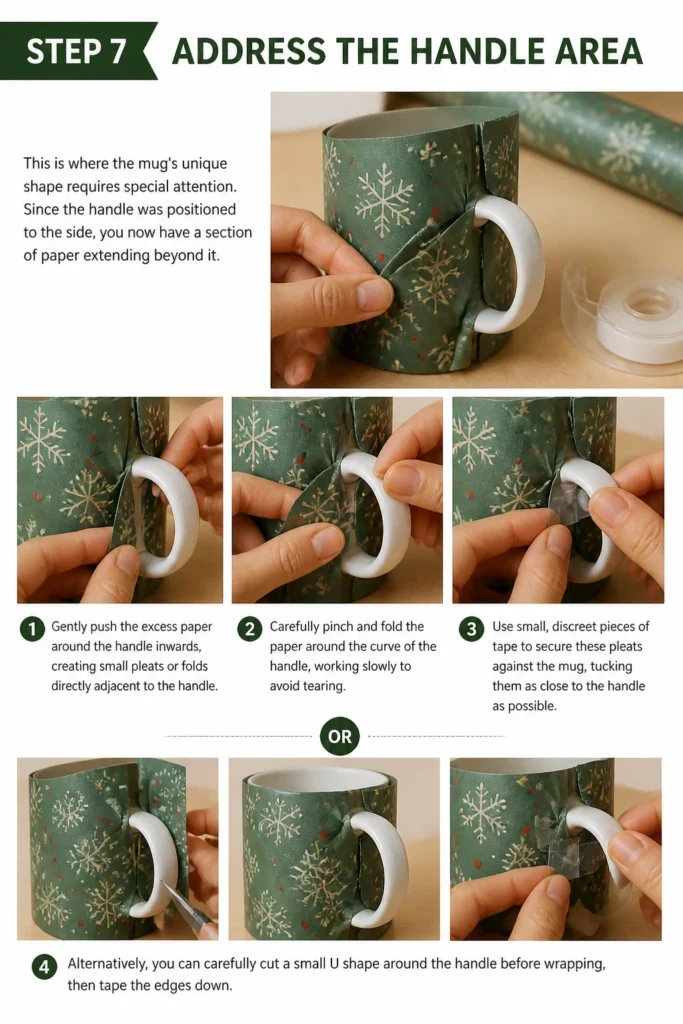
Since the handle was positioned to the side, you now have a section of paper extending beyond it.
Gently push the excess paper around the handle inwards, creating small pleats or folds directly adjacent to the handle.
Carefully pinch and fold the paper around the curve of the handle, working slowly to avoid tearing.
Use small, discreet pieces of tape to secure these pleats against the mug, tucking them as close to the handle as possible.
Alternatively, you can carefully cut a small “U” shape around the handle before wrapping, then tape the edges down.
Step 8: Add Finishing Touches
Now that the mug is fully wrapped, it’s time to personalize it.
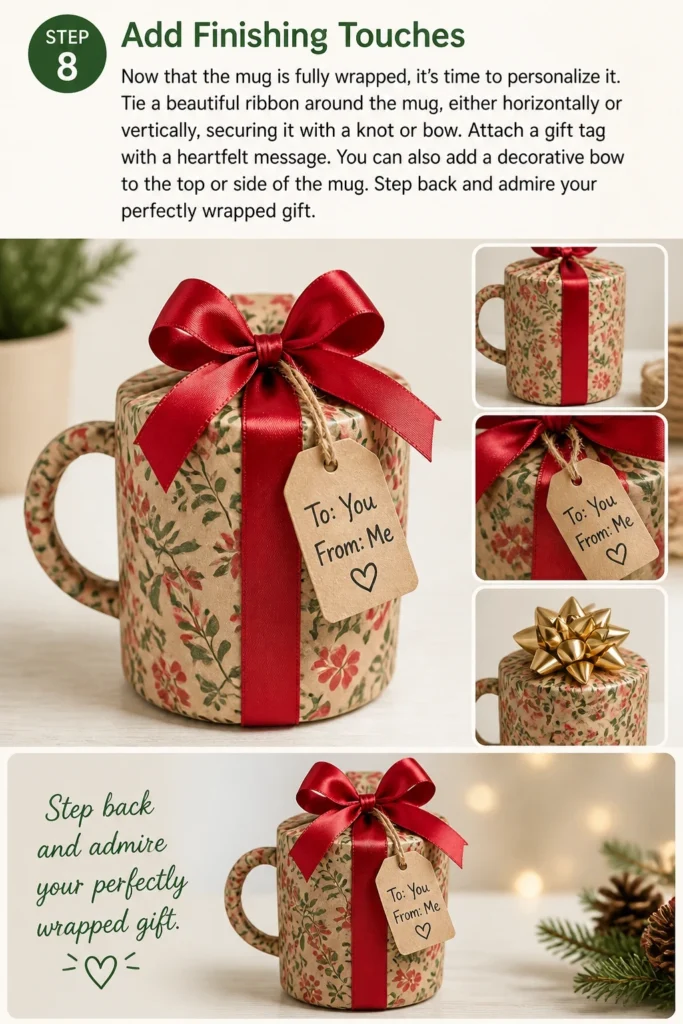
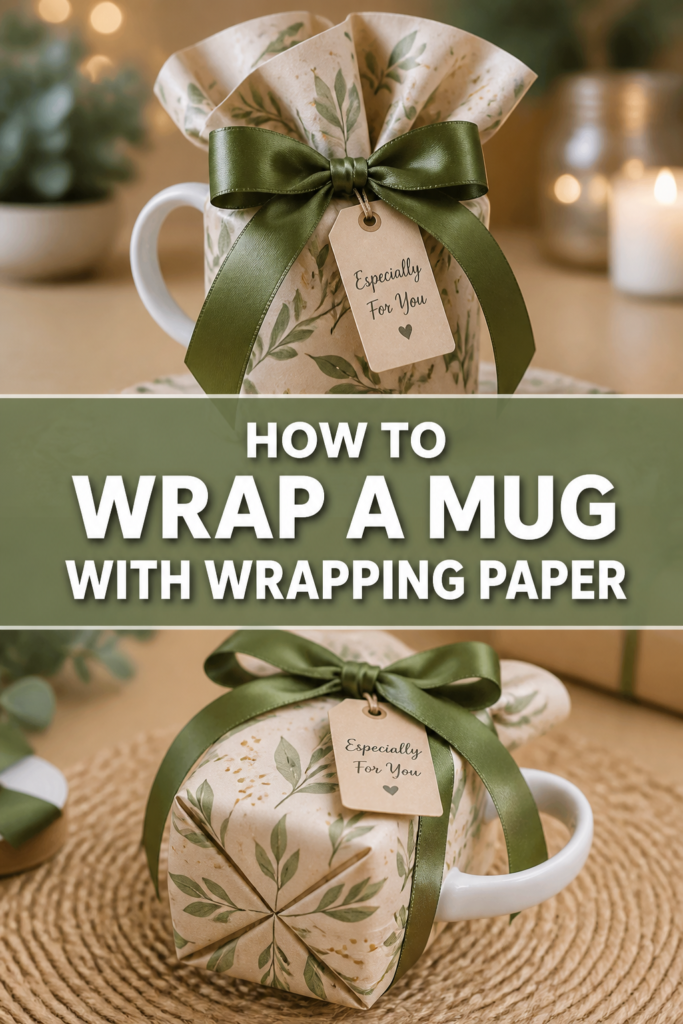
Tie a beautiful ribbon around the mug, either horizontally or vertically, securing it with a knot or bow.
Attach a gift tag with a heartfelt message.
You can also add a decorative bow to the top or side of the mug.
Step back and admire your perfectly wrapped gift.
Common Mistakes to Avoid
Using Too Much or Too Little Paper
Cutting the wrong amount of paper is a frequent error. Too much paper leads to bulky, messy folds and excessive overlapping, making the gift look sloppy.
Too little paper results in gaps, tears, or an inability to fully cover the mug, forcing you to patch pieces together.
Always measure carefully as outlined in Step 2, ensuring just enough for overlap and neat folds on the ends.
Ignoring the Handle Until the End
Many people try to wrap the mug as if it were a cylinder, only to realize the handle creates a major obstruction. This often leads to awkward bulges or ripped paper.
Positioning the handle to the side from the start, as described in Step 3, allows you to manage the paper around it more effectively, either by pleating or making a small cut, leading to a much smoother finish.
Sloppy Folds and Creases
Lack of attention to detail during the folding process can ruin the presentation. Uneven folds, soft creases, or crumpled paper on the ends make the gift look rushed and unprofessional.
Take your time with each fold, pressing firmly to create sharp creases. The cleaner your folds, especially on the top and bottom, the more polished the final product will appear.
Visible Tape Marks
Using too much tape, or placing tape haphazardly, can detract from the beauty of the wrapping paper. Large, shiny pieces of tape are often unsightly.
Whenever possible, use double-sided tape for invisible seams. For securing ends, use minimal, strategically placed pieces of clear tape that blend in with the paper or are hidden by folds.
Troubleshooting
Paper Rips During Wrapping
Sometimes, despite your best efforts, the paper tears, especially if it’s thin or you pulled too hard. Don’t panic.
If it’s a small tear, you can often mend it discreetly with a small piece of clear tape applied to the underside of the paper.
For larger tears, consider cutting a small patch from your leftover paper and carefully taping it over the ripped area, then covering it with a ribbon or bow.
Ends Don’t Fold Neatly
If your end folds look bulky or uneven, it’s likely due to excess paper or insufficient creasing. This can also happen if the initial height measurement was too generous.
Try gently unfolding the ends, re-creasing the initial side triangles more sharply, and then folding the top and bottom flaps again.
If there’s still too much bulk, you can carefully trim a small amount of excess paper from the very edge before refolding.
Handle Area Looks Awkward
The handle is often the trickiest part. If it looks messy, the paper might not have been pleated tightly enough or secured properly.
Go back to the handle area and gently re-work the pleats, pushing them closer to the mug’s surface.
Use very small, almost invisible pieces of tape to secure each pleat individually, ensuring they lie flat against the mug.
A well-placed ribbon can also help to disguise minor imperfections around the handle.
Key Takeaways
- Accurate paper measurement prevents waste and ensures a neat finish.
- Positioning the mug handle correctly from the start simplifies the wrapping process.
- Sharp creases and tight folds are essential for a professional, polished look.
- Use tape strategically, opting for double-sided tape for invisible seams when possible.
- Small pleats and careful taping around the handle create a smooth, custom fit.
- Don’t be afraid to enhance your wrapped gift with ribbons, bows, and tags.
Frequently Asked Questions
Can I wrap a mug without using any tape?
While challenging, it is possible. You would need to use a fabric wrap (like Furoshiki) or rely on very precise folding and tucking, often secured with a ribbon or string. For paper, tape offers the best security and neatness.
What if my mug has an unusual shape or a very large handle?
For unusually shaped mugs, the basic principles still apply, but you might need more paper for certain areas. For very large handles, consider making a more deliberate cut-out around the handle before wrapping, then carefully taping the edges of the paper around the handle for a custom fit.
How can I make the wrapping look extra special?
Beyond ribbons and bows, consider adding a small sprig of greenery, a miniature ornament, or even a personalized stamp to the gift tag. Layering different textures of ribbon or using contrasting paper can also elevate the look.
Is it better to use thick or thin wrapping paper for mugs?
Generally, slightly thicker wrapping paper is better for mugs. It’s more durable, less likely to tear around the handle or corners, and holds creases more effectively, leading to a cleaner, more structured final product.
Our Top Recommended Finds
- High-Quality Wrapping Paper: Look for paper that feels substantial, not flimsy. It makes a huge difference in the final look and ease of wrapping.
- Sharp Craft Scissors: A good pair of sharp scissors ensures clean, straight cuts, which are crucial for neat seams and edges.
- Double-Sided Tape Dispenser: This allows for invisible seams, creating a much more professional and seamless appearance for your wrapped gifts.
Transform Your Gift Presentation Today
Wrapping a mug doesn’t have to be a daunting task. With a little practice and the right techniques, you can turn a simple gift into a beautifully presented treasure.
The joy of giving is amplified when the presentation shows thought and care.
Now that you have all the steps, why not grab a mug and some paper?
Try out these methods and elevate your gift-wrapping game for your next special occasion!
You might even discover a new favorite hobby.
Beginner-friendly templates, step-by-step guides,
and weekly project ideas in your inbox.